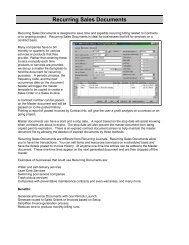
Customer Deposits - Cost Control Software
Customer Deposits - Cost Control Software
Customer Deposits - Cost Control Software

Create successful ePaper yourself
Turn your PDF publications into a flip-book with our unique Google optimized e-Paper software.
<strong>Customer</strong> <strong>Deposits</strong> for Ver: 3.x, 4.x, 5.x, 2009 Classic<br />
(RTC Version works the same, but no manual)<br />
<strong>Customer</strong> <strong>Deposits</strong> Add-on enables you to record and track deposits (down payments) made by<br />
customers. <strong>Deposits</strong> are tracked separately from accounts receivables and they have their own<br />
entries table separate from the customer ledger entries. There are two types of deposits:<br />
“<strong>Deposits</strong> on Account” and “<strong>Deposits</strong> on Orders”.<br />
A “Deposit Account No.” has been added to the <strong>Customer</strong>’s Posting Group. When deposits are<br />
posted they will now credit a deposit account. When Sales Orders are posted with a deposit<br />
applied to them, the standard posting process is maintained with the additional posting of the<br />
deposit, which now debits the deposit account and credits the accounts receivables by the deposit<br />
amount.<br />
<strong>Customer</strong> <strong>Deposits</strong> can be entered in either of two areas in Sales & Receivables. Simply enter<br />
customer deposits in the Cash Receipts Journal and later apply the deposit to one or more sales<br />
orders. Or you can enter a deposit directly on a Sales Order. (Deposit Tab) This is like adding<br />
it “on-the-fly”.<br />
<strong>Customer</strong> <strong>Deposits</strong> can be applied to multiple orders. The <strong>Deposits</strong> Entry table has it’s own<br />
detailed entries which tracks and stores the history of how the Deposit was applied.
<strong>Customer</strong> <strong>Deposits</strong> is fully compliant with basic and advanced dimensions. <strong>Deposits</strong> are stored<br />
historically in the <strong>Deposits</strong> Entry table as well as in the Posted Invoice History. Drill downs,<br />
lookups, and navigate are all features of the <strong>Deposits</strong> application.<br />
Sales Orders and Sales Invoice documents print the application of a deposit on the transaction.<br />
The “Balance Due” is now the last Amount shown.<br />
Several reports track <strong>Customer</strong>’s open deposits and the status of the deposit. The Aged<br />
Accounts Receivables reports also tracks and reports open deposits. <strong>Deposits</strong> are reported and<br />
aged separately from the aged receivables.<br />
Features:<br />
New Deposit Account in <strong>Customer</strong> Posting Group<br />
Enter <strong>Deposits</strong> in Cash Receipts Journal or on new Sales Order Card.<br />
Apply old <strong>Deposits</strong> to new Sales Orders.<br />
New Field on <strong>Customer</strong> Card: “<strong>Deposits</strong> Balance ($).”<br />
Benefits:<br />
Accurately present deposits as deposits vs. credits to accounts receivable.<br />
Speedy Application of existing deposits to new Sales Orders.<br />
New features in version 37.02<br />
Added functionality to better allow for multiple deposits to the same Sales Order.<br />
See more in the Workflow documentation areas.<br />
When printing the <strong>Customer</strong> Deposit Aged Receivables report the deposits reported will<br />
also be date sensitive.<br />
New fields on Sales Order header to show: Un-posted <strong>Deposits</strong> and Posted <strong>Deposits</strong><br />
against that Sales Order.<br />
New features in version 4.01<br />
New option on the Deposit Setup called "Post by Single Bal. Line" that if checked will<br />
allow you to post the Cash Receipts Journal <strong>Deposits</strong> with one balancing account line<br />
instead of a Bal. Account No. on each line.<br />
If you use this option than you will want to leave the Deposit Setup field “Bal. Account<br />
No.” blank.<br />
When you enter the Balancing Account line on the cash receipts Journal the Deposit field<br />
should NOT be checked.<br />
P:\Click here for Manuals\<strong>Customer</strong> <strong>Deposits</strong> Instruction Manual.doc 8/17/09<br />
2
Some additional pointers for data entry of deposits when using a single Balancing<br />
Account Line as shown above.<br />
Navision’s standard functionality when entering the same <strong>Customer</strong> No. and Document<br />
no. on multiple lines, is to add the line together and post one accumulate entry. If the<br />
customer writes one check that is actually multiple deposits on orders then to prevent the<br />
system from making one accumulative entry, you must enter the different Sales Order No.<br />
for which the deposits are to be applied.<br />
If for some reason the deposits are being entered before the Sales Order No.s are created<br />
then you will need to differentiate that deposits by different Document No.s for example<br />
if the Check No. was 7808 then the first line would be 7808-1, and the second line 7808-2<br />
and so forth.<br />
In order for the balancing line to have a different Document no. from the rest of the lines<br />
in the Cash Receipts Journal, you need to go to the Journal Template setup:<br />
P:\Click here for Manuals\<strong>Customer</strong> <strong>Deposits</strong> Instruction Manual.doc 8/17/09<br />
3
…..and uncheck the field called “Force Doc. Balance” as seen below for the Cash<br />
Receipts Journal.<br />
P:\Click here for Manuals\<strong>Customer</strong> <strong>Deposits</strong> Instruction Manual.doc 8/17/09<br />
4
Installation Instructions:<br />
PLEASE READ ENTIRE INSTRUCTIONS BEFORE BEGINNING.<br />
THE INSTRUCTIONS AND OBJECTS INCLUDED HERE ARE FOR USE WITH A 3.01<br />
Navision Attain DATABASE OR GREATER.<br />
These instructions require a working knowledge of the C/SIDE development<br />
system.<br />
Add-on object files will arrive with all objects necessary to run the add-on including the<br />
dependencies. We bundle all add-on products that are needed to work together. This<br />
allows a one time installation of all the necessary objects.<br />
The following is a list of all objects that will be modified when <strong>Customer</strong> <strong>Deposits</strong> is<br />
fully implemented.<br />
Type Count ID Name Version List<br />
1 1 18 <strong>Customer</strong> NAVW13.10,NAVUS3.10.01,CD<br />
1 2 21 Cust. Ledger Entry NAVW13.10.01,CD<br />
1 3 36 Sales Header NAVW13.10.01,NAVUS3.10.02,CD<br />
1 4 37 Sales Line NAVW13.10.01,NAVUS3.10.02.04,CD<br />
1 5 81 Gen. Journal Line NAVW13.10,NAVUS3.10.01,CD<br />
1 6 92 <strong>Customer</strong> Posting Group NAVW13.10,CD<br />
1 7 112 Sales Invoice Header NAVW13.10.01,NAVUS3.10.01,CD<br />
1 8 114 Sales Cr.Memo Header NAVW13.10.01,NAVUS3.10.01.CD<br />
1 9 271 Bank Account Ledger Entry NAVW13.10,NAVUS3.01,CD<br />
1 10 14004490 Deposit Entry CD<br />
1 11 14004491 Deposit Detail Entry CD<br />
1 12 14004492 Deposit Journal Line CD<br />
1 13 14004493 Deposit Setup CD<br />
2 14 21 <strong>Customer</strong> Card NAVW13.10,NAVUS3.10.01,CD<br />
2 15 22 <strong>Customer</strong> List NAVW13.01,CD<br />
2 16 25 <strong>Customer</strong> Ledger Entries NAVW13.10,CD<br />
2 17 42 Sales Order NAVW13.10,NAVUS3.10.01,CD<br />
2 18 110 <strong>Customer</strong> Posting Groups NAVW13.10,CD<br />
2 19 132 Posted Sales Invoice NAVW13.10,NAVUS3.10.01,CD<br />
2 20 151 <strong>Customer</strong> Statistics NAVW13.00,CD<br />
2 21 255 Cash Receipt Journal NAVW13.00,CD<br />
2 22 333 Sales & Receivables Menu NAVW13.10,NAVUS3.01,CD<br />
2 23 397 Sales Invoice Statistics NAVW13.00,CD<br />
2 24 402 Sales Order Statistics NAVW13.10.01,CD<br />
2 25 10038 Sales Order Stats. NAVUS3.10.02.04,CD<br />
2 26 10041 Sales Invoice Stats. NAVUS3.10.01,CD<br />
2 27 14004490 Deposit Entry CD<br />
2 28 14004491 Deposit Detail Entries CD<br />
2 29 14004492 Deposit Setup CD<br />
P:\Click here for Manuals\<strong>Customer</strong> <strong>Deposits</strong> Instruction Manual.doc 8/17/09<br />
5
2 30 14004493 Deposit to Apply Ledg Entries NAVW13.10,CD<br />
3 31 14004490 Sales Order for CD NAVUS3.10.01,CD<br />
3 32 14004491 Sales Invoice for CD NAVUS3.10.01,CD<br />
3 33 14004492 Deposit Entries Report CD<br />
3 34 14004493 Open Deposit Status Report CD<br />
3 35 14004494 Aged Accounts Receivable -CD NAVUS3.01.02,CD<br />
3 36 14004495 <strong>Customer</strong> Statement - CD NAVUS3.10.01,CD<br />
5 37 12 Gen. Jnl.-Post Line NAVW13.10.01,NAVUS3.10.02.04,CD<br />
5 38 80 Sales-Post NAVW13.10.01,NAVUS3.10.02.04,CD<br />
5 39 103 Cust. Entry-Edit NAVW13.10,CD<br />
5 40 225 Gen. Jnl.-Apply NAVW13.10,CD<br />
5 41 14004490 Deposit Jnl.-Post Line CD<br />
5 42 14004491 Release Sales Document for CD NAVW13.10,NAVUS3.10.02.04,CD<br />
5 43 14004492 CustEntry-Apply Posted Deposit NAVW13.00,CD<br />
Instructions for integrating <strong>Customer</strong> <strong>Deposits</strong> into your Database—<br />
Before starting, you will need to determine a couple of things about your<br />
database.<br />
IMPORTANT: Compile ALL existing objects before starting the installation. Resolve<br />
all compiling errors before starting installation. This assures that when you compile<br />
objects after the installation, any compiling errors at that time will be caused by the<br />
installation and not something before the installation started.<br />
Determine if any of the above listed objects have been modified in the database in<br />
which you are going to add <strong>Customer</strong> <strong>Deposits</strong>. This is easily accomplished by<br />
starting an import of the appropriate fob file and looking at the import worksheet.<br />
WE HIGHLY RECOMMEND THAT YOU READ OUR TIPS AND WARNINGS<br />
PAGES LOCATED AT THE BACK OF THIS DOCUMENT BEFORE STARTING.<br />
If this is the first time that you are importing <strong>Customer</strong> <strong>Deposits</strong>, then the only<br />
objects that may have conflicts are the base Navision objects. If you find that you<br />
have modified the same base Navision objects then you will need to manually<br />
integrate the <strong>Customer</strong> <strong>Deposits</strong> changes found in those objects. To assist the<br />
manually integration process we have supplied a detailed Change Log.<br />
File(s) available for importing are: Cust<strong>Deposits</strong>.fob<br />
Start by importing this one file. It contains all the <strong>Customer</strong> <strong>Deposits</strong> objects and all<br />
dependant addon objects. If you have conflicts. Then use the following Change<br />
Log to read about where the modifications exist and manually integrate the<br />
changes.<br />
P:\Click here for Manuals\<strong>Customer</strong> <strong>Deposits</strong> Instruction Manual.doc 8/17/09<br />
6
1. Copy the supplied “fob(s)”, Documents (This manual), and optionally any<br />
provided sample databases to your local hard drive for integration and testing.<br />
2. Start Navision Attain.<br />
3. Go to Tools, Object Designer<br />
4. Go to File, Import<br />
5. Go to provided “fob” - Select Open<br />
6. You should get the following message.<br />
7. Say NO. Open the Import Worksheet for review. (always)<br />
If none of the objects listed above have been modified in the target database you<br />
can import the object file. When you start the import, you will get a different<br />
message than the one shown above that states that no conflicts were found, select<br />
yes to import the objects immediately or select no to open the Import Worksheet. It<br />
is recommended that you select no so the Import Worksheet will open in all<br />
cases.<br />
Even when there are no conflicts you will need to import the .FOB file in two(2)<br />
passes.<br />
1. Once the Worksheet is open, go to the Action column and select SKIP on all the<br />
“base” Navision objects, and make sure the Higher numbered objects<br />
(14004000+) have the “Create” or “Replace” action and then select OK.<br />
2. Next do the File, Import process again on the same .FOB file. This time use the<br />
“Replace All” Button to flag ALL the objects with the Replace action. This will<br />
guarantee that all of the objects in the .fob actually get imported.<br />
P:\Click here for Manuals\<strong>Customer</strong> <strong>Deposits</strong> Instruction Manual.doc 8/17/09<br />
7
You should get a screen similar to this.<br />
If there are conflicting objects the Import Worksheet will indicate which objects are in<br />
conflict. If you have any conflicting objects make a list of these objects. These are the<br />
objects you will have to hand integrate the Sales <strong>Customer</strong> <strong>Deposits</strong> changes into.<br />
Instructions for hand integration of individual objects can be found in the Change Log.<br />
If some, but not all, of the above listed objects have been modified in your database you<br />
can import the ones that have NOT been modified by using the Import Worksheet to<br />
indicate which objects to replace and which objects to skip. Choosing replace next to an<br />
object in the Import Worksheet will cause that object in your database to be replaced by<br />
the import object of the same number. Choosing skip will prevent the object in your<br />
database from being replaced. Select “replace” for all objects NOT on your conflicting<br />
object list and select “skip” for all objects ON your conflicting object list. Using the<br />
merge option is not recommended as a means of dealing with modified objects.<br />
Using this option could make your task much harder.<br />
8. Select OK ONLY after you have decided to Replace All, OR you have edited the<br />
Action column on the import worksheet. (Reminder: Please read our Tips and<br />
Warnings about Navision’s Import process at end of this manual.) You must<br />
remember the objects that you selected to be skipped due to conflicts, so that<br />
you can manually integrate the changes later. (Write them down now or take a<br />
print screen.)<br />
P:\Click here for Manuals\<strong>Customer</strong> <strong>Deposits</strong> Instruction Manual.doc 8/17/09<br />
8
9. After saying OK, the Navision Import dialog box will say: create: X and replace<br />
XX.<br />
10. At this stage there are new tables, forms, and reports added to your database.<br />
But they have no data in them.<br />
11. If you were able to import and replace ALL objects then Compile all the objects.<br />
Problems or objects that were not able to be compiled will be “marked”. Use the<br />
View, Marked only choice from the tool bar at the top of the Navision screen<br />
while still in the Object Designer. If you exiting object designer will remove the<br />
marks!! And you will have to compile again to know which objects failed.<br />
12. If there were Conflicting objects or compile errors, please continue reading and<br />
compare the Change Log to the database objects.<br />
13. If there are not conflicts or compile errors then you have completed the<br />
installation and you can skip the change log area and continue on with the Addon<br />
Setup & Workflow section.<br />
CHANGE LOG:<br />
Navigational Pane Information:<br />
//<strong>Customer</strong> <strong>Deposits</strong><br />
Navigational Pane Info:<br />
Administration:<br />
Application Setup:<br />
Added Menu Group: <strong>Customer</strong> <strong>Deposits</strong><br />
Added Menu Item: Form Deposit Setup<br />
Also<br />
Sales & Marketing:<br />
Setup:<br />
Added Menu Item: From Deposit Setup<br />
P:\Click here for Manuals\<strong>Customer</strong> <strong>Deposits</strong> Instruction Manual.doc 8/17/09<br />
9
<strong>Customer</strong> Deposit Setup:<br />
The Change Log for: <strong>Customer</strong> <strong>Deposits</strong> is a “Change Log” from the Merge Tool.<br />
(97 pages)<br />
If you need this document please give us a call and we will e-mail it to you. (317)<br />
846-6025.<br />
We have attempted to document all changes within objects in the Documentation<br />
area of the C/AL code area in each modified object. We highly recommend that<br />
you first import all the <strong>Customer</strong> Deposit objects into a updated and unmodified<br />
database. Then go to Object Designer, click the ALL objects button and then<br />
filter on the Version Column using the following filter *CD* .<br />
At this point you will be viewing all the objects modified for <strong>Customer</strong> <strong>Deposits</strong>.<br />
The 14004490 to 14004495 range objects are within the add-on number ranges<br />
and can be exported and imported immediately. All the other objects need to be<br />
compared to the objects within the target database.<br />
UPGRADES: When upgrading to the 3.7 version from a previous version of<br />
<strong>Customer</strong> <strong>Deposits</strong>, there is a one time batch process report # 60000 that needs<br />
to be run after all objects have been upgraded.<br />
P:\Click here for Manuals\<strong>Customer</strong> <strong>Deposits</strong> Instruction Manual.doc 8/17/09<br />
10
Once all the changes have been made, COMPILE ALL objects again. If compile<br />
errors still exist, Navision will mark the problem objects and you will need to<br />
double check the integration in your database with the change log.<br />
If you are sure that all changes are installed in the database and the compile<br />
errors continue, please contact you NSC immediately.<br />
If all objects compile (and they should), then continue on with the Setup &<br />
Workflow instructions.<br />
P:\Click here for Manuals\<strong>Customer</strong> <strong>Deposits</strong> Instruction Manual.doc 8/17/09<br />
11
<strong>Customer</strong> <strong>Deposits</strong><br />
Deposit Setup:<br />
1. Deposit Setup in Sales & Receivables –<br />
Go to Sales & Receivables, Setup, <strong>Deposits</strong> Setup Menu choice.<br />
See below for a sample of how <strong>Deposits</strong> are setup:<br />
The above settings are used when <strong>Deposits</strong> are entered directly to a Sales Order. When you “Release” the<br />
Sales Order the Deposit information is automatically sent to the Cash Receipts Journal but the function will<br />
P:\Click here for Manuals\<strong>Customer</strong> <strong>Deposits</strong> Instruction Manual.doc 8/17/09<br />
12
need the above information for the automatic entry. See more on how <strong>Deposits</strong> are entered later in this<br />
manual.<br />
New 37.02 – the Auto Apply First Deposit field<br />
Check this field when you want the first deposit entry to be automatically applied when the Sales<br />
Order is posted. If a second deposit to the same Sales Order is posted, or any additional deposit beyond the<br />
first deposit entry, they will not be applied automatically. You must manually apply the additional deposit<br />
entries in the customer ledger area.<br />
New 4.0 Version – Setup<br />
You have the option of the Bal. Account No. to be entered on each Payment Line same as version 3.7, or<br />
you can leave it blank and check the new field “Post by Single Bal. Line” so when the Payment Lines come<br />
in automatically as the Sales Orders are Released they do not have a Bal. Account No., and you will enter<br />
the “One” Balancing Account Line before you post the Payment Journal.<br />
User often prefer to post a payment journal with one balancing line which will reflect the total amount of<br />
the deposit to the bank, vs. seeing a bank ledger entry for each payment line.<br />
2. Enter the Deposit Account No. in the <strong>Customer</strong> Posting Groups –<br />
Go to Sales & Receivables, Setup, <strong>Customer</strong> Posting Groups Menu choice<br />
P:\Click here for Manuals\<strong>Customer</strong> <strong>Deposits</strong> Instruction Manual.doc 8/17/09<br />
13
Enter a Deposit Account No..<br />
3. Go to Sales & Receivables Setup, Report Selections Sales, and change the Sales Order to # 14004490<br />
and the Sales Invoice to # 14004491.<br />
4. Add the Deposit Documents and Reports to the Sales & Receivables Reports and Documents menus.<br />
P:\Click here for Manuals\<strong>Customer</strong> <strong>Deposits</strong> Instruction Manual.doc 8/17/09<br />
14
Basic Workflow Diagram:<br />
Entry<br />
Option 1.<br />
Cash Receipts<br />
Release<br />
Sales Order Header<br />
New Entry<br />
Entering <strong>Deposits</strong>: <strong>Deposits</strong> can be entered in two ways. “Payment Deposit Entry”<br />
(Option 1) in the Cash Receipts Journal, and “Sales Order Entry” (Option 2) on Sales<br />
Orders.<br />
1. Deposit Entry via the Cash Receipts Journal:<br />
Go to Financial Management, Cash Receipts Journal - Entry is the same as entering a payment except<br />
you check the Deposit field. Deposit Amounts are entered as negatives just like payments. You do not<br />
enter an Applied-to Type or Applied-to Doc. No.. The assumption is that Deposit payments are made<br />
prior to the Sales transaction being posted.<br />
If the related Sales transaction is posted and the “deposit payment” is to be applied to the posted<br />
invoice, then this would NOT be considered a “deposit” transaction for this application. In such a case<br />
you would enter the payment without the deposit flag.<br />
Posted <strong>Deposits</strong> General Ledger Entries:<br />
- Debits the Bank Account No.<br />
(makes a Bank Acct. ledger entry too if you use Bal. Account Type of Bank)<br />
- Credit the Deposit Account No.<br />
New 37.02 – We now allow the Sales Order No. on the Cash Receipts Journal to be entered.<br />
However you cannot change the Sales Order No. on a Cash Receipt entry that came form a deposit<br />
entered on a sales order. You have always been able to enter deposits directly into the Cash Receipts<br />
P:\Click here for Manuals\<strong>Customer</strong> <strong>Deposits</strong> Instruction Manual.doc 8/17/09<br />
Post<br />
Entry<br />
Option 2.<br />
Apply <strong>Deposits</strong> or<br />
Enter New<br />
Applied Deposit<br />
Lookup<br />
<strong>Customer</strong><br />
Card<br />
Deposit Entries<br />
<strong>Customer</strong> Ledger<br />
Apply-to Deposit After<br />
posting too.<br />
15
Journal and now you can designate the sale order no. to which the deposit is to be applied.<br />
Remember you can get the system to automatically apply the first deposit (see Deposit setup) but<br />
additional multiple deposits are manually applied from the customer ledger area once the Sales<br />
Order is posted.<br />
It is also possible to manually apply additional deposits (one deposit per post) if you are partial<br />
posting the Sales Order and want to apply different deposits to each additional posting.<br />
We have not applied a specific filter to only view deposits entries with the sales order no., to allow you to<br />
apply any deposit that that customer has made, however this can be an option now that deposits can have<br />
sales order numbers specified on the cash receipts journal.<br />
Posted Deposit Entries:<br />
- The Deposit entry is stored historically in the Deposit Entry table. You can view this<br />
table from the <strong>Customer</strong> Card or <strong>Customer</strong> List. Select the menu choice Deposit<br />
Entries from the <strong>Customer</strong> Menu button.<br />
- When first posted, the Remaining Amount will be the same as the Deposit Amount.<br />
- As the deposit gets applied, the Remaining Amount will reduce until it becomes zero.<br />
There are “Detailed” entries that track how the deposit was applied. To view the<br />
P:\Click here for Manuals\<strong>Customer</strong> <strong>Deposits</strong> Instruction Manual.doc 8/17/09<br />
16
- “Detailed” entries click the Applied Entries from the <strong>Deposits</strong> Button.<br />
2. A Deposit Entry on a Sales order: You enter the deposit information on the<br />
deposit tab on the Sales Order Header. There are two types of entry on the Deposit Tab.<br />
A. You are entering a deposit for the first time or<br />
B. You are applying an existing (previously posted and still open) deposit<br />
A. Entering a Deposit for the first time:<br />
- Go to the Sales Order, deposit tab.<br />
- Check the “Deposit Entry” field. This tells the system that you are entering a deposit<br />
not applying a deposit and you will see the fields displayed change.<br />
- Enter the Deposit Entry Doc. No. (typically the customer’s check number)<br />
- Enter the Deposit Entry Amount.<br />
- <strong>Deposits</strong> are entered as negative amounts.<br />
P:\Click here for Manuals\<strong>Customer</strong> <strong>Deposits</strong> Instruction Manual.doc 8/17/09<br />
17
RELEASE a Sales Order with a first time Deposit Entry:<br />
Using Navision’s standard procedure of Releasing the Sales Order will trigger the Deposit application to<br />
send the Deposit Entry to the Cash Receipts Journal. Remember the Deposit Setup information is required<br />
for this part of the Deposit application’s functionality. The presumption is that even though the order entry<br />
person is directly entering the deposit to the Sales Order, the customer’s payment (check or cash) needs to<br />
be passed to the individual in the company that handles incoming cash and makes the bank deposit. The<br />
automatic entry of the cash receipts journal line saves another person from having to make the entry.<br />
The actual (physical) bank deposit is made up of deposit funds along with normal payment on account<br />
funds. The Cash Receipts Journal can have deposits and account payment entries in the same journal. It is<br />
simply user preference if you want to send the deposit entries to the same journal that you use for regular<br />
account payments. Your preference on where <strong>Deposits</strong> are sent is done in the Sales & Receivables Setup<br />
menu choice called Deposit Setup.<br />
View of a Deposit entry on the Cash Receipts Journal:<br />
CORRECTING ERRORS:<br />
When the Deposit entry is sent to the cash receipts journal the Deposit Amount on the Sales Order becomes<br />
non-editable. However, you can edit the Deposit Document No. and the change will be made on the CR<br />
journal too. You are not allowed to edit a cash receipts line that came from a sales order. You can<br />
however delete the cash receipts journal with a warning that the Deposit entry on the Sales Order will be<br />
deleted too. At this point you can start over again making the correct entry.<br />
POSTING SALES ORDERS WITH DEPOSITS:<br />
You can not post the sales order with a direct deposit entry until the deposit has been posted from the cash<br />
receipts journal. You will know when the sales order can be posted because the Deposit information on the<br />
Deposit Tab changes after the Deposit is posted. The new look on the Deposit Tab will display the Deposit<br />
P:\Click here for Manuals\<strong>Customer</strong> <strong>Deposits</strong> Instruction Manual.doc 8/17/09<br />
18
Entry No., Posting Date, Document No., Deposit Amount and an Editable Deposit Amount Applied. As<br />
seen below the section on “Posting the Cash Receipt Deposit”:<br />
P:\Click here for Manuals\<strong>Customer</strong> <strong>Deposits</strong> Instruction Manual.doc 8/17/09<br />
19
POSTING THE CASH RECEIPT DEPOSIT:<br />
ENTRIES IN GENERAL LEDGER:<br />
- Debits the Bank Account No.<br />
(makes a Bank Acct. ledger entry too if you use Bal. Account Type of Bank)<br />
- Credit the Deposit Account No.<br />
ENTRIES IN THE DEPOSIT ENTRIES TABLE: See view from the <strong>Customer</strong> Card below.<br />
P:\Click here for Manuals\<strong>Customer</strong> <strong>Deposits</strong> Instruction Manual.doc 8/17/09<br />
20
View of the Sales Order after the CR Journal is Posted.<br />
B. Application of open deposit entries to Sales Orders:<br />
- Go to Sales & Receivables, Orders, Deposit tab.<br />
- From the “Deposit Entry No.” field, use the lookup arrow to view existing open<br />
deposits for the<br />
- Order’s Bill-to <strong>Customer</strong>. When the Deposit Entry No. is selected you will see the<br />
deposit fields automatically fill in and the “Deposit Entry” field is removed. The<br />
deposits functionality will automatically fill in the “Deposit Amount Applied” with<br />
what is remaining on the Deposit. You may receive messages that tell you that the<br />
Deposit you selected has also been used on other Orders. This is allowable as long<br />
as the total amount being applied on all orders is not more then what is remaining on<br />
the Deposit entry. The Deposit application does all the checking and tells you if the<br />
deposit is over applied or simply returns what is available to be applied.<br />
- You now have the option of changing the amount you wish to apply to this order.<br />
- <strong>Deposits</strong> are entered as negative values.<br />
P:\Click here for Manuals\<strong>Customer</strong> <strong>Deposits</strong> Instruction Manual.doc 8/17/09<br />
21
Posting a Sales Order with an applied Deposit:<br />
Remember for automatic application of <strong>Deposits</strong> when you post the<br />
Sales Order, the Deposit must Exists in the Deposit Entries Table and<br />
you have to enter the Deposit Entry No. on the Sales Order. You can<br />
tell if the Deposit is attached to the Sales Order by the way the Deposit<br />
Tab displays the Deposit information. See Bret Barkowski’s sales<br />
order just above section B.<br />
Effects on Tables after Posting:<br />
Deposit Entry:<br />
The Remaining Amount will be reduced by the amount applied. When the Remaining amount is zero the<br />
Deposit Entry is closed.<br />
P:\Click here for Manuals\<strong>Customer</strong> <strong>Deposits</strong> Instruction Manual.doc 8/17/09<br />
22
Deposit detailed entries:<br />
An entry is created to show the amount that was applied. In most cases the full Deposit amount is applied<br />
all at one time; therefore, you will only find one detailed entry. However, when larger deposits are applied<br />
to several sales orders, there will be a detailed entry for each application.<br />
Click on the <strong>Deposits</strong> button on the Deposit Entry form and select the Applied Entries<br />
<strong>Customer</strong> Card:<br />
In our example we posted the full deposit amount of $ -40.00 with Sales Order No. 6017. This deposit<br />
originated as a direct deposit entry on the Sales Order. We Released the Sales Order and posted the Cash<br />
Receipts Journal. We posted the Sales Order without editing the Deposit Applied Amount so the full $-<br />
40.00 was applied. Notice the customer card shows that Bret Barkowski still has a $-50.00 open deposit.<br />
P:\Click here for Manuals\<strong>Customer</strong> <strong>Deposits</strong> Instruction Manual.doc 8/17/09<br />
23
<strong>Customer</strong> Ledger Entries:<br />
The entry of a customer ledger line representing the Sales Invoice will be standard. The Remaining<br />
Amount ($) on the Sales Invoice line will be what is left because of the deposit application. Another entry<br />
will appear in the customer ledger which will represent the application of the deposit. You will be able to<br />
use the “applied entry” lookup to see how the deposit was used. Also using the applied entry lookup on the<br />
invoice will show the deposit.<br />
Noticed the Sales Order No. 6017 amount reduced by the $-40.00 deposit.<br />
Notice the Deposit line now appears in the <strong>Customer</strong> Ledger with zero amount remaining.<br />
P:\Click here for Manuals\<strong>Customer</strong> <strong>Deposits</strong> Instruction Manual.doc 8/17/09<br />
24
General Ledger Entries:<br />
The following represents the GL postings.<br />
{...previous posting of the deposit payment - Credited the Deposit Account for $100 and<br />
Debited the bank account for $100…}<br />
Sales Amount = $450<br />
Deposit Amount = $100<br />
Debit Accounts Receivables by $450<br />
Credit the Sales Accounts by $450<br />
Debit the Deposit Account by $100<br />
Credit Accounts Receivables by $100<br />
Printing <strong>Deposits</strong> on Documents:<br />
Print of Sales Invoice:<br />
P:\Click here for Manuals\<strong>Customer</strong> <strong>Deposits</strong> Instruction Manual.doc 8/17/09<br />
25
Apply <strong>Deposits</strong> to Posted Invoices:<br />
Although most deposits will be applied to Sales Orders prior to posting, you also have the<br />
ability to post a deposit to posted invoices. If you forget to apply the deposit on the Sales<br />
Order or you have a remaining open deposits that needs to be applied, you can apply a<br />
deposit to an open invoice.<br />
On the Apply <strong>Deposits</strong> form you can select the available deposit entry and the amount<br />
you wish to apply. You can apply a deposit to more then one invoice until the deposit’s<br />
remaining amount is zero. From here you can also apply more than one deposit to an<br />
invoice.<br />
You must press F2 to enable editing the Apply to field.<br />
P:\Click here for Manuals\<strong>Customer</strong> <strong>Deposits</strong> Instruction Manual.doc 8/17/09<br />
26
As deposits are applied to invoices via the apply-to Deposit functionality from the<br />
<strong>Customer</strong> ledger, an applied deposit payment entry will show up in the customer ledger.<br />
The Document No. on the deposit payment entry will be the same as the Invoice it was<br />
applied to and the Description field will show you what Deposit entry was used. You can<br />
easily see multiple deposits applied to an invoice by filtering on the invoice number. If<br />
you allow the Application of deposits to “Update Posted Invoice” then a flag on the<br />
Posted invoice will indicate that multiple deposits were applied however you can only see<br />
the related deposits from the customer ledger as I mentioned above.<br />
Correcting a posted Deposit Amount :<br />
There are two possible scenarios for correcting deposits.<br />
1) The deposit amount is more then what it should have been.<br />
2) The deposit amount is not enough.<br />
1) Correcting an amount entered over the actual deposit:<br />
This process only pertains to Deposit Entries that have not been closed. If for some<br />
reason the Deposit was posted with an amount larger than it should have been then follow<br />
these procedures. Use this same process to reduce an incorrectly posted deposit to zero,<br />
as for example you posted the deposit to the wrong customer account. The process uses<br />
the ability to post a Sales Order to reverse/reduce a deposit amount.<br />
The result of the correction will do the following:<br />
- Credit the Bank G/L Account No.<br />
- Debit the Deposit Account No.<br />
- Reduce the Deposit Entry Remaining Amount<br />
- Create a detailed entry that shows the Deposit was corrected<br />
- Create a Bank Account Ledger Entry showing the correction<br />
- Two <strong>Customer</strong> ledger lines will show the correction, both will be<br />
applied to each other and closed and will not effect the customer’s total<br />
sales statistics.<br />
Enter a Sales Order to the same Sell-to and Bill-to customer the incorrect entry went to.<br />
Go to the Deposit tab and select the deposit being corrected, in the “Deposit Entry No.”<br />
field. Next enter the amount of the reduction to the deposit in the “Deposit Amount<br />
Applied” field. The “Deposit Amount Applied” will be a negative as always. Check the<br />
field called “Deposit Correction” in the header of the Sales Order. Activating the Deposit<br />
Correction field will trigger the Deposit Bank Account field to show. You must enter the<br />
Bank Account where <strong>Deposits</strong> are sent. Over Deposit Correction Orders should be set to<br />
Tax Liable = No.<br />
P:\Click here for Manuals\<strong>Customer</strong> <strong>Deposits</strong> Instruction Manual.doc 8/17/09<br />
27
Now Go to the sales lines and enter a Type of Account (G/L). The “No.” field must be<br />
the Bank Account associated with the Bank Acct. Posting Group. Entering the “A” for<br />
Type Account (G/L) will automatically find the right GL Account No. if the Bank<br />
Account is entered correctly on the Sales Order Header. Enter a quantity of one and the<br />
same adjusting amount, as in the header deposit amount applied field, in the Unit Price<br />
field. Excl. Tax field. IMPORTANT: The amount entered on the line is positive. You<br />
can only enter one line on an over deposit correcting sales order.<br />
P:\Click here for Manuals\<strong>Customer</strong> <strong>Deposits</strong> Instruction Manual.doc 8/17/09<br />
28
The following screen print shows you an over deposit correcting entry. We are reducing<br />
deposit entry no. 19 by $–30.00. This happens to be the total amount of this deposit<br />
entry, so we are in fact closing this deposit entry entirely.<br />
Now post the Sales order. The Correction flag will appear in several places and the<br />
following is how General ledger will be effected.<br />
Debit to AR by correction amount (customer posting group)<br />
Credit to Bank Acct. by correction amount (line entry – correct the bank account)<br />
Credit to AR by deposit applied amount (nets zero for this correcting invoice)<br />
Debit to the Deposit account by deposit applied amount (corrects the deposit account)<br />
The Deposit Entry remaining amount is correct and the detailed entries show the<br />
correction.<br />
The correcting customer ledger entries are closed and have been modified so that it is not<br />
included in the total Sales ($) calculation.<br />
And the correcting deposit orders also create a correcting bank account ledger line.<br />
P:\Click here for Manuals\<strong>Customer</strong> <strong>Deposits</strong> Instruction Manual.doc 8/17/09<br />
29
2) Correcting an amount entered that is under the <strong>Deposits</strong> Amount:<br />
In this case the deposit amount was not enough. You have a couple of options. You can<br />
use correction #1) and remove the remaining amount on the incorrect deposit and then reenter<br />
another correct deposit or you can simply add another deposit for the increased<br />
amount. You can apply one of the deposits on a sales order and post, and then enter the<br />
second deposit using the Apply deposit to a posted invoice function. Remember the<br />
apply deposits to posted invoices allows for more than one deposit to be applied to an<br />
invoice.<br />
Correcting a Deposit that has been posted applied to an invoice: A posted<br />
“applied” deposit is no longer a deposit. The amount applied has debited the Deposit<br />
account and credited the Account Receivables account. The applied deposit has been<br />
recorded as an applied payment to the posted invoice. The correction process in this case<br />
is no different than correcting a standard posted invoice and applied payment.<br />
Refunding a Deposit on a cancelled order: Scenario: <strong>Customer</strong> comes in and<br />
places an order. They lay down a deposit on the order. The deposit is posted to the<br />
<strong>Customer</strong> deposit ledger and bank. The customer comes a day later and cancels the order<br />
and demands a refund. We refund their deposit (maybe charging a restocking fee). What<br />
do I do?<br />
I would go back to the sales order that is being canceled. Reopen it, remove the lines that were<br />
being sold. Go back to the header and click the Deposit correction box and the bank account<br />
code to which the deposit was originally recorded. (I am presuming that the original deposit<br />
entry is showing up as attached on the Deposit Tab....... if not enter it). Go back to the lines<br />
and enter Type: Account G/L and quantity of one and the same amount as the deposit in the<br />
header (amount in header is negative, amount on lines is positive). If you plan to charge a<br />
restocking fee then only enter the amount being refunded in the header and on the line. The<br />
posting of this correction will be the record of the cash or credit card refund. Use the Posting<br />
Description Field in the header and the description field on the line to record that this was a<br />
"canceled order refund".<br />
If you do not charge a restocking fee, then you would be finished. If you do charge a restocking<br />
fee, then enter another sales order for the restocking fee and enter the original Deposit Entry No..<br />
which will still be open with a remaining amount (equal to the restocking fee) if you followed the<br />
directions above.<br />
P:\Click here for Manuals\<strong>Customer</strong> <strong>Deposits</strong> Instruction Manual.doc 8/17/09<br />
30
<strong>Customer</strong> <strong>Deposits</strong> – APPLYING MULTIPLE DEPOSITS<br />
Upgrade 4.30<br />
Printing the Sales order has Options to show All deposits applies and a Requested Deposit. See the<br />
Totaling area below:<br />
P:\Click here for Manuals\<strong>Customer</strong> <strong>Deposits</strong> Instruction Manual.doc 8/17/09<br />
Previously applied payments<br />
If you have collected multiple deposit payment posted to the same Sales Order, when you post the Sales<br />
Order you can check a new field call “Apply All SO <strong>Deposits</strong>”. As the Sales Order is posted all deposits<br />
that have that Sales Order No. will be automatically applied to the Invoice.<br />
CAUTION: Check to see that all the deposits that you want to apply show up in the <strong>Deposits</strong> Posted field<br />
on the Sales Order <strong>Deposits</strong> tab. If all deposits are not showing up, you will need to go to the customer<br />
card and to the Deposit entries and make sure that the “missing” deposit has the correct Sales Order No.<br />
The Sales Order No. field on the Deposit Entries view is editable if you click in the field.<br />
31
It is also advised that you turn off the “Auto attach first deposit” in the <strong>Customer</strong> <strong>Deposits</strong> Setup form, if the<br />
majority of Orders will have multiple deposits to apply when posting the sales order.<br />
If you have the Auto Attach First Deposit turned on in the setup area and then remove it from the sales<br />
order so that you can apply multiple posted deposits, the act of removing the attached deposit will remove<br />
the sales order number on the deposit entry. This is why you will want to turn off the Auto Attach First<br />
Deposit if the majority of your orders will have multiple deposits to apply when you post.<br />
---- end of Caution---<br />
The Sales Invoice will indicate multiple deposit payments were applied and will print the total amount of<br />
the deposit applied on the sales invoice.<br />
You can also see the Invoice and applied deposits clearly on the <strong>Customer</strong> Ledger Entries.<br />
P:\Click here for Manuals\<strong>Customer</strong> <strong>Deposits</strong> Instruction Manual.doc 8/17/09<br />
32
P:\Click here for Manuals\<strong>Customer</strong> <strong>Deposits</strong> Instruction Manual.doc 8/17/09<br />
33
Support on this product:<br />
Your local Navision Solution Center will provide support. Please contact them with any<br />
questions or comments.<br />
Thank you for following the procedures. We certainly hope you will find great benefit in<br />
the functionality that this add-on products provides. On behalf of Navision <strong>Software</strong>, all<br />
Navision Solution Centers (NSCs) and Navision Service Providers (NSPs) we thank you<br />
for your business. Do not hesitate to contact your NSC if you are considering<br />
modifications or are in need of new software functionality. There may just be another<br />
add-on product that will work for you. Ask your NSC about getting a complete list of<br />
add-on available.<br />
Abbreviated list of other Add-on products:<br />
Business Snap Shot<br />
Calendar Views<br />
Defaults Setup<br />
Executive Summary<br />
Fast Find<br />
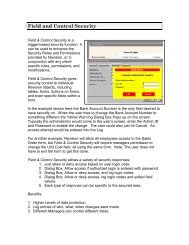
Field and <strong>Control</strong> Security<br />
Line Comments<br />
<strong>Customer</strong> <strong>Deposits</strong><br />
Pop-up Notes<br />
Posted Line Lookup<br />
Purchase Resources<br />
Reports Pack (36 Reports)<br />
Status Views<br />
Visit: www.costcontrolsoftware.com for more details.<br />
P:\Click here for Manuals\<strong>Customer</strong> <strong>Deposits</strong> Instruction Manual.doc 8/17/09<br />
34