Recurring Sales Documents - Cost Control Software
Recurring Sales Documents - Cost Control Software
Recurring Sales Documents - Cost Control Software

Create successful ePaper yourself
Turn your PDF publications into a flip-book with our unique Google optimized e-Paper software.
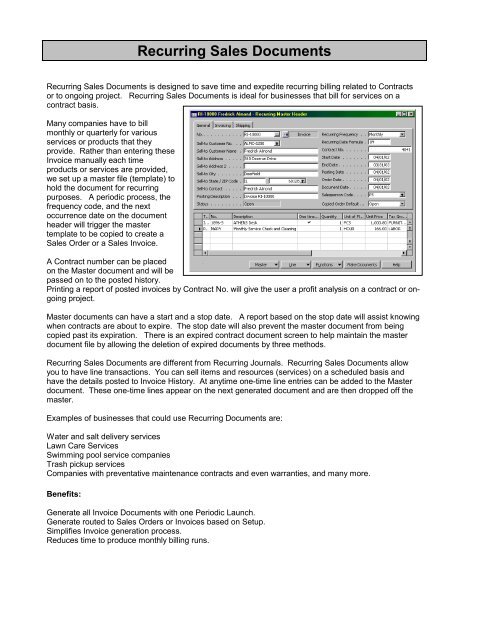
<strong>Recurring</strong> <strong>Sales</strong> <strong>Documents</strong><br />
<strong>Recurring</strong> <strong>Sales</strong> <strong>Documents</strong> is designed to save time and expedite recurring billing related to Contracts<br />
or to ongoing project. <strong>Recurring</strong> <strong>Sales</strong> <strong>Documents</strong> is ideal for businesses that bill for services on a<br />
contract basis.<br />
Many companies have to bill<br />
monthly or quarterly for various<br />
services or products that they<br />
provide. Rather than entering these<br />
Invoice manually each time<br />
products or services are provided,<br />
we set up a master file (template) to<br />
hold the document for recurring<br />
purposes. A periodic process, the<br />
frequency code, and the next<br />
occurrence date on the document<br />
header will trigger the master<br />
template to be copied to create a<br />
<strong>Sales</strong> Order or a <strong>Sales</strong> Invoice.<br />
A Contract number can be placed<br />
on the Master document and will be<br />
passed on to the posted history.<br />
Printing a report of posted invoices by Contract No. will give the user a profit analysis on a contract or ongoing<br />
project.<br />
Master documents can have a start and a stop date. A report based on the stop date will assist knowing<br />
when contracts are about to expire. The stop date will also prevent the master document from being<br />
copied past its expiration. There is an expired contract document screen to help maintain the master<br />
document file by allowing the deletion of expired documents by three methods.<br />
<strong>Recurring</strong> <strong>Sales</strong> <strong>Documents</strong> are different from <strong>Recurring</strong> Journals. <strong>Recurring</strong> <strong>Sales</strong> <strong>Documents</strong> allow<br />
you to have line transactions. You can sell items and resources (services) on a scheduled basis and<br />
have the details posted to Invoice History. At anytime one-time line entries can be added to the Master<br />
document. These one-time lines appear on the next generated document and are then dropped off the<br />
master.<br />
Examples of businesses that could use <strong>Recurring</strong> <strong>Documents</strong> are:<br />
Water and salt delivery services<br />
Lawn Care Services<br />
Swimming pool service companies<br />
Trash pickup services<br />
Companies with preventative maintenance contracts and even warranties, and many more.<br />
Benefits:<br />
Generate all Invoice <strong>Documents</strong> with one Periodic Launch.<br />
Generate routed to <strong>Sales</strong> Orders or Invoices based on Setup.<br />
Simplifies Invoice generation process.<br />
Reduces time to produce monthly billing runs.
Installation:<br />
PLEASE READ THE ENTIRE INSTRUCTIONS BEFORE BEGINNING.<br />
THE INSTRUCTIONS AND OBJECTS INCLUDED HERE ARE FOR<br />
USE WITH AN ATTAIN 3.1+ DATABASE.<br />
WARNING!! These instructions require a working knowledge of the C/SIDE development<br />
system. There are no dependencies for other add-on products. You must have <strong>Sales</strong> &<br />
Receivables Invoicing at least. You will need the <strong>Sales</strong> Order processing for creating recurring<br />
orders.<br />
COMPILE ALL OBJECTS IN THE DATABASE AND RESOLVE ALL UN-COMPILED<br />
OBJECTS BEFORE STARTING THE INSTALLATION.<br />
Upgrade Information: If you are upgrading to <strong>Recurring</strong> <strong>Documents</strong> from <strong>Recurring</strong><br />
<strong>Documents</strong> and Line Posting Dates the following information will apply. The Navision<br />
Attain database is considerably different than the 2.6 version of Navision Financials.<br />
Because of these differenced and in an attempt to offer similar functionality to that<br />
found in Attain, there are some objects additions and new functionality that you will<br />
need to accommodate as you upgrade. <strong>Recurring</strong> <strong>Documents</strong> provides for some new<br />
functionality. You can process recurring documents from the periodic menu. You have<br />
a view expired Contracts form on the Periodic menu too. The Master Contracts now<br />
have a start and stop date. The create recurring documents will not create a document<br />
that has passed it's stop date. <strong>Recurring</strong> <strong>Documents</strong> no longer provides for recurring<br />
Quotes and Credit Memos.<br />
Please note that we have added two codeunits and a couple of extra forms. See chart<br />
below with the list of objects.<br />
The following is a list of all objects that will be modified when the <strong>Recurring</strong><br />
<strong>Documents</strong> is fully implemented.<br />
Type Count ID Name<br />
Table 1 36 <strong>Sales</strong> Header<br />
Table 2 37 <strong>Sales</strong> Line<br />
Table 3 112 <strong>Sales</strong> Invoice Header<br />
Table 4 113 <strong>Sales</strong> Invoice Line<br />
Table 5 115 <strong>Sales</strong> Cr. Memo Line<br />
Table 6 14005031 Contract <strong>Documents</strong> Setup<br />
Table 7 14005032 Contract Header<br />
Table 8 14005033 Contract Lines<br />
Table 9 14005034 Contract Header Comments<br />
Form 10 333 <strong>Sales</strong> & Receivables Menu<br />
Form 11 21 Customer Card<br />
Form 12 14005072 Contract <strong>Documents</strong> Setup<br />
Form 13 14005073 Contract Master Header<br />
Form 14 14005074 Contract Master Lines<br />
P:\Click here for Manuals\<strong>Recurring</strong> <strong>Sales</strong> <strong>Documents</strong> Instructions.doc 10/13/09 2
Form 15 14005075 Contract Comment Line<br />
Form 16 14005076 Contract List<br />
Form 17 14005078 Contract Check Credit New<br />
Form 18 14005079 Contract <strong>Documents</strong> Expired New<br />
Report 19 14005070 <strong>Recurring</strong> <strong>Documents</strong><br />
(Processing)<br />
Report 20 14005071 Contract Docs by Customer New<br />
Report 21 14005072 Contract by Expiration Date New<br />
Report 22 14005073 Contract Docs by Type and Freq New<br />
Report 23 14005074 Contract Docs <strong>Sales</strong> History New<br />
Codeunit 24 80 <strong>Sales</strong>-Post<br />
Codeunit 25 14005032 Contract Doc. Release New<br />
Codeunit 26 14005033 <strong>Recurring</strong> <strong>Documents</strong> CU New<br />
Instructions for integrating <strong>Recurring</strong> <strong>Documents</strong> into your Database—<br />
Before starting, you will need to determine a couple of things about your database.<br />
• Determine if any of the above listed objects has been modified in the database in which<br />
you are going to add <strong>Recurring</strong> <strong>Documents</strong> <strong>Documents</strong>. This is easily accomplished by<br />
starting an import of the <strong>Recurring</strong>Docs_310b_ALL_090302.fob file.<br />
Always answer the import warning so that you view the import worksheet.<br />
If none of the objects listed above have been modified in the target database you can<br />
import the object file. When you start the import, you will get a different message than the<br />
one shown above that states that no conflicts were found, select yes to import the objects<br />
immediately or select no to open the Import Worksheet. It is recommended that you<br />
select no so the Import Worksheet will open in all cases.<br />
Even when there are no conflicts you will need to import the .FOB file in two(2)<br />
passes.<br />
1. Once the Worksheet is open, go to the Action column and select SKIP on all the<br />
“base” Navision objects, and make sure the Higher numbered objects<br />
(14004000+) have the “Create” or “Replace” action and then select OK.<br />
2. Next do the File, Import process again on the same .FOB file. This time use the<br />
“Replace All” Button to flag ALL the objects with the Replace action. This will<br />
guarantee that all of the objects in the .fob actually get imported.<br />
Please read the Tips and Warnings informational document at the end of these instructions<br />
before you continue.<br />
If there are conflicting objects the Import Worksheet will indicate which objects are in conflict. If<br />
you have any conflicting objects make a list of these objects. These are the objects you will<br />
need to hand integrate the <strong>Recurring</strong> <strong>Documents</strong> <strong>Documents</strong> changes into. Instructions for<br />
P:\Click here for Manuals\<strong>Recurring</strong> <strong>Sales</strong> <strong>Documents</strong> Instructions.doc 10/13/09 3
hand integration of individual objects can be found later in this document. Also see Change<br />
Log.<br />
If none of the objects listed above has been modified in the target database you can import the<br />
entire object file. Please make sure you do a replace all. Once the Worksheet is open, select<br />
“Replace All” and select OK. This will guarantee that all of the objects in the .fob actually get<br />
imported.<br />
If some, but not all, of the above listed objects have been modified in your database you can<br />
import the ones that have NOT been modified by using the Import Worksheet to indicate which<br />
objects to replace and which objects to skip. Choosing replace next to an object in the Import<br />
Worksheet will cause that object in your database to be replaced by the import object of the<br />
same number. Choosing skip will prevent the object in your database from being replaced.<br />
Select “replace” for all objects NOT on your conflicting objects list and select “skip” for all<br />
objects ON your conflicting objects list. Using the merge option is not recommended as a<br />
means of dealing with modified objects. Using this option could make your task much<br />
harder.<br />
If none of the objects listed above had been previously modified and you were able to import<br />
IN FULL without using the skip choice on any object, you can by-pass the following hand<br />
integration instructions and move right on to the FINAL SETUP section near the end of this<br />
document. If, however, you DID have objects that had conflicts and could NOT be imported<br />
use the following instructions to hand integrate the <strong>Recurring</strong> <strong>Documents</strong> <strong>Documents</strong> changes<br />
into these objects.<br />
P:\Click here for Manuals\<strong>Recurring</strong> <strong>Sales</strong> <strong>Documents</strong> Instructions.doc 10/13/09 4
SETUP:<br />
1. Go the <strong>Sales</strong> & Receivables Setup. Choose the <strong>Recurring</strong> <strong>Documents</strong> Choice.<br />
Use the screen below as suggestions for you setup.<br />
RM-ORDER stands for a new number series setup for the <strong>Recurring</strong> Order Masters.<br />
RMO-10000 last number used.<br />
RM-INVOICE stands for a new number series setup for the <strong>Recurring</strong> Invoice Masters<br />
RMI-10000 last number used.<br />
We have chosen to show that the <strong>Recurring</strong> Orders can have a different number series as<br />
regular <strong>Sales</strong> Orders by using a new number series code RS-Order. You can of course have<br />
recurring orders and invoices have the same number series as standard sales orders and invoice.<br />
Default Status is used for when <strong>Recurring</strong> Orders and Invoices are created. The Master<br />
<strong>Recurring</strong> documents must be “Released” before they are ready to be used in the Make<br />
document or create multiple recurring documents process. Use this Default Status for Copied<br />
Orders and Invoices to automatically set the status on the recurring created document.<br />
We have also put this Default status on the <strong>Recurring</strong> Masters so you can change it per specific<br />
document. The create recurring process will use the Default status on the <strong>Recurring</strong> Master<br />
Header when the process is running.<br />
P:\Click here for Manuals\<strong>Recurring</strong> <strong>Sales</strong> <strong>Documents</strong> Instructions.doc 10/13/09 5
RECURRIG SALES DOCUMETS<br />
ISTRUCTIOS<br />
<strong>Recurring</strong> <strong>Sales</strong> <strong>Documents</strong> are held in a <strong>Recurring</strong> Header and <strong>Recurring</strong> Lines Table.<br />
<strong>Recurring</strong> <strong>Documents</strong> are very similar to Quotes except that they have a <strong>Recurring</strong> Billing<br />
Frequency. There can only be ONE billing frequency code per document. If A customer has<br />
multiple repetitive billings from your company, and these bills recur at different frequencies,<br />
(One bill recurs monthly, another bill recurs quarterly) then each bill would be entered<br />
separately.<br />
Setting Up <strong>Recurring</strong> <strong>Documents</strong>:<br />
1. Go to <strong>Sales</strong> and Receivables Setup menu and find <strong>Recurring</strong> <strong>Documents</strong> Setup. (v3.7)<br />
V4.0+<br />
<strong>Recurring</strong> Master entry area<br />
<strong>Recurring</strong> Setup area<br />
P:\Click here for Manuals\<strong>Recurring</strong> <strong>Sales</strong> <strong>Documents</strong> Instructions.doc 10/13/09 6
2. This will open the <strong>Recurring</strong> <strong>Documents</strong> Setup Form. From here you will enter a<br />
Numbering Series for each type of Document. Each field is tied to the No Series table.<br />
3. The first two fields are for the Master <strong>Recurring</strong> <strong>Documents</strong>. These fields will number the<br />
<strong>Recurring</strong> Master or template documents that you will be creating for the actual documents.<br />
Click on the lookup. This works just like the rest of the numbering throughout Navision.<br />
Create a new number series or choose one from the list.<br />
4. Once you have filled in the Master Numbers, you will need to complete the actual recurring<br />
numbers. These numbers will be used when an actual document has been created from the<br />
template. The number fields are identical to the <strong>Sales</strong> & Receivable numbers but will be<br />
used for <strong>Recurring</strong> <strong>Documents</strong>. You can use the same number series as Open Orders and<br />
Open Invoices or you can use a new number series to differentiate the <strong>Recurring</strong> Orders and<br />
<strong>Recurring</strong> Invoices from the Manually entered ones.<br />
5. When the <strong>Recurring</strong> templates are copied, what status will the Open Orders and Open<br />
Invoices be? The Default Status for Copied <strong>Documents</strong> will be first set here. As seen above<br />
the copied Open Orders will have a status of Open and the copied Invoices will be in the<br />
status of Released.<br />
This Default status for copied documents is available to change on the <strong>Recurring</strong> Master<br />
document’s header. When you change the default status on the <strong>Recurring</strong> master header it<br />
will only effect that one recurring master.<br />
6. <strong>Recurring</strong> <strong>Documents</strong> complies with Navision Attain’s Advanced Dimension structure.<br />
<strong>Recurring</strong> Header and Lines will have dimensions in the same way the <strong>Sales</strong> header and<br />
lines do. You are allowed to change the dimensions on both header and lines therefore you<br />
may want the edited recurring dimensions to copy to the open orders and invoices vs.<br />
recreating the dimensions as the open order and open invoices are copied. If you check the<br />
boxes in the setup area, this will mean you will use the dimension that exist on the recurring<br />
documents vs. recreating the dimensions when the recurring copy process occurs.<br />
P:\Click here for Manuals\<strong>Recurring</strong> <strong>Sales</strong> <strong>Documents</strong> Instructions.doc 10/13/09 7
7. You have completed the Setup for <strong>Recurring</strong> <strong>Documents</strong> so close the form.<br />
Create A Master Document:<br />
1. Open the <strong>Sales</strong> & Receivables Menu<br />
2. Click on the <strong>Recurring</strong> <strong>Documents</strong> menu button. Click on the appropriate document type<br />
and the form will open.<br />
3. Press F3 to insert a new document. The master template is almost identical to the <strong>Sales</strong><br />
Order Document so most of the fields and functions will work the same.<br />
4. You are now on the No. field, press enter or enter a Manual No. If you enter a manual<br />
number, you must have the number series set to allow for manual numbers. If you leave the<br />
number blank and hit enter the No. field will be populated with the appropriate Master No.<br />
based on the Document Type.<br />
5. You now have a Master Document. Next, choose a customer you will be selling to. The rest<br />
of the customer information will be filled in automatically.<br />
6. Now it is time to fill in the <strong>Recurring</strong> Frequency. Select one choice from the option field,<br />
Weekly, Monthly, Quarterly, Yearly. This field will preset the <strong>Recurring</strong> Date Calculation<br />
P:\Click here for Manuals\<strong>Recurring</strong> <strong>Sales</strong> <strong>Documents</strong> Instructions.doc 10/13/09 8
field. The <strong>Recurring</strong> Date Calculation Field is actually the field that will determine how<br />
often the document will be created. Weekly will insert a 1W in the <strong>Recurring</strong> Date<br />
Calculation field. Monthly = 1M, etc.<br />
7. The <strong>Recurring</strong> Date calculation field can be edited with a more complex formula. I.e. You<br />
selected Monthly and the default was 1M; However, if you want to make sure the next<br />
posting date always falls on the 10 th day of the following month, so you will edit the<br />
<strong>Recurring</strong> date formula to CM+10. If you do not need special date formulasw then no<br />
editing is needed.<br />
8. <strong>Recurring</strong> <strong>Documents</strong> can have a Contract No.. The Contract No. is just a way to associate<br />
one or more recurring documents together in order to analysis revenue and costs related to<br />
Contract business.<br />
9. <strong>Recurring</strong> <strong>Documents</strong> can have Start and End dates. <strong>Recurring</strong> documents will not be<br />
copied before their start date and they will not be copied after the end date. There is a report<br />
that will print a list of recurring contract documents based on the end date so you can<br />
anticipate the end of recurring revenue or service. The End date is also referenced when<br />
viewing the “expired” recurring documents from the <strong>Recurring</strong> <strong>Documents</strong> setup form or<br />
from the Periodic Activities menu.<br />
10. The “Posting Date” on a <strong>Recurring</strong> Contract Document is very important. This is the date<br />
that determines when the next recurring document will be created. If the Posting Date on a<br />
<strong>Recurring</strong> Contract document is after the WORKDATE when the “Make Document” or the<br />
“Create <strong>Recurring</strong> <strong>Documents</strong>” processes are run, then the recurring document will be<br />
copied. During the create process the “next” Posting Date is determined by using the<br />
<strong>Recurring</strong> Date Formula field on the document. For example if the Create recurring<br />
document is run when the WORKDATE is 01/05/02 and the Posting date on a document is<br />
01/01/02 and the <strong>Recurring</strong> Date Formula is 1M, the document will be copied and the new<br />
Posting date on the <strong>Recurring</strong> Master will be 1Month from 01/01/02 which will be 02/01/02.<br />
11. Fill out the rest of the header as if you were filling out a Navision Open <strong>Sales</strong> Document.<br />
12. Once you have completed the header, you will need to fill out the lines. This is a copy of the<br />
Navision <strong>Sales</strong> Lines. Some of the same line functionality is available with recurring lines.<br />
You will be able to insert Extended Text and Explode an item with a Bill of Materials, but<br />
you will not be able to reserve items or post transactions from this screen. The <strong>Recurring</strong><br />
<strong>Documents</strong> is a template to assist the automatic creation of actual <strong>Sales</strong> <strong>Documents</strong> based on<br />
a frequency code.<br />
13. One Time Lines field – mark this field if you want the line to be on the document only once.<br />
If you mark the checkbox after the document has been created this line will be deleted from<br />
the Master Document. This feature will also work with the extended text and the bill of<br />
materials. Mark the line before you insert text or explode the BOM and all lines that are<br />
associated with the starting line will also be marked.<br />
P:\Click here for Manuals\<strong>Recurring</strong> <strong>Sales</strong> <strong>Documents</strong> Instructions.doc 10/13/09 9
14. Once you have filled in all lines for the master document, you are ready to create recurring<br />
documents. <strong>Recurring</strong> Master documents have a status of open or released just like other<br />
transactional documents. <strong>Recurring</strong> documents must be “released” before they can be<br />
copied to and order or invoice.<br />
15. You may also access <strong>Recurring</strong> <strong>Documents</strong> <strong>Recurring</strong> documents from the Customer Card.<br />
Drop down the <strong>Sales</strong> button on the Customer card and see two choices, <strong>Recurring</strong> Orders<br />
and <strong>Recurring</strong> Invoices. You can enter recurring documents from this location too. The<br />
advantage here is that the Customer is already selected. F3 enter on the recurring header will<br />
enter the next recurring master document no. and the customer no. and customer<br />
information.<br />
Creating (Generating) <strong>Recurring</strong> <strong>Documents</strong>:<br />
The <strong>Recurring</strong> document’s "Posting Date" is what determines the NEXT time this particular<br />
document is DUE to be copied to the Open documents area.<br />
The Document Date is typically the same as the Posting Date on a repetitive order. The Due<br />
Date, based on the Payment Terms is calculated from the Document Date. Shipment Date is<br />
also the same as the Posting Date. If these dates need to be different for some reason, you may<br />
need to edit the <strong>Recurring</strong> process “Create <strong>Recurring</strong> <strong>Documents</strong>” pertaining to the way the<br />
Master <strong>Recurring</strong> Document dates change when the actual recurring documents are created.<br />
1. Open the <strong>Sales</strong> & Receivables Menu.<br />
2. There are two ways to access the create multiple recurring documents process. Either from<br />
the S&R Periodic Activity Menu or from the S&R Setup menu then <strong>Recurring</strong> <strong>Documents</strong><br />
Setup and then the Periodic Activity Button. Either way will get you to the same place.<br />
3. Select Create <strong>Recurring</strong> <strong>Documents</strong> and a request Form will open that will allow you to set<br />
the criteria for which documents will be created.<br />
P:\Click here for Manuals\<strong>Recurring</strong> <strong>Sales</strong> <strong>Documents</strong> Instructions.doc 10/13/09 10
4. Type in the appropriate criteria or run the report without filters. You have now created the<br />
recurring documents. Look at the Open <strong>Sales</strong> Orders or Open Invoices areas to see the<br />
documents that have been made. The least amount of filters will find more recurring<br />
documents.<br />
5. You may also do a “Make Document” when you are on a <strong>Recurring</strong> Master document<br />
header. Find the button “Make Document” at the bottom of the Master document. This<br />
works just like the Create multiple recurring documents but automatically sets the single<br />
document no. as a filter on the process.<br />
6. <strong>Recurring</strong> <strong>Documents</strong> must have a released status to be picked up by the Make Document or<br />
Create recurring document process. The Release feature is just like the Release Status on<br />
<strong>Sales</strong> Headers. The Release status protects the master document from being accidentally<br />
edited and or the Open status alerts you to when the master document is now completed<br />
fully.<br />
How Does the Process Work?<br />
When you click on the “Make <strong>Documents</strong>” button or the “Create <strong>Recurring</strong> <strong>Documents</strong>” a<br />
processing only type report is run based on user criteria. The report will look at the Master<br />
<strong>Documents</strong> Posting Date to see if the document needs to be created. If the Posting Date is<br />
before or on the system’s Workdate a document will be made. The copied document is given a<br />
recurring number according to the setup and the master document is updated to the next posting<br />
date. The next posting date is calculated based on the <strong>Recurring</strong> Date Formula. Example: A<br />
Posting Date is 01/01/02. The <strong>Recurring</strong> Date Formula is 1M. When the report is run and the<br />
document is created, the Posting Date on the <strong>Recurring</strong> Master will be updated to 02/01/02. The<br />
newly created order or invoice will have a status of open or released, based on the value set on<br />
the recurring master header in the field “Copied document default status.”<br />
P:\Click here for Manuals\<strong>Recurring</strong> <strong>Sales</strong> <strong>Documents</strong> Instructions.doc 10/13/09 11
After the Document has been created the process will delete all one time lines form the master<br />
document. This includes all BOM lines and Extended Text lines that were exploded from a<br />
“One Time Line”.<br />
How are <strong>Recurring</strong> <strong>Documents</strong> different from the <strong>Recurring</strong> <strong>Sales</strong> Journal?<br />
The <strong>Recurring</strong> <strong>Sales</strong> Journal only records a summarization of a bill. <strong>Recurring</strong> journal entries<br />
are better known as repetitive "charges". Examples would be monthly charges for continued<br />
service....cable TV, Internet, Support agreement, security monitoring etc. Most of the time<br />
the amount is a fixed charge that only varies when the customers adds or subtracts services<br />
being provided. Initial "start-up" invoices usually itemize the services, and then the repetitive<br />
charge description is usually very simple like "for monthly service fee."<br />
The recurring journal will not calculate the tax for you. Tax entries are entered on a separate<br />
line from the charges and you would have to hand calculate them. <strong>Recurring</strong> journal lines also<br />
do not interact with inventory or resources. The only way to notify the customer of the recurring<br />
charges is to send a statement.<br />
<strong>Recurring</strong> <strong>Sales</strong> <strong>Documents</strong> in contrast generally require a picking list, work order, or invoice<br />
format specifying the product or service to be delivered "monthly", "weekly", etc. We need the<br />
line item detail. Examples of <strong>Recurring</strong> <strong>Documents</strong> are rental businesses that involve<br />
maintaining the rental items.... plants, regular delivery of products...fuel, food, and regular<br />
delivery of service such a janitorial services. To determine which recurring method fits best,<br />
listen to how much detail does the client need to keep each period. Who needs to see the<br />
detail, and how long do they want to keep the detail. Will they want to track the product or<br />
service usage historically? If the items that you are billing have different tax rates, or you<br />
need to departmentalize the revenue, you will probably need to use the <strong>Recurring</strong> <strong>Documents</strong><br />
rather than the recurring journal.<br />
If clients want to see USAGE of Products (Items) and or Services (Resources) then the best<br />
option is the <strong>Recurring</strong> <strong>Sales</strong> <strong>Documents</strong>.<br />
Reports:<br />
<strong>Recurring</strong> <strong>Sales</strong> <strong>Documents</strong> comes with four (4) standard reports.<br />
<strong>Recurring</strong>Docs Eval by Customer (#14005071) – This reports prints <strong>Recurring</strong> Order<br />
and <strong>Recurring</strong> Invoice detail by customer and gives an estimated monthly revenue<br />
evaluation.<br />
<strong>Recurring</strong> Docs by End Date(#14005072) - Print all recurring documents sorted by the<br />
end date or specify a end date range and find out whos recurring contracts are about to<br />
expire.<br />
P:\Click here for Manuals\<strong>Recurring</strong> <strong>Sales</strong> <strong>Documents</strong> Instructions.doc 10/13/09 12
<strong>Recurring</strong>Docs by Type and Freq (#14005073) – Get a recurring document list by type<br />
and frequency.<br />
<strong>Recurring</strong> Docs <strong>Sales</strong> History (#14005074) - This report will let you know the revenue<br />
collected by recurring document number. Specify a Sell-to customer number and date<br />
range and find our the recurring revenue for that customer for a period of time.<br />
Place these reports on the <strong>Sales</strong> & Receivables reports menu.<br />
P:\Click here for Manuals\<strong>Recurring</strong> <strong>Sales</strong> <strong>Documents</strong> Instructions.doc 10/13/09 13
Delete Expired <strong>Recurring</strong> <strong>Sales</strong> <strong>Documents</strong>:<br />
You will find this option on the <strong>Recurring</strong> <strong>Sales</strong> Setup screen. Go to <strong>Sales</strong> & Receivable Setup<br />
and take the <strong>Recurring</strong> Setup choice. On the <strong>Recurring</strong> setup form there is a <strong>Recurring</strong> Periodic<br />
Activities Button. There are two menu choices. One creates the recurring orders or invoices<br />
and the other choice takes you to a screen that views the recurring documents that have expired.<br />
Expiration occurs when the “End date” on a recurring master is older then the system’s<br />
Workdate. You can delete one at a time or mark several and delete them together.<br />
Posting to a Deferred Revenue Account:<br />
<strong>Recurring</strong> <strong>Sales</strong> <strong>Documents</strong> does not specifically hold functionality that involves posting<br />
to a deferred revenue. However, The following is a suggestion on how to handle posting to a<br />
deferred revenue account, if you have a client that requests this type of functionality, by using a<br />
little clever handling of Customer Posting Groups.<br />
First you need to post an invoice for the full contract amount (what ever is the deferred revenue<br />
term), i.e. if it is an annual contact (monthly amount x 12). This invoice is just entered totally<br />
separately and not part of the <strong>Recurring</strong> <strong>Sales</strong> Document functionality. I.e. just post a standard<br />
sales invoice. However, you must consider that the full amount would Debit the Accounts<br />
Receivables like you want it to, but what account will hold the Credit? The line Type would be<br />
Account (G/L) and the account you want the Credit to go to, would go in the No. field. I might<br />
guess that this account to be credited would be called "Deferred Revenue".<br />
Next we set up a Customer Posting Group that would hold the "Deferred Revenue" account no.<br />
instead of the Accounts Receivable account no.. The <strong>Recurring</strong> <strong>Sales</strong> <strong>Documents</strong> header would<br />
have to have this "Deferred Revenue" Posting Group instead of the Customer's standard posting<br />
group. The "lite" modification solution is that the entry person would change the Customer<br />
Posting Group field on the <strong>Recurring</strong> Document Header to the Customer Posting Group that<br />
contains the Deferred Revenue account. (Normally the Customer Posting Group field on the<br />
Document Headers are non-editable, however their is not a problem to allow this on a <strong>Recurring</strong><br />
<strong>Sales</strong> Document.) Now when the <strong>Recurring</strong> <strong>Sales</strong> Document posts the Deferred Revenue<br />
account would be debited (reducing the amount that was originally credited by each monthly<br />
amount) and crediting the actual sales account(s). The Accounts Receivables account gets<br />
reduced, normally, as the payments are posted.<br />
If you wish a modification be made, then I would suggest that the <strong>Recurring</strong> <strong>Documents</strong> Setup<br />
contain the question.... Deferred Revenue Posting Group . Plus adding code that gets the entry<br />
made in this new field when the <strong>Recurring</strong> headers are created. This modification would be<br />
considered minor and can be quickly quoted.<br />
P:\Click here for Manuals\<strong>Recurring</strong> <strong>Sales</strong> <strong>Documents</strong> Instructions.doc 10/13/09 14
<strong>Recurring</strong> <strong>Sales</strong> <strong>Documents</strong> – Improvement 37.01<br />
Allows Declining Balance Entry on <strong>Recurring</strong> <strong>Documents</strong><br />
See new Tab on the <strong>Recurring</strong> <strong>Documents</strong> Header: (Balance)<br />
Enter the Balance to Decline with Tax (Contract Amount) and the Number of Payments and the system will<br />
calculate the “<strong>Recurring</strong> Balance Payment”.<br />
Enter the lines and indicate on the line, which lines apply to the declining balance by checking the “Include in<br />
Declining Balance” field. The total of the lines Amount Including Tax will add up into the Header field called<br />
“Lines Declining Amount.”<br />
The system will compare the “<strong>Recurring</strong> Balance Payment” to the “Lines Declining Amount” when you Release the<br />
Document. If the two amounts do not match then you will not be able to Release the Document.<br />
P:\Click here for Manuals\<strong>Recurring</strong> <strong>Sales</strong> <strong>Documents</strong> Instructions.doc 10/13/09 15
See below after Document is released:<br />
The two fields must match:<br />
P:\Click here for Manuals\<strong>Recurring</strong> <strong>Sales</strong> <strong>Documents</strong> Instructions.doc 10/13/09 16
See Balance Tab is automatically updated when the recurring documents are posted.<br />
Credit Memos can be posted to a <strong>Recurring</strong> Document.<br />
P:\Click here for Manuals\<strong>Recurring</strong> <strong>Sales</strong> <strong>Documents</strong> Instructions.doc 10/13/09 17
Be sure to indicate that the line is included in Declining Balance reporting, and the <strong>Recurring</strong> Doc. No. is entered<br />
on the Credit Memo Lines.<br />
When the declining balance posted less any credits posted is equal to or greater then the total Balance entered on the<br />
<strong>Recurring</strong> Document Header then the system will automatically enter an Expiration Date. Notice the check box<br />
next to the Expiration Date on the Balance Tab indicates that the expiration Date was automatically enter by an<br />
internal coded functionality.<br />
If you have manually entered an Expiration Date then the System will respect that date and will not change it;<br />
however, if the Balance posted equals the total Balance, before the manually entered Expiration date, then the<br />
system will continue to allow you to create recurring documents. We would recommend that you do not enter an<br />
Expiration Date when using Declining Balance functionality. You can always use the Contract “End Date” if you<br />
want to “manually” prevent further posting based on a date, regardless of the Declining balance.<br />
Responsibility Centers: (RecurD4.00.02)<br />
<strong>Recurring</strong> <strong>Documents</strong> have the same filtering parameters as <strong>Sales</strong> <strong>Documents</strong>. If a user is set up<br />
with a Responsibility Center in User Setup then Navision will filter the <strong>Recurring</strong> <strong>Documents</strong> by<br />
that Responsibility Center just like is filters the <strong>Sales</strong> Orders.<br />
If you want the ability to have one person enter <strong>Recurring</strong> <strong>Documents</strong> for all responsibility<br />
Centers then that user will not have a Responsibility Center specified in the User Setup table.<br />
Also the person that runs the Create <strong>Sales</strong> Orders from <strong>Recurring</strong> <strong>Documents</strong> will need to be a<br />
user that does not have a Responsibility Center specified in the User Setup Table. The nature of<br />
P:\Click here for Manuals\<strong>Recurring</strong> <strong>Sales</strong> <strong>Documents</strong> Instructions.doc 10/13/09 18
creating documents when the user does not have a Responsibility Center specified is to create<br />
the sales document with a "blank" responsibility center.<br />
The code on the <strong>Sales</strong> Header and on the Create <strong>Recurring</strong> <strong>Documents</strong> processing report to carry<br />
the Responsibility Center entered on the <strong>Recurring</strong> Doc. over to the <strong>Sales</strong> Document as long as<br />
the user has an undefined responsibility center.<br />
P:\Click here for Manuals\<strong>Recurring</strong> <strong>Sales</strong> <strong>Documents</strong> Instructions.doc 10/13/09 19
Support on this product:<br />
Your local Navision Solution Center will provide support. Please contact them with any<br />
questions or comments.<br />
Thank you for following the procedures. We certainly hope you will find great benefit in the<br />
functionality that this add-on product provides. On behalf of Navision <strong>Software</strong>, all Navision<br />
Solution Centers (NSCs) and Navision Service Providers (NSPs) we thank you for your<br />
business. Do not hesitate to contact your NSC if you are considering modifications or are in<br />
need of new software functionality. There may just be another add-on product that will work<br />
for you. Ask your NSC about getting a complete list of add-ons available.<br />
Abbreviated list of Add-on products:<br />
Business Snapshot Plus<br />
Calendar Views<br />
<strong>Recurring</strong> <strong>Sales</strong> <strong>Documents</strong><br />
Defaults Setup<br />
Fast Find<br />
Field and <strong>Control</strong> Security<br />
Line Comments<br />
Pop-up Notes<br />
Posted Line Lookup<br />
Direct Purchasing<br />
Reports Pack (36 Reports)<br />
P:\Click here for Manuals\<strong>Recurring</strong> <strong>Sales</strong> <strong>Documents</strong> Instructions.doc 10/13/09 20