iBook G4 12" 1.33 GHz Optical Drive Replacement - iFixit
iBook G4 12" 1.33 GHz Optical Drive Replacement - iFixit
iBook G4 12" 1.33 GHz Optical Drive Replacement - iFixit

You also want an ePaper? Increase the reach of your titles
YUMPU automatically turns print PDFs into web optimized ePapers that Google loves.
<strong>iBook</strong> <strong>G4</strong> 12" <strong>1.33</strong> <strong>GHz</strong> <strong>Optical</strong> <strong>Drive</strong> <strong>Replacement</strong><br />
<strong>iBook</strong> <strong>G4</strong> 12" <strong>1.33</strong> <strong>GHz</strong> <strong>Optical</strong><br />
TOOLS:<br />
Coin (1)<br />
Phillips 00 Screwdriver (1)<br />
<strong>Drive</strong> <strong>Replacement</strong><br />
Small Flathead Screwdriver (1)<br />
Spudger (1)<br />
T8 Torx Screwdriver (1)<br />
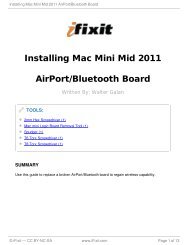
SUMMARY<br />
Written By: Walter Galan<br />
Upgrade or replace the CD, DVD, combo or Super<strong>Drive</strong>.<br />
PARTS:<br />
<strong>iBook</strong> <strong>G4</strong> 12" CD <strong>Drive</strong> (1)<br />
<strong>iBook</strong> <strong>G4</strong> 12" 24x Combo <strong>Drive</strong> (1)<br />
<strong>iBook</strong> <strong>G4</strong> 12" 24x Combo <strong>Drive</strong> (CW-<br />
8124) (1)<br />
© <strong>iFixit</strong> — CC BY-NC-SA www.<strong>iFixit</strong>.com Page 1 of 22
<strong>iBook</strong> <strong>G4</strong> 12" <strong>1.33</strong> <strong>GHz</strong> <strong>Optical</strong> <strong>Drive</strong> <strong>Replacement</strong><br />
Step 1 — Battery<br />
Lay your <strong>iBook</strong> upside down on a flat surface.<br />
Use a coin to rotate the battery locking screw 90 degrees clockwise.<br />
Lift the battery out of the computer.<br />
Step 2 — Keyboard<br />
Pull the keyboard release tabs toward you and lift up on the keyboard until it pops free.<br />
If the keyboard does not come free, use a small flathead screwdriver to turn the<br />
keyboard locking screw 180 degrees in either direction and try again.<br />
Flip the keyboard over, away from the screen, and rest it face-down on the trackpad area.<br />
© <strong>iFixit</strong> — CC BY-NC-SA www.<strong>iFixit</strong>.com Page 2 of 22
<strong>iBook</strong> <strong>G4</strong> 12" <strong>1.33</strong> <strong>GHz</strong> <strong>Optical</strong> <strong>Drive</strong> <strong>Replacement</strong><br />
Step 3<br />
Step 4<br />
Remove the four silver Phillips<br />
screws that secure the RAM<br />
shield.<br />
Pull the keyboard cable up from the<br />
logic board, holding the cable as<br />
close to the connector as possible.<br />
Make sure that you<br />
reconnect the keyboard<br />
cable before replacing the RAM<br />
shield.<br />
© <strong>iFixit</strong> — CC BY-NC-SA www.<strong>iFixit</strong>.com Page 3 of 22
<strong>iBook</strong> <strong>G4</strong> 12" <strong>1.33</strong> <strong>GHz</strong> <strong>Optical</strong> <strong>Drive</strong> <strong>Replacement</strong><br />
Step 5 — Lower Case<br />
Step 6<br />
Use a spudger or small flathead<br />
screwdriver to remove the three<br />
rubber feet from the lower case.<br />
Remove the three newly-revealed<br />
Phillips screws.<br />
© <strong>iFixit</strong> — CC BY-NC-SA www.<strong>iFixit</strong>.com Page 4 of 22
<strong>iBook</strong> <strong>G4</strong> 12" <strong>1.33</strong> <strong>GHz</strong> <strong>Optical</strong> <strong>Drive</strong> <strong>Replacement</strong><br />
Step 7<br />
Step 8<br />
Use a spudger or small flathead<br />
screwdriver to pry up the three<br />
metal rings that housed the rubber<br />
bumpers.<br />
Remove the three hex screws<br />
using a T8 Torx screwdriver.<br />
The shorter screw is in the<br />
center of the computer.<br />
© <strong>iFixit</strong> — CC BY-NC-SA www.<strong>iFixit</strong>.com Page 5 of 22
<strong>iBook</strong> <strong>G4</strong> 12" <strong>1.33</strong> <strong>GHz</strong> <strong>Optical</strong> <strong>Drive</strong> <strong>Replacement</strong><br />
Step 9<br />
Step 10<br />
Remove the two 4.5 mm Phillips<br />
screws on either sides of the<br />
battery contacts.<br />
Breathe deeply. Trying<br />
times are ahead, but we<br />
promise the lower case does come<br />
off.<br />
Push the thin rims of the lower<br />
case surrounding the battery<br />
compartment in, bending them past<br />
the tabs, and then lift up to free that<br />
corner of the lower case.<br />
© <strong>iFixit</strong> — CC BY-NC-SA www.<strong>iFixit</strong>.com Page 6 of 22
<strong>iBook</strong> <strong>G4</strong> 12" <strong>1.33</strong> <strong>GHz</strong> <strong>Optical</strong> <strong>Drive</strong> <strong>Replacement</strong><br />
Step 11<br />
Step 12<br />
There is a slot on the wall of the<br />
battery compartment that locks the<br />
lower case in place. Use a small<br />
flathead screwdriver to pry out the<br />
slot's lower rim and pull up on the<br />
lower case to free the slot from the<br />
tabs holding it.<br />
Run a spudger along the seam<br />
between the lower case and upper<br />
case on the front of the computer<br />
to free the tabs locking the lower<br />
case. Pull up on the lower case and<br />
continue to use the spudger as<br />
necessary until you hear three<br />
distinct clicks.<br />
© <strong>iFixit</strong> — CC BY-NC-SA www.<strong>iFixit</strong>.com Page 7 of 22
<strong>iBook</strong> <strong>G4</strong> 12" <strong>1.33</strong> <strong>GHz</strong> <strong>Optical</strong> <strong>Drive</strong> <strong>Replacement</strong><br />
Step 13<br />
Step 14<br />
Continue to run the spudger around<br />
the front right corner. There are two<br />
tabs on the port side of the<br />
computer, one near the front corner<br />
and one near the sound-out port.<br />
There are three tabs over the<br />
optical drive that must be released<br />
before the lower case can come<br />
off. Slide the spudger into the lower<br />
case above the optical drive and<br />
run it toward the back of the<br />
computer until you hear three<br />
distinct clicks.<br />
© <strong>iFixit</strong> — CC BY-NC-SA www.<strong>iFixit</strong>.com Page 8 of 22
<strong>iBook</strong> <strong>G4</strong> 12" <strong>1.33</strong> <strong>GHz</strong> <strong>Optical</strong> <strong>Drive</strong> <strong>Replacement</strong><br />
Step 15<br />
Step 16<br />
Step 17<br />
The front and sides of the<br />
lower case are now free.<br />
Turn the computer so that the back<br />
is facing you and pull the lower<br />
case up and toward you until the<br />
back tabs pop free.<br />
It may be helpful to jiggle<br />
the case up and down.<br />
Remove the small greasy springs<br />
with white plastic caps from either<br />
side of the battery contacts.<br />
Have patience and follow the directions, the end result is up to you. In my case it worked.<br />
But I was a Technician TRW Automotive. and worked on Air Bag modules that was<br />
returned from customer's that needed them analyzed. I just retired after 26 years.<br />
© <strong>iFixit</strong> — CC BY-NC-SA www.<strong>iFixit</strong>.com Page 9 of 22
<strong>iBook</strong> <strong>G4</strong> 12" <strong>1.33</strong> <strong>GHz</strong> <strong>Optical</strong> <strong>Drive</strong> <strong>Replacement</strong><br />
Step 18 — Bottom Shield<br />
Step 19<br />
Remove the following 4 screws<br />
from the bottom shield:<br />
Two 3 mm Phillips.<br />
Two 7.5 mm Phillips.<br />
Lift the bottom shield off.<br />
© <strong>iFixit</strong> — CC BY-NC-SA www.<strong>iFixit</strong>.com Page 10 of 22
<strong>iBook</strong> <strong>G4</strong> 12" <strong>1.33</strong> <strong>GHz</strong> <strong>Optical</strong> <strong>Drive</strong> <strong>Replacement</strong><br />
Step 20 — DC-In Board<br />
Step 21<br />
Remove the two Phillips screws<br />
securing the DC-In board,<br />
removing tape as necessary.<br />
Deroute the cable from around the optical drive, removing tape as necessary.<br />
Disconnect the DC-In cable from the logic board and angle the DC-In board out of its<br />
compartment.<br />
© <strong>iFixit</strong> — CC BY-NC-SA www.<strong>iFixit</strong>.com Page 11 of 22
<strong>iBook</strong> <strong>G4</strong> 12" <strong>1.33</strong> <strong>GHz</strong> <strong>Optical</strong> <strong>Drive</strong> <strong>Replacement</strong><br />
Step 22 — Upper Case<br />
Step 23<br />
Remove the two 3 mm Phillips<br />
screws inside the left edge of the<br />
battery tray.<br />
We recommend placing the<br />
computer on a soft cloth<br />
from this point on to prevent<br />
damaging the logic board.<br />
Turn over the computer and open<br />
it.<br />
Use the flat side of a flathead<br />
screwdriver to remove the small<br />
magnet covering a screw near the<br />
middle of the computer.<br />
© <strong>iFixit</strong> — CC BY-NC-SA www.<strong>iFixit</strong>.com Page 12 of 22
<strong>iBook</strong> <strong>G4</strong> 12" <strong>1.33</strong> <strong>GHz</strong> <strong>Optical</strong> <strong>Drive</strong> <strong>Replacement</strong><br />
Step 24<br />
Remove the following 7 screws<br />
from the edges of the keyboard<br />
area.<br />
Three 2 mm Phillips along the<br />
right edge.<br />
One 4.5 mm Phillips underneath<br />
where the magnet was.<br />
One 6 mm Phillips with a small<br />
head in the lower left corner.<br />
Two 6 mm Phillips with large<br />
heads, one in the upper left<br />
corner and one in the middle.<br />
© <strong>iFixit</strong> — CC BY-NC-SA www.<strong>iFixit</strong>.com Page 13 of 22
<strong>iBook</strong> <strong>G4</strong> 12" <strong>1.33</strong> <strong>GHz</strong> <strong>Optical</strong> <strong>Drive</strong> <strong>Replacement</strong><br />
Step 25<br />
Before you can yank the<br />
upper case off, you must<br />
disconnect the trackpad connector,<br />
the blue and white power cable,<br />
and speaker cable as described in<br />
the next steps. Be especially<br />
careful with these cables; never<br />
pull directly on the cables, but use<br />
a spudger to pry up the connector<br />
directly.<br />
Carefully lift the upper case slightly<br />
and move it toward the front of the<br />
computer to reveal the trackpad<br />
connector. Use a spudger or your<br />
finger to disconnect the trackpad<br />
connector hidden beneath the white<br />
plastic tab.<br />
After disconnecting the track pad<br />
connector, carefully rotate the<br />
upper case away from you and rest<br />
it against the display.<br />
© <strong>iFixit</strong> — CC BY-NC-SA www.<strong>iFixit</strong>.com Page 14 of 22
<strong>iBook</strong> <strong>G4</strong> 12" <strong>1.33</strong> <strong>GHz</strong> <strong>Optical</strong> <strong>Drive</strong> <strong>Replacement</strong><br />
Step 26<br />
Step 27<br />
The connectors at the ends<br />
of the following cables are<br />
attached very firmly to the sockets<br />
on the logic board. Pulling directly<br />
on the cable will either separate the<br />
cable from its connector or the<br />
socket from the logic board.<br />
Use the sharp end of a spudger to<br />
disconnect the speaker cable<br />
connector.<br />
Using the sharp end of a spudger, disconnect the connector for the blue and white power<br />
cables. Again, be careful to pry up only on the connector.<br />
The key is to apply force in two directions, down to keep the surface board connections<br />
intact, up to release the connector.<br />
The upper case is now free and can be removed from the computer.<br />
© <strong>iFixit</strong> — CC BY-NC-SA www.<strong>iFixit</strong>.com Page 15 of 22
<strong>iBook</strong> <strong>G4</strong> 12" <strong>1.33</strong> <strong>GHz</strong> <strong>Optical</strong> <strong>Drive</strong> <strong>Replacement</strong><br />
Step 28 — Top Shield<br />
Step 29<br />
Remove the fifteen 3 mm Phillips<br />
screws securing the top shield to<br />
the computer.<br />
Lift the top shield up from the right<br />
side, minding the upper left corner,<br />
which may catch on the metal<br />
framework.<br />
© <strong>iFixit</strong> — CC BY-NC-SA www.<strong>iFixit</strong>.com Page 16 of 22
<strong>iBook</strong> <strong>G4</strong> 12" <strong>1.33</strong> <strong>GHz</strong> <strong>Optical</strong> <strong>Drive</strong> <strong>Replacement</strong><br />
Step 30 — <strong>Optical</strong> <strong>Drive</strong><br />
Step 31<br />
Remove the following 4 screws:<br />
One 3 mm Phillips in the channel<br />
between the optical drive and<br />
fan.<br />
Two 6 mm Phillips from the<br />
upper and bottom end of the<br />
drive bezel.<br />
One 6 mm Phillips with a collar<br />
from bracket extending from the<br />
lower left corner of the drive.<br />
Use a spudger to pry up the Reed<br />
Switch Board from the optical<br />
drive, removing tape as necessary.<br />
© <strong>iFixit</strong> — CC BY-NC-SA www.<strong>iFixit</strong>.com Page 17 of 22
<strong>iBook</strong> <strong>G4</strong> 12" <strong>1.33</strong> <strong>GHz</strong> <strong>Optical</strong> <strong>Drive</strong> <strong>Replacement</strong><br />
Step 32<br />
Step 33<br />
This is a diagram of the<br />
ribbon clamp connector you<br />
will disconnect in the next step.<br />
1) With your fingernails, grasp the<br />
locking bar on either side and pull<br />
up a small amount (about 1/16" or 2<br />
mm).<br />
2) After disengaging the locking<br />
bar, slide the cable out of the<br />
connector.<br />
Release the optical drive ribbon<br />
clamp as described above. Slide<br />
the optical drive ribbon out of its<br />
connector.<br />
© <strong>iFixit</strong> — CC BY-NC-SA www.<strong>iFixit</strong>.com Page 18 of 22
<strong>iBook</strong> <strong>G4</strong> 12" <strong>1.33</strong> <strong>GHz</strong> <strong>Optical</strong> <strong>Drive</strong> <strong>Replacement</strong><br />
Step 34<br />
Step 35 — <strong>Optical</strong> <strong>Drive</strong> <strong>Replacement</strong><br />
Lift the optical drive from the metal<br />
framework.<br />
Remove the two Phillips screws<br />
securing the metal bracket and<br />
cable to the back of the optical<br />
drive.<br />
© <strong>iFixit</strong> — CC BY-NC-SA www.<strong>iFixit</strong>.com Page 19 of 22
<strong>iBook</strong> <strong>G4</strong> 12" <strong>1.33</strong> <strong>GHz</strong> <strong>Optical</strong> <strong>Drive</strong> <strong>Replacement</strong><br />
Step 36<br />
Step 37<br />
Use a spudger to pry the white<br />
optical drive cable connector up<br />
from the top of the optical drive,<br />
removing tape as necessary.<br />
Remove the single Phillips screw<br />
securing the bezel at the front of<br />
the optical drive.<br />
This screw is longer than<br />
the two that secure the<br />
bracket and cable at the back of<br />
the drive.<br />
© <strong>iFixit</strong> — CC BY-NC-SA www.<strong>iFixit</strong>.com Page 20 of 22
<strong>iBook</strong> <strong>G4</strong> 12" <strong>1.33</strong> <strong>GHz</strong> <strong>Optical</strong> <strong>Drive</strong> <strong>Replacement</strong><br />
Step 38<br />
Step 39<br />
The bezel has several<br />
small, fragile tabs that will<br />
break easily.<br />
Use a spudger to carefully depress<br />
the two tabs on top of the bezel.<br />
Hold the optical drive on its side<br />
and depress the remaining tab to<br />
free the bezel from the drive.<br />
© <strong>iFixit</strong> — CC BY-NC-SA www.<strong>iFixit</strong>.com Page 21 of 22
<strong>iBook</strong> <strong>G4</strong> 12" <strong>1.33</strong> <strong>GHz</strong> <strong>Optical</strong> <strong>Drive</strong> <strong>Replacement</strong><br />
Step 40<br />
To reassemble your device, follow these instructions in reverse order.<br />
This document was last generated on 2013-01-08 08:41:10 AM.<br />
Turn the drive over and remove the<br />
two Phillips screws from the<br />
bracket on the side of the drive.<br />
These screws are only<br />
partially threaded.<br />
If you have a CD or any<br />
other object jammed in your<br />
optical drive, we have an optical<br />
drive repair guide.<br />
© <strong>iFixit</strong> — CC BY-NC-SA www.<strong>iFixit</strong>.com Page 22 of 22