You also want an ePaper? Increase the reach of your titles
YUMPU automatically turns print PDFs into web optimized ePapers that Google loves.
Setting up the application software<br />
5. After restarting the computer, connect the PC to the camera with the USB<br />
cable.<br />
6. Turn on the camera power.<br />
The [Found New Hardware Wizard] will<br />
open and the computer will recognise the<br />
camera.<br />
If your OS is Windows XP, an image<br />
viewer program will open.<br />
If the download window of Digmax Master<br />
opens after starting Digimax Master, the<br />
camera driver was set up successfully.<br />
INFORMATION<br />
If you have installed the camera driver, The [Found New Hardware Wizard]<br />
may not open.<br />
On a Windows 98 or 98 SE system, the Found New Hardware Wizard<br />
dialog box opens and a window asking you to select a driver file may<br />
appear. In this case, specify "USB Driver" in the CD supplied.<br />
Starting PC mode<br />
If you connect the USB cable to a USB port on your PC and then turn on the<br />
power, the camera will automatically switch to "computer connection mode".<br />
In this mode, you can download stored images to your PC through the USB<br />
cable.<br />
The LCD monitor is always turned off in PC mode.<br />
Connecting the camera to a PC<br />
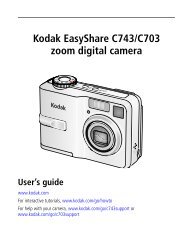
1. Press the Setup menu button and press the F4<br />
menu button.<br />
2. Select the [USB]-[Computer] menu by using the<br />
smart button.<br />
3. Connect the PC to the camera with the USB cable.<br />
Computer<br />
Printer<br />
<br />
Format<br />
Copy to Card<br />
Video Out<br />
USB<br />
Reset<br />
Exit:BACK<br />
63