Create successful ePaper yourself
Turn your PDF publications into a flip-book with our unique Google optimized e-Paper software.
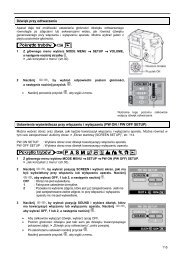
Setting up the Date/ Time/ Date type<br />
You can change the date and time that will be displayed on the captured images and set up<br />
the date type.<br />
Setting Date/Time & Selecting Date Format<br />
1. In any mode with the exception of Voice Recording mode,<br />
press the MENU button.<br />
2. Press the LEFT/ RIGHT button and select the [Setup]<br />
menu tab.<br />
Language<br />
Format<br />
3. Select the [D & Time] menu by pressing the UP/ DOWN D & Time<br />
button and press the RIGHT button.<br />
4. Use the UP, DOWN, LEFT, and RIGHT buttons to select<br />
the desired submenu value, and then press the OK button.<br />
RIGHT button : Selects the year/month / day/hour / minute date type.<br />
LEFT button : Moves the cursor to the [D & Time] main menu if the cursor is at the first item<br />
of the date and time setup. In all other cases, the cursor will be shifted to the<br />
left of its current position.<br />
UP and DOWN buttons : Changes the setting value.<br />
- Date type : [yy/mm/dd] /[dd/mm/yy] /[mm/dd/yy]<br />
5. Press the menu button twice and the menu will disappear.<br />
Imprinting the recording date<br />
There is an option to include DATE/TIME on still images.<br />
Date Imprinting<br />
1. In any mode with the exception of Voice Recording mode,<br />
press the MENU button.<br />
2. Press the LEFT/ RIGHT button and select the [Setup]<br />
menu tab.<br />
3. Select the [Imprint] menu by pressing the UP/ DOWN<br />
Setup<br />
Format Off<br />
D & Time Date<br />
button and press the RIGHT button.<br />
lmprint D & Time<br />
4. Use the UP and DOWN buttons to select the desired date<br />
imprint type, and then press the OK button.<br />
Back: Set : OK<br />
[Off] : The DATE & TIME will not be imprinted on the image file.<br />
[Date] : Only the DATE will be imprinted on the image file.<br />
[D & Time] : The DATE & TIME will be imprinted on the image file.<br />
5. Press the menu button twice and the menu will disappear.<br />
* The Date & Time are imprinted at the bottom right side of the still image.<br />
* The date will be imprinted as a DATE TYPE setting.<br />
* TIME is imprinted in the following way : [Hour : Minute] and hours are shown using the 24<br />
hour clock.<br />
* The imprint function is applied only to still images except for the images taken in the [Text]<br />
scene mode.<br />
92<br />
Setup<br />
Back: Set : OK<br />
3072<br />
<br />
05 / 01/ 01 01:00<br />
<br />
yy/mm/dd<br />
3072


