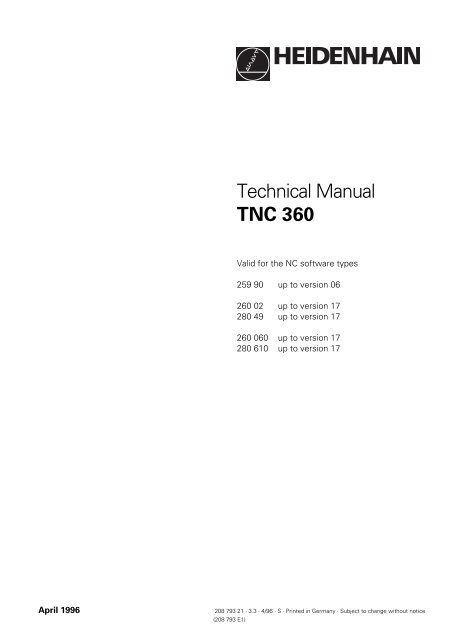
Technical Manual TNC 360 - heidenhain - DR. JOHANNES ...
Technical Manual TNC 360 - heidenhain - DR. JOHANNES ...
Technical Manual TNC 360 - heidenhain - DR. JOHANNES ...

You also want an ePaper? Increase the reach of your titles
YUMPU automatically turns print PDFs into web optimized ePapers that Google loves.
<strong>Technical</strong> <strong>Manual</strong><br />
<strong>TNC</strong> <strong>360</strong><br />
Valid for the NC software types<br />
259 90 up to version 06<br />
260 02 up to version 17<br />
280 49 up to version 17<br />
260 060 up to version 17<br />
280 610 up to version 17<br />
April 1996 208 793 21 · 3.3 · 4/96 · S · Printed in Germany · Subject to change without notice<br />
(208 793 E1)
Preface<br />
This <strong>Technical</strong> <strong>Manual</strong> is intended for all manufacturers and distributors of machine tools. It<br />
contains all the necessary information for the assembly, electrical installation, start-up and PLC<br />
programming for the HEIDENHAIN contouring controls <strong>TNC</strong> <strong>360</strong>.<br />
Whenever HEIDENHAIN improves the hardware or software in these controls you will receive a free<br />
delivery of updated information. Please arrange and insert this updated information in your manual<br />
without delay. This will ensure that your manual always remains at the current revision level.<br />
You can use extracts from this manual for your machine documentation. An enlargement of the<br />
manual format (17 cm x 24 cm) by a factor of 1.225 will produce pages in A4 format.<br />
No manual can be perfect. Like all living things it must grow and change. Among other things, it<br />
lives from your impulses and suggestions for improvement. Please help us by giving us your ideas.<br />
<strong>DR</strong>. <strong>JOHANNES</strong> HEIDENHAIN GmbH<br />
Department E/P<br />
PO Box 1260<br />
83292 Traunreut<br />
Germany<br />
8/95 <strong>TNC</strong> <strong>360</strong>
Contents <strong>Technical</strong> <strong>Manual</strong> <strong>TNC</strong> <strong>360</strong><br />
Update Information<br />
Introduction<br />
Mounting and Electrical Installation<br />
Machine Integration<br />
Machine Parameters<br />
Markers and Words<br />
PLC Programming<br />
Data interfaces<br />
Original Equipment Manufacturer’s (OEM) Cycles<br />
Positioning Module<br />
Appendix<br />
1<br />
2<br />
3<br />
4<br />
5<br />
6<br />
7<br />
8<br />
9<br />
10<br />
11
Update Information No. 8<br />
In mid February 1996 software version 17 was released for the NC software types 260 02 and 280<br />
49, and for the newly introduced software types 260 060 (for 1 MB EPROMs) and 280 610 (for 2 MB<br />
EPROMs). The new software types were introduced for the Polish conversational language.<br />
Software version 17 contains the following additions:<br />
• The software now supports the new handwheel HR 410.<br />
The HR 410 is a portable electronic handwheel with:<br />
Keys for selection of five axes<br />
Keys for traverse direction<br />
Keys for three pre-programmed feed rates for latched traverse<br />
One key for actual-position capture<br />
Three keys for machine functions determined by the machine manufacturer<br />
Two permissive buttons<br />
Emergency stop button<br />
Magnetic holding pads<br />
With MP7640 = 6 you can activate the functions for the HR410 handwheel.<br />
MP7645.0 determines whether the keys on the handwheel are assigned to the NC or the PLC.<br />
MP7645.0 = 0<br />
NC key assignment<br />
X IV<br />
Y V<br />
Z<br />
LOW FEED<br />
RATE<br />
MEDIUM<br />
FEED RATE<br />
ACTUAL<br />
POSITION<br />
CAPTURE<br />
HIGH FEED<br />
RATE<br />
Handwheel<br />
control panel<br />
MP7645.0 = 1<br />
PLC key assignment<br />
O96<br />
I160<br />
O98<br />
I162<br />
O100<br />
I164<br />
O104<br />
I168<br />
O105<br />
I169<br />
O97<br />
I161<br />
O99<br />
I163<br />
O103<br />
I167<br />
O106<br />
I170<br />
– + I171 I172<br />
O109<br />
I173<br />
O110<br />
I174<br />
O111<br />
I175<br />
O109<br />
I173<br />
O110<br />
I174<br />
O111<br />
I175<br />
With the exception of the A, B and C function All keys are assigned to the PLC. Handwheel<br />
keys, all keys are assigned to the NC.<br />
axis and handwheel interpolation are set by<br />
MP7670.x determines the interpolation factor module 9036. With W766 you can change the<br />
for low, medium and high speeds. MP7671.x feed rate by pressing the axis direction keys.<br />
determines the low, medium and high speed<br />
values. The speed is given as a percentage factor<br />
of the manual feed rate (MP1020.x).<br />
4/96 <strong>TNC</strong> <strong>360</strong> Update Information No. 8 1-1
MP7670 Interpolation factor for handwheel<br />
Input: 0 to 10<br />
MP7670.0 Interpolation factor for low speed<br />
MP7670.1 Interpolation factor for medium speed<br />
MP7670.2 Interpolation factor for high speed<br />
MP7671 <strong>Manual</strong> feed rate in "handwheel" operating mode with HR 410<br />
Input: 0 to 1000 [% to MP1020]<br />
MP7670.0 Low speed<br />
MP7670.1 Medium speed<br />
MP7670.2 High speed<br />
A dummy plug (Id.-Nr. 271 958 03) is available for an EMERGENCY STOP.<br />
There are connecting terminals on the adapter for the contacts from the emergency stop button<br />
and the permissive buttons (maximum load 1.2 A)<br />
Connector layout:<br />
VL ID number 281 429.. KA ID number 296 466.. VB ID number 296 467 05 HR 410<br />
ID number<br />
296 469 01<br />
D-sub<br />
connector<br />
(male)<br />
9-pin<br />
D-sub<br />
connector<br />
(female)<br />
9-pin<br />
D-sub<br />
connector<br />
(male)<br />
9-pin<br />
Coupling on<br />
mounting<br />
base<br />
(female)<br />
18-pin<br />
Connecto<br />
r (male)<br />
18-pin<br />
Connecto<br />
r (female)<br />
18-pin<br />
Connecto<br />
r (male)<br />
18-pin<br />
Housing Shield Housing Housing Shield Housing Housing Shield Housing Housing Shield<br />
2 White 2 2 White E E White E E<br />
4 Brown 4 4 Brown D D Brown D D<br />
6 Yellow 6 6 Yellow B B Yellow B B<br />
7 Gray 7 7 Gray A A Gray A A<br />
8 Green 8 8 Green C C Green C C<br />
6 6 WH/BK 6 6<br />
7 7 YL/BK 7 7<br />
5 5 WH/RD 5 5<br />
4 4 WH/BL 4 4<br />
2 2 WH/GN 2 2<br />
3 3 WH/YL 3 3<br />
1 1 WH/BR 1 1<br />
WH/BR 3 Contacts 1 + 2<br />
WH/YL 2 Contact 2 (left) Permissive button<br />
WH/GN 1 Contact 1 (right)<br />
WH/BL 1 Contact 1<br />
WH/RD 2 Contact 1 Emergency stop<br />
YL/BK 3 Contact 2<br />
WH/BK 4 Contact 2<br />
1-2 <strong>TNC</strong> <strong>360</strong> Update Information No. 8 4/96
Internal wiring of the contacts for the HR 410 permissive buttons and the EMERGENCY STOP<br />
button:<br />
Permissive Zustimmtaste button 1 1 Permissive Zustimmtaste button 2 2 EMERGENCY NOT - AUSSTOP<br />
1<br />
1<br />
4/96 <strong>TNC</strong> <strong>360</strong> Update Information No. 8 1-3<br />
2<br />
2<br />
Contact Kontakt 2<br />
Contact Kontakt 1<br />
Cable adapter<br />
Kabeladapter<br />
4<br />
2<br />
1<br />
3<br />
3<br />
2<br />
1<br />
Kontakt Contact 2<br />
Kontakt Contact 1 X2 X2<br />
Kontakt Contact 1<br />
Kontakt<br />
Contact 2<br />
Contact Kontakt 1+2<br />
Kontakt Contact 2 X1 X1<br />
Kontakt Contact 1<br />
• When machine parameters are being downloaded via the V.24 interface, comments beginning<br />
with the characters ";" or "*" can also be downloaded, either before or after the machine<br />
parameter value.<br />
• Machine parameter MP5020, bit 9 decides whether the control sends the EOT character after<br />
receiving the ETX character.<br />
• The error message "ERROR IN TRANSFERRED VALUE“ is displayed after a timeout is exceeded<br />
during transfer via the V.24 interface.<br />
• PLC Module 9036 expanded<br />
With Module 9036, handwheel interpolation factors of all or of individual axes, and the values for<br />
the jog positioning can be transferred from the PLC to the NC.<br />
Calling the module:<br />
PS B/W/D/K PLC status information type<br />
PS B/W/D/K PLC status value<br />
CM 9036<br />
PL B/W/D Messages that are stored in the STACK:<br />
0: PLC status information was transferred<br />
1: Incorrect PLC status information type<br />
2: Transferred PLC status value incorrect<br />
3: Writing inhibited (e.g. by MP)<br />
The marker M3171 is set if there is an error in transfer.
NC status information type: PLC status value:<br />
0: Handwheel interpolation factor for X-axis 0 ... 10<br />
1: Handwheel interpolation factor for Y-axis 0 ... 10<br />
2: Handwheel interpolation factor for Z-axis 0 ... 10<br />
3: Handwheel interpolation factor for 4th axis 0 ... 10<br />
4: Handwheel interpolation factor for all axes 0 ... 10<br />
5: Handwheel interpolation factor for all axes 0 ... 10<br />
6: Select handwheel axis; X-axis 0<br />
Y-axis 1<br />
Z-axis 2<br />
4th axis 3<br />
7 to 9 reserved<br />
10: Limit on jog increment 0 ... 50000 µm<br />
-1 = Remove limit, activate last jog<br />
increment<br />
-2 = Remove limit, activate minimum from<br />
PLC limit on jog increment and jog<br />
increment input via NC<br />
1-4 <strong>TNC</strong> <strong>360</strong> Update Information No. 8 4/96
Update Information No. 7<br />
The new edition of the <strong>Technical</strong> <strong>Manual</strong> for <strong>TNC</strong> <strong>360</strong> incorporates the data from Update Information<br />
issues No. 1 to 6 in the appropriate chapters and sections. The description of <strong>TNC</strong> 355 has been<br />
deleted since this unit is no longer in our product program.<br />
Please replace the complete contents of the manual.<br />
We will continue to send new information on the hardware and software of the <strong>TNC</strong> <strong>360</strong>. Please file<br />
the Update Information issues here.<br />
8/95 <strong>TNC</strong> <strong>360</strong> Update Information No. 7 1-1
Update Information No. 6<br />
New PLC Input/Output Unit PL 410 B<br />
In December the PLC I/O unit PL 410 will be replaced by the PL 410 B.<br />
The PL 410 B provides the same number of switching inputs/output as on the PL 410.<br />
The connector layout is compatible with the PL 410. The dimensions have changed slightly<br />
near the connections X15 to X22.<br />
In contrast to the PL 410, the PL 410 B will be available in two versions. The following version<br />
can be connected to the <strong>TNC</strong> <strong>360</strong>:<br />
PL 410 B Id.-Nr. 263 371 12<br />
64 PLC inputs<br />
31 PLC outputs<br />
1 output “Control is operational“<br />
The logic unit must be connected to the PL 410 B with a new connecting cable.<br />
Connecting cable LE <strong>360</strong>C/ PL 410 B: Id.-Nr. 289 111 ..<br />
Max. 20 m<br />
10/94 <strong>TNC</strong> <strong>360</strong>/<strong>TNC</strong> 335 Update Information No. 6 1-1
Update Information No. 5<br />
For NC software types 260 02 and 280 49, software version 13 was released in mid-June1994,<br />
software version 14 at the end of June, and software version 15 at the beginning of July.<br />
Software version 13 contains the following enhancements:<br />
The input range for machine parameter MP1350 (type of reference mark approach) was<br />
expanded. An input value of 3 selects encoders with distance-coded reference marks, and<br />
thedirection of traverse reverses when the trip dog for the reference end position is crossed.<br />
Data transfer in blockwise mode (ACK/NAK protocol) could be interrupted if the control<br />
characters STX or ETB were transmitted incorrectly. Since the <strong>TNC</strong> did not know the cause of<br />
the interruption, it sends NAK (after a delay in which no further data are transferred) if a block<br />
was not completely recognized due to a faulty STX or ETB.<br />
If ACK is not received within a certain time, the error message TRANSFERRED DATA<br />
INCORRECT N is generated.<br />
If bit 3 in machine parameter MP7641 is set, the electronic handwheel is selected in each<br />
operating mode (initially before REF traversing) to be able to interrogate the inputs of the<br />
handwheel keys (except axis keys) in the PLC. The axis keys on the handwheel and the<br />
handwheel impulses do not become active until handwheel mode is selected. After an error the<br />
handwheel is not selected again until the handwheel key is pressed.<br />
If the operating voltage of the control is outside the limit values, the blinking error message<br />
PROCESSOR CHECK ERROR M is displayed.<br />
The input range of machine parameter MP4220 has been expanded to 0 ... 65535.<br />
The memory for the executable PLC program has been increased from 28K bytes to 32K bytes.<br />
The value for the analog voltage of the analog input at connector X8 is transferred to word<br />
W392.<br />
The meaning of machine parameter MP7225 (automatic block generation with the capture<br />
actual position key or with PLC marker M2829) has been changed as follows:<br />
MP7225 = 1 : Block generation with the capture actual position key<br />
MP7225 = 2 : Block generation with PLC marker M2829<br />
MP7225 = 0 : No block generation<br />
The resolution of the feed rate display depends on the programmed feed rate:<br />
Feed rate ≤ 31 999 mm/min (previously 29 999 mm/min): display step 2 mm/min<br />
Feed rate > 31 999 mm/min (previously 29 999 mm/min): display step 20 mm/min<br />
Software version 14 was released to correct the following error:<br />
If a STOP and an M function for PLC positioning were executed in one NC block, in the<br />
following block an M function that becomes effective at the beginning of the block (e.g., M3)<br />
was not executed!<br />
7/94 <strong>TNC</strong> <strong>360</strong>/<strong>TNC</strong> 335 Update Information No. 5 1-1
Software version 15 was released to correct the following error:<br />
### If, in an OEM cycle that was run from the EPROM, the feed rate was defined via Q parameter,<br />
a greatly excessive feed rate was ouput.<br />
1-2 <strong>TNC</strong> <strong>360</strong>/<strong>TNC</strong> 335 Update Information No. 5 7/94
Update Information No. 4<br />
In late February 1994, software version 12 was released for the NC software 260 02 and 280 49.<br />
Note:<br />
In software version 11, the deceleration ramp is too flat when the feed rate is changed at constant<br />
contour transitions during operation with feed precontrol. This error was corrected in software<br />
version 12.<br />
Software version 11 must be replaced by software version 12!<br />
No new features were introduce in software version 12.<br />
2/94 <strong>TNC</strong> <strong>360</strong>/<strong>TNC</strong> 335 Update Information No. 4 1-1
Update Information No. 3<br />
Software version 11 for software types 260 02 and 280 49 was released at the end of January 1994.<br />
Software version 10 was not released for general distribution.<br />
The following improvements were made since version 9:<br />
• Machine parameter 7411 defines whether during execution of the TOUCH-PROBE block the<br />
current compensation values for probe length and radius should be taken from the central tool<br />
file or from the calibration process.<br />
MP7411 = 1 : Probe length and radius values from the tool file<br />
MP7411 = 0 : Probe length and radius values from the calibration process<br />
MP 7411 is also effective for tool length compensation in the digitizing cycles. This machine<br />
parameter was already available in version 08, but it was not documented.<br />
• Machine parameter MP7225 was introduced for automatic generation of NC blocks in the<br />
PROGRAMMING AND EDITING mode. With the "actual position capture" key (teach-in) it is now<br />
possible to generate a positioning block in plain language dialog (not in ISO mode) with a<br />
maximum of 3 axes and without feed rate, radius compensation or M-functions. This positioning<br />
block is inserted below the currently addressed block in the selected NC part program. The<br />
current actual position values become the nominal position values. The axis is selected in the<br />
dialog "AXIS SELECTION =" in the MOD operating mode. Here up to 3 out of 4 axes can be<br />
selected by pressing the corresponding axis keys.<br />
MP7225 = 1 : Block generation with the actual-position-capture key (teach-in)<br />
MP7225 = 2 : Block generation with the actual-position-capture key or with the PLC marker<br />
M2829 (the marker is reset by the NC)<br />
MP7225 = 0 : No block generation or axis selection possible.<br />
• If the machine parameters are erased, the RS-232-C/V.24 interface is now preset to FE mode.<br />
• PLC inputs I160 to I175 (HR 332 handwheel) now generate signal edges. The positive edge is<br />
assigned to markers M1660 to M1675, the negative flank to markers M1860 to M1875.<br />
• If machine parameter MP7641, Bit 2 = 1, the interpolation factor for the handwheel can be set<br />
both from the keyboard as well as from PLC module 9036. If Bit 2 = 0, the machine parameter<br />
functions as before (input either from the keyboard or from PLC module 9036).<br />
• The NC saves the code number entered in the MOD mode in Doubleword D276.<br />
• Machine parameter MP810 defines the modulo value for reducing the position values of the<br />
auxiliary axes. Machine parameter MP7470 has no effect on auxiliary axes. Rotary axes as NC<br />
axes are always reduced to the range 0° to 359.999°. Machine parameter MP810 was already<br />
available in version 08, but it was not documented.<br />
1/94 <strong>TNC</strong> <strong>360</strong>/<strong>TNC</strong> 335 Update information No. 3 1-1
• The new PLC module 9124 makes it possible to set a feed rate override value for secondary<br />
axes. The override value can lie between 0% and 100% (resolution 0.01 %) and must be<br />
transferred as a whole number (0 to 10 000). It can be set before the beginning of a movement<br />
or during the movement of an auxiliary axis. If the control is reset, the NC presets an override<br />
value of 100%.<br />
Call :<br />
PS B/W/D/K (0..3 for X/Y/Z/4)<br />
PS B/W/D/K (0..10 000)<br />
CM 9124<br />
PL B/W/D <br />
0: Override was set<br />
1: Invalid axis was entered<br />
2: Axis is not defined as auxiliary axis<br />
3: Override value is invalid<br />
Error status after call: M3171 = 0 : Override was set<br />
= 1 : Error condition see above<br />
If more than one of the PLC modules 9120/9121/9123 for controlling the movement of auxiliary<br />
axes is called within one PLC scan, only the last called PLC module is executed. The module<br />
9124 can be called in addition to the above modules within one PLC scan, but it will always<br />
become effective after the other module.<br />
• In PLC module 9036 (transferring PLC status information to the NC) the interpolation factor can<br />
be set for all axes by transferring the value 4 or 5.<br />
• The PLC can inhibit the reference pulse for specific axes through Word W608 (bitcoded,....4zyx).<br />
Bit = 1 : Reference pulse is not evaluated<br />
Bit = 0 : The next reference pulse is evaluated<br />
• By setting marker M2615 the reference mark of the spindle is evaluated again. The marker is<br />
reset by the NC.<br />
• Marker 2510 fixes the spindle potentiometer setting at 100%. Marker M2511 has the same<br />
effect on the feed rate potentiometer.<br />
• CC blocks in OEM cycles are effective only locally and are not transferred into the calling<br />
program.<br />
1-2 <strong>TNC</strong> <strong>360</strong>/<strong>TNC</strong> 335 Update information No. 3 1/94
Update Information No. 2<br />
In earl September 1993 the software version 09 was released for the software types 260 02 and<br />
280 49.<br />
The new version contains the following changes:<br />
• If marker M2612 (Suppress position exchange in the tool table) is set before a T strobe is set<br />
(M2046), the position numbers are not exchanged. The PLC acknowledges the T strobe without<br />
having exchanged in the tool magazine and resets the PLC marker M2612. The new tool<br />
number is shown inverted and the associated tool data (length and radius) are activated. The<br />
tool number is shown inverted in the status display until the tool has physically been changed. If<br />
the control is switched off and on in this condition, the last exchanged tool becomes active<br />
again.<br />
• During execution of cycle 13 (spindle orientation) the NC sets the new marker M2408. This<br />
marker can be evaluated by the PLC for the spindle orientation and should afterwards be reset<br />
by the PLC.<br />
9/93 <strong>TNC</strong> <strong>360</strong>/<strong>TNC</strong> 335 Update information No. 2 1-1
Update Information No. 1<br />
1 Software<br />
In July 1993 the following software was released:<br />
260 02x 08 for insertion of 1M byte EPROMs<br />
and 280 49x 08 for insertion of 2M byte EPROMs<br />
The software numbers 280 49x 01 to 07 were not delivered. The new software version became<br />
necessary because new logic units can also accommodate 2M byte EPROMs (see below in Section<br />
2 "Hardware").<br />
The new software version contains the following changes:<br />
• The PLC can limit the maximum feed rate through the doubleword D596. In order to ensure<br />
compatibility to previous PLC programs the doubleword D596 is preset with the value<br />
300 000 mm/min after control switch-on or after interruption of the PLC run.<br />
The new feed rate is effective immediately!<br />
The doubleword D596 has no effect with the new cycles "Tapping" (Cycle 2) and "Rigid Tapping"<br />
(Cycle 17).<br />
• In the newly introduced machine parameter MP60, axes can be defined as auxiliary axes.<br />
These axes cannot be moved by an NC program. They are controlled exclusively by the PLC.<br />
All auxiliary axes work independently of each other. Auxiliary axes always move in trailing<br />
mode. The following modules are available for the PLC to control the axes:<br />
Module 9120: Positioning of auxiliary axes<br />
Module 9121: Stopping the auxiliary axes<br />
Module 9122: Status inquiry of auxiliary axes<br />
Module 9123: Traversing the reference point of an auxiliary axes<br />
• Spindle orientation can be suppressed at the beginning of Cycle 17 "Rigid Tapping" with<br />
machine parameter MP7160. At the beginning of the cycle, the spindle voltage is decelerated<br />
with the ramp from MP3410.1 to the value 0 volts.<br />
In this case it is not possible to cut into the same thread several times!<br />
• Up to 20 NC "tool def" blocks can be read-in during blockwise transfer without central tool<br />
memory, whereby the tool def block must be read-in before the associated "tool call". When a<br />
"PGM call" NC block is read-in or when a user cycle is called, the NC blocks with "tool def" are<br />
considered up to the above mentioned limit and provided that the proper order is followed. A<br />
violation of these preconditions releases the error message "TOO MANY TOOLS".<br />
9/93 <strong>TNC</strong> <strong>360</strong>/<strong>TNC</strong> 335 Update information No. 1 1-1
• If bit 2 is set in machine parameter MP7300, the last inserted (programmed) tool is<br />
automatically activated during switch-on.<br />
• By setting the static PLC marker M2612 the PLC can now prevent the exchange of pocket<br />
numbers in the central tool memory during a P output.<br />
• Function FN19 was introduced, with which two numerical or Q parameter values with an<br />
accuracy of 1/1000 (i.e., three places after the decimal point) are transferred into the PLC<br />
doublewords D280 and D284. A value of 2.5, for example, is filed in the doublewords as 2500.<br />
The unit of measure of the calling NC program is set in marker M2150 (millimeter=0/inch=1).<br />
During transfer the NC sets the strobe marker M2149. The transfer must be acknowledged by<br />
the PLC with the marker M2611.<br />
• The number of PLC labels was increased to 1024.<br />
• Marker M2614 was introduced. Setting this marker blocks the output of PLC functions<br />
(M/S/T/Q output) by the NC. The marker is set and reset by the PLC; it is read by the NC.<br />
• Marker M2827 was introduced. It is set by the PLC and causes the following behavior in case<br />
of an external EMERGENCY STOP and erasable positioning error:<br />
Machining is not aborted ("control in operation" symbol off, strobe signal reset). Instead,<br />
machining is merely interrupted as in an NC STOP (control-in-operation symbol blinks). This<br />
permits machining to be resumed with NC START after the error has been corrected. This<br />
marker functions only for the output of M/S/T/Q strobes.<br />
• Now a maximum of 32 Q parameters can be transferred for user cycles. To do this, the 'DLG-<br />
DEF' or 'DLG-CALL' blocks must be programmed several times in the user cycle, whereby in<br />
the third DLG block only the first five entries can be evaluated.<br />
• The following Q parameters were introduced:<br />
Q114 current tool length<br />
Q115 to Q118 measured values of the 4th axis after a programmed probing cycle<br />
• The type of tool compensation (R0/RR/RL/R+/R-) is stored in Q parameter Q123:<br />
Q123 = 0 means R0<br />
= 1 means RR<br />
= 2 means RL<br />
= 3 means R+<br />
= 4 means R-<br />
• Application as positioning module:<br />
If machine parameter MP 4010 = 1 is programmed (PLC program from RAM), no machine<br />
parameters will be taken from the PLC EPROM when the positioning module is switched on. If<br />
the CRC sum of the machine parameters is incorrect they will be taken from the PLC EPROM.<br />
1-2 <strong>TNC</strong> <strong>360</strong>/<strong>TNC</strong> 335 Update information No. 1 9/93
• The software now supports PLC subprograms stored in the PLC-EPROM (translated PLC<br />
code). With the PLC.EXE programming software from HEIDENHAIN such programs can be<br />
written and on an external computer and filed in the PLC EPROM.<br />
• The incremental jog positioning can be activated or deactivated (dialog "JOG-INCREMENT: ...")<br />
in the 'ELECTRONIC HANDWHEEL' operating mode by pressing the 'ELECTRONIC<br />
HANDWHEEL' key, provided that marker M2498 is set.<br />
• In the 'PROGRAMMING AND EDITING' operating mode the electronic handwheel can be used<br />
to move the axes, provided that in machine parameter MP7641 bit 1 = 1. The interpolation<br />
factor (regardless of handwheel model) and the handwheel axis (for HR130) can be change<br />
only in the 'ELECTRONIC HANDWHEEL' operating mode. A handwheel axis, once chosen,<br />
remains in effect even when the operating mode is changed.<br />
Simultaneous operation of the handwheel interface and the RS-232-C interface at differing<br />
baud rates (38 400 and 19 200 baud) results in the error message "BAUD RATE NOT<br />
POSSIBLE".<br />
• The current feed rate in mm/min is now available in the PLC.<br />
• Module 9150<br />
During an active M/S/T output the PLC can use module 9150 to define an NC block, which is<br />
then executed after the M/S/T strobe is acknowledged, before the control continues the NC<br />
program. An NC block can also be defined if no program is being run. The block is then<br />
executed immediately.<br />
Call:<br />
PS B/W/D/K <br />
PS B/W/D/K <br />
CM 9150<br />
PL B/W/D <br />
Error code: 0 = NC block was inserted<br />
1 = NC program started, but no M/S/T strobe<br />
2 = Unknown instruction code<br />
3 = Incorrect address in B/W/D range<br />
Error status after call: M3171 = 0 NC block was inserted<br />
= 1 error condition see above<br />
At present the instruction code is implemented for TOOL CALL<br />
Parameters :<br />
B active elements bit-coded<br />
Bit 0 =1: Tool number, otherwise modal<br />
Bit 1 =1: Tool axis, otherwise modal<br />
Bit 2 =1: Spindle speed, otherwise modal<br />
Bit 3 =0<br />
Bit 4 =0<br />
B Tool axis (0/1/2/3 = X/Y/Z/IV)<br />
W Tool number<br />
D Spindle speed (Format 0.001 rpm)<br />
9/93 <strong>TNC</strong> <strong>360</strong>/<strong>TNC</strong> 335 Update information No. 1 1-3
• Module 9120<br />
Positioning an auxiliary axis<br />
The positioning of an axis is started by presetting a target position (in the reference system), a<br />
feed rate and a flag register. The axis is positioned without regard to other processes in the<br />
control. There is no contour interpolation with other axes.<br />
Conditions:<br />
The given axis must be activated via MP10 and configured as an auxiliary axis via MP60.<br />
The values for rapid traverse, analog voltage for rapid traverse, acceleration, etc., must be<br />
properly set in the machine parameters.<br />
For axes with automatic reduction (modulo value in MP810.x) the axis is always moved in the<br />
shortest direction to the target position, unless the target position is entered as an incremental<br />
value.<br />
There is no checking for violations of the limit switch ranges!<br />
The axis must be stationary. If the axis is already moving, the positioning must be terminated<br />
beforehand with module 9121.<br />
If the axis was in the reference point traversing mode, this state is canceled. The positioning<br />
always builds on the momentary counter contents.<br />
If the modules 9120, 9121 and 9122 are called several times during a PLC scan, only the last<br />
instruction is executed.<br />
If a "positioning error" status was set in this axis it is erased.<br />
Potential errors:<br />
A non-existent axis was transferred.<br />
An axis was transferred that was not identified as an auxiliary axis in MP10 and MP60.<br />
The axis is already moving.<br />
Call:<br />
PS B/W/D/K (0 to 3 for X/Y/Z/4)<br />
PS B/W/D/K (in the reference system, Format 0.001mm)<br />
PS B/W/D/K (mm/min)<br />
PS B/W/D/K Bit 0 = 1: incremental target position<br />
= 0: absolute target position<br />
CM9120<br />
PL B/W/D <br />
0: Positioning was started<br />
1: A non-existent axis was transferred<br />
2: Axis is not configured as an auxiliary axis<br />
3: The axis is already moving<br />
4: Absolute position outside of the modulo range<br />
Error status after call: M3171 = 0: Positioning was started correctly<br />
= 1: Positioning was faulty<br />
1-4 <strong>TNC</strong> <strong>360</strong>/<strong>TNC</strong> 335 Update information No. 1 9/93
• PLC MODULE 9121<br />
Stopping a positioning with an auxiliary axis<br />
A positioning started beforehand with modules 9120 or 9123 can be canceled at any time with<br />
module 9121.<br />
Conditions:<br />
The given axis must be activated via MP10 and configured in MP60 as an auxiliary axis.<br />
If modules 9120, 9121 and 9122 are called several times for the same axis during a PLC-scan,<br />
only the last instruction will be executed.<br />
Potential errors:<br />
A non-existent axis was transferred.<br />
An axis was transferred that was not configured in MP10 and MP60 as an auxiliary axis.<br />
The given axis is already stationary.<br />
Call:<br />
PS B/W/D/K (0 to 3 for X/Y/Z/4)<br />
CM9121<br />
PL B/W/D <br />
0: Positioning is canceled<br />
1: A non-existent axis was transferred<br />
2: Axis is not configured as an auxiliary axis<br />
3: Axis was already stationary<br />
Error status after call: M3171 = 0: Positioning was stopped<br />
= 1: Faulty execution<br />
• PLC MODULE 9122<br />
Inquiring the status of an auxiliary axis<br />
For a certain axis a bit-coded status word is transferred that contains information on the<br />
momentary operating state of this axis.<br />
Conditions:<br />
Status changes causes by commands that the PLC sends to control the auxiliary axes<br />
(modules 9120, 9121, 9123) are not recognized until the next PLC scan.<br />
After switch-on, bit 1 (axis over reference point) is erased.<br />
It is possible to position the axis without traversing the reference point first.<br />
9/93 <strong>TNC</strong> <strong>360</strong>/<strong>TNC</strong> 335 Update information No. 1 1-5
Potential errors:<br />
A non-existent axis was transferred.<br />
Call:<br />
PS B/W/D/K (0 to 3 for X/Y/Z/4)<br />
CM9122<br />
PL B/W/D <br />
Bit 0: 1= Axis is auxiliary axis<br />
Bit 1: 1= Axis has traversed the reference point<br />
Bit 2: 1= Axis is positioned<br />
Bit 3: 1= Direction of motion is negative<br />
Bit 4: 1= A positioning error has occurred<br />
Error status after call: M3171 = 0: Status was transferred<br />
= 1: Faulty execution<br />
• PLC MODULE 9123<br />
Passing over the reference point of an auxiliary axis<br />
The module starts positioning in a preset direction, which continues until a reference point is<br />
found or the positioning is canceled with module 9121.<br />
Conditions:<br />
The given axis must be activated via MP10 and configured as an auxiliary axis via MP60.<br />
The values for rapid traverse, analog voltage for rapid traverse, acceleration, etc., must be set<br />
in the machine parameters.<br />
There is no checking for violations of the limit switch ranges!<br />
The axis must be stationary. If the axis is already moving, the positioning must be canceled<br />
beforehand with module 9121.<br />
The feed rate override is not included in the calculation.<br />
The state "reference point not yet traversed" is set for the axis.<br />
A reference point that already exists in this axis is erased, but not the numerical value of the<br />
axis. This is not reinitialized until the reference point is found.<br />
If modules 9120, 9121 and 9122 are called several times during a PLC scan, only the last<br />
instruction is executed.<br />
If a "positioning error" status was set in this axis it is erased.<br />
The positioning is stopped as soon as the reference point is reached. Since the axis must<br />
decelerate before it can stop, it comes to rest behind the reference point in the direction of<br />
motion.<br />
1-6 <strong>TNC</strong> <strong>360</strong>/<strong>TNC</strong> 335 Update information No. 1 9/93
Potential errors:<br />
A non-existent axis was transferred.<br />
An axis was transferred that was not configured in MP10 and MP60 as an auxiliary axis.<br />
The axis is already moving.<br />
Call:<br />
PS B/W/D/K (0 to 3 for X/Y/Z/4)<br />
PS B/W/D/K (mm/min)<br />
PS B/W/D/K Bit 0 = 1: negative traverse direction<br />
= 0: positive traverse direction<br />
CM9123<br />
PL B/W/D <br />
0: Positioning was started<br />
1: A non-existent axis was transferred<br />
2: The axis is not configured as an auxiliary axis<br />
3: The axis is already moving<br />
Error status after call: M3171 = 0: Positioning was started<br />
= 1: Faulty execution<br />
2 Hardware<br />
The part numbers of the LE <strong>360</strong>C logic units that can accommodate 2M byte EPROMs are:<br />
Id.-Nr. 270 641 3x for BE 212<br />
Id.-Nr. 270 642 3x for BF 110<br />
The 2-M byte EPROMs occupy only the sockets IC-P1 and IC-P2. IC-P3 and IC-P4 remain vacant.<br />
The jumper located next to IC-P1 should then be inserted in the setting 2M!<br />
You will receive Update Information issues on the <strong>TNC</strong> <strong>360</strong>/<strong>TNC</strong> 335 hardware and software<br />
whenever developments warrant. This information will then be included in Supplementary Issues<br />
that you can integrate into the appropriate chapters of the <strong>Technical</strong> <strong>Manual</strong>.<br />
9/93 <strong>TNC</strong> <strong>360</strong>/<strong>TNC</strong> 335 Update information No. 1 1-7
Introduction – Contents 2<br />
1 Hardware Concept 2-2<br />
2 Features and Specifications 2-3<br />
2.1 <strong>TNC</strong> <strong>360</strong> 2-3<br />
3 Software 2-6<br />
3.1 NC Software 2-6<br />
3.1.1 Software and hardware versions 2-7<br />
3.1.2 Software option 2-8<br />
3.2 PLC Software 2-8<br />
3.3 EPROM sockets 2-9<br />
8/95 <strong>TNC</strong> <strong>360</strong> 2-1
1 Hardware Concept<br />
The HEIDENHAIN <strong>TNC</strong> <strong>360</strong> contouring control is designed for use with drilling and milling machines.<br />
The HEIDENHAIN <strong>TNC</strong>s consist of several units. The principle subassembly is the logic unit. The<br />
logic unit is joined to the other units and the <strong>TNC</strong> accessories by connecting cables.<br />
Visual display unit<br />
<strong>TNC</strong> keyboard unit<br />
Touch probe<br />
Electronic handwheel<br />
Data interfaces<br />
Encoders<br />
• • •<br />
Noml. value outputs<br />
• • •<br />
PLC I/0 unit<br />
Common<br />
NC<br />
data area<br />
PLC<br />
Machine operating panel<br />
PLC inputs<br />
PLC outputs<br />
The logic unit contains the electronics for both the NC and the PLC sections of the control.<br />
The common data area contains the machine parameters and the PLC markers and words. The<br />
machine parameters define the hardware-configuration of the machine (ranges of travel,<br />
acceleration, number of axes etc.). The PLC markers and words are used for the exchange of<br />
information between the NC and the PLC.<br />
2-2 <strong>TNC</strong> <strong>360</strong> 1 Hardware Concept 8/95<br />
• • •<br />
• • •
2 Features and Specifications<br />
2.1 <strong>TNC</strong> <strong>360</strong><br />
Components • Logic unit LE <strong>360</strong><br />
• Keyboard TE 355 A, TE 355 B<br />
• Color graphics VDU BE 212 (12 inch, 512 x 256 pixels)<br />
• Flat luminescent screen BF 110 (192 mm x 120 mm, 640 x 400 pixels)<br />
Control modes • Contouring control for 4 axes and spindle orientation<br />
• Linear interpolation in 3 of 4 axes<br />
• Circular interpolation in 2 of 4 axes<br />
Program memory Buffered RAM memory (approx. 70 KB) for 32 NC programs,<br />
central tool file, PLC program (if not filed in EPROM),<br />
EPROM memory (128 KB) for PLC program, OEM cycles,<br />
dialogues for OEM cycles, PLC error messages<br />
Tool memory 99 tools<br />
Operating modes • <strong>Manual</strong> operation<br />
• Electronic handwheel /jog positioning<br />
• Positioning by manual data input<br />
• Program run, single block<br />
• Program run, full sequence<br />
• Programming and editing<br />
• Test run (logical and graphical)<br />
Programming In HEIDENHAIN conversational mode and according to ISO<br />
Entry and display 1 μm, 5 μm, 10 μm, 50 μm, 100 μm<br />
resolution<br />
8/95 <strong>TNC</strong> <strong>360</strong> 2 Features and Specifications 2-3
Programmable • Nominal position (absolute or incremental dimensions) in Cartesian or<br />
functions polar coordinates<br />
• Straight lines<br />
• Circular arcs<br />
• Helical interpolation<br />
• Corner rounding, chamfering<br />
• Tangential approach and departure from a contour<br />
• Tool number, tool length and radius compensation<br />
• Spindle speed<br />
• Rapid traverse<br />
• Feed-rate<br />
• Program call from inside other programs<br />
• Subprograms and repetition of program sections<br />
• Fixed cycles for peck drilling, tapping (without floating tap holder),<br />
slot milling, rectangular pocket milling, circular pocket milling<br />
• Cycles for milling pockets with a free contour (SL cycles)<br />
• Shifting and rotation of the coordinate system, mirroring, scaling,<br />
dwell time, miscellaneous functions M, program stop<br />
• Spindle orientation (to be implemented by the machine manufacturer)<br />
• OEM specific cycles (to be defined by the manufacturer of the machine)<br />
Parameter- Mathematical functions (=, +, −, x, :, sin, cos, angle α of r sin α and<br />
programming r cos α, , a² + b²), parameter comparison (=, ≠, >,
Control • 4 inputs for position measuring systems (4 sinusoidal inputs)<br />
inputs • 1 measuring system input for spindle orientation (square-wave input<br />
signal)<br />
• 1 input for electronic handwheel<br />
• 1 input for 3D-touch probe system<br />
• 55 PLC inputs + 1 control-is-ready input<br />
• Additionally 64 PLC inputs on optional PLC I/O board PL 410 B<br />
Control • 5 analogue outputs for the spindle and axes<br />
outputs • 31 PLC outputs + 1 control-is-ready output<br />
• Additionally 31 PLC outputs on optional PLC I/O board PL 410 B<br />
Integrated PLC • Programming in the form of a list of instructions, max. 4000 PLC<br />
commands<br />
• Entry by HEIDENHAIN keyboard or data interface<br />
Supply NC: 24 Vdc (See Chapter 3, Section 4.1)<br />
voltage PLC: 24 Vdc<br />
Power NC: approx. 27 W (with BE 212 connected)<br />
consumption PLC: approx. 48 W (See Chapter 3, Section 4.1)<br />
PL 410 B: approx. 480 W (See Chapter 3, Section 4.1)<br />
BF 110: approx. 33 W<br />
Environmental • Operating: LE/BE 0 to 45° C (32 to 113° F)<br />
temperature BF 110: 0 to 40° C (32 to 104° F)<br />
• Storage: –30 to 70° C (–22 to 158° F)<br />
Approximate LE <strong>360</strong> C: 8.0 kg<br />
weight TE 355: 1.6 kg<br />
BE 212: 11.0 kg<br />
BF 110: 1.7 kg<br />
PL 410 B: 1.5 kg<br />
HRA 110: 0.7 kg<br />
8/95 <strong>TNC</strong> <strong>360</strong> 2 Features and Specifications 2-5
3 Software<br />
The logic unit contains separate software for the NC section and the PLC section. The software is<br />
identified by an 8-digit number.<br />
After switching on the control, the NC and PLC software numbers are displayed on the screen. The<br />
software number can also be directly requested with the aid of the MOD function.<br />
3.1 NC Software<br />
The 8-digit NC software number identifies the type of software, the dialogue language (language of<br />
the country) and the software version.<br />
Software Software-Typ type<br />
National Landessprache language<br />
0 = German deutsch<br />
1 = Czech<br />
tschechisch<br />
2 = französisch<br />
2 = French<br />
3 = italienisch<br />
3 4 = Italian spanisch<br />
4 5 = Spanish portugiesisch<br />
6 = Swedish schwedisch<br />
7 = Danish dänisch<br />
8 = Finnish finnisch<br />
9 = Dutch<br />
niederländisch<br />
Software Software-Version version<br />
260 02 0 15<br />
In addition to the above-listed languages, the <strong>TNC</strong> can always display English, which may be<br />
selected via the machine parameter MP7230.<br />
2-6 <strong>TNC</strong> <strong>360</strong> 3 Software 8/95
3.1.1. Software and hardware versions<br />
HEIDENHAIN has manufactured several different hardware versions of the logic units LE <strong>360</strong> and LE<br />
<strong>360</strong> C. The following table shows which software is compatible with which hardware version:<br />
Software Type<br />
/Version<br />
Id.-Nr. LE <strong>360</strong> Id.-Nr. LE <strong>360</strong> C<br />
258 991 99 264 660 99 264 085 99 270 641 39<br />
(BE 212)<br />
270 642 39<br />
(BF 110)<br />
259 90x 02 to 05 02 to 05 02 to 05 06 -<br />
260 02x (1-MB<br />
EPROM)<br />
- - from 07 from 07 from 07<br />
280 49x (2-MB<br />
EPROM)<br />
- - - from 08 from 08<br />
Only the software types 260 02 and 280 49 will continue to be developed.<br />
Software Releases<br />
HEIDENHAIN releases new versions of NC software in irregular intervals.<br />
NC Software Version Release<br />
259 90x 02 1/91 (Introduction)<br />
259 90x 03 7/91<br />
259 90x 04 3/92<br />
259 90x 05 3/92<br />
259 90x 06 7/92<br />
260 02x 04 3/92 (Introduction)<br />
260 02x 05 3/92<br />
260 02x 06 7/92<br />
260 02x 07 10/92<br />
260 02x 08 7/93<br />
260 02x 09 9/93<br />
260 02x 10 Never released<br />
260 02x 11 1/94<br />
260 02x 12 2/94<br />
260 02x 13 6/94<br />
260 02x 14 6/94<br />
260 02x 15 7/94<br />
260 02x 16 3/95<br />
280 49x 08 7/93 (Introduction)<br />
280 49x 09 9/93<br />
280 49x 10 Never released<br />
280 49x 11 1/94<br />
280 49x 12 2/94<br />
280 49x 13 6/94<br />
280 49x 14 6/94<br />
280 49x 15 7/94<br />
280 49x 16 3/95<br />
8/95 <strong>TNC</strong> <strong>360</strong> 3 Software 2-7
3.1.2 Software option<br />
HEIDENHAIN offers the "Digitizing with TS 120" function as a software option (see Chapter "Machine<br />
integration"). An additional software protection module is installed in controls supplied with this<br />
software option. The Id.-Nr. of the LE <strong>360</strong> logic unit has the variant xxx xxx 79, while the LE <strong>360</strong> has<br />
xxx xxx 34. If the software module is installed, the option number 262 351 01 is indicated on the<br />
screen under the NC and PLC software numbers.<br />
The “Digitizing with TS 120“ software option can be retrofitted. The kit is available under Id. Nr.<br />
265 310 01.<br />
The kit contains:<br />
Software module (EPROM Id.-Nr. 262 351 01)<br />
Printed circuit board<br />
Sponge rubber<br />
ID label<br />
Mounting Instructions<br />
3.2 PLC Software<br />
The PLC software is produced by the manufacturer of the machine. Either HEIDENHAIN or the<br />
manufacturer of the machine can store this software in EPROMs. HEIDENHAIN assigns PLC<br />
software numbers to the machine manufacturers on request. HEIDENHAIN can archive the specific<br />
PLC programs in a data bank, so that the installation of the correct PLC program is assured if a<br />
control has to be exchanged.<br />
2-8 <strong>TNC</strong> <strong>360</strong> 3 Software 8/95
3.3 EPROM sockets<br />
Sockets for the processor board:<br />
IC-S [SW-Modul]<br />
IC-P5 [PLC-EPROM]<br />
If the 2-MB EPROMs are used, only the sockets IC-P1 and IC-P2 are needed. IC-P3 and IC-P4<br />
remain vacant. The jumper located next to IC-P1 must then be set to position 2M.<br />
IC-P3<br />
IC-P4<br />
8/95 <strong>TNC</strong> <strong>360</strong> 3 Software 2-9<br />
IC-P1<br />
IC-P2
Mounting and Electrical Installation – Contents<br />
1 Hardware components <strong>TNC</strong> <strong>360</strong> 3-4<br />
1.1 Changes in the ID-number 3-6<br />
2 Assembly Hints 3-8<br />
2.1 Electrical noise immunity 3-8<br />
2.2 Heat generation and cooling 3-8<br />
2.3 Humidity 3-9<br />
2.4 Mechanical vibration 3-9<br />
2.5 Mounting position 3-9<br />
2.5.1 Logic unit 3-10<br />
2.5.2 Visual display unit (VDU) 3-11<br />
2.5.3 PLC Input/Output board PL 410 3-11<br />
2.6 Degree of protection 3-11<br />
3 Summary of Connections 3-12<br />
4 Power Supply 3-14<br />
4.1 Overview 3-14<br />
4.1.1 NC power supply 3-14<br />
4.1.2 PLC power supply 3-15<br />
4.1.3 Buffer battery 3-16<br />
4.2 Power supply for the visual display unit 3-17<br />
5 Encoders 3-19<br />
5.1 Linear encoders 3-19<br />
5.2 Angular encoders 3-19<br />
5.3 Encoder inputs for sinusoidal signals (7 to 16 mApp) 3-20<br />
5.3.1 Connector assignments 3-20<br />
5.3.2 Connecting cable 3-20<br />
5.4 Encoder inputs for square-wave signals 3-21<br />
5.4.1 Connector assignments 3-21<br />
5.4.2 Connecting cable 3-21<br />
6 Nominal Value Output 3-23<br />
6.1 Connector assignment 3-23<br />
6.2 Connecting cable 3-23<br />
7 Visual Display Unit (VDU) 3-26<br />
7.1 Connector assignment 3-26<br />
7.2 Connecting cable 3-27<br />
8/95 <strong>TNC</strong> <strong>360</strong> 3-1
8 Touch Probe System Input 3-28<br />
8.1 Connector assignment 3-28<br />
8.2 Connection of the touch probe system 3-29<br />
8.2.1 TS 120 3-29<br />
8.2.2 TS 511 3-30<br />
9 RS-232-C/V.24 Data Interface 3-32<br />
10 Handwheel Input 3-33<br />
10.1 Pin layout 3-33<br />
10.2 Portable handwheel HR 330 3-33<br />
10.3 Integral handwheel HR 130 3-34<br />
10.4 Portable handwheel HR 332 3-35<br />
10.5 HRA 110 handwheel adapter 3-37<br />
11 PLC inputs/outputs 3-40<br />
11.1 <strong>Technical</strong> data 3-40<br />
11.2 Connector assignment 3-41<br />
11.2.1 PLC inputs 3-41<br />
11.2.2 PLC output 3-42<br />
11.3 Connecting cable 3-43<br />
11.4 PLC I/O expansion-board 3-45<br />
11.4.1 PL 400 connection 3-45<br />
11.4.2 PLC inputs/outputs on the PL 400 3-47<br />
11.5 PL 410 PLC I/O expansion-board 3-49<br />
11.5.1 PLC inputs/PLC outputs on the PL 410 3-50<br />
12 Machine control panel 3-53<br />
12.1 Pin layout 3-53<br />
12.2 Connecting cable 3-54<br />
13 <strong>TNC</strong> keyboard 3-56<br />
13.1 Pin connections 3-56<br />
13.2 Connecting cable 3-57<br />
14 Dimensions 3-58<br />
14.1 LE <strong>360</strong> C 3-58<br />
14.2 Keyboard units 3-59<br />
14.2.1 TE 355 A 3-59<br />
14.2.2 TE 355 B 3-60<br />
14.3 Visual display units 3-61<br />
14.3.1 BE 212 3-61<br />
14.3.2 BF 110 3-62<br />
3-2 <strong>TNC</strong> <strong>360</strong> 8/95
14.4 Input/Output units 3-63<br />
14.4.1 PL 410 B 3-63<br />
14.4.2 PL 410 3-64<br />
14.4.3 PL 400 3-65<br />
14.5 Panel-mounted handwheels 3-66<br />
14.5.1 HR 130 3-66<br />
14.5.2 HR 150 3-67<br />
14.5.3 HRA 110 handwheel adapter (for HR 150) 3-68<br />
14.5.4 Handwheel knobs 3-69<br />
14.6 Cable adapter 3-72<br />
15 Grounding Diagram 3-75<br />
16 Cable Overview 3-77<br />
8/95 <strong>TNC</strong> <strong>360</strong> 3-3
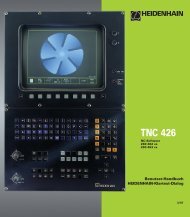
1 Hardware Components <strong>TNC</strong> <strong>360</strong><br />
The <strong>TNC</strong> <strong>360</strong> consists of the following hardware components:<br />
– LE <strong>360</strong> C (Logic unit),<br />
– TE 355 A or TE 355 B (<strong>TNC</strong> keyboard),<br />
– BE 212 or BF 110 (Visual display unit),<br />
– if desired, PL 410 B<br />
The <strong>TNC</strong> <strong>360</strong> is not subject to export restrictions. An export version is not necessary.<br />
Logic unit<br />
<strong>TNC</strong> <strong>360</strong> and <strong>TNC</strong> 335:<br />
LE <strong>360</strong> C<br />
Id.-Nr. 270 641 .. (for connecting the BE 212)<br />
Id.-Nr. 270 642 .. (for connecting the BF 110)<br />
<strong>TNC</strong> keyboard<br />
<strong>TNC</strong> <strong>360</strong>: TE 355 A (Id.-Nr. 255 015 01) TE 355 B (Id.-Nr. 255 016 01)<br />
3-4 <strong>TNC</strong> <strong>360</strong> 1 Hardware Components <strong>TNC</strong> <strong>360</strong> 8/95
Visual display unit<br />
BE 212 (Id.-Nr. 242 370 01) BF 110 (Id.-Nr. 267 209 01)<br />
PLC Input/Output Unit (Option)<br />
PL 410 (Id.-Nr. 263 371 01)<br />
8/95 <strong>TNC</strong> <strong>360</strong> 1 Hardware Components <strong>TNC</strong> <strong>360</strong> 3-5
1.1 Changes in the ID Number<br />
LE <strong>360</strong> Logic Unit:<br />
Id.-Nr. 258 991 99 Series introduction since 1990<br />
Id.-Nr. 258 991 98 Socket for "digitizing" software module since 1991<br />
Id.-Nr. 258 991 79 Same as Id.-Nr. 258 991 98, but with software module since 1991<br />
Id.-Nr. 264 660 99 New processor board since 3/91<br />
Id.-Nr. 264 660 79 Same as Id.-Nr. 264 660 99 but with software module since 7/91<br />
Id.-Nr. 264 085 99 New PLC- and graphics board since 7/91<br />
Id.-Nr. 264 085 79 Like Id.-Nr. 264 085 99, but with software module since 7/91<br />
LE <strong>360</strong> C Logic Unit<br />
Id.-Nr. 270 641 29 For connecting a BE 212 since 1992<br />
Id.-Nr. 270 641 24 With digitizing software module<br />
Id.-Nr. 270 642 29 For connecting a BF 110 since 1992<br />
Id.-Nr. 270 642 24 With digitizing software module<br />
3-6 <strong>TNC</strong> <strong>360</strong> 1 Hardware Components <strong>TNC</strong> <strong>360</strong> 8/95
2 Assembly Hints<br />
2.1 Electrical noise immunity<br />
Please note that the vulnerability of electronic equipment to noise increases with faster signal<br />
processing and higher sensitivity. Please protect your equipment by observing the following rules<br />
and recommendations.<br />
Noise voltages are mainly produced and transmitted by capacitive and inductive coupling. Electrical<br />
noise can be picked up by the inputs and outputs to the equipment, and the cabling.<br />
Likely sources of interference are:<br />
– Strong magnetic fields from transformers and electric motors,<br />
– Relays, contactors and solenoid valves,<br />
– High-frequency equipment, pulse equipment and stray magnetic fields from switch-mode<br />
power supplies,<br />
– Mains leads and leads to the above equipment.<br />
Electrical interference can be avoided by:<br />
– A minimum distance between the logic unit (and its leads) and interfering equipment > 20 cm.<br />
– A minimum distance between the logic unit (and its leads) and cables carrying interference<br />
signals > 10 cm.<br />
(Where signal cables and cables which carry interference signals are laid together in metallic<br />
ducting, adequate decoupling can be achieved by using a grounded separation screen)<br />
– Screening according to DIN VDE 0160.<br />
– Potential compensating lines ∅ ≥ 6 mm² (see Grounding diagram).<br />
– Use of original HEIDENHAIN cables, connectors and couplings.<br />
2.2 Heat generation and cooling<br />
Please note that the reliability of electronic equipment is greatly reduced by continuous operation at<br />
elevated temperatures. Please take the necessary measures to keep the unit within the permissible<br />
ambient temperature range.<br />
Permissible ambient temperature in operation: 0° C to 45° C (BF 110: 0° C to 40° C)<br />
The following means may be employed to ensure adequate heat removal:<br />
– Provide sufficient space for air circulation.<br />
– Build in a ventilator fan to circulate the air inside the control cabinet. The fan must reinforce the<br />
natural convection. It must be mounted so that the warm air is extracted from the logic unit<br />
and no pre-warmed air is blown into the unit. The warmed-up air should flow over surfaces<br />
which have good thermal conductivity to the external surroundings (e.g. sheet metal).<br />
– For a closed steel housing without assisted cooling, the figure for heat conduction is 3 Watt/m²<br />
of surface per °C air temperature difference between inside and outside.<br />
– Use of a heat exchanger with separate internal and external circulation.<br />
– Cooling by blowing external air through the control cabinet to replace the internal air. In this<br />
case the ventilator fan must be mounted so that the warm air is extracted from the control<br />
cabinet and only filtered air can be drawn in. HEIDENHAIN advises against this method of<br />
cooling, since the function and reliability of electronic assemblies are adversely affected by<br />
contaminated air (fine dust, vapors etc.). In addition to these disadvantages, a filter which is<br />
not adequately serviced leads to a loss in cooling efficiency. Regular servicing is therefore<br />
absolutely vital.<br />
3-8 <strong>TNC</strong> <strong>360</strong> 2 Assembly Hints 8/95
2.3 Humidity<br />
LE<br />
Incorrect<br />
Obstructive<br />
elements<br />
Heat generating<br />
elements<br />
8/95 <strong>TNC</strong> <strong>360</strong> 2 Assembly Hints 3-9<br />
LE<br />
Correct<br />
Permissible humidity: < 75 % in continuous operation,<br />
< 95 % for not more than 30 days p.a. (randomly distributed).<br />
In tropical areas it is recommended that the <strong>TNC</strong> is not switched off, so that condensation is avoided<br />
on the circuit boards. The heat generation prevents condensation and has no further disadvantages.<br />
2.4 Mechanical vibration<br />
Permissible vibration: < 0.5 g<br />
2.5 Mounting position<br />
Note the following fundamental points on mounting:<br />
– Mechanical accessibility<br />
– Permissible environmental conditions<br />
– Electrical noise immunity<br />
– The electrical regulations in effect in your country
2.5.1 Logic unit<br />
HEIDENHAIN recommends the following mounting position:<br />
Minimum clearance<br />
for servicing!<br />
recommended:=<br />
approx. 250 mm<br />
Maintain clearance<br />
for screwdriver<br />
Connecting cables<br />
must not hinder<br />
swivel movement<br />
of the control<br />
218.5<br />
40 40<br />
40<br />
132.5<br />
83<br />
*<br />
°C<br />
40°<br />
*<br />
30<br />
°C<br />
60<br />
270<br />
>110<br />
40<br />
R 325<br />
80<br />
PL<br />
*<br />
*<br />
>577<br />
°C<br />
Air<br />
outlet<br />
°C<br />
°C<br />
Air<br />
inlet<br />
°C<br />
145<br />
3-10 <strong>TNC</strong> <strong>360</strong> 2 Assembly Hints 8/95<br />
°C<br />
*<br />
*<br />
*<br />
80<br />
40<br />
*<br />
30<br />
°C<br />
160<br />
Measuring point for<br />
ambient temperature<br />
Free space for air circulation<br />
Free space for servicing<br />
Illustration of<br />
max. swivel range.<br />
The minimum angle of<br />
swivel for exchange<br />
of subassembly should<br />
be at least 90°.<br />
100<br />
30<br />
100
2.5.2 Visual display unit (VDU)<br />
Permissible ambient temperature<br />
BE 212 max. 45° C (113° F)<br />
BF 110 max. 40° C (104° F)<br />
The VDU must be installed with a minimum clearance of 25 mm to the housing. It is recommended<br />
especially, that a large area is left free above the unit for heat removal.<br />
Temperature is measured at a distance of 25 mm to the housing. The above mentioned<br />
temperatures must not be exceeded.<br />
Please also note for the BE 212:<br />
When mounting the VDU it must be remembered that this unit is very sensitive to magnetic pick-up.<br />
The picture position and geometry can be disturbed by stray magnetic fields. Alternating fields cause<br />
periodic movement or distortion of the picture.<br />
For this reason, keep a minimum distance of 0.5 m between the VDU casing and the source of any<br />
disturbance (e.g. permanent magnets, motors, transformers etc.)<br />
2.5.3 PLC Input/Output board PL 410<br />
One PL 410 can be connected to the LE <strong>360</strong> C, if desired. There is no preferred mounting position<br />
for heat removal.<br />
2.6 Degree of protection<br />
When mounted, the visual display unit and the keyboard unit provide class IP54 protection against<br />
dust and splashwater.<br />
8/95 <strong>TNC</strong> <strong>360</strong> 2 Assembly Hints 3-11
3 Summary of Connections<br />
24V<br />
X31<br />
X1<br />
X2<br />
X3<br />
X4<br />
X6<br />
X11<br />
X12<br />
X8<br />
X9<br />
B<br />
X21 X24<br />
X22<br />
X25<br />
X26<br />
X23 X27<br />
Control loop board<br />
X1 = Measuring system 1 (~)<br />
X2 = Measuring system 2 (~)<br />
X3 = Measuring system 3 (~)<br />
X4 = Measuring system 4 (~)<br />
X5 = Measuring system 5 (~)<br />
X6 = Measuring system S ( )<br />
X12 = Touch probe system<br />
X8 = Nominal value outputs 1,2,3,4,S<br />
X9 = VDU<br />
X11 = HR 130/330/332 handwheels,<br />
HRA 110<br />
PLC and graphics board<br />
X21 = PLC output<br />
X22 = PLC input<br />
X23 = <strong>TNC</strong> keyboard (TE)<br />
X24 = Power supply 24 V for PLC<br />
X25 = Data interface RS-232-C/V.24<br />
X26 = Input/Output board PL 410<br />
X27 = Machine operating panel<br />
X31 = Power supply 24 V for NC<br />
B = Signal ground<br />
Danger to internal components!<br />
Do not engage or disengage any connections while the unit is under power.<br />
3-12 <strong>TNC</strong> <strong>360</strong> 3 Summary of Connections 8/95
4 Power Supply<br />
4.1 Overview<br />
The supply voltages must meet the following specifications:<br />
Unit Supply voltage Voltage range dc<br />
average<br />
LE NC 24 Vdc<br />
Lower limit<br />
(VDE 0160, 5.88<br />
low-voltage<br />
electrical<br />
separation)<br />
20.4 V - - -<br />
Upper limit<br />
PLC 24 Vdc<br />
(VDE 0160, 5.88<br />
base insulation)<br />
1) 31 V - - -<br />
PL 410 B<br />
PL 410 4 )<br />
PL 400 4 )<br />
Max. current Power<br />
consumption consumption<br />
LE <strong>360</strong> 1.5 A 28.8 ... 36 W<br />
(also supplies<br />
the BE 212)<br />
2 A<br />
when half3) of<br />
the outputs are<br />
switched on<br />
simultaneously<br />
20 A<br />
when half3) of<br />
the outputs are<br />
switched on<br />
simultaneously<br />
HRA 110 (VDE 0160, 5.88<br />
low-voltage<br />
electrical<br />
separation)<br />
BF 110 2) Approx. 1 A with<br />
full display<br />
1 ) Voltage surges up to 36 V - - - permissible for t< 100 ms.<br />
Approx. 48 W<br />
when half3) of<br />
the outputs are<br />
switched on<br />
simultaneously<br />
Approx. 480 W<br />
when half3) of<br />
the outputs are<br />
switched on<br />
simultaneously<br />
0.2 A Approx. 5 W<br />
24 W typical<br />
32 W max.<br />
2 ) The BF 110 has its own line power connection, which also powers the internal ventilation.<br />
3) No more than half the outputs can be switched on simultaneously.<br />
4 ) No longer included in product program<br />
4.1.1 NC power supply<br />
Connection terminal X31<br />
Pin Number Assignment<br />
1 + 24 Vdc<br />
2 0 V<br />
3-14 <strong>TNC</strong> <strong>360</strong> 4 Power Supply 8/95
The NC and the HRA 110 must not be supplied<br />
from the machine control voltage supply! It<br />
requires an individual, external and separately<br />
generated supply voltage according to VDE<br />
0551. Use 24 Vdc with a permissible ac<br />
component of 1.5 Vpp (recommended filter<br />
capacitor 10 000 μF/40 Vdc).<br />
8/95 <strong>TNC</strong> <strong>360</strong> 4 Power Supply 3-15<br />
24 V<br />
Danger to internal components!<br />
The internal fuses of the power supply assembly must be exchanged only by<br />
HEIDENHAIN personnel.<br />
If the operating voltage of the control (5V on the processor board) is outside the limit values a<br />
blinking error message "PROCESSOR CHECK ERROR M" is displayed.<br />
4.1.2 PLC power supply<br />
U<br />
1.5 V pp<br />
The PLC section (PLC inputs and outputs) of the LE and PL is run from the 24 V machine control voltage<br />
supply, generated according to VDE 0160.<br />
Superimposed ac components, such as those caused by a three-phase bridge rectifier without smoothing,<br />
are permissible up to a ripple factor of 5% (see DIN 40110/10.75, Section 1.2). This means an absolute<br />
upper voltage limit of 32.6 V and an absolute lower voltage limit of 18.5 V.<br />
U<br />
32.6 V<br />
31 V<br />
20.4 V<br />
18.5 V<br />
t<br />
t
X24 power supply for the PLC at the LE<br />
Pin Number Assignment<br />
1 + 24 Vdc switched off by EMERGENCY STOP<br />
2 + 24 Vdc not switched off by EMERGENCY STOP<br />
3 0 V<br />
Danger to internal components!<br />
Use only original replacement fuses.<br />
Power supply for the PL 410 B<br />
The PLC outputs are powered in groups.<br />
Terminal Assignment PLC output<br />
X9 0V<br />
X10 +24 V power for logic and for "Control is operational"<br />
X11 +24 V power for outputs O32 to O39<br />
X12 O40 to O47<br />
X13 O48 to O55<br />
X14 O56 to O62<br />
Power supply for the PL 410<br />
Connections as with PL 410 B.<br />
Terminal Assignment<br />
X13 +24 Vdc switched off by EMERGENCY STOP<br />
X12 0 V<br />
X3 Pin 12 + 24 Vdc not switched off by EMERGENCY STOP<br />
4.1.3 Buffer battery<br />
The buffer battery is the potential source for the RAM memory for NC programs, PLC programs<br />
and machine parameters when the control is switched off.<br />
If the ”EXCHANGE BUFFER BATTERY” message appears, the batteries must be exchanged.<br />
The 3 batteries may be found behind a screw cap in the power supply section of the logic unit.<br />
As well as the batteries, the logic unit contains an additional energy store, mounted on the<br />
processor board, for buffering the memory contents.<br />
This means that the mains can be switched off when replacing the batteries. The energy<br />
store will ensure that the memory is retained while the batteries are exchanged.<br />
3-16 <strong>TNC</strong> <strong>360</strong> 4 Power Supply 8/95
Type of batteries:<br />
Three AA-size batteries, leak-proof,<br />
IEC designation "LR6"<br />
4.2 Power supply for the visual display unit<br />
BE 212<br />
The BE 212 visual display unit is powered through the LE (connector X9).<br />
BF 110<br />
X1 power supply<br />
Pin Number Assignment<br />
1 + 24 V<br />
2 0 V<br />
The BF 110 must not be supplied with 220 V!<br />
8/95 <strong>TNC</strong> <strong>360</strong> 4 Power Supply 3-17
5 Encoders<br />
The HEIDENHAIN contouring controls are designed for the installation of incremental linear and<br />
angular encoders.<br />
The control controls the actual position with a measuring step of 0.001 mm or 0.001°. Encoders with<br />
a graduation period of 0.001 mm or 0.001° to 1 mm or 1° may be used.<br />
It does not matter whether the encoder or encoder has one or several reference marks.<br />
However, HEIDENHAIN recommends the use of encoders with distance-coded reference marks,<br />
since the traversing distance when homing on the reference marks is thereby reduced to a<br />
minimum. See chapter "Machine Integration."<br />
5.1 Linear encoders<br />
Measurement of length is best performed by a linear encoder. Insofar as it is compatible with the<br />
accuracy requirements, linear measurement can also be made using a rotary encoder on the<br />
ballscrew.<br />
HEIDENHAIN recommends use of the following linear encoders:<br />
LS 103 C, LS 106 C, LS 405 C, LS 406 C, LS 706 C, LB 326, ULS 300 C.<br />
For linear measurement with the aid of a rotary encoder and a ballscrew you could use, for example,<br />
an ROD 450.<br />
5.2 Angle encoders<br />
For direct angular measurement in the A, B or C axes the following incremental angle encoders are<br />
available: ROD 250 C, ROD 700 C, RON 255 C, and RON 705 C.<br />
In order to meet accuracy requirements, HEIDENHAIN recommends line counts of at least 18 000.<br />
8/95 <strong>TNC</strong> <strong>360</strong> 5 Encoders 3-19
5.3 Encoder inputs for sinusoidal signals (7 to 16 μApp)<br />
The LE can have encoders with sinusoidal inputs (7 μA pp to 16 μA pp ).<br />
Maximum input frequency is 30 kHz.<br />
5.3.1 Connector assignments<br />
X1, X2, X3, X4 encoder 1, 2, 3, 4<br />
Flange socket with female connector insert (9-pin)<br />
Pin No. Assignment<br />
1 I1+ 2 I1– 5 I2+ 6 I2– 7 I0+ 8 I0– 3 + 5 V (UP)<br />
4 0 V (UN)<br />
9 Inner shield<br />
Housing Outer shield = unit housing<br />
The interface complies with the recommendations in VDE 0160, 5.88 for separation from<br />
line power.<br />
5.3.2 Connecting cable<br />
Please use only HEIDENHAIN encoder cables, connectors and couplings. Standard HEIDENHAIN<br />
extension cables cover a maximum distance of 30 m.<br />
Measuring<br />
system LE<br />
max. 30 m<br />
With standard extension cable (Id.-Nr. 262 006 ..)<br />
With armoured extension cable (Id.-Nr. 262 016 ..)<br />
A connecting cable with power supply lines Ø 1 mm 2 PUR [3 (2x0.14) + (2x1.0) mm 2 ],<br />
Id.-Nr. 244 955 01 can have a maximum length of 60 m.<br />
3-20 <strong>TNC</strong> <strong>360</strong> 5 Encoders 8/95
5.4 Encoder inputs for square-wave signals<br />
One encoder with square-wave signals can be connected at the input X6. Maximum input frequency<br />
is 300 kHz.<br />
5.4.1 Connector assignments<br />
X6 encoder S<br />
Flange socket with female connector insert (12-pin)<br />
Pin Number Assignment<br />
5 Ua1<br />
––—–<br />
6 Ua1<br />
8 Ua2<br />
––—–<br />
1 Ua2<br />
3 Ua0<br />
––—–<br />
4 Ua0<br />
––—–<br />
7 UaS<br />
2 + 5 V (UP)<br />
12 + 5 V (UP)<br />
11 0 V (UN)<br />
10 0 V (UN)<br />
9 (contact spring) screen = housing<br />
The interface complies with the recommendations in VDE 0160, 5.88 for separation from<br />
line power.<br />
5.4.2 Connecting cable<br />
Please use only HEIDENHAIN encoder cables, connectors and couplings.<br />
In order to be able to connect an encoder to the square-wave signal input of the logic unit, the<br />
sinusoidal signal from the encoder must be converted to a square-wave signal. This conversion is<br />
performed by the interpolation and digitizing electronics (EXE). The interpolation and digitizing<br />
electronics is either integrated into the encoder or is an independent unit.<br />
If the interpolation and digitizing electronics does not have its own power supply, it can be supplied<br />
from the logic unit. In order to ensure a correct supply voltage, the total length of the connecting<br />
cable between the interpolation and digitizing electronics and the logic unit must be limited (see the<br />
following diagram).<br />
8/95 <strong>TNC</strong> <strong>360</strong> 5 Encoders 3-21
ROD 426.xxx8<br />
ROD 271 C<br />
RON 275 C<br />
ROD 250 C<br />
RON 255 C<br />
ROD 700 C<br />
RON 705 C<br />
ROD 250 C<br />
RON 255 C<br />
ROD 700 C<br />
RON 705 C<br />
Spindle Spindel-Orientierung:<br />
orientation:<br />
1024 lines Striche<br />
Angle Winkelmeßsysteme:<br />
encoders:<br />
oder: or:<br />
or: bzw.<br />
Extension cable<br />
Verlängerungskabel<br />
Id.-Nr. 262 011..<br />
max. 20 m<br />
Extension Verlängerungskabel cable<br />
Id.-Nr. 262 011..<br />
max. 20 m<br />
Extension Verlängerungskabel cable Connection Verbindungskabel cable<br />
EXE<br />
602 E<br />
Id.-Nr. 262 006..<br />
5-fold 5fach<br />
Id.-Nr. 262 004..<br />
max. 30 m<br />
max. 10 m<br />
Extension Verlängerungskabel cable Connection Verbindungskabel cable<br />
EXE<br />
801<br />
Id.-Nr. 262 006..<br />
5-fold<br />
5fach<br />
Id.-Nr. 233 764..<br />
max. 30 m<br />
max. 50 m<br />
If necessary, linear encoders can also be connected to the LE via interpolation and digitizing<br />
electronics.<br />
3-22 <strong>TNC</strong> <strong>360</strong> 5 Encoders 8/95<br />
X6<br />
X6<br />
X6<br />
X6<br />
LE<br />
LE<br />
LE<br />
LE
6 Nominal Value Output<br />
The HEIDENHAIN contouring controls control the position loop servo with a nominal value potential<br />
of ± 10 volts.<br />
Maximum loading of the nominal value outputs: 2 mA<br />
Maximum load capacitance: 2 nF<br />
6.1 Connector assignment X8<br />
BROWN<br />
YELLOW<br />
RED/BLUE<br />
PINK<br />
GRAY/PINK<br />
RED<br />
VIOLET<br />
WHITE<br />
GREEN<br />
GRAY<br />
BLUE<br />
BLACK<br />
max. 20 m<br />
Id.-Nr. 244 006..<br />
•<br />
1<br />
2<br />
3<br />
4<br />
5<br />
6<br />
7<br />
8<br />
9<br />
10<br />
11<br />
12<br />
13<br />
14<br />
15<br />
1<br />
2<br />
3<br />
4<br />
5<br />
6<br />
7<br />
8<br />
9<br />
10<br />
11<br />
12<br />
13<br />
14<br />
15<br />
X8 Nominal value output<br />
Nominal value output 1<br />
Analog input<br />
Nominal value output 2<br />
do not use<br />
Nominal value output 3<br />
do not use<br />
Nominal value output 4<br />
Nominal value output S axis<br />
0V Nominal value output 1<br />
Analog input<br />
0V Nominal value output 2<br />
do not use<br />
0V Nominal value output 3<br />
0V Nominal value output 4<br />
0V Nominal value output S axis<br />
The interface complies with the recommendations in VDE 0160, 5.88 for separation from<br />
line power.<br />
6.2 Connecting cable<br />
HEIDENHAIN offers a connecting cable with a connector at one end (Id.-Nr. 244 006 ..).<br />
The connecting cable to the nominal value outputs may not have more than one intermediate<br />
terminal clamp. The clamp must be made in an earthed connection box. This is necessary when the<br />
cable must branch to physically separate servo inputs. It is only possible to earth the screening of<br />
the servo leads in this way. If required, suitable connection boxes are available from HEIDENHAIN<br />
with the Id.-Nr. 251 249 01.<br />
Connection box<br />
8/95 <strong>TNC</strong> <strong>360</strong> 6 Nominal Value Output 3-23
The housing of the connection box must be electrically connected with the frame of the machine.<br />
The 0 V of the nominal value differential input must be joined to signal ground, (cable cross-section ≥<br />
Ø 6 mm², see also under "Grounding diagram").<br />
Suggested solution for connecting and wiring the screening in the connection box:<br />
LE<br />
1 2 3 4 5 6 7 8 9 10 11 12 13 14 15 16<br />
X Y Z IV S<br />
SERVO<br />
Pin Number Assignment<br />
1 Noml. value output X axis<br />
2 Noml. value output 0 V X axis<br />
3 Noml. value output Y axis<br />
4 Noml. value output 0 V Y axis<br />
5 Noml. value output Z axis<br />
6 Noml. value output 0 V Z axis<br />
7 Noml. value inputIV axis<br />
8 Noml. value input 0 V IV axis<br />
9 Analog input<br />
10 Analog input 0 V<br />
11 Noml. value output S axis<br />
12 Noml. value output 0 V S axis<br />
13 Screen connection<br />
14 Screen connection<br />
15 Screen connection<br />
16 Screen connection<br />
•<br />
•<br />
Insulated against housing<br />
Leads are provided<br />
with end en sleeves.<br />
Cable screens are led onto 0.14 mm 2<br />
insulated strands via crimp eyelets.<br />
If the manufacturers want to use their own cable, HEIDENHAIN offers a 15-pin D-sub connector<br />
with solderable leads (Id.-Nr. 243 971 ZY).<br />
3-24 <strong>TNC</strong> <strong>360</strong> 6 Nominal Value Output 8/95
7 Visual Display Unit (VDU)<br />
The LE <strong>360</strong> C is factory-prepared for connecting the BE 212 CRT screen or BF 110 flat panel display.<br />
The status is indicated by the Id.-Nr. on the ID label (Id.-Nr. 270 641 for BE 212 and Id.-Nr. 270 642<br />
for BF 110).<br />
7.1 Connector assignment X10<br />
Both display units are connected to the socket X9 on the LE <strong>360</strong> C, but with different cables.<br />
X9 Visual display unit<br />
D-sub connection (female 15-pin)<br />
Pin Number BE 212 BF 110<br />
1,8 0 V power supply –<br />
2,4 + 12 V power supply –<br />
3, 5, 6 Do not use Do not use<br />
7 – Video<br />
9 V SYNC V SYNC<br />
10 H SYNC 1 –<br />
11 0 V Signal 0 V Signal<br />
12 – –<br />
13 Video –<br />
14 H SYNC 2<br />
15 CLOCK<br />
Housing Outer screen = Unit housing<br />
The interface complies with the recommendations in VDE 0160, 5.88 for separation from<br />
line power.<br />
3-26 <strong>TNC</strong> <strong>360</strong> 7 Visual Display Unit (VDU) 8/95
7.2 Connecting cable<br />
BE 212<br />
BF 110<br />
Standard cable<br />
Id.-Nr. 242 874 ..<br />
Standard cable<br />
Id.-Nr. 250 477 ..<br />
max. 25 m<br />
max. 25 m<br />
Extension cable<br />
Id.-Nr. 244 504 ..<br />
Extension cable<br />
Id.-Nr. 254 640<br />
8/95 <strong>TNC</strong> <strong>360</strong> 7 Visual Display Unit (VDU) 3-27<br />
LE<br />
LE
8 Touch Probe System Input<br />
The 3D touch probe systems from HEIDENHAIN can be delivered in two versions:<br />
– TS 120 with cable transmission and integrated APE interface electronics<br />
– TS 511 with infrared transmission of the trigger signal and connectable via APE interface<br />
electronics<br />
For start-up and adjustment of the 3D touch probe systems see Chapter "Machine Integration".<br />
8.1 Connector assignment X12<br />
X12 Touch probe system TS 120/TS 511<br />
Flange socket with female connector insert (15-pin)<br />
Pin Number Signal designation<br />
1 Inner screen (0 V)<br />
3 Ready/standby<br />
4 Start<br />
5 +15 V ± 10 % (UP)<br />
6 + 5 V ± 5 % (UP)<br />
7 Battery warning<br />
8 0 V (UN)<br />
9 Trigger signal<br />
10<br />
Trigger signal 2<br />
2, 11 to 15 Do not use<br />
2 Stylus in rest position = signal high<br />
3-28 <strong>TNC</strong> <strong>360</strong> 8 Touch Probe System Input 8/95
8.2 Connection of the touch probe system<br />
Please use only HEIDENHAIN connecting cables and adapters for the connection to the touch probe<br />
system.<br />
8.2.1 TS 120<br />
The touch probe system TS 120 is connected directly to the logic unit via a cable adapter.<br />
See also Section "Mounting dimensions".<br />
TS 120 helical cable<br />
(extended 1,5 m)<br />
TS<br />
120<br />
WH<br />
BN<br />
GY<br />
GN<br />
YL<br />
•<br />
1<br />
2<br />
3<br />
4<br />
5<br />
6<br />
Cable adapter complete max. 50 50 m<br />
m<br />
1<br />
2<br />
3<br />
4<br />
5<br />
6<br />
•<br />
Id.-Nr. 274 543..<br />
PK<br />
BN/GN<br />
GY<br />
WH/GN •<br />
GN<br />
YL<br />
• 1<br />
2<br />
3<br />
4<br />
5<br />
6<br />
7<br />
8<br />
9<br />
10<br />
11<br />
12<br />
13<br />
14<br />
15<br />
8/95 <strong>TNC</strong> <strong>360</strong> 8 Touch Probe System Input 3-29<br />
X12<br />
1<br />
2<br />
3<br />
4<br />
5<br />
6<br />
7<br />
8<br />
9<br />
10<br />
11<br />
12<br />
13<br />
14<br />
15<br />
Touch probe inputs<br />
Standby<br />
+15V ±10% (U P)<br />
+ 5V ± 5% (U P)<br />
Battery warning<br />
0V (UN)<br />
Trigger signal<br />
Trigger signal
8.2.2 TS 511<br />
The TS 511 touch probe system can only function together with a transmitter/receiver unit (SE 510)<br />
and interface electronics (APE 510).<br />
SE 510<br />
SE 510<br />
0V<br />
UP<br />
Flash signal<br />
3 m<br />
IR-signal<br />
Internal<br />
WH/<br />
screen (0V) BK<br />
•<br />
WH<br />
BN<br />
GY<br />
GN<br />
max. 7 m max. 30 m<br />
Id.-Nr. 274 540 ..<br />
•<br />
1<br />
2<br />
3<br />
4<br />
5<br />
6<br />
2<br />
3<br />
4<br />
5<br />
6<br />
GY<br />
YL<br />
BN<br />
RD<br />
WH<br />
GN<br />
BL<br />
WH/<br />
BK<br />
7 7<br />
• 1<br />
•<br />
Id.-Nr. 274 539 ..<br />
Touch probe input<br />
Internal screen (0V)<br />
Standby<br />
Start<br />
15V ±10% (U P)<br />
Battery warning<br />
0V (UN)<br />
Trigger signal<br />
3-30 <strong>TNC</strong> <strong>360</strong> 8 Touch Probe System Input 8/95<br />
1<br />
2<br />
3<br />
4<br />
5<br />
6<br />
7<br />
APE 510<br />
The signals may be inverted by changing the switch positions S1 to S4 in the APE 510.<br />
See the operating instructions for the TS 511.<br />
Please install the transmitter/receiver unit SE 510 either insulated from, or electrically connected to<br />
the machine, as it must take up a definite potential, also under vibration. The earthing screw of<br />
the APE 510 must be joined to the machine signal ground by a potential compensating lead<br />
(≥ ∅ 6 mm²).<br />
See also Section "Earthing plan".<br />
APE<br />
510<br />
7<br />
5<br />
3<br />
2<br />
6<br />
1<br />
4<br />
•<br />
GY<br />
YL<br />
BN<br />
BL<br />
WH<br />
GN<br />
WH/BN<br />
•<br />
1<br />
2<br />
3<br />
4<br />
5<br />
6<br />
7<br />
8<br />
9<br />
10<br />
11<br />
12<br />
13<br />
14<br />
15<br />
X12<br />
1<br />
2<br />
3<br />
4<br />
5<br />
6<br />
7<br />
8<br />
9<br />
10<br />
11<br />
12<br />
13<br />
14<br />
15
9 RS-232-C/V.24 Data Interface<br />
HEIDENHAIN guarantees that, if properly connected, the serial data interface RS-232-C/V.24 will<br />
transmit data correctly up to a distance of 20 m between the logic unit and the peripheral unit.<br />
The connection to the peripheral unit is made via a cable adapter which is attached to either the<br />
operating console or the control cabinet. See also the section "Mounting dimensions". For<br />
connection to the peripheral unit, HEIDENHAIN offers a standard connecting cable<br />
(Id.-Nr. 274 545 01) , length 3 m.<br />
X25 V.24/RS-232-C<br />
D-sub connection (female 24-pin)<br />
Pin Number LE <strong>360</strong> C<br />
1 Chassis GND<br />
2 RXD<br />
3 TXD<br />
4 CTS<br />
5 RTS<br />
6 DTR<br />
7 Signal GND<br />
20 DSR The interface complies with the recommendations in<br />
9 - 19, 21-24 Do not use VDE 0160, 5.88 for separation from line power.<br />
Peripheral<br />
unit<br />
GND<br />
TXD<br />
RXD<br />
RTS<br />
CTS<br />
DSR<br />
GND<br />
DTR<br />
1<br />
2<br />
3<br />
4<br />
5<br />
6<br />
7<br />
8<br />
9<br />
10<br />
11<br />
12<br />
13<br />
14<br />
15<br />
16<br />
17<br />
18<br />
19<br />
20<br />
21<br />
22<br />
23<br />
24<br />
25<br />
•<br />
1<br />
2<br />
3<br />
4<br />
5<br />
6<br />
7<br />
8<br />
9<br />
10<br />
11<br />
12<br />
13<br />
14<br />
15<br />
16<br />
17<br />
18<br />
19<br />
20<br />
21<br />
22<br />
23<br />
24<br />
25<br />
•<br />
Id.-Nr. 274 545 01<br />
•<br />
1<br />
2<br />
3<br />
4<br />
5<br />
6<br />
7<br />
8<br />
9<br />
10<br />
11<br />
12<br />
13<br />
14<br />
15<br />
16<br />
17<br />
18<br />
19<br />
20<br />
21<br />
22<br />
23<br />
24<br />
25<br />
1<br />
2<br />
3<br />
4<br />
5<br />
6<br />
7<br />
8<br />
9<br />
10<br />
11<br />
12<br />
13<br />
14<br />
15<br />
16<br />
17<br />
18<br />
19<br />
20<br />
21<br />
22<br />
23<br />
24<br />
25<br />
max. 17 m<br />
Id.-Nr. 239 760..<br />
• • •<br />
• • •<br />
WH/BN WH/BN<br />
WH/BN WH/BN<br />
•<br />
3 m<br />
GN<br />
YL<br />
GY<br />
PK<br />
BL<br />
RD<br />
BN<br />
•<br />
•<br />
V.24-Adapter Block<br />
Id.-Nr. 239 758 01<br />
1<br />
2<br />
3<br />
4<br />
5<br />
6<br />
7<br />
8<br />
9<br />
10<br />
11<br />
12<br />
13<br />
14<br />
15<br />
16<br />
17<br />
18<br />
19<br />
20<br />
21<br />
22<br />
23<br />
24<br />
25<br />
1<br />
2<br />
3<br />
4<br />
5<br />
6<br />
7<br />
8<br />
9<br />
10<br />
11<br />
12<br />
13<br />
14<br />
15<br />
16<br />
17<br />
18<br />
19<br />
20<br />
21<br />
22<br />
23<br />
24<br />
25<br />
GND Chassis<br />
RXD Receive data<br />
TXD Transmit data<br />
CTS Clear to send<br />
RTS Request to send<br />
DTR Data terminal ready<br />
GND Signal ground<br />
DSR Data set ready<br />
3-32 <strong>TNC</strong> <strong>360</strong> 9 RS-232-C/V.24 Data Interface 8/95<br />
YL<br />
GN<br />
PK<br />
GY<br />
BN<br />
RD<br />
BL<br />
•<br />
1<br />
2<br />
3<br />
4<br />
5<br />
6<br />
7<br />
8<br />
9<br />
10<br />
11<br />
12<br />
13<br />
14<br />
15<br />
16<br />
17<br />
18<br />
19<br />
20<br />
21<br />
22<br />
23<br />
24<br />
25<br />
X25 Data interface RS-232-C/V.24<br />
1<br />
2<br />
3<br />
4<br />
5<br />
6<br />
7<br />
8<br />
9<br />
10<br />
11<br />
12<br />
13<br />
14<br />
15<br />
16<br />
17<br />
18<br />
19<br />
20<br />
21<br />
22<br />
23<br />
24<br />
25
10 Handwheel Input<br />
The handwheel HR 130 or HR 330 or HR 332 or the handwheel adapter HRA 110 can be attached to<br />
the HEIDENHAIN contouring control <strong>TNC</strong> <strong>360</strong>. See also Chapter "Machine Integration".<br />
10.1 Pin layout<br />
X11 Handwheel input<br />
D-sub connection (female insert, 9-pin)<br />
Pin Number LE <strong>360</strong> C<br />
1 CTS<br />
2 0 V (U N)<br />
3 RTS<br />
4 + 12 V (U P)<br />
5 Do not use<br />
6 DTR<br />
7 TxD<br />
8 RxD<br />
9 DSR<br />
The interface complies with the recommendations in VDE 0160, 5.88 for separation from<br />
line power.<br />
10.2 Portable handwheel HR 330<br />
The HR 330 is a portable handwheel with keys for the 4 axes, rapid traverse, direction of traverse<br />
and EMERGENCY STOP.<br />
The HR 330 is connected to the logic unit by means of the cable adapter Id.-Nr. 249 889 ..<br />
See also Section "Mounting dimensions".<br />
The HEIDENHAIN extension cable Id.-Nr. 249 814 .. may be used to increase the connection<br />
distance.<br />
The HR 330 is available in 2 versions:<br />
– HR 330 Helical cable (stretched length 2.2 m) Id.-Nr. 251 534 11<br />
– HR 330.001 Normal cable (max. 6 m) Id.-Nr. 251 534 02<br />
– HR 330 Helical cable (stretched length 2.2 m) Id.-Nr. 251 534 11<br />
– HR 330.001 Normal cable (max. 6 m) Id.-Nr. 251 534 12<br />
– Dummy plug for EMERGENCY STOP circuit Id.-Nr. 271 958 02<br />
8/95 <strong>TNC</strong> <strong>360</strong> 10 Handwheel Input 3-33
HR<br />
HR 330<br />
HR 330.001 max. 6 m<br />
HR 330 max. 2.2 m<br />
Id.-Nr. 251 534 ..<br />
EMERGENCY OFF<br />
max. 24V<br />
BLUE<br />
BLUE<br />
GREEN<br />
YELLOW<br />
BROWN<br />
WHITE<br />
1<br />
2<br />
3<br />
4<br />
5<br />
6<br />
2<br />
1<br />
1<br />
2<br />
3<br />
4<br />
5<br />
6<br />
• • •<br />
Adapter<br />
HR 330<br />
BLUE<br />
BLUE<br />
max. 48 m<br />
Id.-Nr. 249 889 ..<br />
WHITE<br />
BROWN<br />
YELLOW<br />
GREEN<br />
•<br />
max. 50 m<br />
Id.-Nr. 249 814 ..<br />
3-34 <strong>TNC</strong> <strong>360</strong> 10 Handwheel Input 8/95<br />
1<br />
2<br />
3<br />
4<br />
5<br />
6<br />
7<br />
8<br />
9<br />
1<br />
2<br />
3<br />
4<br />
5<br />
6<br />
7<br />
8<br />
9<br />
•<br />
max. 49 m<br />
WHITE<br />
BROWN<br />
YELLOW<br />
GREEN<br />
•<br />
1<br />
2<br />
3<br />
4<br />
5<br />
6<br />
7<br />
8<br />
9<br />
LE<br />
X11<br />
The adapter includes a cable with a 9-pin connector for the logic unit, and two terminals for<br />
connecting the 24 V of the EMERGENCY STOP control circuit (max. load 1.2 A).<br />
See also section "Mounting dimensions".<br />
10.3 Integral handwheel HR 130<br />
1<br />
2<br />
3<br />
4<br />
5<br />
6<br />
7<br />
8<br />
9<br />
Electronic<br />
handwheel<br />
0V<br />
+12V ± 0.6V(U V)<br />
The HR 130 is the integral version of the HR 330, without the keys for the axes, rapid traverse etc.<br />
It may be attached directly to the logic unit, or via an extension cable (Id.-Nr. 249 814 ..).<br />
DTR<br />
RXD<br />
The HR 130 (Id.-Nr. 254 040 ..) is available in several versions (standard cable length 1 m):<br />
– Small knob; axial cable exit: version 01<br />
– Small knob; radial cable exit: version 02<br />
– Large knob; axial cable exit: version 03<br />
– Large knob; radial cable exit: version 04<br />
– Ergonomic knob; radial cable exit: version 05<br />
Mounting dimension drawings are provided at the end of this chapter.
HR 130<br />
HR 130<br />
•<br />
max. 6 m<br />
Id.-Nr. 254 040 ..<br />
WHITE<br />
BROWN<br />
YELLOW<br />
GREEN<br />
•<br />
1<br />
2<br />
3<br />
4<br />
5<br />
6<br />
7<br />
8<br />
9<br />
1<br />
2<br />
3<br />
4<br />
5<br />
6<br />
7<br />
8<br />
9<br />
•<br />
max. 50 m<br />
10.4 Portable handwheel HR 332<br />
max. 49 m<br />
Id.-Nr. 249 814 ..<br />
WHITE<br />
BROWN<br />
YELLOW<br />
GREEN<br />
8/95 <strong>TNC</strong> <strong>360</strong> 10 Handwheel Input 3-35<br />
•<br />
1<br />
2<br />
3<br />
4<br />
5<br />
6<br />
7<br />
8<br />
9<br />
LE<br />
X11<br />
Electronic<br />
handwheel<br />
1<br />
2<br />
3<br />
4<br />
5<br />
6<br />
7<br />
8<br />
9<br />
0V<br />
+12V ±0.6V (U V)<br />
The HR 332 handwheel features two permission buttons and a keypad that can be evaluated via<br />
PLC (see Section "Handwheel" in Chapter "Machine Integration"). There are several variants of the<br />
handwheel with different labeling. Please contact HEIDENHAIN for more information.<br />
The HR 332 is connected to a cable adapter on the panel through a connecting cable of 5 m length.<br />
The connecting cable is available with or without metal armor tubing. The maximum cable length<br />
from the HR to the LE is 50 m.<br />
HR 332 Id.-Nr. 266 064 21<br />
Connecting cable to HR 332 Id.-Nr. 272 291 ..<br />
Connecting cable to HR 332, with metal armor Id.-Nr. 272 292 ..<br />
Cable adapter HR 332/ LE Id.-Nr. 274 556 ..<br />
Extension cable for cable adapter In development<br />
Dummy plug for EMERGENCY STOP circuit Id.-Nr. 271 958 01<br />
Handwheel holder Id.-Nr. 268 268 03<br />
DTR<br />
RXD
HR<br />
332<br />
HR 332<br />
EMERGENCY OFF<br />
EMERGENCY OFF<br />
Permiss.<br />
Common<br />
Permiss.<br />
6<br />
TXD<br />
RXD<br />
Screen<br />
DSR<br />
0V<br />
+12V<br />
Id.-Nr. 272 292 ..<br />
Id.-Nr. 272 291 ..<br />
1<br />
2<br />
3<br />
4<br />
5<br />
6<br />
7<br />
8<br />
9<br />
10<br />
11<br />
12<br />
blue<br />
pink<br />
red<br />
violet<br />
black<br />
x<br />
green<br />
grey<br />
x<br />
yellow<br />
white<br />
brown<br />
1<br />
2<br />
3<br />
4<br />
5<br />
6<br />
7<br />
8<br />
9<br />
10<br />
11<br />
12<br />
Adapter<br />
HR 332<br />
Id.-Nr. 274 556 ..<br />
3<br />
2<br />
1<br />
2<br />
1<br />
1<br />
2<br />
3<br />
4<br />
5<br />
6<br />
7<br />
8<br />
9<br />
10<br />
11<br />
12<br />
sw<br />
vt<br />
rt<br />
ws<br />
ws<br />
bl<br />
white<br />
rt<br />
brown<br />
x<br />
yellow<br />
grey<br />
green<br />
max. 50 m<br />
Id.-Nr. on request<br />
3-36 <strong>TNC</strong> <strong>360</strong> 10 Handwheel input 8/95<br />
1<br />
2<br />
3<br />
4<br />
5<br />
6<br />
7<br />
8<br />
9<br />
1<br />
2<br />
3<br />
4<br />
5<br />
6<br />
7<br />
8<br />
9<br />
bl<br />
white<br />
rt<br />
brown<br />
x<br />
yellow<br />
grey<br />
green<br />
1<br />
2<br />
3<br />
4<br />
5<br />
6<br />
7<br />
8<br />
9<br />
LE<br />
X11<br />
LE X11<br />
1<br />
0V<br />
3<br />
+12V<br />
5<br />
DTR<br />
DXD<br />
RXD<br />
The adapter has a cable with 9-pin connector for the logic unit, two connecting terminals for the 24 V<br />
of the EMERGENCY OFF circuit of the control (max. load 1.2 A) and 3 connecting terminals for the<br />
permission switch circuit. The permission keys are make-contacts (24 V/1.2 A).<br />
10 Handwheel input
10.5 HRA 110 Handwheel Adapter<br />
The HRA 110 permits two or three HR 150 handwheels to be connected to an LE.<br />
The first two handwheels are permanently assigned to the X and Y axes. The third handwheel can<br />
be assigned to the X, Y, Z or IV axes either through an optional step switch or via machine<br />
parameter. (See Section "Handwheel" in Chapter "Machine Integration").<br />
HR 150<br />
max. 20 m<br />
HRA 110<br />
X1<br />
X2<br />
X3<br />
X31 24 V<br />
S2<br />
S1<br />
X23<br />
Achswahl (Option)<br />
AXIS SELECTION (OPTIONAL)<br />
Unterteilungsfaktorwahl (Option)<br />
INTERPOLATION FACTOR (OPTIONAL)<br />
Id.-Nr. 270 909..<br />
max. 50 m<br />
LE X11<br />
Another step switch (optional) is available for selecting the interpolation factor of the handwheels.<br />
The interpolation factor of the switch must be evaluated in the PLC and is displayed on the <strong>TNC</strong><br />
screen, but it cannot be changed via <strong>TNC</strong> keyboard. If the handwheels are mounted without the step<br />
switch, however, the interpolation factor is selected for each axis via <strong>TNC</strong> keyboard.<br />
Pin layout<br />
Handwheel inputs X1, X2, X3<br />
Pin Number Assignment<br />
1 I1+ 2 I1– 5 I2+ 6 I2– 7 I0+ 8 I0– 3 + 5 V (UP)<br />
4 0 V (UN)<br />
9 Inner screen<br />
Housing Outer screen<br />
8/95 <strong>TNC</strong> <strong>360</strong> 10 Handwheel input 3-37
Handwheel adapter output X23<br />
Pin layout<br />
Pin Number Assignment<br />
1 RTS<br />
2 0 V (U N)<br />
3 CTS<br />
4 +12V (U P)<br />
5 Do not use<br />
6 DSR<br />
7 RxD<br />
8 TxD<br />
9 DTR<br />
Direct current connection X31<br />
Pin layout<br />
Pin Number Assignment<br />
1 + 24 V<br />
2 0 V<br />
The 24 V power supply of the PLC must not be connected to the handwheel adapter, since this<br />
would cancel the electrical isolation of the PLC inputs and outputs. The handwheel adapter must be<br />
supplied by the 24V supply of the NC (low voltage electrical separation according to VDE 0160,<br />
5.88).<br />
3-38 <strong>TNC</strong> <strong>360</strong> 10 Handwheel input 8/95
11 PLC inputs/outputs<br />
The HEIDENHAIN contouring control <strong>TNC</strong> <strong>360</strong> C has a capacity of max. 119 PLC inputs and 62 PLC<br />
outputs.<br />
55 PLC inputs and 31 PLC outputs can be connected directly to the logic unit. One PLC I/O board<br />
(model PL 410 B or PL 410), with 64 PLC inputs and 31 PLC outputs, can be connected to the logic<br />
unit.<br />
11.1 <strong>Technical</strong> data<br />
PLC inputs<br />
Logic unit/ PL 410 PL 410 B PL 400<br />
Potential range<br />
”1” signal: Ui 13 V to 30.2 V 13 V to 30.2 V 16.5 V to 30 V<br />
”0” signal: Ui<br />
Current range<br />
–20 V to 3.2 V –20 V to 3.2 V –20 V to 4 V<br />
”1” signal: Ii 3.8 mA to 8.9 mA 2.5 mA to 6 mA 6.2 mA to12.6 mA<br />
”0” signal: Ii 1.0 mA at Ui = 3.2 V 0.65 mA at Ui = 3.2 V 1.6 mA at Ui = 4 V<br />
PLC outputs<br />
Transistor outputs with current limiting<br />
Logic unit PL 410 B/ PL 410 / PL 400<br />
Min. output potential<br />
for ”1” signal 3 V below supply voltage<br />
Nominal operating<br />
current per output 0.1 A 1.2 A<br />
Permissible load: resistive load, inductive load only with a quenching diode parallel to the inductance.<br />
No more that half of the outputs may be switched on at simultaneously.<br />
It is not permissible to short-circuit several outputs from the logic unit simultaneously.<br />
A single short circuit does not cause an overload.<br />
3-40 <strong>TNC</strong> <strong>360</strong> 11 PLC inputs/outputs 8/95
11.2 Connector assignment<br />
11.2.1 PLC inputs<br />
The PLC inputs I128 to I151 are on connector X27 for the machine control panel.<br />
X22 PLC inputs<br />
D-sub connector (37-pin female insert)<br />
Pin Number Assignment<br />
1 I0<br />
2 I1<br />
3 I2<br />
4 I3 acknowledgment for ”control is<br />
operational” test<br />
5 I4<br />
6 I5<br />
7 I6<br />
8 I7<br />
9 I8<br />
10 I9<br />
11 I10<br />
12 I11<br />
13 I12<br />
14 I13<br />
15 I14<br />
16 I15<br />
17 I16<br />
18 I17<br />
19 I18<br />
20 I19<br />
21 I20<br />
22 I21<br />
23 I22<br />
24 I23<br />
25 I24<br />
26 I25<br />
27 I26<br />
28 I27<br />
29 I28<br />
30 I29<br />
31 I30<br />
32 I31<br />
33, 34 Do not use<br />
35, 36, 37 0 V (PLC) test output; do not use<br />
Housing Outer screen<br />
8/95 <strong>TNC</strong> <strong>360</strong> 11 PLC inputs/outputs 3-41
11.2.2 PLC output<br />
The PLC outputs O0 to O30 and the "Control is operational" output are on connector X21 (PLC<br />
output). The PLC outputs O0 to O7 are also to be found on the connector for the machine control<br />
panel (X27).<br />
See also Section "Machine control panel".<br />
X21 PLC output<br />
D-sub connector (37-pin female insert)<br />
Pin Number Assignment<br />
1 O0<br />
2 O1<br />
3 O2<br />
4 O3<br />
5 O4<br />
6 O5<br />
7 O6<br />
8 O7<br />
9 O8<br />
10 O9<br />
11 O10<br />
12 O11<br />
13 O12<br />
14 O13<br />
15 O14<br />
16 O15<br />
17 O16<br />
18 O17<br />
19 O18<br />
20 O19<br />
21 O20<br />
22 O21<br />
23 O22<br />
24 O23<br />
25 O24 1)<br />
26 O25 1)<br />
27 O26 1)<br />
28 O27 1)<br />
29 O28 1)<br />
30 O29 1)<br />
31 O30 1)<br />
32 Do not use<br />
33 0 V (PLC) 1)<br />
34 Control operational<br />
Housing Outer screen<br />
1) Cannot be switched off via EMERGENCY STOP<br />
3-42 <strong>TNC</strong> <strong>360</strong> 11 PLC inputs/outputs 8/95
11.3 Connecting cable<br />
Please use only HEIDENHAIN connecting cables.<br />
The length of cable between the logic unit and the element to be switched is limited to 25 m.<br />
HEIDENHAIN recommends building a transfer unit with a terminal strip into the switch cabinet.<br />
This transfer unit can be connected to the logic unit with the HEIDENHAIN connecting cable Id.-Nr.<br />
244 017 ..<br />
max. 25 m<br />
Id.-Nr. 244 017..<br />
If operation is to be without transfer unit, then the HEIDENHAIN connecting cable<br />
Id.-Nr. 244 005 .. can be used.<br />
max. 25 m<br />
Id.-Nr. 244 005..<br />
Terminal color assignments:<br />
1 = GY/RD 14 = GN/BL 27 = YL/BK<br />
2 = BN/BK 15 = YL 28 = WH/YL<br />
3 = WH/BK 16 = RD 29 = GY/BL<br />
4 = GN/BK 17 = GY 30 = PK/BL<br />
5 = BN/RD 18 = BL 31 = PK/RD<br />
6 = WH/RD 19 = PK 32 = BN/BL<br />
7 = WH/GN 20 = WH/GY 33 = PK/GN<br />
8 = RD/BL 21 = YL/GY 34 = BN<br />
9 = YL/RD 22 = GN/RD 35 = YL/PK<br />
10 = GY/PK 23 = WH/PK 36 = VI<br />
11 = BK 24 = GY/GN 37 = WH<br />
12 = PK/BN 25 = YL/BN<br />
13 = YL/BL 26 = GY/BN<br />
If the connector is to be assembled in the field, a 37-pin solderable connector is available from<br />
HEIDENHAIN (Id.-Nr. 243 937 ZY).<br />
8/95 <strong>TNC</strong> <strong>360</strong> 11 PLC inputs/outputs 3-43
11.4 PLC I/O unit<br />
One PL 400 board with 63 PLC inputs, 31 PLC outputs and the "Control is operational" output can be<br />
connected to the logic unit. The PL 400 can be mounted directly on the logic unit. See Section<br />
"Power supply" for the power connection.<br />
11.4.1 PL 400 connection<br />
Pin connections on the logic unit<br />
X26 PLC I/O board (PL 400)<br />
D-sub connector (24-pin male insert)<br />
Pin Number Assignment<br />
1, 2, 3 0 V<br />
4 Serial IN 2<br />
5, 6, 17, 18 Do not use<br />
7 RESET<br />
8 WRITE EXTERN<br />
9 WRITE EXTERN<br />
10 A5<br />
11 A3<br />
12 A1<br />
13 Screen<br />
14, 15, 16 + 12 V (from PL 400)<br />
19 Serial IN 1<br />
20 EMERGENCY STOP<br />
21 Serial OUT<br />
22 Serial OUT<br />
23 A4<br />
24 A2<br />
25 A0<br />
Housing External shield<br />
8/95 <strong>TNC</strong> <strong>360</strong> 11 PLC inputs/outputs 3-45
Pin connections on the PL 400<br />
X10 Connections on the logic unit<br />
Pin connections as for connector X26 on the logic unit<br />
Connecting cable<br />
PL 400<br />
X10<br />
Id.-Nr. 250 481..<br />
max. 20 m<br />
3-46 <strong>TNC</strong> <strong>360</strong> 11 PLC inputs/outputs 8/95<br />
LE<br />
X26
11.4.2 PLC inputs/outputs on the PL 400<br />
The PLC inputs/outputs on the PL 400 are distributed among nine connectors.<br />
Assignments as follows:<br />
X1 X2<br />
Pin Number Assignment<br />
Pin Number Assignment<br />
PL 400<br />
PL 400<br />
1 O32 1 O43<br />
2 O33 2 O44<br />
3 O34 3 O45<br />
4 O35 4 O46<br />
5 O36 5 O47<br />
6 O37 6 O48<br />
7 O38 7 O49<br />
8 O39 8 O50<br />
9 O40 9 O51<br />
10 O41 10 O52<br />
11 O42 11 O53<br />
12 Do not use 12 Do not use<br />
X3 X4<br />
Pin Number Assignment<br />
Pin Number Assignment<br />
PL 400<br />
PL 400<br />
1 O54 1 I126<br />
2 O55 2 I74<br />
3 O562) 3 I73<br />
4 O572) 4 I72<br />
5 O58 5 I71<br />
6 O592) 6 I70<br />
7 O602) 7 I69<br />
8 O612) 8 I68<br />
9 O622) 9 I67<br />
10 Control is operational 10 I66<br />
11 Do not use 11 I65<br />
12 +24 V cannot be switched<br />
off via ext. EMERGENCY<br />
OFF1) 12 I64<br />
1) +24 V must always be connected, even if the outputs are not used.<br />
2) Outputs cannot be switched off via EMERGENCY STOP<br />
8/95 <strong>TNC</strong> <strong>360</strong> 11 PLC inputs/outputs 3-47
X5 X6<br />
Pin Number Assignment<br />
Pin Number Assignment<br />
PL 400<br />
PL 400<br />
1 I86 1 I98<br />
2 I85 2 I97<br />
3 I84 3 I96<br />
4 I83 4 I95<br />
5 I82 5 I94<br />
6 I81 6 I93<br />
7 I80 7 I92<br />
8 I79 8 I91<br />
9 I78 9 I90<br />
10 I77 10 I89<br />
11 I76 11 I88<br />
12 I75 12 I87<br />
X7 X8<br />
Pin Number Assignment<br />
Pin Number Assignment<br />
PL 400<br />
PL 400<br />
1 I110 1 I122<br />
2 I109 2 I121<br />
3 I108 3 I120<br />
4 I107 4 I119<br />
5 I106 5 I118<br />
6 I105 6 I117<br />
7 I104 7 I116<br />
8 I103 8 I115<br />
9 I102 9 I114<br />
10 I101 10 I113<br />
11 I100 11 I112<br />
12 I99 12 I111<br />
X9<br />
Pin Number Assignment<br />
PL 400<br />
1 Do not use<br />
2 Do not use<br />
3 Do not use<br />
4 I125<br />
5 I124<br />
6 I123<br />
The connections to the PLC inputs/outputs must be made with leads with a conductor<br />
cross-section ≥ ∅ 0.14 mm² Cu. The maximum permissible lead length is 20 m.<br />
3-48 <strong>TNC</strong> <strong>360</strong> 11 PLC inputs/outputs 8/95
11.5 PL 410 B / PL 410 PLC I/O unit<br />
The PL 410 B / PL 410 has 64 PLC inputs, 31 PLC outputs and one "control-is-operational" output.<br />
In its interface to the LE and its load capacity of inputs and outputs it is identical to the PL 400.<br />
The analog inputs (X15 to X22) of the PL 410 cannot be evaluated in the LE <strong>360</strong> C! The DIL switch<br />
on the PCB of the PL 410 must therefore be set to OFF (as is stated on the housing). The PLC<br />
outputs are powered in groups and are therefore switched off via EMERGENCY STOP in groups.<br />
Connecting cable<br />
PL 410B<br />
PL 410<br />
X1<br />
Id.-Nr. 263 662 ..<br />
max. 20 m<br />
8/95 <strong>TNC</strong> <strong>360</strong> 11 PLC inputs/outputs 3-49<br />
LE
11.5.1 PLC inputs/PLC outputs on the PL 410<br />
The PLC inputs and outputs on the PL 410 are distributed over 6 switches. The 16-pin connectors<br />
are arranged in vertical pairs.<br />
PLC inputs<br />
Pin layout<br />
X3 X4<br />
Pin Number Assignment Pin Number Assignment<br />
1 I64 1 I80<br />
2 I65 2 I81<br />
3 I66 3 I82<br />
4 I67 4 I83<br />
5 I68 5 I84<br />
6 I69 6 I85<br />
7 I70 7 I86<br />
8 I71 8 I87<br />
9 I72 9 I88<br />
10 I73 10 I89<br />
11 I74 11 I90<br />
12 I75 12 I91<br />
13 I76 13 I92<br />
14 I77 14 I93<br />
15 I78 15 I94<br />
16 I79 16 I95<br />
X5 X6<br />
Pin Number Assignment Pin Number Assignment<br />
1 I96 1 I112<br />
2 I97 2 I113<br />
3 I98 3 I114<br />
4 I99 4 I115<br />
5 I100 5 I116<br />
6 I101 6 I117<br />
7 I102 7 I118<br />
8 I103 8 I119<br />
9 I104 9 I120<br />
10 I105 10 I121<br />
11 I106 11 I122<br />
12 I107 12 I123<br />
13 I108 13 I124<br />
14 I109 14 I125<br />
15 I110 15 I126<br />
16 I111 16 I127<br />
3-50 <strong>TNC</strong> <strong>360</strong> 11 PLC inputs/outputs 8/95
PLC outputs<br />
Assignment of the grouped power supply:<br />
Terminal Assignment PL 410 /PL 410 B<br />
X9 0 V<br />
X10 +24V PL supply and "Control is ready" (cannot be<br />
switched of via EMERGENCY STOP)<br />
X11 +24 V supply O32 - O39<br />
X12 +24 V supply O40 - O47<br />
X13 +24 V supply O48 - O55<br />
X14 +24 V supply O56 - O62<br />
Pin Layout<br />
X7 X8<br />
Pin Number Assignment PL 410/PL<br />
Pin Number Assignment PL 410/PL<br />
410 B<br />
410 B<br />
1 O32 1 O48<br />
2 O33 2 O49<br />
3 O34 3 O50<br />
4 O35 4 O51<br />
5 O36 5 O52<br />
6 O37 6 O53<br />
7 O38 7 O54<br />
8 O39 8 O55<br />
9 O40 9 O56<br />
10 O41 10 O57<br />
11 O42 11 O58<br />
12 O43 12 O59<br />
13 O44 13 O60<br />
14 O45 14 O61<br />
15 O46 15 O62<br />
16 O47 16 "Control is operational"<br />
8/95 <strong>TNC</strong> <strong>360</strong> 11 PLC inputs/outputs 3-51
12 Machine Control Panel<br />
A separate 37-pin female connector (X27) is mounted on the logic unit for the connection to the<br />
manufacturer's proprietary machine control panel. This connector includes the PLC inputs I128 to<br />
I151, the PLC outputs O0 to O7, as well as the 0 V and +24 V of the PLC power supply. The PLC<br />
inputs I128 to I151 may be connected only with the power supply from pins 36 and 37, since this<br />
power supply is internally secured as required.<br />
12.1 Pin layout<br />
X27 Machine control panel<br />
D-sub connector (37-pin female insert)<br />
Pin Number Assignment<br />
1 I128<br />
2 I129<br />
3 I130<br />
4 I131<br />
5 I132<br />
6 I133<br />
7 I134<br />
8 I135<br />
9 I136<br />
10 I137<br />
11 I138<br />
12 I139<br />
13 I140<br />
14 I141<br />
15 I142<br />
16 I143<br />
17 I144<br />
18 I145<br />
19 I146<br />
20 I147<br />
21 I148<br />
22 I149<br />
23 I150<br />
24 I151<br />
25 Do not use<br />
26 O0<br />
27 O1<br />
28 O2<br />
29 O3<br />
30 O4<br />
31 O5<br />
32 O6<br />
33 O7<br />
34, 35 0 V (PLC) 1)<br />
36, 37 + 24 V (PLC) 2)<br />
1) Externally available PLC reference potential for the outputs O0-O7<br />
2) Externally available (via fuse) PLC supply voltage for the inputs.<br />
8/95 <strong>TNC</strong> <strong>360</strong> 12 Machine Control Panel 3-53
12.2 Connecting cable<br />
Please use only HEIDENHAIN connecting cables.<br />
HEIDENHAIN recommends that a 37-pin D-subminiature connector should be mounted on the<br />
machine control panel. The machine control panel can be connected to the logic unit with the<br />
standard HEIDENHAIN connecting cable Id.-Nr. 263 954 ..<br />
max. 25 m<br />
Id.-Nr. 263 954..<br />
If the machine control panel does not have a 37-pin D-subminiature connector, the HEIDENHAIN<br />
connecting cable Id.-Nr. 244 005 .. may be used.<br />
max. 25 m<br />
Id.-Nr. 244 005..<br />
For the assignments of the multi-core conductors see Section "PLC inputs/outputs".<br />
If for any reason the manufacturers of the machine have to produce their own cable, a 37-pin<br />
connector is available from HEIDENHAIN (Id.-Nr. 243 937 ZY).<br />
3-54 <strong>TNC</strong> <strong>360</strong> 12 Machine Control Panel 8/95
13 <strong>TNC</strong> Keyboard<br />
The <strong>TNC</strong> keyboard TE 355 A/B is connected to the logic unit by a connecting cable.<br />
13.1 Pin connections<br />
On the logic unit<br />
X23 <strong>TNC</strong> keyboard (TE 355 A/B)<br />
D-sub connector (37-pin female insert)<br />
Pin Number Assignment<br />
1 RL0<br />
2 RL1<br />
3 RL2<br />
4 RL3<br />
5 RL4<br />
6 RL5<br />
7 RL6<br />
8 RL7<br />
9 Do not use<br />
10 Do not use<br />
11 Do not use<br />
12 Do not use<br />
13 Do not use<br />
14 Do not use<br />
15 Do not use<br />
16 Do not use<br />
17 Do not use<br />
18 Do not use<br />
19 Do not use<br />
20 SL0<br />
21 SL1<br />
22 SL2<br />
23 SL3<br />
24 SL4<br />
25 SL5<br />
26 SL6<br />
27 SL7<br />
28 Do not use<br />
29 Do not use<br />
30 Do not use<br />
31 Do not use<br />
32 Do not use<br />
33 Do not use<br />
34 Spindle override (wiper)<br />
35 Feed override (wiper)<br />
36 + 5 V override potentiometer<br />
37 0 V override potentiometer<br />
Housing External screen<br />
3-56 <strong>TNC</strong> <strong>360</strong> 13 <strong>TNC</strong> Keyboard 8/95
13.2 Connecting cable<br />
Please use only HEIDENHAIN connecting cables.<br />
TE 355<br />
Standard cable<br />
Id.-Nr. 263 954 ..<br />
max. 25 m<br />
Extension cable<br />
Id.-Nr. 263 955 ..<br />
8/95 <strong>TNC</strong> <strong>360</strong> 13 <strong>TNC</strong> Keyboard 3-57<br />
LE
3-58 <strong>TNC</strong> <strong>360</strong> 14 Dimensions 8/95<br />
7.3±0.3<br />
.29±.012"<br />
326±0.5<br />
12.93"±.02" 160 134<br />
6.34" 5.3"<br />
84<br />
3.3" 10<br />
.4"<br />
R 40<br />
Ø 8<br />
DIA .32"<br />
Ø10,3<br />
DIA .4"<br />
R 1.58 "<br />
R 50<br />
R 2.4"<br />
8<br />
.31"<br />
10<br />
4"<br />
0<br />
100.5<br />
3.95"<br />
36 80±0.2<br />
1.42" 3.15"±.008"<br />
Anschlußkabel dürfen Schwenkbereich der<br />
Steuerung nicht beeinträchtigen!<br />
CONNECTION CABELS SHOULD NOT INTERFERE<br />
WITH TILTING RANGE OF CONTROL UNIT!<br />
10.5<br />
.41"<br />
12.5<br />
.5"<br />
9<br />
.35"<br />
25<br />
1"<br />
0<br />
476+5<br />
560<br />
22"<br />
18.8"+.02" 456+2<br />
18"+.08"<br />
Befestigungsmöglichkeit PL 400<br />
(Befestigungsschrauben M3x5)<br />
MOUNTING POSSIBILITY PL 400<br />
(FIXING SCREWS M3x5)<br />
210±0.2<br />
8.26"±.008"<br />
392<br />
15.43"<br />
311.5<br />
12.26"<br />
M3 (Einschraublänge max. 3)<br />
M3 (LENGTH OF ENGAGEMENT .12")<br />
427<br />
16.8"<br />
340±0.2<br />
13.39"±.008"<br />
411.5<br />
16.2"<br />
13<br />
.51"<br />
15<br />
.6"<br />
36<br />
20<br />
.78"<br />
328<br />
12.9" 280±o.2<br />
9.25"±.008"<br />
235±0,2<br />
9.25"±.008" 267±0,2<br />
10.5"±.008"<br />
7<br />
.28"<br />
45<br />
1.77"<br />
272.5<br />
10.73"<br />
Schutzerde M5<br />
PROTECTION EARTH M5<br />
145<br />
5.7"<br />
83.5<br />
3.3"<br />
132.5±0,2<br />
5.2"±.08"<br />
140.5±0.2<br />
5.53"±.08"<br />
R 325<br />
R12.8"<br />
Betriebserde M6<br />
SYSTEM EARTH M6<br />
Schwenkbereich der Steuerung<br />
FIELD OF SWIVEL FRAME TRAVERSE<br />
14.1 LE <strong>360</strong> C<br />
14 Dimensions
14.2 Keyboard units<br />
14.2.1 TE 355 A<br />
274<br />
10.787"<br />
31+5<br />
1.16"+.19"<br />
25<br />
.98"<br />
6±0.2<br />
.236"±.008"<br />
262<br />
10.315"<br />
25<br />
.98"<br />
1<br />
.039"<br />
6±0.2<br />
.236"±.008"<br />
0<br />
8+1<br />
DIA.315"+.039"<br />
4<br />
.157"<br />
2<br />
.079"<br />
10<br />
DIA.394"<br />
224+0.5<br />
8.819"+.020"<br />
5.5<br />
.217"<br />
23.5<br />
0.925"<br />
55<br />
2.165"<br />
112<br />
4.409"<br />
269±0.2<br />
10.591"±.008"<br />
281<br />
11.063"<br />
Frontplattenausschnitt 236+0.5 x 224+0.5<br />
FRONT PANEL OPENING 9.21"+.020" x 8.819"+0.20"<br />
Dichtung 3 dick, im eingebauten Zustand 2 dick<br />
GASKET .118" THICK INCORPORATED .079 THICK<br />
R60<br />
R2.36<br />
X2<br />
234+2<br />
9.212"+.079"<br />
236+0.5<br />
9.291"+.020"<br />
Massenanschluß M5<br />
GROUND CONNECTION M5<br />
8/95 <strong>TNC</strong> <strong>360</strong> 14 Dimensions 3-59<br />
18<br />
.708"<br />
222+2<br />
8.740"+.079"<br />
Frontplattenausschnitt<br />
FRONT PANEL OPENING
14.2.2 TE 355 B<br />
4<br />
.157"<br />
5.5<br />
.217"<br />
1<br />
.40"<br />
2<br />
.079"<br />
6±0.2<br />
.236"±.008"<br />
96.5<br />
3.80"<br />
66.5<br />
2.62"<br />
Ø8+1<br />
DIA.351"+.04"<br />
193±0.2<br />
7.598"±.008"<br />
51<br />
2.01"<br />
Ø10<br />
DIA .394"<br />
19<br />
.748"<br />
Dichtung 3 dick, im eingebauten Zustand 2 dick<br />
GASKET .118" THICK INCORPORATED .079 THICK<br />
X1<br />
191±0.5<br />
752"±.020"<br />
Montagefläche<br />
MOUNTING SURFACE<br />
338±0.2<br />
13.307"±.008"<br />
248+1<br />
9.76"+.040"<br />
X2<br />
350<br />
13.78" 338±0.2<br />
R60<br />
R2.36"<br />
300±0.5<br />
11.81"±.020"<br />
0.5<br />
.02"<br />
13.307"±.008"<br />
3-60 <strong>TNC</strong> <strong>360</strong> 14 Dimensions 8/95<br />
75±0.4<br />
2.95"±.016"<br />
1<br />
.040"<br />
6±0.2<br />
.236"±.008"<br />
193±0.2<br />
7.598"±.008"<br />
8.5±0.4<br />
.335"±.016"<br />
187.5+1<br />
7.38"+.04"<br />
205<br />
8.07"<br />
31+5<br />
1.16+.19"<br />
25<br />
.98"<br />
50+5<br />
1.97"+.20"<br />
Frontplattenausschnitt<br />
FRONT PANEL OPENING
14.3 Visual display units<br />
14.3.1 BE 212<br />
274<br />
10.79"<br />
6±0.2<br />
.236"±.008"<br />
6±0.2<br />
20<br />
.79"<br />
350<br />
13.78"<br />
.236"±.008" 338±0.2<br />
262±0.2<br />
10.315"±.008"<br />
6<br />
.236"<br />
244±0.5<br />
9.61"±.020"<br />
5<br />
.197"<br />
328+0.5<br />
12.91"+.020"<br />
Montagefläche<br />
MOUNTING SURFACE<br />
13.307"±.008"<br />
322.5<br />
12.70"<br />
max. 300<br />
MAX. 11.80"<br />
40<br />
1.58"<br />
Freiraum für Belüftung<br />
FREESPACE FOR AIR VENTILATION<br />
20<br />
.79"<br />
5.5<br />
.217"<br />
196<br />
7.72"<br />
0.5 Frontplattenausschnitt<br />
.02"<br />
FRONT PANEL OPENING<br />
280<br />
11.02"<br />
Freiraum für Belüftung<br />
FREESPACE FOR AIR VENTILATION<br />
max. 303<br />
MAX. 11.93"<br />
8/95 <strong>TNC</strong> <strong>360</strong> 14 Dimensions 3-61<br />
max. 242<br />
MAX. 9.53"<br />
47.5<br />
1.87"<br />
max. 160<br />
MAX. 6.30"<br />
Z<br />
Ø7.8<br />
DIA .307"+.008"<br />
2–0.5<br />
.08"–.02"<br />
94<br />
3.20"<br />
30<br />
1.18"<br />
30<br />
1.18"<br />
1<br />
.040"<br />
5<br />
.197"<br />
Ø10<br />
DIA .394"<br />
26<br />
1.02"<br />
Dichtung 3 dick<br />
im eingebauten Zustand 2 dick<br />
GASKET .118" THICK<br />
INCORPORATED CONDITION .079" THICK<br />
max. 326<br />
MAX. 12.83"<br />
Z<br />
min. 12<br />
MIN. .47"<br />
min. 20<br />
MIN. .79"
3-62 <strong>TNC</strong> <strong>360</strong> 14 Dimensions 8/95<br />
205<br />
8.07"<br />
6±0.2<br />
.236"±.008"<br />
M5<br />
193±0.2<br />
7.598"±.008"<br />
6±0.2<br />
.236"±.008"<br />
11,5–0.5<br />
.45"–.02"<br />
170+1<br />
6.7"+.04"<br />
6.5–0.5<br />
.26"–.02"<br />
14±1<br />
.55"±.04"<br />
5.5<br />
.22"<br />
281<br />
11.06"<br />
253±1<br />
9.96"±.04"<br />
269±0.2<br />
10.59"±.008"<br />
256+1<br />
10.03"+.04"<br />
R40<br />
R 1.6"<br />
Ø8<br />
DIA .32"<br />
0,5<br />
.02"<br />
Montagefläche<br />
MOUNTING SURFACE<br />
Frontplattenausschnitt<br />
FRONT PANEL OPENING<br />
Masseanschluß M5<br />
GROUND CONNECTION M5<br />
20±1<br />
.79"±.04"<br />
165±1<br />
6.5"±.04"<br />
55+5<br />
2.2"+.2"<br />
4<br />
.16"<br />
8+1<br />
.32"+.04"<br />
1<br />
.04"<br />
Ø10<br />
Dichtung 3 dick<br />
GASKET .12" THICK<br />
14.3.2 BF 110
14.4 Input/Output units<br />
14.4.1 PL 410 B<br />
228<br />
8.98"<br />
9<br />
.35"<br />
210±0.2<br />
8.268±.008"<br />
33+2<br />
1.3"+.08"<br />
23.5<br />
.93"<br />
ø9.3<br />
DIA.37"<br />
282<br />
11.1"<br />
235±0.2<br />
9.252±.008"<br />
18±0.5<br />
.7±.02"<br />
3.6<br />
.14"<br />
Masseanschluß M5<br />
GROUND CONNECTION M5<br />
PL-Eingänge<br />
PL INPUTS<br />
PL-Ausgänge<br />
PL OUTPUTS<br />
8<br />
.315"<br />
1±0.5<br />
.04+.02"<br />
52.5<br />
2.07"<br />
47.5<br />
1.87"<br />
8/95 <strong>TNC</strong> <strong>360</strong> 14 Dimensions 3-63
14.4.2 PL 410<br />
228<br />
8.98"<br />
9<br />
.35"<br />
210±0.2<br />
8.268±.008"<br />
33+2<br />
1.3"+.08"<br />
23.5<br />
.93"<br />
ø9.3<br />
DIA.37"<br />
282<br />
11.1"<br />
235±0.2<br />
9.252±.008"<br />
18±0.5<br />
.7±.02"<br />
3.6<br />
.14"<br />
Masseanschluß M5<br />
GROUND CONNECTION M5<br />
PL-Eingänge<br />
PL INPUTS<br />
PL-Ausgänge<br />
PL OUTPUTS<br />
1±0.5<br />
.04+.02"<br />
52.5<br />
2.07"<br />
47.5<br />
1.87"<br />
3-64 <strong>TNC</strong> <strong>360</strong> 14 Dimensions 8/95
14.4.3 PL 400<br />
M4<br />
225+1<br />
8.86"+.04"<br />
20.5<br />
.8"<br />
61.5<br />
2.42"<br />
5<br />
.2"<br />
235±0.2<br />
9.252"±.008"<br />
58.5<br />
2.30"<br />
14.5<br />
.57"<br />
79<br />
3.11"<br />
14.5<br />
.57"<br />
ø4.5<br />
DIA.177"<br />
10<br />
.4"<br />
31<br />
1.22"<br />
37.5<br />
1.48"<br />
67<br />
2.64"<br />
•<br />
80±0.2<br />
3.15".008"<br />
0<br />
<strong>360</strong>+1<br />
14.2"+.04"<br />
363+1<br />
14.3"+.04"<br />
391+1<br />
15.4"+.04"<br />
210±0.2<br />
8.268".008"<br />
340±0.2<br />
13.386".008"<br />
8/95 <strong>TNC</strong> <strong>360</strong> 14 Dimensions 3-65<br />
245+1<br />
9.65"+.04"
14.5 Panel-mounted handwheels<br />
14.5.1 HR 130<br />
DIA 2.283"<br />
Ø58<br />
Ø36 f8<br />
DIA 1.4173–.0010"<br />
DIA 1.4173–.0025"<br />
Ø10–0.01<br />
Ø10–0.02<br />
DIA .3937–.0004"<br />
DIA .3937–.0008"<br />
19.5+1<br />
.768+.04"<br />
10<br />
.394"<br />
36–1.5<br />
1.417–.06"<br />
12.5<br />
.492"<br />
3-66 <strong>TNC</strong> <strong>360</strong> 14 Dimensions 8/95<br />
14<br />
.551"<br />
Ø4.4<br />
DIA .173“<br />
Ø0.2<br />
DIA .008"<br />
3x<br />
48<br />
1.890"<br />
16<br />
.630"<br />
Befestigungsgewinde M3 x 5<br />
FIXING HOLE M3 x .197"<br />
30°<br />
120°<br />
3 x 120°
14.5.2 HR 150<br />
DIA 2.283"<br />
Ø58<br />
Ø0.2 B<br />
DIA .008" B<br />
C<br />
Ø36 f8<br />
DIA 1.4173–.0010"<br />
DIA 1.4173–.0025"<br />
Dimensions<br />
0.2<br />
.008"<br />
0.1<br />
.004"<br />
Ø10–0.01<br />
Ø10–0.02<br />
DIA .3937–.0004"<br />
DIA .3937–.0008"<br />
B<br />
19.5+1<br />
.768+.04"<br />
A<br />
A<br />
A<br />
A<br />
10<br />
.394"<br />
36–1.5<br />
1.417–.06"<br />
A<br />
8/95 <strong>TNC</strong> <strong>360</strong> 14 Dimensions 3-67<br />
12.5<br />
.492"<br />
14<br />
.551"<br />
Ø6<br />
DIA .236“<br />
SW 5.5<br />
HEX FLATS<br />
48<br />
1.890"<br />
16<br />
.630"<br />
52<br />
2.047“<br />
M3<br />
30°<br />
120°<br />
Ø0.3 C<br />
DIA .012" C<br />
3 x 120°<br />
DIA 1.102“<br />
Ø28
14.5.3 Handwheel adapter HRA 110 (for HR 150)<br />
58 – 1<br />
2.28 – .04"<br />
1<br />
1 ± 0.5<br />
.04 ± .02"<br />
53<br />
2.08"<br />
116 ± 0.2<br />
4.567 ± .008"<br />
14<br />
.55"<br />
9<br />
.35"<br />
X<br />
248<br />
9.76"<br />
Ø 6<br />
DIA .24"<br />
230 ± 0.2<br />
9.055 ± .008"<br />
Datenausgang HRA<br />
DATA INTERFACE HRA<br />
X23<br />
X<br />
S1 S2<br />
HR 150<br />
X31 24V<br />
+ –<br />
Masseanschluß M5<br />
GROUND CONNECTION M5<br />
116 ± 0.2<br />
4.567 ± .008"<br />
45 – 1<br />
1.8 – .04"<br />
207 + 2<br />
8.15 + .08"<br />
3-68 <strong>TNC</strong> <strong>360</strong> 14 Dimensions 8/95
14.5.4 Handwheel knobs<br />
Knob, small<br />
Ø61<br />
DIA 2.402"<br />
Ø10<br />
DIA .394"<br />
max. 10<br />
MAX .394"<br />
1<br />
.0394"<br />
18<br />
.709" (18)<br />
(.709")<br />
Frontplatte (2)<br />
FRONT PANEL (.079")<br />
3x<br />
HR ...<br />
SW 14<br />
7<br />
.276"<br />
8/95 <strong>TNC</strong> <strong>360</strong> 14 Dimensions 3-69<br />
M3<br />
18<br />
.709"<br />
SW 5.5<br />
6<br />
.236"<br />
M3
Knob, large<br />
max. 15.5<br />
MAX .610"<br />
SW 1.5<br />
48<br />
1.89"<br />
27<br />
1.063"<br />
Frontplatte (2)<br />
FRONT PANEL (.079")<br />
(12)<br />
(.472")<br />
3x<br />
HR ...<br />
SW 5.5<br />
M3<br />
12<br />
.472"<br />
7<br />
.276"<br />
90<br />
3.543"<br />
Ø10 F7<br />
DIA .3937 +.0011"<br />
DIA .3937 +.0005"<br />
6<br />
.236"<br />
3-70 <strong>TNC</strong> <strong>360</strong> 14 Dimensions 8/95<br />
M3
Knob, ergonomic<br />
SW 2<br />
10<br />
.394"<br />
6<br />
.236"<br />
17.7<br />
.697"<br />
22<br />
.866"<br />
Frontplatte (2)<br />
FRONT PANEL (.079")<br />
4<br />
.158"<br />
(12)<br />
(.472")<br />
3x<br />
SW 5.5<br />
HR ...<br />
M3<br />
12<br />
.472"<br />
7<br />
.276"<br />
6<br />
.236"<br />
70<br />
2.756"<br />
Ø10 H7<br />
DIA .3937 +.0006"<br />
8/95 <strong>TNC</strong> <strong>360</strong> 14 Dimensions 3-71<br />
M3
14.6 Cable adapter<br />
Cable adapter for TS 120<br />
Id.-Nr. 244 891..<br />
8<br />
.315"<br />
3<br />
.118"<br />
55<br />
2.165"<br />
M5<br />
ø55<br />
DIA2.165"<br />
max. 7<br />
MAX.276"<br />
32x15<br />
1.26"x.59"<br />
38<br />
1.469"<br />
80<br />
3.150"<br />
Cable adapter for HR 330 Id.-Nr. 249 889 ..<br />
Cable adapter for HR 332 Id.-Nr. 274 556 ..<br />
44<br />
1.732"<br />
34<br />
1.339"<br />
5.5<br />
.217"<br />
ø47.2±0.3<br />
DIA1.858".012"<br />
20<br />
.787"<br />
ø36<br />
DIA1.417"<br />
ø8<br />
DIA.315"<br />
14<br />
.551"<br />
S M4<br />
52<br />
2.047"<br />
54<br />
2.126"<br />
40<br />
1.575"<br />
23<br />
.906"<br />
4<br />
.158"<br />
Mounting when housing thickness S≤4 Mounting when housing thickness S>4<br />
23<br />
.906"<br />
37<br />
1.457"<br />
44<br />
1.732"<br />
3-72 <strong>TNC</strong> <strong>360</strong> 14 Dimensions 8/95<br />
S
RS-232-C/V.24 Adapter Block<br />
21+0.5<br />
.83"+.02"<br />
7<br />
.275"<br />
38<br />
1.5"<br />
10.5<br />
.41"<br />
9<br />
.35"<br />
78±0.2<br />
3.071".008"<br />
92<br />
3.62"<br />
Opening for mounting the adapter<br />
78±0.2<br />
3.071*.008"<br />
60+1<br />
2.36"+.04" 5<br />
.2"<br />
31.5<br />
1.24"<br />
8/95 <strong>TNC</strong> <strong>360</strong> 14 Dimensions 3-73<br />
M4
LE - Power supply<br />
VDE 0551<br />
1<br />
Selectable<br />
connection<br />
3<br />
+24V<br />
0V<br />
+24V<br />
0V<br />
Emergency stop<br />
controlled<br />
PLC - Power supply<br />
VDE 0160<br />
basic insulation<br />
+24V<br />
X31 1<br />
0V<br />
2<br />
X23 1<br />
X9<br />
2<br />
X14<br />
X13<br />
X12<br />
X11<br />
X10<br />
Emergency Stop<br />
X8<br />
SI<br />
0V<br />
X7<br />
8 x 1,2A<br />
+5V<br />
Insulated<br />
0V<br />
stab. supply<br />
voltages<br />
Power supply<br />
X7<br />
8 x 1,2A<br />
Optoc.<br />
X8<br />
8 x 1,2A<br />
X8<br />
7 x 1,2A<br />
LE <strong>360</strong><br />
X3-X6<br />
64 Inputs<br />
1<br />
2<br />
X1 X2 X3 X4<br />
Unit PL 410B<br />
X1 X26<br />
X2<br />
6mm 2<br />
6mm 2<br />
6mm 2<br />
B<br />
1<br />
0<br />
Machine Encoders<br />
3<br />
SI<br />
X24/1<br />
SI<br />
X24/2<br />
+24V- +24V-<br />
4<br />
X24/3<br />
0V<br />
6<br />
X6 X12<br />
X21 X21 X21 X21 X22<br />
7x0,1A<br />
Emergency Stop<br />
0,1A<br />
2<br />
6mm<br />
6mm<br />
2<br />
6mm<br />
2<br />
2<br />
6mm<br />
2<br />
6mm<br />
Triggering<br />
touch probe<br />
Optoc.<br />
C X25<br />
8/95 <strong>TNC</strong> <strong>360</strong> 15 Grounding Diagram 3-75<br />
16x0,1A<br />
8x0,1A<br />
32 Inputs<br />
C<br />
V<br />
C<br />
C<br />
Optoc.<br />
Test point 1<br />
(Fault voltg. 0V/<br />
housing)<br />
L C<br />
C<br />
B<br />
X11<br />
X9<br />
X23<br />
X27<br />
X8<br />
8 x24 Matrix<br />
8 x 0,1A<br />
1,2,3,4<br />
(Spindel)<br />
Spindel<br />
V<br />
Test point 2<br />
(Fault voltg.with grounded nominal<br />
value input)<br />
Operating panel<br />
Adapter<br />
V.24<br />
Handwheel<br />
Display<br />
Unit<br />
Keyboard<br />
Unit<br />
24 Inputs Machine<br />
Op. Panel<br />
Terminal box<br />
Analog<br />
input<br />
To prevent earth circuits,<br />
the measuring voltages should not be grounded.<br />
If it must be grounded,<br />
ensure that the line is short and noise immune.<br />
A grounded nominal input<br />
results in anearth circuit.<br />
Therefore ensure that the 0V<br />
and ground line are short and noise immune<br />
*)<br />
2<br />
4mm<br />
Measuring voltage<br />
0V<br />
15 Grounding Diagram<br />
0V<br />
0V<br />
1-Axis<br />
2-Axis<br />
3-Axis<br />
4-Axis<br />
(Spindle)<br />
Motor control<br />
with nominal value<br />
difference input<br />
Spindle<br />
Motor control<br />
without nominal<br />
value difference<br />
input
<strong>TNC</strong> <strong>360</strong> C<br />
<strong>TNC</strong> <strong>360</strong> C 25m<br />
Encoders<br />
20m<br />
60m<br />
VL<br />
262 006 ..<br />
Cable assembly<br />
VL<br />
262 006 ..<br />
VB<br />
262 004 ..<br />
VL<br />
262 011 ..<br />
VB<br />
262 009 ..<br />
BF 110<br />
267 209 01<br />
VB<br />
250 477 ..<br />
4 inputs<br />
VL<br />
254 640 ..<br />
1 input<br />
or BE 212<br />
or 242 370 01<br />
VB<br />
242 874 ..<br />
20m<br />
25m<br />
VB<br />
263 954 ..<br />
VL<br />
244 504 ..<br />
VB<br />
244 005 ..<br />
Connection box<br />
251 249 01<br />
TE 355 A<br />
255 015 01<br />
VL<br />
263 955 ..<br />
VB<br />
263 954 ..<br />
15-pin male connector<br />
243 971 ZY<br />
VB<br />
290 109 ..<br />
VB<br />
290 110 ..<br />
VL<br />
263 955 ..<br />
Machine<br />
operating<br />
panel<br />
LE <strong>360</strong> C<br />
Nominal value<br />
output<br />
or TE 355 B<br />
255 016 01<br />
PLC I / 0<br />
VB<br />
289 111 ..<br />
8/95 <strong>TNC</strong> <strong>360</strong> 16 Cable Overview 3-77<br />
PL 410 B<br />
263 371 12<br />
VL<br />
281 429 ..<br />
VB<br />
244 005 ..<br />
VB<br />
270 909 ..<br />
VB<br />
239 760 ..<br />
37-pin male connector<br />
243 937 ZY<br />
KA<br />
274 543 ..<br />
VB<br />
274 539 ..<br />
VB<br />
263 954 .. 25m<br />
20m<br />
KA<br />
296 466 ..<br />
50m<br />
HRA 110<br />
261 097 01<br />
RS-232-C Adapter block<br />
239 758 01<br />
VL: Extension cable<br />
– for separation points with connecting cable<br />
– for extending existing connecting cable<br />
VB: Connecting cable between two components<br />
that do not have their own cable.<br />
KA: Cable adapter 30.03.95<br />
VB<br />
296 467 ..<br />
Included with FE<br />
274 545 01<br />
max. 20 m<br />
max. 20 m<br />
Accessories<br />
50m<br />
20m<br />
EA 550<br />
262 904 01<br />
30m<br />
HR 130<br />
254 040 ..<br />
HR 150<br />
HR 150<br />
HR 150<br />
257 061 ..<br />
50m<br />
TS 120<br />
265 348 ..<br />
TS 220<br />
294 242 ..<br />
16 Cable Overview<br />
HR 410<br />
296 469 01<br />
Step switch<br />
270 908 ..<br />
FE 401 B<br />
251 029 01<br />
TS 630<br />
293 714 ..
Machine Integration – Contents 4<br />
1 Machine axes 4-5<br />
1.1 Measuring systems 4-5<br />
1.1.1 Signal period 4-5<br />
1.1.2 Direction of traverse 4-7<br />
1.1.3 Measuring system monitoring 4-8<br />
1.2 Axis designation 4-11<br />
1.2.1 Assignment 4-12<br />
1.2.2 Current tool axis 4-13<br />
1.3 VDU display 4-13<br />
1.4 Traverse ranges 4-15<br />
1.5 Lubrication pulse 4-18<br />
1.6 Axis-error compensation 4-21<br />
1.6.1 Backlash compensation 4-21<br />
1.6.2 Compensation for reversal errors in circular motion 4-22<br />
1.6.3 Linear axis-error compensation 4-23<br />
1.6.4 Nonlinear axis error compensation 4-24<br />
1.6.5 Temperature compensation 4-29<br />
1.7 PLC positioning 4-32<br />
1.8 PLC Axes 4-35<br />
2 Reference marks 4-36<br />
2.1 Passing over the reference marks 4-38<br />
2.1.1 Measuring systems with distance-coded reference marks 4-39<br />
2.1.2 Measuring systems with one reference mark 4-43<br />
2.1.3 Linear measurement via rotary encoder 4-46<br />
2.2 Machine datum 4-49<br />
3 Servo positioning of the NC-axes 4-51<br />
3.1 The position control loop of an NC-machine 4-51<br />
3.2 Servo positioning in <strong>TNC</strong> controls 4-52<br />
3.2.1 Control with servo lag 4-52<br />
3.2.2 Control with feed forward 4-60<br />
3.3 Offset adjustment 4-63<br />
3.3.1 Offset adjustment by code number 4-63<br />
3.3.2 Automatic cyclical offset adjustment 4-63<br />
3.3.3 Offset adjustment with integral factor 4-64<br />
3.4 Contour behavior in corners 4-66<br />
3.4.1 Radial acceleration 4-66<br />
3.4.2 Constant feed rate in corners 4-66<br />
3.4.3 Constant feed rate in corners with M90 4-67<br />
3.5 Monitoring functions 4-68<br />
3.5.1 Position monitoring for operation with lag 4-69<br />
8/95 <strong>TNC</strong> <strong>360</strong> 1 Machine Axes 4-1
3.5.2 Position monitoring for operation with feed forward control 4-70<br />
3.5.3 Monitoring the analog voltage 4-71<br />
3.5.4 Movement-monitoring 4-71<br />
3.5.5 Standstill monitoring 4-72<br />
3.5.6 Positioning window 4-72<br />
3.6 Controlled axes 4-74<br />
3.6.1 Axis-enable, feed rate enable 4-74<br />
3.6.2 Axes in position 4-75<br />
3.6.3 Axes in motion 4-76<br />
3.6.4 Open control loop 4-77<br />
3.6.5 Actual - nominal value transfer 4-77<br />
4 Spindle 4-79<br />
4.1 Analog output of the spindle speed 4-80<br />
4.1.1 Direction of spindle rotation 4-80<br />
4.1.2 Gear range 4-81<br />
4.1.3 Spindle-override 4-84<br />
4.1.4 Gear change 4-85<br />
4.2 BCD-coded output of spindle speed 4-91<br />
4.3 Spindle-orientation 4-93<br />
4.4 Tapping 4-99<br />
4.4.1 Tapping with floating tap holder for analog spindle-speed output 4-99<br />
4.4.2 Tapping with floating tap holder and coded spindle-speed output 4-102<br />
4.4.3 Rigid tapping 4-103<br />
5 EMERGENCY STOP Routine 4-106<br />
5.1 Connection diagram 4-107<br />
5.2 Flow diagram 4-108<br />
6 Display and Operation 4-109<br />
6.1 Machine datum 4-109<br />
6.2 Graphic simulation 4-112<br />
6.3 Status display 4-113<br />
6.3.1 Position display 4-113<br />
6.3.2 Display mode and traverse direction for rotary axes 4-114<br />
6.3.3 Feed rate display, feed rate display 4-115<br />
6.3.4 Display of M functions 4-117<br />
6.3.5 Display of run duration 4-117<br />
6.3.6 Control is operational 4-118<br />
6.3.7 Cancel status display 4-119<br />
6.3.8 Expanded spindle display 4-119<br />
6.3.9 Generating NC blocks with the actual-position-capture key 4-121<br />
6.4 PLC text window 4-121<br />
6.5 Error messages 4-121<br />
4-2 <strong>TNC</strong> <strong>360</strong> 1 Machine Axes 8/95
6.6 Cycles 4-126<br />
6.6.1 Cycle inhibit 4-126<br />
6.6.2 Pocket milling 4-128<br />
6.6.3 Milling-cycles for pockets with free-programmed contours 4-128<br />
6.6.4 Scaling factor 4-130<br />
6.7 File types 4-132<br />
6.7.1 File types – disable 4-132<br />
6.7.2 Block numbers - step size for ISO programs 4-132<br />
6.8 User parameters 4-132<br />
6.9 Code numbers 4-133<br />
6.10 Programming station 4-134<br />
6.11 Dialog language 4-134<br />
6.12 Decimal sign 4-134<br />
6.13 Memory test 4-135<br />
6.14 End of program run 4-135<br />
6.15 Overwrite Q-parameters overwriting 4-135<br />
7 M Functions 4-137<br />
7.1 Program halt on M functions 4-140<br />
7.2 Program halt on M06 4-140<br />
7.3 M function M89 4-140<br />
8 Key Simulation 4-141<br />
8.1 <strong>TNC</strong> Keyboard 4-141<br />
8.2 Machine control panel 4-149<br />
9 Touch Probe 4-151<br />
9.1 Interfacing the touch probe 4-151<br />
9.2 Digitizing with TS 120 4-155<br />
9.2.1 Scanning cycles 4-158<br />
9.2.2 Response of the scanning sequence at corners 4-159<br />
9.2.3 Optimizing the scanning sequence 4-161<br />
10 Electronic Handwheel 4-166<br />
10.1 Panel-mounted handwheel HR 130 4-169<br />
10.2 Portable handwheel HR 330 4-169<br />
10.3 Portable handwheel HR 332 4-169<br />
10.3.1 Assignment of keys and LEDs to the PLC inputs and outputs 4-170<br />
10.3.2 PLC example 4-171<br />
10.4 Panel-mounted handwheels HR 150 with handwheel adapter HRA 110 4-172<br />
10.4.1 Assignment of the switch setting to the PLC inputs 4-173<br />
10.4.2 PLC Example 4-174<br />
11 Analog Inputs 4-176<br />
8/95 <strong>TNC</strong> <strong>360</strong> 1 Machine Axes 4-3
12 Incremental Jog Positioning 4-178<br />
13 Hirth Coupling 4-183<br />
13.1 Positioning in the manual operating mode 4-183<br />
13.2 Positioning in controlled operation 4-183<br />
13.3 Program example 4-183<br />
14 Datum Correction 4-194<br />
15 Tool Changer 4-196<br />
15.1 Tool table 4-196<br />
15.1.1 Special Tools 4-197<br />
15.2 Controlling the tool changer 4-197<br />
15.2.1 Output of tool number (Fixed pocket coding) 4-199<br />
15.2.2 Output of pocket number (Variable pocket coding) 4-199<br />
15.3 PLC program example 4-215<br />
15.3.1 Program module TOOL DEF 4-217<br />
15.3.2 Program module TOOL CALL 4-218<br />
15.3.3 Program module STANDBY 4-219<br />
15.3.4 Program module STANDBY BACK 4-219<br />
15.3.5 Program module MANUAL TOOL IN 4-220<br />
15.3.6 Program module MANUAL TOOL OUT 4-221<br />
15.3.7 Program module MANUAL TOOL IN/OUT 4-222<br />
15.3.8 Program module CHANGE 4-223<br />
15.3.9 Program module COMPARE P-CODE WITH ISTREG 4-224<br />
15.3.10 Program module COMPARE GRE1 WITH ISTREG 4-224<br />
15.3.11 Program module COMPUTE SHORTEST PATH 4-226<br />
16 Commissioning and Start-up Procedure 4-227<br />
16.1 Code numbers for commissioning 4-227<br />
16.2 Preparation of the machine 4-227<br />
16.3 Commissioning the control 4-231<br />
16.3.1 Entry of the provisional and pre-defined machine parameters 4-231<br />
16.3.2 Entry of the PLC-program 4-231<br />
16.3.3 Testing the EMERGENCY STOP routine 4-231<br />
16.3.4 Testing the direction of traverse 4-232<br />
16.3.5 Fixing the software limit switch ranges 4-233<br />
16.3.6 Optimizing the control with lag (MP1390 = 1) 4-233<br />
16.3.7 Optimizing the control with feed forward control (MP1390 = 0) 4-237<br />
16.3.8 Optimizing the integral factor 4-242<br />
16.3.9 Adjust the offset 4-243<br />
16.3.10 Adjustment of the monitoring functions 4-243<br />
17 Point-to-Point and Straight-Cut Control 4-246<br />
4-4 <strong>TNC</strong> <strong>360</strong> 1 Machine Axes 8/95
1 Machine Axes<br />
The HEIDENHAIN contouring controls <strong>TNC</strong> <strong>360</strong>/<strong>TNC</strong> 335 permit the control of up to four machine<br />
axes and the spindle (see also section "Servo positioning").<br />
The machine parameter MP10 can be set to determine which axes should be operational on the<br />
machine. If necessary, MP10 can be used to select all the axes functions (control, display, pass over<br />
reference marks etc.).<br />
MP10 Active axes<br />
Input range: 1 to 15<br />
Bit 0 X axis +0 = not active<br />
+1 = active<br />
Bit 1 Y axis +0 = not active<br />
+2 = active<br />
Bit 2 Z axis +0 = not active<br />
+4 = active<br />
Bit 3 4th axis +0 = not active<br />
+8 = active<br />
1.1 Encoders<br />
Incremental measuring systems can be attached to the HEIDENHAIN contouring controls.<br />
See also chapter "Mounting and electrical installation ."<br />
1.1.1 Signal period<br />
The signal period of the attached measuring system in μm or 1 °<br />
is entered in the machine<br />
1000<br />
parameter MP330.x .<br />
Linear measurement<br />
For linear measurement systems with sinusoidal output signals the signal period is the same as<br />
the graduation period:<br />
Signal period (~) = grating period<br />
The standard linear encoders from HEIDENHAIN have a graduation period of 20 μm<br />
(LS models; except for LS 101 and LS 405: 10 μm) and 100 μm (LB model). If linear measurement is<br />
performed by rotary encoder and ballscrew, the line count of the rotary encoder (see encoder<br />
technical data) as well as the ballscrew pitch must be considered when calculating the signal period:<br />
ballscrew pitch [mm] · 1000 [μm/mm]<br />
Signal period (~) =<br />
line count<br />
Up to 3 decimal places can be entered in MP330.x. If traverse is 60 m/min, the signal period must<br />
not be less than 20 µm, because then the frequency would fall below the lower limit of 300 kHz.<br />
8/95 <strong>TNC</strong> <strong>360</strong> 1 Machine Axes 4-5
In addition to the signal period, MP 310 can also set a signal subdivision that can be 1-, 2-, 4-, or 256fold<br />
and should be entered so that in combination with the signal period (MP 330) a display step of 1<br />
µm is achieved. For example, a 4 µm signal period and 4-fold subdivision yields a display step of 1<br />
µm, a 20 µm signal period and 4-fold subdivision results in a display step of 5 µm. In order to attain a<br />
1 µm display step from a 20 µm signal period, you must enter a subdivision factor of 256. The<br />
control internally rounds the result of the division 20 µm/256 up to 1 µm.<br />
The signal at the square-wave input (Spindle input X6) undergoes a control-internal 4-fold evaluation.<br />
Machine parameter MP 340 was introduced to permit including an external signal interpolation via<br />
EXE, or IBV. This information is needed in order to determine the absolute position with scales<br />
featuring distance-coded reference marks. In machine parameter MP340 must defined whether the<br />
ballscrew encoder has 2048 or 4096 lines.<br />
Angular measurement: The signal period for angular measuring system is calculated as follows:<br />
Signal period (~) = <strong>360</strong>°<br />
line count · 1000<br />
MP310 Signal subdivision<br />
Entry: 0 to 3<br />
0 = 256-fold<br />
1 = 4-fold<br />
2 = 2-fold<br />
3 = 1-fold<br />
MP 310.0 Signal subdivision axis X<br />
MP 310.1 Signal subdivision axis Y<br />
MP 310.2 Signal subdivision axis Z<br />
MP 310.3 Signal subdivision 4th axis<br />
If the angular measurement is made by gearing up or down this must be taken into account when<br />
calculating the signal period.<br />
MP330 Signal period<br />
Entry: 0.100 to 999.999 [μm] or [ 1°<br />
1000]<br />
MP330.0 Axis X<br />
MP330.1 Axis Y<br />
MP330.2 Axis Z<br />
MP330.3 4th axis<br />
MP340 Interpolation factor of the EXE at X6<br />
Entry: 0 to 5<br />
0 = No measuring system on X6<br />
1 = EXE without interpolation<br />
2 = Spindle encoder with 2048 lines<br />
3 = Spindle encoder with 4096 lines<br />
5 = EXE with 5-fold interpolation<br />
4-6 <strong>TNC</strong> <strong>360</strong> 1 Machine Axes 8/95
1.1.2 Direction of traverse<br />
The machine parameters MP210 and MP1040 determine the direction of traverse for the axes. The<br />
direction of traverse for the axes of numerically controlled machine tools are defined by DIN (see<br />
also sections "Axis designation" and "Commissioning and start-up procedure").<br />
MP210 defines the counting direction for the measuring system signals. The counting direction<br />
depends on the mounting orientation of the measuring systems.<br />
MP210 Counting direction of the measuring system signals<br />
Input range: 0 to 15<br />
Bit 0 X axis +0 = positive<br />
+1 = negative<br />
Bit 1 Y axis +0 = positive<br />
+2 = negative<br />
Bit 2 Z axis +0 = positive<br />
+4 = negative<br />
Bit 3 4th axis +0 = positive<br />
+8 = negative<br />
Machine parameter MP1040 determines the polarity of the nominal value voltage during the positive<br />
direction of traverse.<br />
MP1040 Polarity of the nominal value voltage for the positive direction of traverse<br />
Input range: 0 to 15<br />
Bit 0 X axis +0 = positive<br />
+1 = negative<br />
Bit 1 Y axis +0 = positive<br />
+2 = negative<br />
Bit 2 Z axis +0 = positive<br />
+4 = negative<br />
Bit 3 4th axis +0 = positive<br />
+8 = negative<br />
The NC uses markers to tell the PLC in which direction the axes are to travel.<br />
0 = positive<br />
1 = negative<br />
Marker Function Set Reset<br />
M2160 Traverse direction X axis NC NC<br />
M2161 Traverse direction Y axis<br />
M2162 Traverse direction Z axis<br />
M2163 Traverse direction 4th axis<br />
8/95 <strong>TNC</strong> <strong>360</strong> 1 Machine Axes 4-7
1.1.3 Encoder monitoring<br />
HEIDENHAIN contouring controls can monitor the signal transmissions of the measuring system.<br />
This measuring system monitoring must be activated by a machine parameter.<br />
Three different conditions can be checked:<br />
Error message<br />
The absolute position of distance-coded reference marks C<br />
The amplitude of the measuring system signals A<br />
The edge separation of the measuring system signals B<br />
If one of the conditions is not fulfilled, it results in the error message:<br />
"Measuring system defect A/B/C."<br />
For sinusoidal signals the LE monitors the amplitude of the measuring system signals, for squarewave<br />
signals the LE evaluates the fault detection signal (U aS) of the external electronics (EXE or<br />
IBV).<br />
MP30 Checking the absolute position of the distance-coded reference marks<br />
Input range: 0 to 15<br />
Bit 0 X axis +0 = not active<br />
+1 = active<br />
Bit 1 Y axis +0 = not active<br />
+2 = active<br />
Bit 2 Z axis +0 = not active<br />
+4 = active<br />
Bit 3 4th axis +0 = not active<br />
+8 = active<br />
MP31 Checking the amplitude of the measuring system signals<br />
Input range: 0 to 31<br />
Bit 0 X axis +0 = not active<br />
+1 = active<br />
Bit 1 Y axis +0 = not active<br />
+2 = active<br />
Bit 2 Z axis +0 = not active<br />
+4 = active<br />
Bit 3 4th axis +0 = not active<br />
+8 = active<br />
Bit 4 Axis S +0 = not active<br />
+16 = active<br />
4-8 <strong>TNC</strong> <strong>360</strong> 1 Machine Axes 8/95
MP32 Checking the edge separation of the measuring system signals<br />
Input range: 0 to 31<br />
Bit 0 X axis +0 = not active<br />
+1 = active<br />
Bit 1 Y axis +0 = not active<br />
+2 = active<br />
Bit 2 Z axis +0 = not active<br />
+4 = active<br />
Bit 3 4th axis +0 = not active<br />
+8 = active<br />
Bit 4 Axis S +0 = not active<br />
+16 = active<br />
8/95 <strong>TNC</strong> <strong>360</strong> 1 Machine Axes 4-9
✎<br />
4-10 <strong>TNC</strong> <strong>360</strong> 1 Machine Axes 8/95
1.2 Axis designation<br />
The coordinate axes and their directions of travel are standardized in ISO 841.<br />
The directions of traverse may be simply determined by using the "right-hand rule."<br />
+Z<br />
+X<br />
+Y<br />
In the direction of the spindle axis the convention is:<br />
The movement of the tool towards the workpiece is the negative direction of traverse. When<br />
creating an NC program one proceeds as if the tool is moving and the workpiece is always<br />
stationary.<br />
If the machine moves the workpiece, then the direction of movement and the direction of the axis<br />
are opposite to one another. The positive relative directions of movement are then designated +X',<br />
+Y' etc.<br />
+X<br />
+X´<br />
The fourth axis can be used either as an axis of rotation or alternatively as an extra linear axis.<br />
While the three principal axes have the standard designations X, Y and Z, the designations of the<br />
fourth axis can be selected by a machine parameter.<br />
A rotational axis is designated by the letter A, B or C. The correlation with the principle axes and<br />
determination of the direction of rotation is standardized in ISO 841.<br />
+Z<br />
+C<br />
+B<br />
+Y<br />
+A<br />
+X<br />
8/95 <strong>TNC</strong> <strong>360</strong> 1 Machine Axes 4-11
A secondary linear axis is designated by the letter U, V or W. The correlation with the principle<br />
axes and the direction of travel are also standardized in ISO 841.<br />
+Z<br />
+W<br />
+V<br />
+U<br />
+Y<br />
+X<br />
MP410.3 Axis designation for 4th axis<br />
Entry: 0 to 5<br />
1.2.1 Assignment<br />
0 = A<br />
1 = B<br />
2 = C<br />
3 = U<br />
4 = V<br />
5 = W<br />
The measuring system inputs X1 to X4 and X6 and the analog outputs, Output 1 to Output S (on the<br />
connector X8) can be assigned to the individual axes. The assignment is determined by the machine<br />
parameters MP110 and MP120.<br />
The assignment of measuring system input X6 and the nominal value output S to one of the four<br />
axes is only possible when the Spindle Orientation function is not utilized.<br />
MP110 Assignment of the measuring system inputs to the axes<br />
MP110.0 X axis<br />
MP110.1 Y axis<br />
MP110.2 Z axis<br />
MP110.3 4th axis<br />
Entry: 0 = measuring system input X1<br />
1 = measuring system input X2<br />
2 = measuring system input X3<br />
3 = measuring system input X4<br />
5 = measuring system input X6<br />
4-12 <strong>TNC</strong> <strong>360</strong> 1 Machine Axes 8/95
MP120 Assignment of the analog outputs<br />
Entry: 0 = output 1<br />
1 = output 2<br />
2 = output 3<br />
3 = output 4<br />
5 = output S<br />
MP120.0 X axis<br />
MP120.1 Y axis<br />
MP120.2 Z axis<br />
MP120.3 4th axis<br />
1.2.2 Current tool axis<br />
In the NC block "TOOL CALL" it is determined whether the tool moves parallel to one of the principle<br />
axes X, Y, Z or parallel to the fourth axis. The markers M2100 to M2103 are used to show which of<br />
the four axes is currently defined as the tool axis. The appropriate marker is then set.<br />
Marker Function Set Reset<br />
M2100 X axis is tool axis NC NC<br />
M2101 Y axis is tool axis<br />
M2102 Z axis is tool axis<br />
M2103 4th axis is tool axis<br />
1.3 VDU display<br />
Machine parameters can be used to select which of the active axes (MP10) should be displayed in<br />
the status window.<br />
The display of the spindle position cannot be activated by MP40. The spindle position is displayed in<br />
the status window when the spindle control loop is closed (see section "Spindle").<br />
MP40 VDU display<br />
Input range: 1 to 15<br />
Bit 0 X axis +0 = not active<br />
+1 = active<br />
Bit 1 Y axis +0 = not active<br />
+2 = active<br />
Bit 2 Z axis +0 = not active<br />
+4 = active<br />
Bit 3 4th axis +0 = not active<br />
+8 = active<br />
8/95 <strong>TNC</strong> <strong>360</strong> 1 Machine Axes 4-13
✎<br />
4-14 <strong>TNC</strong> <strong>360</strong> 1 Machine Axes 8/95
1.4 Traverse ranges<br />
For all four axes, three different software traverse ranges can be defined by machine parameters<br />
(e.g. for pendulum machining). The traverse ranges are defined by so-called software limit switches.<br />
The input values for the software limit switches are referenced to the machine datum. The<br />
momentary software limit switch range is selected by the markers (M2817, M2816) and activated<br />
by the strobe marker M2824.<br />
The MOD function "Axis limit" can be used to enter an additional limitation for each traverse range.<br />
In the setting for one traverse range, the software limit switches that are entered via MOD function<br />
as well as the datum are effective for all traverse ranges that are selected through the PLC.<br />
Traverse ranges 1 to 3:<br />
Entry:<br />
Linear axis: – 30 000.000 to + 30 000.000 [mm]<br />
Rotary axis: – 30 000.000 to + 30 000.000 [°]<br />
(Values referenced to the machine datum)<br />
MP910 Traverse range 1: Maximum value<br />
Default values after power-on;<br />
MP920 Traverse range 1: Minimum value<br />
Activated via PLC M2817 = 0, M2816 = 0<br />
MP910.0 Software limit switch X+<br />
MP910.1 Software limit switch Y+<br />
MP910.2 Software limit switch Z+<br />
MP910.3 Software limit switch 4+<br />
MP920.0 Software limit switch X–<br />
MP920.1 Software limit switch Y–<br />
MP920.2 Software limit switch Z–<br />
MP920.3 Software limit switch 4–<br />
MP911 Traverse range 2: Maximum value<br />
Default values after power-on;<br />
MP921 Traverse range 2: Minimum value<br />
Activated by PLC M2817 = 0, M2816 = 1<br />
MP911.0 Software limit switch X+<br />
MP911.1 Software limit switch Y+<br />
MP911.2 Software limit switch Z+<br />
MP911.3 Software limit switch 4+<br />
MP921.0 Software limit switch X–<br />
MP921.1 Software limit switch Y–<br />
MP921.2 Software limit switch Z–<br />
MP921.3 Software limit switch 4–<br />
8/95 <strong>TNC</strong> <strong>360</strong> 1 Machine Axes 4-15
MP912 Traverse range 3: Maximum value<br />
MP922 Traverse range 3: Minimum value<br />
Activated by PLC: M2817 = 1, M2816 = 0<br />
MP912.0 Software limit switch X+<br />
MP912.1 Software limit switch Y+<br />
MP912.2 Software limit switch Z+<br />
MP912.3 Software limit switch 4+<br />
MP922.0 Software limit switch X–<br />
MP922.1 Software limit switch Y–<br />
MP922.2 Software limit switch Z–<br />
MP922.3 Software limit switch 4–<br />
The markers M2816 and M2817 are used to define the traverse range.<br />
M2816 M2817 Traverse range<br />
0 0 Range 1 (MP910.x; MP920.x)<br />
1 0 Range 2 (MP911.x; MP921.x)<br />
0 1 Range 3 (MP912.x; MP922.x)<br />
The change-over to the selected traverse range must be activated by the strobe marker M2824 by<br />
the PLC. This strobe marker is reset by the NC after the change-over has been carried out.<br />
In the "<strong>Manual</strong>" and "Electronic handwheel" modes of operation this is done immediately, in all other<br />
modes of operation it is usually done with the next M/S/T strobe. The range must be switched<br />
during an M/S/T strobes.<br />
Example:<br />
M2045<br />
M2482<br />
M2824<br />
In the <strong>Manual</strong> and Electronic Handwheel modes, the range can be switched immediately.<br />
Set Reset<br />
M2824 Activation of the selected traverse range PLC NC<br />
(M2816/M2817)<br />
If one of the software limit switches is reached, the error message "LIMIT SWITCH ..." appears and<br />
the appropriate marker (M2624 to M2631) is set.<br />
4-16 <strong>TNC</strong> <strong>360</strong> 1 Machine Axes 8/95
Set Reset<br />
M2624 Limit switch X+ NC NC<br />
M2625 Limit switch X–<br />
M2626 Limit switch Y+<br />
M2627 Limit switch Y–<br />
M2628 Limit switch Z+<br />
M2629 Limit switch Z–<br />
M2630 Limit switch 4+<br />
M2631 Limit switch 4–<br />
Example:<br />
PLC program example of changing the traverse ranges. The PLC input I10 is used as a condition for<br />
change.<br />
I10 = 0 Traverse range 1<br />
I10 = 1 Traverse range 2<br />
.<br />
127 LN I10 ;Traverse range 1<br />
128 AN M555 ;Already done?<br />
129 R M2816 ;Select traverse range 1<br />
130 R M2817 ;Select traverse range 1<br />
131 S M2824 ;Activate change<br />
132 S M555 ;Edge recognition traverse range1<br />
133 R M556 ;Reset edge recognition traverse range2<br />
134 L I10 ;Traverse range2<br />
135 AN M556 ;already done?<br />
136 S M2816 ;Select traverse range2<br />
137 R M2817 ;Select traverse range2<br />
138 S M2824 ;Activate change<br />
139 S M556 ;Edge recognition traverse range2<br />
140 R M555 ;Reset edge recognition traverse range1<br />
.<br />
I10<br />
M2816<br />
M2817<br />
M2824<br />
M555<br />
M556<br />
8/95 <strong>TNC</strong> <strong>360</strong> 1 Machine Axes 4-17
1.5 Lubrication pulse<br />
The PLC can control the lubrication of the guideway according to the distance traveled on each axis.<br />
In machine parameter MP4060.x the distance after which lubrication should be performed is<br />
registered for each axis. The entry is in units of 65 536 µm.<br />
Example:<br />
Desired traversing distance: 100 m<br />
Value entered =<br />
100 000 000 μm<br />
65 536 μm = 1 526<br />
If the stored path limit for an axis is exceeded, the NC sets a marker (M2012 to M2015) to "1."<br />
After carrying out the lubrication the PLC must reset the accumulated traverse distance (M2548 to<br />
M2551).<br />
MP4060 Path-dependent lubrication<br />
MP4060.0 X axis<br />
MP4060.1 Y axis<br />
MP4060.2 Z axis<br />
MP4060.3 4th axis<br />
Input range: 0 to 65 535 (in units of 65 536 µm)<br />
Set Reset<br />
M2012 Lubrication pulse X axis, since value of MP4060.0 NC NC<br />
was exceeded<br />
M2013 Lubrication pulse Y axis, since value of MP4060.1<br />
was exceeded<br />
M2014 Lubrication pulse Z axis, since value of MP4060.2<br />
was exceeded<br />
M2015 Lubrication pulse 4th axis, since value of MP4060.3<br />
was exceeded<br />
M2548 Reset of accumulated distance for PLC PLC<br />
lubrication X axis<br />
M2549 Reset of accumulated distance for<br />
lubrication Y axis<br />
M2550 Reset of accumulated distance for<br />
lubrication Z axis<br />
M2551 Reset of accumulated distance for<br />
lubrication 4th axis<br />
4-18 <strong>TNC</strong> <strong>360</strong> 1 Machine Axes 8/95
Example:<br />
PLC program example of activating the lubrication for the X axis.<br />
In the machine parameter MP4060.0 the traverse distance after which the X axis should be<br />
lubricated is entered. The duration of the lubrication is defined by the timer T0 (MP4110.0).<br />
The PLC output O24 is to be set for the duration of the X-axis lubrication. In our example the<br />
lubrication is activated as soon as the marker M2012 is set. If , for some reason, the lubrication<br />
should only be activated when the axis is at rest, then this must be taken into account in the PLC<br />
program.<br />
MP4060.0 = 1 000 (approx. 65 m)<br />
MP4110.0 = 100 (approx. 2 sec.).<br />
.<br />
.<br />
45 L M2012 ;Lubrication pulse X axis<br />
46 = T0 ;Start timer for duration of lubrication<br />
47 = M2548 ;Reset accumulated distance<br />
48 L T48 ;Duration of lubrication for X axis<br />
49 = O24 ;Set output for lubrication<br />
.<br />
.<br />
.<br />
M2012<br />
M2548<br />
T0<br />
T48<br />
024<br />
8/95 <strong>TNC</strong> <strong>360</strong> 1 Machine Axes 4-19
✎<br />
4-20 <strong>TNC</strong> <strong>360</strong> 1 Machine Axes 8/95
1.6 Axis-error compensation<br />
A HEIDENHAIN contouring control can compensate for mechanical defects in the machine. The<br />
following axis-error compensation is possible:<br />
– backlash compensation,<br />
– compensation of reversal errors in circular motion,<br />
– linear axis-error compensation,<br />
– nonlinear axis-error compensation,<br />
– compensation of thermal expansion.<br />
Either the linear or the nonlinear axis-error compensation can be activated. The other types of<br />
compensation can always be activated in parallel.<br />
1.6.1 Backlash compensation<br />
When using linear measurement by ballscrew and rotary encoder, a small amount of play can occur<br />
between the movement of the table and that of the rotary encoder.<br />
Depending on the design, the movement of the rotary encoder may be advanced or retarded relative<br />
to the table. The professional jargon describes this as positive or negative backlash.<br />
Positive backlash: rotary encoder advanced relative to the table (traverse movement of the table is<br />
too short).<br />
Negative backlash: rotary encoder retarded relative to the table (traverse movement of the table is<br />
too long).<br />
For every change in direction of traverse, the <strong>TNC</strong> adds the value from machine parameter MP710<br />
to value from the encoder signals.<br />
MP710 Backlash compensation<br />
Input range: – 1.000 to + 1.000 [mm] or [°]<br />
MP710.0 X axis<br />
MP710.1 Y axis<br />
MP710.2 Z axis<br />
MP710.3 4th axis<br />
8/95 <strong>TNC</strong> <strong>360</strong> 1 Machine Axes 4-21
1.6.2 Compensation for reversal errors in circular motion<br />
The stiction in the axis bearings can lead to reversal errors at the quadrant transitions during circular<br />
movements.<br />
Commercially available devices such as the HEIDENHAIN Double Ball Bar system (DBB) can<br />
diagnose these errors and determine the size and duration of their peaks.<br />
μm<br />
12<br />
9<br />
6<br />
3<br />
0<br />
3<br />
6<br />
9<br />
12<br />
91°<br />
MP711<br />
Spitzenweite<br />
Peak width<br />
92° 93° 94° 95° 96° 97° 98° 99°<br />
The <strong>TNC</strong> can then compensate for these errors. The size of the reversal error which is to be<br />
compensated is entered in machine parameter MP711, and the portion of the peaks to be<br />
compensated per closed loop cycle time is entered in MP712.<br />
The diagram from the DBB system shows the size and duration of a reversal peak.<br />
The input value for MP712 can be calculated as follows:<br />
– Duration of the reversal peak<br />
Peak width[ °⋅ ] 2π⋅Radius [mm] ⋅60<br />
s / min<br />
tPr [s] =<br />
<strong>360</strong> [ °⋅ ] Feed rate [mm / min]<br />
the peak width is [°] indicated in the diagram;<br />
feed rate [mm/min] is the programmed contouring feed rate.<br />
– Compensation per control loop cycle time (6 ms with <strong>TNC</strong> <strong>360</strong>)<br />
Reversal peaks [mm] ⋅Control<br />
loop cycle time [s]<br />
Compensation [mm] =<br />
3<br />
0.5 ⋅t Pr [s] ⋅10<br />
The compensation value is entered in MP712.<br />
MP711 Size of the reversal peaks in circular motion<br />
Input range: –1.000 to +1.000 [mm]<br />
MP711.0 X axis<br />
MP711.1 Y axis<br />
MP711.2 Z axis<br />
MP711.3 4th axis<br />
4-22 <strong>TNC</strong> <strong>360</strong> 1 Machine Axes 8/95
MP712 Compensation value per control loop cycle time<br />
Input value 0.000 to 1.000 [mm]<br />
MP712.0 X axis<br />
MP712.1 Y axis<br />
MP712.2 Z axis<br />
MP712.3 4th axis<br />
1.6.3 Linear axis-error compensation<br />
One linear axis-error can be compensated per linear axis (not rotary axes A, B or C). The axis-error is<br />
entered, with the correct sign, in machine parameter MP720. The error is positive if the table travel<br />
is too long, and negative if the travel is too short.<br />
Error<br />
[mm]<br />
0.02<br />
0.01<br />
0<br />
-0.01<br />
-0.02<br />
Ref. mark 500 1000 Measuring system<br />
[mm]<br />
MP720 Linear axis-error compensation<br />
Input range: – 1.000 to + 1.000 [mm/m]<br />
MP720.0 X axis<br />
MP720.1 Y axis<br />
MP720.2 Z axis<br />
MP720.3 4th axis<br />
8/95 <strong>TNC</strong> <strong>360</strong> 1 Machine Axes 4-23
1.6.4 Nonlinear axis error compensation<br />
Depending on the design of the machine or external factors (e.g. temperature) a nonlinear axis-error<br />
can occur.<br />
Such an axis-error is usually determined by a comparator measuring instrument (e.g. HEIDENHAIN<br />
VM 101A).<br />
For example, the leadscrew pitch error for the Z axis (Z=F(Z)) or the sag as a function of the Y axis<br />
(Z=F(Y)) could be determined.<br />
In the HEIDENHAIN contouring control an axis can only be corrected as a function of one errorrelated<br />
axis. So in our example either the leadscrew pitch or the sag can be compensated. For each<br />
of the four axes one table of corrections with 64 correction values per table can be entered. The<br />
following definitions must be fixed for this purpose:<br />
Correlation: Correction as a function of which axis?<br />
(X=F(X); X=F(Y) etc.)<br />
Datum point: Distance to the machine datum<br />
The error curve must always start with<br />
correction value = 0 at the datum point.<br />
Distance: Distance between the correction points (grid).<br />
entry of the exponent to base 2<br />
(e.g. entry 11 = 211 = 2,048 mm).<br />
max. input value = 223 When determining the error curve with the aid of a comparator measuring instrument the above<br />
definitions must be already taken into account, whereby it is important to note that the error curve is<br />
continued in positive direction starting at the datum.<br />
4-24 <strong>TNC</strong> <strong>360</strong> 1 Machine Axes 8/95
Example: Y = F(Z)<br />
Measurement length on Z axis = 1 000 mm<br />
Desired distance between correction points = 1 000 mm : 64 = 15.62 mm<br />
0.1<br />
0.08<br />
0.06<br />
0.04<br />
0.02<br />
-0.02<br />
-0.04<br />
-0.06<br />
-0.08<br />
-0.1<br />
-0.12<br />
Error in Y<br />
[mm]<br />
Datum<br />
Possible exponent (base 2) = 2 14 = 16.384 mm<br />
Datum point: - 990<br />
–976.8928 –950.6784 –924.464 –898.2496<br />
–990 –963.7856 –937.5712 –911.3568<br />
Machine<br />
datum<br />
0<br />
–46.2816 –20.0672 +6.1472<br />
–33.1744 –6.96 +19.2544<br />
Z<br />
[mm]<br />
The errors which have thus been determined can be entered in the form of a table directly into the<br />
HEIDENHAIN contouring control. However, the axis-error compensation is only effective when it is<br />
enabled for a specific axis by the machine parameter MP730.<br />
Before entering the correction table the code number 105 296 must be entered. After the code<br />
number has been entered the control will initially show the correction table for the X axis:<br />
X = F(X)<br />
DATUM POINT +0<br />
SETUP 1<br />
0 X+0 X+0<br />
1 X+0.001 X+0<br />
2 X+0.002 X+0<br />
.<br />
.<br />
.<br />
8/95 <strong>TNC</strong> <strong>360</strong> 1 Machine Axes 4-25
The orange axis keys can be used to select a different fault-related axis for the X axis. After pressing<br />
the GOTO key, the axis keys can be used to select a correction table for one of the other axes. The<br />
correction value which is entered must not exceed the maximum correction-value difference. The<br />
correction-value difference is calculated as follows:<br />
Max. correction-value difference =<br />
distance between correction points [mm]<br />
64<br />
In our example, the result is<br />
16.384 mm<br />
64<br />
= 0.256 mm<br />
Only the compensation points of the error curve should be entered. The control will automatically<br />
make a linear interpolation between the compensation points. In the example above the correction<br />
table is thus:<br />
Y = F(Z)<br />
DATUM POINT –990<br />
SETUP 14<br />
0 Z–990 Y+0<br />
1 Z–973.616 Y–0.06<br />
2 Z–957.232 Y–0.09<br />
3 Z–940.848<br />
4 Z–924.464<br />
5 Z–908.08 Y–0.12<br />
6 Z–891.696 Y–0.12<br />
7 Z–875.312 Y–0.1<br />
8 Z–858.928 Y–0.09<br />
.<br />
.<br />
.<br />
No entry is necessary in lines 3 and 4 (press the NO ENT key), because there is no visible kink. The<br />
individual lines of the correction table are selected either by the arrow keys or with the GOTO key.<br />
Press the END key to leave the correction table.<br />
Special case: Axis of rotation<br />
In a correction table for a rotary axis, the entered distance between correction points must be large<br />
enough that the 64 correction points will cover a complete revolution of <strong>360</strong>°. An angular separation<br />
of at least 5.625° (2 16 ) is therefore necessary. For an axis of rotation, correction values will only be<br />
recognized for entries from 0 to <strong>360</strong>°.<br />
Input and output of the correction table via the data interface<br />
After entering the code number 105296 the correction table can be entered or read out via the data<br />
interface.<br />
As usual, the data transfer is initiated with the EXT key. The correction table receives the file name<br />
extension ".S".<br />
4-26 <strong>TNC</strong> <strong>360</strong> 1 Machine Axes 8/95
MP730 Nonlinear axis-error compensation<br />
Input range: 0 to 15<br />
Bit 0 X axis + 0 = not active<br />
+ 1 = active<br />
Bit 1 Y axis + 0 = not active<br />
+ 2 = active<br />
Bit 2 Z axis + 0 = not active<br />
+ 4 = active<br />
Bit 3 4th axis + 0 = not active<br />
+ 8 = active<br />
8/95 <strong>TNC</strong> <strong>360</strong> 1 Machine Axes 4-27
✎<br />
4-28 <strong>TNC</strong> <strong>360</strong> 1 Machine Axes 8/95
1.6.5 Temperature compensation<br />
Exact measurements of machine thermal behavior (center of expansion in the axes, amount of<br />
expansion as a function of temperature) are necessary to compensate the effects of thermal<br />
expansion!<br />
The words W576 to W582 were introduced for thermal expansion compensation As soon as these<br />
words receive a value, the "follow-up tracking" becomes active.<br />
"Follow-up tracking" means that the actual position value changes 1 µm/sec until it has changed by<br />
the full value from the words W576 to W582. This does not change the value in the actual position<br />
display.<br />
The actual thermal expansion can be measured, for example, with a TESTOTERM unit. The values<br />
are transmitted to the PLC through the PLC inputs, further processed in the PLC program and finally<br />
transmitted to the words W576 to W582. The actual value display does not change.<br />
Input range: +32 767 to –32 768 [µm]<br />
W576 Follow-up axis error compensation axis X<br />
W578 Follow-up axis error compensation axis Y<br />
W580 Follow-up axis error compensation axis Z<br />
W582 Follow-up axis error compensation 4th axis<br />
Example: Temperature compensation in the Z axis.<br />
Program description<br />
The 13 TESTOTERM-BCD outputs are transmitted at the <strong>TNC</strong> control through the PLC inputs I128<br />
to I140 and converted to a binary data format. Then the binary value is multiplied by a correction<br />
factor (linear thermal behavior) and sent to the Z axis. The correction factor is located in MP4210.44.<br />
Main program<br />
L M 0<br />
ON M 0<br />
S M 1 M1 is always set<br />
LW I 128 Read in from TESTOTERM outputs<br />
LW M1180 Instead of inputs, non-volatile markers<br />
A K+8191 Reset bits 13, 14 and 15<br />
W= M1200 Intermediate register TESTOTERM BCD<br />
A K +3840 Reset 1st, 2nd and 4th decade<br />
>> K +8<br />
X K +100 Multiply 3rd decade by 100<br />
= W 252 Intermediate register TESTOTERM binary<br />
8/95 <strong>TNC</strong> <strong>360</strong> 1 Machine Axes 4-29
LW M 1200 Intermediate register TESTOTERM BCD<br />
A K +240 Block out 1st, 3rd and 4th decade<br />
>> K +4<br />
X K +10 Multiply 2nd decade by 10<br />
+ W252 Intermediate register TESTOTERM binary<br />
= W252 Intermediate register TESTOTERM binary<br />
LW M 1200 Intermediate register TESTOTERM binary<br />
A K + 15 Block out 2nd, 3rd and 4th decade<br />
+ W252 Intermediate register TESTOTERM binary<br />
= W 248 Final register TESTOTERM binary<br />
W= M1220 Control register<br />
LW M1200 Intermediate register TESTOTERM BCD<br />
BT K+12 4th decade sign bit<br />
CMT 133 Module change sign<br />
L W 946 Correction factor MP 4210.44 least significant word<br />
X W 248 Final register TESTOTERM binary<br />
= W580 Z axis datum shift<br />
.<br />
.<br />
EM<br />
Subprogram<br />
LBL 133<br />
L- W248 Final register TESTOTERM binary<br />
= W248 Final register TESTOTERM binary<br />
W= M1220 Control register<br />
EM<br />
4-30 <strong>TNC</strong> <strong>360</strong> 1 Machine Axes 8/95
✎<br />
8/95 <strong>TNC</strong> <strong>360</strong> 1 Machine Axes 4-31
1.7 PLC positioning<br />
The four axes of the control can also be positioned by the PLC. The spindle, too, can be positioned<br />
with the aid of the PLC (see section "Spindle"). The positions of the individual axes must be stored as<br />
Doublewords (D528 to D540) before activating the positioning (M2704 to M2707).<br />
The feed for positioning the individual axes is stored in W560 to W566.<br />
The transfer of the positions and of the feed to the PLC is carried out, for example, by<br />
machine parameters (MP4210.X, MP4220.X). All four axes can be traversed simultaneously<br />
[simultaneous activation of all the strobe markers (M2704 to M2706)]. The PLC positioning can be<br />
interrupted by resetting the strobe marker (M2704 to M2706).<br />
The NC resets the strobe marker (M2704 to 2707) when:<br />
− the axes have reached the given position<br />
− NC STOP occurs in the <strong>Manual</strong> or Handwheel operating mode<br />
− NC STOP and "internal stop" occur in the automatic operating modes<br />
− an EMERGENCY STOP occurs<br />
− an error message occurs that results in a stop<br />
The strobe markers M2704 to M2707 may be set only if an M/S/T strobe is present. The M/S/T<br />
acknowledgment must not occur until the PLC positioning has been completed, i.e. markers M2704<br />
to M2707 have been reset.<br />
Example:<br />
M2045<br />
M2482<br />
M2704<br />
In the <strong>Manual</strong> mode of operation the strobe markers M2704 to M2707 cannot be set if an axis<br />
direction key is depressed.<br />
The Doublewords D528 to D540 have a multiple usage. They have the following meaning for the<br />
PLC positioning:<br />
Address Function<br />
D528 Position X axis [1/ 1000 mm]<br />
D532 Position Y axis<br />
D536 Position Z axis<br />
D540 Position 4th axis<br />
Feed rate for PLC positioning<br />
W560 Feed rate X axis [mm/min]<br />
W562 Feed rate Y axis<br />
W564 Feed rate Z axis<br />
W566 Feed rate 4th axis<br />
4-32 <strong>TNC</strong> <strong>360</strong> 1 Machine Axes 8/95
Set Reset<br />
M2704 Activate PLC positioning X axis PLC NC; PLC<br />
M2705 Activate PLC positioning Y axis<br />
M2706 Activate PLC positioning Z axis<br />
M2707 Activate PLC positioning 4th axis<br />
– The positions which are given are referenced to the machine datum (MP960.x).<br />
– Software limit switches are not considered.<br />
– Tool corrections are not calculated.<br />
– The path compensation must be terminated before a PLC positioning.<br />
– PLC positioning is not displayed in the test graphics.<br />
8/95 <strong>TNC</strong> <strong>360</strong> 1 Machine Axes 4-33
Example: PLC positioning of the Z axis<br />
A PLC positioning in the Z axis is to be initiated with the M function M70. The target position is<br />
stored in the machine parameter MP4210.2. The feed for the PLC positioning is defined in machine<br />
parameter MP4220.2<br />
.<br />
.<br />
.<br />
67 L M0<br />
68 ON M0<br />
69 S M2496 ;Decoded M code output (M1900 to M1999)<br />
70 S M2719 ;Word processing (incompatible with <strong>TNC</strong> 155/355)<br />
71 L M1970 ;M function M70?<br />
72 A M2045 ;Change signal M function?<br />
73 AN M4 ;Edge marker<br />
74 CMT 110 ;Load position and feed<br />
75 S M2706 ;Activate PLC positioning Z axis<br />
76 S M4 ;Edge marker<br />
77 L M1970 ;M function M70?<br />
78 A M2045 ;Change signal M function?<br />
79 AN M2706 ;PLC positioning Z axis done<br />
80 S M2482 ;Acknowledgment M function done<br />
81 LN M2045 ;No M function?<br />
82 R M2482 ;Acknowledgment reset<br />
83 R M4 ;Edge marker reset<br />
.<br />
.<br />
.<br />
1210 EM ;Main program end<br />
1211 LBL 110 ;Load Z position and feed rate<br />
1212 L D776 ;Load target position from MP4210.2<br />
1213 = D536 ;Target position PLC positioning Z axis<br />
1214 L W964 ;Load feed from MP4220.2<br />
1215 = W564;Feed PLC positioning Z axis<br />
1216 EM<br />
M1970<br />
M2045<br />
M4<br />
M2706<br />
M2482<br />
4-34 <strong>TNC</strong> <strong>360</strong> 1 Machine Axes 8/95
1.8 PLC Axes<br />
The controlled axes can also be assigned individually to the PLC. On a machine with three NC axes,<br />
for example, the 4th axis could be used independently from the three NC axes to position the<br />
toolchanger. Machine parameter MP60 defines which axis is to be controlled by the PLC.<br />
The positioning of the PLC axes is commanded through a special module in the PLC program:<br />
Module 9120: Starts the positioning of a PLC axis<br />
Module 9121: Stops the positioning of a PLC axis<br />
Module 9122: Polls the status of a PLC axis<br />
Module 9123: Traverses the reference marks in a PLC axis<br />
For a description of each module, see the chapter "PLC Programming."<br />
If a PLC axis has been edited in the NC program, the error message "WRONG AXIS<br />
PROGRAMMED" appears during program run. PLC axes can be moved with the machine axis<br />
direction keys. PLC axes always move in servo-lag mode. Several PLC axes can be started at once.<br />
These axes cannot, however, be interpolated with each other. In MP810 a modulo value can be<br />
entered for the counting mode of the axes. An input value of 0 means that the display value is not<br />
reduced.<br />
MP60 PLC auxiliary axes<br />
Input: 0 to 15<br />
Bit 0 Axis X +0 = normal axis<br />
+1 = PLC axis<br />
Bit 1 Axis Y +0 = normal axis<br />
+2 = PLC axis<br />
Bit 2 Axis Z +0 = normal axis<br />
+4 = PLC axis<br />
Bit 3 4th axis +0 = normal axis<br />
+8 = PLC axis<br />
MP810 Modulo value for reducing the position display values<br />
Input: 0 to 99 999.999 [mm]<br />
MP810.0 Axis X<br />
MP810.1 Axis Y<br />
MP810.2 Axis Z<br />
MP810.3 4th axis<br />
8/95 <strong>TNC</strong> <strong>360</strong> 1 Machine Axes 4-35
2 Reference Marks<br />
By setting a datum point, a definite positional value (coordinate) is assigned to each axis position for<br />
the machining of the workpiece. Since the actual-position value is established incrementally by the<br />
encoder, this defined assignment of values to positions must be re-established after every power<br />
interruption.<br />
The HEIDENHAIN linear encoders are therefore equipped with one or several reference marks.<br />
When a reference mark is traversed, it generates a signal that identifies the particular position as a<br />
reference point. By traversing the reference marks after a power interruption, the assignment of<br />
positional values to axis positions (and, at the same time, the fixed machine references) that were<br />
most recently determined by datum point setting are re-established.<br />
Workpiece<br />
datum<br />
0<br />
+Z<br />
REF Value<br />
–44,985<br />
10 20 30 40<br />
Workpiece<br />
Machine table<br />
Measuring system<br />
REF Value<br />
0<br />
+X<br />
Reference mark = Machine datum<br />
Since it is inconvenient to restore the reference points if large traverses are required to do so,<br />
HEIDENHAIN recommends the use of encoders with distance-coded reference marks. On these<br />
measuring systems the absolute position value is available after crossing two reference marks.<br />
Scale with distance-coded reference marks<br />
The graduation consists of an incremental grating and a parallel track for the reference marks. The<br />
absolute position of each reference mark is encoded by varying the distance between adjacent<br />
reference marks according to a mathematical algorithm.<br />
Scale with one reference mark<br />
Scale with distance-coded reference marks<br />
4-36 <strong>TNC</strong> <strong>360</strong> 2 Reference Marks 8/95
✎<br />
8/95 <strong>TNC</strong> <strong>360</strong> 2 Reference Marks 4-37
2.1 Passing over the reference marks<br />
The reference marks for axes must be traversed after switching on the control. This can be<br />
achieved by<br />
– pressing the external START key. The axis sequence is determined by machine parameter<br />
MP1340.x (automatic passing of the reference marks),<br />
– pressing the external axis direction keys. The sequence is determined by the operator.<br />
Only after passing over the reference mark is...<br />
– the software limit switch activated,<br />
– the most recently set datum point reproduced,<br />
– PLC positioning and positioning with the miscellaneous functions M91 and M92 possible,<br />
– the counter value set to zero for non-controlled axes.<br />
For distance-coded measuring systems the machine datum is the Zero Reference mark. In linear<br />
measurement systems the Zero Reference mark is the first reference mark after the start of the<br />
measuring length; in angular measurement systems the Zero Reference mark is marked.<br />
The direction of traverse and the velocity on passing the reference marks is defined by machine<br />
parameters (MP1320, MP1330.x).<br />
The functional sequence for passing the reference marks can be fixed specifically for each axis by<br />
machine parameters (MP1350.x).<br />
The operating condition "PASS OVER REFERENCE MARKS" is sent to the PLC by the NC (W272).<br />
In order to avoid exceeding the traverse range when passing over the reference marks a trip dog<br />
(reference end position) is necessary. This trip dog must be fixed at the end of the traverse range by<br />
the manufacturer of the machine. The trigger signal from the trip dog is connected to an available<br />
PLC input. In the PLC program this PLC input is combined with the markers for "Reference end<br />
position" (M2556 to M2559).<br />
4-38 <strong>TNC</strong> <strong>360</strong> 2 Reference Marks 8/95
2.1.1 Measuring systems with distance-coded reference marks<br />
Machine parameter MP1350.x=3<br />
Closed<br />
Open<br />
Traverse direction MP1320<br />
Reference marks<br />
Trip dog<br />
"Reference end<br />
position"<br />
8/95 <strong>TNC</strong> <strong>360</strong> 2 Reference Marks 4-39
Sequence "Automatic passing over reference marks" (press the external START key).<br />
MP1350.x = 3<br />
Machine traverse<br />
in direction from<br />
MP1320<br />
Trip dog<br />
"Reference end position" is<br />
closed before consecutive<br />
reference marks are<br />
passed over<br />
Press the external START key<br />
No<br />
Trip dog<br />
"Reference end<br />
position"<br />
closed?<br />
Yes<br />
No<br />
Two consecutive reference marks are passed over<br />
Is the machine<br />
outside the software<br />
limit switch range?<br />
No<br />
Yes<br />
Machine stops<br />
Machine traverses in<br />
inverted direction from<br />
MP1320<br />
Machine moves to<br />
software limit switch<br />
4-40 <strong>TNC</strong> <strong>360</strong> 2 Reference Marks 8/95<br />
Yes
Machine parameter MP1350.x=0<br />
Closed<br />
Open<br />
Traverse direction MP1320.x<br />
Reference marks<br />
Trip dog<br />
"Reference end position"<br />
8/95 <strong>TNC</strong> <strong>360</strong> 2 Reference Marks 4-41
Sequence "Automatic passing over reference marks" (press the external START key).<br />
MP1350.x = 0<br />
Traverse direction from<br />
MP1320.x<br />
Press external START key<br />
No<br />
Trip dog<br />
"Reference end position"<br />
closed?<br />
Yes<br />
Pass over two consecutive<br />
reference marks<br />
Is the machine<br />
outside the software<br />
limit switch range?<br />
No<br />
Machine stops<br />
Invert traverse direction<br />
from MP1320.x<br />
Machine moves to<br />
software limit switch range<br />
If during automatic pass-over the trip dog is not closed until it is in the "Reference end position"<br />
range, the contouring control will ignore the signal. It is therefore necessary that there be at least<br />
two reference marks in the range of the "Reference end position."<br />
4-42 <strong>TNC</strong> <strong>360</strong> 2 Reference Marks 8/95<br />
Yes
2.1.2 Measuring systems with one reference mark<br />
Machine parameter MP1350.x=1<br />
Closed<br />
Open<br />
Traverse direction MP1320.x<br />
Reference marks<br />
Trip dog<br />
"Reference end position"<br />
8/95 <strong>TNC</strong> <strong>360</strong> 2 Reference Marks 4-43
Sequence "Automatic passing over reference marks" (press the external START key).<br />
Machine traverse<br />
in direction from<br />
MP1320.x<br />
Trip dog<br />
"Reference end position" is<br />
closed before reference mark<br />
is passed over<br />
Press the external START key<br />
No Trip dog<br />
"Reference end position"<br />
closed?<br />
Yes<br />
No<br />
Reference mark is passed over<br />
Is the machine<br />
outside the software<br />
limit switch range?<br />
No<br />
Yes<br />
Machine stops<br />
Machine traverses in<br />
inverted direction from<br />
MP1320.x<br />
Machine moves to<br />
software limit switch<br />
4-44 <strong>TNC</strong> <strong>360</strong> 2 Reference Marks 8/95<br />
Yes
✎<br />
8/95 <strong>TNC</strong> <strong>360</strong> 2 Reference Marks 4-45
2.1.3 Linear measurement via rotary encoder<br />
Machine parameter MP1350.x = 2<br />
For linear measurement using a rotary encoder a reference pulse is produced on each revolution of<br />
the encoder. It must be ensured that, after switching on the machine, always the same reference<br />
pulse is evaluated. This can also be achieved by using the trip dog "Reference end position."<br />
Closed<br />
Open<br />
Desired reference pulse<br />
Traverse direction MP1320.x<br />
Measuring length<br />
Reference pulse<br />
Trip dog<br />
"Reference end position"<br />
4-46 <strong>TNC</strong> <strong>360</strong> 2 Reference Marks 8/95
Sequence "Automatic passing over reference marks" (Press the external START key).<br />
Press the external START key<br />
No Trip dog<br />
"Reference end position"<br />
closed?<br />
Yes<br />
Machine traverse in direction from<br />
MP1320.x with velocity from<br />
MP1330.x to the trip dog<br />
"Reference end positon"<br />
Machine traverse in inverted direction<br />
from MP1320.x and with reduced velocity from MP1331.x<br />
The first reference pulse after opening of the trip dog<br />
"Reference end position" is evaluated<br />
Is the<br />
machine outside<br />
the software limit<br />
switch range?<br />
No<br />
Machine stops<br />
Machine moves to<br />
software limit switch<br />
8/95 <strong>TNC</strong> <strong>360</strong> 2 Reference Marks 4-47<br />
Yes
MP1320 Direction for traversing the reference marks<br />
Input range: 0 to 15<br />
Bit 0 X axis: + 0 = positive<br />
+ 1 = negative<br />
Bit 1 Y axis: + 0 = positive<br />
+ 2 = negative<br />
Bit 2 Z axis: + 0 = positive<br />
+ 4 = negative<br />
Bit 3 4th axis: + 0 = positive<br />
+ 8 = negative<br />
MP1330 Feed rate for traversing the reference marks<br />
Input range: 80 to 30 000 [mm/min]<br />
MP1330.0 X axis<br />
MP1330.1 Y axis<br />
MP1330.2 Z axis<br />
MP1330.3 4th axis<br />
MP1331 Feed rate for leaving the reference end position<br />
(only for rotary encoders MP1350=2)<br />
Input range: 80 to 500 [mm/min]<br />
MP1331.0 X axis<br />
MP1331.1 Y axis<br />
MP1331.2 Z axis<br />
MP1331.3 4th axis<br />
MP1340 Sequence for traversing reference marks<br />
Entry: 0 = no evaluation of the reference mark<br />
1 = X axis<br />
2 = Y axis<br />
3 = Z axis<br />
4 = 4th axis<br />
MP1340.0 1st axis<br />
MP1340.1 2nd axis<br />
MP1340.2 3rd axis<br />
MP1340.3 4th axis<br />
4-48 <strong>TNC</strong> <strong>360</strong> 2 Reference Marks 8/95
MP1350 Type of reference mark approach<br />
MP1350.0 X axis<br />
MP1550.1 Y axis<br />
MP1350.2 Z axis<br />
MP1350.3 4th axis<br />
Entry: 0 = measuring system with distance-coded reference marks<br />
1 = measuring system with one reference mark<br />
2 = special sequence (linear measurement via rotary encoder)<br />
Marker Function Set Reset<br />
M2556 Reference end position for X axis PLC PLC<br />
M2557 Reference end position for Y axis<br />
M2558 Reference end position for Z axis<br />
M2559 Reference end position for 4th axis<br />
Address Function Set Reset<br />
W272 Operating mode NC NC<br />
0 = Programming and editing<br />
1 = <strong>Manual</strong> operation<br />
2 = Electronic handwheel<br />
3 = Positioning with manual entry<br />
4 = Program run, single block<br />
5 = Program run, full sequence<br />
6 = Test run<br />
7 = Pass over reference points<br />
2.2 Machine datum<br />
The reference mark defines a point on the measuring system. The reference points of all axes define<br />
the scale datum. All REF-based displays and positioning movements refer to the machine datum<br />
(see also section "Display and operation").<br />
8/95 <strong>TNC</strong> <strong>360</strong> 2 Reference Marks 4-49
✎<br />
4-50 <strong>TNC</strong> <strong>360</strong> 2 Reference Marks 8/95
3 Servo Positioning of the NC Axes<br />
This section describes all the control functions which are important for the control and monitoring of<br />
the NC axes.<br />
Further parameters for the NC axes can be found under "Machine axes."<br />
The control of the spindle (S axis) is described in section "Spindle."<br />
3.1 The position control loop of an NC machine<br />
In CNC machines the servo control is normally implemented as a cascade control (see following<br />
block diagram).<br />
The motor speed control and the current control (both in the drive amplifier) are integrated into the<br />
servo position control (CNC control). The servo controlled system consists of the motor and machine<br />
slide.<br />
CNC Control Servo amplifier Machine<br />
Nom.<br />
pos.<br />
Actual<br />
position<br />
Servo<br />
lag<br />
Position<br />
controller<br />
Nom.<br />
rpm<br />
Actual<br />
rpm<br />
Speed<br />
controller<br />
Nom.<br />
cur.<br />
Actual<br />
current<br />
Current<br />
regulator<br />
Block diagram of the position control loop, here as a cascade control<br />
Drive Tacho<br />
Linear/<br />
angle<br />
encoder<br />
8/95 <strong>TNC</strong> <strong>360</strong> 3 Servo Positioning of the NC Axes 4-51<br />
Actual<br />
rpm<br />
Actual<br />
position
3.2 Servo positioning in <strong>TNC</strong> controls<br />
Two control methods are possible with the control. They can be used alternatively.<br />
1. control with lag (section 3.2.1)<br />
2. control with feed forward (section 3.2.2)<br />
The choice of control method is determined by machine parameter MP1390.<br />
The machine adjustment must always be carried out for both methods of control.<br />
MP1390 Control with lag or feed forward control<br />
Input value: 0 or 1,<br />
1 = operation with lag,<br />
0 = operation with feed forward control.<br />
3.2.1 Control with servo lag<br />
Servo lag refers to the difference (lag) between the nominal position which is defined by the NC and<br />
the actual position of the axes. Control would not be possible without this lag.<br />
In the operating modes "<strong>Manual</strong> operation" and "Electronic handwheel" the operation is always with<br />
servo lag, regardless of machine parameter MP1390.<br />
In the operating modes "Positioning with manual entry", "Program run, single block" and "Program<br />
run, full sequence" machine parameter MP1390 must be appropriately entered for lag operation.<br />
The advantage of operation with servo lag lies in the "softer" control, which is especially suitable for<br />
machining 3D contours, since corners and radii are smoothed out, depending on the Kv factor<br />
(position loop gain factor) and the machining feed rate.<br />
Depending on how far these "contour errors" can be tolerated, the machine operator or manufacturer<br />
must decide and choose either operation with servo lag or with feed forward control.<br />
Operation with servo lag is depicted in a simplified form in the following block diagram for the X axis.<br />
It shows a part of the cascade control mentioned previously.<br />
All machine parameters which influence the control characteristic are shown here.<br />
4-52 <strong>TNC</strong> <strong>360</strong> 3 Servo Positioning of the NC Axes 8/95
v<br />
v=a·t<br />
➀ ➁<br />
Acceleration:<br />
MP1060<br />
t<br />
s=s 0+v·Δt<br />
➂<br />
X S<br />
Y S<br />
X Noml<br />
8/95 <strong>TNC</strong> <strong>360</strong> 3 Servo Positioning of the NC Axes 4-53<br />
-<br />
X Actl<br />
+ ➃<br />
s ax<br />
kv factor: MP1810<br />
Kinkpoint: MP1830<br />
Multiplication factor: MP1820<br />
V x<br />
U<br />
➄<br />
➅<br />
s ax<br />
v = kv ·s ax<br />
Integral factor<br />
MP1080<br />
t<br />
v x Noml+<br />
Servo<br />
amplifier<br />
➀ The control calculates a nominal velocity value every 6 ms from the feed programmed in the NC<br />
program and the final position (X- , Y-, Z-, 4th axis) , allowing for the acceleration which has been<br />
stored (MP1060). The stored acceleration is valid for the rising as well as the falling slope. If<br />
several axes are traversed simultaneously, then the smallest value for acceleration is effective.<br />
➁ Every 6 ms a nominal path value is calculated from the velocity nominal value.<br />
s = so + v ·Δt s = nominal path value<br />
so = previous nominal path value<br />
v = nominal velocity value<br />
Δt = cycle time 6 ms<br />
➂ The nominal path value is resolved into the individual axis components, depending on which<br />
axes have been programmed.<br />
➃ The axis-dependent nominal path value is compared with the actual value of the positions and<br />
the lag sa is calculated.<br />
sax = xNoml - xActl sax<br />
= lag for X axis<br />
xNoml = nominal path value for X axis<br />
xAct l = actual path value for X axis<br />
➄ The lag is multiplied by the kv factor MP1810 and passed on to the drive amplifier as a nominal<br />
velocity value (analog voltage).<br />
vx= kv · sax vx = nominal velocity value for X axis<br />
➅ If the axes are stopped, the integral factor MP1080 is effective as well. It causes an offset<br />
adjustment (see section "Offset adjustment").<br />
+<br />
v x Actl<br />
-
The kv factor (position loop gain) determines the control loop response of the machine, and it must<br />
be matched to the machine.<br />
If a very high kv factor is chosen, the lag is very small. However, this can lead to an overshoot when<br />
running into a new position. If the kv factor is too small the new position will be reached too slowly.<br />
The optimal kv factor must be determined by experiment (see the section "Commissioning and startup<br />
procedure"). The following diagram shows the response for various kv factors.<br />
U [V]<br />
MP1810<br />
MP1060 MP1810<br />
kv correct<br />
kv too large<br />
kv too small<br />
The acceleration can be programmed by the machine parameter MP1060. It determines the slope of<br />
the ramp on the rising and falling edges.<br />
For axes which are mutually interpolated the kv factor must be the same, in order to avoid contour<br />
distortion!<br />
MP1060 Acceleration<br />
Input value 0.001 to 3.0 [m/s2]<br />
MP1060.0 Acceleration X axis<br />
MP1060.1 Acceleration Y axis<br />
MP1060.2 Acceleration Z axis<br />
MP1060.3 Acceleration 4th axis<br />
The Kv factor MP1810 is, in general, determined by the rapid traverse (MP1010) of the machine and<br />
the lag, using the following formula:<br />
kv = Ve<br />
s a<br />
or<br />
sa = Ve<br />
k v<br />
[mm]<br />
kv = Position loop gain [ m/min<br />
mm ]<br />
ve = Rapid traverse [ m<br />
min ]<br />
sa = Servo lag [mm]<br />
4-54 <strong>TNC</strong> <strong>360</strong> 3 Servo Positioning of the NC Axes 8/95<br />
t [s]
Rapid traverse<br />
[m/min]<br />
10<br />
8<br />
6<br />
4<br />
2<br />
kv = 2<br />
kv = 1<br />
2 4 6 8 10<br />
kv = 0.5<br />
s a [mm]<br />
The rapid traverse value stored in machine parameter MP1010 can be reduced by the PLC.<br />
The rapid traverse (maximum traversing speed) must be adjusted by the desired analog voltage (e.g.<br />
9 V) on the servo amplifier (see section "Commissioning and start-up procedure"). For each axisspecific<br />
rapid traverse there is an analog voltage which is stored in the machine parameter MP1050.<br />
The resulting lag error sa thus depends on the analog voltage.<br />
U[V]<br />
10<br />
8<br />
6<br />
4<br />
2<br />
2 4 6 8 10<br />
8/95 <strong>TNC</strong> <strong>360</strong> 3 Servo Positioning of the NC Axes 4-55<br />
12<br />
kv = 1, Rapid traverse 10 m/min<br />
12<br />
s a [mm]<br />
A special feed rate for manual operation (<strong>Manual</strong> feed) is stored in machine parameter MP1020. In<br />
general, it is significantly lower than the rapid traverse. Unlike the rapid traverse, this has no effect<br />
on the servo behavior.
MP1810 Kv factor for operation with lag<br />
Input range 0.1 to 10 [1/min]<br />
MP1810.0 kv factor X axis<br />
MP1810.1 kv factor Y axis<br />
MP1810.2 kv factor Z axis<br />
MP1810.3 kv factor 4th axis<br />
MP1010 Rapid traverse<br />
Input range 80 to 300 000 [mm/min]<br />
MP1010.0 Rapid traverse X axis<br />
MP1010.1 Rapid traverse Y axis<br />
MP1010.2 Rapid traverse Z axis<br />
MP1010.3 Rapid traverse 4th axis<br />
MP1050 Analog voltage for rapid traverse<br />
Input range 4.5 to 9 [V]<br />
MP1050.0 Analog voltage X axis<br />
MP1050.1 Analog voltage Y axis<br />
MP1050.2 Analog voltage Z axis<br />
MP1050.3 Analog voltage 4th axis<br />
MP1020 <strong>Manual</strong> feed<br />
Input range 80 to 300 000 [mm/min]<br />
MP1020.0 <strong>Manual</strong> feed X axis<br />
MP1020.1 <strong>Manual</strong> feed Y axis<br />
MP1020.2 <strong>Manual</strong> feed Z axis<br />
MP1020.3 <strong>Manual</strong> feed 4th axis<br />
Address Function<br />
D596 Rapid traverse from PLC<br />
Servo accuracy:<br />
The internal servo accuracy of the control is always 1 µm. The control has, however, a display step<br />
of 5 µm or 1 µm, selectable by machine parameter MP7290. The rounding up or down is only in the<br />
display (see section "Display and operation").<br />
Normally a servo accuracy of 1 µm is sufficient, i.e. the control must be able to generate at least one<br />
voltage step per 1 µm positional deviation.<br />
4-56 <strong>TNC</strong> <strong>360</strong> 3 Servo Positioning of the NC Axes 8/95
Calculation of the smallest voltage step:<br />
The controls produce an analog voltage 0 to 10 V.<br />
In the <strong>TNC</strong> <strong>360</strong> the 10 V analog potential is produced by a 14 Bit A/D converter, giving 16 384<br />
divisions. The resulting smallest potential step is 0.6 mV.<br />
Potential steps per µm positional deviation:<br />
As described above, moving with the rapid traverse (MP1010) results in a certain lag distance sa.<br />
The rapid traverse rate is reached at a definite voltage (MP1050). So one can calculate a definite<br />
potential ΔU per µm of positional deviation (lag).<br />
ΔU = MP1050 [mV] / sa [µm]<br />
If ΔU is divided by the smallest voltage step which can be produced (0.6 mV), the result is the<br />
number of voltage steps which are produced per 1 µm positional deviation.<br />
Example:<br />
n = ΔU [mV]/0.6 [mV]<br />
kv = 2 rapid traverse 5 000 [mm/min], U = 9 [V]<br />
sa =<br />
ΔU =<br />
n =<br />
5 000 [μm]<br />
= 2 500 [µm]<br />
2<br />
9 000 [mV]<br />
= 3.6 [mV/µm]<br />
2 500 [μm]<br />
3.6 [mV/μm]<br />
= 6 steps/µm positional deviation<br />
0.6 [mV]<br />
8/95 <strong>TNC</strong> <strong>360</strong> 3 Servo Positioning of the NC Axes 4-57
Kink point:<br />
For machines with high rapid traverse rates it is usually not possible to raise the kv factor enough to<br />
give an optimal loop characteristic over the entire range of positioning speeds (stop, machining feed<br />
rates, rapid traverse). In such cases one can introduce a kink point, which gives the following<br />
advantages:<br />
– a high kv at lower positioning speeds, i.e. a larger voltage step per µm of positional deviation<br />
– a low kv at higher positioning speeds (above the machining rates).<br />
The position of the kink point is determined by machine parameter MP1830. In the upper range the<br />
kv factor is multiplied by the factor from MP1820.<br />
U [V]<br />
9<br />
MP1830<br />
MP1810 (= kv)<br />
MP1810 · MP1820<br />
The kink point must lie above the range of machining feeds!<br />
Under these conditions, the lag can be calculated as follows:<br />
sa = Ve<br />
k v<br />
· MP1830 [%] [<br />
]<br />
+ 100 [%] – MP1830 [%]<br />
100 [%] MP1820 · 100 [%]<br />
MP1820 Multiplication factor for the Kv factor<br />
Input value 0.001 to 1<br />
MP1830 Kink point<br />
Input value 0 to 100 [%]<br />
4-58 <strong>TNC</strong> <strong>360</strong> 3 Servo Positioning of the NC Axes 8/95<br />
sa
✎<br />
8/95 <strong>TNC</strong> <strong>360</strong> 3 Servo Positioning of the NC Axes 4-59
3.2.2 Control with feed forward<br />
Feed forward control means that the nominal velocity value for the machine is varied by a machine<br />
parameter (control element of the nominal velocity). Together with the velocity element which is<br />
calculated from the lag (servo controlled element of the nominal velocity), this gives the final nominal<br />
velocity value.<br />
The lag is very small with this method. Operation with feed forward control has the advantage that<br />
contours can be followed very accurately at a high speed.<br />
Normally, work will be carried out using feed forward control.<br />
In the operating modes "Positioning with manual data input", "Program run, single block" and<br />
"Program run, full sequence" this method of servo control can be selected with the machine<br />
parameter MP1390.<br />
Operation with feed forward control for the X axis can be shown in a simplified form in the following<br />
block diagram.<br />
All machine parameters which influence the servo characteristic are shown here.<br />
Acceleration: MP1060<br />
Transient response: MP1530<br />
Position approach speed: MP1520<br />
v<br />
v=a·t<br />
MP1530<br />
s=s 0+v·Δt<br />
MP1520<br />
t<br />
➁<br />
v Y<br />
v X<br />
s X<br />
s Y<br />
X Noml<br />
X Actl<br />
+<br />
-<br />
4-60 <strong>TNC</strong> <strong>360</strong> 3 Servo Positioning of the NC Axes 8/95<br />
s ax<br />
➂<br />
➃<br />
v x<br />
U<br />
kv factor for<br />
speed pre-control<br />
MP1510<br />
s ax<br />
v = k v ·s ax<br />
t<br />
+<br />
+<br />
Integral factor: MP1080<br />
➀<br />
vx Noml+<br />
+<br />
Servo<br />
amplifier<br />
+<br />
v x Actl<br />
-
➀ When operating with feed forward control the set velocity value (the analog potential for<br />
the drive amplifier) is formed from three components:<br />
feed forward control,<br />
servo lag,<br />
integral component.<br />
➁ The feed forward control value, which is adjusted to the dynamic characteristics of the<br />
machine by machine parameters, makes it possible to control the loop with a lag distance<br />
which is nearly "0".<br />
➂ Deviations in the actual positional value are compensated as described under "Operation<br />
with lag." The servo follows the pre-compensated curve.<br />
The K v factor for the feed forward control then comes into play.<br />
➃ If the axes are stopped, the integral factor will also be effective:<br />
it results in an offset correction.<br />
The feed forward control value is adjusted to the dynamics of the machine by three machine<br />
parameters.<br />
U [V]<br />
9<br />
Pre-control<br />
MP1530<br />
MP1060 MP1520<br />
Entry value correct<br />
Entry value too large<br />
Entry value too small<br />
t [ms]<br />
The machine parameter MP1060 determines the acceleration (= slope of the pre-controlled speed<br />
curve).<br />
The machine parameter MP1530 determines the transient response. The larger the value which is<br />
entered, the more the system will tend to oscillate.<br />
MP1520 determines the run-in behavior into the nominal position. The larger the value which is<br />
entered, the more the system will tend to oscillate.<br />
The fine control of the pre-controlled speed set-value is influenced by the K v factor for feed forward<br />
control MP1510.<br />
8/95 <strong>TNC</strong> <strong>360</strong> 3 Servo Positioning of the NC Axes 4-61
U [V]<br />
t [ms]<br />
If the K v factor is too large, the system will oscillate about the pre-controlled speed set value.<br />
The size of the K v factor is normally the same as the K v factor for operation with servo lag<br />
Depending on the dynamic characteristics of the machine it may also be higher (see section<br />
"Commissioning and start-up procedure").<br />
MP1530 Damping factor for transient response<br />
Input value: 0.01 to 0.999<br />
MP1520 Position approach speed<br />
Input value: 0.1 to 10 [m/min]<br />
MP1510 K v factor for feed forward control<br />
Input value: 0.1 to 10 [1/min]<br />
MP1510.0 K v factor X axis<br />
MP1510.1 K v factor Y axis<br />
MP1510.2 K v factor Z axis<br />
MP1510.3 K v factor 4th axis<br />
4-62 <strong>TNC</strong> <strong>360</strong> 3 Servo Positioning of the NC Axes 8/95
3.3 Offset adjustment<br />
The <strong>TNC</strong> <strong>360</strong>/<strong>TNC</strong> 335 controls include several possibilities for compensating for an offset voltage<br />
which would cause the axes to drift. The maximum permissible offset voltage in the control is<br />
100 mV. If this voltage is reached or exceeded, then the error message<br />
will appear.<br />
"Gross positioning error E"<br />
The automatic cyclical offset adjustment and the adjustment via integral factor must not be active<br />
simultaneously!<br />
3.3.1 Offset adjustment by code number<br />
An automatic offset adjustment can be activated with the code number 75 368. After entering the<br />
code number the control shows the offset values for the axes X, Y, Z, IV, in the dialog line. The<br />
values indicate the voltage in 0.6 mV units. Thus a display of 10 means 10 x 0.6 mV = 6.0 mV. The<br />
display 0 means no offset. The displayed offset value consists of the offset values that originate in<br />
the motor controller and in the control.<br />
On pressing the "ENT" key the offset values, which are displayed on the VDU, are automatically<br />
compensated, the control puts out an appropriate compensating voltage. Compensation only takes<br />
place if the offset voltage is > 0.6 mV.<br />
To switch off the automatic offset adjustment, enter the code number and press the "NO ENT" key.<br />
The offset values are stored in the control and are non-volatile.<br />
After a control is exchanged, the offset adjustment must be re-activated via code number.<br />
3.3.2 Automatic cyclical offset adjustment<br />
The machine parameter MP1220 can be used to program a time interval, after which an offset<br />
adjustment will be performed cyclically.<br />
An automatic adjustment will be carried out, when the predetermined time has elapsed and the<br />
following conditions are fulfilled:<br />
- all axes are stopped,<br />
- the spindle is not switched on,<br />
the axes are not clamped.<br />
For each adjustment cycle there will be a 1 mV correction if the offset voltage is larger than 1 mV. If<br />
the offset voltage is smaller than 1 mV then compensation will be in steps of 0.6 mV.<br />
MP1220 Automatic cyclical offset adjustment<br />
Input value: 0 to 65536 [s]<br />
0 = no automatic adjustment<br />
8/95 <strong>TNC</strong> <strong>360</strong> 3 Servo Positioning of the NC Axes 4-63
3.3.3 Offset adjustment with integral factor<br />
The integral factor MP1080 also results in an automatic offset adjustment. It is only effective in the<br />
stop condition (see block diagram of control loop).<br />
According to the size of the factor the offset voltage will be reduced quickly or slowly.<br />
Even a small amount of play in the drives can lead to instability in the control loop. An integral factor<br />
of 0 is entered in this case.<br />
Voltage<br />
step<br />
(0.6 mV)<br />
10<br />
8<br />
6<br />
4<br />
2<br />
MP1080 Integral factor<br />
Input value: 0 to 65535<br />
MP1080.0 Integral factor X axis<br />
MP1080.1 Integral factor Y axis<br />
MP1080.2 Integral factor Z axis<br />
MP1080.3 Integral factor 4th axis<br />
MP1080 ·s a = 1000<br />
MP1080 ·s a = 500<br />
1 2 3<br />
MP1080 ·s a = 150<br />
4-64 <strong>TNC</strong> <strong>360</strong> 3 Servo Positioning of the NC Axes 8/95<br />
t [s]
✎<br />
8/95 <strong>TNC</strong> <strong>360</strong> 3 Servo Positioning of the NC Axes 4-65
3.4 Contour behavior in corners<br />
3.4.1 Radial acceleration<br />
As well as the normal acceleration (MP1060) there is also a machine parameter for radial<br />
acceleration (MP1070).<br />
The machine parameter limits the feed for circular movements according to the following formula:<br />
v = r [m] · MP1070 [m/s 2 ] v= feed rate for circular movements [m/s]<br />
r= radius [m] (cutter mid-point contour)<br />
It is recommended that a value should be entered which is between the half of and the same as that<br />
in MP1060 (Acceleration). If the programmed feed is lower than that above, then the programmed<br />
feed will be used. MP1070 is effective for operation with lag and with feed forward control.<br />
MP1070 Radial acceleration<br />
Input value: 0,001 to 3.0 [m/s2]<br />
3.4.2 Constant feed rate in corners<br />
Machine parameter MP7460 defines the angle which can still be traversed with constant surface<br />
speed. This machine parameter is effective for corners without a radius compensation, for internal<br />
corners it is also effective with a radius compensation.<br />
MP7460<br />
This machine parameter is effective for operation with feed forward control as well as for operation<br />
with lag. The permissible size of the angle depends on the drives in the machine.<br />
Realistic values are 5° to 15°.<br />
4-66 <strong>TNC</strong> <strong>360</strong> 3 Servo Positioning of the NC Axes 8/95
The resulting path is as follows:<br />
Axis standstill<br />
s a<br />
α<br />
MP7460 Constant feed rate in corners<br />
Input value: 0.001 to 179.999°<br />
α = Change of axis movement direction<br />
s a = Servo lag<br />
Path when MP7460 < α<br />
Path when MP7460 > α<br />
3.4.3 Constant feed rate in corners with M90<br />
The miscellaneous function M90 was introduced to enable constant surface speed to be achieved in<br />
corners without radius compensation.<br />
This miscellaneous function is only effective in operation with lag!<br />
with M90<br />
s a<br />
without M90<br />
8/95 <strong>TNC</strong> <strong>360</strong> 3 Servo Positioning of the NC Axes 4-67
3.5 Monitoring functions<br />
The NC monitors the axis positions and the dynamic behavior of the machine. If the fixed values in<br />
the machine parameters are exceeded, an error message is displayed and the machine is stopped.<br />
Position, standstill, movement and analog voltage are monitored.<br />
If, for some reason, monitoring is not wanted at all, the following markers must be set in the PLC<br />
program:<br />
Set Reset<br />
M2688 No monitoring X axis PLC PLC<br />
M2689 No monitoring Y axis<br />
M2690 No monitoring Z axis<br />
M2691 No monitoring 4th axis<br />
The monitoring can be reactivated by resetting the markers in the PLC.<br />
The monitoring functions can also be switched off conditionally. In the machine parameter MP4130<br />
a PLC input is defined, which is interrogated with a 6 ms cycle time. The condition for activating this<br />
input is stored in MP4131. This function must be activated from the PLC by setting Bit 0 in Word<br />
W522.<br />
MP4130 Fast PLC input to suppress the monitoring functions<br />
Input value: 0 to 255 (No. of the PLC input)<br />
MP4131 Activation condition for fast PLC input from MP4130<br />
Input value: 0 or 1<br />
0 = Activation for Low level<br />
1 = Activation for High level<br />
Set Reset<br />
W522 Bit 0 Monitoring functions suppressed PLC PLC<br />
if PLC input MP 4130 is activated<br />
from MP4130<br />
4-68 <strong>TNC</strong> <strong>360</strong> 3 Servo Positioning of the NC Axes 8/95
3.5.1 Position monitoring for operation with lag<br />
The machine parameters MP1710 and MP1720 determine the ranges for the continuous position<br />
monitoring in the machine (lag monitoring). The monitoring is active as soon as the axes are under<br />
the control of the position control loop.<br />
If the limits of parameter MP1710 are exceeded, the error message<br />
"Positioning error"<br />
will appear and the machine stops. The error message can be canceled by the "CE" key.<br />
If the limit of parameter MP1720 is exceeded, the flashing error message<br />
appears.<br />
"Gross positioning error A"<br />
This error can only be canceled by switching off the control. An input value of approx. 1 to 1.4 times<br />
lag for rapid traverse is realistic. MP1720 is larger than MP1710.<br />
MP1710 Position monitoring for operation with lag (cancelable)<br />
Input value: 0.001 to 1000 [mm]<br />
MP1720 Position monitoring for operation with lag (EMERGENCY STOP)<br />
Input value: 0.001 to 1000 [mm]<br />
8/95 <strong>TNC</strong> <strong>360</strong> 3 Servo Positioning of the NC Axes 4-69
3.5.2 Position monitoring for operation with feed forward control<br />
In operation with feed forward control the ranges for continuous position monitoring are determined<br />
by MP1410 and MP1420 lag monitoring. The monitoring is active as soon as the axes are under the<br />
control of the position control loop.<br />
If the limits of MP1410 are exceeded, the error message<br />
"Positioning error"<br />
will appear, which can be canceled with the "CE" key. If the limit of parameter MP1420 is exceeded,<br />
the flashing error message<br />
"Gross positioning error A"<br />
appears. This error can only be canceled by switching off the control.<br />
If clamped axes cause the error message "Positioning error", a residual voltage can remain at the<br />
nominal value output, since the machine axes can no longer be traversed. MP1150 can be used to<br />
program a time after which the residual voltage becomes zero. After this period a nominal/actual<br />
value transfer is carried out. If the error message is canceled by "CE" before the time has elapsed,<br />
the nominal/actual value transfer is carried out and the residual voltage is switched off. This machine<br />
parameter functions in operation with lag as well as with feed forward control.<br />
MP1410 Position monitoring in operation with feed forward control (cancelable)<br />
Input value: 0.001 to 30 [mm]<br />
MP1420 Position monitoring in operation with feed forward control (EMERGENCY<br />
STOP)<br />
Input value: 0.001 to 30 [mm]<br />
MP1150 Delay time before switching off the residual voltage on error message<br />
"Positioning error"<br />
Input value: 0 to 65.535 [s]<br />
4-70 <strong>TNC</strong> <strong>360</strong> 3 Servo Positioning of the NC Axes 8/95
3.5.3 Monitoring the analog voltage<br />
Monitoring of the analog voltage is only possible in operation with feed forward control.<br />
If it exceeds 10 V, the flashing error message<br />
is displayed.<br />
"Gross positioning error B"<br />
3.5.4 Movement monitoring<br />
The movement monitoring functions in operation with feed forward control as well as with lag.<br />
During movement monitoring, the actual path traveled is compared with a nominal path calculated<br />
by the NC at short intervals (several servo cycles). If, during this period, the actual path traveled<br />
differs from the calculated path, the flashing error message<br />
is displayed.<br />
"Gross positioning error C"<br />
In machine parameter MP1140 a voltage can be stored, below which the movement monitoring is<br />
out of action.<br />
If 10 [V] is entered in this machine parameter, the movement monitoring becomes<br />
inactive. It is not possible to operate the machine safely without movement<br />
monitoring.<br />
MP1140 Movement monitoring<br />
Input value: 0.03 to 10 [V]<br />
8/95 <strong>TNC</strong> <strong>360</strong> 3 Servo Positioning of the NC Axes 4-71
3.5.5 Standstill monitoring<br />
The Standstill monitoring functions in operation with feed forward control and with lag. The<br />
monitoring functions when the axes have reached the positioning window. The range in which the<br />
axes may move is defined in MP1110.<br />
As soon as position deviation is greater than the value which is stored in MP1110, the flashing error<br />
message<br />
"Gross positioning error D"<br />
is displayed. The message also appears if, on running-in to a position, an overshoot occurs which is<br />
larger than the value in MP1110 or the axis moves in the opposite direction on beginning a<br />
positioning movement.<br />
MP1110 Standstill monitoring<br />
Input range: 0.001 to 30 [mm]<br />
3.5.6 Positioning window<br />
The positioning window defines the limits within which the control considers that a position has<br />
been reached. After reaching the position the control starts the execution of the next block.<br />
The size of the positioning window is defined in machine parameter MP1030.<br />
If the value which is entered is too small, the run-in time and therefore the time between one<br />
program block and the next will be lengthened.<br />
If the axes have reached the positioning window after a movement, the markers M2008 to M2011<br />
and M2017 are set (see section "Axis in position").<br />
MP1030 Positioning window<br />
Input range 0.001 to 2 [mm] or [°]<br />
MP1030.0 X axis<br />
MP1030.1 Y axis<br />
MP1030.2 Z axis<br />
MP1030.3 4th axis<br />
4-72 <strong>TNC</strong> <strong>360</strong> 3 Servo Positioning of the NC Axes 8/95
✎<br />
8/95 <strong>TNC</strong> <strong>360</strong> 3 Servo Positioning of the NC Axes 4-73
3.6 Controlled axes<br />
The machine parameter MP50 determines which of the four NC axes should be controlled.<br />
MP50 Controlled axes<br />
Input value 0 to 15<br />
Bit 0 X axis +0 = not controlled<br />
+1 = controlled<br />
Bit 1 Y axis +0 = not controlled<br />
+2 = controlled<br />
Bit 2 Z axis +0 = not controlled<br />
+4 = controlled<br />
Bit 3 4th axis +0 = not controlled<br />
+8 = controlled<br />
Further parameters for the NC axes may be found in the section "machine axes."<br />
The PLC functions which are described in the following sections are only effective for controlled<br />
axes.<br />
3.6.1 Axis enable, feed rate enable<br />
After switching on the control voltage the "Axis-enable markers" are automatically set by the NC, so<br />
that the machine axes can be held in closed position loops by the control .<br />
The axis-enable markers can be reset by the NC if the control loop is opened by the PLC, see<br />
section "Open control loop").<br />
Set Reset<br />
M2000 Axis enable X NC PLC, NC<br />
M2001 Axis enable Y<br />
M2002 Axis enable Z<br />
M2003 Axis enable 4<br />
The feed rate enable must be specified for all axes by M2451 and complement marker M2467. If the<br />
feed rate enable is removed, the analog voltage is output as 0 V and the axes immediately stop<br />
moving. The letter "F" is then highlighted in the status display.<br />
Set Reset<br />
M2451 Feed rate enable for all axes PLC PLC<br />
M2467 Complement feed rate enable<br />
4-74 <strong>TNC</strong> <strong>360</strong> 3 Servo Positioning of the NC Axes 8/95
3.6.2 Axes in position<br />
If the axes have reached the defined positioning window (MP1030, see section "Positioning<br />
window") after a movement, the "axis in position" markers are set by the NC. This also happens<br />
after switching on the control voltage.<br />
The markers will be reset by the NC only if the axes leave the positioning window when being<br />
traversed in manual operation or automatic operation. This is also valid when passing over the<br />
reference marks. In the "Electronic handwheel" mode of operation the markers M2008 to M2011 are<br />
reset.<br />
The markers also inform the PLC when an axis should be moved. A positioning block resets the<br />
corresponding in-position marker. This makes it possible to unclamp the axis and close the control<br />
loop.<br />
For contours which can be machined with constant feed rate the "Axis in position" markers are not<br />
set.<br />
Marker Function Set Reset<br />
M2008 X axis in position NC NC<br />
M2009 Y axis in position<br />
M2010 Z axis in position<br />
M2011 4th axis in position<br />
8/95 <strong>TNC</strong> <strong>360</strong> 3 Servo Positioning of the NC Axes 4-75
3.6.3 Axes in motion<br />
If the axes are in motion the appropriate "Axis in motion" markers are set by the NC.<br />
Note: The markers are only set in the operating modes "Positioning with manual entry", "Single block"<br />
and "Full sequence."<br />
Set Reset<br />
M2128 X axis in motion NC NC<br />
M2129 Y axis in motion<br />
M2130 Z axis in motion<br />
M2131 4th axis in motion<br />
Example for markers "Axis in position" and "Axis in motion":<br />
P3<br />
P2<br />
M2008<br />
M2009<br />
M2128<br />
M2129<br />
P1<br />
P0<br />
.<br />
.<br />
.<br />
L X80 Y20 RL<br />
L X0 RL<br />
L X80 RL<br />
.<br />
.<br />
.<br />
P0 P1 P2 P3<br />
4-76 <strong>TNC</strong> <strong>360</strong> 3 Servo Positioning of the NC Axes 8/95
3.6.4 Open control loop<br />
If, after the execution of an NC block, the control loop for a particular axis is opened and this axis is<br />
clamped, then it is necessary to delay this opening to give the clamp sufficient time to operate. The<br />
markers M2492 to M2495 were introduced for this purpose. If one of these markers is set, and the<br />
appropriate axis is in position, then the next NC block will only then be processed when the "Open<br />
control loop" marker (M2544 to M2547) has been set. After the control loops are opened the<br />
markers M2000 to M2003 are reset by the NC.<br />
As soon as the "Axis in position" marker is reset, the control loop must re-closed so that the axes<br />
can be moved again.<br />
Set Reset<br />
M2544 Open control loop X axis PLC PLC<br />
M2545 Open control loop Y axis<br />
M2546 Open control loop Z axis<br />
M2547 Open control loop 4th axis<br />
M2492 Await open control loop X axis PLC PLC<br />
M2493 Await open control loop Y axis<br />
M2494 Await open control loop Z axis<br />
M2495 Await open control loop 4th axis<br />
3.6.5 Actual - nominal value transfer<br />
If the markers M2552 to M2555 are set, then the actual position value will be transferred to memory<br />
as the nominal position value.<br />
Actual value transfer is possible only in the "<strong>Manual</strong>" and Electronic handwheel" modes of operation.<br />
Set Reset<br />
M2552 Actual - nominal value transfer X axis PLC PLC<br />
M2553 Actual - nominal value transfer Y axis<br />
M2554 Actual - nominal value transfer Z axis<br />
M2555 Actual - nominal value transfer 4th axis<br />
8/95 <strong>TNC</strong> <strong>360</strong> 3 Servo Positioning of the NC Axes 4-77
✎<br />
4-78 <strong>TNC</strong> <strong>360</strong> 4 Spindle 8/95
4 Spindle<br />
The spindle is controlled by the PLC.<br />
The spindle speed (S output) can be either an analog voltage output or a BCD-coded output. The<br />
spindle speed is programmed in rpm in the NC program.<br />
The machine parameter MP3010 determines whether the spindle speed is a BCD-coded output or<br />
an analog output, and whether the spindle orientation should be active.<br />
Up to eight gear ranges can be defined by machine parameters.<br />
Tapping cycles are available for tapping with and without floating tap holder.<br />
MP3010 Spindle-speed output, Spindle orientation<br />
Input value: 0 to 8<br />
0 =No spindle-speed output<br />
1 =BCD-coded output of the spindle speed,<br />
only if the spindle speed changes<br />
2 =BCD-coded output of the spindle speed at every TOOL CALL<br />
3 =Analog output of the spindle speed and gear-change signal,<br />
only when the gear range is changed<br />
4 =Analog output of the spindle speed and gear-change signal<br />
at every TOOL CALL<br />
5 =Analog output of the spindle speed and no gear-change signal<br />
6 =As for Input value 3, but with controlled spindle for orientation<br />
7 =As for Input value 4, but with controlled spindle for orientation<br />
8 =As for Input value 5, but with controlled spindle for orientation<br />
The functions are described in detail in the following sections.<br />
8/95 <strong>TNC</strong> <strong>360</strong> 4 Spindle 4-79
4.1 Analog output of the spindle speed<br />
For analog output of the spindle speed (S analog) spindle speeds can be programmed from 0 to 99<br />
999.999 rpm. The programmed spindle speed is available as an analog DC voltage of 0 to 10 V on<br />
connector X8 of the logic unit. In addition, gear change signals can be assigned to any PLC outputs<br />
by the PLC program.<br />
For S analog the value 991 must be entered in the machine parameter MP3020!<br />
If the control is operating with S analog, marker M2042 is set. The programmed spindle speed is<br />
stored in D356 in 1/1 000 [rpm]. The nominal spindle speed is stored in Word W320 in rpm. The<br />
actual spindle speed is stored in Word W322 in rpm.<br />
Marker, Function Set Reset<br />
Word<br />
M2042 Analog output of the spindle speed NC NC<br />
D356 Programmed spindle speed NC NC<br />
W320 Nominal spindle speed NC NC<br />
W322 Actual spindle speed NC NC<br />
4.1.1 Direction of spindle rotation<br />
The polarity of the S-analog voltage is defined by machine parameter MP3130. The count direction<br />
of the measuring system signals for the spindle is defined in MP3140. The direction of spindle<br />
rotation can be reversed by setting marker M2489, i.e. the polarity of the analog voltage is inverted.<br />
The S-analog voltage appears at the output as soon as the marker M2485 for M03 or M2486 for<br />
M04 is set. At the same time the miscellaneous function is displayed in the status window of the<br />
control (see section "Display and operation"). Marker M2487 turns off the analog voltage and<br />
displays M05.<br />
If more than one of the markers M2485 to M2487 is set at the same time, this will release the<br />
flashing error message<br />
Error in PLC program 1Q<br />
Marker M2608 can be used to remove the spindle-enable, at the same time M03, M04 or M05 is<br />
displayed inversely. The S-analog voltage will then go to 0 V.<br />
MP3130 Polarity of the S-analog voltage<br />
Input value: 0 to 3<br />
0 =M03 positive voltage<br />
M04 negative voltage<br />
1 =M03 negative voltage<br />
M04 positive voltage<br />
2 =M03 and M04 positive voltage<br />
3 =M03 and M04 negative voltage<br />
4-80 <strong>TNC</strong> <strong>360</strong> 4 Spindle 8/95
MP3140 Count direction of the measuring system signals for the spindle<br />
0 =positive count direction with M03<br />
1 =negative count direction with M03<br />
Set Reset<br />
M2489 Change direction of spindle rotation PLC PLC<br />
M2485 Status display and output of the analog voltage PLC PLC<br />
for M03<br />
M2486 Status display and output of the analog voltage PLC PLC<br />
for M04<br />
M2487 Status display M05 and spindle stop PLC PLC<br />
M2608 Inverse display of M03, M04, M05 and PLC PLC<br />
S analog = 0 V [no spindle-enable)<br />
4.1.2 Gear range<br />
With the aid of the machine parameters MP3510 and MP3210 up to eight gear ranges can be<br />
defined. The nominal speed for S override 100 % and a matching S-analog voltage is entered for<br />
each gear range.<br />
If not all gear ranges are required, then the remaining machine parameters are set to zero.<br />
Machine parameter MP3515 can be used to define a maximum achievable spindle speed for each<br />
gear range which cannot be exceeded by S-override.<br />
The voltage range can be restricted by machine parameter MP3240.1.<br />
MP3120 can determine whether zero spindle speed is permitted, in spite of a minimum producable<br />
analog output voltage.<br />
If an S-analog voltage output 0 V is produced, marker M2005 will be set. This is also the case when<br />
the potential has been turned down to zero with the override potentiometer.<br />
The ramp slope for the S-analog voltage on output of M03, M04 is stored in MP3410.0.<br />
If the spindle voltage is on a rising or falling ramp, marker M2004 will be set. This also happens<br />
when the spindle voltage is altered with the override potentiometer, the voltage changes very<br />
quickly, and the ramp of MP3410.0 cannot be followed.<br />
8/95 <strong>TNC</strong> <strong>360</strong> 4 Spindle 4-81
MP3510 Spindle speed for gear ranges<br />
Input value: 0 to 99 999.999 [rpm]<br />
MP3510.0 Spindle speed for gear range 1<br />
MP3510.1 Spindle speed for gear range 2<br />
MP3510.2 Spindle speed for gear range 3<br />
MP3510.3 Spindle speed for gear range 4<br />
MP3510.4 Spindle speed for gear range 5<br />
MP3510.5 Spindle speed for gear range 6<br />
MP3510.6 Spindle speed for gear range 7<br />
MP3510.7 Spindle speed for gear range 8<br />
MP3210 S-analog voltage for gear range<br />
Input value: 0 to 9.999 [V]<br />
MP3210.0 S-analog voltage, gear range 1<br />
MP3210.1 S-analog voltage, gear range 2<br />
MP3210.2 S-analog voltage, gear range 3<br />
MP3210.3 S-analog voltage, gear range 4<br />
MP3210.4 S-analog voltage, gear range 5<br />
MP3210.5 S-analog voltage, gear range 6<br />
MP3210.6 S-analog voltage, gear range 7<br />
MP3210.7 S-analog voltage, gear range 8<br />
MP3240.0 Maximum S-analog voltage output<br />
Input value: 0 to 9.999 [V]<br />
MP3240.1 Minimum S-analog voltage output<br />
Input value: 0 to 9.999 [V]<br />
MP3120 Zero spindle speed permitted<br />
Input value 0:S = 0 permitted<br />
Input value 1:S = 0 not permitted<br />
MP3410.0 Ramp slope for spindle for M03, M04, M05<br />
Input range: 0 to 1.999 [V/ms]<br />
Set Reset<br />
M2004 S-analog voltage not on ramp NC NC<br />
M2005 S-analog voltage = 0 V NC NC<br />
M2020 Actual spindle speed below minimum rpm fromNC<br />
MP3240.1<br />
NC<br />
4-82 <strong>TNC</strong> <strong>360</strong> 4 Spindle 8/95
✎<br />
8/95 <strong>TNC</strong> <strong>360</strong> 4 Spindle 4-83
4.1.3 Spindle override<br />
The spindle speed can be altered within certain limits by the spindle override potentiometer. These<br />
limits are fixed by machine parameter MP3310. However, the upper spindle speed limit from<br />
MP3240 cannot be exceeded by spindle override.<br />
The % factor which is adjusted by spindle override is kept in Word W492 and W764. However,<br />
W764 can be changed by the PLC. As soon as a different value is entered here it will be adopted by<br />
the NC. In this way the % factor can be influenced by the PLC .<br />
If W764 is not changed by the PLC, the normal override function remains active.<br />
MP7620 bit 3 determines whether the override is effective in 1% steps or according to a nonlinear<br />
characteristic curve. In the nonlinear curve, the lower range changes in 0.01% steps, and in the<br />
range over 2.5% the step is 0.75%.<br />
The range of override values in W492 and W764 lies between 1 and 150 in 1% steps for the linear<br />
curve, and between 0 and 15 000 for the nonlinear curve.<br />
MP3310.0 Limit with spindle override (maximum)<br />
Input value: 0 to 150 [%]<br />
MP3310.1 Limit with spindle override (minimum)<br />
Input value: 0 to 150 [%]<br />
Word Function Set Reset<br />
W492 % factor – spindle override NC NC<br />
(NC → PLC)<br />
W764 % factor – spindle override NC; PLC NC; PLC<br />
(PLC → NC)<br />
MP7620 Bit 3 Spindle override in 1% steps or according to a non linear characteristic<br />
curve<br />
+0 = 1% steps<br />
+8 = nonlinear curve<br />
4-84 <strong>TNC</strong> <strong>360</strong> 4 Spindle 8/95
The following diagram illustrates the relationships:<br />
U [V]<br />
MP3240.0<br />
= 9 V<br />
MP3210.1<br />
= 8 V<br />
MP3210.0<br />
= 6 V<br />
MP3240.1<br />
= 1 V<br />
0 250 750 1500 1875<br />
3000<br />
MP3510.0<br />
MP3510.1<br />
I II<br />
Gear range I: 1 500 rpm at 6 V (MP3510.0; MP3210.0)<br />
Gear range II: 3 000 rpm at 8 V (MP3510.1; MP3210.1)<br />
Upper spindle override limit: 125 % (MP3310.0)<br />
Lower spindle override limit: 50 % (MP3310.1)<br />
Maximal permissible output voltage: 9 V (MP3240.0)<br />
Minimal permissible output voltage: 1 V (MP3240.1)<br />
4.1.4 Gear change<br />
3375<br />
MP3515.1<br />
[rpm]<br />
Gear change is controlled by the PLC program. Up to eight gear ranges are available, coded in Word<br />
W256. The NC enters the gear code for the gear ranges one to eight in Word W256, – according to<br />
the programmed spindle speeds in the NC program (see MP3510).<br />
After setting the gear code, the marker M2043 is set by the NC as a strobe signal.<br />
The spindle speed which is programmed in the NC program as TOOL CALL S is stored in<br />
Doubleword D356 and D756 in 1/1000 [rpm] by the NC. If a different spindle speed (from the spindle<br />
speed fixed by the NC) is to be activated by the PLC, the speed must be entered by the PLC in<br />
D756, this can then be activated by marker M2814 .<br />
8/95 <strong>TNC</strong> <strong>360</strong> 4 Spindle 4-85
A different gear range from that which is selected by the NC can be activated by the PLC setting<br />
Markers M2104 – M2106 and Marker M2814. Marker M2814 is reset by the NC after the gear<br />
change.<br />
Check that the spindle speed selected by the PLC is within the spindle speed limits of the selected<br />
gear range.<br />
The PLC program must transfer the gear code to the machine. The NC waits for the<br />
acknowledgment signal "Gear change completed" (M2480) before continuing the program . As soon<br />
as marker M2480 is set by the PLC the NC resets the strobe signal M2043. The marker M2480 may<br />
only be set in one PLC cycle.<br />
Set Reset<br />
M2043 Gear-code change signal NC NC<br />
M2480 Acknowledgment PLC PLC<br />
“Gear change completed”<br />
M2104 1st bit gear code for S analog (lsb) PLC PLC<br />
M2105 2nd bit gear code for S analog PLC PLC<br />
M2106 3rd bit gear code for S analog (msb) PLC PLC<br />
M2814 Activation of a gear range and spindle speed PLC NC<br />
via PLC<br />
D356 Programmed spindle speed NC<br />
D756 Set spindle speed from the PLC; NC, PLC<br />
programmed spindle speed<br />
W256 G code for S analog NC<br />
An alternating S-analog voltage can be produced for changing gear. For this purpose the marker<br />
M2490 and the marker M2491 must be alternately set and reset by the PLC. This may be achieved<br />
by interrogating a particular timer in the PLC program. The markers M2490 and M2491 are reset to<br />
stop the spindle. The output voltage is defined by MP3240.2.<br />
MP3240.2 Jog voltage for gear change<br />
Input value 0 to 9.999 [V]<br />
Set Reset<br />
M2490 Spindle rotation left (for gear change) PLC PLC<br />
M2491 Spindle rotation right (for gear change) PLC PLC<br />
The direction of spindle rotation after the gear change is determined by the PLC program with the<br />
markers M2485 to M2487 (see "Direction of spindle rotation").<br />
Machine parameter MP3030 can be used to determine whether an axis halt should occur on a TOOL<br />
CALL with only a spindle speed output.<br />
4-86 <strong>TNC</strong> <strong>360</strong> 4 Spindle 8/95
If an axis halt is not permitted, then no PLC positioning, datum correction, spindle<br />
orientation or change of limit switch range may be performed during the S-code<br />
output.<br />
MP3030 Axis halt on TOOL CALL with only a spindle speed output.<br />
1 = No axis halt on TOOL CALL<br />
0 = Axis halt on TOOL CALL<br />
If a non-permissible spindle speed is programmed, the marker M2092 will be set by the NC, and<br />
simultaneously the error message appears:<br />
Wrong spindle speed<br />
Set Reset<br />
M2092 Illegal spindle speed NC NC<br />
8/95 <strong>TNC</strong> <strong>360</strong> 4 Spindle 4-87
PLC example for gear change and jog-voltage output:<br />
. . .<br />
. . .<br />
. . .<br />
L M2043 ;Gear-code change signal for S analog<br />
CMT 50 ;Module call (output gear code )<br />
. . .<br />
. . .<br />
. . .<br />
L M2043 ;Gear-code change signal for S analog<br />
AN M968 ;Buffer marker for T13<br />
AN T13<br />
AN T14<br />
AN T61 ;Timer 13 for spindle left, running<br />
AN T62 ;Timer 14 for spindle right, running<br />
= T13 ;Set timer 13 (value from MP4110.13)<br />
S M968 ;Set buffer marker for T13<br />
L M2043<br />
AN M969 ;Buffer marker for T14<br />
AN T13<br />
AN T14<br />
AN T61<br />
AN T62<br />
= T14 ;Set timer 14 (value from MP4110.14)<br />
S M969 ;Set buffer marker for T14<br />
L T61 ;Timer 13 running<br />
= M2490 ;Spindle left for gear change<br />
L T62 ;Timer 14 running<br />
= M2491 ;Spindle right for gear change<br />
LN T13<br />
AN T61<br />
R M968 ;Reset buffer marker<br />
LN T14<br />
AN T61<br />
R M968 ;Reset buffer marker<br />
. . .<br />
. . .<br />
. . .<br />
L M2043<br />
A I5 ;Input for acknowledgment signal<br />
S M2480 ;Acknowledgment - gear changed<br />
. . .<br />
. . .<br />
EM ;End main program<br />
LBL50 ;Module start<br />
L M2043 ;Gear-code change signal<br />
L W256 ;Gear-code for S analog<br />
B= 015 ;Outputs 15, 16 and 17 for gear change are<br />
activated<br />
EM ;Module end<br />
4-88 <strong>TNC</strong> <strong>360</strong> 4 Spindle 8/95
✎<br />
8/95 <strong>TNC</strong> <strong>360</strong> 4 Spindle 4-89
✎<br />
4-90 <strong>TNC</strong> <strong>360</strong> 4 Spindle 8/95
4.2 Coded output of spindle speed<br />
For coded (binary) output of the spindle speed an S code is entered by the NC in Word W258. At the<br />
same time strobe marker M2044 is set by the NC. The signals are static. The NC delays the<br />
continuation of program run until marker M2481 gives the acknowledgment that the new spindle<br />
speed has been activated. On acknowledgment the change marker M2044 is reset. The S code is<br />
not altered before the next S output.<br />
A spindle speed is entered in the TOOL CALL block with a maximum of four figures in rpm, if<br />
necessary, rounded off by the NC to the nearest standard value. Spindle speeds of 0 to 9 000 are<br />
possible. The spindle speed which has been entered is put out by the control as S Code according to<br />
DIN 66025, as shown in the list of S Codes. With MP3020 the minimum and maximum spindle<br />
speeds and the desired spindle-speed steps can be defined.<br />
The Input value is a 5-figure number, derived as follows:<br />
Example:<br />
Minimum spindle speed 00 to 99 (see S-code table)<br />
Maximum spindle speed 00 to 99 (see S-code table)<br />
Spindle-speed step 1 to 9<br />
The minimum spindle speed is to be 1 rpm (S code 20), the maximum spindle speed is to be<br />
1000 rpm (S code 80). Only every second spindle speed should be programmable. This gives an<br />
input value of 20802 for MP3020. An input value of 991 would mean no limit.<br />
The S code is stored in the PLC in Word W258. The minimum spindle speed from MP3020 is stored<br />
in Word W1008.<br />
Set Reset<br />
M2044 S-code change signal NC NC<br />
M2481 S-code acknowledgment PLC PLC<br />
W258 S-code NC NC<br />
W1008 S-code for minimum spindle rpm NC NC<br />
MP3020 Definition of the spindle speed range<br />
Input value: 0 to 99 999<br />
8/95 <strong>TNC</strong> <strong>360</strong> 4 Spindle 4-91
S-code table<br />
S code rpm S-code rpm<br />
S 00 0 S 50 31.5<br />
S 01 0.122 S 51 35.5<br />
S 02 0.125 S 52 40<br />
S 03 0.14 S 53 45<br />
S 04 0.16 S 54 50<br />
S 05 0.18 S 55 56<br />
S 06 0.2 S 56 63<br />
S 07 0.224 S 57 71<br />
S 08 0.25 S 58 80<br />
S 09 0.28 S 59 90<br />
S 10 0.315 S 60 100<br />
S 11 0.355 S 61 112<br />
S 12 0.4 S 62 125<br />
S 13 0.45 S 63 140<br />
S 14 0.5 S 64 160<br />
S 15 0.56 S 65 180<br />
S 16 0.63 S 66 200<br />
S 17 0.71 S 67 224<br />
S 18 0.8 S 68 250<br />
S 19 0.9 S 69 280<br />
S 20 1 S 70 315<br />
S 21 1.12 S 71 355<br />
S 22 1.25 S 72 400<br />
S 23 1.4 S 73 450<br />
S 24 1.6 S 74 500<br />
S 25 1.8 S 75 560<br />
S 26 2 S 76 630<br />
S 27 2.24 S 77 710<br />
S 28 2.5 S 78 800<br />
S 29 2.8 S 79 900<br />
S 30 3.15 S 80 1000<br />
S 31 3.55 S 81 1120<br />
S 32 4 S 82 1250<br />
S 33 4.5 S 83 1400<br />
S 34 5 S 84 1600<br />
S 35 5.6 S 85 1800<br />
S 36 6.3 S 86 2000<br />
S 37 7.1 S 87 2240<br />
S 38 8 S 88 2500<br />
S 39 9 S 89 2800<br />
S 40 10 S 90 3150<br />
S 41 11.2 S 91 3550<br />
S 42 12.5 S 92 4000<br />
S 43 14 S 93 4500<br />
S 44 16 S 94 5000<br />
S 45 18 S 95 5600<br />
S 46 20 S 96 6300<br />
S 47 22.4 S 97 7100<br />
S 48 25 S 98 8000<br />
S 49 28 S 99 9000<br />
4-92 <strong>TNC</strong> <strong>360</strong> 4 Spindle 8/95
4.3 Spindle orientation<br />
In order to use the <strong>TNC</strong> on machines with automatic tool changers an orientation of the spindle (S<br />
axis) is necessary. The orientation is carried out by a miscellaneous function M19 or another M<br />
function and must be initiated by the PLC program. MP3010 determines whether the control<br />
operates with or without spindle orientation.<br />
Spindle-orientation sequence<br />
In normal operation the spindle is not in the position control loop. If the miscellaneous function M19<br />
is activated, marker M2712 (Strobe - spindle orientation) must be set by the PLC program and the<br />
spindle must be switched off. The spindle is driven down the ramp from MP3410.1 to the spindle<br />
speed from MP3520.1. An orientation does not begin until marker M2499 has been reset. When<br />
this spindle speed has been reached, the spindle is under the control of the position control loop and<br />
oriented to the set position of D592, along the ramp of MP3410.1.<br />
During a spindle orientation from a stop position the shortest path is followed, provided the start<br />
position of the spindle is in the positioning window (MP3430). If the start position is outside the<br />
positioning window, then the positioning is carried out according to markers M2656 and M03 or<br />
M04.<br />
If the spindle does not have to remain in the position control loop after reaching the set position,<br />
then the marker M2499 must be set. The spindle is only freed when this marker has been set by the<br />
PLC . If M2499 is set continuously the control loop will be opened immediately after every<br />
orientation, when the positioning window has been reached.<br />
MP3410.1 Ramp slope of the analog voltage for spindle orientation<br />
Input value: 0 to 1.999 [V/ms]<br />
MP3520.1 Spindle speed for spindle orientation<br />
Input value: 0 to 99 999.999 [rpm]<br />
Set Reset<br />
M2656 Spindle orientation from stop PLC PLC<br />
0 = Orientation with M03<br />
1 = Orientation with M04<br />
M2499 Open spindle control loop PLC PLC<br />
M2712 Activate PLC positioning PLC NC<br />
for spindle orientation<br />
D592 Position spindle orientation<br />
(Strobe M2712)<br />
8/95 <strong>TNC</strong> <strong>360</strong> 4 Spindle 4-93
Orientation from rotation:<br />
S<br />
[rpm]<br />
Prog. rpm<br />
MP3520.1<br />
0<br />
Orientation from standstill:<br />
S<br />
[rpm]<br />
Prog. rpm<br />
MP3520.1<br />
0<br />
M19<br />
(M2712 = 1)<br />
(M05)<br />
MP3410.1<br />
MP3410.0<br />
Standstill<br />
MP3410.1<br />
Target<br />
position<br />
Distance<br />
to target position<br />
M function<br />
(opening the<br />
control loop<br />
M2499 = 1)<br />
MP3410.1<br />
M05 M19<br />
Target M function<br />
M2712 = 1 position (opening the<br />
control loop<br />
M2499 = 1)<br />
4-94 <strong>TNC</strong> <strong>360</strong> 4 Spindle 8/95<br />
t<br />
t
The nominal position can be defined in a machine parameter MP4210.xx , and is referred to the<br />
reference point. It must be copied into Doubleword D592 with a PLC command. The nominal<br />
position can also be taken from the cycle "Orientation" (CYCL DEF 13). In this case the MSB of D592<br />
must be = 1 and the other Bits set to 0. This can be carried out by the PLC program.<br />
The orientation can be performed to an accuracy of 0.1 degree. This value results from the line count<br />
of the rotary encoder which is incorporated (ROD 426.xx8 with 1024 lines) and the quadruple<br />
evaluation in the <strong>TNC</strong>. A positioning window is defined by MP3420. If the spindle is within the<br />
positioning window after orientation, marker M2007 will be set.<br />
In order to be able to correct for any misalignment on assembly of the rotary encoder the machine<br />
parameter MP3430 was introduced. The deviation between the nominal and actual position of the<br />
reference mark which is entered here is taken into account during orientation.<br />
The reference mark is instantly evaluated by the NC when the spindle is turned on for the first time.<br />
MP3420 Positioning window for spindle<br />
Input range: 0 to 65 535 [increments]<br />
1 increment is equivalent to about 0.088 degree<br />
=<br />
<strong>360</strong> degrees<br />
1024 lines · quadruple-evaluation<br />
MP3430 Reference mark deviation from the desired position (Spindle preset)<br />
Input value: 0 to <strong>360</strong> [degrees]<br />
Set Reset<br />
M2007 Spindle in position NC NC<br />
In order to control the orientation process precisely, a k v factor can be entered individually for each<br />
gear range via MP3440.<br />
MP3440 k v factor for Spindle orientation<br />
Input range: 0.1 to 10 [1/min]<br />
MP3440.0 k v factor gear range 1<br />
MP3440.1 k v factor gear range 2<br />
MP3440.2 k v factor gear range 3<br />
MP3440.3 k v factor gear range 4<br />
MP3440.4 k v factor gear range 5<br />
MP3440.5 k v factor gear range 6<br />
MP3440.6 k v factor gear range 7<br />
MP3440.7 k v factor gear range 8<br />
8/95 <strong>TNC</strong> <strong>360</strong> 4 Spindle 4-95
After the start of spindle orientation the spindle position is displayed in the status window.<br />
The displayed value remains, as long as the spindle is in the closed position control loop.<br />
The display is modulo <strong>360</strong> degrees.<br />
A spindle orientation can also be performed by an initiator. For this, marker M2501 must be set by<br />
the PLC. This marker activates a spindle rotation with a spindle speed defined by machine parameter<br />
MP3520.0 and a direction of rotation according to marker M2656. If the marker M2501 is reset by<br />
the PLC (e.g.. via initiator), then the spindle will stop. The positional value will be displayed in the<br />
status window. "Jog mode" for the spindle can be achieved in this way.<br />
MP3520.0 Spindle speed activated by marker M2501<br />
Input value: 0 to 99 999.999 [rpm]<br />
Set Reset<br />
M2501 Activates spindle speed MP3520.0 PLC PLC<br />
and direction of rotation from marker M2656<br />
Example of a PLC program for spindle orientation with M19/M20<br />
Program description:<br />
Using the M Function M19 to activate a spindle orientation to the value which is determined by the<br />
spindle-orientation cycle.<br />
Using the M Function M20 to activate a spindle orientation to the value which is stored in<br />
MP4210.47.<br />
;Main program<br />
LN M1 ;Generate logic ONE<br />
S M1 ;Buffer marker which is continuously ONE<br />
.<br />
.<br />
.<br />
.<br />
.<br />
.<br />
LN M2045 ;M strobe inactive<br />
R M12 ;Spindle-orientation cycle active<br />
R M2482 ;Acknowledgment of M code<br />
.<br />
.<br />
.<br />
Activation of the orientation to the value from the HEIDENHAIN cycle<br />
L M1919 ;Decoded M function 19<br />
A M2045 ;M-code change signal<br />
AN M12 ;Orientation cycle active<br />
CMT 180 ;Activation of the Orientation from the cycle<br />
S M12 ;Orientation cycle active<br />
4-96 <strong>TNC</strong> <strong>360</strong> 4 Spindle 8/95
Activation of the orientation to the Value of MP4210.47<br />
L M1920 ;Decoded M function 20<br />
A M2045 ;M-code change signal<br />
AN M12 ;Orientation cycle active<br />
CMT 181 ;Activation of the orientation from the MP<br />
S M12 ;Orientation cycle active<br />
Acknowledgment of the orientation<br />
L M1919 ;Decoded M function 19<br />
O M1920 ;Decoded M function 20<br />
A M2045 ;M-code change signal<br />
A M2007 ;Spindle in position<br />
AN M2712 ;Strobe for spindle orientation<br />
S M2482 ;Acknowledgment of M code<br />
. . .<br />
. . .<br />
. . .<br />
EM ;Main program - end<br />
LBL 180; Transfer positional value from the spindle-orientation cycle<br />
L K+O ;Load the constant value ZERO<br />
BS K+31 ;Set Bit 31 to ONE<br />
= D592 ;Position spindle orientation<br />
. . .<br />
. . .<br />
. . .<br />
L M1 ;Buffer marker which is continuously ONE<br />
S M2712 ;Strobe for spindle orientation<br />
. . .<br />
. . .<br />
. . .<br />
EM<br />
LBL 181; Transfer positional value from the machine parameter<br />
L D956 ;MP4210.47 PLC positional value<br />
= D592 ;Position spindle orientation<br />
. . .<br />
. . .<br />
. . .<br />
L M1 ;Buffer marker which is continuously ONE<br />
S M2712 ;Strobe for spindle orientation<br />
. . .<br />
. . .<br />
. . .<br />
EM<br />
8/95 <strong>TNC</strong> <strong>360</strong> 4 Spindle 4-97
✎<br />
4-98 <strong>TNC</strong> <strong>360</strong> 4 Spindle 8/95
4.4 Tapping<br />
There are two tapping cycles available in the control:<br />
– tapping with floating tap holder and<br />
– tapping without floating tap holder.<br />
Tapping with floating tap holder is possible for both analog and coded spindle-speed output.<br />
Tapping without floating tap holder is only possible for analog spindle-speed output.<br />
The tapping cycle is defined in the NC program and can be called with CYCL CALL (M03). Tapping is<br />
adjusted to the dynamic behavior of the machine by machine parameters.<br />
4.4.1 Tapping with floating tap holder for analog spindle-speed<br />
output<br />
The following diagram shows the sequence of events in the cycle.<br />
F<br />
0<br />
S<br />
0<br />
M03<br />
M05<br />
M04<br />
Acknowledgement<br />
of M code<br />
M2048<br />
Cycle<br />
start<br />
MP3410.0<br />
MP3410.2<br />
MP7120.2<br />
30 ms<br />
(due to<br />
software)<br />
MP7120.0<br />
Dwell time from<br />
CYCL DEF 2.3<br />
MP3410.2<br />
MP3410.0<br />
End of<br />
cycle<br />
8/95 <strong>TNC</strong> <strong>360</strong> 4 Spindle 4-99
If the tapping cycle is called, marker M2048 is set by the NC.<br />
After switching on the spindle with M03 and successful acknowledgment (marker M2482) the set<br />
spindle speed should have been reached when the feed commences. Upon switch-on, the spindle<br />
follows the ramp from MP3410.0, on switching off it follows the ramp from MP3410.2. The M<br />
functions that are output by the NC must be acknowledged.<br />
However, if the feed ramp is flatter than the spindle ramp, then the spindle follows the flatter feed<br />
ramp. Switch-off can be delayed by MP7120.2.<br />
Example:<br />
If spindle speed s = 1000 [rpm] = 1.8 [V], the thread ramp is 0.05 [V/ms], and the feed ramp is<br />
steeper than 0.05 [V/ms] then:<br />
1.8 [V]: 0.05 [V/ms] = 36 ms<br />
The spindle is decelerated 36 ms before reaching the total hole depth. The spindle deceleration can<br />
be delayed by the spindle slow-down time.<br />
The restarting of the Spindle with M04 can be delayed by MP7120.0. The ramp follows MP3410.2<br />
again. The restarting of the feed can be delayed with the dwell time which is programmed in the<br />
cycle. The dwell times permit an optimal adjustment of the floating tap holder.<br />
The switch-off of the spindle is again performed by the NC with M05. The switch-off ramp follows<br />
MP3410.0. After this, the spindle is switched on again with M03.<br />
The feed override can only be effective within limits when tapping, otherwise the floating tap holder<br />
may be damaged. MP7110 was introduced for this limit.<br />
MP3410.2 Ramp slope for tapping<br />
Input value: 0 to 1.999 [V/ms]<br />
MP7120.0 Dwell time for change of direction of spindle rotation<br />
Input value: 0 to 65.535 [s]<br />
MP7120.2 Spindle run-on time after reaching total hole depth<br />
Input value: 0 to 65.535 [s]<br />
MP7110.0 Minimum for feed override when tapping<br />
Input value: 0 to 150 [%]<br />
MP7110.1 Maximum for feed override when tapping<br />
Input value: 0 to 150 [%]<br />
Set Reset<br />
M2048 Tapping cycle called NC NC<br />
4-100 <strong>TNC</strong> <strong>360</strong> 4 Spindle 8/95
✎<br />
8/95 <strong>TNC</strong> <strong>360</strong> 4 Spindle 4-101
4.4.2 Tapping with floating tap holder and coded spindle-speed<br />
output<br />
The following diagram shows the sequence of events in the cycle:<br />
F<br />
0<br />
S<br />
0<br />
M03<br />
M05<br />
M04<br />
Acknowledgement<br />
of M code<br />
M2048<br />
Cycle<br />
start<br />
MP7120.1<br />
MP7120.0<br />
Dwell time from<br />
CYCL DEF 2.3<br />
End of<br />
cycle<br />
Since, when using the spindle speed output in code, the spindle- and feed ramps cannot be<br />
synchronized by the NC, a machine parameter MP7120.1 was introduced to enable the spindle to be<br />
switched off early. M05 is automatically output by the NC and must be acknowledged.<br />
The machine parameter MP7120.0 (dwell time for change of direction of rotation) and the<br />
programmable dwell time are just as effective as for analog spindle-speed output.<br />
MP7120.1 Advanced switch time of spindle for "tapping" cycle (only active with BCD output<br />
of spindle rpm)<br />
Input value: 0 to 65.535 [s]<br />
4-102 <strong>TNC</strong> <strong>360</strong> 4 Spindle 8/95
4.4.3 Rigid tapping<br />
Tapping without a floating tap holder is defined in the NC program by "CYCL DEF 17 RIGID<br />
TAPPING" and called by CYCL CALL . Here too the dynamic behavior is determined by machine<br />
parameters.<br />
Before tapping, the axes (e.g. Z and S) are synchronized by a spindle orientation, i.e. each Z position<br />
is assigned to a particular spindle position. This means, that the same thread can be cut more than<br />
once. The fixed assignment of the spindle position depends on the thread pitch which is entered in<br />
the cycle. Because of the fixed thread pitch the correlated Z-dependent spindle position can not be<br />
altered by the operator. The thread pitch can be positive or negative.<br />
Marker M2095 is set at the start of the cycle. With this marker the PLC program can switch on the<br />
spindle, if required, with M03 or M04. The marker M2499 (Close control loop - S-axis) must be set to<br />
zero in acknowledgment. Only then can the orientation take place, and spindle and tool axis move<br />
synchronously until the cycle has been completely processed. Before orientation the NC outputs an<br />
M05. An acknowledgment is necessary.<br />
After this, marker M2095 is reset by the NC and the control loop is opened. The spindle position is<br />
displayed during tapping. The ramps for the drilling process are stored in MP3410.3.<br />
F<br />
0<br />
S<br />
0<br />
M05<br />
Acknowledge-<br />
Rückmeldung<br />
ment M-Funktion of<br />
M function<br />
M2095<br />
M2499<br />
Cycle Zyklusstart<br />
Start<br />
orientierter Oriented stop Halt<br />
Positioning Positionierfenster window<br />
reached erreicht (MP7150)<br />
Ramp Rampe from aus<br />
MP3410.3<br />
Oriented orientierter stop Halt<br />
End Zyklus of cycle<br />
Ende<br />
8/95 <strong>TNC</strong> <strong>360</strong> 4 Spindle 4-103
Machine parameters MP7130 and MP7140 were introduced so that the spindle ramp for tapping<br />
could be better adjusted to the dynamic characteristics of the machine. Machine parameter MP7150<br />
fixes the positioning window for the tool axis. The input value must be less than or equal to<br />
MP1030.2.<br />
A spindle overshoot when accelerating and running into position must be avoided at all costs.<br />
S<br />
MP7140<br />
Greater<br />
Smaller<br />
Smaller<br />
Marker Function Set Reset<br />
M2095 Rigid tapping is active NC NC<br />
M2499 Open control loop S axis PLC PLC<br />
MP3410.3 Accelerations ramp for rigid tapping<br />
Input value: 0 to 1.999 [V/ms]<br />
MP7130 Spindle run-in characteristic<br />
Input value: 0.001 to 10 [°/min] (matching MP1520)<br />
MP7140 Transient response of spindle Spindle, t on acceleration<br />
Input value: 0.001 to 1 (matching MP1530)<br />
MP7150 Positioning window for tool axis<br />
Input value: 0.001 to 2 [mm]<br />
MP7160 Suppression of spindle orientation at beginning of Cycle 17<br />
Input: 0 or 1<br />
0 = Spindle orientation is performed<br />
1 = Spindle orientation is not performed<br />
Greater<br />
MP7130<br />
4-104 <strong>TNC</strong> <strong>360</strong> 4 Spindle 8/95<br />
t
✎<br />
8/95 <strong>TNC</strong> <strong>360</strong> 4 Spindle 4-105
5 EMERGENCY STOP Routine<br />
A PLC input (X42/4) and a PLC output (X21/34; in the PL400, X3/10; and in the PL 410, X8/16) with<br />
the designation "control is ready" are available in the control for the EMERGENCY STOP routine.<br />
If a malfunction is recognized in the control, the <strong>TNC</strong> switches the "control is ready" output off, a<br />
flashing error message appears on the VDU screen and the PLC program is stopped. This error<br />
message can not be canceled. After removing the fault, the switch-on routine must be gone through<br />
again.<br />
If the input "control is ready" is switched off by an event outside the control, the error message<br />
External EMERGENCY STOP<br />
is displayed and the NC sets the marker M2190 and M2191. This error message can only be<br />
canceled after the control voltage is switched on again.<br />
The external EMERGENCY STOP is evaluated by the control as an external stop. If the external<br />
EMERGENCY STOP is triggered during an axis movement, the moving axis is stopped in a controlled<br />
manner. If the drive amplifiers are blocked by the external EMERGENCY STOP, the nominal-value<br />
output may exceed the position monitoring fixed by the machine parameter. In this case, the error<br />
message "Positioning error" or "Gross positioning error" will be displayed.<br />
Marker M2827 makes it possible to suppress the external EMERGENCY STOP. If marker M2827 is<br />
set, an external EMERGENCY STOP is not sent to the NC, instead all control loops are opened and<br />
the nominal values are immediately set to 0 V.<br />
Set Reset<br />
M2190 Non-flashing error message is displayed NC NC<br />
M2191 "External EMERGENCY STOP" message<br />
is displayed<br />
M2827 Suppress EMERGENCY STOP, open the<br />
control loop, NC stop PLC PLC<br />
4-106 <strong>TNC</strong> <strong>360</strong> 5 EMERGENCY STOP Routine 8/95
5.1 Connection diagram<br />
Under fault conditions the "control is ready" output should switch off the 24-volt supply. Because of<br />
the enormous importance of this function this output is tested by the control every time the mains<br />
power is switched on.<br />
HEIDENHAIN recommends the following wiring:<br />
This diagram represents a proposal for circuitry. The machine tool builder is responsible for<br />
complying with applicable safety regulations.<br />
EMERGENCY STOP<br />
buttons<br />
Control<br />
voltage<br />
on<br />
Logic unit<br />
After control voltage is switched on, the switch is opened<br />
by each microprocessor for a short time.<br />
X21/34 X24/2 X24/1 X22/4<br />
"Control<br />
is ready"<br />
k1<br />
K1<br />
24V cannot<br />
be switched<br />
off<br />
+ -<br />
24 V<br />
PLC<br />
24V can be<br />
switched off Acknowledgement<br />
"Control is ready"<br />
8/95 <strong>TNC</strong> <strong>360</strong> 5 EMERGENCY STOP Routine 4-107<br />
k1
5.2 Flow diagram<br />
The external electronics must meet the specified conditions. In particular, the acknowledgment for<br />
"Control is ready" must reach the <strong>TNC</strong> <strong>360</strong> after a maximum of 146 ms.<br />
X21/34<br />
X22/4<br />
1 2 3 4 5 6 7 8 9<br />
VDU display<br />
1. Wait for control voltage. RELAY EXT. DC VOLTAGE<br />
MISSING<br />
2. Recognize the control voltage on X22/4 and switch-off<br />
of the "Control is ready" signal on X21/34 (t < 70 ms).<br />
3. Maximum time during which the acknowledgment of<br />
"control is ready" on X22/4 must go to 0 (t < 146 ms).<br />
If exceeded EMERGENCY STOP DEFECTIVE<br />
4. Recognize the acknowledgment and set X21/34<br />
(t < 20 ms).<br />
5. Wait for control voltage. RELAY EXT. DC VOLTAGE<br />
MISSING<br />
6. Normal control operation. Output and acknowledgment<br />
"control is ready" are high.<br />
7. Machine control voltage is switched off externally EMERGENCY STOP<br />
8. After switching on the control voltage again, the<br />
error message can be canceled, followed by<br />
normal control operation.<br />
9. The control switches off the output "control is ready" Flashing error-<br />
(X21/34) after recognizing a fault. message<br />
4-108 <strong>TNC</strong> <strong>360</strong> 5 EMERGENCY STOP Routine 8/95
6 Display and Operation<br />
Machine parameters and PLC markers can be used to influence the control behavior for certain<br />
functions.<br />
All machine parameters and PLC markers which influence the display and the operation of the<br />
control, and for which there is no separate section in this manual, are described in section "Display<br />
and operation" .<br />
6.1 Machine datum<br />
In the operating mode ”<strong>Manual</strong> operation", a workpiece datum can be defined. NC positioning<br />
blocks normally refer to this datum. If a positioning block should be referenced to the machine<br />
datum instead of the workpiece datum, this must be programmed in M91. On the <strong>TNC</strong> <strong>360</strong> the<br />
machine datum and scale datum point (= Reference point) are identical. All REF-referenced displays<br />
and positioning movements (PLC positioning or M91) are referenced to the machine datum.<br />
With MP950.x you can define an additional machine-referenced position. If you wish to reference to<br />
this position in a positioning block, you must program it in with M92. MP950.x defines the distance<br />
from this machine-referenced position to the machine datum.<br />
RM<br />
M91 and M92 are active only in the blocks in which they are programmed.<br />
RM RM<br />
Workpiece datum<br />
Machine datum<br />
Scale reference point RM = Reference mark<br />
8/95 <strong>TNC</strong> <strong>360</strong> 6 Display and Operation 4-109
MP950 Datum point for positioning blocks with M92<br />
Input range: –30 000.000 to +30 000.000 [mm] or [°]<br />
Values referenced to the machine datum<br />
MP950.0 X axis<br />
MP950.1 Y axis<br />
MP950.2 Z axis<br />
MP950.3 4th axis<br />
4-110 <strong>TNC</strong> <strong>360</strong> 6 Display and Operation 8/95
✎<br />
8/95 <strong>TNC</strong> <strong>360</strong> 6 Display and Operation 4-111
6.2 Graphic simulation<br />
To check for errors, the execution of part programs can be graphically simulated on the basis of a<br />
programmed blank form. It is possible to choose between three different graphics display modes.<br />
The graphics display on the VDU screen can be altered by machine parameters.<br />
The following alterations are possible:<br />
The 3-plane display mode can be produced according to either European or American convention.<br />
Preferred European Preferred American<br />
Example:<br />
The coordinate system can be rotated by +90° in the machining plane<br />
This is useful when, for instance, the Y axis is fixed as the tool axis.<br />
X<br />
Z<br />
No rotation Rotation by +90°<br />
MP 7310 Graphics display<br />
Input range: 0 to 3<br />
X<br />
Bit 0 Changeover of<br />
3-plane display + 0 = European convention<br />
+ 1 = American convention<br />
Bit 1 Rotation of the coordinate system<br />
in the machining plane by + 90° + 0 = no rotation<br />
+ 2 = coordinate system rotated by +90°<br />
Z<br />
4-112 <strong>TNC</strong> <strong>360</strong> 6 Display and Operation 8/95
6.3 Status display<br />
6.3.1 Position display<br />
The display step for the axis positions can be selected for specific axes by machine parameter<br />
MP7290. Regardless of this selection the programming and positioning of the axis position is always<br />
carried out to 0.001 mm or 0.001° precisely.<br />
The input resolution of the <strong>TNC</strong> <strong>360</strong> is 0.001 mm or 0.001°.<br />
The most recently selected axis is displayed inversely. The PLC is informed (by a marker) which axis<br />
has an inverse display. This information can be evaluated, for example, in connection with handcontrol<br />
equipment.<br />
Machine parameter MP7285 can be used to select whether, in the positional display, the tool axis<br />
takes account of the tool length or not.<br />
MP7285 Calculation of the tool length in the position display of the tool axis<br />
Input value: 0 or 1<br />
0 = tool length ignored<br />
1 = tool length taken into account<br />
MP7290 Position display step<br />
Input values: 0 to 4<br />
0 = 0.001 mm or 0.001°<br />
1 = 0.005 mm or 0.005°<br />
2 = 0.010 mm or 0.010°<br />
3 = 0.050 mm or 0.050°<br />
4 = 0.100 mm or 0.100°<br />
Marker Function Set Reset<br />
M2096 X key last pressed NC NC<br />
M2097 Y key last pressed<br />
M2098 Z key last pressed<br />
M2099 Key IV last pressed<br />
8/95 <strong>TNC</strong> <strong>360</strong> 6 Display and Operation 4-113
6.3.2 Display mode and traverse direction for rotary axes<br />
Machine parameter MP7470 determines the traverse direction for absolute positioning and the<br />
display mode for rotary axes.<br />
– Display from +0 to +359.999°: After a full turn the display value jumps back to 0°. In this<br />
operating mode it is not possible to set software limit switches.<br />
During absolute programmed movements of rotary axes (including PLC positioning) the table now<br />
takes the shortest path to the target position, provided that Bit 1 of MP 7470 is set. For<br />
incrementally programmed movements, however, the table moves according to the sign of the<br />
programmed value.<br />
– Display from –30 000° to +30 000°: In this operating mode software limit switches may be<br />
entered. Absolute positional values from – 30 000° to + 30 000° can be programmed (166<br />
revolutions).<br />
MP7470 Display mode for rotary axis<br />
Input values: 0 to 3<br />
Bit 0: +0 = 0 to + 359.999° (no software limit switches)<br />
+1 = –30 000° to +30 000° (software limit switches active)<br />
Bit 1: +0 = Absolute positioning of rotary axes takes the programmed direction to<br />
the target position<br />
+2 = Absolute positioning of rotary axes takes the shortest direction to the<br />
target position<br />
4-114 <strong>TNC</strong> <strong>360</strong> 6 Display and Operation 8/95
6.3.3 Feed rate setting, feed rate display<br />
In the operating modes "Program run, single block" and "Program run, full sequence" the programmed<br />
contour feed rate is displayed when the feed potentiometer is in the 100 % position. The<br />
feed potentiometer can be used to vary this programmed feed rate from 0 to 150 %.<br />
With the feed rate potentiometer the feed rate can be changed to 0% to 150% of the programmed<br />
feed rate.<br />
The override values are shown in the PLC in word W766 and W494. If the PLC program overwrites a<br />
value in W766, it will become active regardless of the potentiometer setting. W766 must be<br />
overwritten in every PLC scan, since otherwise the normal feed rate would become effective again.<br />
The value range is 0 to 150 in 1% increments, for nonlinear curves it is 0 to 15 000, corresponding to<br />
0 to 150%.<br />
To adjust the override values for auxiliary axes (PLC axes) see PLC module 9124.<br />
With the Doubleword D596 the PLC can limit the maximum possible feed rate by entering a feed<br />
rate value. The new feed rate becomes effective immediately.<br />
In order to ensure compatibility with previous PLC programs, the Doubleword D596 is give the<br />
default value 300 000 mm/min when the control is switched on or after an interruption of the PLC<br />
scan, so that the maximum feed rate from the machine parameter becomes effective. With<br />
"Tapping" (Cycle 2) and "Rigid tapping" (Cycle 17), the Doubleword D596 has no effect.<br />
In the manual operating modes the axis feed rate is displayed, not the contour feed rate. There is a<br />
choice of two display modes:<br />
– The axis-specific feed rate from machine parameter MP1020.X is only displayed after pressing<br />
an axis-direction key. If two axis-direction keys are pressed simultaneously no feed rate will be<br />
shown.<br />
– Even when none of the axis-direction keys is operated one feed rate will be displayed, which<br />
can also be adjusted by the feed potentiometer. The smallest feed rate from MP 1020.X is valid<br />
for all axes. The axis feed rate will also be shown if several axis-direction keys are pressed<br />
simultaneously.<br />
MP7270 Display of the feed-rates in manual operating modes (<strong>Manual</strong> operation,<br />
Electronic handwheel)<br />
Input value: 0 or 1<br />
0 = Display of the axis feed rate only when an axis-direction key is pressed<br />
axis-specific feed from MP1020.x)<br />
1 = Display of the axis feed rate before operating an axis-direction key<br />
(smallest value from MP1020.x for all axes)<br />
8/95 <strong>TNC</strong> <strong>360</strong> 6 Display and Operation 4-115
MP7620 Feed rate override<br />
Input: 0 to 7<br />
Bit 0 Feed rate override if rapid traverse key is pressed in<br />
a "Program run" mode<br />
+0 = Override not effective<br />
+1 = Override effective<br />
Bit 2 Feed rate override if rapid traverse key and<br />
machine axis direction key are pressed in the<br />
"<strong>Manual</strong>" mode<br />
+0 = Override not effective<br />
+4 = Override effective<br />
Bit 3 Spindle and feed rate override<br />
in 1% increments or according to<br />
a nonlinear curve<br />
+0 = 1% increments<br />
+8 = Nonlinear curve<br />
W494 % factor – feed rate override (NC → PLC)<br />
W766 % factor – feed rate override (PLC → NC)<br />
D596 Feed rate from PLC for feed rate limiting<br />
4-116 <strong>TNC</strong> <strong>360</strong> 6 Display and Operation 8/95
6.3.4 Display of M functions<br />
The miscellaneous functions for control of the spindle (M03, M04, M05) and the coolant (M08, M09)<br />
are displayed in the status display. The display of these M functions is controlled by the PLC, i.e. the<br />
machine tool builder must take this into account when creating the PLC program. The markers<br />
M2485 and M2486 also change the polarity of the analog voltage for the spindle. M2608 switches<br />
off the analog output for the spindle. The programmed spindle speed is, however, still displayed (see<br />
section "Spindle").<br />
Marker Function Set Reset<br />
M2485 Status display and sign of S analog for M03 PLC PLC<br />
M2486 Status display and sign of S analog for M04<br />
M2487 Status display for M05 and spindle stop<br />
M2508 Status display M08 or M09<br />
0 = Status display M09<br />
1 = Status display M08<br />
M2608 Status display M03, M04, M05 inverse and<br />
S analog output = 0V<br />
M2609 Status display M08, M09 inverse<br />
6.3.5 Display of run duration<br />
The <strong>TNC</strong> has three timers that measure the duration in seconds of the following states:<br />
– Control (dialog "Control on")<br />
– Program run (dialog "Program run")<br />
– Spindle (dialog "Spindle on")<br />
Control on<br />
This timer starts with the first PLC run after the control reset.<br />
Program run<br />
This timer measures the duration of program run (see User's <strong>Manual</strong> <strong>TNC</strong> <strong>360</strong>).<br />
Spindle<br />
The spindle operating time starts when the Markers M2485/M2486 are set and stops when they are<br />
reset.<br />
Display of run duration<br />
The three timers can be called by entering the code number 85 7282 (see User's <strong>Manual</strong> <strong>TNC</strong> <strong>360</strong>)<br />
and can then be reset, depending on MP 7235.<br />
Resetting the run duration timers<br />
All timers are kept in the battery-buffered RAM and are reset after the error message "Operation<br />
parameters erased."<br />
8/95 <strong>TNC</strong> <strong>360</strong> 6 Display and Operation 4-117
The machine parameter MP 7235 allows a specific resetting of the run duration timers.<br />
MP7235 Resetting the timing<br />
Input value: 0 to 7<br />
Bit 0 Run time – Control on<br />
+0 cannot be reset<br />
+1 can be reset<br />
Bit 1 Run time – Program run<br />
+0 cannot be reset<br />
+2 can be reset<br />
Bit 2 Run time – Spindle<br />
+0 cannot be reset<br />
+4 can be reset<br />
It is not possible to reset a timer during a program run.<br />
6.3.6 Control is operational<br />
If the control is operational, i.e. a positioning or M function is performed, the status window displays<br />
a large asterisk "*". If a current NC program is interrupted with the external stop key, a "*" will flash<br />
in the status display. This information is transmitted to the PLC through the markers M2183 and<br />
M2184. M2183 and M2184 are effective in the operating modes "Positioning with MDI", "Program<br />
run, single block" and "Program run, full sequence."<br />
Set Reset<br />
M2183 Program interruption (display "Control is ready" NC NC<br />
flashes)<br />
M2184 Control is ready ("Control is ready" display<br />
goes on or flashes)<br />
4-118 <strong>TNC</strong> <strong>360</strong> 6 Display and Operation 8/95
6.3.7 Cancel status display<br />
A machine parameter can be used to decide whether the status display should be reset and the<br />
contents of the Q parameters and the tool data erased with the M functions M02 and M30, as well<br />
as with NC block "END PGM" and the selection of a program. All the programmed values in the<br />
status display, e.g. tool number, tool length, tool radius, scaling factor, datum shift, feed rate etc. will<br />
then be reset. The Q parameters will all be set to 0.<br />
MP7300 Cancel status display, Q parameters, and tool data<br />
Input value: 0 to 7<br />
0 = Cancel status display, Q parameters and tool data when a program is<br />
selected<br />
1 = Cancel the status display, Q parameters and tool data with M02, M30, END<br />
PGM and when a program is selected.<br />
2 = Cancel the status display and tool data when a program is selected<br />
3 = Cancel the status display and tool data with M02, M30, END PGM and when<br />
a program is selected<br />
4 = Cancel the status display and Q parameters when a program is selected<br />
5 = Cancel the status display and Q parameters with M02, M30, END PGM<br />
and when a program is selected<br />
6 = Cancel the status display when a program is selected<br />
7 = Cancel the status display with M02, M30, END PGM and when a program is<br />
selected<br />
6.3.8 Expanded spindle display<br />
A moving bar diagram with the dialog "Spindle power" can be added beneath the status display. The<br />
selected gear range can be shown in the status display next to the spindle speed (e.g.: S1000/2).<br />
With machine parameter MP7274 the display of the current gear range can be selected through the<br />
bit.<br />
Bit 1 determines whether information necessary for spindle power display is measured directly<br />
through the analog input at connector X8 (0 to 4.999 V) or through the PLC Word W600.<br />
In machine parameter MP7275 the reference value of the spindle power is enter at 100%. This<br />
results from the maximum value to be acquired and the maximum percentage factor to be shown.<br />
MP7275 =<br />
Maximum value to be aquired<br />
Maximum percentage factor to be displayed<br />
x 100<br />
8/95 <strong>TNC</strong> <strong>360</strong> 6 Display and Operation 4-119
MP7274 Expanded spindle display<br />
Input values: 0 to 3<br />
Bit 0 Display of current gear range +0 = No display<br />
+1 = Display<br />
Bit 1 Display of spindle power +0 = Acquisition via analog input<br />
(Value range 0 to 4.999 [V])<br />
+2 = Acquisition via PLC Word W600<br />
(Value range 0 to 65.535)<br />
MP7275 Reference value of displayed spindle power<br />
for acquisition via analog input<br />
Input range: 0 to 4.999 [V]<br />
for acquisition via PLC Word W600<br />
Input range: 0 to 43 690<br />
MP7275 Value for spindle power display<br />
Example 1: Acquisition via analog input<br />
A voltage of 0 to 4.999 volts is acquired via analog input. The spindle power should be displayed<br />
between 0 and 150 %.<br />
0 [V] 3.333 [V] 4.999 [V]<br />
⏐ _________________________________________________ ⏐ _______________ ⏐<br />
0% 100 % 150 %<br />
Example 2: Acquisition via PLC Word W600<br />
The information needed to display the spindle power is acquired through the 8 PLC inputs I100 to<br />
I107. Values between 0 and 127 can be acquired. You wish to display the spindle power between 0<br />
and 150 %. The reference value at 100% results as follows:<br />
127<br />
x 100 = 84.66<br />
150<br />
The information is to be evaluated and displayed through the word W600:<br />
Machine parameters:<br />
MP7274 = 2<br />
MP7275 = 85<br />
PLC Program:<br />
.<br />
.<br />
.<br />
LW I100 ;Read in the status of the PLC inputs I100 to I107.<br />
A K+255 ;Evaluate only the lower 8 bits (PLC inputs)<br />
= W600 ;and transfer for the spindle power display.<br />
4-120 <strong>TNC</strong> <strong>360</strong> 6 Display and Operation 8/95
6.3.9 Generating NC blocks with the actual-position-capture key<br />
MP7225 was introduced to permit automatic generation of NC blocks in the "Programming and<br />
editing" mode of operation. In plain language dialog (not in ISO programming), the actual-positioncapture<br />
key can generate a positioning block with up to 3 axes, without feed rate, radius<br />
compensation or M functions. This positioning block is inserted behind the block currently selected<br />
in the "Programming and editing" mode. The actual positions are transferred to memory as nominal<br />
position values. The axis is selected with the dialog "AXIS SELECTION" in the MOD mode of<br />
operation. Here up to 3 of 4 axes can be selected by pressing the desired axis keys.<br />
The PLC marker M2829 can also generate a block. The marker is reset by the NC.<br />
MP 7225 Generating blocks with the "ACTUAL POSITION CAPTURE" key<br />
Input: 0 to 3<br />
0 = no block generation possible<br />
1 = block generation with the "ACTUAL POSITION CAPTURE" key<br />
2 = block generation with M2829<br />
Set Reset<br />
M2829 NC block generation PLC NC<br />
6.4 PLC text window<br />
The PLC can display a text above the status line for the circle center. The text length is 16<br />
characters or 32 small characters.<br />
Word W602 causes the text to be displayed.<br />
W 602 A text is displayed in the PLC text window<br />
Bit 0 to 7: Number of PLC error text/dialog<br />
(0 to 199)<br />
Bit 8 to 11: 0000 = Erase display<br />
0001 = Normal display<br />
1111= Inverse display<br />
Bit 12 to 13: 00 = Erase display<br />
01 = Display with small characters<br />
10 = Display with normal characters<br />
Bit 14 to 15: reserved<br />
The text display for PLC Trace (PCTR) was placed up next to * for “Control in operation“ if the actual<br />
value display is small.<br />
6.5 Error messages<br />
Under certain conditions error messages from the NC or the PLC will be displayed on the screen<br />
under the display for the operating mode. Non-flashing error messages can be canceled with the CE<br />
key. In the event of a flashing error message the machine must be switched off and the fault<br />
corrected. If a non-flashing error message is displayed on the screen, marker M2190 will be set.<br />
The machine tool builder determines the conditions under which the PLC will produce error<br />
messages. Up to 100 different PLC error messages can be generated.<br />
8/95 <strong>TNC</strong> <strong>360</strong> 6 Display and Operation 4-121
The dialogs for PLC error messages can be determined by the manufacturer of the machine. Please<br />
contact HEIDENHAIN about this. The standard version has dialogs with the reserved designations<br />
"PLC: ERROR 0" to "PLC: ERROR 99". These PLC error messages can be activated by the PLC<br />
markers M2924 to M3023.<br />
The error messages can be canceled either by pressing the CE key or by resetting the appropriate<br />
markers.<br />
If several PLC error messages are activated simultaneously, they can be read out one after another<br />
by pressing the CE key.<br />
If the program run is to be stopped on output of a PLC error message, this must be explicitly<br />
programmed in the PLC program (NC STOP).<br />
In order to show a PLC error message as a flashing message, the marker M2815 must also be set.<br />
If marker M2815 is set, but none of the 100 PLC error messages is activated, then the flashing error<br />
message "EMERGENCY STOP PLC" will be displayed.<br />
If, for some reason, the display of the PLC error message is not wanted in the field under the<br />
operating-mode display, the message can also be displayed in the PLC window.<br />
Marker Function Set Reset<br />
M2815 Flashing PLC error message PLC PLC<br />
M2190 Non-flashing error message NC NC<br />
M2924 PLC error message 0 PLC NC;PLC<br />
M2925 PLC error message 1<br />
M2926 PLC error message 2<br />
M2927 PLC error message 3<br />
M2928 PLC error message 4<br />
M2929 PLC error message 5<br />
M2930 PLC error message 6<br />
M2931 PLC error message 7<br />
M2932 PLC error message 8<br />
M2933 PLC error message 9<br />
M2934 PLC error message 10<br />
M2935 PLC error message 11<br />
M2936 PLC error message 12<br />
M2937 PLC error message 13<br />
M2938 PLC error message 14<br />
M2939 PLC error message 15<br />
M2940 PLC error message 16<br />
M2941 PLC error message 17<br />
M2942 PLC error message 18<br />
M2943 PLC error message 19<br />
M2944 PLC error message 20<br />
M2945 PLC error message 21<br />
M2946 PLC error message 22<br />
M2947 PLC error message 23<br />
M2948 PLC error message 24<br />
M2949 PLC error message 25<br />
M2950 PLC error message 26<br />
M2951 PLC error message 27<br />
4-122 <strong>TNC</strong> <strong>360</strong> 6 Display and Operation 8/95
M2952 PLC error message 28<br />
M2953 PLC error message 29<br />
M2954 PLC error message 30<br />
M2955 PLC error message 31<br />
M2956 PLC error message 32<br />
M2957 PLC error message 33<br />
M2958 PLC error message 34<br />
M2959 PLC error message 35<br />
M2960 PLC error message 36<br />
M2961 PLC error message 37<br />
M2962 PLC error message 38<br />
M2963 PLC error message 39<br />
M2964 PLC error message 40<br />
M2965 PLC error message 41<br />
M2966 PLC error message 42<br />
M2967 PLC error message 43<br />
M2968 PLC error message 44<br />
M2969 PLC error message 45<br />
M2970 PLC error message 46<br />
M2971 PLC error message 47<br />
M2972 PLC error message 48<br />
M2973 PLC error message 49<br />
M2974 PLC error message 50<br />
M2975 PLC error message 51<br />
M2976 PLC error message 52<br />
M2977 PLC error message 53<br />
M2978 PLC error message 54<br />
M2979 PLC error message 55<br />
M2980 PLC error message 56<br />
M2981 PLC error message 57<br />
M2982 PLC error message 58<br />
M2983 PLC error message 59<br />
M2984 PLC error message 60<br />
M2985 PLC error message 61<br />
M2986 PLC error message 62<br />
M2987 PLC error message 63<br />
M2988 PLC error message 64<br />
M2989 PLC error message 65<br />
M2990 PLC error message 66<br />
M2991 PLC error message 67<br />
M2992 PLC error message 68<br />
M2993 PLC error message 69<br />
M2994 PLC error message 70<br />
M2995 PLC error message 71<br />
M2996 PLC error message 72<br />
M2997 PLC error message 73<br />
M2998 PLC error message 74<br />
M2999 PLC error message 75<br />
M3000 PLC error message 76<br />
M3001 PLC error message 77<br />
M3002 PLC error message 78<br />
M3003 PLC error message 79<br />
M3004 PLC error message 80<br />
M3005 PLC error message 81<br />
8/95 <strong>TNC</strong> <strong>360</strong> 6 Display and Operation 4-123
M3006 PLC error message 82<br />
M3007 PLC error message 83<br />
M3008 PLC error message 84<br />
M3009 PLC error message 85<br />
M3010 PLC error message 86<br />
M3011 PLC error message 87<br />
M3012 PLC error message 88<br />
M3013 PLC error message 89<br />
M3014 PLC error message 90<br />
M3015 PLC error message 91<br />
M3016 PLC error message 92<br />
M3017 PLC error message 93<br />
M3018 PLC error message 94<br />
M3019 PLC error message 95<br />
M3020 PLC error message 96<br />
M3021 PLC error message 97<br />
M3022 PLC error message 98<br />
M3023 PLC error message 99<br />
4-124 <strong>TNC</strong> <strong>360</strong> 6 Display and Operation 8/95
✎<br />
8/95 <strong>TNC</strong> <strong>360</strong> 6 Display and Operation 4-125
6.6 Cycles<br />
The HEIDENHAIN contouring controls permit calling HEIDENHAIN standard cycles within the NC<br />
program (e.g.. pecking, tapping, pocket milling etc.).<br />
In addition, the machine tool builder can program manufacturer cycles and store them in the control<br />
(see chapter "OEM cycles"). The sequence of some cycles can be altered by machine parameters<br />
and PLC markers.<br />
The description of the "Tapping" and "Spindle orientation" cycles can be found in the section<br />
"Spindle."<br />
6.6.1 Cycle inhibit<br />
Machine parameter MP7245 can be used to selectively inhibit the HEIDENHAIN standard cycles.<br />
MP7245.0 Inhibit the HEIDENHAIN Cycles 1 to 15<br />
Input range: 0 to 65 534<br />
Bit 1 Cycle 1 + 0 = enable<br />
+ 2 = inhibit<br />
Bit 2 Cycle 2 + 0 = enable<br />
+ 4 = inhibit<br />
Bit 3 Cycle 3 + 0 = enable<br />
+ 8 = inhibit<br />
Bit 4 Cycle 4 + 0 = enable<br />
+ 16 = inhibit<br />
Bit 5 Cycle 5 + 0 = enable<br />
+ 32 = inhibit<br />
Bit 6 Cycle 6 + 0 = enable<br />
+ 64 = inhibit<br />
Bit 7 Cycle 7 + 0 = enable<br />
+ 128 = inhibit<br />
Bit 8 Cycle 8 + 0 = enable<br />
+ 256 = inhibit<br />
Bit 9 Cycle 9 + 0 = enable<br />
+ 512 = inhibit<br />
Bit 10 Cycle 10 + 0 = enable<br />
+ 1024 = inhibit<br />
Bit 11 Cycle 11 + 0 = enable<br />
+ 2048 = inhibit<br />
Bit 12 Cycle 12 + 0 = enable<br />
+ 4096 = inhibit<br />
Bit 13 Cycle 13 + 0 = enable<br />
+ 8192 = inhibit<br />
Bit 14 Cycle 14 + 0 = enable<br />
+ 16 384 = inhibit<br />
Bit 15 Cycle 15 + 0 = enable<br />
+ 32 768 = inhibit<br />
4-126 <strong>TNC</strong> <strong>360</strong> 6 Display and Operation 8/95
MP7245.1 Inhibit the HEIDENHAIN standard cycles 16 to 31<br />
Input range: 0 to 65 535<br />
Bit 0 Cycle 16 + 0 = enable<br />
+ 1 = inhibit<br />
Bit 1 Cycle 17 + 0 = enable<br />
+ 2 = inhibit<br />
Bit 2 Cycle 18 + 0 = enable<br />
+ 4 = inhibit<br />
Bit 3 Cycle 19 + 0 = enable<br />
+ 8 = inhibit<br />
Bit 4 Cycle 20 + 0 = enable<br />
+ 16 = inhibit<br />
Bit 5 Cycle 21 + 0 = enable<br />
+ 32 = inhibit<br />
Bit 6 Cycle 22 + 0 = enable<br />
+ 64 = inhibit<br />
Bit 7 Cycle 23 + 0 = enable<br />
+ 128 = inhibit<br />
Bit 8 Cycle 24 + 0 = enable<br />
+ 256 = inhibit<br />
Bit 9 Cycle 25 + 0 = enable<br />
+ 512 = inhibit<br />
Bit 10 Cycle 26 + 0 = enable<br />
+ 1024 = inhibit<br />
Bit 11 Cycle 27 + 0 = enable<br />
+ 2048 = inhibit<br />
Bit 12 Cycle 28 + 0 = enable<br />
+ 4096 = inhibit<br />
Bit 13 Cycle 29 + 0 = enable<br />
+ 8192 = inhibit<br />
Bit 14 Cycle 30 + 0 = enable<br />
+ 16 384 = inhibit<br />
Bit 15 Cycle 31 + 0 = enable<br />
+ 32 768 = inhibit<br />
8/95 <strong>TNC</strong> <strong>360</strong> 6 Display and Operation 4-127
6.6.2 Pocket milling<br />
The overlap factor for clearing out a rectangular or circular pocket ( Cycle 4 and Cycle 5) can be<br />
altered by machine parameters.<br />
Stepover<br />
MP7430 Overlap factor for pocket milling<br />
Input range: 0.1 to 1.414<br />
Stepover = (MP7430) x cutter radius<br />
6.6.3 Milling cycles for pockets with free-programmed contours<br />
The sequence for milling cycles for pockets with free programmed contours (Cycles 6, 14, 15, 16)<br />
can be changed by machine parameters.<br />
The choices are:<br />
– Whether a channel should first be milled around the contour and the pocket cleared out afterwards,<br />
or the pocket cleared out first, and then a channel milled round the contour.<br />
– Whether the channel should be milled in a clockwise or anti-clockwise direction.<br />
– Under which conditions programmed pockets should be merged. The choice is between:<br />
merging programmed pockets when the programmed contours overlap, or when the tool center<br />
paths intersect.<br />
– Whether the channel milling should be performed in one operation for all stepovers, or whether<br />
for each peck depth channel milling and clearing out should be performed alternately.<br />
The programmed contours of two pockets have a small overlap.<br />
4-128 <strong>TNC</strong> <strong>360</strong> 6 Display and Operation 8/95
MP7420 Bit 2 = 0 (entry +0):<br />
The control clears out the pockets separately, since the tool center paths do not intersect.<br />
Material will remain in inside corners.<br />
MP7420 Bit 2 = 1 (entry +4):<br />
The control clears out the pockets jointly, since the programmed contours overlap. No material will<br />
remain in inside corners.<br />
MP7420 Cycles for milling pockets with free programmed contours.<br />
Input range: 0 to 15<br />
Bit 0 Direction for channel milling + 0 = Anti-clockwise channel milling of the pocket<br />
contours, clockwise for islands<br />
+ 1 = Clockwise channel milling of the pocket<br />
contours, anti-clockwise for islands<br />
Bit 1 Sequence for clearing + 0 = First channel milling, then clear out pocket<br />
and channel milling + 2 = First clear out pocket , then channel milling<br />
Bit 2 Merge programmed + 0 = Contours merged only if the tool center paths<br />
contours intersect<br />
+ 4 = Contours merged if the programmed contours<br />
overlap<br />
Bit 3 Clearing out and channel + 0 = Clearing out and channel milling performed in<br />
milling to pocket one operation for all depths<br />
depth, or for each + 8 = For each peck, first perform channel milling,<br />
infeed depth and then clearing out (depending on Bit 1)<br />
before next peck<br />
8/95 <strong>TNC</strong> <strong>360</strong> 6 Display and Operation 4-129
6.6.4 Scaling factor<br />
Machine parameters can be used to decide whether the "Scaling factor" cycle only operates in the<br />
machining plane or also parallel to the tool axis.<br />
MP7410 "Scaling factor" cycle active in two or three axes<br />
Entry: 0 or 1<br />
0 = Cycle "Scaling factor" operates in all three principle axes<br />
1 = Cycle "Scaling factor" only operates in the machining plane<br />
4-130 <strong>TNC</strong> <strong>360</strong> 6 Display and Operation 8/95
✎<br />
8/95 <strong>TNC</strong> <strong>360</strong> 6 Display and Operation 4-131
6.7 File types<br />
With the <strong>TNC</strong> it is possible to process different types of file with the file management. The types of<br />
file are designated by an extension after the names.<br />
- HEIDENHAIN dialog programs<br />
- ISO programs<br />
ISO files are indicated by the file name extension ISO.<br />
6.7.1 File types – disable<br />
MP7222 determines whether the <strong>TNC</strong> executes HEIDENHAIN dialog or ISO programs.<br />
This selection can be made either through the MOD functions (see User's <strong>Manual</strong> for the <strong>TNC</strong> <strong>360</strong>)<br />
or the corresponding file types are disabled directly. If the ISO programming is activated via MOD<br />
functions, marker M2060 is set.<br />
If a file type is disabled all files of that type are erased.<br />
MP7222 Programming language selection: dialog or ISO<br />
Input: 0 to 2<br />
0 = Selection via MOD function<br />
1 = Programming in HEIDENHAIN dialog<br />
2 = Programming in ISO<br />
Set Reset<br />
M2060 ISO programming is selected NC NC<br />
6.7.2 Block numbers - step size for ISO programs<br />
The block-number step size for ISO programs can be fixed by a machine parameter.<br />
MP7220 Block-number step size for ISO programs<br />
Input range: 0 to 255<br />
6.8 User parameters<br />
With the MOD function up to 16 different machine parameters can be made accessible to the<br />
machine operator as User parameters. The machine manufacturer determines in machine parameter<br />
MP7330.x which machine parameters are to be defined as User parameters. If, for example, you<br />
wish to define MP5030.1 as the first user parameter, you must enter the value 5030.01 in MP<br />
7330.0.<br />
4-132 <strong>TNC</strong> <strong>360</strong> 6 Display and Operation 8/95
If a User parameter is selected by the operator, a dialog appears on the screen. Machine parameter<br />
MP7340.x determines which dialog should be displayed.<br />
The dialog is taken from the PLC error file (input 0 to 99) or from the dialog file (100 to 199).<br />
MP7330 Determination of the User Parameters<br />
Input range: 0 to 9999.00 (No. of the desired machine parameter).<br />
MP7330.0 User parameter 0<br />
MP7330.1 User parameter 1<br />
. .<br />
. .<br />
MP7330.14 User parameter 14<br />
MP7330.15 User parameter 15<br />
MP7340 Dialogs for User Parameters<br />
Input range:0 to 199 (line number of the PLC dialog)<br />
MP7340.0 Dialog for User parameter 0<br />
MP7340.1 Dialog for User parameter 1<br />
. .<br />
. .<br />
MP7340.14 Dialog for User parameter 14<br />
MP7340.15 Dialog for User parameter 15<br />
6.9 Code numbers<br />
The MOD functions can be used to enter code numbers for the control. These code numbers can be<br />
used to activate certain control functions.<br />
The following code numbers have a fixed meaning:<br />
Code number Function<br />
95 148 Select machine parameter list<br />
807 667 Select PLC mode<br />
105 296 Correction tables for the nonlinear axis-error compensation<br />
86 357 Remove program protection<br />
75 368 Automatic offset adjustment<br />
123 Select the user-available list of machine parameters<br />
531 210 Erase markers M1000 to M2000 and Byte 0 to Byte 127<br />
Special function:<br />
Switch-on the control while pressing the MOD key, then enter the code number.<br />
The entire contents of the RAM memory (MPs, NC programs, PLC programs, all<br />
markers, all bytes) are erased.<br />
857 282 Clock displays<br />
8/95 <strong>TNC</strong> <strong>360</strong> 6 Display and Operation 4-133
6.10 Programming station<br />
Machine parameters can be used to set the control so that it can be utilized without a machine tool<br />
as a programming station, without the machine. In this setting only the operating modes<br />
"Programming and editing" and "Test run" function. It is possible to select whether the PLC should be<br />
active or not in the "programming station" setting.<br />
MP7210 Programming station<br />
Input values: 0 to 2<br />
6.11 Dialog language<br />
Entry: 0 = Control and programming<br />
1 = Programming station, "PLC active"<br />
2 = Programming station, "PLC inactive"<br />
The HEIDENHAIN contouring controls are available in ten different dialog languages, see chapter<br />
"Introduction." The dialog language can be altered by a simple software exchange. English, as a<br />
basic language, is stored in every control as a second language and can be selected by machine<br />
parameter.<br />
If the basic language English has been selected, then marker M2041 is set by the NC.<br />
MP7230 Switching the dialog language<br />
Entry: 0 or 1<br />
0 = First dialog language<br />
1 = Basic language - English<br />
Marker Function Set Reset<br />
M 2041 Basic language - English is selected NC NC<br />
6.12 Decimal sign<br />
The decimal sign can be selected by machine parameter.<br />
MP7280 Decimal sign<br />
Entry: 0 or 1<br />
0 = Decimal comma<br />
1 = Decimal point<br />
4-134 <strong>TNC</strong> <strong>360</strong> 6 Display and Operation 8/95
6.13 Memory test<br />
A machine parameter can be used to select if the RAM and the EPROM memory areas should be<br />
tested upon switching on the control.<br />
MP7690 Memory test at switch-on<br />
Input range: 0 to 3<br />
Bit 0 RAM test + 0 = Memory test at switch-on<br />
+ 1 = No memory test at switch-on<br />
Bit 1 EPROM test + 0 = Memory test at switch-on<br />
+ 2 = No memory test at switch-on<br />
6.14 End of program run<br />
In the operating modes "Program run, single block" or "Program run, full sequence", if the end of the<br />
program is reached, the NC sets the marker M2061. This marker is only reset at the start of the next<br />
program.<br />
The information "End of program" can be evaluated by the PLC. This is necessary when operating,<br />
for instance, with a pallet changer.<br />
Set Reset<br />
M2061 END PGM, M02 or M30 has been executed NC NC<br />
6.15 Overwrite Q parameters overwriting<br />
The values in the Q Parameters Q100 to Q107 can be overwritten by the PLC. In this way<br />
information from the PLC can be transferred to the machining program.<br />
The value which is to be transferred is stored in Doubleword D528. The Q parameter which is to be<br />
overwritten is defined in Word W516. The transfer is initiated by the strobe marker M2713.<br />
The Doubleword D528 has a multiple usage. See also sections "PLC positioning" and "Datum shift."<br />
W516 Number of the Q parameter to be overwritten<br />
(Q100 to Q107 = 0 to 7)<br />
D528 Value to be transferred to the Q Parameter<br />
Set Reset<br />
M2713 Activate the transfer of the value from D528 to the PLC NC<br />
Q Parameter defined in W516<br />
8/95 <strong>TNC</strong> <strong>360</strong> 6 Display and Operation 4-135
✎<br />
4-136 <strong>TNC</strong> <strong>360</strong> 6 Display and Operation 8/95
7 M Functions<br />
Up to 100 miscellaneous functions (M functions) can be programmed in HEIDENHAIN contouring<br />
controls. The code for these M functions is transferred to the PLC either before or after execution<br />
of the NC block. A number of these M functions have a fixed meaning for the NC. These M<br />
functions are marked with * in the following table. The other M functions are freely assignable.<br />
M func- Effective at:<br />
tion Beginning<br />
of<br />
block-<br />
End of<br />
block<br />
*M 00 ●<br />
M 01 ●<br />
*M 02 ●<br />
*M 03 ●<br />
*M 04 ●<br />
*M 05<br />
1<br />
M 06<br />
●<br />
●<br />
M 07 ●<br />
*M 08 ●<br />
*M 09 ●<br />
M 10 ●<br />
M 11 ●<br />
M 12 ●<br />
*M 13 ●<br />
*M 14 ●<br />
M 15 ●<br />
M 16 ●<br />
M 17 ●<br />
M 18 ●<br />
M 19 ●<br />
M 20 ●<br />
M 21 ●<br />
M 22 ●<br />
M 23 ●<br />
M 24 ●<br />
M 25 ●<br />
M 26 ●<br />
M 27 ●<br />
M 28 ●<br />
M 29 ●<br />
*M 30 ●<br />
M 31 ●<br />
M 32 ●<br />
M 33 ●<br />
M func- Effective at:<br />
tion Beginning<br />
of<br />
block<br />
End of<br />
block<br />
M 34 ●<br />
M 35 ●<br />
M 36 ●<br />
M 37 ●<br />
M 38 ●<br />
M 39 ●<br />
M 40 ●<br />
M 41 ●<br />
M 42 ●<br />
M 43 ●<br />
M 44 ●<br />
M 45 ●<br />
M 46 ●<br />
M 47 ●<br />
M 48 ●<br />
M 49 ●<br />
M 50 ●<br />
M 51 ●<br />
M 52 ●<br />
M 53 ●<br />
M 54 ●<br />
M 55 ●<br />
M 56 ●<br />
M 57 ●<br />
M 58 ●<br />
M 59 ●<br />
M 60 ●<br />
M 61 ●<br />
M 62 ●<br />
M 63 ●<br />
M 64 ●<br />
M 65 ●<br />
M 66 ●<br />
M 67 ●<br />
1 Function is dependent on machine parameter M7440<br />
M func- Effective at:<br />
tion Beginning<br />
of<br />
block<br />
End of<br />
block<br />
M 68 ●<br />
M 69 ●<br />
M 70 ●<br />
M 71 ●<br />
M 72 ●<br />
M 73 ●<br />
M 74 ●<br />
M 75 ●<br />
M 76 ●<br />
M 77 ●<br />
M 78 ●<br />
M 79 ●<br />
M 80 ●<br />
M 81 ●<br />
M 82 ●<br />
M 83 ●<br />
M 84 ●<br />
M 85 ●<br />
M 86 ●<br />
M 87 ●<br />
M 88<br />
1<br />
M 89<br />
●<br />
●<br />
*M 90 ●<br />
*M 91 ●<br />
*M 92 ●<br />
M 93 ●<br />
*M 94 ●<br />
M 95 ●<br />
M 96 ●<br />
*M 97 ●<br />
*M 98 ●<br />
*M 99 ●<br />
8/95 <strong>TNC</strong> <strong>360</strong>/<strong>TNC</strong> 335 7 M Functions 4-137
The evaluation of the M function must be programmed in the PLC. When transferring an M function<br />
to the PLC the code for the M function is stored in Word W260 and the strobe marker M2045 is set.<br />
The execution of the M function must be signaled to the NC by setting the markers M2482. The<br />
next NC block is only processed when the signal is acknowledged and the marker M2045 (strobe<br />
signal for M function) is reset by the NC. The M functions M00 to M99 can also be decoded and<br />
transferred to the markers M1900 to M1999. This function is activated by the marker M2496. The<br />
decoded output is retained for reasons of compatibility. However, HEIDENHAIN recommends M<br />
code evaluation using Word W260.<br />
W260 Code for M function NC<br />
Set Reset<br />
Set Reset<br />
M2045 Strobe signal for M function NC NC<br />
M2482 Acknowledgment of M function, acknowledgment of PLC PLC<br />
M2496 Enable marker for the decoded M code- PLC PLC<br />
transfer to markers M1900 to M1999<br />
M1900 Miscellaneous function M00 NC NC<br />
M1901 Miscellaneous function M01 NC NC<br />
M1902 Miscellaneous function M02 NC NC<br />
. .<br />
. .<br />
. .<br />
M1999 Miscellaneous function M99 NC NC<br />
4-138 <strong>TNC</strong> <strong>360</strong> 7 M Functions 8/95
Example:<br />
Evaluation of the miscellaneous function M03 in the PLC.<br />
PLC output: O10 = Spindle ON/OFF<br />
PLC input: I10 = Acknowledgment of M function<br />
100 LN M1<br />
101 S M1 ;Generate one<br />
.<br />
.<br />
199 L M2045 ;Strobe signal for M function<br />
200 RN M2482 ;Reset acknowledgment of M function<br />
201 CMT 77 ;Evaluation of M function<br />
.<br />
.<br />
901 EM<br />
902 LBL 77<br />
903 CASE W260 ;M code?<br />
904 CM0<br />
905 CM1<br />
906 CM2<br />
907 CM3<br />
.<br />
.<br />
930 ENDC<br />
931 EM<br />
.<br />
.<br />
1170 LBL 3 ;M function M03<br />
1171 L M1<br />
1172 S M2485 ;Status display M03, algebraic sign S analog<br />
1173 R M2486 ;Reset M04<br />
1174 R M2487 ;Reset M05<br />
1175 S O10 ;Spindle ON<br />
1176 L I10 ;Input for acknowledgment of M function?<br />
1177 EM<br />
M2045<br />
M2485<br />
O10<br />
I10<br />
M2482<br />
8/95 <strong>TNC</strong> <strong>360</strong> 7 M Functions 4-139
7.1 Program halt on M functions<br />
Normally, when an M function is produced, the program run in the operating modes "Program<br />
run/full sequence" and "Program run/single block" is interrupted until the PLC acknowledges that the<br />
M function has been performed.<br />
For some applications this can be disadvantageous (e.g. laser cutting machines). In such applications<br />
the program should be executed continuously and not wait for the acknowledgment of the M<br />
function. This function can be selected by machine parameter MP7440, Bit 2. If this function is<br />
selected then PLC positioning, datum correction, spindle orientation or limit switch range change are<br />
all not permitted during the output of the M function.<br />
This function must not be used for milling machines and boring machines.<br />
7.2 Program halt on M06<br />
According to ISO 6983, the M function M06 means a tool change. Machine parameter MP7440, Bit<br />
0 can be used to select whether on transferring M06 to the PLC the program should halt. If the<br />
control is set so that a program halt occurs on M06 then the program must be restarted after the<br />
tool change. This can also be carried out directly by the PLC.<br />
7.3 M function M89<br />
The M function M89 can be used for the modal cycle call. The possibilities for calling a cycle are:<br />
– With the NC block "CYCL CALL".<br />
– With the miscellaneous function M99. M99 is only effective for a single block and must<br />
be reprogrammed for each execution.<br />
– With the miscellaneous function M89 (depending on the machine parameter).<br />
M89 as a cycle call is modally effective, i.e. for every following positioning block<br />
there will be a call of the last programmed machining cycle. M89 is canceled by M99 or<br />
a CYCL CALL block.<br />
If M89 is not defined as a modal Cycle call by machine parameters, then M89 will be transferred<br />
to the PLC as a normal M function at the beginning of the block.<br />
MP7440 Output of M functions<br />
Input range: 0 to 7<br />
Bit 0 Program halt on M06 + 0 = Program halt on M06<br />
+ 1 = No program halt on M06<br />
Bit 1 modal cycle call M89 + 0 = Normal code transfer of<br />
M89 at beginning of block<br />
+ 2 = modal cycle call M89 at end of block<br />
Bit 2 Program halt on + 0 = Program halt until<br />
M functions acknowledgment of M function<br />
+ 4 = No program halt<br />
do not wait for acknowledgment<br />
4-140 <strong>TNC</strong> <strong>360</strong> 7 M Functions 8/95
8 Key Simulation<br />
The HEIDENHAIN contouring control is operated through the keys on the <strong>TNC</strong> keyboard (TE 355)<br />
and the manufacturer's own machine control panel. The two control panels are joined to connectors<br />
X23 and X27 on the logic unit by a connecting cable (see Chapter "Mounting and electrical<br />
installation ").<br />
The key code from the <strong>TNC</strong> keyboard is directly evaluated by the NC. PLC inputs and outputs for the<br />
machine control panel are available on connector X27 . These PLC inputs and outputs must be<br />
evaluated by the PLC and the appropriate information passed to the NC.<br />
8.1 <strong>TNC</strong> keyboard<br />
The key code from the <strong>TNC</strong> keyboard is directly evaluated by the NC.<br />
All keys on the <strong>TNC</strong> keyboard can be inhibited by the PLC with M2855 to M2923. If an inhibited key<br />
is pressed, the NC sets the marker M2182 and stores the corresponding key code in Word W274.<br />
The PLC must reset the marker M2182 after evaluating this information.<br />
The keys on the <strong>TNC</strong> keyboard can also be simulated by the PLC. To achieve, this the appropriate<br />
key code is entered in Word W516 and activated by the strobe marker M2813. After execution of<br />
the key code the NC resets the strobe marker M2813. For a key simulation the operating mode can<br />
be taken from W272.<br />
W272 Operating mode<br />
0 = Programming and editing<br />
1 = <strong>Manual</strong> operation<br />
2 = Electronic handwheel<br />
3 = Positioning with manual entry<br />
4 = Program run/single block<br />
5 = Program run/full sequence<br />
6 = Test run<br />
7 = Pass over reference point<br />
W274 Key code for the operated, inhibited key,<br />
Signal via M2182<br />
W516 Word with multiple function<br />
Key code for simulation of <strong>TNC</strong> keys<br />
Activate with M2813<br />
Set Reset<br />
NC NC<br />
NC NC<br />
PLC PLC<br />
S R<br />
M2182 Inhibited key was operated NC PLC<br />
M2813 Activate the key from W516 PLC NC<br />
8/95 <strong>TNC</strong> <strong>360</strong> 8 Key Simulation 4-141
Marker Function Key code Set Reset<br />
M2855<br />
M2856<br />
M2857<br />
M2858<br />
M2859<br />
M2860<br />
M2861<br />
M2862<br />
M2863<br />
M2864<br />
M2865<br />
M2867<br />
M2868<br />
M2869<br />
M2870<br />
PGM inhibit 59 PLC PLC<br />
NR<br />
L inhibit 60 PLC PLC<br />
RND<br />
CC<br />
inhibit 61 PLC PLC<br />
inhibit 62 PLC PLC<br />
C inhibit 63 PLC PLC<br />
inhibit 64 PLC PLC<br />
inhibit 65 PLC PLC<br />
MOD inhibit 66 PLC PLC<br />
P inhibit 67 PLC PLC<br />
inhibit 68 PLC PLC<br />
PGM inhibit 69 PLC PLC<br />
CALL<br />
CR inhibit 71 PLC PLC<br />
inhibit 72 PLC PLC<br />
inhibit 73 PLC PLC<br />
inhibit 74 PLC PLC<br />
4-142 <strong>TNC</strong> <strong>360</strong> 8 Key Simulation 8/95
Marker Function Key code Set Reset<br />
M2871 inhibit 75 PLC PLC<br />
M2872 inhibit 76 PLC PLC<br />
M2873 CT inhibit 77 PLC PLC<br />
M2874<br />
M2880<br />
M2881<br />
TOUCH<br />
PROBE inhibit 78 PLC PLC<br />
TOOL inhibit 84 PLC PLC<br />
DEF<br />
TOOL inhibit 85 PLC PLC<br />
CALL<br />
M2882 R- L inhibit 86 PLC PLC<br />
M2883 R + R inhibit 87 PLC PLC<br />
M2884 inhibit 88 PLC PLC<br />
M2885 inhibit 89 PLC PLC<br />
M2886 inhibit 90 PLC PLC<br />
M2887<br />
M2888<br />
M2889<br />
M2890<br />
CYCL inhibit 91 PLC PLC<br />
DEF<br />
CYCL inhibit 92 PLC PLC<br />
CALL<br />
LBL inhibit 93 PLC PLC<br />
SET<br />
LBL inhibit 94 PLC PLC<br />
CALL<br />
8/95 <strong>TNC</strong> <strong>360</strong> 8 Key Simulation 4-143
Marker Function Key code Set Reset<br />
M2891<br />
NO<br />
inhibit 95 PLC PLC<br />
ENT<br />
M2892 STOP inhibit 96 PLC PLC<br />
M2893 EXT inhibit 97 PLC PLC<br />
M2894<br />
M2895<br />
CL<br />
inhibit 98 PLC PLC<br />
PGM<br />
DEL<br />
inhibit 99 PLC PLC<br />
M2896 inhibit 100 PLC PLC<br />
M2897 ENT inhibit 101 PLC PLC<br />
M2898<br />
GOTO<br />
inhibit 102 PLC PLC<br />
M2899 inhibit 103 PLC PLC<br />
M2900<br />
Q<br />
inhibit 104 PLC PLC<br />
DEF<br />
M2901 CE inhibit 105 PLC PLC<br />
M2902 IV inhibit 106 PLC PLC<br />
M2903 Z inhibit 107 PLC PLC<br />
M2904 Y inhibit 108 PLC PLC<br />
M2905 X inhibit 109 PLC PLC<br />
M2906 Q inhibit 110 PLC PLC<br />
4-144 <strong>TNC</strong> <strong>360</strong> 8 Key Simulation 8/95
Marker Function Key code Set Reset<br />
M2907 0 inhibit 111 PLC PLC<br />
M2908 1 inhibit 112 PLC PLC<br />
M2909 4 inhibit 113 PLC PLC<br />
M2910 7 inhibit 114 PLC PLC<br />
M2911 inhibit 115 PLC PLC<br />
M2912 2 inhibit 116 PLC PLC<br />
M2913 5 inhibit 117 PLC PLC<br />
M2914 8 inhibit 118 PLC PLC<br />
M2915<br />
M2920+ /<br />
END<br />
inhibit 119 PLC PLC<br />
inhibit 124 PLC PLC<br />
M2921 3 inhibit 125 PLC PLC<br />
M2922 6 inhibit 126 PLC PLC<br />
M2923 9 inhibit 127 PLC PLC<br />
M2916 MOD inhibit 120 PLC PLC<br />
M2917<br />
BLK inhibit 121 PLC PLC<br />
FORM<br />
8/95 <strong>TNC</strong> <strong>360</strong> 8 Key Simulation 4-145
Marker Function Key code Set Reset<br />
M2918 MAGN inhibit 122 PLC PLC<br />
M2919 START inhibit 123 PLC PLC<br />
Example:<br />
If the "Position transfer" key is pressed in the operating mode "Positioning with manual entry" , a<br />
linear NC block with all three principal coordinates (X, Y, Z) is to be generated.<br />
66 CASE W272 ;Interrogate - operating mode<br />
. . .<br />
70 CM 3 ;Positioning with manual entry<br />
. . .<br />
75 ENDC<br />
. . .<br />
1102 EM ;End main program<br />
1103 LBL 3 ;Operating mode: Positioning with manual entry<br />
1104 L M10 ;Key simulation active?<br />
1105 SN M2896 ;No, then disable "Positions-transfer" key<br />
1106 L M2182 ;Disabled key operated?<br />
1107 CMT 31 ;Yes, then call key simulation<br />
1108 EM<br />
1109 LBL 31 ;Key simulation<br />
1110 L M10 ;Key simulation active?<br />
1111 R M2896 ;Yes, then enable "Positions-transfer" key<br />
1112 SN M10 ;Otherwise set key simulation active<br />
1113 CASE B200 ;Perform single step<br />
1114 CM 130 ;Key L(line)<br />
1115 CM 131 ;Key X<br />
1116 CM 132 ;Key "Position transfer"<br />
1117 CM 133 ;Key Y<br />
1118 CM 132 ;Key "Position transfer"<br />
1119 CM 134 ;Key Z<br />
1120 CM 132 ;Key "Position transfer"<br />
1121 CM 135 ;Key "END BLOCK"<br />
1122 CM 141 ;Reset key simulation<br />
1123 ENDC<br />
1124 EM<br />
1125 LBL 130 ;L(ine)<br />
1126 L K60 ;Key code for L(ine)<br />
1127 = W102<br />
1128 CM 136 ;Simulate key<br />
1129 EM<br />
1130 LBL 131 ;X<br />
4-146 <strong>TNC</strong> <strong>360</strong> 8 Key Simulation 8/95
1131 L K109 ;Key code for X<br />
1132 = W102<br />
1133 CM 136 ;Simulate key<br />
1134 EM<br />
1135 LBL 132 ;"Position transfer"<br />
1136 L K100 ;Key code for "Position transfer"<br />
1137 = W102<br />
1138 CM 136 ;Simulate key<br />
1139 EM<br />
1140 LBL 133 ;Y<br />
1141 L K108 ;Key code for Y<br />
1142 = W 102<br />
1143 CM 136 ;Simulate key<br />
1144 EM<br />
1145 LBL 134 ;Z<br />
1146 L K107 ;Key code for Z<br />
1147 = W102<br />
1148 CM 136 ;Simulate key<br />
1149 EM<br />
1150 LBL 135 ;"END BLOCK"<br />
1151 L K119 ;Key code for "END BLOCK"<br />
1152 = W102<br />
1153 CM 136 ;Simulate key<br />
1154 EM<br />
1155 LBL 136 ;Key simulation<br />
1156 L M2813 ;Strobe key transfer from W516<br />
1157 JPT 137 ;Still set, then wait<br />
1158 L B200 ;Case byte<br />
1159 + K+1<br />
1160 = B200 ;Increment case byte<br />
1161 L W102 ;Buffered key code<br />
1162 = W516 ;To NC<br />
1163 LN M2813<br />
1164 S M2813 ;Set strobe (activate simulation)<br />
1165 EM<br />
1166 LBL 137 ;Return marker<br />
1167 EM<br />
1168 LBL 141 ;End key simulation<br />
1169 L M2813 ;Simulation performed?<br />
1170 JPT 137 ;No, then wait<br />
1171 L K+0<br />
1172 = B200 ;Reset step counter<br />
1173 L M10<br />
1174 R M10 ;Reset marker "Key simulation active"<br />
1175 R M2182 ;Reset marker "Disabled key operated"<br />
1176 EM<br />
8/95 <strong>TNC</strong> <strong>360</strong> 8 Key Simulation 4-147
✎<br />
4-148 <strong>TNC</strong> <strong>360</strong> 8 Key Simulation 8/95
8.2 Machine control panel<br />
A manufacturer's specific machine control panel can be connected to the HEIDENHAIN contouring<br />
controls. See Chapter "Mounting and electrical installation".<br />
24 PLC inputs (I 128 to I 151) and 8 PLC outputs (O 0 to O 7) are available on the female connector<br />
X27 for the evaluation of the keys on the machine control panel. The evaluation of the signals from<br />
the machine control panel must be performed in the PLC program. The appropriate markers will be<br />
set thereby. For safety reasons a complement marker must be reset when some functions are<br />
activated. This is especially so for keys with several contacts. If the complement marker is not<br />
properly set or reset, the flashing error message "Error in PLC program" will appear. The displayed<br />
code identifies the marker where the error has occurred.<br />
An axis direction key which has been operated can be stored by marker M2450 (Complement<br />
marker M2466) . This means that the axis will be traversed until NC STOP occurs. This memory<br />
function must be activated by machine parameter MP7680 Bit 0.<br />
MP7680 - Memory function for axis-direction keys, memory function for<br />
Input: 0 or 1<br />
+ 0 = Not stored<br />
+ 1 = Stored<br />
Marker Function Error<br />
message<br />
Set Reset<br />
M2448 NC start (edge evaluation) 1A PLC PLC<br />
M2464 Complement NC start<br />
M2449 Rapid traverse 1B<br />
M2465 Complement – rapid traverse<br />
M2488 NC stop (“0” signifies stop) –<br />
M2450 Memory function for axis-direction keys 1C<br />
M2466 Complement – memory function for axisdirection<br />
keys<br />
M2451 Feed release for all axes 1D<br />
M2467 Complement – feed release<br />
M2456 <strong>Manual</strong> traverse X+ 1I<br />
M2472 Complement - manual traverse X+<br />
M2457 <strong>Manual</strong> traverse X- 1J<br />
M2473 Complement - manual traverse X-<br />
M2458 <strong>Manual</strong> traverse Y+ 1K<br />
M2474 Complement - manual traverse Y+<br />
M2459 <strong>Manual</strong> traverse Y- 1L<br />
M2475 Complement - manual traverse Y-<br />
8/95 <strong>TNC</strong> <strong>360</strong> 8 Key Simulation 4-149
Marker Function Error<br />
message<br />
Set Reset<br />
M2460 <strong>Manual</strong> traverse Z+ 1M PLC PLC<br />
M2476 Complement - manual traverse Z+<br />
M2461 <strong>Manual</strong> traverse Z- 1N<br />
M2477 Complement - manual traverse Z-<br />
M2462 <strong>Manual</strong> traverse 4+ 1O<br />
M2478 Complement - manual traverse 4+<br />
M2463 <strong>Manual</strong> traverse 4- 1P<br />
M2479 Complement - manual traverse 4-<br />
Marker for spindle control: see Section "Main spindle".<br />
Example:<br />
NC start key with two contacts I 128 and I 129<br />
axis-direction key X+ with one contact I 130<br />
.<br />
71 L I128 ;First contact NC start key<br />
72 = M2448 ;NC start<br />
73 LN I129 ;Second contact NC start key<br />
74 = M2464 ;Complement – NC start<br />
.<br />
100 L I130 ;Axis-direction key X+<br />
101 = M2456 ;<strong>Manual</strong> traverse X+<br />
102 LN I130<br />
103 = M2472 ;Complement - manual traverse X+<br />
.<br />
4-150 <strong>TNC</strong> <strong>360</strong> 8 Key Simulation 8/95
9 Touch Probe<br />
The 3-D TS Touch Probes by HEIDENHAIN are available in two versions:<br />
- TS 120 with cable transmission and integrated interface electronics,<br />
- TS 511 with infrared transmission of the switch signal and connected by a separate interface<br />
electronics unit (APE).<br />
The chapter "Mounting and electrical installation" contains instructions for connecting the touch<br />
probes.<br />
9.1 Interfacing the touch probe<br />
Machine parameter MP6010 is used to select either touch probe TS 120 or TS 511. The machine<br />
tool manufacturer must ensure that the spindle is interlocked when the touch probe is in use.<br />
The touch probe can be controlled either with the probing cycles in the "<strong>Manual</strong>" and "Electronic<br />
Handwheel" modes or by the "Touch Probe" function in the NC program (see <strong>TNC</strong> <strong>360</strong> User's<br />
<strong>Manual</strong>). The touch probe is interfaced to the measuring conditions using machine parameters<br />
MP6120 to MP6150.<br />
Touch probe function<br />
"Reference Plane"<br />
Max. measuring range<br />
(MP6130)<br />
Touch probe cycles<br />
in the "<strong>Manual</strong>" and<br />
"Electronic<br />
Handwheel"<br />
operating modes<br />
Max. measuring range<br />
(MP6130)<br />
F1 = Rapid traverse during probing cycle (MP6150)<br />
F2 = Probing feed rate (MP6120)<br />
8/95 <strong>TNC</strong> <strong>360</strong> 9 Touch Probe 4-151<br />
F 1<br />
F 2<br />
F 2<br />
Setup clearance<br />
(MP6140)
An error message "Touch point inaccessible" appears if the maximum measuring range (MP6130) is<br />
exceeded. Machine parameters MP6140 and MP6150 have no function with the probing cycles in<br />
the "<strong>Manual</strong>" and "Electronic Handwheel" modes.<br />
The probing sequence must be enabled by the PLC with marker M2503. This marker is set by the<br />
NC after a probing cycle starts and the NC waits until the PLC resets marker M2503 before<br />
executing the probing function.<br />
A number of conditions are transferred to the PLC with markers M2022 to M2072. This information<br />
can be processed further in the PLC program. The probing function is controlled entirely from the<br />
NC.<br />
In all modes when the stylus is deflected and marker M2502 is set, the controller stops the<br />
machine. (This only applies for TS 120!). If M2502 is not set, the controller only detects stylus<br />
deflection if the probing function has started. This is why HEIDENHAIN recommend setting marker<br />
M2502 as soon as the touch probe is in the spindle.<br />
The machine parameter MP7411 determines whether, during execution of the TOUCH PROBE block<br />
the current compensation data for touch probe length and radius is taken from the tool file or from<br />
the probe calibration process. MP7411 is also effective for the tool length compensation in the<br />
digitizing cycles.<br />
MP6010 Selection of the touch probe system<br />
Input: 0 or 1<br />
0 = TS 120<br />
1 = TS 511<br />
MP6120 Probing feed rate<br />
Input range: 80 to 30 000 [mm/min]<br />
MP6130 Maximum measuring range<br />
Input range: 0.001 to 99 999.999 [mm]<br />
MP6140 Setup clearance above measuring point<br />
Input range: 0.001 to 99 999.999 [mm]<br />
MP6150 Rapid traverse in probing cycle<br />
Input range: 80 to 30 000 [mm/min]<br />
MP7411 Compensation data for TOUCH PROBE block<br />
Input: 0 or 1<br />
0 = Compensation value from the calibration process<br />
1 = Compensation value from the tool file<br />
4-152 <strong>TNC</strong> <strong>360</strong> 9 Touch Probe 8/95
Set Reset<br />
M2502 NC STOP in all operating modes if stylus<br />
is deflected<br />
PLC PLC<br />
M2503 Enable marker for probing functions NC PLC<br />
M2022 Touch probe not ready (no standby<br />
signal at connector X12)<br />
M2023 Stylus deflected before start of probing<br />
cycle<br />
M2025 Stylus deflected (probing sequence is<br />
executed)<br />
NC NC<br />
NC NC<br />
NC PLC<br />
M2026 Probe operation ended or interrupted NC NC<br />
M2027 Battery voltage too low (battery warning<br />
on connector X12); evaluated only during<br />
the probe operation<br />
Example:<br />
Enable of probing function in the PLC.<br />
.<br />
.<br />
.<br />
489 LN I9 ;I9 = 0 => TS not in holder<br />
490 = M2502 ;stop if stylus deflected<br />
491 ;<br />
492 L M2503<br />
493 AN I9<br />
494 R M2503 ;acknowledge probing cycle<br />
495 ;<br />
496 ;<br />
497 ;safety function<br />
498 ;M03/M04 deactivate if TS not in holder<br />
499 ;<br />
500 L M2485 ;M03 activated?<br />
501 O M2486 ;M04 activated?<br />
502 AN I9 ;touch probe not in holder<br />
503 S M2487 ;display M05<br />
504 R M2485 ;deactivate M03<br />
505 R M2486 ;deactivate M04<br />
506 R M922 ;clear buffered marker M03<br />
507 R M923 ;clear buffered marker M04<br />
508 R M2488 ;NC stop<br />
NC NC<br />
8/95 <strong>TNC</strong> <strong>360</strong> 9 Touch Probe 4-153
✎<br />
4-154 <strong>TNC</strong> <strong>360</strong> 9 Touch Probe 8/95
9.2 Digitizing with TS 120<br />
Digitizing is possible with all HEIDENHAIN triggering touch probes. However, because the digitizing<br />
process can take several hours to complete, it is advisable to use the TS 120 touch probe with signal<br />
transmission by cable. The TS 511 touch probe with its infrared signal transmission can be<br />
continuously operated for up to 8 hours on one battery charge.<br />
<strong>Technical</strong> Requirements<br />
- "Digitizing with TS 120" is possible with <strong>TNC</strong> <strong>360</strong> using software types 259 90x03 (<strong>TNC</strong> <strong>360</strong>) and<br />
260 02x 04 (<strong>TNC</strong> <strong>360</strong> C) See also Chapter "Introduction", Section "Software".<br />
- Installing the software module "Digitizing with the TS 120". The ID number of the logic unit<br />
indicates whether the software module is already installed (see Chapter "Introduction", Sections<br />
"EPROM locations", and in Chapter "Mounting and electrical installation", Section "Hardware<br />
components"). If the module is already installed, the software number of the option will appear<br />
beneath the NC and PLC software number, when the system is switched on or when the MOD<br />
key is pressed.<br />
- Interfaced touch probe TS 120.<br />
- The machine must be optimized for "Servo lag operation".<br />
The digitizing sequence is optimized by the machine parameters.<br />
Machine parameter MP6210 is the value for the oscillations executed by the touch probe as it scans<br />
the form. It is governed by the dynamic response of the machine. The dynamic response is in turn<br />
determined by the Kv factor (servo lag operation). The greater the Kv factor, the greater the number<br />
of oscillations.<br />
Machine parameter MP6210 determines the maximum probing feed rate in conjunction with the<br />
programmed probe point interval, P.P.INT from the scanning cycles "Meander" and "Contour Lines":<br />
F [mm/min] = PP.INT [mm] x oscillations [1/s] x 60 [s/min]<br />
This relation gives the formula for calculating the input value of MP6210:<br />
optimized F [mm/min]1)<br />
Oscillations [1/s] =<br />
PP.INT [mm] x 60 [s/min]<br />
1) The optimized probing feed rate depends on the feed rate in the normal direction (MP6230).<br />
8/95 <strong>TNC</strong> <strong>360</strong> 9 Touch Probe 4-155
The feed rate in the normal direction (MP6230) is the resultant velocity at which the touch probe is<br />
fed from the non-deflected to the deflected condition perpendicular to the contour and vice versa.<br />
Normal direction<br />
Apart from the oscillation amplitude, the feed rate in the normal direction also determines the<br />
maximum scanning feed rate. If MP6230 is too low, the machine dynamics will be under-utilized and<br />
the scanning feed rate will also be low. If MP6230 is too high the oscillation amplitude will be too<br />
high. In this case the stylus will be seen to lift off from the contour (the stylus "taps" the surface of<br />
the workpiece) and the scanning feed rate no longer increases.<br />
The maximum stylus deflection is defined by machine parameter MP6240. MP6240 will depend on<br />
the length of the stylus used. MP6240 defines the maximum travel by which the stylus retracts on<br />
inside corners. If the touch probe is not "cleared" after the stylus backs out by the travel defined in<br />
MP6240, the touch probe axis (e.g. Z) is retracted in the positive direction. Digitizing continues as<br />
soon as the touch probe is cleared. If the input value is too small, the touch probe system may get<br />
caught up in a repeated attempt to get out of an inside corner.<br />
Machine parameter MP6260 defines an M function that stores technology data such as tool<br />
dimensions, spindle speed, feed rate and certain M functions (e.g. M3, M13). A small program is<br />
generated containing these technology data and the M functions determined by MP6250. If the<br />
program with the digitized data is run in blockwise mode this program is run immediately after the<br />
generated program, the technology data is taken over.<br />
Machine parameter MP6260 determines whether an M90 is added to each NC block (see also<br />
"Constant feed rate in corners with M90" in Section "Servo positioning of the NC axes".<br />
Machine parameter MP6270 defines the output format of the digitized data, i.e. the number of<br />
decimal places to which the coordinates are output.<br />
MP6210 Number of oscillations per second in normal direction.<br />
Input range 0 to 65.535 [1/s]<br />
MP6230 Feed rate in normal direction<br />
Input range: 0 to 10 000 [mm/min]<br />
MP6240 Maximum deflection of stylus<br />
Input range: 0 to 10.000 [mm]<br />
4-156 <strong>TNC</strong> <strong>360</strong> 9 Touch Probe 8/95
MP 6254 Numerical value for M function for transferring modal values<br />
Input value: 0 = no take-over<br />
1 to 89 = take-over with M (1 ... 89)<br />
MP6260 Output of M90 for NC blocks with digitized data<br />
Input value: 0 = no M90 output<br />
1 = M90 output in each NC block<br />
MP6270 Rounding of trailing zeros<br />
Input value: 0 = output 0.001 mm steps (1µm)<br />
1 = output 0.01 mm steps (10 µm)<br />
8/95 <strong>TNC</strong> <strong>360</strong> 9 Touch Probe 4-157
9.2.1 Scanning cycles<br />
Direct access to the position control loop of the <strong>TNC</strong> controller allows the rapid recording of<br />
measured values (3 to 5 values per second). With a programmed probe point interval of 1 mm, this<br />
produces a scanning feed rate of 180 to 300 mm/min. Three scanning cycles are used for digitizing:<br />
"Range", "Meander" and "Contour Lines".<br />
The "Range" cycle defines the cuboid scanning range and the file where the digitized data are stored.<br />
The "Meander" cycle digitizes a 3-D form meander-wise (line by line) in the pre-defined range.<br />
Y<br />
Z<br />
The "Contour Lines" cycle digitizes a 3-D form level-by-level in contour lines within a pre-defined<br />
range. Level-by-level digitizing is mainly used for forms with steep edges.<br />
Y<br />
Z<br />
4-158 <strong>TNC</strong> <strong>360</strong> 9 Touch Probe 8/95<br />
X<br />
X
The acquired data can be stored in the controller's program memory, on the FE 401 floppy disk unit<br />
or in a PC.<br />
Further particulars about scanning cycles will be found in the <strong>TNC</strong> <strong>360</strong> User's <strong>Manual</strong>.<br />
9.2.2 Response of the scanning sequence at corners<br />
FE 401<br />
The scanning sequence responds differently for inside and outside corners. Here the two<br />
parameters PP.INT (maximum probe point interval) and TRAVEL from the "Meander" and "Contour<br />
Lines" scanning cycles operate like a travel limiter. Depending on the values that are entered for<br />
these parameters, either the travel or the probe point interval are limited.<br />
The travel is also responsible for geometrical accuracy at the corners. The smaller the stroke, the<br />
greater the accuracy of corner resolution. If too small a stroke is defined however, it may affect<br />
clearance at acute inside corners (minimum travel = 0.1 mm).<br />
Outside Corners<br />
Contour<br />
1<br />
4<br />
PP. INT<br />
2<br />
Travel<br />
On outside corners, having probed the last point the touch probe moves down the resultant<br />
straight line until it either makes workpiece contact again or hits one of the two limits TRAVEL d or<br />
PP.INT e. In the illustrated example TRAVEL is the limit, and the touch probe returns to the contour<br />
f in the inverse scanning direction. The new scanning direction is defined by the probed points c<br />
and f.<br />
3<br />
8/95 <strong>TNC</strong> <strong>360</strong> 9 Touch Probe 4-159
Inside Corners<br />
6<br />
Max. deflection<br />
of stylus MP6240<br />
5<br />
1<br />
4<br />
PP. INT<br />
Contour<br />
PP. INT<br />
2<br />
Travel<br />
3<br />
On inside corners, having probed the last point c the touch probe continues to oscillate in the same<br />
scanning direction but changes direction because it cannot get clear. It then moves down the<br />
resultant straight line until it either gets clear or hits one of the limits TRAVEL e or PP.INT.e<br />
The touch probe moves in inverse scanning direction to get clear. If the programmed probe point<br />
interval PP.INT f is too small for the probe to clear, it travels paraxially in negative direction by up to<br />
the value of MP6240 (maximum stylus deflection). As soon as the touch probe is clear it returns to<br />
the contour g in the inverse travel direction. The new scanning direction is defined by the probed<br />
points c and g. If the touch probe has failed to clear even after it has backed out by the value of<br />
MP6240 h, the touch probe axis (e.g. Z+) is cleared in the positive direction. If the stylus is still<br />
deflected after it reaches the "clearance height" (see "Range" scanning cycle) the scanning sequence<br />
is aborted and an error message is displayed.<br />
4-160 <strong>TNC</strong> <strong>360</strong> 9 Touch Probe 8/95
9.2.3 Optimizing the scanning sequence<br />
The following preparations should be made before optimizing machine and controller.<br />
- Set up the flat workpiece with vertical face and plane surface in the machining plane (e.g. XY<br />
plane).<br />
- Probe the surface with probing function "Surface = Datum" ("MANUAL" or "EL. HANDWHEEL<br />
MODE") and enter the reference plane as +0 mm.<br />
- Basic setting of the relevant machine parameters for "Digitizing"<br />
MP6210 = 5 [1/s] Oscillations in normal direction<br />
MP6230 = 30 [mm/min] Feed rate in normal direction<br />
MP6240 = 5 [mm] Maximum stylus deflection<br />
- The interface must be configured according to the type of desired memory for the digitized data<br />
(FE 401 or PC with "Block Transfer" program). See <strong>TNC</strong> <strong>360</strong> User's <strong>Manual</strong>.<br />
- Connect FE 401 or PC to the serial data interface if necessary.<br />
- Enter NC program with the scanning cycles "Range" and "Meander" and the scanning direction X<br />
and the probe point interval 1 mm, e.g.<br />
0 BEGIN PGM 1 MM<br />
5 TCH PROBE 5.0 RANGE Define the range<br />
6 TCH PROBE 5.1 PGM NAME:2 to be digitized with<br />
7 TCH PROBE 5.2 Z X+0 Y+0 Z-10 the program name for<br />
8 TCH PROBE 5.3 X+100 Y+100 Z+10 the digitized data and<br />
9 TCH PROBE 5.4 HEIGHT: +25 clearance height (absolute)<br />
10 TCH PROBE 6.0 MEANDER "Meander" scanning in X<br />
11 TCH PROBE 6.1 DIRECTN:X direction with stroke (for<br />
12 TCH PROBE 6.2 TRAVEL:0.5 L.SPAC:1 P.P.INT:1 clearing steep edges), line<br />
13 END PGM 1 MM spacing and probe point<br />
interval<br />
8/95 <strong>TNC</strong> <strong>360</strong> 9 Touch Probe 4-161
Optimize the X and Y axes by defining the range such that only the level surface of the component is<br />
scanned.<br />
Z<br />
MIN<br />
Y<br />
X<br />
MAX<br />
Optimize the Z axis by defining the range such that mainly the vertical face is scanned.<br />
Z<br />
MIN<br />
Y<br />
X<br />
MAX<br />
4-162 <strong>TNC</strong> <strong>360</strong> 9 Touch Probe 8/95
Procedure for Optimizing Machine Parameters<br />
Increment MP6230<br />
(e.g. by 10 mm/min)<br />
no<br />
[1] Keep a note of the maximum<br />
feedrate that is possible in the<br />
worst axis.<br />
[2] If the override potentiometers<br />
are already at 150% and the axis<br />
still moves with a steady speed,<br />
increase MP6210.<br />
[2] The optimizing sequence is geared<br />
to the worst axis. This is why the<br />
feedrate must not be further increased<br />
with the override potentiometer and<br />
normal feedrate (MP6230).<br />
Connect a storage oscilloscope to the nominal<br />
command input of the servo amplifier for the<br />
X axis.<br />
In the<br />
"PROGRAM RUN/FULL SEQUENCE"<br />
mode, select optimization program and operate<br />
the external START KEY.<br />
Machine runs, digitizing starts.<br />
Increase the feedrate [1] with the override potentiometer<br />
[2] until X nominal command attains.<br />
maximum value and shows only minor voltage<br />
dips (axis should just still traverse at even<br />
speed).<br />
U[V]<br />
Umax<br />
Are oscillations in<br />
normal direction visible<br />
(stylus tip is seen to lift off<br />
workpiece surface)?<br />
Decrement MP6230 again<br />
(e.g. by 10 mm/min)<br />
Repeat optimizing sequence for Y axis.<br />
Switch the NC program to scanning<br />
direction Y [3].<br />
8/95 <strong>TNC</strong> <strong>360</strong> 9 Touch Probe 4-163<br />
yes<br />
t[s]<br />
Repeat optimizing sequence for Z axis.<br />
Change the scanning range accordingly [3].<br />
Pay particular attention to vertical face.
Calculation of Possible Oscillations in Normal Direction<br />
MP 6210 [1/s] = optimised F 1) [mm/min]<br />
PP.INT 2) [mm] x 60 [s/min]<br />
When the calculated machine parameter MP 6210 is entered the feed override potentiometer is<br />
trimmed to the "attained feed rate".<br />
1) Maximum possible feed rate noted during optimizing<br />
2) PP.INT is the programmed maximum probe point interval from the "Meander" scanning<br />
cycle (in the example, PP.INT = 1 mm).<br />
4-164 <strong>TNC</strong> <strong>360</strong> 9 Touch Probe 8/95
✎<br />
8/95 <strong>TNC</strong> <strong>360</strong> 9 Touch Probe 4-165
10 Electronic Handwheel<br />
Either a<br />
– an panel-mounted handwheel (HR 130)<br />
– an portable handwheel (HR 330 or HR 331)<br />
– or up to three single-axis integral handwheels (HR 150) via handwheel adapter (HRA 110)<br />
can be connected to HEIDENHAIN contouring controls (see also Chapter "Mounting and electrical<br />
installation "). The operation of the electronic handwheel is described in the <strong>TNC</strong> <strong>360</strong> User's <strong>Manual</strong>.<br />
MP7640 determines which handwheel is connected. If a value greater than zero is entered but no<br />
handwheel is connected, the error message "HANDWHEEL?" will appear.<br />
The counting direction for the measuring system signals of the handwheel are entered in machine<br />
parameter MP7650.<br />
Shock and vibration can cause a slight movement of the handwheel and thus lead to an unwanted<br />
traverse movement. In order to avoid this, a threshold sensitivity for the electronic handwheel is<br />
entered in machine parameter MP7660. Setting the Marker M2826 inhibits traverse with the<br />
handwheel, i.e. handwheel pulses are suppressed.<br />
For HR 130, HR 330, and HR 332 one interpolation factor can be selected in the "Handwheel"<br />
operating mode. For HR 150 with HRA 110 up to three can be selected. This interpolation factor<br />
determines the traverse distance per handwheel revolution. In order to ensure that the rapid<br />
traverse rate fixed by the machine parameter MP1010.x is not exceeded, the NC determines the<br />
minimum entry value for the interpolation factor. For the HR 130, HR 330, and HR 332 handwheels,<br />
the NC goes by the smallest value which was entered, i.e. according to the slowest axis.<br />
Machine parameter MP7641 bit 0 defines whether the interpolation factor can be entered through<br />
the <strong>TNC</strong> keyboard (see User's <strong>Manual</strong>) or through the PLC module 9036 (see Chapter 7, section<br />
"PLC Modules"). With machine parameter MP7641 bit 2 the interpolation factor for the handwheel<br />
can be defined both from the keyboard and from the PLC module 9036. If bit 2 = 0, the machine<br />
parameters function as before (entry from the keyboard or from PLC module 9036).<br />
If in machine parameter MP7641 bit 3 is set, the PLC can poll the keys (except for the axis keys) in<br />
any mode of operation. This function takes effect before the REF run. The axis keys and the<br />
handwheel pulses do not become effective until handwheel mode is active. After an error the<br />
handwheel is not driven until the handwheel key is pressed.<br />
In the "Programming and editing" mode of operation the axis can be moved by the handwheel if in<br />
machine parameter MP7641 bit 1 = 1. The interpolation factor or the handwheel axis can be<br />
changed only in the "Electronic handwheel" mode, regardless of the handwheel model. Once a<br />
handwheel axis has be selected, it remains active even after a switch of operating modes.<br />
Simultaneous use of the handwheel interface and the RS-232-C interface causes a conflict in baud<br />
rates (38 400 and 19 200 baud) resulting in the error message BAUD RATE NOT POSSIBLE.<br />
For the HR 150 with the HRA 110 handwheel adapter the control sets the interpolation factor<br />
individually for up to three axes.<br />
Interpolation factor Traverse distance per handwheel<br />
revolution [mm]<br />
0 20 12 000<br />
1 10 6 000<br />
2 5 3 000<br />
Effective from rapid traverse rate:<br />
MP1010.x [mm/min.]<br />
4-166 <strong>TNC</strong> <strong>360</strong> 10 Electronic Handwheel 8/95
3 2.5 1 500<br />
4 1.25 750<br />
5 0.625 80<br />
6 0.312 80<br />
7 0.156 80<br />
8 0.078 80<br />
9 0.039 80<br />
10 0.019 80<br />
Machine parameter MP7670 can be used to select a higher limit than that calculated by the NC.<br />
MP7640 Handwheel<br />
Input: 0 to 6<br />
0 = Machine without electronic handwheel<br />
1 = Portable handwheel HR 330<br />
2 = Panel-mounted handwheel HR 130<br />
3 = Portable handwheel HR 330 (evaluation of keys via PLC)<br />
4 = Portable handwheel HR 332 (evaluation of keys via PLC)<br />
5 = Up to three HR 150 via HRA 110<br />
6 = Reserved<br />
MP7641 Entry of interpolation factor<br />
Input: 0 to 15<br />
Bit 0 +0 = Entry of interpolation factor via <strong>TNC</strong> keyboard<br />
+1 = Entry of interpolation factor via PLC module 9036<br />
Bit 1 +0 =<br />
+2 = Handwheel active in the Programming and editing mode<br />
Bit 2 +0 =<br />
+4 = Entry of interpolation factor via PLC module and <strong>TNC</strong> keyboard<br />
Bit 3 +0 =<br />
+8 = Key polling (except axis keys) from the PLC in every operating mode<br />
MP7650 Count direction for handwheel<br />
Input: 0 or 1<br />
0 = positive count direction<br />
1 = negative count direction<br />
MP7660 Threshold sensitivity for electronic handwheel<br />
Input range: 0 to 65 535 [increments]<br />
MP7670 Minimum interpolation factor for handwheel<br />
Input range: 0 to 10<br />
Marker Function Set Reset<br />
M2826 Suppress handwheel pulses PLC PLC<br />
8/95 <strong>TNC</strong> <strong>360</strong> 10 Electronic Handwheel 4-167
✎<br />
10 Electronic handwheel<br />
4-168 <strong>TNC</strong> <strong>360</strong> 10 Electronic handwheel 8/95
10.1 Panel-mounted handwheel HR 130<br />
MP7640 = 2<br />
10.2 Portable handwheel HR 330<br />
MP7640 = 1 with evaluation of all keys through the NC<br />
MP7640 = 3 with evaluation of the +, – and rapid traverse keys in the PLC<br />
Assignment of keys to the PLC inputs<br />
Key PLC input<br />
+ I160<br />
– I161<br />
”Rapid traverse” I162<br />
10.3 Portable handwheel HR 332<br />
MP7640 = 4 with evaluation of all keys in the PLC<br />
MP7645.0 determines whether all 12 keys and their LEDs are accessible via PLC or whether the<br />
axis selection keys and their LEDs are excepted.<br />
MP7645.0 Assignment of handwheel keys for HR 332<br />
Input: 0 or 1<br />
0 = All keys except axis selection keys and their LEDs are<br />
accessible via PLC<br />
1 = All 12 keys and LEDs are accessible via PLC<br />
8/95 <strong>TNC</strong> <strong>360</strong> 10 Electronic handwheel 4-169
10.3.1 Assignment of keys and LEDs to the PLC inputs and outputs<br />
The 12 keys of the HR 332 handwheel are assigned to various PLC inputs and the 12 indicator LEDs<br />
to various PLC outputs according to the input value of the machine parameter MP7645.0.<br />
When a key is pressed, the corresponding PLC input is set. When a PLC output is set, the<br />
corresponding LED lights up.<br />
The PLC inputs I160 and I175 generate signal edges. The positive edge is assigned to markers<br />
M1660 to M1675, the negative edge is assigned to markers M1860 to M1875.<br />
If MP7645.0 = 0 the keys X, Y, Z, IV and their<br />
LEDs are assigned to the NC. The remaining<br />
keys are assigned to the PLC inputs I164 to I170.<br />
the LEDs are assigned to the PLC outputs O100<br />
to O106.<br />
X<br />
Y<br />
Z<br />
O101<br />
I165<br />
IV<br />
O100<br />
I164<br />
V O102<br />
I166<br />
O103<br />
I167 O104<br />
I168<br />
O105<br />
I169 O106<br />
I170<br />
In the standard version of the HR 332 the keys<br />
assigned the following functions:<br />
X<br />
Y<br />
Z<br />
IV<br />
V<br />
The key without symbols can be assigned any<br />
function by the PLC program.<br />
If MP7645.0 = 1 all twelve keys are assigned to<br />
the PLC inputs I160 to I171 and all LEDs to the<br />
PLC outputs O96 to O107.<br />
0O96<br />
I160<br />
0O99<br />
I163<br />
O102<br />
I166<br />
O105<br />
I169<br />
0O97<br />
I161<br />
O100<br />
I164<br />
0O98<br />
I162<br />
O101<br />
I165<br />
O103<br />
I167 O104<br />
I168<br />
O106<br />
I170 O107<br />
I171<br />
4-170 <strong>TNC</strong> <strong>360</strong> 10 Electronic handwheel 8/95
10.3.2 PLC example<br />
In the following example the currently selected axis is evaluated so that this axis can be moved with<br />
the +/− keys. This example is for the X axis (MP7640=4, MP7641=0 and MP7645.0 = 0).<br />
Key on HR 332 PLC input or output<br />
+ Key I170<br />
– Key I169<br />
+ LED O105<br />
– LED O106<br />
;Main program<br />
LBL 1<br />
PS<br />
CM<br />
PL<br />
K+9<br />
9035<br />
B0<br />
Interrogate the selected handwheel axis with 9035<br />
L K+0 Erase the 8 Markers for "manual"<br />
B= M2456 traverse of the axes X to IV<br />
L K$FF Set the 8 complement markers<br />
B= M2472<br />
A MO Erase the PLC outputs<br />
ON MO O100 to O106.<br />
R O100 All LEDs except the<br />
R O101 LED of the selected<br />
R O102 axis are switched off.<br />
R O103<br />
R O104<br />
R O105<br />
R O106<br />
Case B0 Evaluate the selected handwheel axis<br />
CM 10 X axis<br />
CM 11 Y axis<br />
CM 12 Z axis<br />
CM 13 IV axis<br />
ENDC<br />
EM<br />
LBL 10 X axis<br />
LN M2457 If X– is not active<br />
A I170 and the + key is pressed,<br />
S M2456 the axis moves in X+<br />
R M2472 direction.<br />
S O105 LED on the + key lights up.<br />
LN M2456 If X+ is not active<br />
A I169 and the – key is pressed,<br />
S M2457 the axis moves in X–<br />
R M2473 direction.<br />
S O106 LED on the – key lights up.<br />
EM<br />
8/95 <strong>TNC</strong> <strong>360</strong> 10 Electronic handwheel 4-171
LBL 11<br />
.<br />
.<br />
EM<br />
LBL 12<br />
.<br />
.<br />
EM<br />
LBL 13<br />
.<br />
.<br />
EM<br />
Y axis<br />
Z axis<br />
IV axis<br />
10.4 Panel-mounted handwheels HR 150 with handwheel adapter<br />
HRA 110<br />
MP7640 = 5<br />
MP7641 determines whether the interpolation factor can be entered directly through the <strong>TNC</strong><br />
keyboard or through the PLC module 9036 (see also Chapter 7, Section "PLC Modules").<br />
If the switch for the selection of the interpolation factor is used, the inputs I160 to I167 are to be<br />
evaluated in binary values before using the PLC Modules 9036. The third handwheel can be<br />
assigned to any axis. MP7645.2 determines whether the axis for the third handwheel is selected<br />
through the axis selection key (see MP7645.0) or via the machine parameter MP7645.1.<br />
MP7641 Entry of interpolation factor for HR 150 with HRA 110<br />
Input: 0 or 1<br />
0 = via <strong>TNC</strong> keyboard<br />
1 = via PLC module 9036<br />
MP7645 Assignment of the third handwheel<br />
MP7645.0 Assignment of third handwheel via axis selection switch<br />
Input: 0 to 2<br />
Switch setting 3rd handwheel<br />
0: 1 (Left-most setting) Z axis<br />
2 IV axis<br />
1: 1 (Left-most setting) X axis<br />
2 Y axis<br />
3 Z axis<br />
4 IV axis<br />
2: 3 Z axis<br />
4 IV axis<br />
4-172 <strong>TNC</strong> <strong>360</strong> 10 Electronic handwheel 8/95
If no axis selection switch is connected (see also MP 7645.2), the third handwheel<br />
is permanently assigned to an axis as entered in MP 7645.1.<br />
MP7645.1 Assignment of 3rd handwheel via machine parameter<br />
Input: 0 to 8<br />
0: Simulation of switch setting 1 (Left-most setting)<br />
The third handwheel is assigned from MP7645.0<br />
(Input value 0 or 1).<br />
1: X axis<br />
2: Y axis<br />
4: Z axis<br />
8: IV axis<br />
MP7645.2: Assignment of 3rd handwheel via axis selection switch or MP7645.1<br />
Input: 0 or 1<br />
0: Assignment via axis selection switch<br />
according to MP7645.0<br />
1: Assignment via MP7645.1.<br />
The axis selection switch transmits data to the PLC inputs I168 to I175.<br />
The axis selection switch can therefore also serve other functions.<br />
10.4.1 Assignment of the switch setting to the PLC inputs<br />
The following tables show the assignments of the switch settings of S1 and S2 to the PLC inputs<br />
I160 to I175.<br />
Both switches function with 0V logic. If, for example, the switch S1 is at setting 3, then input I162 is<br />
logically 0 and inputs I160, I161 and I163 to I167 are logically 1.<br />
Step switch S1<br />
Switch for the selection of the interpolation factor<br />
Switch setting PLC input<br />
1 (Left-most setting) I160<br />
2 I161<br />
3 I162<br />
4 I163<br />
5 I164<br />
6 I165<br />
7 I166<br />
8 (Right-most setting) I167<br />
8/95 <strong>TNC</strong> <strong>360</strong> 10 Electronic handwheel 4-173
Step switch S2<br />
Step switch for axis selection<br />
Switch setting PLC input<br />
1 (Left-most setting) I168<br />
2 I169<br />
3 I170<br />
4 I171<br />
5 I172<br />
6 I173<br />
7 I174<br />
8 (Right-most setting) I175<br />
10.4.2 PLC Example<br />
In the following example the settings of switch S1 are assigned for the selection of the interpolation<br />
factor through evaluation of the inputs I160 to I167 from the smallest permissible interpolation<br />
factor from MP7670 to the largest interpolation factor = 10. They are then transferred from the PLC<br />
to the NC (MP7640 = 5 and MP7641 = 1).<br />
In this PLC example the minimum interpolation factor is read and processed with the PLC module<br />
9032 from MP7670.<br />
LB I160 Assign the inputs I160 to I167<br />
= B1 to Byte 1 (0V logic, negative logic)<br />
== K0 If all inputs are 0, then<br />
JPT 103 error message<br />
LN B1 Invert Byte 1 (positive logic)<br />
= B2<br />
== K0 If all Bits are 0, then<br />
JPT 103 error message<br />
LBL 100 Loop for bit test of the "inverted inputs"<br />
L B2 I160 to I167 in Byte 2<br />
BT B3<br />
JPT 101 Jump if Bit is set, i.e. input Ixxx = 0V<br />
L B3 prepare next Bit for interrogation, i.e.<br />
+ K+1 read input, if input Ixxx was not 0V.<br />
= B3<br />
JP 100<br />
LBL 101<br />
PS K+7670 Read the smallest interpolation factor<br />
PS K+0 from MP7670 with PLC module 9032<br />
CM 9032<br />
4-174 <strong>TNC</strong> <strong>360</strong> 10 Electronic handwheel 8/95
PL B4 Result is in Byte 4<br />
L B3 Current switch setting (0 to 7) plus<br />
+ B4 minimum interpolation factor from MP7670<br />
= B5 is new interpolation factor<br />
<br />
CM 9036 NC) factors.<br />
PL B6 Read error code<br />
L B6 If transfer is faulty, then<br />
> K0 error message<br />
JPT 103<br />
EM<br />
.<br />
LBL 103 Error-message subprogram<br />
.<br />
Example:<br />
Switch setting: 4<br />
Minimum interpolation factor: MP 7670 = 5<br />
In this PLC example are the following events:<br />
Inputs: I160 to I162 and I164 to I167 are logically 1<br />
Input: I163 is logically 0<br />
Byte 1: 11110111<br />
Byte 2: 00001000<br />
Byte 3: 3<br />
Byte 4: 5<br />
Byte 5: 8<br />
In the above example, the switch S2 is configured as follows:<br />
Switch setting Interpolation factor<br />
1 (Left-most setting) 5<br />
2 6<br />
3 7<br />
4 8 Present switch setting<br />
5 9<br />
6 10<br />
7 10<br />
8 (Right-most setting) 10<br />
8/95 <strong>TNC</strong> <strong>360</strong> 10 Electronic handwheel 4-175
11 Analog Inputs<br />
The function of the <strong>TNC</strong> <strong>360</strong>'s analog input for displaying spindle power is described in Section<br />
"Expanded spindle display" (see 6.3.8).<br />
The analog input is located at connector X8 (Pin 2 analog input, Pin 10 0V for analog input).<br />
4-176 <strong>TNC</strong> <strong>360</strong> 11 Analog Inputs 8/95
✎<br />
8/95 <strong>TNC</strong> <strong>360</strong> 11 Analog Inputs 4-177
12 Incremental Jog Positioning<br />
The "incremental jog" function for the electronic handwheel operating mode can be activated through<br />
the PLC program. This function permits the user to enter a jog increment (0.001 to 50 mm) by which<br />
an axis moves whenever a machine axis direction button (e.g. X+) is pressed.<br />
The incremental jog positioning function is activated through the PLC marker M2498. In the<br />
electrical handwheel mode the dialogue "jog increment" is then displayed to prompt the user to enter<br />
the jog increment.<br />
Incremental jog positioning is normally executed through axis direction keys. In order to cause only a<br />
single movement when the button is pressed, the PLC input signal for the axis direction button must<br />
be evaluated for one edge (e.g. positive edge). See also Chapter "PLC programming", Section "Edge<br />
evaluation of the PLC inputs".<br />
This inhibits the function for manual traverse in the electronic handwheel mode when the axis<br />
direction button is pressed for a long time. Each time the button is pressed, the axis moves only<br />
once and only by the entered jog increment.<br />
In the PLC program the start marker and the corresponding complement marker must be taken into<br />
account. If this in not the case the error message "PLC ERROR xx" appears.<br />
Marker Function and input Error<br />
message<br />
Set Reset<br />
M2052 Operating mode: Electronic handwheel<br />
or Word W 272<br />
NC NC<br />
M2497 Activate the edge evaluation for PLC inputs PLC PLC<br />
M2498 Release jog positioning PLC PLC<br />
M2512 Start jog positioning X+<br />
2A PLC PLC<br />
M2528 Complement jog positioning X+<br />
M2513 Start jog positioning X−<br />
2B<br />
M2529 Complement jog positioning X−<br />
M2514 Start jog positioning Y+<br />
2C<br />
M2530 Complement jog positioning Y+<br />
M2515 Start jog positioning Y−<br />
2D<br />
M2531 Complement jog positioning Y−<br />
M2516 Start jog positioning Z+<br />
2E<br />
M2533 Complement jog positioning Z+<br />
M2517 Start jog positioning Z−<br />
2F<br />
M2534 Complement jog positioning Z−<br />
M2518 Start jog positioning 4th axis +<br />
2G<br />
M2535 Complement jog positioning 4th axis +<br />
M2519 Start jog positioning 4−<br />
2H<br />
M2536 Complement jog positioning 4−<br />
4-178 <strong>TNC</strong> <strong>360</strong> 12 Incremental Jog Positioning 8/95
PLC example:<br />
Axis direction button X+ with contact I138<br />
Axis direction button X− with contact ,133<br />
L M2052 Interrogate operating mode<br />
CMT 10 Electronic handwheel<br />
.<br />
.<br />
EM End of main program<br />
.<br />
.<br />
LBL 10<br />
L M2052 Incremental jog positioning<br />
S M2497 Activate edge evaluation of the PLC inputs<br />
S M2498 Release incremental jog positioning<br />
R M2512 Erase marker for incremental jog positioning in axis X<br />
R M2513<br />
S M2528<br />
S M2529<br />
L M1638 Incremental jog positioning in axis X+<br />
AN ,133<br />
S M2512<br />
R M2528<br />
L M1633 Incremental jog positioning in axis X−<br />
AN ,138<br />
S M2513<br />
R M2529<br />
EM<br />
.<br />
.<br />
.<br />
8/95 <strong>TNC</strong> <strong>360</strong> 12 Incremental Jog Positioning 4-179
✎<br />
4-180 <strong>TNC</strong> <strong>360</strong> 12 Incremental Jog Positioning 8/95
✎<br />
8/95 <strong>TNC</strong> <strong>360</strong> 12 Incremental Jog Positioning 4-181
✎<br />
4-182 <strong>TNC</strong> <strong>360</strong> 12 Incremental Jog Positioning 8/95
13 Hirth Coupling<br />
Many machine tool use Hirth couplings to clamp rotary axes and swivel heads. A Hirth coupling is a<br />
pair of more or less finely toothed plates that form a rigid rotary connection when pressed together.<br />
The Hirth functions are realized through the PLC program.<br />
A repositioning is performed as PLC positioning or an error message is displayed, depending on<br />
whether the axis with Hirth coupling is positioned automatically or manually. The default values for<br />
grid, positioning accuracy and further parameters for positioning before Hirth clamping are<br />
performed through free machine parameters by transferring the input values to the PLC.<br />
13.1 Positioning in the manual operating mode<br />
When axis 4 is selected and positioned with the electronic handwheel, the "Axis in position" marker<br />
(M2011) is reset. This can be used for de-clamping the Hirth coupling. The same applies for traverse<br />
via axis direction button. When the "Axis is position" marker is set, the nominal position is checked<br />
for its agreement to the Hirth coupling grid. The PLC takes the shortest path to reposition the axis,<br />
i.e. the axis is moved to the nearest grid point.<br />
13.2 Positioning in controlled operation<br />
When the NC is started, the "Axis in position" marker is also reset. This starts an internal<br />
examination of the target position. If the target position is not in the Hirth grid, an error message is<br />
released. After the error message is erased and the NC is restarted, the axis is moved from the<br />
target position to the nearest Hirth grid point.<br />
13.3 Program example<br />
.<br />
.<br />
.<br />
LBL 14 ;HIRTH_AXES<br />
;INITIALIZE HIRTH<br />
L M2180 ;1ST PLC CYCLE AFTER POWER ON<br />
O M2185 ;1ST PLC CYCLE AFTER PLC_PGM COMPILE<br />
S M528 ;INIT_ACTIVE<br />
L M528 ;1ST PLC CYCLE DELAY DUE TO <strong>TNC</strong> <strong>360</strong><br />
AN M2180 ;1ST PLC CYCLE AFTER POWER ON<br />
AN M2185 ;1ST PLC CYCLE AFTER PLC_PGM COMPILE<br />
JPT 26 ;INIT_HIRTH<br />
;----READ COORDINATES ----<br />
PS K128<br />
PS K2 ;REFERENCE_VALUE<br />
CM 9040 ;READ COORDINATE VALUES<br />
L M3171 ;NP_M3171_MODULE_ERR<br />
S M2955 ;PN_MODULEERRCYCL<br />
S M2815 ;PN_M2815_PLC_EMERGENCY_STOP<br />
;---- HIRTH MODULES FOR THE AXES----<br />
L M595 ;G_HIRTH_ACTIVE_4<br />
8/95 <strong>TNC</strong> <strong>360</strong> 13 Hirth Coupling 4-183
CMT 47 ;HIRTH_4_AXIS<br />
;----CLEAR ERROR MESSAGE----<br />
LN M527 ;HIRTH_ERR_4<br />
AN M527 ;HIRTH_ERR_4<br />
R M2933 ;PN_ERR_HIRTH_NOTINPOS<br />
EM ; END OF HIRTH MODULE<br />
LBL 47 ;HIRTH_4_AXIS<br />
;----CALCULATE LEFT AND RIGHT GRID POINT ---<br />
L D140 ;REFPOS_4TH_AXIS<br />
/ W232 ;GRID_4<br />
PSW<br />
X W232 ;GRID_4<br />
= D152 ;RIGHT_GRID<br />
PLW<br />
+ K1 ;ONE<br />
X W232 ;GRID_4<br />
= D156 ;RIGHT_GRID<br />
;----CALCULATE DIST (DIFFERENCE FROM LEFT AND RIGHT GRID) ---<br />
L D140 ;REFPOS_4_AXIS<br />
- D152 ;RIGHT_GRID<br />
PSW<br />
CM 29 ;GENERATE ABSOLUTE VALUE<br />
PL D160 ;DIF_LEFT<br />
L D140 ;REFPOS_4_AXIS<br />
- D156 ;RIGHT_GRID<br />
PSW<br />
CM 29 ; GENERATE ABSOLUTE VALUE<br />
PL D164 ;DIF_RIGHT<br />
;----COMPARE DISTANCE LEFT > < RIGHT ? ----<br />
L D164 ;LOAD DIF.-RIGHT<br />
< D160 ;LOAD DIF.-LEFT<br />
CMT 49 ;RIGHT GRID IS NEARER<br />
CMF 50 ;RIGHT GRID IS NEARER<br />
;----HIRTH GRID CONTACTED----<br />
L M2 ;MP_EDITOR_ACTIVE<br />
A M2011 ;NP_M2011_4_INPOS<br />
= M597 ;G_HIRTH_4A_INPOS<br />
;----HIRTH-ERROR 4-AXIS----<br />
LN M600 ;MANAL MODE OF OPERATION<br />
AN M2 ;MP_EDITOR_ACTIVE<br />
A M2011 ;NP_M2011_4_INPOS<br />
S M527 ;HIRTH_ERR_4<br />
;----ERASE ERROR WITH NC START----<br />
L I132 ;I_NC_START<br />
R M527 ;HIRTH_ERR_4<br />
;----DISPLAY ERROR----<br />
L M527 ;HIRTH_ERR_4<br />
S M2933 ;PN_ERR_HIRTH_NOTINPOS<br />
;----RELEASE FOR POSITIONING TO THE GRID----<br />
LN M2011 ;NP_M2011_4_INPOS<br />
S M530 ;POSRELEASE_4A<br />
;----MOVE HIRTH-ACHSE TO THE GRID----<br />
L M600 ;MANUAL OPERATING MODE<br />
4-184 <strong>TNC</strong> <strong>360</strong> 13 Hirth Coupling 8/95
AN M2 ;MP_EDITOR_ACTIVE<br />
A M2011 ;NP_M2011_4_INPOS<br />
AN M2707 ;PN_M2707_START_4_POS<br />
AN M527 ;HIRTH_ERR_4<br />
A M530 ;POSRELEASE_4A<br />
CMT 51 ;START_4_PLC_POS<br />
;----INHIBIT FOR POSITIONING TO THE GRID<br />
L M597 ;G_HIRTH_4A_INPOS<br />
R M530 ;POSRELEASE_4A<br />
EM<br />
LBL 49 ;R_4A_GRID<br />
L D164 ;DIF_RIGHT<br />
< W236 ;POS_WINDOW_4<br />
= M2 ;MP_EDITOR_ACTIVE<br />
L D156 ;RIGHT_GRID<br />
= D148 ;PLC_POS<br />
EM<br />
LBL 50 ;L_4A_GRID<br />
L D160 ;DIF_LEFT<br />
< W236 ;POS_WINDOW_4<br />
= M2 ;MP_EDITOR_ACTIVE<br />
L D152 ;RIGHT_GRID<br />
= D148 ;PLC_POS<br />
EM<br />
LBL 51 ;START_4_PLC_POS<br />
L D148 ;PLC_POS<br />
= D540 ;PN_D540_4_PLC_POS<br />
L W966 ;NP_W966_FEED_4_ACHSE<br />
= W566 ;PN_W566_POSFEED_4<br />
LN M2707 ;PN_M2707_START_4_POS<br />
S M2707 ;PN_M2707_START_4_POS<br />
EM<br />
LBL 26 ;INIT_HIRTH<br />
;----READ MP4230 AXIS ACTIVE----<br />
PS K4230 ;MP420<br />
PS K3 ;MP_EDITOR<br />
CM 9032<br />
L M3171 ;NP_M3171_MODULE_ERR<br />
S M2956 ;PN_MODULEERRSUBM<br />
S M2815 ;PN_M2815_PLC_EMERGENCY_STOP<br />
PLW<br />
K0 ;ZERO<br />
= M595 ;G_HIRTH_ACTIVE_4<br />
;----READ MP4239 GRID---<br />
PS K4239 ;MP430<br />
PS K3 ;MP_EDITOR<br />
CM 9032<br />
L M3171 ;NP_M3171_MODULE_ERR<br />
S M2956 ;PN_MODULEERRSUBM<br />
S M2815 ;PN_M2815_PLC_NOT_AUS<br />
8/95 <strong>TNC</strong> <strong>360</strong> 13 Hirth Coupling 4-185
PL W232 ;GRID_4<br />
;----READ MP1030.3 INPOS---<br />
PS K1030 ;MP1030<br />
PS K3 ;MP_EDITOR<br />
CM 9032<br />
L M3171 ;NP_M3171_MODULE_ERR<br />
S M2956 ;PN_MODULEERRSUBM<br />
S M2815 ;PN_M2815_PLC_EMERGENCY_STOP<br />
PL W236 ;POS_WINDOW_4<br />
L M528 ;INIT_ACTIVE<br />
R M528 ;INIT_ACTIVE<br />
EM<br />
; ABSOLUTE VALUE GENERATION<br />
LBL 29 ;ABSOLUTE VALUE GENERATION<br />
PLW ;READ DATA FROM D-STACK<br />
PSW ;AND WRITE AGAIN<br />
>= K0 ;IF POSITIVE THEN END OF MODULE<br />
JPT 30 ;LABEL END OF MODULE<br />
PLW ;IF NEGATIVE THEN 2ND COMPLEMENT<br />
XON K0 ;ZERO<br />
+ K1 ;ONE<br />
PSW ;STORE DATA ON STACK<br />
EM<br />
4-186 <strong>TNC</strong> <strong>360</strong> 13 Hirth Coupling 8/95
✎<br />
8/95 <strong>TNC</strong> <strong>360</strong> 13 Hirth Coupling 4-187
✎<br />
4-188 <strong>TNC</strong> <strong>360</strong> 13 Hirth Coupling 8/95
✎<br />
8/95 <strong>TNC</strong> <strong>360</strong> 13 Hirth Coupling 4-189
✎<br />
4-190 <strong>TNC</strong> <strong>360</strong> 14 Datum Correction 8/95
✎<br />
8/95 <strong>TNC</strong> <strong>360</strong> 14 Datum Correction 4-191
✎<br />
4-192 <strong>TNC</strong> <strong>360</strong> 14 Datum Correction 8/95
✎<br />
8/95 <strong>TNC</strong> <strong>360</strong> 14 Datum Correction 4-193
14 Datum Correction<br />
The PLC datum correction function is used to shift the zero or datum point with the PLC program.<br />
Datum corrections are required for machines that have swivel heads, e.g. when swivelling the head<br />
causes a correction in the X/Z axis.<br />
Each axis (X, Y, Z, 4) is assigned a doubleword (D528 to D540) for the correction value. If a value for<br />
the appropriate axis is entered via the PLC program and strobe marker M2716 is set, then a datum<br />
correction will be active at the next M/S/T strobe. The correction is computed in the actual position<br />
display. The display then indicates the shifted system of coordinates.<br />
Example:<br />
Actual position display for X axis without correction = 50<br />
Correction in D528 = +20<br />
Strobe marker M2716 set, i.e. correction is active<br />
New actual position display X= +70<br />
The corrections can be transferred to doublewords, D528 to D540, from different memory areas:<br />
- Enter values in MP4210.0 to MP4210.47 and they will also be in D768 to D956; now copy values<br />
via PLC program into D528 to D540.<br />
If several datum shifts are executed in one axis, the correction values refer to the uncorrected<br />
reference system. In datum compensation with the value 0, previous (axis specific) corrections are<br />
canceled.<br />
D528 Datum correction for X axis<br />
D532 Datum correction for Y axis<br />
D536 Datum correction for Z axis<br />
D540 Datum correction for 4th axis<br />
M2716 Strobe marker for datum correction<br />
4-194 <strong>TNC</strong> <strong>360</strong> 14 Datum Correction 8/95
PLC example: Datum correction with M20 activated, with M21 deactivated.<br />
.<br />
.<br />
LN M2045<br />
S M10<br />
.<br />
L M1920<br />
A M2045 ;M20 activated<br />
A M10 ;Buffered marker for strobe marker 2716<br />
CMT 200 ;Datum correction call<br />
R M10<br />
L M1921<br />
A M2025 ;M21 activated<br />
A M10 ; Buffered marker for strobe marker 2716<br />
CMT201 ;Deactivate datum correction call<br />
R M10<br />
L M1920<br />
O M1921<br />
A M2045<br />
AN M2716<br />
S M2482 ;Acknowledgment<br />
EM ;End of main program<br />
LBL 200 ;Activate module for datum correction call<br />
L D896 ;Value from MP4210.32<br />
= D528 ;Shift X axis<br />
L K0<br />
= D532 ;Do not shift Y axis<br />
= D536 ;Do not shift Z axis<br />
= D540 ;Do not shift 4th axis<br />
L M10<br />
S M2716<br />
EM<br />
LBL 201 ;Cancel module for datum compensation<br />
L D900 ;Value from MP4210.33<br />
= D528<br />
L K0<br />
= D532 ;Do not shift Y axis<br />
= D536 ;Do not shift Z axis<br />
= D540 ;Do not shift 4th axis<br />
L M10<br />
S M2716<br />
EM<br />
.<br />
.<br />
8/95 <strong>TNC</strong> <strong>360</strong> 14 Datum Correction 4-195
15 Tool Changer<br />
A tool changer can be operated with the PLC of the HEIDENHAIN contouring control. Tool changers<br />
are often controlled by proximity switches.<br />
Tool data are stored in the tool table and tool management (special tool, tool pocket management<br />
etc.) is handled by the NC. The NC supplies the PLC with the information it needs to control the tool<br />
changer via markers and words.<br />
15.1 Tool table<br />
The operator can edit the tool table (program 0) in the "Programming and editing" mode (see User's<br />
<strong>Manual</strong>). The tool table can be uploaded and downloaded through the data interface. The tool<br />
number (T), length (L), radius (R), pocket number (P), and special tool (ST) are all defined in the tool<br />
table. Special tools and pocket number are only displayed if MP7266 and MP7480 have been set<br />
accordingly. The pocket numbers can be protected from editing or erasure by setting marker M2594.<br />
BEGIN TOOL MM<br />
T0 P0 L+0 R+0<br />
T1 P1 L+10 R+20<br />
T2 P2 L+50 R+30<br />
T3 L+0 R+0<br />
T4 SP4 L+100 R+300<br />
T5 L+0 R+0<br />
T6<br />
.<br />
.<br />
.<br />
END<br />
P6<br />
.<br />
.<br />
.<br />
TOOL<br />
L+50<br />
.<br />
.<br />
.<br />
R+15<br />
.<br />
.<br />
.<br />
MM<br />
The number of tools in the tool table is defined in machine parameter MP7260. If MP7260 contains<br />
a zero value, then the system will run without a tool table (program "0" does not exist). Tool length<br />
and tool radius are programmed in the NC program with TOOL DEF (see User's <strong>Manual</strong>).<br />
MP7260 Number of tools in the tool table<br />
Input range: 0 to 99<br />
0 = no tool table<br />
1 to 99 = number of tools<br />
Set Reset<br />
M2594 Inhibit editing of pocket number in the tool table PLC PLC<br />
in the tool table<br />
4-196 <strong>TNC</strong> <strong>360</strong> 15 Tool Changer 8/95
15.1.1 Special tools<br />
Special tools are oversize tools where pockets on either side in the tool magazine have to be left<br />
vacant .<br />
P5 P6<br />
P7 P8 P9<br />
P10<br />
The number of pockets to be left vacant on both sides of the tool is defined in machine parameter<br />
MP7264. Special tools are identified by an "S" in the tool table. The numbers of the vacant pockets<br />
are not displayed. Variable pocket coding can be limited for special tools. If marker M2601 is set,<br />
then special tools are returned to their original pocket despite the "variable pocket coding" setting.<br />
MP7264 Number of pockets reserved next to special tool<br />
Input range: 0 to 3<br />
Set Reset<br />
M2601 Special tool to original pocket PLC PLC<br />
despite variable pocket coding<br />
15.2 Controlling the tool changer<br />
Controlling the tool changer, i.e. positioning the changing arm and carousel and the complete<br />
toolchange sequence is performed by the PLC. The NC handles tool pocket assignment and<br />
evaluation of the TOOL DEF and TOOL CALL blocks. The NC and PLC communicate by markers and<br />
words.<br />
The TOOL DEF block can be used to pre-position the tool changer. After a tool has been changed,<br />
the next tool is programmed with TOOL DEF. The PLC evaluates the tool and pocket number and<br />
pre-positions the tool changer at the follow-up tool.<br />
8/95 <strong>TNC</strong> <strong>360</strong> 15 Tool Changer 4-197
Example of NC program:<br />
.<br />
.<br />
.<br />
TOOL CALL 1 Z S500<br />
TOOL DEF 2<br />
L Z+20 R0 F500 M03<br />
.<br />
.<br />
.<br />
TOOL CALL 2 Z S1000<br />
TOOL DEF 3<br />
.<br />
.<br />
.<br />
Variable and Fixed Pocket Coding<br />
The system can be operated with either variable or fixed tool pocket coding.<br />
Machine parameter MP7480 defines whether the tool number or the pocket number is transferred<br />
to the PLC. For variable pocket coding the pocket number must be transferred to the PLC (MP7480<br />
= 3). With fixed pocket coding it is advisable to work with the tool number (MP7480 = 1 or 2).<br />
When executing a TOOL CALL or TOOL DEF block, depending on the setting of MP7480, the NC<br />
transfers either only the tool number or the tool number and the pocket number of the programmed<br />
tool to the Word W262 or W262 and W264, respectively. The strobe marker M2046 (TOOL CALL)<br />
or M2047 (TOOL DEF) is set. The NC does not reset these strobe markers until the PLC sets marker<br />
M2483 (TOOL CALL) or M2484 (TOOL DEF) after processing the tool or pocket number. The<br />
machining program is resumed when strobe markers M2046/M2047 are reset.<br />
If tool number 0 is executed, then NC sets marker M2400 and this is not reset until there is a TOOL<br />
CALL for another tool.<br />
MP7480.0 Output tool or pocket number with TOOL CALL block<br />
Input range: 0 to 3<br />
0 = No output<br />
1 = Tool number output only when tool number changes (W262)<br />
2 = Tool number output with every TOOL CALL block (W262)<br />
3 = Output of pocket number (W262) and tool number (W264) only when tool<br />
number changes<br />
Reading and writing to the tool file<br />
If the PLC enters the tool number in Word W512, the associated pocket number is stored in W264<br />
through strobe marker M2715. If the PLC enters the tool number in W512 and the pocket number in<br />
W514, the strobe marker M2714 of the T code and P code is transferred to the NC.<br />
4-198 <strong>TNC</strong> <strong>360</strong> 15 Tool Changer 8/95
MP7480.1 Output tool or pocket number with TOOL DEF block<br />
Input range: 0 to 3<br />
0 = No output<br />
1 = Tool number output only when tool number changes (W262)<br />
2 = Tool number output with every TOOL DEF block (W262)<br />
3 = Output of pocket number (W262) and tool number (W264) only when tool<br />
number changes<br />
W262 Pocket number when MP7480 = 3 NC NC<br />
Tool number when MP7480 = 1 or 2<br />
W264 Tool number when MP7480 = 3 NC NC<br />
W512 T code PLC PLC<br />
W514 P code PLC PLC<br />
Set Reset<br />
M2046 Strobe signal T code (P code) with TOOL CALL NC NC<br />
M2047 Strobe signal 2nd T code (2nd P code) with TOOL DEF NC NC<br />
M2483 Feedback T code (P code) with TOOL CALL PLC PLC<br />
M2484 Feedback T code (P code) with TOOL DEF PLC PLC<br />
M2400 Tool number 0 programmed NC NC<br />
M2063 PGM 0 is selected NC NC<br />
M2597 Binary format for T code and P code in W262 and W264 PLC PLC<br />
15.2.1 Output of tool number (Fixed pocket coding)<br />
Evaluating the tool number is adequate for fixed tool pocket coding. MP7480 is used to select<br />
whether the tool number should be transferred to the PLC with every TOOL CALL (TOOL DEF)<br />
block or only when the tool number changes (input values for MP7480 = 2 or 1). With this setting<br />
the tool number is transferred to the Word W262 when a TOOL CALL or TOOL DEF block is<br />
executed. W264 is not used.<br />
Unlike variable pocket coding, the pocket numbers are displayed in the tool table but are not<br />
changed by the NC.<br />
15.2.2 Output of pocket number (Variable pocket coding)<br />
With variable pocket coding, the NC must transfer the pocket number of the called tool to the PLC<br />
(MP7480 = 3). In this setting, the pocket number is filed in Word W262. In addition to the pocket<br />
number, the NC also transfers the current tool number in W264. Variable pocket management (the<br />
assignment of tool number to pocket number in the tool table) is handled by the NC.<br />
If marker M2612 (suppress pocket exchange in the tool table ) is set before a T strobe is output<br />
(M2046), the pocket numbers are not exchanged. The PLC only acknowledges the T strobe without<br />
having made an exchange in the tool magazine and resets the PLC marker M2612. The new tool<br />
number is displayed highlighted (inversely) in the status and the associated tool data ( length, radius)<br />
are activated. The inverse display of the tool number in the status display remains until a tool has<br />
8/95 <strong>TNC</strong> <strong>360</strong> 15 Tool Changer 4-199
een physically changed. If the control is switched off and back on again in the above-mentioned<br />
condition, the tool last inserted becomes active again.<br />
The number of tools with a pocket number is defined in machine parameter MP7261. The input<br />
value for MP7261 matches the number of pockets in the tool magazine. This means that more tools<br />
can be defined in the tool table than there is room for in the tool magazine [(MP7260) > (MP7261)]. If<br />
a tool number is programmed and no pocket is defined for it, pocket number 255 (W262) is<br />
transferred on TOOL CALL, and marker M2401 is set.<br />
Only the tool number and the pocket number are transferred when TOOL DEF is programmed. A<br />
TOOL DEF for a manual tool has no relevance in the PLC.<br />
A variety of tool types can be called from the machining program. The following definitions are used<br />
in the examples that follow:<br />
N = Tool for which a pocket number is defined in the tool table. (Normal).<br />
M = Tool for which no pocket number is defined in the tool table. These tools must be changed<br />
by hand. (<strong>Manual</strong>).<br />
S = Special tool (defined in tool table).<br />
Nine different combinations of toolchange sequence are therefore possible. For many toolchange<br />
sequences, for the tool magazine to be controlled, two pocket numbers (tool numbers) must be<br />
output in succession for one TOOL CALL. This is reported to the PLC by markers M2093 and<br />
M2600. The PLC must evaluate and acknowledge both pocket numbers (tool numbers).<br />
The logic diagrams for the nine different toolchange sequences are shown on the following pages<br />
(activated by TOOL CALL).<br />
4-200 <strong>TNC</strong> <strong>360</strong> 15 Tool Changer 8/95
N → N: Normal tool follows Normal tool<br />
The pocket number and tool number of the called tool are transferred.<br />
M2046<br />
M2483<br />
M2093<br />
M2600<br />
M2401<br />
M2402<br />
M2403<br />
M2601<br />
W262<br />
W264<br />
1<br />
0<br />
1<br />
0<br />
1<br />
0<br />
1<br />
0<br />
1<br />
0<br />
1<br />
0<br />
1<br />
0<br />
1<br />
0<br />
Pocket No. [new N]<br />
Tool No. [new N]<br />
8/95 <strong>TNC</strong> <strong>360</strong> 15 Tool Changer 4-201
S → N: Normal tool follows Special tool<br />
With this toolchange two pocket numbers (or tool numbers) must be transferred in succession.<br />
M2093 indicates that another TOOL CALL strobe (M2046) follows.<br />
With M2600 the PLC can determine the sequence in which the pocket numbers are transferred. The<br />
decision will depend on whether a single or double changing arm is in use.<br />
S → N, Single Changing Arm (M2600 = 0):<br />
The pocket number of the old tool and tool number 0 are transferred first. Tool number 0 tells the<br />
PLC to clear the spindle. After acknowledging with M2483 the pocket number and tool number of<br />
the new tool are transferred.<br />
M2046<br />
M2483<br />
M2093<br />
M2600<br />
M2401<br />
M2402<br />
M2403<br />
M2601<br />
W262<br />
W264<br />
1<br />
0<br />
1<br />
0<br />
1<br />
0<br />
1<br />
0<br />
1<br />
0<br />
1<br />
0<br />
1<br />
0<br />
1<br />
0<br />
Pocket No. [S] Pocket No. [N]<br />
Tool No. Ø Tool No. [N]<br />
4-202 <strong>TNC</strong> <strong>360</strong> 15 Tool Changer 8/95
S → N, Double Changing Arm (M2600 = 1):<br />
The pocket number and tool number of the new tool are transferred first. After acknowledging with<br />
M2483 the pocket number of the old tool and tool number 0 are transferred. Tool number 0 tells the<br />
PLC to clear the spindle.<br />
0<br />
0<br />
0<br />
0<br />
0<br />
0<br />
0<br />
0<br />
:<br />
:<br />
3RFNHW 1R >1@ 3RFNHW 1R >6@<br />
7RRO 1R 1 7RRO 1R<br />
8/95 <strong>TNC</strong> <strong>360</strong> 15 Tool Changer 4-203
M → N: Normal tool follows <strong>Manual</strong> tool<br />
With this toolchange sequence two pocket numbers (or tool numbers) must be transferred in<br />
succession. M2093 indicates that another TOOL CALL strobe (M2046) follows.<br />
Irrespective of marker M2600, pocket number 255 and tool number 0 are transferred first. Tool<br />
number 0 tells the PLC to clear the spindle. Pocket number 255 means that there is no pocket in the<br />
tool magazine for the called tool. After acknowledging with M2483, the pocket number and tool<br />
number of the new tool (called tool) are transferred.<br />
0<br />
0<br />
0<br />
0<br />
0<br />
0<br />
0<br />
0<br />
:<br />
:<br />
3RFNHW 1R 3RFNHW 1R >1@<br />
7RRO 1R 7RRO 1R >1@<br />
4-204 <strong>TNC</strong> <strong>360</strong> 15 Tool Changer 8/95
M → M: <strong>Manual</strong> tool follows <strong>Manual</strong> tool<br />
The pocket number 255 tells the PLC that there is no pocket in the tool magazine for the called tool.<br />
0<br />
0<br />
0<br />
0<br />
0<br />
0<br />
0<br />
0<br />
:<br />
:<br />
3RFNHW 1R<br />
7RRO 1R >QHZ 0@<br />
8/95 <strong>TNC</strong> <strong>360</strong> 15 Tool Changer 4-205
N → M: <strong>Manual</strong> tool follows Normal tool<br />
With this toolchange sequence two pocket numbers (or tool numbers) must be transferred in<br />
succession. M2093 indicates that another TOOL CALL strobe (M2046) follows.<br />
Irrespective of marker M2600, the pocket number of the old tool and tool number 0 are transferred<br />
first. Tool number 0 tells the PLC to clear the spindle. After acknowledging with M2483, pocket<br />
number 255 and the tool number of the called tool are transferred. Pocket number 255 tells the PLC<br />
that there is no pocket in the tool magazine for the called tool.<br />
0<br />
0<br />
0<br />
0<br />
0<br />
0<br />
0<br />
0<br />
:<br />
:<br />
3RFNHW 1R >1@ 3RFNHW 1R<br />
7RRO 1R 7RRO 1R >0@<br />
4-206 <strong>TNC</strong> <strong>360</strong> 15 Tool Changer 8/95
S → M: <strong>Manual</strong> tool follows Special tool<br />
With this toolchange sequence two pocket numbers (or tool numbers) must be transferred in<br />
succession. M2093 indicates that another TOOL CALL strobe (M2046) follows.<br />
Irrespective of marker M2600, the pocket number of the old tool and tool number 0 are transferred<br />
first. Tool number 0 tells the PLC to clear the spindle. After acknowledging with M2483, pocket<br />
number 255 and the tool number of the called tool are transferred. Pocket number 255 tells the PLC<br />
that there is no pocket in the tool magazine for the called tool.<br />
0<br />
0<br />
0<br />
0<br />
0<br />
0<br />
0<br />
0<br />
:<br />
:<br />
3RFNHW 1R >6@ 3RFNHW 1R<br />
7RRO 1R 7RRO 1R >0@<br />
8/95 <strong>TNC</strong> <strong>360</strong> 15 Tool Changer 4-207
S → S: Special tool follows Special tool<br />
Marker 2601 can be used to set whether the special tool is to be returned to its original pocket<br />
despite variable pocket coding.<br />
The same logic diagram applies to single and double changing arms (M2600 = 0 and 1) with variable<br />
pocket coding for special tools (M2601 = 0).<br />
0<br />
0<br />
0<br />
0<br />
0<br />
0<br />
0<br />
0<br />
:<br />
:<br />
3RFNHW 1R >QHZ 6@<br />
7RRO 1R >QHZ 6@<br />
4-208 <strong>TNC</strong> <strong>360</strong> 15 Tool Changer 8/95
If the special tool is to return to its original pocket despite variable pocket coding (M2601 = 1), there<br />
is a different pocket number transfer sequence for single and double changing arms (M2600).<br />
S → S, Single Changing Arm (M2600 = 0)<br />
The pocket number of the old tool and tool number 0 are transferred first. Tool number 0 tells the<br />
PLC to clear the spindle. After acknowledging with M2483, the pocket number and tool number of<br />
the new tool are transferred.<br />
0<br />
0<br />
0<br />
0<br />
0<br />
0<br />
0<br />
0<br />
:<br />
:<br />
3RFNHW 1R >ROG 6@ 3RFNHW 1R >QHZ 6@<br />
7RRO 1R 7RRO 1R >QHZ 6@<br />
8/95 <strong>TNC</strong> <strong>360</strong> 15 Tool Changer 4-209
S → S, Double Changing Arm (M2600 = 1)<br />
The pocket number and tool number of the new tool are transferred first. After acknowledging with<br />
M2483, the pocket number of the old tool and tool number 0 are transferred. Tool number 0 tells the<br />
PLC to clear the spindle.<br />
0<br />
0<br />
0<br />
0<br />
0<br />
0<br />
0<br />
0<br />
:<br />
:<br />
3RFNHW 1R >QHZ 6@ 3RFNHW 1R >ROG 6@<br />
7RRO 1R >QHZ 6@ 7RRO 1R<br />
4-210 <strong>TNC</strong> <strong>360</strong> 15 Tool Changer 8/95
N → S: Special tool follows Normal tool<br />
With this toolchange sequence two pocket numbers (or tool numbers) must be transferred in<br />
succession. M2093 indicates that another TOOL CALL strobe (M2046) follows.<br />
There is a different pocket number transfer sequence depending on M2600 (single/double changing<br />
arm). M2601 is not relevant.<br />
N → S, Single Changing Arm (M2600 = 0)<br />
The pocket number of the old tool and tool number 0 are transferred first. Tool number 0 tells the<br />
PLC to clear the spindle. After acknowledging with M2483, the pocket number and tool number of<br />
the new tool are transferred<br />
0<br />
0<br />
0<br />
0<br />
0<br />
0<br />
0<br />
0<br />
:<br />
:<br />
3RFNHW 1R >1@ 3RFNHW 1R >6@<br />
7RRO 1R 7RRO 1R >6@<br />
8/95 <strong>TNC</strong> <strong>360</strong> 15 Tool Changer 4-211
N → S, Double Changing Arm (M2600 = 1)<br />
The pocket number and tool number of the new tool are transferred first. After acknowledging with<br />
M2483, the pocket number of the old tool and tool number 0 are transferred. Tool number 0 tells the<br />
PLC to clear the spindle.<br />
0<br />
0<br />
0<br />
0<br />
0<br />
0<br />
0<br />
0<br />
:<br />
:<br />
3RFNHW 1R >6@ 3RFNHW 1R >1@<br />
7RRO 1R >6@ 7RRO 1R<br />
4-212 <strong>TNC</strong> <strong>360</strong> 15 Tool Changer 8/95
M → S: Special tool follows <strong>Manual</strong> tool<br />
With this toolchange sequence two pocket numbers (or tool numbers) must be transferred in<br />
succession. M2093 indicates that another TOOL CALL strobe (M2046) follows.<br />
Irrespective of marker M2600 and M2601, pocket number 255 and tool number 0 are transferred<br />
first. Tool number 0 tells the PLC to clear the spindle. Pocket number 255 means that there is no<br />
pocket in the tool magazine for the called tool. After acknowledging with M2483, the pocket number<br />
and tool number of the new tool (called tool) are transferred.<br />
0<br />
0<br />
0<br />
0<br />
0<br />
0<br />
0<br />
0<br />
:<br />
:<br />
3RFNHW 1R 3RFNHW 1R >6@<br />
7RRO 1R 7RRO 1R >6@<br />
8/95 <strong>TNC</strong> <strong>360</strong> 15 Tool Changer 4-213
MP7261 Number of pockets in tool magazine Tool magazine, n<br />
Input range: 0 to 254<br />
Marker Function Set Reset<br />
M2093 Another T code (P code) follows with TOOL CALL NC NC<br />
0 = Normal tool follows Normal tool<br />
(N -> N)<br />
or <strong>Manual</strong> tool follows <strong>Manual</strong> tool<br />
(M -> M)<br />
or Special tool follows Special tool<br />
(S -> S)<br />
1 = Special tool follows <strong>Manual</strong> tool<br />
(M -> S)<br />
or Special tool follows Normal tool<br />
(N -> S)<br />
or Special tool follows Special tool<br />
(S -> S) when M2601 = 1<br />
or <strong>Manual</strong> tool follows Special tool<br />
(S -> M)<br />
or <strong>Manual</strong> tool follows Normal tool<br />
(N -> M)<br />
or Normal tool follows <strong>Manual</strong> tool<br />
(M -> N)<br />
or Normal tool follows Special tool<br />
(S -> N) (see Marker M2600)<br />
M2600 Sequence of tool number or PLC PLC<br />
pocket number transfer (M2093 = 1)<br />
0 = Number of old tool first,<br />
then number of new tool (single changing arm)<br />
1 = Number of new tool first,<br />
then number of old tool (double changing arm)<br />
M2401 Active tool with pocket number (MP7260/MP7261) NC NC<br />
(active only when MP7480 = 3 and TOOL CALL)<br />
M2402 Active tool without pocket number (MP7260/MP7261) NC NC<br />
(active only when MP7480 = 3 and TOOL CALL)<br />
M2403 Active tool = special tool NC NC<br />
M2601 Special tool to original pocket PLC PLC<br />
despite variable pocket coding<br />
4-214 <strong>TNC</strong> <strong>360</strong> 15 Tool Changer 8/95
15.3 PLC program example<br />
This section describes a tool changer and contains the basic sequence diagrams of the<br />
corresponding PLC programs. When creating a program (set auxiliary markers etc.) the constraints<br />
on a PLC program sequence must be remembered .<br />
The example describes a tool changer with the following features:<br />
- Up to 99 tools<br />
- Variable pocket coding (MP7480 = 3)<br />
- Special tools are permitted<br />
- Next tool standby with TOOL DEF<br />
- Toolchange with TOOL CALL<br />
- Tools with no pocket number defined in the tool table can be changed by hand<br />
- Double changing arm<br />
- Special tools variable (M2601 = 0)<br />
ISTREG<br />
GRE1 GRE2<br />
SPIREG<br />
The following sequence diagram uses variables for greater clarity. In the PLC program these<br />
variables are replaced by byte addresses.<br />
ISTREG = B10 = Pocket number at the toolchange position of the tool magazine<br />
GRE1 = B11 = Pocket number of tool in changing arm facing tool magazine<br />
GRE2 = B12 = Pocket number of tool in changing arm facing spindle<br />
SPIREG = B13 = Pocket number of tool in spindle<br />
8/95 <strong>TNC</strong> <strong>360</strong> 15 Tool Changer 4-215
Other PLC operands which are used:<br />
Marker Function Set Reset<br />
M2046 Strobe signal T code (P code) with TOOL CALL NC NC<br />
M2047 Strobe signal T code (P code) with TOOL DEF NC NC<br />
M2093 Another T code (P code) follows with TOOL CALL NC NC<br />
M2403 Special tool called (TOOL CALL) NC NC<br />
M2483 Feedback T code (P code) with TOOL CALL PLC PLC<br />
M2484 Feedback T code (P code) with TOOL DEF PLC PLC<br />
M2600 Sequence of tool number or PLC PLC<br />
pocket number transfer (M2093 = 1)<br />
M2601 Special tool to original pocket despite PLC PLC<br />
variable pocket coding<br />
W262 Pocket number<br />
W264 Tool number<br />
Machine parameters used:<br />
MP7260 = 90 Number of tools in tool table<br />
MP7261 = 12 Number of pockets in tool magazine<br />
MP7264 = 1 Number of pockets vacant beside special tool<br />
MP7480.0 = 3 Output of pocket number and tool number with every TOOL CALL block<br />
MP7480.1 = 3 Output of pocket number and tool number with every TOOL DEF block<br />
The sequence diagram for this tool changer is subdivided into modules.<br />
List of modules (subroutines):<br />
- TOOL DEF Search tool and load in GRE1<br />
- TOOL CALL Automatic tool change<br />
- STANDBY Search tool and load in GRE1<br />
- STANDBY BACK Return tool from GRE1 to magazine<br />
- MANUAL TOOL IN <strong>Manual</strong> tool follows Normal or Special tool<br />
- MANUAL TOOL OUT Normal or Special tool follows <strong>Manual</strong> tool<br />
- MANUAL OUT/IN <strong>Manual</strong> tool follows <strong>Manual</strong> tool<br />
- CHANGE Take old tool out and put new tool in<br />
- COMPUTE SHORTEST ROUTE<br />
- COMPARE P-CODE WITH ISTREG<br />
- COMPARE GRE1 WITH ISTREG<br />
4-216 <strong>TNC</strong> <strong>360</strong> 15 Tool Changer 8/95
15.3.1 Program module TOOL DEF<br />
Search tool and load in GRE1<br />
TOOL DEF<br />
feedback<br />
P < 255<br />
Yes<br />
P = SPIREG<br />
Yes<br />
P = GRE1<br />
Yes<br />
GRE1 = 0<br />
STANDBY BACK<br />
Module<br />
No<br />
<strong>Manual</strong> tool<br />
No<br />
No<br />
No<br />
GRE1 empty<br />
Yes<br />
GRE1 assigned<br />
Feedback is<br />
immediate so<br />
that the NC PGM<br />
can continue<br />
Message:<br />
CANNOT<br />
PREPARE<br />
MANUAL<br />
TOOL<br />
Load GRE1<br />
STANDBY Module<br />
End<br />
Tool already in spindle<br />
Tool already in GRE1<br />
8/95 <strong>TNC</strong> <strong>360</strong> 15 Tool Changer 4-217
15.3.2 Program module TOOL CALL<br />
Automatic toolchange (main program)<br />
T = 0<br />
Yes<br />
P = 255<br />
Yes<br />
P = SPIREG<br />
Yes<br />
P = GRE1<br />
Yes<br />
GRE1 = 0<br />
Yes<br />
STANDBY BACK<br />
Module<br />
Clear spindle Another TOOL CALL S/N tool<br />
strobe follows<br />
No<br />
No<br />
No<br />
M2093 = 0 P = 255<br />
No<br />
M tool<br />
M2093 = 1<br />
No<br />
Another<br />
TOOL CALL<br />
strobe follows<br />
Yes<br />
No<br />
No<br />
Tool already in changing arm<br />
Unload GRE1<br />
Yes Yes<br />
M tool<br />
MAN. OUT/IN<br />
Module<br />
STANDBY Module<br />
Fetch tool to GRE1<br />
No<br />
M tool<br />
S/N tool out<br />
IN Module M-tool in<br />
M tool<br />
OUT Module<br />
CHANGE<br />
Module<br />
TOOL CALL<br />
feedback<br />
M tool out<br />
S-/N-tool in<br />
M-tool out<br />
M-tool in<br />
Tool already<br />
in spindle<br />
S-/N-tool out<br />
S-/N-tool in<br />
4-218 <strong>TNC</strong> <strong>360</strong> 15 Tool Changer 8/95
15.3.3 Program module STANDBY<br />
Search tool and load in GRE1<br />
P = ISTREG<br />
Yes<br />
COMPARE<br />
P-CODE<br />
WITH ISTREG<br />
Module<br />
No<br />
Load ISTREG<br />
to GRE1<br />
End<br />
15.3.4 Program module STANDBY BACK<br />
Return tool from GRE1 to magazine<br />
GRE1 =<br />
ISTREG<br />
Yes<br />
COMPARE<br />
GRE1 WITH<br />
ISTREG<br />
Module<br />
No<br />
Bring GRE1 to<br />
magazine and<br />
load GRE1<br />
with zero<br />
End<br />
Pocket in magazine found<br />
Load tool from<br />
magazine to GRE1<br />
Pocket in magazine found<br />
Return tool<br />
to magazine<br />
8/95 <strong>TNC</strong> <strong>360</strong> 15 Tool Changer 4-219
15.3.5 Program module MANUAL TOOL IN<br />
N -> M or S -> M: <strong>Manual</strong> tool follows Normal or Special tool.<br />
The old tool is returned to the tool magazine and the operator is prompted to load a manual tool (not<br />
in tool magazine).<br />
GRE1 = 0<br />
Yes<br />
STANDBY BACK<br />
Module<br />
Unload GRE1<br />
No<br />
No<br />
Move GRE2 to<br />
spindle and<br />
load SPIREG<br />
to GRE2<br />
Turn changing<br />
arm, load SPIREG<br />
with GRE1, set<br />
GRE1 to zero<br />
and return arm<br />
Swap over GRE1<br />
and GRE2<br />
registers<br />
STANDBY BACK<br />
Module<br />
TOOL CALL<br />
feedback<br />
M2046 = 1<br />
Yes<br />
Strobe set<br />
again<br />
Old tool out<br />
As GRE1 is already<br />
zero, this routine has<br />
software relevance only.<br />
Bring old tool<br />
to magazine<br />
Move axes to<br />
man. change<br />
position<br />
Prompt user to<br />
load tool and press<br />
OK key<br />
OK key<br />
pressed<br />
Load T code<br />
to SPIREG<br />
4-220 <strong>TNC</strong> <strong>360</strong> 15 Tool Changer 8/95<br />
Yes<br />
No<br />
End
15.3.6 Program module MANUAL TOOL OUT<br />
M -> N or M -> S: Normal or Special tool follows <strong>Manual</strong> tool<br />
The operator is prompted to unload the spindle manually as there is no pocket for the current tool in<br />
the magazine. The called tool is loaded automatically.<br />
No<br />
Move axes to<br />
manual change<br />
position<br />
Prompt user to<br />
unload tool and<br />
press OK key<br />
OK key<br />
pressed<br />
Yes<br />
Load zero in<br />
SPIREG<br />
(spindle empty)<br />
TOOL CALL<br />
feedback<br />
M2046 = 1<br />
Yes<br />
No<br />
TOOL CALL<br />
strobe set again<br />
GRE1 = P<br />
Yes<br />
GRE1 = 0<br />
Yes<br />
Unload GRE1<br />
STANDBY BACK<br />
Module<br />
Fetch tool to<br />
GRE1<br />
No Tool in GRE1<br />
STANDBY<br />
Module<br />
CHANGE<br />
Module<br />
8/95 <strong>TNC</strong> <strong>360</strong> 15 Tool Changer 4-221<br />
No<br />
End<br />
GRE1<br />
empty
15.3.7 Program module MANUAL TOOL IN/OUT<br />
M -> M: <strong>Manual</strong> tool follows <strong>Manual</strong> tool.<br />
The operator is prompted to unload the spindle and load the new tool manually as there is no pocket<br />
for these tools in the magazine.<br />
No<br />
Move axis to<br />
manual change<br />
position<br />
Prompt user to<br />
unload old and<br />
load new tool<br />
Press OK key<br />
OK key<br />
pressed<br />
Yes<br />
Load T code to<br />
SPIREG<br />
End<br />
4-222 <strong>TNC</strong> <strong>360</strong> 15 Tool Changer 8/95
15.3.8 Program module CHANGE<br />
The spindle is unloaded and the new tool is loaded automatically. This module defines whether the<br />
tool is to be returned to its old pocket in the tool magazine or not (e.g. Special tool).<br />
Move GRE2 to<br />
spindle, load<br />
SPIREG to<br />
GRE2<br />
Turn changing<br />
arm, load<br />
SPIREG with<br />
GRE1, set<br />
GRE1 to zero,<br />
retract arm<br />
Swap over<br />
GRE1 and<br />
GRE2 registers<br />
Another<br />
TOOL CALL<br />
strobe follows<br />
Wait<br />
Old tool out<br />
Turn changing arm<br />
and load new tool<br />
No<br />
M2093 = 1<br />
Yes<br />
TOOL CALL<br />
feedback<br />
M2046 = 1<br />
COMPARE<br />
P-CODE WITH<br />
ISTREG<br />
Module<br />
No<br />
Yes<br />
TOOL CALL<br />
strobe set<br />
again<br />
No<br />
P = ISTREG<br />
Magazine in position<br />
Yes<br />
GRE1 to<br />
magazine, load<br />
GRE1 with zero<br />
Position tool magazine<br />
8/95 <strong>TNC</strong> <strong>360</strong> 15 Tool Changer 4-223<br />
End<br />
Store old tool<br />
in magazine
15.3.9 Program module COMPARE P CODE WITH ISTREG<br />
The tool magazine is positioned at the search pocket number by the shortest path.<br />
Index magazine<br />
forward<br />
Transfer<br />
P code<br />
to data stack<br />
COMPUTE THE<br />
SHORTEST<br />
PATH IN<br />
M3042<br />
Module<br />
P = ISTREG<br />
Yes<br />
M3042 = 1<br />
Yes<br />
No<br />
No<br />
4-224 <strong>TNC</strong> <strong>360</strong> 15 Tool Changer 8/95<br />
End<br />
Index magazine<br />
reverse
15.3.10 Program module COMPARE GRE1 WITH ISTREG<br />
The tool magazine is positioned at the pocket number of the tool in GRE1 by the shortest path.<br />
Index magazine<br />
forward<br />
Transfer GRE1<br />
to data stack<br />
COMPUTE THE<br />
SHORTEST<br />
PATH IN<br />
M3042<br />
Module<br />
GRE1 =<br />
ISTREG<br />
Yes<br />
M3042 = 1<br />
Yes<br />
No<br />
No<br />
8/95 <strong>TNC</strong> <strong>360</strong> 15 Tool Changer 4-225<br />
End<br />
Index magazine<br />
reverse
15.3.11 Program module COMPUTE SHORTEST PATH<br />
The program determines the direction in which the tool magazine must move in order to reach the<br />
search pocket number by the shortest path.<br />
The path is filed in marker M3042:<br />
M3042 = 0: reverse<br />
M3042 = 1: forward<br />
Fetch search<br />
pocket from data<br />
stack to NOMREG<br />
Divide number of<br />
mag. pockets by<br />
two and save to<br />
MAGREG<br />
Save absolute<br />
value from<br />
ISTREG-NOMREG<br />
difference to<br />
ABSREG<br />
NOMREG ><br />
ISTREG<br />
Yes<br />
ABSREG <<br />
MAGREG<br />
Yes<br />
No<br />
No<br />
NOMREG <<br />
ISTREG<br />
ABSREG ><br />
MAGREG<br />
Magazine<br />
M3042 = 1 forward<br />
M3042 = 0<br />
End<br />
Yes<br />
Yes<br />
No<br />
No<br />
Magazine<br />
reverse<br />
4-226 <strong>TNC</strong> <strong>360</strong> 15 Tool Changer 8/95
16 Commissioning and Start-up Procedure<br />
This section describes the commissioning procedure for the controls step-by-step. The precise<br />
descriptions of the functions may be found by referring to the appropriate sections.<br />
16.1 Code numbers for commissioning<br />
Certain operating conditions and functions for the commissioning procedure must be selected by<br />
code numbers (see Section "Display and operation").<br />
Code number Function<br />
9 51 48 List of machine parameters (see Chapter "Machine parameters")<br />
80 76 67 PLC operation (see Chapter "PLC programming")<br />
53 12 10 Cancel markers M1000 to M2000 and B0 to B127<br />
7 53 68 Automatic offset adjustment (see Section "Servo positioning")<br />
10 52 96 Non-linear axis error compensation (see Section 1.6.4)<br />
16.2 Preparation of the machine<br />
The machine is prepared without a control being connected.<br />
Follow the sequence below to commission the drive amplifiers:<br />
– Clamp the nominal value lead to 0 V:<br />
Disconnect and short together the nominal value inputs of the drive amplifiers.<br />
0 V must be applied to the input.<br />
– Connect the servo-enable input:<br />
Connect the servo-enable input to 24 V, thus activating the servo.<br />
– Connect the power supply to the drive amplifiers.<br />
– Rough offset adjustment:<br />
If the axis moves even though the nominal value input is clamped to 0 V, the offset<br />
potentiometer must be adjusted such that the axis comes to a stop. After the offset adjustment,<br />
remove the short-circuit bridge on the nominal value input.<br />
– Rough velocity adjustment:<br />
Connect battery supply to the nominal value input. Adjust the battery supply to 9 V and adjust<br />
the drive motor with the tacho-potentiometer to the desired speed (which equals the maximum<br />
rapid traverse rate). The rated speed can be read from the drive motor with a tachometer.<br />
8/95 <strong>TNC</strong> <strong>360</strong> 16 Commissioning and Start-up Procedure 4-227
– Tuning of the drive amplifier:<br />
As far as the control is concerned, the actual servo-loop consists of the drive amplifier, motor<br />
and axis slide (see Section "Servo positioning"). The servo-loop must be tuned before the position<br />
control loop in the control can be optimized.<br />
To achieve this, a battery supply is used to apply a (9 V) step function to the nominal value input<br />
of the drive amplifier. The step response of the tachometer signal can be recorded by an<br />
oscillograph. The axis should be loaded with the permissible workpiece weight during the<br />
acquisition of the step response. The subordinate control loop (current control, spindle speed<br />
control) must be so optimized that the step response shows an overshoot. The following picture<br />
shows the ideal response of the tacho-signal.<br />
U [V]<br />
U max<br />
Given step<br />
function<br />
T<br />
Tacho-signal<br />
1 Overshoot<br />
t [ms]<br />
The following pictures show incorrectly adjusted tacho-signals:<br />
U [V]<br />
U max<br />
Several overshoots<br />
Incorrect!<br />
t [ms]<br />
Correct<br />
Incorrect<br />
The P component of the subordinate control loop is too high, or the I component too low.<br />
4-228 <strong>TNC</strong> <strong>360</strong> 16 Commissioning and Start-up Procedure 8/95
U [V]<br />
U max<br />
Too flat<br />
Incorrect!<br />
t [ms]<br />
Incorrect<br />
The P component of the subordinate control loop is too low, or the I component too high.<br />
Determination of the acceleration<br />
The maximum acceleration time T can be deduced from the step response.<br />
U [V]<br />
U max<br />
T<br />
To calculate the acceleration increase T by 10%.<br />
From this it follows that:<br />
a = vmax<br />
T ⋅11 .<br />
t [ms]<br />
vmax = convert velocity at Umax in [m/sec]<br />
a = acceleration [sec]<br />
T = Acceleration time [sec]<br />
The step response must be investigated for all axes.<br />
The acquired acceleration values are entered in MP1060.0 to MP1060.3.<br />
After adjustment, switch off the supply voltage to the drive amplifiers.<br />
This concludes the preparation of the drive amplifiers.<br />
8/95 <strong>TNC</strong> <strong>360</strong> 16 Commissioning and Start-up Procedure 4-229
✎<br />
4-230 <strong>TNC</strong> <strong>360</strong> 16 Commissioning and Start-up Procedure 8/95
16.3 Commissioning the control<br />
The machine must be prepared in accordance with Section 16.2 before the machine parameters for<br />
commissioning can be optimized.<br />
Before connecting the control, the NC and PLC supply voltages and the ground connections should<br />
be tested once more (see Chapter "Mounting and electrical installation ").<br />
16.3.1 Entry of the provisional and pre-defined machine parameters<br />
After switching on the machine for the first time, the control will first of all display the message<br />
"Operation parameters erased", which means that the machine parameters still have to be entered<br />
(see "Machine parameters").<br />
Most machine parameters can be pre-defined and entered according to the machine parameter list<br />
and the functional descriptions. The parameters which affect the control loop must be assigned<br />
provisional values (see Section 16.3.6).<br />
In order to avoid lengthy delays on restarting during the commissioning of the control, the memory<br />
test can be suppressed by MP7690 (see Section "Display and operation").<br />
16.3.2 Entry of the PLC program<br />
A complete PLC program for all machine functions must be created for commissioning and stored<br />
either in EPROM or RAM (see "PLC programming").<br />
Machine parameter MP4010 (see Section "Display and operation") selects whether the processing<br />
uses a PLC program from EPROM or from RAM.<br />
The PLC program in RAM is used for commissioning purposes. It only makes sense to create an<br />
EPROM when all functions are operating without error. In case of doubt, please contact your<br />
HEIDENHAIN customer service agency<br />
16.3.3 Testing the EMERGENCY STOP routine<br />
Since the EMERGENCY STOP circuit is very important for the machine it is vital that it is tested!<br />
– Test the Function "Control operational" according to Section "EMERGENCY STOP routine".<br />
– Test the EMERGENCY STOP circuit by pressing the EMERGENCY STOP keys and by traversing<br />
past the EMERGENCY STOP limit switches.<br />
8/95 <strong>TNC</strong> <strong>360</strong> 16 Commissioning and Start-up Procedure 4-231
16.3.4 Testing the direction of traverse<br />
Test the controls for the direction of traverse according to the following diagram (effective machine<br />
parameters: MP210 count direction of the measuring system signals, MP1040 polarity of the<br />
nominal value voltage, MP1320 direction of traverse on passing over the reference marks).<br />
No<br />
Change<br />
MP210<br />
MP1040<br />
MP1320<br />
Yes<br />
Yes<br />
Reference traverse with<br />
machine START button<br />
Traverse<br />
direction correct?<br />
(as defined<br />
in MP1320)<br />
Test the traverse direction of<br />
referencing in each axis<br />
No<br />
START<br />
Line voltage on<br />
"Cross positioning error"<br />
or incorrect<br />
traverse direction<br />
after passing over<br />
ref. marks?<br />
4-232 <strong>TNC</strong> <strong>360</strong> 16 Commissioning and Start-up Procedure 8/95<br />
No<br />
Erase POWER INTERRUPTED error message with CE<br />
Control voltage on;<br />
axes are in the control loop<br />
Gross<br />
positioning error<br />
(MP1040 or<br />
MP210 incorrect)<br />
?<br />
No<br />
Start reference<br />
traverse with<br />
axis direction keys<br />
?<br />
Yes<br />
Axis traverse<br />
direction correct?<br />
(defined in MP1040<br />
and MP210)<br />
Test the traverse direction<br />
in each axis<br />
This flow diagram must be worked through for every axis!<br />
No<br />
Yes<br />
Line<br />
voltage<br />
off<br />
(Both types of<br />
referencing must<br />
be performed!)
16.3.5 Fixing the software limit switch ranges<br />
Determine the software limit switch ranges (see Section "Machine axes") as follows:<br />
In "<strong>Manual</strong> operation" mode select the REF<br />
display with the MOD key.<br />
↓<br />
Positional displays show the distance to the<br />
machine datum .<br />
↓<br />
Move all axes with the aid of the direction keys or<br />
the handwheel in positive and negative direction to<br />
just before the EMERGENCY STOP limit switches. Note the<br />
values in the positional displays and their sign.<br />
↓<br />
Enter the noted values in MP910 or MP920.<br />
↓<br />
Select actual value display with MOD key.<br />
16.3.6 Optimizing the control with lag (MP1390 = 1)<br />
The following provisional values can be entered for the machine parameters which determine the<br />
control characteristics:<br />
Machine parameter Function Provisional entry value<br />
MP1050 Analogs voltage for rapid<br />
traverse<br />
9 V<br />
MP1060 Acceleration As measured on the machine<br />
(see "Preparation of the machine")<br />
MP1810<br />
MP1820<br />
kv factor<br />
Multiplication factor<br />
1<br />
1<br />
MP1830 Kink point<br />
max. mach. speed · 100 %<br />
Entry value =<br />
Rapid traverse<br />
These values can usually be further optimized.<br />
8/95 <strong>TNC</strong> <strong>360</strong> 16 Commissioning and Start-up Procedure 4-233
k v factor<br />
Adjust the k v factor (MP1810) so that the voltage characteristic is as described in Section "Servo<br />
positioning". If a different k v factor is required for rapid traverse to that for the machining feed rate, it<br />
must be optimized separately.<br />
Optimize kv factor for the machining feed rate (X axis)<br />
Connect storage oscilloscope to tachometer<br />
of the servo-amplifier of X axis.<br />
MP1810: Increase entry value until position loop oscillates or<br />
until an overshoot occurs after the acceleration ramp.<br />
➀ Machining feed<br />
Enter following program in<br />
"PROGRAMMING AND EDITING"<br />
operating mode:<br />
LBL 1<br />
X 100 1) R0 F 2)...<br />
X 0 R0 F 2)...<br />
CALL LBL 1 REP 100/100<br />
Press machine START button in the<br />
"PROGRAM RUN/FULL SEQUENCE"<br />
operating mode. Machine runs.<br />
Note: Set feed override to 100%.<br />
U [V]<br />
➀<br />
MP1810 (kv factor): Reduce entry value until no oscillations are detectable.<br />
U [V]<br />
4-234 <strong>TNC</strong> <strong>360</strong> 16 Commissioning and Start-up Procedure 8/95<br />
t [s]<br />
t [s]<br />
Repeat adjustment for axes Y, Z, and IV.<br />
1) Program the traverse paths for the axis concerned as large as possible.<br />
2) Enter the max. feed rate for machining.<br />
For axes which are mutually interpolated the kv factor must be the same.<br />
In this case the worst axis determines the entry value.
Optimize k v factor for the rapid traverse rate<br />
Check multiplication factor kv (MP1820 = 1) and characteristic kink<br />
Max. machining feed x 100%<br />
(MP1830= ------------------------------------------------------------------------------<br />
Rapid traverse<br />
Connect storage oscilloscope to tachometer<br />
of the servo-amplifier of X axis.<br />
Enter following program in<br />
"PROGRAMMING AND EDITING"<br />
operating mode:<br />
LBL 1<br />
X 100 1) R0 F MAX<br />
X 0 R0 F MAX<br />
CALL LBL 1 REP 100/100<br />
Press machine START button in the<br />
"PROGRAM RUN/SINGLE BLOCK"<br />
operating modes. Machine runs.<br />
Does the tacho signal show overshoot?<br />
U [V]<br />
Reduce multiplication factor<br />
MP1820 in steps until overshoot<br />
can no longer be detected.<br />
8/95 <strong>TNC</strong> <strong>360</strong> 16 Commissioning and Start-up Procedure 4-235<br />
t [s]<br />
Yes No<br />
Characteristic kink<br />
not required.<br />
Repeat adjustment for axes Y, Z and IV.<br />
1) Program the traverse paths for the axis concerned as large as possible.<br />
The worst axis determines the entry value for MP 1820.
✎<br />
4-236 <strong>TNC</strong> <strong>360</strong> 16 Commissioning and Start-up Procedure 8/95
16.3.7 Optimizing the control with feed forward control (MP1390 = 0)<br />
The following provisional values can be entered for the machine parameters which determine the<br />
control characteristics:<br />
Machine parameter Function Provisional entry value<br />
MP1050 Analog voltage for rapid traverse 9 V<br />
MP1060 Acceleration As measured on the machine<br />
(see "Preparation of the machine")<br />
MP1510 k v factor 1<br />
MP1520 Position approach 0.5 [m/min]<br />
MP1530 Transient response 0.1<br />
These values can usually be further optimized.<br />
Optimize k v factor<br />
Connect storage oscilloscope to tachometer<br />
of the servo-amplifier of the X axis.<br />
Enter following program in<br />
"PROGRAMMING AND EDITING"<br />
operating mode:<br />
LBL 1<br />
X 100 1) R0 F MAX<br />
X 0 R0 F MAX<br />
CALL LBL 1 REP 100/100<br />
Press machine START button in the<br />
"PROGRAM RUN/SINGLE BLOCK"<br />
operating mode.<br />
Machine runs.<br />
kv factor MP1510: Increase entry value until position loop oscillates.<br />
U [V]<br />
t [ms]<br />
kv factor MP1510: Reduce entry value until no oscillations can be detected.<br />
U [V]<br />
t [ms]<br />
1) Program the traverse paths for the axis concerned as large as possible.<br />
8/95 <strong>TNC</strong> <strong>360</strong> 16 Commissioning and Start-up Procedure 4-237
Optimizing acceleration<br />
If the maximum acceleration of the servo loop cannot be determined with the battery supply, the<br />
acceleration can be optimized as follows:<br />
Connect storage oscilloscope to<br />
tachometer of servo-amplifier of X axis.<br />
Enter following values for<br />
position supervision<br />
MP1410: 0.5<br />
MP1420: 30<br />
Enter following program in<br />
"PROGRAMMING AND EDITING"<br />
operating mode:<br />
LBL 1<br />
X 100 1) R0 F MAX<br />
X 0 R0 F MAX<br />
CALL LBL 1 REP 100/100<br />
MP1060<br />
Increase "acceleration"<br />
in small steps.<br />
Press machine START button in the<br />
"PROGRAM RUN/FULL SEQUENCE"<br />
operating mode.<br />
Control stops machine.<br />
Error display<br />
"POSITIONING ERROR"<br />
?<br />
Yes<br />
Enter acceleration from MP1060.0<br />
in MP1060.1 to 1060.4.<br />
Move the Y, Z and IV axes with<br />
the acceleration value found.<br />
Reduce values, if necessary.<br />
Enter the 0.7 to 0.9-fold factor of<br />
the determined values<br />
as acceleration in MP1060.<br />
1) Program the traverse paths for the axis concerned as large as possible.<br />
4-238 <strong>TNC</strong> <strong>360</strong> 16 Commissioning and Start-up Procedure 8/95<br />
No
Optimizing transient response<br />
MP1530 affects the form of the acceleration ramp in all axes .<br />
Tacho U [V]<br />
voltage<br />
t [ms]<br />
MP1530 correct<br />
MP1530 too large<br />
MP1530 too small<br />
Since MP1530 is effective for all axes, the worst axis determines the entry value. No axis should<br />
show an overshoot.<br />
Connect storage oscilloscope to<br />
tachometer of servo-amplifier of X axis.<br />
Enter following program in<br />
"PROGRAMMING AND EDITING"<br />
operating mode:<br />
LBL 1<br />
X 100 1) R0 F MAX<br />
X 0 R0 F MAX<br />
CALL LBL 1 REP 100/100<br />
Press machine START button in the<br />
"PROGRAM RUN/SINGLE BLOCK"<br />
operating mode.<br />
Machine runs.<br />
MP1530: Increase entry value until overshoot occurs.<br />
U [V]<br />
t [ms]<br />
MP1530: Reduce entry value until overshoot stops.<br />
U [V]<br />
t [ms]<br />
Check axes Y, Z and IV and correct MP1530, if necessary.<br />
1) Program the traverse paths for the axis concerned as large as possible.<br />
8/95 <strong>TNC</strong> <strong>360</strong> 16 Commissioning and Start-up Procedure 4-239
Optimize the position approach<br />
For all axes, MP1520 influences the slope of the run-in characteristic when close to the nominal<br />
position<br />
U [V]<br />
MP1520 correct<br />
MP1520 too large<br />
MP1520 too small<br />
t [ms]<br />
Since MP1520 is effective for all axes, the worst axis determines the entry value. No axis should<br />
show an overshoot of the nominal position.<br />
If MP1520 is made too small, the approach times to the nominal position will be significantly longer.<br />
So MP1520 must be carefully optimized!<br />
4-240 <strong>TNC</strong> <strong>360</strong> 16 Commissioning and Start-up Procedure 8/95
Connect storage oscilloscope to tachometer<br />
of servo-amplifier of X axis.<br />
Enter following program in<br />
"PROGRAMMING AND EDITING"<br />
operating mode:<br />
LBL 1<br />
X 100 1) R0 F MAX<br />
X 0 R0 F MAX<br />
CALL LBL 1 REP 100/100<br />
Press machine START button in the<br />
"PROGRAM RUN/FULL SEQUENCE"<br />
operating mode.<br />
Machine runs.<br />
MP1520: Increase entry value until the position is clearly traversed when<br />
approaching. The overshoot can also be observed in the actual value display.<br />
Tacho voltage U [V]<br />
MP1520: Reduce the entry value until the position is no longer traversed.<br />
U [V]<br />
t [ms]<br />
t [ms]<br />
Check axes Y, Z and IV and correct MP1530, if necessary.<br />
1) Program the traverse paths for the axis concerned as large as possible.<br />
8/95 <strong>TNC</strong> <strong>360</strong> 16 Commissioning and Start-up Procedure 4-241
16.3.8 Optimizing the integral factor<br />
MP7290: "0" (display step = 1 µm)<br />
Machine stands in position, under servo control.<br />
↓<br />
MP1080 integral factor (for X axis):<br />
raise entry value 1) , until the<br />
Servo positioning becomes noticeably unstable<br />
(observe the actual value display).<br />
↓<br />
MP1080: reduce the entry value in small steps<br />
until the servo positioning is steady again 2).<br />
↓<br />
Repeat adjustment for Y axis, Z, and IV.<br />
Whether or not an integral factor is possible in connection with the automatic offset adjustment with<br />
MP 1220 can only be judged when observing the complete machine.<br />
The optimum solution must be found during the commissioning procedure.<br />
1) First entry value 100, raise subsequent values in steps of 100.<br />
2) For drives which are not quite free of backlash the entry value should be "0".<br />
4-242 <strong>TNC</strong> <strong>360</strong> 16 Commissioning and Start-up Procedure 8/95
16.3.9 Adjust the offset<br />
The rough offset adjustment has already been carried out on the servo amplifier. A fine offset<br />
adjustment can be performed with the offset adjustment possibility described in Section "Servo<br />
positioning".<br />
16.3.10 Adjustment of the monitoring functions<br />
The following entry values are recommended for the monitoring functions (see Section "Servo<br />
positioning"):<br />
Machine parameter Function Entry value<br />
MP1710 Position monitoring 1.2 × lag in rapid traverse<br />
MP1720 Position monitoring (EMERGENCY STOP) 1.4 × lag in rapid traverse<br />
MP1410 Position monitoring 0.5 [mm]<br />
MP1420 Position monitoring (EMERGENCY STOP) 10 [mm]<br />
MP1140 Movement monitoring 0.5 [V]<br />
MP1030 Positioning window 0.01 [mm]<br />
MP1110 Standstill monitoring 0.2 [mm]<br />
If the drives of the machine permit narrower limits, these may be entered.<br />
8/95 <strong>TNC</strong> <strong>360</strong> 16 Commissioning and Start-up Procedure 4-243
✎<br />
16 Commissioning and start-up procedure<br />
4-244 <strong>TNC</strong> <strong>360</strong> 16 Commissioning and start-up procedure 8/95
✎<br />
16 Commissioning and start-up procedure<br />
8/95 <strong>TNC</strong> <strong>360</strong> 16 Commissioning and start-up procedure 4-245
17 Point-to-Point and Straight-Cut Control<br />
The LE <strong>360</strong> logic unit is used as a control for simple machine tools with common drive.<br />
All functions for which two or more axes must be interpolated are inhibited with machine parameter<br />
MP7215, while certain other machine parameters are without function.<br />
MP7215 Contouring control or point-to-point and straight-cut control<br />
Input: 0 to 3<br />
Input value 0: Contouring control<br />
Input value 1: Point-to-point and straight-cut control<br />
Contouring functions inhibited<br />
Basic rotation inhibited<br />
ISO inhibited<br />
MP 1070 without function<br />
MP 7220 without function<br />
MP 7222 without function<br />
MP 7420 without function<br />
MP 7430 without function<br />
MP 7460 without function<br />
Input value 3: Position display inhibited, otherwise same as input value 1<br />
(only nominal, REF, lag, distance-to-go display possible)<br />
Set Reset<br />
M2040 Control is point-to-point and straight-cut control NC NC<br />
Machines with common drive<br />
On machines with common drive is necessary to set the analog voltages for the axis drives to a<br />
common output through machine parameter MP120 (see Section 1.2.1).<br />
Example for MP120:<br />
Input for all axes: 0<br />
X axis MP 120.0 = 0<br />
Y axis MP 120.1 = 0<br />
Z axis MP 120.2 = 0<br />
^ = Output 1<br />
This means that the analog voltage for the X, Y and Z axis is sent to output 1.<br />
After an axis is positioned, its control loop must be opened through the PLC program and its axis<br />
must be clamped (see Section 3.6.4).<br />
4-246 <strong>TNC</strong> <strong>360</strong> 17 Point-to-Point and Straight-Cut Control 8/95
✎<br />
8/95 <strong>TNC</strong> <strong>360</strong> 17 Point-to-Point and Straight-Cut Control 4-247
Machine parameters – Contents 5<br />
1 What is a Machine Parameter? 5-2<br />
1.1 User parameters 5-2<br />
2 Input/Output of Machine Parameters 5-3<br />
3 List of Machine Parameters 5-4<br />
3.1 Measuring systems and machines 5-4<br />
3.2 Positioning 5-8<br />
3.3 Operation with feed forward control 5-10<br />
3.4 Operation with servo lag 5-10<br />
3.5 Spindle 5-11<br />
3.6 Integrated PLC 5-13<br />
3.7 Setting the data interfaces 5-14<br />
3.8 Measuring with a 3D touch probe 5-16<br />
3.9 Digitizing with TS 120 (only with digitizing option) 5-16<br />
3.10 Tapping 5-17<br />
3.11 Display and operation 5-17<br />
3.12 Machining and program run 5-21<br />
3.13 Hardware 5-23<br />
4/96 <strong>TNC</strong> <strong>360</strong> 5-1
1 What is a Machine Parameter?<br />
A contouring control must have access to specific data (e.g., paths of traverse, acceleration) before<br />
it can execute its programmed instructions.<br />
The machine tool builder provides these data in so-called machine parameters. In addition, machine<br />
parameters can be used to activated certain functions, which are possible with HEIDENHAIN<br />
contouring controls, but are required only on certain types of machines (e.g. automatic tool<br />
changing).<br />
The machine parameters are grouped according to function:<br />
Machine parameters Functional group<br />
0 to 999<br />
1000 to 1399<br />
1400 to 1699<br />
1700 to 1999<br />
3000 to 3999<br />
4000 to 4999<br />
5000 to 5999<br />
6000 to 6199<br />
6200 to 6299<br />
7100 to 7199<br />
7200 to 7399<br />
7400 to 7599<br />
7600 to 7699<br />
Measuring systems and machine axes<br />
Positioning<br />
Operation with feed forward control<br />
Operation with servo lag<br />
Spindle<br />
Integrate PLC<br />
Setting the data interface<br />
Measuring with a 3D touch probe<br />
Digitizing with TS 120<br />
Tapping<br />
Display and programming<br />
Machining and program run<br />
Hardware<br />
If there is more than one input value for a single function (e.g., a separate input for each axis), the<br />
parameter number is provided with indices.<br />
Example:<br />
MP330 Grating period<br />
MP330.0 Grating period for axis X<br />
MP330.1 Grating period for axis Y<br />
MP330.2 Grating period for axis Z<br />
MP330.3 Grating period for axis 4<br />
The indices are assigned to the corresponding axes according to a fixed pattern.<br />
1.1 User parameters<br />
The MOD function "User Parameters" permits the control operator to easily access and change<br />
certain machine parameters. The machine tool builder can define up to 16 different machine<br />
parameters as user parameters through MP 7330 / MP 7340 (see Chapter "Machine Integration",<br />
Section "Display and operation").<br />
5-2 <strong>TNC</strong> <strong>360</strong> 1 What is a Machine Parameter? 4/96
2 Input/Output of Machine Parameters<br />
To call the machine parameter editor, press the MOD key and select "code number."<br />
Enter the code number 95148 to access the complete set of machine parameters.<br />
The accesses a limited set of the machine parameters. This set of parameters can be safely<br />
entrusted to access by the control user (see User's <strong>Manual</strong>) The machine parameters that can be<br />
changed with the code number 123 are indicated in the list below with CN 123.<br />
To exit the machine parameter editor, press the END key.<br />
If the machine parameters have not yet been entered in a HEIDENHAIN contouring control (e.g.,<br />
during commissioning), the <strong>TNC</strong> presents the list of machine parameters after the memory test.<br />
Now the input values must be entered either by hand on the keyboard or through the data interface.<br />
The data interface is activated by pressing the EXT key. It is preset to RS-232-C format and FE1<br />
mode. This default setting can be changed through the MOD functions (see Chapter "Data<br />
Interface").<br />
A number is entered for each machine parameter. This value can be, for example, the acceleration<br />
in m/s2 of an individual axis, or the analog voltage in volts.<br />
Some machine parameters have multiple functions. The input values for these machine parameters<br />
are calculated according to the function to be activated.<br />
Up to 16 different functions can be activated/deactivated in one machine parameter with bits 0 to<br />
15. The input value is the sum of the decimal values of the bits representing the desired functions.<br />
Bit Significance Decimal value<br />
0 2 0 1<br />
1 2 1 2<br />
2 2 2 4<br />
3 2 3 8<br />
4 2 4 16<br />
5 2 5 32<br />
6 2 6 64<br />
7 2 7 128<br />
8 2 8 256<br />
9 2 9 512<br />
10 2 10 1 024<br />
11 2 11 2 048<br />
12 2 12 4 096<br />
13 2 13 8 192<br />
14 2 14 16 384<br />
15 2 15 32 768<br />
Incorrect entries are indicated with the error message "entry value incorrect."<br />
4/96 <strong>TNC</strong> <strong>360</strong> 2 Input/Output of Machine Parameters 5-3
3 List of Machine Parameters<br />
3.1 Measuring systems and machines<br />
Machine Function and input Reaction/ Page<br />
parameter<br />
CN 123<br />
MP10 Active axes<br />
Input range: 1 to 15<br />
RESET 4-5<br />
Bit 0 X axis +0 = not active<br />
+1 = active<br />
Bit 1 Y axis +0 = not active<br />
+2 = active<br />
Bit 2 Z axis +0 = not active<br />
+4 = active<br />
Bit 3 4th axis +0 = not active<br />
+8 = active<br />
MP30 Checking the absolute position of the<br />
distance-coded reference marks<br />
Input range: 0 to 15<br />
Bit 0 X axis +0 = not active<br />
+1 = active<br />
Bit 1 Y axis +0 = not active<br />
+2 = active<br />
Bit 2 Z axis +0 = not active<br />
+4 = active<br />
Bit 3 4th axis +0 = not active<br />
+8 = active<br />
MP31 Checking the amplitude of the measuring<br />
system signals<br />
Input range: 0 to 31<br />
Bit 0 X axis +0 = not active<br />
+1 = active<br />
Bit 1 Y axis +0 = not active<br />
+2 = active<br />
Bit 2 Z axis +0 = not active<br />
+4 = active<br />
Bit 3 4th axis +0 = not active<br />
+8 = active<br />
Bit 4 S axis +0 = not active<br />
+16 = active<br />
5-4 <strong>TNC</strong> <strong>360</strong> 3 List of Machine Parameters 4/96<br />
4-8<br />
4-8
Machine Function and input Reaction/<br />
parameter<br />
CN 123<br />
MP32 Checking the edge separation of the measuring<br />
system signals<br />
Input range: 0 to 31<br />
Bit 0 X axis +0 = not active<br />
+1 = active<br />
Bit 1 Y axis +0 = not active<br />
+2 = active<br />
Bit 2 Z axis +0 = not active<br />
+4 = active<br />
Bit 3 4th axis +0 = not active<br />
+8 = active<br />
Bit 4 S axis +0 = not active<br />
+16 = active<br />
MP40 VDU display<br />
Input range: 1 to 15<br />
Bit 0 X axis +0 = not active<br />
+1 = active<br />
Bit 1 Y axis +0 = not active<br />
+2 = active<br />
Bit 2 Z axis +0 = not active<br />
+4 = active<br />
Bit 3 4th axis +0 = not active<br />
+8 = active<br />
MP50 Controlled axes<br />
Input range: 0 to 15<br />
Bit 0 X axis +0 = not controlled<br />
+1 = controlled<br />
Bit 1 Y axis +0 = not controlled<br />
+2 = controlled<br />
Bit 2 Z axis +0 = not controlled<br />
+4 = controlled<br />
Bit 3 4th axis +0 = not controlled<br />
+8 = controlled<br />
MP60 PLC axes<br />
Input: 0 to 15<br />
Bit 0 Axis X +0 = normal NC axis<br />
+1 = PLC axis<br />
Bit 1 Axis Y +0 = normal NC axis<br />
+2 = PLC axis<br />
Bit 2 Axis Z +0 = normal NC axis<br />
+4 = PLC axis<br />
Bit 3 4th axis +0 = normal NC axis<br />
+8 = PLC axis<br />
Page<br />
4/96 <strong>TNC</strong> <strong>360</strong> 3 List of Machine Parameters 5-5<br />
4-9<br />
4-13<br />
4-74<br />
4-35
Machine<br />
parameter<br />
MP110.0<br />
to<br />
MP110.3<br />
MP120.0<br />
to<br />
MP120.3<br />
Function and input Reaction /<br />
CN 123<br />
Page<br />
Assignment of the measuring system inputs<br />
to the axes<br />
Input range: 0 to 5<br />
RESET 4-12<br />
0 = measuring system input X1<br />
1 = measuring system input X2<br />
2 = measuring system input X3<br />
3 = measuring system input X4<br />
5 = measuring system input X6<br />
Assignment of the nominal value outputs<br />
Input range: 0 to 5<br />
0 = output 1<br />
1 = output 2<br />
2 = output 3<br />
3 = output 4<br />
5 = output S<br />
MP210 Count direction of the measuring system signals<br />
Input range: 0 to 15<br />
Bit 0 X axis +0 = positive<br />
+1 = negative<br />
Bit 1 Y axis +0 = positive<br />
+2 = negative<br />
Bit 2 Z axis +0 = positive<br />
+4 = negative<br />
Bit 3 4th axis +0 = positive<br />
+8 = negative<br />
MP310 Signal subdivision<br />
Input range: 0 to 3<br />
MP330.0<br />
to<br />
MP330.3<br />
MP340.0<br />
to<br />
MP340.4<br />
0 = 256-fold<br />
1 = 4-fold<br />
2 = 2-fold<br />
3 = 1-fold<br />
Signal period<br />
Input range 1000 to 1000,000 in [μm] or [ 1°<br />
1000]<br />
Interpolation factor of the EXE at X6<br />
Input: 0 to 5<br />
0 = No measuring system on X6<br />
1 = EXE without interpolation<br />
2 = Spindle encoder with 2048 lines<br />
3 = Spindle encoder with 4096 lines<br />
5 = EXE with 5-fold interpolation<br />
RESET 4-13<br />
RESET 4-7<br />
5-6 <strong>TNC</strong> <strong>360</strong> 3 List of Machine Parameters 4/96<br />
4-6<br />
REF 4-6<br />
4-6
Machine Function and input Reaction / Page<br />
parameter<br />
CN 123<br />
MP410.3 Axis designation for axis 4<br />
Input range: 0 to 5<br />
RESET 4-12<br />
MP710.0<br />
to<br />
MP710.3<br />
MP711.0<br />
to<br />
MP711.3<br />
MP712.0<br />
to<br />
MP712.3<br />
MP720.0<br />
to<br />
MP720.3<br />
0 = A<br />
1 = B<br />
2 = C<br />
3 = U<br />
4 = V<br />
5 = W<br />
Backlash compensation<br />
Input range: –1.000 to +1.000 [mm]<br />
Size of the reversal peaks in circular motion<br />
Input range: –1.000 to 1.000 [mm]<br />
Compensation value per control loop cycle time<br />
Input range: 0.000 to 1.000 [mm]<br />
Linear axis-error compensation<br />
Input range:<br />
– 1.000 to + 1.000 in [mm/m]<br />
MP730 Non-linear axis-error compensation<br />
Input range: 0 to 15<br />
Bit 0 X axis +0 = not active<br />
+1 = active<br />
Bit 1 Y axis +0 = not active<br />
+2 = active<br />
Bit 2 Z axis +0 = not active<br />
+4 = active<br />
Bit 3 4th axis +0 = not active<br />
+8 = active<br />
MP810 Modulo value for display of the PLC axes<br />
Input: 0.000 to 99 999999 [mm]<br />
MP910.0<br />
to<br />
MP910.3<br />
MP911.0<br />
to<br />
MP911.3<br />
MP912.0<br />
to<br />
MP912.3<br />
MP810.0 Axis X<br />
MP810.1 Axis Y<br />
MP810.2 Axis Z<br />
MP810.3 Axis 4<br />
Traverse range 1: Maximum value<br />
Input range:<br />
–99 999.999 to +99 999.999 [mm] or [°]<br />
Traverse range 2: Maximum value<br />
Input range:<br />
–99 999.999 to +99 999.999 [mm] or [°]<br />
Traverse range 3: Maximum value<br />
Input range:<br />
–99 999.999 to +99 999.999 [mm] or [°]<br />
4/96 <strong>TNC</strong> <strong>360</strong> 3 List of Machine Parameters 5-7<br />
4-21<br />
4-22<br />
4-23<br />
4-23<br />
4-27<br />
4-35<br />
4-15<br />
4-15<br />
4-16
Machine<br />
parameter<br />
MP920.0<br />
to<br />
MP920.3<br />
MP921.0<br />
to<br />
MP921.3<br />
MP922.0<br />
to<br />
MP922.3<br />
MP950.0<br />
to<br />
MP950.3<br />
3.2 Positioning<br />
Function and input Reaction /<br />
CN 123<br />
Neg. software limit switch for traverse range 1:<br />
Input range:<br />
–99 999.999 to +99 999.999 [mm] or [°]<br />
Neg. software limit switch for traverse range 2:<br />
Input range:<br />
–99 999.999 to +99 999.999 [mm] or [°]<br />
Neg. software limit switch for traverse range 3:<br />
Input range:<br />
–99 999.999 to +99 999.999 [mm] or [°]<br />
Datum point for positioning blocks with M92<br />
Input range:<br />
–99 999.999 to +99 999.999 [mm] or [°]<br />
Values referenced to machine datum<br />
Machine Function and input Reaction /<br />
parameter<br />
CN 123<br />
MP1010.0 Rapid traverse<br />
to<br />
MP1010.3<br />
Input range: 80 to 300 000 [mm/min]<br />
MP1020.0 <strong>Manual</strong> feed<br />
to<br />
MP1020.3<br />
Input range: 80 to 300 000 [mm/min]<br />
MP1030.0 Positioning window<br />
to<br />
MP1030.3<br />
Input range: 0.001 to 2 [mm] or [°]<br />
MP1040 Polarity of the nominal value voltage for the<br />
positive direction of traverse<br />
Input range: 0 to 15<br />
MP1050.0<br />
to<br />
MP1050.3<br />
MP1060.0<br />
to<br />
MP1060.3<br />
Bit 0 X axis +0 = positive<br />
+1 = negative<br />
Bit 1 Y axis +0 = positive<br />
+2 = negative<br />
Bit 2 Z axis +0 = positive<br />
+4 = negative<br />
Bit 3 4th axis +0 = positive<br />
+8 = negative<br />
Analog voltage for rapid traverse<br />
Input range: 4.5 to 9 [V]<br />
Acceleration<br />
Input range: 0.001 to 3.0 [m/s2]<br />
MP1070 Radial acceleration<br />
Input range: 0.001 to 3.0 [m/s2]<br />
MP1080.0 Integral factor<br />
to<br />
Input range: 0 to 65 535<br />
MP1080.3<br />
Page<br />
5-8 <strong>TNC</strong> <strong>360</strong> 3 List of Machine Parameters 4/96<br />
4-15<br />
4-15<br />
4-16<br />
4-110<br />
Page<br />
4-56<br />
4-56<br />
4-72<br />
4-7<br />
4-56<br />
4-54<br />
4-66<br />
4-64
Machine Function and input Reaction /<br />
parameter<br />
CN 123<br />
MP1110 Standstill monitoring<br />
Input range: 0.001 to 30 [mm]<br />
MP1140 Movement monitoring<br />
Input value: 0.03 to 10 [V]<br />
MP1150 Delay time before switching off the residual<br />
voltage on error message "Position error"<br />
Input value: 0 to 65.535 [s]<br />
MP1220 Automatic cyclical offset adjustment<br />
Input value 0 to 65 536 [s]<br />
0 = no automatic adjustment<br />
MP1320 Direction for traversing the reference marks<br />
Input range: 0 to 15<br />
MP1330.0<br />
to<br />
MP1330.3<br />
MP1331.0<br />
to<br />
MP1331.3<br />
MP1340.0<br />
to<br />
MP1340.3<br />
MP1350.0<br />
to<br />
MP1350.3<br />
Bit 0 Axis X +0 = positive<br />
+1 = negative<br />
Bit 1 Axis Y +0 = positive<br />
+2 = negative<br />
Bit 2 Axis Z +0 = positive<br />
+4 = negative<br />
Bit 3 4th axis +0 = positive<br />
+8 = negative<br />
Feed rate for traversing the reference marks<br />
Input range: 80 to 30 000 [mm/min]<br />
Feed rate for leaving the reference end position<br />
(only for rotary encoders MP1350 = 2)<br />
Input range: 80 to 500 [mm/min]<br />
Sequence for traversing reference marks<br />
Input range: 0 to 4<br />
0 = no evaluation of the reference marks<br />
1 = axis X<br />
2 = axis Y<br />
3 = axis Z<br />
4 = 4th axis<br />
Type of reference mark approach<br />
Input range: 0 to 3<br />
0 = measuring system with distance-coded<br />
reference marks<br />
1 = measuring system with one reference mark<br />
2 = special sequence (linear measurement<br />
via rotary encoder)<br />
3 = measuring system with distance-coded<br />
reference marks; after REF end position<br />
traverse direction is changed<br />
Page<br />
4/96 <strong>TNC</strong> <strong>360</strong> 3 List of Machine Parameters 5-9<br />
4-72<br />
4-71<br />
4-70<br />
4-63<br />
4-48<br />
4-48<br />
4-48<br />
REF 4-48<br />
REF 4-49
Machine Function and input Reaction /<br />
parameter<br />
CN 123<br />
MP1390 Control with lag or feed forward control<br />
Input range: 0 or 1<br />
1 = operation with lag<br />
0 = operation with feed forward control<br />
3.3 Operation with feed forward control<br />
Machine Function and input Reaction /<br />
parameter<br />
CN 123<br />
MP1410 Position monitoring in operation with feed forward<br />
(cancelable)<br />
Input value: 0.001 to 30 [mm]<br />
MP1420 Position monitoring in operation with feed forward<br />
(EMERGENCY STOP)<br />
Input value: 0.001 to 30 [mm]<br />
MP1510.0 kv factor for feed forward control<br />
to<br />
MP1510.3<br />
Input value: 0.1 to 10 [m/min/mm]<br />
MP1520 Position approach speed<br />
Input value: 0.1 to 10 [m/min]<br />
MP1530 Damping factor for transient response<br />
Input value: 0.01 to 0.999<br />
3.4 Operation with servo lag<br />
Machine Function and input Reaction /<br />
parameter<br />
CN 123<br />
MP1710 Position monitoring for operation with lag<br />
(cancelable)<br />
Input value: 0.001 to 1000 [mm]<br />
MP1720 Position monitoring for operation with lag<br />
(EMERGENCY STOP)<br />
Input value: 0.001 to 1000 [mm]<br />
MP1810.0 kv factor for operation with lag<br />
to<br />
MP1810.3<br />
Input range: 0.1 to10 [m/min/mm]<br />
MP1820 Multiplication factor for the kv factor<br />
Input value: 0.001 to 1<br />
MP1830 Kink point<br />
Input value: 0 to 100 [%]<br />
Page<br />
5-10 <strong>TNC</strong> <strong>360</strong> 3 List of Machine Parameters 4/96<br />
4-52<br />
Page<br />
4-70<br />
4-70<br />
4-62<br />
4-62<br />
4-62<br />
Page<br />
4-69<br />
4-69<br />
4-56<br />
4-58<br />
4-58
3.5 Spindle<br />
Machine Function and input Reaction / Page<br />
parameter<br />
CN 123<br />
MP3010 Spindle-speed output, Spindle orientation<br />
RESET 4-79<br />
Input value: 0 to 8<br />
0 = No spindle-speed output<br />
1 = BCD-coded output of the spindle speed,<br />
only if the spindle speed changes<br />
2 = BCD-coded output of the spindle speed<br />
at every TOOL CALL<br />
3 = Analog output of the spindle speed, but gearchange<br />
signal only if the gear range changes<br />
4 = Analog output of the spindle speed and<br />
gear-change signal at every TOOL CALL<br />
5 = Analog output of the spindle speed and<br />
no gear-change signal<br />
6 = As for input value 3, but with controlled<br />
spindle for orientation<br />
7 = As for input value 4, but with controlled<br />
spindle for orientation<br />
8 = As for input value 5, but with controlled<br />
spindle for orientation<br />
MP3020 Definition of the spindle speed range<br />
Input value: 0 to 99 999<br />
MP3030 Axis-halt on TOOL CALL with only a spindle speed<br />
output<br />
Input value: 0 or 1<br />
1 = No axis halt on TOOL CALL<br />
0 = Axis halt on TOOL CALL<br />
MP3120 Zero spindle speed permitted<br />
Input value: 0 or 1<br />
0 = 0 rpm permitted<br />
1 = 0 rpm not permitted<br />
4/96 <strong>TNC</strong> <strong>360</strong> 3 List of Machine Parameters 5-11<br />
4-91<br />
4-87<br />
4-82
Machine Function and input Reaction /<br />
parameter<br />
CN 123<br />
MP3130 Polarity of the S-analog voltage<br />
Input value: 0 to 3<br />
0 = M03 positive voltage<br />
M04 negative voltage<br />
1 = M03 negative voltage<br />
M04 positive voltage<br />
2 = M03 and M04 positive voltage<br />
3 = M03 and M04 negative voltage<br />
MP3140 Count direction of the measuring system signals<br />
for the spindle<br />
Input value: 0 or 1<br />
0 = Positive count direction with M03<br />
1 = Negative count direction with M03<br />
MP3210.0 S-analog voltage for gear range<br />
to<br />
Input value: 0 to 9.999 [V]<br />
MP3210.7<br />
MP3240.0 Maximum S-analog voltage output<br />
Input: 0 to 9.000 [V]<br />
MP3240.1 Minimum S-analog voltage output<br />
Input value: 0 to 9.999 [V]<br />
MP3240.2 Jog voltage for gear change<br />
Input value: 0 to 9.999 [V]<br />
MP3310.0 Limit with S override (maximum)<br />
Input value: 0 to 150 [%]<br />
MP3310.1 Limit with S override (minimum)<br />
Input value: 0 to 150 [%]<br />
MP3410.0 Ramp slope for spindle for M03, M04, M05<br />
Input range: 0 to 1.999 [V/ms]<br />
MP3410.1 Ramp slope of the analog voltage for<br />
Spindle orientation<br />
Input value: 0 to 1.999 [V/ms]<br />
MP3410.2 Ramp slope for tapping<br />
Input value: 0 to 1.999 [V/ms]<br />
MP3410.3 Accelerations ramp for rigid tapping<br />
Input value: 0 to 1.999 [V/ms]<br />
MP3420 Positioning window for spindle<br />
Input range: 0 to 65 535 [increments]<br />
1 increment is equivalent to about 0.088°<br />
MP3430 Reference mark deviation from the desired<br />
position (Spindle preset)<br />
Input value: 0 to <strong>360</strong> [°]<br />
MP3440.0 kv factor for spindle orientation<br />
to<br />
Input range: 0.1 to 10 [m/min/mm]<br />
MP3440.7<br />
Page<br />
5-12 <strong>TNC</strong> <strong>360</strong> 3 List of Machine Parameters 4/96<br />
4-80<br />
4-81<br />
4-82<br />
4-82<br />
4-82<br />
4-86<br />
4-84<br />
4-84<br />
4-82<br />
4-93<br />
4-100<br />
4-104<br />
4-95<br />
4-95<br />
4-95
Machine Function and input Reaction /<br />
parameter<br />
CN 123<br />
MP3510.0 Spindle speed for gear ranges<br />
to<br />
MP3510.7<br />
Input value: 0 to 99 999.999 [rpm]<br />
MP3520.0 Spindle speed activated by marker M2501<br />
Input value: 0 to 99 999.999 [rpm]<br />
MP3520.1 Spindle speed for spindle orientation<br />
Input value: 0 to 99 999.999 [rpm]<br />
3.6 Integrated PLC<br />
Page<br />
4/96 <strong>TNC</strong> <strong>360</strong> 3 List of Machine Parameters 5-13<br />
4-82<br />
4-96<br />
4-93<br />
Machine Function and input Reaction / Page<br />
parameter<br />
CN 123<br />
MP4010 PLC program from RAM or from EPROM<br />
Input: 0 or 1<br />
RESET 7-21<br />
MP4060.0<br />
to<br />
MP4060.4<br />
MP4110.0<br />
to<br />
MP4110.47<br />
0 = EPROM operation<br />
1 = RAM operation<br />
Path dependent lubrication<br />
Input range: 0 to 65 535<br />
(units of 65 536 µm)<br />
Time for timers<br />
Input range: 0 to 65 535 [PLC cycles]<br />
(<strong>TNC</strong> <strong>360</strong>: 20 ms)<br />
Preset value for counters C0 to C31<br />
Input range: 0 to 65 535 [PLC cycles]<br />
MP4120.0<br />
to<br />
MP4120. 31<br />
MP4130 Fast PLC input to suppress the monitoring<br />
functions<br />
Input value: 0 to 255 [No. of the PLC input]<br />
MP4131 Activation condition for fast PLC input from<br />
MP4130<br />
Input value: 0 or 1<br />
MP4210.0<br />
to<br />
MP4210.47<br />
MP4220.0<br />
to<br />
MP4220.3<br />
Set a number in the PLC (D768 to W 988)<br />
Input range:<br />
–99 999.9999 to +99 999.9999 [mm] or [°]<br />
Set a number in the PLC in the word range W960<br />
to W966<br />
Input: 0 to 65 535<br />
4-18<br />
7-19<br />
7-21<br />
4-68<br />
4-68<br />
7-17<br />
7-17
Machine<br />
parameter<br />
MP4230.0<br />
to<br />
MP4230.31<br />
to<br />
MP4239.0<br />
to<br />
MP4239.31<br />
MP4310.0<br />
to<br />
MP4310.6<br />
Function and input Reaction /<br />
CN 123<br />
Set a number in the PLC via module 9032<br />
Input value: -30 000 000 to + 30 000 000<br />
Set a number in the PLC, in the Word range W976<br />
to W988<br />
Input range: 0 to 65 535<br />
3.7 Setting the data interfaces<br />
Page<br />
5-14 <strong>TNC</strong> <strong>360</strong> 3 List of Machine Parameters 4/96<br />
7-17<br />
7-17<br />
Machine Function and input Reaction / Page<br />
parameter<br />
CN 123<br />
MP5010.0 Control characters for "blockwise transfer"<br />
Input range: 0 to 32 382<br />
Character for program end and beginning<br />
The character for program end also applies for<br />
"Standard data interface"<br />
CN 123 8-26<br />
MP5010.1 ASCII characters for data input CN 123 8-27<br />
MP5010.2 ASCII characters for data output CN 123 8-27<br />
MP5010.3 ASCII characters for beginning and end of the<br />
command block<br />
CN 123 8-26<br />
MP5010.4 ASCII characters for positive acknowledgment or<br />
negative acknowledgment<br />
CN 123 8-26<br />
MP5010.5 ASCII character for data transmission ended CN 123 8-26
Machine Function and input Reaction / Page<br />
parameter<br />
CN 123<br />
MP5020 Operating mode EXT: interface configuration<br />
Input range: 0 to 255<br />
CN 123 8-28<br />
Bit 0 7 or 8 Data bits<br />
+0 = 7 Data bits<br />
+1 = 8 Data bits<br />
Bit 1 Block Check Character<br />
+0 = BCC character optional<br />
+2 = BCC character not control character<br />
Bit 2 Transmission stop through RTS<br />
+0 = not active<br />
+4 = active<br />
Bit 3 Transmission stop through DC3<br />
+0 = not active<br />
+8 = active<br />
Bit 4 Character parity<br />
+0 = even<br />
+16 = odd<br />
Bit 5 Character parity<br />
+0 = not required<br />
+32 = required<br />
Bit 6/7 Stop bits<br />
Bit 6 Bit 7<br />
+0 = 1½ Stop bits 0 0<br />
+64 = 2 Stop bits 1 0<br />
+128 = 1 stop bit 0 1<br />
+192 = 1 stop bit 1 1<br />
Bit 8 RTS in quiescent state low<br />
Bit 9 No EOT after ETX received<br />
MP5030.0 Operating mode EXT: data transmission protocol<br />
Input: 0 or 1<br />
0 = "Standard data transmission"<br />
1 = "Blockwise transfer"<br />
MP5040 Data transfer rate for PLC interface<br />
Input range: 0 to 9<br />
0 = 110 baud 5 = 2 400 baud<br />
1 = 150 baud 6 = 4 800 baud<br />
2 = 300 baud 7 = 9 600 baud<br />
3 = 600 baud 8 = 19 200 baud<br />
4 = 1200 baud 9 = 38 400 baud<br />
CN 123 8-28<br />
CN 123 8-42<br />
4/96 <strong>TNC</strong> <strong>360</strong> 3 List of Machine Parameters 5-15
3.8 Measuring with a 3D touch probe<br />
Machine Function and input Reaction / Page<br />
parameter<br />
CN 123<br />
MP6010 Selection of the touch probe system<br />
Input: 0 or 1<br />
CN 123 4-152<br />
0 = TS 120<br />
1 = TS 511<br />
MP6120 Probing feed rate<br />
Input range: 80 to 30 000 [mm/min]<br />
MP6130 Maximum measuring range<br />
Input range: 0.001 to 99 999.999 [mm]<br />
MP6140 Safety clearance above measuring point<br />
Input range: 0.001 to 99 999.999 [mm]<br />
MP6150 Rapid traverse for probe cycle<br />
Input range: 80 to 30 000 [mm/min]<br />
CN 123 4-152<br />
CN 123 4-152<br />
CN 123 4-152<br />
CN 123 4-152<br />
3.9 Digitizing with TS 120 (only with digitizing option)<br />
Machine Function and input Reaction / Page<br />
parameter<br />
CN 123<br />
MP6210 Number of oscillations per second in normal<br />
direction<br />
Input range: 0 to 65.535 [1/s]<br />
4-156<br />
MP6230 Feed rate in normal direction<br />
Input range: 0 to 10 000 [mm/min]<br />
4-156<br />
MP6240 Maximum deflection of stylus<br />
Input range: 0 to 10.000 [mm]<br />
4-156<br />
MP6250 Numerical value for M function for transferring<br />
modal values<br />
Input 0 to 89<br />
0 = no transfer<br />
1 ... 89 number of the M function<br />
4-157<br />
MP6260 Output of M90 for NC blocks with digitized data<br />
Input: 0 or 1<br />
0 = no output of M90<br />
1 = output of M90 in every NC block<br />
4-157<br />
MP6270 Rounding of trailing zeros<br />
Input: 0 to 1<br />
0 = Output in 0.001 mm increments (1 μm)<br />
1 = Output in 0.01 mm increments (10 μm)<br />
4-157<br />
5-16 <strong>TNC</strong> <strong>360</strong> 3 List of Machine Parameters 4/96
3.10 Tapping<br />
Machine Function and input Reaction /<br />
parameter<br />
CN 123<br />
MP7000 Acknowledgment of display "Power interruption"<br />
0 = manual with "CE"<br />
1 = automatic after 3 sec (for positioning module)<br />
MP7110.0 Minimum for feed override when tapping<br />
Input range: 0 to 150 [%]<br />
MP7110.1 Maximum for feed override when tapping<br />
Input range: 0 to 150 [%]<br />
MP7120.0 Dwell time for change of direction of spindle<br />
rotation<br />
Input range: 0 to 65.535 [s]<br />
Advanced switch time of spindle for "tapping" cycle<br />
(only active with BCD output of spindle rpm)<br />
Input range: 0 to 65.535 [s]<br />
MP7120.2 Spindle run-on time after reaching total hole depth<br />
Input range: 0 to 65.535 [s]<br />
MP7130 Spindle run-in characteristic<br />
Input range: 0.001 to 10 [°/min]<br />
(matching MP1520)<br />
MP7140 Transient response of spindle on acceleration<br />
Input range: 0.001 to 1<br />
(matching MP1530)<br />
MP7150 Positioning window for tool axis<br />
Input range: 0.001 to 2 [mm]<br />
MP7160 Suppress spindle orientation at the beginning of<br />
Cycle 17<br />
Input: 0 or 1<br />
0 = Orient the spindle<br />
1 = Suppress spindle orientation<br />
3.11 Display and operation<br />
0 = Control and programming<br />
1 = Programming station, "PLC active"<br />
2 = Programming station "PLC inactive"<br />
Page<br />
4/96 <strong>TNC</strong> <strong>360</strong> 3 List of Machine Parameters 5-17<br />
–<br />
4-100<br />
4-100<br />
4-100<br />
4-102<br />
4-100<br />
4-104<br />
4-104<br />
4-104<br />
4-104<br />
Machine Function and input Reaction / Page<br />
parameter<br />
CN 123<br />
MP7210 Programming station<br />
CN 123 4-134<br />
Input values: 0 to 2<br />
RESET
Machine Function and input Reaction / Page<br />
parameter<br />
CN 123<br />
MP7215 Contouring control or point-to-point and straight-cut<br />
control<br />
Input range 0 to 3<br />
0 = Contouring control (<strong>TNC</strong> <strong>360</strong>)<br />
1 = Point-to-point and straight cut (<strong>TNC</strong> 335)<br />
2 = Position display inhibited, otherwise same as 1<br />
CN 123 4-246<br />
MP7220 Block number step size for ISO programs<br />
Input range: 0 to 255<br />
CN 123 4-132<br />
MP7222 Programming language selection: dialog or ISO<br />
Input: 0 to 2<br />
0 = Selection via MOD<br />
1 = Only dialog<br />
2 = Only ISO<br />
CN 123 4-132<br />
MP7225 Generating blocks with the "ACTUAL POSITION<br />
CAPTURE" key (not in ISO programming)<br />
Input: 0 to 3<br />
0 = no block generation possible<br />
1 = block generation with the "ACTUAL POSITION<br />
CAPTURE" key<br />
2 = block generation with M2829<br />
4-121<br />
MP7230 Switching the dialogue language<br />
Input: 0 or 1<br />
0 = First dialog language<br />
1 = Basic language (English)<br />
CN 123 4-134<br />
MP7235 Resetting the timing<br />
Input: 0 to 4<br />
0 = No resetting<br />
1 = Reset switch-on duration<br />
2 = Reset run time of automatic operation<br />
4 = Reset run time of spindle<br />
4-118<br />
MP7240 Inhibit program input for [Program name] = [OEM<br />
cycle number in EPROM].<br />
Input: 0 or 1<br />
9-5<br />
0 = Inhibited<br />
1 = Not inhibited<br />
MP7245.0 Inhibit the HEIDENHAIN cycles 1 to 15<br />
Input range: 0 to 65 534<br />
MP7245.1 Inhibit the HEIDENHAIN standard cycles<br />
16 to 30<br />
Input range: 0 to 65 535<br />
MP7250 Difference between Q parameter number for "CALLactive"<br />
and "DEF-active" block in OEM cycles<br />
Input 0 to 50<br />
MP7251 Number of global Q parameters that can be<br />
transferred from OEM cycle to the calling program<br />
Input: 0 to 100<br />
4-126<br />
4-127<br />
5-18 <strong>TNC</strong> <strong>360</strong> 3 List of Machine Parameters 4/96<br />
9-5<br />
9-5
Machine Function and input Reaction / Page<br />
parameter<br />
CN 123<br />
MP7260 Number of tools in the tool table<br />
CN 123 4-196<br />
Input: 0 to 99<br />
0 = No central tool file<br />
1 - 99 number of tools, tool file is active<br />
RESET<br />
MP7261 Number of pockets in the tool magazine<br />
CN123 4-<br />
Input: 0 to 99<br />
RESET 214<br />
MP7264 Number of pockets reserved next to special tool CN 123 4-197<br />
Input: 1 to 3<br />
RESET<br />
MP7270 Display of the feed rates in manual operating<br />
modes (<strong>Manual</strong> operation, Electronic handwheel)<br />
Input: 0 or 1<br />
CN 123 4-116<br />
Bit 0 = 0 Display of the axis feed rate only when<br />
an axis direction key is pressed<br />
Bit 0 = 1 Display of the axis feed rate before<br />
operating an axis-direction key (smallest<br />
value from MP1020.X for all axes)<br />
Bit 1 = 1 Abortion after NC stop in manual<br />
operating mode (control-in-operation<br />
symbol off)<br />
MP7274 Expanded spindle display<br />
Input: 0 to 3<br />
Bit 0 Display of current gear range<br />
+0 No display<br />
+1 Display<br />
Bit 1 Display of spindle power<br />
+0 Acquisition via analog input<br />
+2 Acquisition via PLC word W600<br />
MP7275 Reference value of displayed spindle power for<br />
acquisition via analog input<br />
Input: 0 to 4.999 [V]<br />
for acquisition via word W600<br />
Input: 0 to 43 690<br />
Input value is equivalent to 100%<br />
MP7280 Decimal sign<br />
Input: 0 or 1<br />
0 = Decimal comma<br />
1 = Decimal point<br />
MP7285 Calculation of the tool length for the position<br />
display of the tool axis<br />
Input: 0 or 1<br />
0 = Tool length is not calculated<br />
1 = Tool length is calculated<br />
4-120<br />
4-120<br />
CN 123 4-134<br />
CN 123 4-113<br />
4/96 <strong>TNC</strong> <strong>360</strong> 3 List of Machine Parameters 5-19
MP7290 Position-display step<br />
Input: 1 to 4<br />
0 = 0.001 mm or 0.001°<br />
1 = 0.005 mm or 0.005°<br />
2 = 0.010 mm or 0.01°<br />
3 = 0.050 mm 0r 0.05°<br />
4 = 0.100 mm or 0.1°<br />
MP7300 Cancel status display, Q parameters, and tool data<br />
Input: 0 to 7<br />
0 = Status display, Q parameters and tool data<br />
canceled through program selection<br />
1 = Status display, Q parameters and tool data<br />
canceled through M02, M30, END PGM and<br />
program selection<br />
2 = Status display and tool data canceled through<br />
program selection<br />
3 = Status display and tool data canceled through<br />
M02, M30, END PGM and program selection<br />
4 = Status display and Q parameters canceled<br />
through program selection<br />
5 = Status display and Q parameters canceled<br />
through M02, M30, END PGM and program<br />
selection<br />
6 = Status display canceled through program<br />
selection<br />
7 = Status display canceled through M02, M30,<br />
END PGM and program selection<br />
MP7310 Graphics display<br />
Input range: 0 to 3<br />
MP7330.0<br />
to<br />
MP7330.15<br />
MP7340.0<br />
to<br />
MP7340.15<br />
Bit 0 Changeover of 3-plane display<br />
+ 0 = European preferred<br />
+ 1 = American preferred<br />
Bit 1 Rotation of the coordinate system in the<br />
machining plane + 90°<br />
+ 0 = no rotation<br />
+ 2 = coordinate system rotated by +90°<br />
Determination of the User Parameters<br />
Input range: 0 to 9999.00 (Number of the desired<br />
machine parameter)<br />
Dialogues for User Parameters<br />
Input range: 0 to 199<br />
0 to 99 from PLC error messages<br />
100 to 199 from dialogue texts<br />
4-113<br />
CN 123 4-119<br />
CN 123 4-112<br />
4-133<br />
4-133<br />
5-20 <strong>TNC</strong> <strong>360</strong> 3 List of Machine Parameters 4/96
3.12 Machining and program run<br />
Machine Function and input Reaction / Page<br />
parameter<br />
CN 123<br />
MP7410 ”Scaling factor” cycle active in two or three axes<br />
Input: 0 or 1<br />
CN 123 4-130<br />
0 = Cycle ”Scaling factor” operates in all three<br />
principle axes<br />
1 = Cycle ”Scaling factor” only operates in the<br />
machining plane<br />
MP7411 Compensation data for TOUCH PROBE block<br />
Input: 0 or 1<br />
0 = Compensation value from the calibration<br />
process<br />
1 = Compensation value from the tool file<br />
MP7420 Cycles for milling pockets with free-programmed<br />
contours<br />
Input range: 0 to 15<br />
Bit 0 Slot milling direction for<br />
+ 0 = Anti-clockwise slot milling of the<br />
pocket contours, clockwise for<br />
islands<br />
+ 1 = Clockwise slot milling of the<br />
pocket contours, anti-clockwise<br />
for islands<br />
Bit 1 Sequence for clearing out and – slot<br />
milling<br />
+ 0 = First slot milling, then clear out<br />
pocket<br />
+ 2 = First clear out pocket, then<br />
slot milling<br />
Bit 2 Merge programmed contours<br />
+ 0 = Contours merged only if the tool<br />
center paths intersect<br />
+ 4 = Contours merged if the<br />
programmed contours overlap<br />
Bit 3 Clear out and slot milling to pocket depth,<br />
or for each feed<br />
+ 0 = Clearing out and slot milling<br />
performed in one operation for<br />
all feeds<br />
+ 8 = For each peck, first perform slotmilling<br />
and then feed clearing out<br />
(depending on Bit 1) before next<br />
peck<br />
MP7430 Overlap factor for pocket milling<br />
Input: = 0.1 to 1.414<br />
4-152<br />
CN 123 4-129<br />
CN 123 4-128<br />
4/96 <strong>TNC</strong> <strong>360</strong> 3 List of Machine Parameters 5-21
Machine Function and input Reaction / Page<br />
parameter<br />
CN 123<br />
MP7440 Output of M functions<br />
Input range: 0 to 7<br />
CN 123 4-140<br />
Bit 0 Program halt on M06<br />
+ 0 = Program halt on M06<br />
+ 1 = No program halt on M06<br />
Bit 1 modal cycle call M89<br />
+ 0 = normal code transfer of M89 at<br />
beginning of block<br />
+ 2 = modal cycle call M89 at end of<br />
block<br />
Bit 2 Program halt on M functions<br />
+ 0 = Program halt until<br />
acknowledgment of M function<br />
+ 4 = No program halt (does not wait<br />
for acknowledgment)<br />
Bit 3 and Bit 4: no function<br />
Bit 5 + 0<br />
+ 1 = Setting the marker axis in position<br />
between 2 NC blocks, if there is<br />
delay time here (e.g. programmed<br />
dwell time)<br />
MP7460 Constant contouring speed at corners<br />
Input: 0.001 to 179.999°<br />
MP7470 Display mode for rotary axis (not for PLC help axes)<br />
Input: 0 to 3<br />
Bit 0 Display mode<br />
+0 = 0 to + 359.999 [°] (no software<br />
limit switch)<br />
+1 = – 30 000.000 to + 30 000.000<br />
(software limit switch active)<br />
Bit 1 Positioning the rotary axis<br />
+0 = according to the sign<br />
+2 = always by the shortest path<br />
(useful only when Bit 0 = 0)<br />
MP7480.0 Output of tool or pocket number in TOOL CALL<br />
block<br />
Input: 0 to 3<br />
0 = No output<br />
1 = Output of tool number only when tool number<br />
changes (W262)<br />
2 = Output of tool number with every TOOL CALL<br />
block (W262)<br />
3 = Output of pocket number (W262) and tool<br />
number (W264) only when tool number changes<br />
CN 123 4-67<br />
CN 123 4-114<br />
4-198<br />
5-22 <strong>TNC</strong> <strong>360</strong> 3 List of Machine Parameters 4/96
Machine Function and input Reaction /<br />
parameter<br />
CN 123<br />
MP7480.1 Output of tool or pocket number in TOOL DEF<br />
block<br />
Input: 0 to 3<br />
3.13 Hardware<br />
0 = No output<br />
1 = Tool number output only after tool number<br />
change (W262)<br />
2 = Tool number output with each TOOL DEF<br />
block (W262)<br />
3 = Output of pocket number (W262) and tool<br />
number (W264) only after tool number change<br />
Page<br />
4-199<br />
Machine Function and input Reaction Page<br />
parameter<br />
/ CN 123<br />
MP7620 Feed rate and spindle override<br />
CN 123 4-84<br />
Input: 0 to 15<br />
4-116<br />
Bit 0 Feed rate override is rapid traverse button<br />
is pressed in the "program run" mode<br />
+0 = Override not active<br />
+1 = Override active<br />
Bit 2 Feed rate override if rapid traverse buttons<br />
and machine direction buttons are pressed<br />
in "manual" operating mode<br />
+0 = Override not active<br />
+4 = Override active<br />
Bit 3 Spindle and feed rate override in 1%<br />
increments or according to a non-linear<br />
characteristic curve<br />
+0 = 1% increments<br />
+8 = non-linear characteristic curve<br />
MP7640 Handwheel<br />
Input: 0 to 6<br />
0 = No handwheel<br />
1 = HR 330<br />
2 = HR 130<br />
3 = HR 330 with evaluation of keys via PLC<br />
4 = HR 332 with evaluation of keys via PLC<br />
5 = Up to three HR 150 via HRA 110<br />
6 = HR 410<br />
CN 123 4-167<br />
4/96 <strong>TNC</strong> <strong>360</strong> 3 List of Machine Parameters 5-23
Machine Function and input Reaction<br />
parameter<br />
/ CN 123<br />
MP7641 Entry of interpolation factor and handwheel<br />
activation<br />
Input: 0 to 15<br />
Bit 0 = 0 Entry of interpolation factor via <strong>TNC</strong><br />
keyboard<br />
= 1 Entry of interpolation factor via PLC<br />
module 9036<br />
Bit 1 = 1 Handwheel active in the Programming<br />
and editing mode<br />
Bit 2 = 1 Entry of interpolation factor via PLC<br />
module 9036 and <strong>TNC</strong> keyboard<br />
Bit 3 = 1 Polling handwheel keys from the PLC<br />
in every operating mode<br />
MP7645.0 Assignment of handwheel keys for HR 332 if<br />
MP7640 = 4:<br />
Input value: 0 or 1<br />
0 = All keys and LEDs, except axis selection keys<br />
and their LEDs, are selectable via PLC<br />
1 = All 12 keys and LEDs are selectable via PLC<br />
If MP 7640 = 5:<br />
Assignment of 3rd handwheel via axis selection<br />
switch<br />
Input value: 0 to 2<br />
Switch 3rd handwheel<br />
0 = 1 (left stop) Z axis<br />
2 4th axis<br />
1 = 1 (left stop) X axis<br />
2 Y axis<br />
3 Z axis<br />
4 4th axis<br />
2 = 3 Z axis<br />
4 4th axis<br />
MP7645.1 Assignment of 3rd handwheel via machine parameter<br />
Input: 0 to 8<br />
0 = Assignment of 3rd handwheel via MP7645.0<br />
1 = 3rd handwheel X axis<br />
2 = 3rd handwheel Y axis<br />
4 = 3rd handwheel Z axis<br />
8 = 3rd handwheel 4th axis<br />
MP7645.2 Assignment of 3rd handwheel via axis selection<br />
switch or MP7645.1<br />
Input: 0 to 1<br />
0 = Assignment via axis selection switch according<br />
to MP 7645.0<br />
1 = Assignment via MP 7645.1<br />
Page<br />
4-107<br />
4-172<br />
4-169<br />
4-172<br />
4-173<br />
4-173<br />
5-24 <strong>TNC</strong> <strong>360</strong> 3 List of Machine Parameters 4/96
Machine Function and input Reaction<br />
parameter<br />
/ CN 123<br />
MP7650 Count direction for handwheel<br />
Input: 0 or 1<br />
MP7660<br />
0 = Positive count direction<br />
1 = Negative count direction<br />
Threshold sensitivity for electronic handwheel<br />
Input value: 0 to 65 535 [increments]<br />
MP7670 Minimum interpolation factor for handwheel<br />
Input range: 0 to 10<br />
MP7670 Interpolation factor for handwheel HR410<br />
Input: 0 to 10<br />
MP7670.0 Interpolation factor at low speed<br />
MP7670.1 Interpolation factor at medium speed<br />
MP7670.2 Interpolation factor at high speed<br />
MP7671 <strong>Manual</strong> feed rate in "handwheel" operation mode<br />
with HR 410<br />
Input: 0 to 1000 [% to MP1020]<br />
MP7671.0 Low speed<br />
MP7671.1 Medium speed<br />
MP7671.2 High speed<br />
MP7680 Memory function for axis-direction keys<br />
0 = not stored<br />
1 = stored<br />
MP7690 Memory test at switch-on<br />
Input range: 0 to 3<br />
Bit 0 RAM test<br />
+ 0 = Memory test at switch-on<br />
+ 1 = No memory test at switch-on<br />
Bit 1 EPROM test<br />
+ 0 = Memory test at switch-on<br />
+ 2 = No memory test at switch-on<br />
Page<br />
4-167<br />
4-167<br />
4-167<br />
4-149<br />
4-135<br />
4/96 <strong>TNC</strong> <strong>360</strong> 3 List of Machine Parameters 5-25
1 List of Markers<br />
The markers listed in italics have been retained to insure compatibility with the <strong>TNC</strong> 355. It is<br />
recommended, however, that these functions be activated through the new word functions.<br />
Marker Function Set Reset Page<br />
M2000 Axis enable X NC PLC 4-74<br />
M2001 Axis enable Y NC PLC 4-74<br />
M2002 Axis enable Z NC PLC 4-74<br />
M2003 Axis enable 4 NC PLC 4-74<br />
M2004 S-analogue voltage not on ramp NC NC 4-82<br />
M2005 S-analogue voltage = 0 V NC NC 4-82<br />
M2007 Spindle in position NC NC 4-95<br />
M2008 X axis in position NC NC 4-75<br />
M2009 Y axis in position NC NC 4-75<br />
M2010 Z axis in position NC NC 4-75<br />
M2011 4th axis in position NC NC 4-75<br />
M2012 Lubrication pulse X axis, since value of MP4060.0<br />
was exceeded<br />
NC NC 4-18<br />
M2013 Lubrication pulse Y axis, since value of MP4060.1<br />
was exceeded<br />
NC NC 4-18<br />
M2014 Lubrication pulse Z axis, since value of MP4060.2<br />
was exceeded<br />
NC NC 4-18<br />
M2015 Lubrication pulse 4th axis, since value of MP4060.3<br />
was exceeded<br />
NC NC 4-18<br />
M2022 Touch probe not ready (no standby signal at connector X12) NC NC 4-153<br />
M2023 Stylus deflected before start of probing cycle NC NC 4-153<br />
M2025 Stylus deflected (probing sequence is executed) NC PLC 4-153<br />
M2026 Probe operation ended or interrupted NC NC 4-153<br />
M2027 Battery voltage too low (battery warning on connector X12);<br />
evaluated only during the probe operation<br />
NC NC 4-153<br />
M2032 T Code 1st bit (lsb) NC NC 7-123<br />
M2033 T Code 2nd bit NC NC 7-123<br />
M2034 T Code 3rd bit NC NC 7-123<br />
M2035 T Code 4th bit NC NC 7-123<br />
M2036 T Code 5th bit NC NC 7-123<br />
M2037 T Code 6th bit NC NC 7-123<br />
M2038 T Code 7th bit NC NC 7-123<br />
M2039 T Code 8th bit (msb) NC NC 7-123<br />
M2040 The control functions as point-to-point and straight-cut control NC NC 4-246<br />
M2041 Basic language (English) is selected NC NC 4-134<br />
M2042 Analogue output of the spindle speed NC NC 4-80<br />
M2043 Change signal for gear code NC NC 4-86<br />
M2044 Change signal for S code NC NC 4-91<br />
M2045 Change signal for M function NC NC 4-138<br />
4/96 <strong>TNC</strong> <strong>360</strong> 1 List of Markers 6-1
Marker Function Set Reset Page<br />
M2046 Strobe signal T code (P code) with TOOL CALL NC NC 4-199<br />
M2047 Strobe signal 2nd T code (2nd P code) with TOOL DEF NC NC 4-199<br />
M2048 Tapping cycle called NC NC 4-100<br />
M2049 Parallel editing NC NC –<br />
M2050 Operating mode: Programming and editing NC NC 7-123<br />
M2051 Operating mode: <strong>Manual</strong> NC NC 7-123<br />
M2052 Operating mode: Electronic handwheel NC NC 7-123<br />
M2053 Operating mode: Positioning with manual data input NC NC 7-123<br />
M2054 Operating mode: Program run/single block NC NC 7-123<br />
M2055 Operating mode: Program run/full sequence NC NC 7-123<br />
M2056 Operating mode: Test run NC NC 7-123<br />
M2057 Operating mode: Traversing the reference marks NC NC 7-123<br />
M2058 Repeat last operating mode key NC NC –<br />
M2060 ISO program is selected NC NC 4-132<br />
M2061 END PGM, M02 or M30 has been executed NC NC 4-135<br />
M2063 "PGM 0" is selected NC NC 4-199<br />
M2064 S Code 1st bit (lsb) 7-123<br />
M2065 S Code 2nd bit 7-123<br />
M2066 S Code 3rd bit 7-123<br />
M2067 S Code 4th bit 7-123<br />
M2068 S Code 5th bit 7-123<br />
M2069 S Code 6th bit 7-123<br />
M2070 S Code 7th bit 7-123<br />
M2071 S Code 8th bit (msb) 7-123<br />
M2072 M Code 1st bit (lsb) 7-123<br />
M2073 M Code 2nd bit 7-123<br />
M2074 M Code 3rd bit 7-123<br />
M2075 M Code 4th bit 7-123<br />
M2076 M Code 5th bit 7-123<br />
M2077 M Code 6th bit 7-123<br />
M2078 M Code 7th bit 7-123<br />
M2079 M Code 8th bit (msb) 7-123<br />
M2080 Minimum rpm from MP3020 1st bit (lsb) 7-123<br />
M2081 Minimum rpm from MP3020 2nd bit 7-123<br />
M2082 Minimum rpm from MP3020 3rd bit 7-123<br />
M2083 Minimum rpm from MP3020 4th bit 7-123<br />
M2084 Minimum rpm from MP3020 5th bit 7-123<br />
M2085 Minimum rpm from MP3020 6th bit 7-123<br />
M2086 Minimum rpm from MP3020 7th bit 7-123<br />
M2087 Minimum rpm from MP3020 8th bit (msb) 7-123<br />
M2088 Increment from MP3020 1st bit (lsb) 7-123<br />
M2089 Increment from MP3020 2nd bit 7-123<br />
M2090 Increment from MP3020 3rd bit 7-123<br />
M2091 Increment from MP3020 4th bit (msb) 7-123<br />
M2092 Illegal spindle speed NC NC 4-87<br />
M2093 Another T code (P code) follows with TOOL CALL NC NC 4-214<br />
M2095 Rigid tapping is active NC NC 4-104<br />
6-2 <strong>TNC</strong> <strong>360</strong> 1 List of Markers 8/95
Marker Function Set Reset Page<br />
M2096 X key last pressed NC NC 4-113<br />
M2097 Y key last pressed NC NC 4-113<br />
M2098 Z key last pressed NC NC 4-113<br />
M2099 Key IV last pressed NC NC 4-113<br />
M2100 X axis is tool axis NC NC 4-13<br />
M2101 Y axis is tool axis NC NC 4-13<br />
M2102 Z axis is tool axis NC NC 4-13<br />
M2103 4th axis is tool axis NC NC 4-13<br />
M2104 G Code S Analog 1st bit (lsb) PLC PLC 4-86<br />
M2105 G Code S Analog 2nd bit PLC PLC 4-86<br />
M2106 G Code S Analog 3rd bit (msb) PLC PLC 4-86<br />
M2112 T Number (P Number) 1st decade (lsb) 7-124<br />
M2113 T Number (P Number) 1st decade 7-124<br />
M2114 T Number (P Number) 1st decade 7-124<br />
M2115 T Number (P Number) 1st decade (msb) 7-124<br />
M2116 T Number (P Number) 2nd decade (lsb) 7-124<br />
M2117 T Number (P Number) 2nd decade 7-124<br />
M2118 T Number (P Number) 2nd decade 7-124<br />
M2119 T Number (P Number) 2nd decade (msb) 7-124<br />
M2128 X axis in motion NC NC 4-76<br />
M2129 Y axis in motion NC NC 4-76<br />
M2130 Z axis in motion NC NC 4-76<br />
M2131 4th axis in motion NC NC 4-76<br />
M2136 X axis reference mark not yet traversed NC NC –<br />
M2137 Y axis reference mark not yet traversed NC NC –<br />
M2138 Z axis reference mark not yet traversed NC NC –<br />
M2139 4th axis reference mark not yet traversed NC NC –<br />
M2149 Strobe marker for Q parameter transfer with FN19 NC NC –<br />
M2150 Unit of measure of the NC program (0 = mm, 1 = inch) NC NC –<br />
M2160 Traverse direction X axis 0 = positive 1 = negative NC NC 4-7<br />
M2161 Traverse direction Y axis 0 = positive 1 = negative NC NC 4-7<br />
M2162 Traverse direction Z axis 0 = positive 1 = negative NC NC 4-7<br />
M2163 Traverse direction 4th axis 0 = positive 1 = negative NC NC 4-7<br />
M2176 Code operating mode (lsb) 7-124<br />
M2177 Code operating mode 7-124<br />
M2178 Code operating mode 7-124<br />
M2179 Code operating mode (msb) 7-124<br />
M2180 1st PLC scan after switch-on NC NC –<br />
M2182 Inhibited key was operated NC PLC 4-141<br />
M2183 Program interruption<br />
NC NC 4-118<br />
M2184<br />
("Control operational" display flashes)<br />
Control operational<br />
("Control operational" display goes on or flashes)<br />
NC NC 4-118<br />
M2185 1st PLC scan after interruption of the PLC program NC NC –<br />
M2186 Code number 84159 entered NC PLC 7-124<br />
M2190 Non-flashing error message is displayed NC NC 4-122<br />
M2191 "External EMERGENCY STOP" message is displayed NC NC 4-106<br />
4/96 <strong>TNC</strong> <strong>360</strong> 1 List of Markers 6-3
Marker Function Set Reset Page<br />
M2192 Markers controllable<br />
NC NC 7-124<br />
to<br />
M2239<br />
by MP4310.0, MP 4310.1 and MP 4310.2<br />
M2240 Inhibit OEM cycle 68 PLC PLC 9-5<br />
M2241 Inhibit OEM cycle 69 PLC PLC 9-5<br />
M2242 Inhibit OEM cycle 70 PLC PLC 9-5<br />
M2243 Inhibit OEM cycle 71 PLC PLC 9-5<br />
M2244 Inhibit OEM cycle 72 PLC PLC 9-5<br />
M2245 Inhibit OEM cycle 73 PLC PLC 9-5<br />
M2246 Inhibit OEM cycle 74 PLC PLC 9-5<br />
M2247 Inhibit OEM cycle 75 PLC PLC 9-5<br />
M2248 Inhibit OEM cycle 76 PLC PLC 9-5<br />
M2249 Inhibit OEM cycle 77 PLC PLC 9-5<br />
M2250 Inhibit OEM cycle 78 PLC PLC 9-5<br />
M2251 Inhibit OEM cycle 79 PLC PLC 9-5<br />
M2252 Inhibit OEM cycle 80 PLC PLC 9-5<br />
M2253 Inhibit OEM cycle 81 PLC PLC 9-5<br />
M2254 Inhibit OEM cycle 82 PLC PLC 9-5<br />
M2255 Inhibit OEM cycle 83 PLC PLC 9-5<br />
M2256 Inhibit OEM cycle 84 PLC PLC 9-5<br />
M2257 Inhibit OEM cycle 85 PLC PLC 9-5<br />
M2258 Inhibit OEM cycle 86 PLC PLC 9-5<br />
M2259 Inhibit OEM cycle 87 PLC PLC 9-5<br />
M2260 Inhibit OEM cycle 88 PLC PLC 9-5<br />
M2261 Inhibit OEM cycle 89 PLC PLC 9-5<br />
M2262 Inhibit OEM cycle 90 PLC PLC 9-5<br />
M2263 Inhibit OEM cycle 91 PLC PLC 9-5<br />
M2264 Inhibit OEM cycle 92 PLC PLC 9-5<br />
M2265 Inhibit OEM cycle 93 PLC PLC 9-5<br />
M2266 Inhibit OEM cycle 94 PLC PLC 9-5<br />
M2267 Inhibit OEM cycle 95 PLC PLC 9-5<br />
M2268 Inhibit OEM cycle 96 PLC PLC 9-5<br />
M2269 Inhibit OEM cycle 97 PLC PLC 9-5<br />
M2270 Inhibit OEM cycle 98 PLC PLC 9-5<br />
M2271 Inhibit OEM cycle 99 PLC PLC 9-5<br />
M2400 Tool number 0 programmed NC NC 4-199<br />
M2401 Active tool with pocket number (MP7260/MP7261) NC NC 4-214<br />
M2402 Active tool without pocket number (MP7260/MP7261) NC NC 4-214<br />
M2403 Active tool = special tool NC NC 4-214<br />
M2408 Cycle 13 is executed<br />
M2448 NC start (edge evaluation) PLC PLC 4-149<br />
M2449 Rapid traverse PLC PLC 4-149<br />
M2450 Memory function for axis-direction keys PLC PLC 4-149<br />
M2451 Feed release for all axes PLC PLC 4-74<br />
M2452 Activate PLC positioning X axis PLC NC 7-124<br />
M2453 Activate PLC positioning Y axis PLC NC 7-124<br />
M2454 Activate PLC positioning Z axis PLC NC 7-124<br />
M2455 Activate PLC positioning 4th axis PLC NC 7-124<br />
6-4 <strong>TNC</strong> <strong>360</strong> 1 List of Markers 8/95
Marker Function Set Reset Page<br />
M2456 <strong>Manual</strong> traverse X+ PLC PLC 4-149<br />
M2457 <strong>Manual</strong> traverse X– PLC PLC 4-149<br />
M2458 <strong>Manual</strong> traverse Y+ PLC PLC 4-149<br />
M2459 <strong>Manual</strong> traverse Y- PLC PLC 4-149<br />
M2460 <strong>Manual</strong> traverse Z+ PLC PLC 4-150<br />
M2461 <strong>Manual</strong> traverse Z- PLC PLC 4-150<br />
M2462 <strong>Manual</strong> traverse 4+ PLC PLC 4-150<br />
M2463 <strong>Manual</strong> traverse 4– PLC PLC 4-150<br />
M2464 Complement – NC start PLC PLC 4-149<br />
M2465 Complement – rapid traverse PLC PLC 4-149<br />
M2466 Complement – memory function for axis-direction keys PLC PLC 4-149<br />
M2467 Complement – feed release PLC PLC 4-75<br />
M2468 Complement PLC positioning X axis NC PLC 7-124<br />
M2469 Complement PLC positioning Y axis NC PLC 7-124<br />
M2470 Complement PLC positioning Z axis NC PLC 7-124<br />
M2471 Complement PLC positioning 4th axis NC PLC 7-124<br />
M2472 Complement – manual traverse X+ PLC PLC 4-149<br />
M2473 Complement – manual traverse X– PLC PLC 4-149<br />
M2474 Complement – manual traverse Y+ PLC PLC 4-149<br />
M2475 Complement – manual traverse Y– PLC PLC 4-149<br />
M2476 Complement – manual traverse Z+ PLC PLC 4-150<br />
M2477 Complement – manual traverse Z– PLC PLC 4-150<br />
M2478 Complement – manual traverse 4+ PLC PLC 4-150<br />
M2479 Complement – manual traverse 4– PLC PLC 4-150<br />
M2480 Acknowledgment ”Gear change completed” PLC PLC 4-86<br />
M2481 S code acknowledgment PLC PLC 4-90<br />
M2482 Acknowledgment of M function PLC PLC 4-138<br />
M2483 Acknowledgment T code (P code) with TOOL CALL PLC PLC 4-199<br />
M2484 Acknowledgment T code (P code) with TOOL DEF PLC PLC 4-199<br />
M2485 Status display and sign of S analogue for M03 PLC PLC 4-81<br />
M2486 Status display and sign of S analogue for M04 PLC PLC 4-81<br />
M2487 Status display for M05 and spindle stop PLC PLC 4-81<br />
M2488 NC stop (”0” signifies stop) PLC PLC 4-149<br />
M2489 Change direction of spindle rotation PLC PLC 4-81<br />
M2490 Spindle rotation left (for gear change) PLC PLC 4-86<br />
M2491 Spindle rotation right (for gear change) PLC PLC 4-86<br />
M2492 Await open control loop X axis PLC PLC 4-77<br />
M2493 Await open control loop Y axis PLC PLC 4-77<br />
M2494 Await open control loop Z axis PLC PLC 4-77<br />
M2495 Await open control loop 4th axis PLC PLC 4-77<br />
M2496 Enable marker for the decoded M code transfer to markers<br />
M1900 to M1999<br />
PLC PLC 4-138<br />
M2497 Activate the edge evaluation for PLC inputs<br />
Rising-edge marker M1500 to M1659<br />
Falling-edge marker M1700 to M1859<br />
PLC PLC 7-21<br />
M2498 Release jog positioning PLC PLC 4-178<br />
M2499 Open spindle control loop PLC PLC 4-93<br />
4/96 <strong>TNC</strong> <strong>360</strong> 1 List of Markers 6-5
Marker Function Set Reset Page<br />
M2501 Activates spindle speed MP3520.0 and direction of rotation<br />
from marker M2656<br />
PLC PLC 4-96<br />
M2502 NC STOP in all operating modes if stylus is deflected PLC PLC 4-153<br />
M2503 Enable marker for probing functions NC PLC 4-153<br />
M2508 Status display M08 or M09<br />
0 = Status display M09<br />
1 = Status display M08<br />
PLC PLC 4-117<br />
M2510 Spindle potentiometer fixed to 100% PLC PLC –<br />
M2511 Feed rate potentiometer fixed to 100% PLC PLC –<br />
M2512 Start jog positioning axis X+ PLC PLC 4-178<br />
M2513 Start jog positioning axis X– PLC PLC 4-178<br />
M2514 Start jog positioning axis Y+ PLC PLC 4-178<br />
M2515 Start jog positioning axis Y– PLC PLC 4-178<br />
M2516 Start jog positioning axis Z+ PLC PLC 4-178<br />
M2517 Start jog positioning axis Z– PLC PLC 4-178<br />
M2518 Start jog positioning axis 4+ PLC PLC 4-178<br />
M2519 Start jog positioning axis 4– PLC PLC 4-178<br />
M2527 Activate spindle orientation PLC NC 7-124<br />
M2528 Complement jog positioning axis X+ PLC PLC 4-178<br />
M2529 Complement jog positioning axis X– PLC PLC 4-178<br />
M2530 Complement jog positioning axis Y+ PLC PLC 4-178<br />
M2531 Complement jog positioning axis Y– PLC PLC 4-178<br />
M2532 Complement jog positioning axis Z+ PLC PLC 4-178<br />
M2533 Complement jog positioning axis Z– PLC PLC 4-178<br />
M2534 Complement jog positioning axis 4+ PLC PLC 4-178<br />
M2535 Complement jog positioning axis 4– PLC PLC 4-178<br />
M2543 Complement spindle orientation NC PLC 7-124<br />
M2544 Open control loop X axis PLC PLC 4-77<br />
M2545 Open control loop Y axis PLC PLC 4-77<br />
M2546 Open control loop Z axis PLC PLC 4-77<br />
M2547 Open control loop 4th axis PLC PLC 4-77<br />
M2548 Reset of accumulated distance for lubrication X axis PLC PLC 4-18<br />
M2549 Reset of accumulated distance for lubrication Y axis PLC PLC 4-18<br />
M2550 Reset of accumulated distance for lubrication Z axis PLC PLC 4-18<br />
M2551 Reset of accumulated distance for lubrication 4th axis PLC PLC 4-18<br />
M2552 Actual – nominal value transfer X axis PLC PLC 4-77<br />
M2553 Actual – nominal value transfer Y axis PLC PLC 4-77<br />
M2554 Actual – nominal value transfer Z axis PLC PLC 4-77<br />
M2555 Actual – nominal value transfer 4 axis PLC PLC 4-77<br />
M2556 Reference end position for X axis PLC PLC 4-49<br />
M2557 Reference end position for Y axis PLC PLC 4-49<br />
M2558 Reference end position for Z axis PLC PLC 4-49<br />
M2559 Reference end position for axis 4 PLC PLC 4-49<br />
6-6 <strong>TNC</strong> <strong>360</strong> 1 List of Markers 8/95
Marker Function Set Reset Page<br />
M2560 BCD numerical values for PLC positioning, tool number, spindle PLC PLC 7-124<br />
to<br />
M2589<br />
orientation and Q parameters<br />
M2594 Inhibit editing of central tool file (L and R possible) PLC PLC –<br />
M2597 Tool number: output mode<br />
0 = binary 1 = BCD<br />
PLC PLC –<br />
M2600 Sequence of tool number or pocket number transfer<br />
(M2093 = 1)<br />
PLC PLC 4-214<br />
M2601 Return special tool to its original pocket in spite of variable<br />
pocket coding<br />
PLC PLC 4-214<br />
M2608 Inverse display of M03, M04, M05 and S analogue = 0 V PLC PLC 4-117<br />
M2609 Status display M08, M09 inverse PLC PLC 4-117<br />
M2610 Tool number shown inverted in status display PLC PLC –<br />
M2611 Acknowledgment of Q parameter transfer with FN19 PLC PLC –<br />
M2612 Suppress exchange of pocket number PLC PLC 4–200<br />
M2614 Suppress PLC functions (M/S/T/Q strobe) by the NC PLC PLC –<br />
M2615 Re-evaluate reference mark of the spindle PLC NC<br />
M2624 Limit switch X+ NC NC 4-17<br />
M2625 Limit switch X– NC NC 4-17<br />
M2626 Limit switch Y+ NC NC 4-17<br />
M2627 Limit switch Y– NC NC 4-17<br />
M2628 Limit switch Z+ NC NC 4-17<br />
M2629 Limit switch Z– NC NC 4-17<br />
M2630 Limit switch 4+ NC NC 4-17<br />
M2631 Limit switch 4– NC NC 4-17<br />
M2656 Spindle orientation from stop<br />
0 = Orientation with M03<br />
1 = Orientation with M04<br />
PLC PLC 4-93<br />
M2688 No monitoring X axis PLC PLC 4-68<br />
M2689 No monitoring Y axis PLC PLC 4-68<br />
M2690 No monitoring Z axis PLC PLC 4-68<br />
M2691 No monitoring axis 4 PLC PLC 4-68<br />
M2704 Activate PLC positioning X axis PLC NC 4-33<br />
M2705 Activate PLC positioning Y axis PLC NC 4-33<br />
M2706 Activate PLC positioning Z axis PLC NC 4-33<br />
M2707 Activate PLC positioning 4th axis PLC NC 4-33<br />
M2712 Activate PLC positioning for spindle orientation PLC NC 4-93<br />
M2713 Activate the transfer of the value from D528 to the<br />
Q Parameter defined in W516<br />
PLC NC 4-135<br />
M2714 Strobe marker write to tool file PLC NC –<br />
M2715 Strobe marker read from tool file PLC NC –<br />
M2716 Strobe marker for datum correction PLC NC 4-194<br />
M2719 Deactivate the <strong>TNC</strong> 355 mode PLC PLC 7-121<br />
4/96 <strong>TNC</strong> <strong>360</strong> 1 List of Markers 6-7
Marker Function Set Reset Page<br />
M2800<br />
to<br />
M2807<br />
Key code PLC PLC 7-124<br />
M2808 Strobe marker for key code PLC PLC 7-124<br />
M2809 Activate numerical value transfer from PLC to NC PLC PLC 7-124<br />
M2810 Data format of a numerical value in M2560 to M2576 7-124<br />
M2811 Data format of a numerical value in M2560 to M2576 7-124<br />
M2812 Data format of a numerical value in M2560 to M2576 7-124<br />
M2813 Activate the key from W516 PLC NC 4-139<br />
M2814 Activation of a gear range and spindle speed via PLC PLC NC 4-86<br />
M2815 Flashing PLC error message PLC PLC 4-122<br />
M2816 Select traverse range PLC PLC 4-16<br />
M2817 Select traverse range PLC PLC 4-16<br />
M2818 Q number (msb) PLC PLC 7-124<br />
M2819 Activate datum correction PLC NC 7-124<br />
M2824 Activation of the selected traverse range<br />
(M2816/M2817)<br />
PLC NC 4-16<br />
M2825 External EMERGENCY OFF via PLC PLC PLC –<br />
M2826 Suppress handwheel pulses PLC PLC 4-167<br />
M2827 Suppress EMERGENCY OFF, open the control loop, NC stop PLC PLC –<br />
M2829 NC block generation PLC NC 4–121<br />
M2832<br />
to<br />
M2839<br />
Key code of the pressed inhibited key NC NC 7-124<br />
M2855<br />
to<br />
M2923<br />
Inhibit keys PLC PLC 4-142<br />
M2924 Activate PLC error messages PLC NC; 4-122<br />
to<br />
M3023<br />
PLC<br />
M3168 Overflow during multiplication NC PLC 7-59<br />
M3169 Division by 0 NC PLC 7-60<br />
M3170 MODULO incorrectly executed NC PLC 7-61<br />
M3171 M3171 is set when transfer incorrectly executed 7-103<br />
- 118<br />
M3172 Reserved for errors that the PLC programmer would like to<br />
intercept<br />
–<br />
M3200<br />
to<br />
M3263<br />
Values from MP4310.3 to MP4310.6 7-125<br />
6-8 <strong>TNC</strong> <strong>360</strong> 1 List of Markers 8/95
2 List of Words<br />
Word<br />
Words Function Page<br />
W256 G code for S analogue 4-86<br />
W258 S code 4-91<br />
W260 Code for M function 4-138<br />
W262 Pocket number when MP7480 = 3<br />
Tool number when MP7480 = 1 or 2<br />
4-199<br />
W264 Tool number when MP7480 = 3 4-199<br />
W272 Operating mode<br />
0 = Programming and editing<br />
1 = <strong>Manual</strong> operation<br />
2 = Electronic handwheel<br />
3 = Positioning with manual entry<br />
4 = Program run/single block<br />
5 = Program run/full sequence<br />
6 = Test run<br />
7 = Pass over reference point<br />
4-141<br />
W274 Key code for the operated, inhibited key, Signal via M2182 4-141<br />
D276 Code number entered in MOD mode –<br />
D280 1st value FN19 –<br />
D284 2nd value FN19 –<br />
W320 Nominal spindle speed 4-80<br />
W322 Actual spindle speed 4-80<br />
D356 Programmed spindle speed (NC → PLC) 4-80<br />
D<strong>360</strong> Programmed feed rate (NC → PLC) –<br />
D388 Current feed rate (NC → PLC) –<br />
W392 Analog voltage of the analog input (0 to 5 V) –<br />
W492 % factor – spindle override (NC → PLC) 4-84<br />
W494 % factor – feed rate override (NC → PLC) 4-116<br />
W512 T code –<br />
W514 P code –<br />
W516 Word with multiple function<br />
Key code for simulation of <strong>TNC</strong> keys<br />
Activate with M2813<br />
Number of the Q parameter to be overwritten (Q100 to Q107 = 0 to 7)<br />
4-135<br />
W522 Monitoring functions suppressed if PLC<br />
input from MP4130 is activated<br />
4-68<br />
D528 Value to be transferred to the Q parameter<br />
Datum correction for X axis<br />
Position of X axis [1/1000 mm]<br />
D532 Datum correction for Y axis<br />
Position Y axis<br />
D536 Datum correction for Z axis<br />
Position Z axis<br />
D540 Datum correction for 4th axis<br />
Position 4th axis<br />
4-135<br />
4-194<br />
4-32<br />
4-194<br />
4-32<br />
4-194<br />
4-32<br />
4-194<br />
4-32<br />
W560 Feed rate X axis [mm/min] 4-33<br />
W562 Feed rate Y axis 4-33<br />
W564 Feed rate Z axis 4-33<br />
4/96 <strong>TNC</strong> <strong>360</strong> 2 List of Words 6-9
Words Function Page<br />
W566 Feed rate 4th axis 4-33<br />
W576 Follow up axis error compensation<br />
4-29<br />
to<br />
W582<br />
Input range: +32 767 to –32 768 [µm]<br />
W576<br />
W578<br />
W580<br />
W582<br />
Axis X<br />
Axis Y<br />
Axis Z<br />
Axis 4<br />
D592 Position spindle orientation (Strobe M2712) 4-93<br />
D596 Feed rate from PLC for feed rate limitation 4-116<br />
W600 Value for spindle power display 4-120<br />
W602 PLC text window 4-121<br />
W604 Reserved<br />
W608 Axis specific inhibition of the reference pulse –<br />
D756 Set spindle speed from the PLC; programmed spindle speed 4-86<br />
W764 % factor – spindle override (PLC → NC) 4-84<br />
W766 % factor – feed rate override (PLC → NC) 4-116<br />
D768<br />
to<br />
D956<br />
Input values from MP4210.0 to MP4210.47 7-15<br />
W960<br />
to<br />
W968<br />
Input values from MP4220.0 to MP4220.4 7-17<br />
W976<br />
to<br />
W988<br />
Input values from MP 4310.0 to MP4310.6 7-17<br />
W1008 S code for minimum rpm 4-91<br />
W1010 Number of tool magazine pockets –<br />
6-10 <strong>TNC</strong> <strong>360</strong> 2 List of Words 8/95
PLC Programming – Contents 7<br />
1 PLC-functions 7-5<br />
1.1 Select PLC-operation 7-5<br />
1.2 PLC – Main menu 7-6<br />
1.2.1 PLC-program editing 7-6<br />
1.2.2 Erase PLC-program 7-8<br />
1.2.3 Transfer program from EPROM 7-8<br />
1.2.4 Translate PLC program 7-8<br />
1.2.5 Utilization 7-8<br />
1.3 Test functions for the PLC-program 7-9<br />
1.6.1 TRACE-function 7-9<br />
1.3.2 TABLE function 7-10<br />
1.3.3 Transferring the PLC-program 7-10<br />
2 Program creation 7-12<br />
2.1 Program structure 7-12<br />
2.1.1 Command 7-12<br />
2.1.2 Module technique 7-13<br />
2.2 Address allocation 7-14<br />
2.2.1 Operand directory 7-14<br />
2.2.2 Addressing the word memory 7-14<br />
2.3 Data transfer PLC → NC and NC → PLC 7-15<br />
2.4 Timers and counters 7-17<br />
2.4.1 Timers 7-17<br />
2.4.2 Counters 7-20<br />
2.5 Edge evaluation of the PLC-inputs 7-21<br />
2.6 EPROM-creation 7-21<br />
2.7 Error-messages 7-24<br />
2.7.1 Syntax errors within a command line 7-24<br />
2.7.2 Syntax errors in the course of a program 7-24<br />
2.7.3 Run-time errors 7-25<br />
3 Commands 7-27<br />
3.1 Load and Assign Commands 7-27<br />
3.1.1 LOAD L 7-27<br />
3.1.2 LOAD NOT LN 7-29<br />
3.1.3 LOAD TWO'S-COMPLEMENT L– 7-31<br />
3.1.4 LOAD BYTE LB 7-32<br />
3.1.5 LOAD WORD LW 7-32<br />
3.1.6 LOAD DOUBLEWORD LD 7-32<br />
3.1.7 ASSIGN = 7-34<br />
3.1.8 ASSIGN BYTE B= 7-36<br />
3.1.9 ASSIGN WORD W= 7-36<br />
8/95 <strong>TNC</strong> <strong>360</strong> 7-1
3.1.10 ASSIGN DOUBLEWORD D= 7-36<br />
3.2 Set-commands 7-39<br />
3.2.1 SET S 7-39<br />
3.2.2 RESET R 7-40<br />
3.2.3 SET NOT SN 7-41<br />
3.2.4 RESET NOT RN 7-42<br />
3.3 Logic Gates 7-44<br />
3.3.1 AND A 7-44<br />
3.3.2 AND NOT AN 7-46<br />
3.3.3 OR O 7-48<br />
3.3.4 OR NOT ON 7-50<br />
3.3.5 EXCLUSIVE OR XO 7-52<br />
3.3.6 EXCLUSIVE OR NOT XON 7-54<br />
3.4 Arithmetic Commands 7-57<br />
3.4.1 ADDITION + 7-57<br />
3.4.2 SUBTRACTION – 7-58<br />
3.4.3 MULTIPLICATION x 7-59<br />
3.4.4 DIVISION / 7-60<br />
3.4.5 REMAINDER MOD 7-61<br />
3.5 Comparisons 7-63<br />
3.5.1 EQUAL TO == 7-63<br />
3.5.2 LESS THAN < 7-64<br />
3.5.3 GREATER THAN > 7-65<br />
3.5.4 LESS THAN OR EQUAL TO = 7-67<br />
3.5.6 UNEQUAL 7-68<br />
3.6 Parentheses with logical gating 7-70<br />
3.6.1 AND [ ] A[ ] 7-70<br />
3.6.2 AND NOT [ ] AN[ ] 7-70<br />
3.6.3 OR [ ] O[ ] 7-70<br />
3.6.4 OR NOT [ ] ON[ ] 7-70<br />
3.6.5 EXCLUSIVE OR [ ] XO[ ] 7-71<br />
3.6.6 EXCLUSIVE OR NOT [ ] XON[ ] 7-71<br />
3.7 Parentheses with arithmetic commands 7-74<br />
3.7.1 ADDITION [ ] + [ ] 7-74<br />
3.7.2 SUBTRACTION [ ] – [ ] 7-74<br />
3.7.3 MULTIPLICATION [ ] x [ ] 7-74<br />
3.7.4 DIVISION [ ] / [ ] 7-74<br />
3.7.5 REMAINDER [ ] MOD [ ] 7-75<br />
3.8 Parentheses with comparison commands 7-78<br />
3.8.1 EQUAL TO [ ] == [ ] 7-78<br />
3.8.2 LESS THAN [ ] < [ ] 7-78<br />
3.8.3 GREATER THAN [ ] > [ ] 7-78<br />
3.8.4 LESS THAN OR EQUAL TO [ ]
3.8.5 GREATER THAN OR EQUAL TOL [ ] >= [ ] 7-79<br />
3.8.6 NOT EQUAL TO [ ] [ ] 7-79<br />
3.9 Shift Commands 7-82<br />
3.9.1 SHIFT LEFT > 7-83<br />
3.10 Bit Commands 7-85<br />
3.10.1 BIT SET BS 7-85<br />
3.10.2 BIT RESET BC 7-86<br />
3.10.3 BIT TEST BT 7-87<br />
3.11 Stack Operations 7-89<br />
3.11.1 Load Data onto the Data Stack PS 7-89<br />
3.11.2 Acquire data from the data stack PL 7-90<br />
3.11.3 Load logic accumulator onto the data stack PSL 7-90<br />
3.11.4 Load word accumulator onto the data stack PSW 7-91<br />
3.11.5 Acquire logic accumulator from the data stack PLL 7-91<br />
3.11.6 Acquire word accumulator from the data stack PLW 7-91<br />
3.12 Jump Commands 7-94<br />
3.12.1 Unconditional Jump JP 7-94<br />
3.12.2 Jump if Logic Accumulator = 1 JPT 7-94<br />
3.12.3 Jump if Logic Accumulator = 0 JPF 7-94<br />
3.12.4 Call Module CM 7-96<br />
3.12.5 Call Module if Logic Accumulator = 1 CMT 7-96<br />
3.12.6 Call Module if Logic Accumulator = 0 CMF 7-96<br />
3.12.7 End of Module, Program End EM 7-98<br />
3.12.8 Jump Label LBL 7-98<br />
3.13 CASE statement 7-100<br />
3.13.1 Indexed call module CASE 7-100<br />
3.13.2 End indexed Call Module ENDC 7-100<br />
4 PLC-Modules 7-103<br />
4.1 Module 9000: Copy a marker-block 7-103<br />
4.2 Module 9001: Copy a Word-block 7-103<br />
4.3 Module 9010: Indexed reading of Byte<br />
Module 9011: Indexed reading of Word<br />
Module 9012: Indexed reading of Doubleword 7-104<br />
4.4 Module 9020: Indexed writing of Byte<br />
Module 9021: Indexed writing of Word<br />
Module 9022: Indexed writing of Doubleword 7-105<br />
4.5 Module 9032: Transfer machine parameter values to the PLC 7-106<br />
4.6 Module 9035: Transfer status information to the PLC 7-107<br />
4.7 Module 9036: Transfer PLC status information to the NC 7-108<br />
4.8 Module 9040: Transfer coordinate values to the PLC 7-109<br />
4.9 Data transfer by the PLC 7-109<br />
4.9.1 Module 9100: Assign data interface 7-110<br />
4.9.2 Module 9101: Enable data interface 7-110<br />
8/95 <strong>TNC</strong> <strong>360</strong> 7-3
4.9.3 Module 9102: Interface status 7-111<br />
4.9.4 Module 9105: Transmit binary data via data interface 7-112<br />
4.9.5 Module 9106: Receive binary data via data interface 7-113<br />
4.9.6 Module 9120: Position an auxiliary axis 7-114<br />
4.9.7 Module 9121: Stop an auxiliary axis 7-115<br />
4.9.8 Module 9122: Poll the status of an auxiliary axis 7-115<br />
4.9.9 Module 9123: Traverse the reference point of an auxiliary axis 7-116<br />
4.9.10 Module 9124: Override for PLC axis 7-117<br />
4.9.11 Module 9125: Run an NC block 7-118<br />
5 Compatibility with <strong>TNC</strong> 355 7-121<br />
5.1 PLC Program Conversion 7-122<br />
5.2 Compatibility Markers 7-123<br />
5.3 Incompatibility 7-125<br />
5.3.1 PLC Macros 7-125<br />
5.3.2 Non-implemented markers 7-128<br />
5.3.3 PLC Cycle Time 7-128<br />
7-4 <strong>TNC</strong> <strong>360</strong> 8/95
1 PLC Functions<br />
The integrated PLC in the <strong>TNC</strong> <strong>360</strong>/<strong>TNC</strong> 335 contains its own Text Editor for creating the list of<br />
instructions for the PLC program. Commands and comments are entered via the ASCII keyboard on<br />
the control panel (see Section "Programming and editing files").<br />
The functions TRACE and TABLE, as well as a Syntax check on entering the PLC commands and a<br />
logical test with the Function COMPILE can make it easier to find faults in the PLC program (see<br />
section "Test functions").<br />
5 ms are available for a PLC run. Up to 4000 logic commands, equivalent to 28 KB, can be<br />
processed within this period (executable memory). A new PLC run commences every 24 ms, i.e.<br />
every 24 ms the inputs are read and outputs are set.<br />
The following section shows how to start PLC operation.<br />
1.1 Select PLC operation<br />
PLC operation covers all functions for creating and testing the PLC programs.<br />
It can be selected as follows, using the code number 807 667.<br />
Select NC operating mode<br />
"Programming and editing"<br />
↓<br />
Press MOD<br />
key<br />
↓<br />
Enter code number 807 667<br />
↓<br />
ENT key<br />
↓<br />
PLC operation is selected<br />
(Main menu)<br />
PLC operation can be stopped by pressing the END key.<br />
8/95 <strong>TNC</strong> <strong>360</strong> 1 PLC Functions 7-5
1.2 PLC – Main menu<br />
Enter the code number 807 667 to call the following screen display (main menu):<br />
ERASE PLC PROGRAM<br />
TRANSFER PROGRAM FROM EPROM<br />
PLC EDITING MODE<br />
PLC PROGRAM TRACE MODE<br />
TABLES I/O/C/T/M<br />
TRANSLATE PLC PROGRAM<br />
UTILIZATION<br />
Select the required mode with the cursor keys ↑ and ↓ and activate by pressing ENT. To exit the<br />
menu and return to the original NC mode, press the END key again.<br />
1.2.1 PLC program editing<br />
In the operating mode PLC EDITING MODE an instruction list can be compiled or edited.<br />
After the ENT key is pressed, the editor identifies itself with<br />
"0 EM"<br />
"0" stands for program line 0 and "EM" for End of Module.<br />
When entering an instruction, "EM" automatically moves downward by one line.<br />
With this control it is possible to reassign the functions of <strong>TNC</strong> operating keys by entering the code<br />
number 807 667. The new key assignments are indicated on a special tactile membrane that is<br />
place over the <strong>TNC</strong> keyboard. The tactile membrane is included with this <strong>Technical</strong> <strong>Manual</strong>.<br />
The PLC editing mode can be exited by pressing the END key.<br />
A complete instruction list comprises:<br />
.Line numbers<br />
.Command from command store (see Section "Commands")<br />
.Operand type<br />
.Operand number<br />
.Comment<br />
The line number is automatically generated on entering a command.<br />
The command, operand type, operand number and the comment must be transferred with ENT. The<br />
cursor then jumps to the next positions within the instruction. The instruction is completed after the<br />
comments are entered. If no comment is to be entered, the position is simply concluded the ENT.<br />
Lines that are to contain only a comment should be started with the character ";" instead of a<br />
command. A comment can therefore cover several lines if each line commences with ";". A line<br />
contains a maximum of 26 characters for the comment and may include all numeral, letters and<br />
other characters on the keyboard.<br />
A "find function" makes is easier to find certain operands.<br />
7-6 <strong>TNC</strong> <strong>360</strong> 1 PLC Functions 8/95
If you wish to find a certain marker in the program listing, use the arrow keys to move the cursor to<br />
a marker and press GOTO. Enter the number of the desired marker. Then press ENT to find the<br />
marker.<br />
Key assignments for the PLC editor<br />
+ *<br />
[ <<br />
_ / ] = ><br />
EXT $<br />
GOTO<br />
$<br />
DEL<br />
MOD ENT<br />
A B C D E<br />
NO<br />
ENT<br />
F G H I<br />
X 7 8 9<br />
Y 4 5 6<br />
Z 1 2 3<br />
$ 0 · + /<br />
CE ;<br />
T U V W J K L M N<br />
O<br />
T U V W<br />
+ *<br />
[ <<br />
_ / ] = ><br />
EXT $<br />
GOTO<br />
$<br />
DEL<br />
END<br />
P Q R S<br />
MOD ENT<br />
A B C D E<br />
NO<br />
ENT<br />
F G H I<br />
J<br />
O<br />
X 7 8 9<br />
Y 4 5 6<br />
Z 1 2 3<br />
$ 0 · + /<br />
CE ;<br />
TE 335 A / TE 355 A<br />
8/95 <strong>TNC</strong> <strong>360</strong> 1 PLC Functions 7-7<br />
END<br />
K L M N<br />
P Q R S<br />
TE 335 B/TE 335 B
1.2.2 Erase PLC program<br />
In the operating mode ERASE PLC PROGRAM, a PLC program contained in the RAM can be deleted<br />
by pressing ENT.<br />
1.2.3 Transfer program from EPROM<br />
In the operating mode TRANSFER PROGRAM FROM EPROM, a program that is stored in the<br />
EPROM can be copied into the RAM by pressing ENT (see also MP 4010).<br />
1.2.4 Translate PLC program<br />
A PLC program created with the PLC editor and stored in RAM must first be compiled in the<br />
TRANSLATE PLC PROGRAM mode before it can be tested.<br />
Press ENT to start translation.<br />
If a PLC program is already in the RAM prior to <strong>TNC</strong> switch-on, it is automatically translated.<br />
Errors in the program can be found during the translation run (see Section "Program creation", "Error<br />
messages").<br />
1.2.5 Utilization<br />
In the UTILIZATION mode of operation the occupied PLC processing time and the vacant PLC<br />
memory are displayed.<br />
The vacant memory is derived from the total memory and the occupied memory.<br />
The vacant PLC memory is displayed in bytes or in percent of the maximum memory (28 KB).<br />
100 % processing time corresponds to 2.5 ms (from 24 ms PLC cycle time). The maximum possible<br />
processing time is determined by the manufacturer and equals 5 ms. The current processing time<br />
indicates the duration of the last PLC scan. If the current processing time exceeds 5 ms, the blinking<br />
error message<br />
will appear.<br />
ERROR IN PLC PROGRAM 53<br />
Please note that the processing time increases by 20% during active V.24 data transfer, and by 5%<br />
during handwheel operation. A PLC program should therefore be tested during active V.24 and<br />
handwheel operation in order to ensure that it will never exceed maximum processing time.<br />
7-8 <strong>TNC</strong> <strong>360</strong> 1 PLC Functions 8/95
1.3 Test functions for the PLC program<br />
1.3.1 TRACE function<br />
The TRACE function makes it possible to check the logical states of the markers, inputs, outputs,<br />
timers and counters.<br />
If this function is selected, the following menu appears:<br />
SELECT I/O/C/T/M<br />
DISPLAY TRACE BUFFER<br />
START TRACE<br />
END TRACE<br />
SELECT I/O/C/T/M<br />
Those inputs (I), outputs (O), counters (C), timers (T) or markers (M) whose logical states are to be<br />
checked can be entered into a table in the SELECT I/O/C/T/M function. A maximum of 16 markers,<br />
timers etc. can be simultaneously verified. Each position is interrogated via dialogue. Erroneous<br />
entries can be deleted by pressing DEL.<br />
The memory for the trace mode (TRACE BUFFER) has space for 1024 individual states per operand,<br />
i.e. 1024 PLC processes are recorded. In order to record the required time duration of the user, a<br />
TRIGGER condition can be entered for each operand:<br />
"1" = Recording when operand is logically "1"<br />
"0" = Recording when operand is logically "0"<br />
If the trigger position is verified with the NOENT key, it means that a trigger condition is not<br />
required. 512 states are recorded before and after a trigger event. The trigger event is regarded as<br />
fulfilled only when the conditions for all operands are simultaneously fulfilled with TRIGGER.<br />
Example: M2064 1<br />
M2065 0<br />
M2066 1<br />
I5<br />
Trigger event: M2064 logical "1"<br />
M2065 logical "0"<br />
M2066 logical "1"<br />
The state of I5 has no significance for the trigger event: it is, however, recorded.<br />
If no trigger condition is entered for the operands, the states of the operands are continually<br />
recorded and, after ending the trace mode, the last 1024 states are displayed.<br />
To exit the SELECT I/O/C/T/M function, press END.<br />
8/95 <strong>TNC</strong> <strong>360</strong> 1 PLC Functions 7-9
DISPLAY TRACE BUFFER<br />
With the DISPLAY TRACE BUFFER function the logic states 0 or 1 of the selected operands are<br />
graphically displayed in a diagram. With simultaneous triggering, the counter is reset to 0 (upper left<br />
in screen). By using the cursor keys ← and →, 512 logic states can be observed before and after the<br />
trigger event.<br />
This can be used to determine, for example, whether a marker, output etc. was set too late or too<br />
early. Taking the PLC processing time of 24 ms into account, a time displacement in ms can be<br />
detected.<br />
START TRACE<br />
With this mode, TRACE is started. Until the trigger event occurs, the display PC TR blinks in the<br />
status field. Then the display goes out.<br />
END TRACE<br />
If the trigger event does not occur, the trace can be aborted with the END TRACE function. In this<br />
case, the last 1024 states of the selected operands are stored.<br />
1.3.2 TABLE function<br />
In the TABLES I/O/C/T/M function the states of inputs (I), outputs (O), counters (C), timers (T) and<br />
markers (M) can be dynamically displayed on the screen. If the desired operand number is selected<br />
with the cursor keys, the operand can be changed with Set (S) or Reset (R), provided that it was not<br />
defined through the PLC program. The individual tables for inputs, outputs, etc. are selected with<br />
the corresponding letter.<br />
1.3.3 Transferring the PLC program PLC program<br />
Data transmission can be activated with the EXT key from the main menu.<br />
The following menu appears:<br />
READ-IN SELECTED PROGRAM<br />
OUTPUT ASCII<br />
OUTPUT ASCII UNFORMATTED<br />
OUTPUT ASCII WITH CROSS-REF<br />
BINARY OUTPUT<br />
PLC programs written on a computer can be transferred into the PLC RAM with the RS-232-C<br />
interface. To load a program, select READ IN SELECTED PROGRAM. With the OUTPUT ASCII<br />
function the PLC program can be transferred from the RAM to an external device. It can be<br />
transferred with the cross references of all its operands.<br />
It is also possible to transfer the program in unformatted or binary form by selecting the<br />
corresponding menu items (see Section "Program creation", "EPROM creation").<br />
7-10 <strong>TNC</strong> <strong>360</strong> 1 PLC Functions 8/95
✎<br />
8/95 <strong>TNC</strong> <strong>360</strong> 1 PLC Functions 7-11
2 Program Creation<br />
The PLC program can be created directly on the HEIDENHAIN contouring controls. For this, the PLC<br />
Editor must be called with the code number 807 667 (see Section "PLC functions").<br />
The PLC program can also be written in ASCII code on a PC and then transferred to the control.<br />
2.1 Program structure<br />
2.1.1 Command<br />
A command is the smallest unit in a PLC program. It consists of the<br />
operation portion and the Operand portion.<br />
A I 28 ;Comment<br />
Operation<br />
(A, AN...)<br />
Operand<br />
designation<br />
(I, O, M, T, C,<br />
B, W, D, K)<br />
Operand<br />
Operand<br />
address;<br />
constant value<br />
The operation describes the function which is to be performed. It explains what is done with the<br />
Operands.<br />
The Operand shows what is to be operated on. It consists of the Operand abbreviation and a<br />
parameter (Address). Register and memory contents can be gated, erased and loaded by using PLC<br />
commands.<br />
Both Bit and Word processing are possible. In Word processing it is possible to address memory<br />
contents with a length of 8 Bits (Byte), 16 Bits (Word) or 32 Bits (Doubleword) (see Section<br />
"Commands").<br />
7-12 <strong>TNC</strong> <strong>360</strong> 2 Program Creation 8/95
2.1.2 Module technique<br />
It is good practice to make the maintenance of the PLC programs easier by creating the program<br />
with the most transparent structure possible. This can be best achieved by dividing the PLC program<br />
into individual Modules (structured programming).<br />
Only the most important PLC functions should be programmed in the main routine.<br />
Individual PLC functions such as spindle orientation and key simulation are programmed in their own<br />
Modules.<br />
0 L M2719<br />
1 SN M2719 ;Activate the strobes for Word processing<br />
2 L M2497<br />
3 SN M2497 ;Activate the edge evaluation<br />
4 L M2496<br />
5 SN M2496 ;Activate transfer of decoded M codes<br />
;(M1900 to M1999)<br />
. . .<br />
. . .<br />
. . .<br />
20 L M1919 ;M Function M19<br />
21 A M2045 ;Change signal for M function<br />
22 AN M12 ;Spindle orientation already active?<br />
23 CMT 180 ;Spindle orientation<br />
24 LM 2182 ;Disabled key operated?<br />
25 CMT 31 ;Yes, then call key simulation<br />
. . .<br />
. . .<br />
. . .<br />
150 EM ;End Main program<br />
151 LBL 31 ;Key simulation<br />
. . .<br />
. . .<br />
. . .<br />
200 EM<br />
201 LBL 180 ;Spindle orientation<br />
. . .<br />
. . .<br />
. . .<br />
259 EM<br />
. . .<br />
. . .<br />
. . .<br />
Error conditions in the machine should be interrogated in the PLC program and a plain language error<br />
message should be displayed on the VDU screen. See Chapter "Machine integration", Section<br />
"Display and operation" and Chapter "PLC programming", Section "Modules".<br />
8/95 <strong>TNC</strong> <strong>360</strong> 2 Program Creation 7-13
2.2 Address allocation<br />
2.2.1 Operand directory<br />
Operand Abbreviation Address range<br />
Marker M (Marker) 0 to 3263<br />
Input I (Input) I0 to I31; I128 to I151;<br />
I64 to I126 (PL 400) or up to I127 (PL 410)<br />
Output O (Output) O0 to O30;<br />
O32 to O62(PL 400/PL 410)<br />
Counter C (Counter) Set counter : C0 to C31<br />
Counter contents: C48 to C79<br />
Release count pulse: C96 to C127<br />
Timer T (Timer) Timer start: T0 to T47<br />
Timer running: T48 to T95<br />
Byte B (Byte) 0 to 1023 (8 Bit)<br />
Word W (Word) 0 to 1022 (16 Bit)<br />
Doubleword D (Doubleword) 0 to 1020 (32 Bit)<br />
Constant K - 2 147 483 647 to + 2 147 483 647<br />
2.2.2 Addressing the word memory<br />
The memory for the Operands B (8 Bit), W (16 Bit), D (32 Bit) is only 8 Bit wide. Since the Operands<br />
can be 8,16 or 32 Bit wide, an overlap of the memory areas will occur, which must be taken into<br />
account in addressing the memory.<br />
8 bit<br />
D0<br />
D4<br />
.<br />
W0<br />
W2<br />
W4<br />
D1020 W1020<br />
.<br />
.<br />
W1022<br />
B0<br />
B1<br />
B2<br />
B3<br />
B4<br />
B5<br />
.<br />
B1020<br />
B1021<br />
B1022<br />
B1023<br />
7<br />
7-14 <strong>TNC</strong> <strong>360</strong> 2 Program Creation 8/95<br />
0<br />
➞ High-Byte for W; Highest-Byte for D<br />
➞ Low-Byte for W<br />
➞ Lowest-Byte for D<br />
In Byte addressing every address from 0 to 1023 is accessible. In Word addressing, every second<br />
address from 0 to 1022 is accessible and in Doubleword addressing every fourth from 0 to 1020.<br />
The address parameter gives the High Byte for a Word Address (W) , or the Highest Byte for a<br />
Doubleword address (D).<br />
Markers M1000 to M2000 and Bytes B0 to B127 are non-volatile, i.e. the contents of this memory<br />
are maintained when the supply voltage is switched off.
After entry of the code number 531 210, the markers M1000 to M2000 and Bytes B0 to B127 and<br />
the machine parameters are erased.<br />
B0 to B127 Freely available, not deleted with RESET<br />
B128 to B255 Freely available, deleted with RESET<br />
B256 to B511 Data transfer NC → PLC<br />
B512 to B767 Data transfer PLC → NC<br />
B768 to B1023 Machine parameters → PLC<br />
2.3 Data transfer PLC → NC and NC → PLC<br />
PLC → NC<br />
The Q parameters Q100 to Q107 transfer numbers from the PLC to the part program. This means<br />
that Q100 to Q107 can be overwritten by the PLC. The numerical value is registered in Doubleword<br />
D528 and the Q parameter numbers 0 to 7 are defined in Word W516. The numbers 0 to 7<br />
correspond to parameters Q100 to Q107. The transfer is activated with the strobe marker M2713.<br />
The Q parameter values are transferred with the next M/S/T strobe.<br />
Marker Function Set Reset<br />
M2713 Activate the transfer of the value from D528<br />
to the Q Parameter defined in W516<br />
Address Function<br />
PLC NC<br />
D 528 Doubleword with multiple function, here data for transfer from the<br />
PLC to the NC<br />
W516 Q Parameter No. for numerical transfer from PLC to NC<br />
(0 – 7 = Q100 – Q107)<br />
NC → PLC<br />
Sixty different machine parameters are reserved for data transfer in the PLC. These machine<br />
parameters are kept in the Doublewords D768 to D956 and the Words W960 to W968 and W976 to<br />
W988. For example, PLC positioning, datum shifts, feed rates for PLC positioning or coding for the<br />
release of certain PLC functions can be filed in these machine parameters. These numerical values<br />
are evaluated in the PLC program.<br />
Address Function<br />
D768 Value from MP4210.0<br />
D772 Value from MP4210.1<br />
D776 Value from MP4210.2<br />
D780 Value from MP4210.3<br />
D784 Value from MP4210.4<br />
D788 Value from MP4210.5<br />
8/95 <strong>TNC</strong> <strong>360</strong> 2 Program Creation 7-15
Address Function<br />
D792 Value from MP4210.6<br />
D796 Value from MP4210.7<br />
D800 Value from MP4210.8<br />
D804 Value from MP4210.9<br />
D808 Value from MP4210.10<br />
D812 Value from MP4210.11<br />
D816 Value from MP4210.12<br />
D820 Value from MP4210.13<br />
D824 Value from MP4210.14<br />
D828 Value from MP4210.15<br />
D832 Value from MP4210.16<br />
D836 Value from MP4210.17<br />
D840 Value from MP4210.18<br />
D844 Value from MP4210.19<br />
D848 Value from MP4210.20<br />
D852 Value from MP4210.21<br />
D856 Value from MP4210.22<br />
D860 Value from MP4210.23<br />
D864 Value from MP4210.24<br />
D868 Value from MP4210.25<br />
D872 Value from MP4210.26<br />
D876 Value from MP4210.27<br />
D880 Value from MP4210.28<br />
D884 Value from MP4210.29<br />
D888 Value from MP4210.30<br />
D892 Value from MP4210.31<br />
D896 Value from MP4210.32<br />
D900 Value from MP4210.33<br />
D904 Value from MP4210.34<br />
D908 Value from MP4210.35<br />
D912 Value from MP4210.36<br />
D916 Value from MP4210.37<br />
D920 Value from MP4210.38<br />
D924 Value from MP4210.39<br />
D928 Value from MP4210.40<br />
D932 Value from MP4210.41<br />
D936 Value from MP4210.42<br />
D940 Value from MP4210.43<br />
D944 Value from MP4210.44<br />
D948 Value from MP4210.45<br />
D952 Value from MP4210.46<br />
D956 Value from MP4210.47<br />
7-16 <strong>TNC</strong> <strong>360</strong> 2 Program Creation 8/95
Address Function<br />
W960 Value from MP 4220.0<br />
W962 Value from MP 4220.1<br />
W964 Value from MP 4220.2<br />
W966 Value from MP 4220.3<br />
W968 Value from MP 4220.4<br />
W976 Value from MP 4310.0<br />
W978 Value from MP 4310.1<br />
W980 Value from MP 4310.2<br />
W982 Value from MP 4310.3<br />
W984 Value from MP 4310.4<br />
W986 Value from MP 4310.5<br />
W988 Value from MP 4310.6<br />
MP4210.0 Set a number in the PLC<br />
to MP4210.47 Input range: –99 999.999 to +99 999.999<br />
MP 4220 Setting a number in the PLC: In the Word range W960 to W968<br />
to MP4220.4 Input range: 80 to 30 000<br />
MP4230.0 Set a number in the PLC via module 9032<br />
to MP4230..31 Input range: –30 000 000 to +30 000 000<br />
to<br />
MP4239.0<br />
to MP4239.31<br />
MP4310.0 Set a number in the PLC: in the Word range W976 to W988<br />
to MP4310.6 Input range: 0 to 65 535<br />
2.4 Timers and counters<br />
2.4.1 Timers<br />
48 timers are available in the PLC. These 48 timers are controlled by special markers with the<br />
abbreviation symbol T. The time period for the timer is defined in the machine parameter MP4110.X.<br />
The time unit corresponds to the PLC cycle time.<br />
The timers are started by setting the markers T0 to T47 which also sets the timers to the value from<br />
MP4110.X. This activation may only be performed for a single PLC run, as otherwise the timers will<br />
be restarted by every succeeding run.<br />
The markers T48 to T95 (timer running) will remain set for the period defined in the machine<br />
parameters.<br />
8/95 <strong>TNC</strong> <strong>360</strong> 2 Program Creation 7-17
Example:<br />
Start of Timer 1<br />
Period in MP4110.1 = 9 (PLC cycles)<br />
T1<br />
T49<br />
7-18 <strong>TNC</strong> <strong>360</strong> 2 Program Creation 8/95
Timer start Timer running Machine parameter<br />
T0 T48 MP4110.0<br />
T1 T49 MP4110.1<br />
T2 T50 MP4110.2<br />
T3 T51 MP4110.3<br />
T4 T52 MP4110.4<br />
T5 T53 MP4110.5<br />
T6 T54 MP4110.6<br />
T7 T55 MP4110.7<br />
T8 T56 MP4110.8<br />
T9 T57 MP4110.9<br />
T10 T58 MP4110.10<br />
T11 T59 MP4110.11<br />
T12 T60 MP4110.12<br />
T13 T61 MP4110.13<br />
T14 T62 MP4110.14<br />
T15 T63 MP4110.15<br />
T16 T64 MP4110.16<br />
T17 T65 MP4110.17<br />
T18 T66 MP4110.18<br />
T19 T67 MP4110.19<br />
T20 T68 MP4110.20<br />
T21 T69 MP4110.21<br />
T22 T70 MP4110.22<br />
T23 T71 MP4110.23<br />
T24 T72 MP4110.24<br />
T25 T73 MP4110.25<br />
T26 T74 MP4110.26<br />
T27 T75 MP4110.27<br />
T28 T76 MP4110.28<br />
T29 T77 MP4110.29<br />
T30 T78 MP4110.30<br />
T31 T79 MP4110.31<br />
T32 T80 MP4110.32<br />
T33 T81 MP4110.33<br />
T34 T82 MP4110.34<br />
T35 T83 MP4110.35<br />
T36 T84 MP4110.36<br />
T37 T85 MP4110.37<br />
T38 T86 MP4110.38<br />
T39 T87 MP4110.39<br />
T40 T88 MP4110.40<br />
T41 T89 MP4110.41<br />
T42 T90 MP4110.42<br />
T43 T91 MP4110.43<br />
T44 T92 MP4110.44<br />
T45 T93 MP4110.45<br />
T46 T94 MP4110.46<br />
T47 T95 MP4110.47<br />
MP4110.x Time for timers<br />
Input range: 0 to 65 535 [PLC cycles] (= 24 ms on <strong>TNC</strong> <strong>360</strong>/<strong>TNC</strong> 335)<br />
8/95 <strong>TNC</strong> <strong>360</strong> 2 Program Creation 7-19
2.4.2 Counters<br />
32 counters are available in the PLC. Each of these 32 counters is controlled by special markers with<br />
the abbreviation symbol C. After setting a marker from the range C0 to C31 the counter is loaded<br />
with the value from machine parameter MP4120.X. The marker range C48 to C79 indicates whether<br />
the count has been completed or not. The marker range C96 to C127 is used to start the counter<br />
(counter release pulse).<br />
Example: Logic diagram for counter C1<br />
Contents of machine parameter MP4120.1 = 10 (PLC cycles)<br />
C1<br />
C49<br />
C97<br />
C0 C48 C96 MP4120.0<br />
C1 C49 C97 MP4120.1<br />
C2 C50 C98 MP4120.2<br />
C3 C51 C99 MP4120.3<br />
C4 C52 C100 MP4120.4<br />
C5 C53 C101 MP4120.5<br />
C6 C54 C102 MP4120.6<br />
C7 C55 C103 MP4120.7<br />
C8 C56 C104 MP4120.8<br />
C9 C57 C105 MP4120.9<br />
C10 C58 C106 MP4120.10<br />
C11 C59 C107 MP4120.11<br />
C12 C60 C108 MP4120.12<br />
C13 C61 C109 MP4120.13<br />
C14 C62 C110 MP4120.14<br />
C15 C63 C111 MP4120.15<br />
C16 C64 C112 MP4120.16<br />
C17 C65 C113 MP4120.17<br />
C18 C66 C114 MP4120.18<br />
C19 C67 C115 MP4120.19<br />
C20 C68 C116 MP4120.20<br />
C21 C69 C117 MP4120.21<br />
C22 C70 C118 MP4120.22<br />
C23 C71 C119 MP4120.23<br />
C24 C72 C120 MP4120.24<br />
C25 C73 C121 MP4120.25<br />
C26 C74 C122 MP4120.26<br />
C27 C75 C123 MP4120.27<br />
C28 C76 C124 MP4120.28<br />
C29 C77 C125 MP4120.29<br />
C30 C78 C126 MP4120.30<br />
C31 C79 C127 MP4120.31<br />
MP4120.x Pre-set value for counters C0 to C31<br />
7-20 <strong>TNC</strong> <strong>360</strong> 2 Program Creation 8/95
Input range: 0 to 65 535 [PLC cycles]<br />
2.5 Edge evaluation of the PLC inputs<br />
The edge evaluation for the PLC inputs can be activated by marker M2497. Edge evaluation means<br />
that if the signal at the PLC input changes, a certain marker will be set for the duration of a PLC run.<br />
If marker M2497 is set, the following markers will be set if the signals change at the PLC inputs.<br />
Marker for rising edges at the PLC inputs:<br />
Marker PLC inputs<br />
M1500 to M1531 I0 to I31<br />
M1564 to M1626 I64 to I126 (PL 400) or I127 (PL410)<br />
M1628 to M1651 I128 to I151<br />
Marker for falling edges at the PLC inputs:<br />
Marker PLC inputs<br />
M1700 to M1731 I0 to I31<br />
M1764 to M1826 I64 to I126 (PL 400) or I127 (PL410)<br />
M1828 to M1851 I128 to I151<br />
Marker Function Set Reset<br />
M2497 Activate the edge evaluation for PLC inputs<br />
Rising-edge marker M1500 to M1651<br />
Falling-edge marker M1700 to M1851<br />
PLC PLC<br />
2.6 EPROM creation<br />
Machine parameter MP4010 selects whether the PLC program is run from the RAM area of the<br />
control or the EPROM area.<br />
During the creation and test of the PLC program the control should operate from the RAM area.<br />
HEIDENHAIN recommends that an EPROM is created for the PLC program before delivering the<br />
machine to the customer (see also Chapter "Introduction").<br />
MP4010 PLC program from RAM or from EPROM<br />
Input: 0 or 1<br />
0 = EPROM operation<br />
1 = RAM operation<br />
A PC and the MEGA PROMMER Software (Version 2.12.or later) are necessary for programming<br />
the PLC EPROMS.<br />
The PLC files from the RAM area in the control can be transferred to the PC via the data interface<br />
(see Chapter "Data interface").The output is initiated from the control in binary code (see Section<br />
"PLC functions").<br />
8/95 <strong>TNC</strong> <strong>360</strong> 2 Program Creation 7-21
The PLC files are then transferred to the PC in the Motorola EXORMAX S2 Record (MOD) format.<br />
With the MEGA PROMMER these data can be read in the MOD format and the EPROM<br />
programmed.<br />
Please contact the HEIDENHAIN customer service if you have further questions.<br />
7-22 <strong>TNC</strong> <strong>360</strong> 2 Program Creation 8/95
✎<br />
8/95 <strong>TNC</strong> <strong>360</strong> 2 Program Creation 7-23
2.7 Error messages<br />
Error messages aid the programmer in creating the instruction list and testing of the program.<br />
2.7.1 Syntax errors within a command line<br />
These errors may occur when editing a line or on reading it in via the interface.<br />
0 No valid command.<br />
1 Operand for jump is not a Label. (Can only happen when reading in via the interface.<br />
For a Jump command a type abbreviation is available for the Operand).<br />
2 Invalid Operand type (the command cannot be combined with this Operand).<br />
4 Operand outside the permissible range (the stated number is too high, or odd address for<br />
Word or Doubleword).<br />
5 No Limiter after command. (Can only happen when reading in via the interface. The comment<br />
after the command was not designated by ";" or "*").<br />
6 Line end not found (Can only happen when reading in via the interface. Comment too long).<br />
2.7.2 Syntax errors in the course of a program<br />
These errors are recognized during the compilation process. The Editor points to the line where the<br />
error was found. If the PLC program is compiled on switching-on (for example, because the control<br />
was switched off immediately after editing the PLC program) then a flashing message "ERROR IN<br />
PLC PROGRAM" will be displayed. Remedy: switch off and on again, and call the PLC Editor with<br />
the code number. The Editor indicates the position of the error.<br />
7 Called Label has not been defined.<br />
8 No End program condition found (the program does not contain an EM instruction, or it<br />
contains a JP instruction without a following LBL instruction).<br />
9 Program is too long (RAM overflow) (insufficient memory for the program code which is to be<br />
generated).<br />
10 Assign within parentheses (an =, S, SN, R, RN, or PS instruction or a Jump command has<br />
been programmed, although arithmetic parentheses are open).<br />
11 Excessive nesting of parentheses (more than 16 parentheses successively opened).<br />
12 Jump within a gating sequence (an unconditional jump has been programmed, although the<br />
gating sequence was not closed with an Assign ).<br />
13 "Close parentheses" without "open parentheses" (a "close parentheses" command was<br />
programmed, although no parentheses were open).<br />
14 Label within parentheses (a LBL instruction has been programmed, although parentheses are<br />
open).<br />
15 Label within a gating sequence (a LBL instruction has been programmed, although the<br />
previous gating was not closed with an Assign).<br />
16 Jump within parentheses (a jump instruction has been programmed, although parentheses<br />
are open).<br />
17 Parentheses open at end of block (an EM instruction has been programmed, although<br />
parentheses are open).<br />
18 Label defined twice.<br />
19 Word Assign missing (a Logic instruction has been programmed, although the previous Word<br />
gating was not closed with an Assign).<br />
7-24 <strong>TNC</strong> <strong>360</strong> 2 Program Creation 8/95
20 Logic Assign missing (a Word instruction has been programmed, although the previous Logic<br />
gating was not closed with an Assign)<br />
21 Word Accumulator not loaded (a Word Assign or gating has been programmed, although the<br />
Word Accumulator does not contain a definite value).<br />
22 Logic Accumulator not loaded (a Logic Assign has been programmed, although the Logic<br />
Accumulator does not contain a definite value).<br />
23 Accumulators not loaded on "open parentheses" (an A[, AN[, O[, ON[, or XON[ command has<br />
been programmed, although neither the Word nor the Logic Accumulator has been gated or<br />
loaded).<br />
24 Incorrect type of the parentheses result (a different type has been calculated in the<br />
parentheses from that which was defined at the "open parentheses" command, i.e. Logic<br />
instead of Word or vice versa).<br />
25 Conditional jump with incorrect Logic Accumulator (a conditional jump has been programmed,<br />
although the Logic Accumulator does not contain a definite value).<br />
26 Empty CASE instruction.<br />
27 "END CASE" missing.<br />
2.7.3 Run time errors<br />
These errors only appear when the PLC program is executed. A flashing error message "ERROR IN<br />
PLC PROGRAM NR" is displayed. After switching the control off and on again, the Editor can be<br />
accessed by using the code number. The message ”INPUT ERROR” is then displayed and the<br />
Editor stands at the erroneous line or, if the program run time has been exceeded, at the jump<br />
instruction which was last processed.<br />
50 Excessive nesting (too many Modules nested inside one another).<br />
51 STACK underflow (an attempt to acquire data from the STACK, although it was empty).<br />
52 STACK overflow (an attempt to load too much data onto the STACK).<br />
53 Time out (the permissible program run time has been exceeded by more than twice. Check<br />
the subprogram structure).<br />
54 CASE Arguments are larger than the number of entries in the table.<br />
8/95 <strong>TNC</strong> <strong>360</strong> 2 Program Creation 7-25
✎<br />
7-26 <strong>TNC</strong> <strong>360</strong> 2 Program Creation 8/95
3 Commands<br />
3.1 Load and Assign Commands<br />
3.1.1 LOAD (L) L<br />
Abbreviation for the PLC Editor: L (LOAD)<br />
Logic Byte/Word Double Constant<br />
Execution time [µs] 1.2 2.0/1.6 1.6 1.2<br />
Number of bytes 4 6 4 6<br />
Logic execution with LOAD command<br />
Operands: M, I, O, T, C<br />
Operation:<br />
The addressed operand is copied into the Accumulator. A load command is always used at the start<br />
of a logic chain, in order to enable subsequent gating commands. The same function is achieved<br />
when the gating commands A, O, XO are used at the start of a logic chain, however this should<br />
only be used when compatibility with the <strong>TNC</strong> 355 is required.<br />
Example:<br />
Input I4 and Input I5 is to be gated with AND and the result assigned to Output O2. Thus the logic<br />
state of Input I4 is loaded into the Accumulator to enable subsequent gating commands.<br />
Initial state: Input I4 = 1<br />
Input I5 = 0<br />
Output O2 = ?<br />
Line Instruction Accumulator Contents Operand Contents<br />
Bit 31 . . . 7 0<br />
... x x x x x x X x x x x x x x<br />
1 L I4 ... x x x x x x 1 x x x x x x x 1<br />
2 A I5 ... x x x x x x 0 x x x x x x x 0<br />
3 = O2 ... x x x x x x 0 x x x x x x x 0<br />
Line 1: The operand contents are loaded into the Logic Accumulator.<br />
Line 2: The contents of the Logic Accumulator and Input I5 are gated with AND.<br />
Line 3: The gating result is assigned to output O2.<br />
8/95 <strong>TNC</strong> <strong>360</strong> 3 Commands 7-27
Word execution with the LOAD command<br />
Operands: B, W, D, K<br />
Operation:<br />
The addressed Operand (B, W, D) or a Constant (K) is copied into the Word Accumulator. In addition,<br />
the Accumulator is filled, if necessary, according to the sign bit. In contrast to logic execution the<br />
start of a word gating chain must always be with the L command. It is not possible to use a gating<br />
command.<br />
Example:<br />
A Constant and Byte B5 is to be gated with AND and the result assigned to Byte B8.<br />
Initial state: Byte B5 = 2A (hex)<br />
Constant: 54 = 36 (hex)<br />
Byte B8 = ?<br />
Line Instruction Accumulator Contents Operand Contents<br />
Bit 31 . . . 15 7 0 7 0<br />
... x x x x x x x x x x x x x x x x x x<br />
1 L K+54 ... 0 0 0 0 0 0 0 0 0 0 0 0 1 1 0 1 1 0<br />
2 A B5 ... 0 0 0 0 0 0 0 0 0 0 0 0 1 0 0 0 1 0 00101010<br />
3 = B8 ... 0 0 0 0 0 0 0 0 0 0 0 0 1 0 0 0 1 0 00100010<br />
Line 1: The Constant is loaded into the Word Accumulator.<br />
Line 2: The contents of the Word Accumulator and Byte B5 are gated with AND.<br />
Line 3: The gating result is assigned to Byte B8.<br />
7-28 <strong>TNC</strong> <strong>360</strong> 3 Commands 8/95
3.1.2 LOAD NOT (LN) LN<br />
Abbreviation for the PLC Editor: LN (LOAD NOT)<br />
Logic Byte/Word Double Constant<br />
Execution time [µs] 1.6 2.4/2.0 2.2 1.8<br />
Number of bytes 6 8 6 8<br />
Logic execution with the LOAD NOT command<br />
Operands: M, I, O, T, C<br />
Operation:<br />
The complement of the addressed operand is loaded into the Logic Accumulator. A load command is<br />
always used at the start of a logic chain in order to enable subsequent gating commands. The same<br />
function is achieved when the gating commands AN, ON, XON are used at the start of a logic chain,<br />
however this should only be used when compatibility with <strong>TNC</strong> 355 is required.<br />
Example:<br />
The inverted logic state of Input I4 and Input I5 is to be gated with AND and the result assigned to<br />
Output O2. Thus the inverted logic state of Input I4 is loaded into the Accumulator to enable<br />
subsequent gating commands.<br />
Initial state: Input I4 = 0<br />
Input I5 = 1<br />
Output O2 = ?<br />
Line Instruction Accumulator Contents Operand Contents<br />
Bit 31 . . . 7 0<br />
... x x x x x x X x x x x x x x<br />
1 LN I4 ... x x x x x x 1 x x x x x x x 0<br />
2 A I5 ... x x x x x x 1 x x x x x x x 1<br />
3 = O2 ... x x x x x x 1 x x x x x x x 1<br />
Line 1: The inverted operand contents are loaded into the Logic Accumulator.<br />
Line 2: The contents of the Logic Accumulator and Input I5 are gated with AND.<br />
Line 3: The gating result is assigned to Output O2.<br />
8/95 <strong>TNC</strong> <strong>360</strong> 3 Commands 7-29
Word execution with the LOAD NOT command<br />
Operands: B, W, D, K<br />
Operation:<br />
The complement of the contents of the addressed Operand (B, W, D) or Constant (K) is loaded into<br />
the Word Accumulator. In addition, the Accumulator is filled, if necessary, according to the sign bit.<br />
In contrast to logic execution a word gating chain must always start with a load command. It is not<br />
possible to use a gating command.<br />
Example:<br />
The complement of Byte B6 and Byte B5 is to be gated with AND and the result assigned to Byte<br />
B8.<br />
Initial state: Byte B5 = 2A (hex)<br />
Byte B6 = B6 (hex)<br />
Byte B8 = ?<br />
Line Instruction Accumulator Contents Operand Contents<br />
Bit 31 . . . 15 7 0 7 0<br />
... x x x x x x x x x x x x x x x x x x<br />
1 LN B6 ... 0 0 0 0 0 0 0 0 0 0 0 1 0 0 1 0 0 1 10110110<br />
2 A B5 ... 0 0 0 0 0 0 0 0 0 0 0 0 0 0 1 0 0 0 00101010<br />
3 = B8 ... 0 0 0 0 0 0 0 0 0 0 0 0 0 0 1 0 0 0 00001000<br />
Line 1: The inverted contents of Byte B6 are loaded into the Word Accumulator.<br />
Line 2: The contents of the Word Accumulator and Byte B5 are gated with AND.<br />
Line 3: The gating result is assigned to Byte B8.<br />
7-30 <strong>TNC</strong> <strong>360</strong> 3 Commands 8/95
3.1.3 LOAD TWO'S COMPLEMENT (L–) L–<br />
Abbreviation for the PLC Editor: L– (LOAD MINUS)<br />
Logic Byte/Word Double Constant<br />
Execution time [µs] ---- 2.4/2.0 2.2 1.8<br />
Number of bytes ---- 8 6 8<br />
Operands: B, W, D, K<br />
Operation:<br />
The contents of the addressed Operand (B, W, D) or a Constant (K) are loaded into the Word<br />
Accumulator as a two's complement. In addition, the Accumulator is filled, if necessary, according to<br />
the sign bit. The two's complement allows negative numbers to be stored. i.e. a number loaded with<br />
the L– command appears in the Accumulator with an inverted sign.<br />
This command may only be used with Word execution.<br />
Example:<br />
The contents of Byte B5 is to be negated, added to Byte B6 and the result assigned to Byte B8.<br />
Initial state: Byte B5 = 15 (dec)<br />
Byte B6 = 20 (dec)<br />
Byte B8 = ?<br />
Line Instruction Accumulator Contents Operand Contents<br />
Bit 31 . . . 15 7 0 7 0<br />
... x x x x x x x x x x x x x x x x x x<br />
1 L– B5 ... 1 1 1 1 1 1 1 1 1 1 1 1 1 1 0 0 0 1 (–15) (+15) 00001111<br />
2 + B6 ... 0 0 0 0 0 0 0 0 0 0 0 0 0 0 0 1 0 1 (+ 5) (+20) 00010100<br />
3 = B8 ... 0 0 0 0 0 0 0 0 0 0 0 0 0 0 0 1 0 1 (+ 5) (+5) 00000101<br />
To aid understanding of this example, the contents of the Accumulator and operands are shown as<br />
decimal values in parentheses.<br />
Line 1: The contents of Byte B5 are loaded into the Accumulator and the sign of the value is<br />
inverted.<br />
Line 2: The contents of the Word Accumulator and Byte B6 are added.<br />
Line 3: The result is assigned to Byte B8.<br />
8/95 <strong>TNC</strong> <strong>360</strong> 3 Commands 7-31
3.1.4 LOAD BYTE (LB) LB<br />
Abbreviation for the PLC Editor: LB (LOAD BYTE)<br />
Execution time [µs] 30.0<br />
Number of bytes 18<br />
Operands: M, I, O, T, C<br />
Operation:<br />
With the command LB, 8 Markers, Inputs, Outputs, Timers or Counters with ascending numbering<br />
are loaded into the Word Accumulator. Each operand occupies 1 bit in the Accumulator. The<br />
designated operand address occupies the LSB in the Accumulator, the designated address + 1 the<br />
LSB + 1 and so on. In this way, the last affected operand occupies the MSB!<br />
If necessary, the Accumulator is filled according to the sign bit.<br />
3.1.5 LOAD WORD (LW) LW<br />
Abbreviation for the PLC Editor: LW (LOAD WORD)<br />
Execution time [µs] 57.2<br />
Number of bytes 18<br />
Operands: M, I, O, T, C<br />
Operation:<br />
With the command LW, 16 Markers, Inputs, Outputs, Timers or Counters with ascending numbering<br />
are loaded into the Word Accumulator. Each operand occupies 1 bit in the Accumulator. The<br />
designated operand address occupies the LSB in the Accumulator, the designated address + 1 the<br />
LSB + 1 and so on. In this way, the last affected operand occupies the MSB!<br />
If necessary, the Accumulator is filled according to the sign bit.<br />
3.1.6 LOAD DOUBLEWORD (LD) LD<br />
Abbreviation for the PLC Editor: LD (LOAD DOUBLE WORD)<br />
Execution time [µs] 117.2<br />
Number of bytes 16<br />
Operands: M, I, O, T, C<br />
Operation:<br />
With the command LD, 32 Markers, Inputs, Outputs, Timers or Counters with ascending numbering<br />
are loaded into the Word Accumulator. Each operand occupies 1 bit in the Accumulator. The<br />
designated operand address occupies the LSB in the Accumulator, the designated address + 1 the<br />
LSB + 1 and so on. In this way, the last affected operand occupies the MSB!<br />
If necessary, the Accumulator is filled according to the sign bit.<br />
7-32 <strong>TNC</strong> <strong>360</strong> 3 Commands 8/95
Example for the Commands LB, LW and LD:<br />
Via the Inputs I3 to I10, a binary coded value is to be read in and assigned to Byte B8 for further use.<br />
Initial state: Input I3 = 1 Input I7 = 0<br />
Input I4 = 1 Input I8 = 1<br />
Input I5 = 1 Input I9 = 1<br />
Input I6 = 0 Input I10 = 0<br />
Line Instruction Accumulator Contents Operand Contents<br />
Bit 31 . . . 15 7 0 I10 I3<br />
... x x x x x x x x x x x x x x x x x x<br />
1 LB I3 ... 0 0 0 0 0 0 0 0 0 0 0 1 1 0 0 1 1 1 01100111<br />
7 0<br />
2 = B8 ... 0 0 0 0 0 0 0 0 0 0 0 1 1 0 0 1 1 1 01100111<br />
Line 1: Inputs I3 to I10 are loaded into the Word Accumulator (Bit 0 to Bit 7).<br />
Line 2: The Accumulator Contents are assigned to Byte 8.<br />
The Commands LW and LD are processed in the same way except that 16 or 32 operands are used<br />
accordingly.<br />
8/95 <strong>TNC</strong> <strong>360</strong> 3 Commands 7-33
3.1.7 ASSIGN (=)=<br />
Abbreviation for the PLC Editor: = (ASSIGN)<br />
Logic Byte/Word Double Constant<br />
Execution time [µs] 1.2 1.2/1.2 1.6 ----<br />
Number of bytes 4 4 4<br />
Logic execution with the ASSIGN command<br />
Operands: M, I, O, T, C<br />
Operation:<br />
ASSIGN in conjunction with the Logic Operands (M, I, O, T, C) copies the contents of the Logic<br />
Accumulator to the addressed operand. The = command is only used at the end of a logic chain in<br />
order that a gating result is available. The command may be used several times in succession (see<br />
example).<br />
Example:<br />
Input I4 and Input I5 should be gated with AND and the result assigned to Outputs O2 and O5.<br />
Initial state: Input I4 = 1<br />
Input I5 = 0<br />
Output O2 = ?<br />
Output O5 = ?<br />
Line Instruction Accumulator Contents Operand Contents<br />
Bit 31 . . . 7 0<br />
... x x x x x x X x x x x x x x<br />
1 L I4 ... x x x x x x 1 x x x x x x x 1<br />
2 A I5 ... x x x x x x 0 x x x x x x x 0<br />
3 = O2 ... x x x x x x 0 x x x x x x x 0<br />
4 = O5 ... x x x x x x 0 x x x x x x x 0<br />
Line 1: The operand contents are loaded into the Logic Accumulator.<br />
Line 2: The contents of the Logic Accumulator and Input I5 are gated with AND.<br />
Line 3: The gating result is assigned to Output O2.<br />
Line 4: The gating result is assigned to Output O5.<br />
7-34 <strong>TNC</strong> <strong>360</strong> 3 Commands 8/95
Word execution with the ASSIGN command<br />
Operands: B, W, D<br />
Operation:<br />
ASSIGN in conjunction with the Word Operands (B, W, D) copies the contents of the Word<br />
Accumulator to the addressed operand. The = command is only used at the end of a gating chain in<br />
order that a gating result is available. The command can be used several times in succession (see<br />
example).<br />
Example:<br />
A Constant (K) and the contents of Byte B5 should be gated with AND and the result assigned to<br />
Byte B8 and Byte B10.<br />
Initial state: Byte B5 = 2A (hex)<br />
Constant 54 = 36 (hex)<br />
Byte B8 = ?<br />
Byte B10 = ?<br />
Line Instruction Accumulator Contents Operand Contents<br />
Bit 31 . . . 15 7 0 7 0<br />
... x x x x x x x x x x x x x x x x x x<br />
1 L K+54 ... 0 0 0 0 0 0 0 0 0 0 0 0 1 1 0 1 1 0<br />
2 A B5 ... 0 0 0 0 0 0 0 0 0 0 0 0 1 0 0 0 1 0 00101010<br />
3 = B8 ... 0 0 0 0 0 0 0 0 0 0 0 0 1 0 0 0 1 0 00100010<br />
4 = B10 ... 0 0 0 0 0 0 0 0 0 0 0 0 1 0 0 0 1 0 00100010<br />
Line 1: The Constant is loaded into the Word Accumulator.<br />
Line 2: The contents of the Word Accumulator and Byte B5 are gated with AND.<br />
Line 3: The gating result is assigned to Byte B8.<br />
Line 4: The gating result is assigned to Byte B10.<br />
8/95 <strong>TNC</strong> <strong>360</strong> 3 Commands 7-35
3.1.8 ASSIGN BYTE (B=) B=<br />
Abbreviation for the PLC Editor: B= (ASSIGN BYTE)<br />
Execution time [µs] 26.0<br />
Number of bytes 14<br />
Operands: M, I, O, T, C<br />
Operation:<br />
With the command B=, 8 bits are copied from the Word Accumulator to Markers, Inputs, Outputs,<br />
Timers or Counters with ascending numbering. Each bit corresponds to 1 operand. The LSB in the<br />
Accumulator is copied to the designated operand address, the LSB + 1 to the designated address +<br />
1 and so on. The last affected operand is occupied by the MSB.<br />
3.1.9 ASSIGN WORD (W=) W=<br />
Abbreviation for the PLC Editor: W= (ASSIGN WORD)<br />
Execution time [µs] 50<br />
Number of bytes 14<br />
Operands: M, I, O, T, C<br />
Operation:<br />
With the command W=, 16 bits are copied from the Word Accumulator to Markers, Inputs,<br />
Outputs, Timers or Counters with ascending numbering. Each bit corresponds to 1 operand. The<br />
LSB in the Accumulator is copied to the designated operand address, the LSB + 1 to the designated<br />
address + 1 and so on. The last affected operand is occupied by the MSB.<br />
3.1.10 ASSIGN DOUBLEWORD (D=)D=<br />
Abbreviation for the PLC Editor: D= (ASSIGN DOUBLE)<br />
Execution time [µs] 104.4<br />
Number of bytes 14<br />
Operands: M, I, O, T, C<br />
Operation:<br />
With the command D=, 32 bits are copied from the Word Accumulator to Markers, Inputs, Outputs,<br />
Timers or Counters with ascending numbering. Each bit corresponds to 1 operand. The LSB in the<br />
Accumulator is copied to the designated operand address, the LSB + 1 to the designated address +<br />
1 and so on. The last affected operand is occupied by the MSB.<br />
7-36 <strong>TNC</strong> <strong>360</strong> 3 Commands 8/95
Example:<br />
A bit pattern, as defined in Word W8 , is to be assigned to Outputs O5 to O20.<br />
Initial state: Word W8: 36 FF (hex)<br />
Line Instruction Accumulator Contents Operand Contents<br />
Bit 31 . . . 15 7 0 15 8 7 0<br />
... x x x x x x x x x x x x x x x x x x<br />
1 L W8 ... 0 0 0 0 1 1 0 1 1 0 1 1 1 1 1 1 1 1 00110110 11111111<br />
O20 ... ... O5<br />
2 W= O5 ... 0 0 0 0 1 1 0 1 1 0 1 1 1 1 1 1 1 1 00110110 11111111<br />
Line 1: The contents of Word W8 are loaded into the Accumulator.<br />
Line 2: The contents of the Accumulator are assigned to the Outputs O5 to O20.<br />
The Commands B= and D= are processed in the same way except that 8 or 32 bits are used<br />
accordingly.<br />
8/95 <strong>TNC</strong> <strong>360</strong> 3 Commands 7-37
✎<br />
7-38 <strong>TNC</strong> <strong>360</strong> 3 Commands 8/95
3.2 Set commands<br />
3.2.1 SET (S) S<br />
Abbreviation for the PLC Editor: S (SET)<br />
Operand changed Operand unchanged<br />
Execution time [µs] 2.0 to 2.40 1.0 to 1.4<br />
Number of bytes 8 (6)<br />
Byte value in parentheses:<br />
With certain preceding program sequences, the command may be shortened.<br />
Operands: M, I, O, T, C<br />
Operation:<br />
The function of the command depends on the contents of the Logic Accumulator. If the Logic<br />
Accumulator = 1, the addressed operand is set to 1, otherwise the operand remains unchanged. An<br />
S command is used at the end of a logic chain so that the gating result may influence the operand.<br />
The command may be used several times in succession (see example).<br />
Example:<br />
Input I4 and input I5 should be gated with OR.<br />
If the gating result is 1, output O2 and marker M500 should be set.<br />
Initial state: Input I4 = 1<br />
Input I5 = 0<br />
Output O2 = ?<br />
Marker M500 = ?<br />
Line Instruction Accumulator Contents Operand Contents<br />
Bit 31 . . . 7 0<br />
... x x x x x x X x x x x x x x<br />
1 L I4 ... x x x x x x 1 x x x x x x x 1<br />
2 O I5 ... x x x x x x 1 x x x x x x x 0<br />
3 S O2 ... x x x x x x 1 x x x x x x x 1<br />
4 S M500 ... x x x x x x 1 x x x x x x x 1<br />
Line 1: The contents of the operand are loaded into the Accumulator.<br />
Line 2: The contents of the Logic Accumulator and Input I5 are gated with OR.<br />
Line 3: The gating result = 1: output O2 is set.<br />
Line 4: The gating result = 1: marker M500 is set.<br />
8/95 <strong>TNC</strong> <strong>360</strong> 3 Commands 7-39
3.2.2 RESET (R) R<br />
Abbreviation for the PLC Editor: R (RESET)<br />
Operand changed Operand unchanged<br />
Execution time [µs] 2.0 to 2.4 1.0 to 1.4<br />
Number of bytes 8 ( 6 )<br />
Byte value in parentheses:<br />
With certain preceding program sequences the command may be shortened.<br />
Operands: M, I, O, T, C<br />
Operation:<br />
The function of the command is dependent on the contents of the Logic Accumulator. If the Logic<br />
Accumulator = 1, the addressed operand is set to 0, otherwise the operand remains unchanged. An<br />
R command is used at the end of a logic chain, in order that a gating result may influence the<br />
operand. The command may be used several times in succession (see example).<br />
Example:<br />
Input I4 and Input I5 should be gated with OR.<br />
If the gating result = 1, Output O2 and Marker M500 should be reset.<br />
Initial state: Input I4 = 1<br />
Input I5 = 0<br />
Output O2 = ?<br />
Marker M500 = ?<br />
Line Instruction Accumulator Contents Operand Contents<br />
Bit 31 . . . 7 0<br />
... x x x x x x X x x x x x x x<br />
1 L I4 ... x x x x x x 1 x x x x x x x 1<br />
2 O I5 ... x x x x x x 1 x x x x x x x 0<br />
3 R O2 ... x x x x x x 1 x x x x x x x 0<br />
4 R M500 ... x x x x x x 1 x x x x x x x 0<br />
Line 1: The operand contents are loaded into the Accumulator.<br />
Line 2: The contents of the Logic Accumulator and input I5 are gated with OR.<br />
Line 3: The gating result = 1: Output O2 is reset.<br />
Line 4: The gating result = 1: Marker 500 is reset.<br />
7-40 <strong>TNC</strong> <strong>360</strong> 3 Commands 8/95
3.2.3 SET NOT (SN) SN<br />
Abbreviation for the PLC Editor: SN (SET NOT)<br />
Operand changed Operand unchanged<br />
Execution time [µs] 2.0 to 2.4 1.0 to 1.4<br />
Number of bytes 8 ( 6 )<br />
Byte value in parentheses:<br />
With certain preceding program sequences the command may be shortened.<br />
Operands: M, I, O, T, C<br />
Operation:<br />
The function of the command is dependent upon the contents of the Logic Accumulator. If the Logic<br />
Accumulator = 0 , then the addressed operand is set to 1, otherwise the operand remains<br />
unchanged. An SN command is used at the end of a logic chain, in order that a gating result may<br />
influence the operand. The command may be used several times in succession (see example).<br />
Example:<br />
Input I4 and Input I5 are to be gated with OR.<br />
If the gating result = 0, Output O2 and Marker M500 are set.<br />
Initial state: Input I4 = 0<br />
Input I5 = 0<br />
Output O2 = ?<br />
Marker M500 = ?<br />
Line Instruction Accumulator Contents Operand Contents<br />
Bit 31 . . . 7 0<br />
... x x x x x x X x x x x x x x<br />
1 L I4 ... x x x x x x 0 x x x x x x x 0<br />
2 O I5 ... x x x x x x 0 x x x x x x x 0<br />
3 SN O2 ... x x x x x x 0 x x x x x x x 1<br />
4 SN M500 ... x x x x x x 0 x x x x x x x 1<br />
Line 1: The operand contents are loaded into the Accumulator.<br />
Line 2: The contents of the Logic Accumulator and Input I5 are gated with OR.<br />
Line 3: The gating result = 0: Output O2 is set.<br />
Line 4: The gating result = 0: Marker 500 is set.<br />
8/95 <strong>TNC</strong> <strong>360</strong> 3 Commands 7-41
3.2.4 RESET NOT (RN) RN<br />
Abbreviation for the PLC Editor: RN (RESET NOT)<br />
Operand changed Operand unchanged<br />
Execution time [µs] 2.0 to 2.4 1.0 to 1.4<br />
Number of bytes 8 ( 6 )<br />
Byte value in parentheses:<br />
With certain preceding program sequences the command may be shortened.<br />
Operands: M, I, O, T, C<br />
Operation:<br />
The function of the command is dependent upon the contents of the Logic Accumulator. If the Logic<br />
Accumulator = 0, then the addressed operand is set to 0, otherwise the operand remains<br />
unchanged. An RN command is used at the end of a logic chain, in order that a gating result may<br />
influence the operand. The command may be used several times in succession (see example).<br />
Example:<br />
Input I4 and Input I5 are to be gated with OR.<br />
If the gating result = 0, Output O2 and Marker M500 are reset.<br />
Initial state: Input I4 = 0<br />
Input I5 = 0<br />
Output O2 = ?<br />
Marker M500 = ?<br />
Line Instruction Accumulator Contents Operand Contents<br />
Bit 31 . . . 7 0<br />
... x x x x x x X x x x x x x x<br />
1 L I4 ... x x x x x x 0 x x x x x x x 0<br />
2 O I5 ... x x x x x x 0 x x x x x x x 0<br />
3 RN O2 ... x x x x x x 0 x x x x x x x 0<br />
4 RN M500 ... x x x x x x 0 x x x x x x x 0<br />
Line 1: The operand contents are loaded into the Accumulator.<br />
Line 2: The contents of the Logic Accumulator and Input I5 are gated with OR.<br />
Line 3: The gating result = 0: Output O2 is reset.<br />
Line 4: The gating result = 0: Marker M500 is reset.<br />
7-42 <strong>TNC</strong> <strong>360</strong> 3 Commands 8/95
✎<br />
8/95 <strong>TNC</strong> <strong>360</strong> 3 Commands 7-43
3.3 Logic Gates<br />
3.3.1 AND (A) A<br />
Abbreviation for the PLC Editor: A (AND)<br />
Logic Byte/Word Double Constant<br />
Execution time [µs] 1.2 1.2/1.2 1.8 1.6<br />
Number of bytes 4 4 4 6<br />
Logic execution with the AND command<br />
Operands: M, I, O, T, C<br />
Operation:<br />
This command functions in different ways according to its position in the program:<br />
a) At the start of a logic chain the command functions as an L command, i.e. the logic state of the<br />
operand is loaded into the Logic Accumulator. This is to ensure compatibility with the <strong>TNC</strong> 355<br />
control which did not have the special L command. In PLC programs for the <strong>TNC</strong> <strong>360</strong>/<strong>TNC</strong> 335, a<br />
logic chain should always be started with a load command (see L, LN, L–).<br />
b)Within a logic chain the contents of the Logic Accumulator and the logic state of the operand (M, I,<br />
O, T, C) are gated with AND. The gating result is stored in the Logic Accumulator.<br />
Example:<br />
Input I4 and Input I5 are to be gated with AND and the result assigned to Output O2.<br />
Initial state: Input I4 = 1<br />
Input I5 = 0<br />
Output O2 = ?<br />
Line Instruction Accumulator Contents Operand Contents<br />
Bit 31 . . . 7 0<br />
... x x x x x x x x x x x x x x<br />
1 L I4 ... x x x x x x 1 x x x x x x x 1<br />
2 A I5 ... x x x x x x 0 x x x x x x x 0<br />
3 = O2 ... x x x x x x 0 x x x x x x x 0<br />
Line 1: The operand contents are loaded into the Accumulator.<br />
Line 2: The contents of the Logic Accumulator and Input I5 are gated with AND.<br />
Line 3: The gating result is assigned to Output O2.<br />
7-44 <strong>TNC</strong> <strong>360</strong> 3 Commands 8/95
Word execution with the AND Command<br />
Operands: B, W, D, K<br />
Operation:<br />
The contents of the Word Accumulator and the contents of the operand (B, W, D, K) are gated with<br />
AND. In accordance with the different sizes of operand (B = 8 bit; W = 16 bit; D = K = 32 bit), 8, 16<br />
or 32 bits will be influenced in the Accumulator.<br />
Thus: Bit 0 of the Accumulator is gated with bit 0 of the operand<br />
Bit 1 of the Accumulator is gated with bit 1 of the operand and so on.<br />
The result of the operation is stored in the Word Accumulator.<br />
Example:<br />
The contents of Byte B5 and Byte B6 should be gated with AND and the result assigned to Byte B8.<br />
Initial state: Byte B5 = 2A (hex)<br />
Byte B6 = 36 (hex)<br />
Byte B8 = ?<br />
Line Instruction Accumulator Contents Operand Contents<br />
Bit 31 . . . 15 7 0 15 8 7 0<br />
... x x x x x x x x x x x x x x x x x x<br />
1 L B6 ... 0 0 0 0 0 0 0 0 0 0 0 0 1 1 0 1 1 0 00110110<br />
2 A B5 ... 0 0 0 0 0 0 0 0 0 0 0 0 1 0 0 0 1 0 00101010<br />
3 = B8 ... 0 0 0 0 0 0 0 0 0 0 0 0 1 0 0 0 1 0 00100010<br />
Line 1: The contents of Byte B6 are loaded into the Accumulator.<br />
Line 2: The contents of the Word Accumulator and Byte B5 are gated with AND.<br />
Line 3: The gating result is assigned to Byte B8.<br />
8/95 <strong>TNC</strong> <strong>360</strong> 3 Commands 7-45
3.3.2 AND NOT (AN) AN<br />
Abbreviation for the PLC Editor: AN (AND NOT)<br />
Logic Byte/Word Double Constant<br />
Execution time [µs] 2.0 2.0/2.0 3.0 2.6<br />
Number of bytes 8 8 8 10<br />
Logic execution with the AND NOT command<br />
Operands: M, I, O, T, C<br />
Operation:<br />
This command functions in different ways according to its position in the program:<br />
a) At the start of a logic chain the command functions as an LN command, i.e. the complement of<br />
the operand is loaded into the Logic Accumulator. This is to ensure compatibility with the <strong>TNC</strong> 355<br />
control which did not have the special LN command. In PLC programs for the <strong>TNC</strong> <strong>360</strong>/<strong>TNC</strong> 335 a<br />
logic chain should always be started with a load command (see L, LN, L–).<br />
b)Within a logic chain, the contents of the Logic Accumulator and the logic state of the operand (M,<br />
I, O, T, C) are gated with AND NOT.<br />
The gating result is stored in the Logic Accumulator.<br />
Example:<br />
Input I4 and Input I5 should be gated with AND NOT and the result assigned to Output O2.<br />
Initial state: Input I4 = 1<br />
Input I5 = 1<br />
Output O2 = ?<br />
Line Instruction Accumulator Contents Operand Contents<br />
Bit 31 . . . 7 0<br />
... x x x x x x x x x x x x x x<br />
1 L I4 ... x x x x x x 1 x x x x x x x 1<br />
2 AN I5 ... x x x x x x 0 x x x x x x x 1<br />
3 = O2 ... x x x x x x 0 x x x x x x x 0<br />
Line 1: The operand contents are loaded into the Accumulator.<br />
Line 2: The contents of the Logic Accumulator and Input I5 are gated with AND NOT.<br />
Line 3: The gating result is assigned to Output O2.<br />
7-46 <strong>TNC</strong> <strong>360</strong> 3 Commands 8/95
Word execution with the AND NOT command<br />
Operands: B, W, D, K<br />
Operation:<br />
The contents of the Word Accumulator and the contents of the operand (B, W, D, K) are gated with<br />
AND NOT. In accordance with the different sizes of operand (B = 8 bit; W = 16 bit; D = K = 32 bit),<br />
8, 16 or 32 bits will be influenced in the Accumulator.<br />
Thus: Bit 0 in the Accumulator is gated with bit 0 in the operand.<br />
Bit 1 in the Accumulator is gated with bit 1 in the operand and so on.<br />
The result of the operation is stored in the Word Accumulator.<br />
Example:<br />
The contents of Word W4 and Word W6 should be gated with AND NOT and the result assigned to<br />
Word W8.<br />
Initial state: Word W4 = 36 AA (hex)<br />
Word W6 = 3C 36 (hex)<br />
Word W8 = ?<br />
Line Instruction Accumulator Contents Operand Contents<br />
Bit 31 . . . 15 7 0 15 8 7 0<br />
... x x x x x x x x x x x x x x x x x x<br />
1 L W6 ... 0 0 0 0 1 1 1 1 0 0 0 0 1 1 0 1 1 0 00111100 00110110<br />
2 AN W4 ... 0 0 0 0 0 0 1 0 0 0 0 0 0 1 0 1 0 0 00110110 10101010<br />
3 = W8 ... 0 0 0 0 0 0 1 0 0 0 0 0 0 1 0 1 0 0 00001000 00010100<br />
Line 1: The contents of Word W6 are loaded into the Accumulator.<br />
Line 2: The contents of the Word Accumulator and Word W4 are gated with AND NOT.<br />
Line 3: The gating result is assigned to Word W8.<br />
8/95 <strong>TNC</strong> <strong>360</strong> 3 Commands 7-47
3.3.3 OR (O) O<br />
Abbreviation for the PLC Editor: O (OR)<br />
Logic Byte/Word Double Constant<br />
Execution time [µs] 1.2 1.2/1.2 1.8 1.6<br />
Number of bytes 4 4 4 6<br />
Logic execution with the OR command<br />
Operands: M, I, O, T, C<br />
Operation:<br />
This command functions in different ways according to its position in the program:<br />
a) At the start of a logic chain the command functions as an L command, i.e. the logic state of the<br />
operand is loaded into the Logic Accumulator. This is to ensure compatibility with the <strong>TNC</strong> 355<br />
control which did not have the special L command. In PLC programs for the <strong>TNC</strong> <strong>360</strong>/<strong>TNC</strong> 335 a<br />
logic chain should always be started with a load command (see L, LN, L–).<br />
b)Within a logic chain, the contents of the Logic Accumulator and the logic state of the operand (M,<br />
I, O, T, C) are gated with OR. The result of the operation is stored in the Logic Accumulator.<br />
Example:<br />
Input I4 and Input I5 are to be gated with OR and the result assigned to Output O2.<br />
Initial state: Input I4 = 0<br />
Input I5 = 1<br />
Output O2 = ?<br />
Line Instruction Accumulator Contents Operand Contents<br />
Bit 31 . . . 7 0<br />
... x x x x x x x x x x x x x x<br />
1 L I4 ... x x x x x x 0 x x x x x x x 0<br />
2 O I5 ... x x x x x x 1 x x x x x x x 1<br />
3 = O2 ... x x x x x x 1 x x x x x x x 1<br />
Line 1: The operand contents are loaded into the Accumulator.<br />
Line 2: The contents of the Logic Accumulator and Input I5 are gated with OR.<br />
Line 3: The gating result is assigned to Output O2.<br />
7-48 <strong>TNC</strong> <strong>360</strong> 3 Commands 8/95
Word execution with the OR command<br />
Operands: B, W, D, K<br />
Operation:<br />
The contents of the Word Accumulator and the contents of the operand (B, W, D, K) are gated with<br />
OR. In accordance with the different sizes of operand (B = 8 bit; W = 16 bit; D = K = 32 bit), 8, 16 or<br />
32 bits will be influenced in the Accumulator.<br />
Thus: Bit 0 in the Accumulator is gated with bit 0 in the operand<br />
Bit 1 in the Accumulator is gated with bit 1 in the operand and so on.<br />
The result of the operation is stored in the Word Accumulator.<br />
Example:<br />
The contents of Byte B5 and Byte B6 are to be gated with OR and the result assigned to Word W8.<br />
Initial state: Byte B5 = 2A (hex)<br />
Byte B6 = 36 (hex)<br />
Word W8 = ?<br />
Line Instruction Accumulator Contents Operand Contents<br />
Bit 31 . . . 15 7 0 15 8 7 0<br />
... x x x x x x x x x x x x x x x x x x<br />
1 L B6 ... 0 0 0 0 0 0 0 0 0 0 0 0 1 1 0 1 1 0 00110110<br />
2 O B5 ... 0 0 0 0 0 0 0 0 0 0 0 0 1 1 1 1 1 0 00101010<br />
3 = W8 ... 0 0 0 0 0 0 0 0 0 0 0 0 1 1 1 1 1 0 00000000 00111110<br />
Line 1: The contents of Byte B6 are loaded into the Accumulator.<br />
Line 2: The contents of the Word Accumulator and Byte B5 are gated with OR.<br />
Line 3: The gating result is assigned to Word W8.<br />
8/95 <strong>TNC</strong> <strong>360</strong> 3 Commands 7-49
3.3.4 OR NOT (ON) ON<br />
Abbreviation for the PLC Editor: ON (OR NOT)<br />
Logic Byte/Word Double Constant<br />
Execution time [µs] 2.0 2.0/2.0 3.0 2.6<br />
Number of bytes 8 8 8 10<br />
Logic execution with the OR NOT command<br />
Operands: M, I, O, T, C<br />
Operation:<br />
This command functions in different ways according to its position in the program:<br />
a) At the start of a logic chain this command functions as an LN command, i.e. the complement of<br />
the operand is loaded into the Logic Accumulator. This is to ensure compatibility with the <strong>TNC</strong> 355<br />
control which did not have the special LN command. In PLC programs for the <strong>TNC</strong> <strong>360</strong>/<strong>TNC</strong> 335 a<br />
logic chain should always be started with a load command (see L, LN, L–).<br />
b)Within a logic chain, the contents of the Logic Accumulator and the logic state of the operand (M,<br />
I, O, T, C) are gated with OR NOT. The result of the operation is stored in the Logic Accumulator.<br />
Example:<br />
Input I4 and Input I5 are to be gated with OR NOT and the result assigned to Output O2.<br />
Initial state: Input I4 = 0<br />
Input I5 = 0<br />
Output O2 = ?<br />
Line Instruction Accumulator Contents Operand Contents<br />
Bit 31 . . . 7 0<br />
... x x x x x x x x x x x x x x<br />
1 L I4 ... x x x x x x 0 x x x x x x x 0<br />
2 ON I5 ... x x x x x x 1 x x x x x x x 0<br />
3 = O2 ... x x x x x x 1 x x x x x x x 1<br />
Line 1: The operand contents are loaded into the Accumulator.<br />
Line 2: The contents of the Logic Accumulator and Input I5 are gated with OR NOT.<br />
Line 3: The gating result is assigned to Output O2.<br />
7-50 <strong>TNC</strong> <strong>360</strong> 3 Commands 8/95
Word execution with the OR NOT command<br />
Operands: B, W, D, K<br />
Operation:<br />
The contents of the Word Accumulator and the contents of the operand (B, W, D, K) are gated with<br />
OR NOT. In accordance with the different sizes of operand (B = 8 bit; W = 16 bit; D = K = 32 bit), 8,<br />
16 or 32 bits will be influenced in the Accumulator.<br />
Thus: Bit 0 in the Accumulator is gated with bit 0 in the operand<br />
Bit 1 in the Accumulator is gated with bit 1 in the operand and so on.<br />
The result of the operation is stored in the Word Accumulator.<br />
Example:<br />
The contents of Word W4 and Word W6 are to be gated with OR NOT and the result assigned to<br />
Word W8.<br />
Initial state: Word W4 = 36 AA (hex)<br />
Word W6 = 3C 36 (hex)<br />
Word W8 = ?<br />
Line Instruction Accumulator Contents Operand Contents<br />
Bit 31 . . . 15 7 0 15 8 7 0<br />
... x x x x x x x x x x x x x x x x x x<br />
1 L W6 ... 0 0 0 0 1 1 1 1 0 0 0 0 1 1 0 1 1 0 00111100 00110110<br />
2 ON W4 ... 1 1 1 1 1 1 1 1 0 1 0 1 1 1 0 1 1 1 00110110 10101010<br />
3 = W8 ... 1 1 1 1 1 1 1 1 0 1 0 1 1 1 0 1 1 1 11111101 01110111<br />
Line 1: The contents of Word W6 are loaded into the Accumulator.<br />
Line 2: The contents of the Word Accumulator and Word W4 are gated with OR NOT.<br />
Line 3: The gating result is assigned to Word W8.<br />
8/95 <strong>TNC</strong> <strong>360</strong> 3 Commands 7-51
3.3.5 EXCLUSIVE OR (XO) XO<br />
Abbreviation for the PLC Editor: XO (EXCLUSIVE OR)<br />
Logic Byte/Word Double Constant<br />
Execution time [µs] 1.6 1.6/1.6 2.4 2.0<br />
Number of bytes 6 6 6 8<br />
Logic execution with the EXCLUSIVE OR command<br />
Operands: M, I, O, T, C<br />
Operation:<br />
This command functions in different ways according to its position in the program:<br />
a) At the start of a logic chain the command functions as an L command, i.e. the logic state of the<br />
operand is loaded into the Logic Accumulator. This is to ensure compatibility with the <strong>TNC</strong> 355<br />
control which did not have the special L command. In PLC programs for the <strong>TNC</strong> <strong>360</strong>/<strong>TNC</strong> 335 a<br />
logic chain should always be started with a load command (see L, LN, L–).<br />
b)Within a logic chain the contents of the Logic Accumulator and the logic state of the operand (M, I,<br />
O, T, C) are gated with EXCLUSIVE OR. The result of the operation is stored in the Logic<br />
Accumulator.<br />
Example:<br />
Input I4 and Input I5 are to be gated with EXCLUSIVE OR and the result assigned to Output O2.<br />
Initial state: Input I4 = 1<br />
Input I5 = 1<br />
Output O2 = ?<br />
Line Instruction Accumulator Contents Operand Contents<br />
Bit 31 . . . 7 0<br />
... x x x x x x X x x x x x x x<br />
1 L I4 ... x x x x x x 1 x x x x x x x 1<br />
2 XO I5 ... x x x x x x 0 x x x x x x x 1<br />
3 = O2 ... x x x x x x 0 x x x x x x x 0<br />
Line 1: The operand contents are loaded into the Accumulator.<br />
Line 2: The contents of the Logic Accumulator and Input I5 are gated with EXCLUSIVE OR.<br />
Line 3: The gating result is assigned to Output O2.<br />
7-52 <strong>TNC</strong> <strong>360</strong> 3 Commands 8/95
Word execution with the EXCLUSIVE OR command<br />
Operands: B, W, D, K<br />
Operation:<br />
The contents of the Word Accumulator and the contents of the operand (B, W, D, K) are gated with<br />
EXCLUSIVE OR. In accordance with the different sizes of operand (B = 8 bit; W = 16 bit;<br />
D = K = 32 bit), 8, 16 or 32 bits will be influenced in the Accumulator.<br />
Thus: Bit 0 in the Accumulator is gated with bit 0 in the operand<br />
Bit 1 in the Accumulator is gated with bit 1 in the operand and so on.<br />
The result of the operation is stored in the Word Accumulator.<br />
Example:<br />
The contents of Byte B5 and Byte B6 are to be gated with EXCLUSIVE OR and the result assigned<br />
to Word W8.<br />
Initial state Byte B5 = 2A (hex)<br />
Byte B6 = 36 (hex)<br />
Word W8 = ?<br />
Line Instruction Accumulator Contents Operand Contents<br />
Bit 31 . . . 15 7 0 15 8 7 0<br />
... x x x x x x x x x x x x x x x x x x<br />
1 L B6 ... 0 0 0 0 0 0 0 0 0 0 0 0 1 1 0 1 1 0 00110110<br />
2 XO B5 ... 0 0 0 0 0 0 0 0 0 0 0 0 0 1 1 1 0 0 00101010<br />
3 = W8 ... 0 0 0 0 0 0 0 0 0 0 0 0 0 1 1 1 0 0 00000000 00011100<br />
Line 1: The contents of Byte B6 are loaded into the Accumulator.<br />
Line 2: The contents of the Word Accumulator and Byte B5 are gated with EXCLUSIVE OR.<br />
Line 3: The gating result is assigned to Word W8.<br />
8/95 <strong>TNC</strong> <strong>360</strong> 3 Commands 7-53
3.3.6 EXCLUSIVE OR NOT (XON) XON<br />
Abbreviation for the PLC Editor: XON (EXCLUSIVE OR NOT)<br />
Logic Byte/Word Double Constant<br />
Execution time [µs] 2.0 2.0 3.0 2.6<br />
Number of bytes 8 8 8 10<br />
Logic execution with the EXCLUSIVE OR NOT command<br />
Operands: M, I, O, T, C<br />
Operation:<br />
This command functions in different ways according to its position in the program:<br />
a) At the start of a logic chain this command functions as a LN command, i.e. the complement of the<br />
operand is loaded into the Logic Accumulator. This is to ensure compatibility with the <strong>TNC</strong> 355<br />
control which did not have the special LN command. In PLC programs for the <strong>TNC</strong> <strong>360</strong>/<strong>TNC</strong> 335 a<br />
logic chain should always be started with a load command (see L, LN, L–).<br />
b)Within a logic chain the contents of the Logic Accumulator and the logic state of the operand (M, I,<br />
O, T, C) are gated with EXCLUSIVE OR NOT. The result of the operation is stored in the Logic<br />
Accumulator.<br />
Example:<br />
Input I4 and Marker M500 are to be gated with EXCLUSIVE OR NOT and the result assigned to<br />
Output O2.<br />
Initial state: Input I4 = 0<br />
Marker M500 = 0<br />
Output O2 = ?<br />
Line Instruction Accumulator Contents Operand Contents<br />
Bit 31 . . . 7 0<br />
... x x x x x x X x x x x x x x<br />
1 L M500 ... x x x x x x 0 x x x x x x x 0<br />
2 XON I4 ... x x x x x x 1 x x x x x x x 0<br />
3 = O2 ... x x x x x x 1 x x x x x x x 1<br />
Line 1: The operand contents are loaded into the Accumulator.<br />
Line 2: The contents of the Logic Accumulator and the Input I4 are gated with<br />
EXCLUSIVE OR NOT.<br />
Line 3: The gating result is assigned to Output O2.<br />
7-54 <strong>TNC</strong> <strong>360</strong> 3 Commands 8/95
Word execution with the EXCLUSIVE OR NOT command<br />
Operands: B, W, D, K<br />
Operation:<br />
The contents of the Word Accumulator and the contents of the operand (B, W, D, K) are gated with<br />
EXCLUSIVE OR NOT. In accordance with the different sizes of operand (B = 8 bit; W = 16 bit; D = K<br />
= 32 bit), 8, 16 or 32 bits will be influenced in the Accumulator.<br />
Thus: Bit 0 in the Accumulator is gated with bit 0 in the operand<br />
Bit 1 in the Accumulator is gated with bit 1 in the operand and so on.<br />
The result of the operation is stored in the Logic Accumulator.<br />
Example:<br />
The contents of Word W4 and Word W6 are to be gated with EXCLUSIVE OR NOT and the result<br />
assigned to Word W8.<br />
Initial state: Word W4 = 36 AA (hex)<br />
Word W6 = 3C 36 (hex)<br />
Word W8 = ?<br />
Line Instruction Accumulator Contents Operand Contents<br />
Bit 31 . . . 15 7 0 15 8 7 0<br />
... x x x x x x x x x x x x x x x x x x<br />
1 L W6 ... 0 0 0 0 1 1 1 1 0 0 0 0 1 1 0 1 1 0 00111100 00110110<br />
2 XON W4 ... 1 1 1 1 1 1 0 1 0 1 0 1 1 0 0 0 1 1 00110110 10101010<br />
3 = W8 ... 1 1 1 1 1 1 0 1 0 1 0 1 1 0 0 0 1 1 11110101 01100011<br />
Line 1: The contents of Word W6 are loaded into the Accumulator.<br />
Line 2: The contents of the Word Accumulator and Word W4 are gated with<br />
EXCLUSIVE OR NOT.<br />
Line 3: The gating result is assigned to Word W8.<br />
8/95 <strong>TNC</strong> <strong>360</strong> 3 Commands 7-55
✎<br />
7-56 <strong>TNC</strong> <strong>360</strong> 3 Commands 8/95
3.4 Arithmetic Commands<br />
3.4.1 ADDITION (+) +<br />
Abbreviation for the PLC Editor: + (PLUS)<br />
Logic Byte/Word Double Constant<br />
Execution time [µs] ---- 2.8/2.4 1.8 1.6<br />
Number of bytes ---- 8 4 6<br />
Operands: B, W, D, K<br />
Operation:<br />
With arithmetic functions the operand is firstly expanded to the size of the Accumulator (32 bits).<br />
Then the contents of the operand are added to the Word Accumulator. The result of the operation is<br />
stored in the Word Accumulator and may be processed further.<br />
Example:<br />
A constant and a stored value in Word W6 are to be added. The result is then stored in Doubleword<br />
D8.<br />
Initial state: Constant = 100 000 (dec)<br />
Word W6 = 200 (dec)<br />
Doubleword D8 = ?<br />
In the interests of clarity the contents of the Accumulator and operand are shown in decimal<br />
notation.<br />
The 10 bit wide Accumulator allows the entry of the highest possible Accumulator contents<br />
(2 147 483 647).<br />
Line Instruction Accumulator Contents Operand Contents<br />
x x x x x x x x x x<br />
1 L K100000 1 0 0 0 0 0<br />
2 + W6 1 0 0 2 0 0 2 0 0<br />
3 = D8 1 0 0 2 0 0 1 0 0 2 0 0<br />
Line 1: The Constant is loaded into the Accumulator.<br />
Line 2: The contents of the Accumulator and Word W6 are added.<br />
Line 3: The result is assigned to Doubleword D8.<br />
8/95 <strong>TNC</strong> <strong>360</strong> 3 Commands 7-57
3.4.2 SUBTRACTION (–) –<br />
Abbreviation for the PLC Editor: – (MINUS)<br />
Logic Byte/Word Double Constant<br />
Execution time [µs] ---- 2.8/2.4 1.8 1.6<br />
Number of bytes ---- 8 4 6<br />
Operands: B, W, D, K<br />
Operation:<br />
With arithmetic functions the operand is firstly expanded to the size of the Accumulator (32 bits).<br />
Then the contents of the operand are subtracted from the contents of the Word Accumulator. The<br />
result of the operation is stored in the Word Accumulator and may be processed further.<br />
Example:<br />
A stored value in Word W6 is to be subtracted from a Constant. The result is then stored in<br />
Doubleword D8.<br />
Initial state: Constant = 100 000 (dec)<br />
Word W6 = 200 (dec)<br />
Doubleword D8 = ?<br />
In the interests of clarity the contents of the Accumulator and the operand are shown in decimal<br />
notation. The 10 bit wide Accumulator allows the entry of the highest possible Accumulator<br />
contents (2 147 483 647).<br />
Line Instruction Accumulator Contents Operand Contents<br />
x x x x x x x x x x<br />
1 L K100000 1 0 0 0 0 0<br />
2 – W6 9 9 8 0 0 2 0 0<br />
3 = D8 9 9 8 0 0 9 9 8 0 0<br />
Line 1: The Constant is loaded into the Accumulator.<br />
Line 2: The contents of Word W6 are subtracted from the Accumulator.<br />
Line 3: The result is assigned to Doubleword D8.<br />
7-58 <strong>TNC</strong> <strong>360</strong> 3 Commands 8/95
3.4.3 MULTIPLICATION (x) x<br />
Abbreviation for the PLC Editor: x (MULTIPLY)<br />
Logic Byte/Word Double Constant<br />
Execution time [µs]* ---- 10.2/9.4 --- 9.8<br />
Number of bytes ---- 14 10 14<br />
* Only a maximum processing time can be entered with the arithmetic operations X, / and MOD.<br />
The processing time may be shorter, depending on the operands.<br />
Operands: B, W, D, K<br />
Operation:<br />
With arithmetic functions the operand is firstly expanded to the size of the Accumulator (32 bits).<br />
Then the contents of the operand are multiplied with the contents of the Word Accumulator. The<br />
result of the operation is stored in the Word Accumulator and may be processed further. If the result<br />
of multiplication causes an overflow, Marker M3168 is set, otherwise it is reset.<br />
Example:<br />
A Constant and a value stored in Word W6 are to be multiplied. The result is then stored in<br />
Doubleword D8.<br />
Initial state Constant = 100 (dec)<br />
Word W6 = 20 (dec)<br />
Doubleword D8 = ?<br />
In the interests of clarity the contents of the Accumulator and the operand are shown in decimal<br />
notation. The 10 bit wide Accumulator allows the entry of the highest possible Accumulator<br />
contents (2 147 483 647).<br />
Line Instruction Accumulator Contents Operand Contents<br />
x x x x x x x x x x<br />
1 L K100 1 0 0<br />
2 x W6 2 0 0 0 2 0<br />
3 = D8 2 0 0 0 2 0 0 0<br />
Line 1: The Constant is loaded into the Accumulator.<br />
Line 2: The contents of the Accumulator are multiplied by the contents of Word W6.<br />
Line 3: The result is assigned to Doubleword D8.<br />
8/95 <strong>TNC</strong> <strong>360</strong> 3 Commands 7-59
3.4.4 DIVISION (/) /<br />
Abbreviation for the PLC Editor: / (DIVIDE)<br />
Logic Byte/Word Double Constant<br />
Execution time [µs] *) **) ---- 20.2/19.8 --- 19.8<br />
Number of bytes ---- 16 14 16<br />
*) see Multiplication<br />
**) An error in division and modulo (divisor = 0) results in a execution time of 3.8 µs.<br />
An error condition (Divisor = 0) results in an execution time of 1.0 to 1.8 µs.<br />
Operands: B, W, D, K<br />
Operation:<br />
With arithmetic functions the operand is firstly expanded to the size of the Accumulator (32 bits) .<br />
Then the contents of the Word Accumulator are divided by the contents of the operand. The result<br />
of the operation is stored in the Word Accumulator and may be processed further. If division by 0 is<br />
attempted, the Marker M3169 is set, otherwise it is reset.<br />
Example:<br />
A Constant is to be divided by the value stored in Word W6 . The result is then assigned to<br />
Doubleword D8.<br />
Initial state: Constant = 100 (dec)<br />
Word W6 = 20 (dec)<br />
Doubleword D8 = ?<br />
In the interests of clarity the contents of the Accumulator and the operand are shown in decimal<br />
notation. The 10 bit wide Accumulator allows the entry of the highest possible Accumulator<br />
contents (2 147 483 647).<br />
Line Instruction Accumulator Contents Operand Contents<br />
x x x x x x x x x x<br />
1 L K100 1 0 0<br />
2 / W6 5 2 0<br />
3 = D8 5 5<br />
Line 1: The Constant is loaded into the Accumulator.<br />
Line 2: The contents of the Accumulator are divided by the contents of Word W6.<br />
Line 3: The result is assigned to Doubleword D8.<br />
7-60 <strong>TNC</strong> <strong>360</strong> 3 Commands 8/95
3.4.5 REMAINDER (MOD) MOD<br />
Abbreviation for the PLC Editor: MOD (MODULO)<br />
Logic Byte/Word Double Constant<br />
Execution time [µs] ---- 20.6 to 20.2 20.2<br />
Number of bytes ---- 18 16 12<br />
*) see Multiplication<br />
**) see Division<br />
An error condition (Divisor = 0) results in an execution time of 1.0 to 1.8 µs.<br />
Operands: B, W, D, K<br />
Operation:<br />
With arithmetic functions the operand is firstly expanded to the size of the Accumulator (32 bits).<br />
Then the REMAINDER is determined from a division of the contents of the Word Accumulator by<br />
the contents of the operand. The REMAINDER is stored in the Word Accumulator and may be<br />
processed further. If the MOD command is not correctly executed then the Marker M3170 is set,<br />
otherwise it is reset.<br />
Example:<br />
The REMAINDER of a division of the value stored in Word W6 by a constant is to be determined.<br />
The REMAINDER is then stored in Doubleword D8.<br />
Initial state: Word W6 = 50 (dec)<br />
Constant K = 15 (dec)<br />
Doubleword D8 = ?<br />
In the interests of clarity the contents of the Accumulator and the operand are shown in decimal<br />
notation. The 10 bit wide Accumulator allows the entry of the highest possible Accumulator<br />
contents (2 147 483 647).<br />
Line Instruction Accumulator Contents Operand Contents<br />
x x x x x x x x x x<br />
1 L W6 5 0<br />
2 MOD K15 5 5 0<br />
3 = D8 5 5<br />
Line 1: The contents of Word W6 are loaded into the Accumulator.<br />
Line 2: The contents of the Accumulator are divided by the constant and the integer<br />
REMAINDER is left in the Accumulator.<br />
Line 3: The REMAINDER is assigned to Doubleword D8.<br />
8/95 <strong>TNC</strong> <strong>360</strong> 3 Commands 7-61
✎<br />
7-62 <strong>TNC</strong> <strong>360</strong> 3 Commands 8/95
3.5 Comparisons<br />
3.5.1 EQUAL TO (==) ==<br />
Abbreviation for the PLC Editor: == (EQUAL)<br />
Byte/Word/Double Constant<br />
Execution time [µs] 1.8 to 2.4 2.0<br />
Number of bytes 6 8<br />
Operands: B, W, D, K<br />
Operation:<br />
With this command, a direct transfer from Word to Logic processing occurs. The contents of the<br />
Word Accumulator and the contents of the addressed operand are compared. If the Word<br />
Accumulator and the operand are equal, the condition is true and the Logic Accumulator is set to 1.<br />
If they are not equal the Logic Accumulator is set to 0. The comparison takes place over the number<br />
of bits corresponding to the operand, i.e. B = 8 bit, W = 16 bit and D = K = 32 bit.<br />
Example:<br />
A constant is to be compared with the contents of Doubleword D8. The result is then assigned to<br />
Marker M500.<br />
Initial state: Constant = 16 000<br />
Doubleword D8 = 15 000<br />
The Accumulator and operand contents are shown in decimal notation. The 10 bit wide Accumulator<br />
allows the entry of the highest possible Accumulator contents (2 147 483 647).<br />
Line Instruction Accumulator Contents Operand Contents<br />
x x x x x x x x x x<br />
1 L K16000 1 6 0 0 0<br />
Bit 31 . . . 7 0<br />
2 == D8 ... x x x x x x 0 x x x x x x x 1 5 0 0 0<br />
3 = M500 ... x x x x x x 0 x x x x x x x 0<br />
Line 1: The constant is loaded into the Accumulator.<br />
Line 2: The contents of the Accumulator and the Doubleword D8 are compared<br />
( Accumulator = Operand ? ).<br />
As the condition is not fulfilled the Logic Accumulator is set to 0.<br />
Line 3: The contents of the Logic Accumulator (The result of the comparison) are<br />
assigned to Marker M500.<br />
8/95 <strong>TNC</strong> <strong>360</strong> 3 Commands 7-63
3.5.2 LESS THAN (
3.5.3 GREATER THAN (>) ><br />
Abbreviation for the PLC Editor: > (GREATER THAN)<br />
Byte/Word/Double Constant<br />
Execution time [µs] 1.8 to 2.4 2.0<br />
Number of bytes 6 8<br />
Operands: B, W, D, K<br />
Operation:<br />
With this command, a direct transfer from Word to Logic processing occurs. The contents of the<br />
Word Accumulator are compared with the contents of the addressed operand. If the Word<br />
Accumulator is greater than the operand, the condition is true and the Logic Accumulator is set to 1.<br />
If the Word Accumulator is less than or equal to the operand, the Logic Accumulator is set to 0. The<br />
comparison takes place over the number of bits in the operand, i.e. B = 8 bit, W = 16 bit and D = K<br />
= 32 bit.<br />
Example:<br />
A constant is to be compared with the contents of Doubleword D8. The result is then assigned to<br />
Marker M500.<br />
Initial state: Constant = 16 000<br />
Doubleword D8 = 15 000<br />
The Accumulator and operand contents are shown in decimal notation. The 10 bit wide Accumulator<br />
allows the entry of the highest possible Accumulator contents (2 147 483 647).<br />
Line Instruction Accumulator Contents Operand Contents<br />
x x x x x x x x x x<br />
1 L K16000 1 6 0 0 0<br />
Bit 31 . . . 7 0<br />
1 > D8 ... x x x x x x 1 x x x x x x x 1 5 0 0 0<br />
2 = M500 ... x x x x x x 1 x x x x x x x 1<br />
Line 1: The constant is loaded into the Accumulator<br />
Line 2: The contents of the Accumulator and the Operand are compared (Accumulator<br />
> Operand ? ). As this condition is fulfilled the Logic Accumulator is set to 1.<br />
Line 3: The contents of the Logic Accumulator (The result of the comparison) are<br />
assigned to Marker M500.<br />
8/95 <strong>TNC</strong> <strong>360</strong> 3 Commands 7-65
3.5.4 LESS THAN OR EQUAL TO (
3.5.5 GREATER THAN OR EQUAL TO (>=)<br />
Abbreviation for PLC Editor: >= (GREATER EQUAL)<br />
Byte/Word/Double Constant<br />
Execution time [µs] 1.8 to 2.4 1.8 to 2.0<br />
Number of bytes 6 8<br />
Operands: B, W, D, K<br />
Operation:<br />
With this command, a direct transfer from Word to Logic execution occurs. The content of the Word<br />
Accumulator is compared with the content of the addressed operand. If the Word Accumulator is<br />
greater than or equal to the operand, the condition is true and the Logic Accumulator is set to 1. If<br />
the Word Accumulator is smaller than the operand, the Logic Accumulator is set to 0. The<br />
comparison takes place over the number of bits corresponding to the operand i.e. B=8 bit, W=16 bit<br />
and D=K=32 bit.<br />
Example:<br />
A constant is to be compared with the content of Doubleword D8. The result is then assigned to<br />
marker M500.<br />
Initial state: Constant = 16 000<br />
Doubleword D8 = 15 000<br />
Accumulator and operand contents are entered here in decimal notation. The ten-position<br />
Accumulator thus permits the maximum possible Accumulator content (2 147 483 647).<br />
Line Instruction Accumulator Content Operand Content<br />
x x x x x x x x x x<br />
1 L K16000 1 6 0 0 0<br />
Bit 31 . . . 7 0<br />
1 >= D8 ... x x x x x x 1 x x x x x x x 1 5 0 0 0<br />
2 = M500 ... x x x x x x 1 x x x x x x x 1<br />
Line 1: The constant is loaded into the Word Accumulator.<br />
Line 2: The contents of the Word Accumulator and operand are compared according to the<br />
following criteria: Word Accumulator >= Operand. As this condition is fulfilled, the Logic<br />
Accumulator is set to 1.<br />
Line 3: The content of the Logic Accumulator (result of the comparison) is assigned to marker<br />
M500.<br />
8/95 <strong>TNC</strong> <strong>360</strong> 3 Commands 7-67
3.5.6 UNEQUAL ()<br />
Abbreviation for PLC Editor: (NOT EQUAL)<br />
Byte/Word/Double Constant<br />
Execution time [µs] 1.8 to 2.4 1.8 to 2.0<br />
Number of bytes 6 8<br />
Operands: B, W, D, K<br />
Operation:<br />
With this command, a direct transfer from Word to Logic execution occurs. The content of the Word<br />
Accumulator is compared with the content of the addressed operand. If the Word Accumulator and<br />
the operand are not equal, the condition is true and the Logic Accumulator is set to 1. If the Word<br />
Accumulator is equal to the operand, the Logic Accumulator is set to 0. The comparison takes place<br />
over the number of bits corresponding to the operand i.e. B=8 bit,W=16 bit and D=K=32 bit.<br />
Example:<br />
A constant is to be compared with the contents of Doubleword D8. The result is then assigned to<br />
marker M500.<br />
Output state Constant = 16 000<br />
Doubleword D8 = 15 000<br />
Accumulator and operand contents are entered here in decimal notation. The ten position<br />
Accumulator thus permits the maximum possible Accumulator content (2 147 483 647).<br />
Line Instruction Accumulator Content Operand<br />
Content<br />
x x x x x x x x x x<br />
1 L K16000 1 6 0 0 0<br />
Bit 31 . . . 7 0<br />
1 D8 ... x x x x x x 1 x x x x x x x 1 5 0 0 0<br />
2 = M500 ... x x x x x x 1 x x x x x x x 1<br />
Line 1: The constant is loaded into the Word Accumulator.<br />
Line 2: Contents of the Word Accumulator and operand are compared according to the following<br />
criteria: Word Accumulator Operand. If this condition is fulfilled, the Logic Accumulator<br />
is set to 1.<br />
Line 3: The contents of the Logic Accumulator [result of the comparison] is assigned to<br />
marker M500.<br />
7-68 <strong>TNC</strong> <strong>360</strong> 3 Commands 8/95
✎<br />
8/95 <strong>TNC</strong> <strong>360</strong> 3 Commands 7-69
3.6 Parentheses with logical gating<br />
Execution time and code length are summarized respectively for the "open parentheses" and<br />
corresponding "close parentheses" commands.<br />
3.6.1 AND [ ] (A[ ]) A[ ]<br />
Abbreviation for PLC Editor: A[ ] (AND [ ])<br />
Logic Byte/Word/Double<br />
Execution time [µs] 1.6 2.6<br />
Number of bytes 6 6<br />
Operands: none<br />
3.6.2 AND NOT [ ] (AN[ ]) AN[ ]<br />
Abbreviation for PLC Editor: AN[ ] (AND NOT [ ])<br />
Logic Byte/Word/Double<br />
Execution time [µs] 2.0 3.2<br />
Number of bytes 6 6<br />
Operands: none<br />
3.6.3 OR [ ] (O[ ]) O[ ]<br />
Abbreviation for PLC Editor: O[ ] (OR [ ])<br />
Logic Byte/Word/Double<br />
Execution time [µs] 1.6 2.6<br />
Number of bytes 6 6<br />
Operands: none<br />
3.6.4 OR NOT [ ] (ON[ ]) ON[ ]<br />
Abbreviation for PLC Editor: ON[ ] (OR NOT [ ])<br />
Logic Byte/Word/Double<br />
Execution time [µs] 2.0 3.2<br />
Number of bytes 6 6<br />
Operands: none<br />
7-70 <strong>TNC</strong> <strong>360</strong> 3 Commands 8/95
3.6.5 EXCLUSIVE OR [ ] (XO[ ]) XO[ ]<br />
Abbreviation for PLC Editor: XO[ ] (EXCL: OR [ ])<br />
Logic Byte/Word/Double<br />
Execution time [µs] 2.0 3.2<br />
Number of bytes 6 6<br />
Operands: none<br />
3.6.6 EXCLUSIVE OR NOT [ ] (XON[ ]) XON[ ]<br />
Abbreviation for PLC Editor: XON[ ] (EXCL: OR NOT [ ])<br />
Logic Byte/Word/Double<br />
Execution time [µs] 2.4 3.8<br />
Number of bytes 8 8<br />
Operands: none<br />
Function of Parentheses with Logic Commands:<br />
The execution sequence in a ladder may be altered by the use of parentheses. The "open<br />
parentheses" command loads the contents of the Accumulator onto the Program Stack. If the Logic<br />
Accumulator is addressed in the previous command, prior to a "parentheses open" instruction, the<br />
content of the Logic Accumulator is loaded into the Program Stack. By addressing the Word<br />
Accumulator, the content of the Word Accumulator will be distributed.<br />
The "close parentheses" instruction initiates the gating of the buffered value from the Program Stack<br />
with the Logic Accumulator and/or the Word Accumulator, depending on which Accumulator was<br />
addressed prior to the "parentheses open" instruction. The result is then available in the<br />
corresponding Accumulator. The maximum nesting level is 16 parentheses.<br />
8/95 <strong>TNC</strong> <strong>360</strong> 3 Commands 7-71
Examples for the commands AND [ ], AND NOT [ ], OR [ ], OR NOT [ ], EXCLUSIVE OR [ ],<br />
EXCLUSIVE OR NOT [ ].<br />
With the use of parentheses, an instruction listing may be developed according to the following logic<br />
block diagram.<br />
M500 ο⎯<br />
M501 ο⎯<br />
I0 ο⎯⎯⎯<br />
I1 ο⎯⎯⎯<br />
OR<br />
OR<br />
AND ⎯⎯⎯⎯ο O12<br />
Initial state: Marker M500 = 0Input I0 = 0<br />
Marker M501 = 1Input I1 = 1<br />
Output O12 = ?<br />
Line Instruction Accumulator Contents Operand Contents<br />
1 L M500<br />
2 O M501<br />
3 A [<br />
4 L I0<br />
5 O I1<br />
6 ]<br />
7 = O12<br />
bit 31 7 0<br />
... x x x x x x x x x x x x x x<br />
... x x x x x x 0 x x x x x x x<br />
... x x x x x x 1 x x x x x x x<br />
... x x x x x x 1 x x x x x x x<br />
... x x x x x x 0 x x x x x x x<br />
... x x x x x x 1 x x x x x x x<br />
... x x x x x x 1 x x x x x x x<br />
... x x x x x x 1 x x x x x x x<br />
Program-stack:<br />
xxxxxxxx 1 xxxxxxx<br />
bit 15 7 0<br />
Line 1: Marker state M500 is loaded into the Logic Accumulator.<br />
Line 2: The Logic Accumulator is gated with Marker M501.<br />
Line 3: Open parentheses: the Accumulator contents are buffered on the Program Stack.<br />
Line 4: Input state I0 is loaded into the Logic Accumulator.<br />
Line 5: The Logic Accumulator is gated with Input I1.<br />
Line 6: Close parentheses: Accumulator content is gated with the content of the Program Stack,<br />
according to the command (A[, O[, NO[ ...).<br />
Line 7:<br />
Note:<br />
The result of the complete logical process is assigned to Output O12.<br />
The functional sequence is in principle the same for word execution, with the exception that the<br />
whole Accumulator is written onto the Stack.<br />
7-72 <strong>TNC</strong> <strong>360</strong> 3 Commands 8/95<br />
0<br />
1<br />
0<br />
1<br />
1
✎<br />
8/95 <strong>TNC</strong> <strong>360</strong> 3 Commands 7-73
3.7 Parentheses with arithmetic commands<br />
Execution time and code length are summarized respectively for the "open parentheses" and<br />
corresponding "close parentheses" commands.<br />
3.7.1 ADDITION [ ] (+[ ]) + [ ]<br />
Abbreviation for PLC Editor: + [ ] (PLUS [ ])<br />
Logic Byte/Word/Double<br />
Execution time [µs] ----- 2.6<br />
Number of bytes ----- 6<br />
Operands: none<br />
3.7.2 SUBTRACTION [ ] (–[ ]) – [ ]<br />
Abbreviation for PLC Editor: – [ ] (MINUS [ ])<br />
Logic Byte/Word/Double<br />
Execution time [µs] ----- 3.2<br />
Number of bytes ----- 6<br />
Operands: none<br />
3.7.3 MULTIPLICATION [ ] (x[ ]) X [ ]<br />
Abbreviation for PLC Editor: x [ ] (MULTIPLY [ ])<br />
Logic Byte/Word/Double<br />
Execution time [µs] *) ----- 11.0<br />
Number of bytes ----- 12<br />
Operands: none<br />
3.7.4 DIVISION [ ] (/[ ]) / [ ]<br />
Abbreviation for PLC Editor: / [ ] (DIVIDE [ ])<br />
Logic Byte/Word/Double<br />
Execution time [µs] *) **) ----- 20.2<br />
Number of bytes ----- 16<br />
In the event of an error (Divisor = 0) in the Division and MODULO functions, the execution time will<br />
be in the range 0.9 to 1.3 µs.<br />
Operands: none<br />
*) See Multiplication<br />
**) See Division<br />
7-74 <strong>TNC</strong> <strong>360</strong> 3 Commands 8/95
3.7.5 REMAINDER [ ] (MOD[ ]) MOD [ ]<br />
Abbreviation for PLC Editor: MOD [ ] (MODULO [ ])<br />
Logic Byte/Word/Double<br />
Execution time [µs] *) **) ----- 20.6<br />
Number of bytes ----- 14<br />
*) See Multiplication<br />
**) See Division<br />
In the event of an error (Divisor = 0) in the Division and MODULO functions, the execution time will<br />
be in the range 0.9 to 1.3 µs.<br />
Operands: none<br />
Function of Parentheses with Arithmetic Commands:<br />
With arithmetic commands, only word execution is possible. The execution sequence in a ladder<br />
may be altered by the use of parentheses. The "open-parentheses" command loads the content of<br />
the Word Accumulator onto the Program Stack. Then the Accumulator is available for the calculation<br />
of intermediate results. The "close parentheses" instruction initiates the gating of the buffered value<br />
from the Program Stack with the content of the Word Accumulator. The result is again loaded into<br />
the Accumulator. The maximum nesting level is 16 parentheses.<br />
Example for the commands ADD [ ], SUBTRACT [ ], MULTIPLY [ ], DIVIDE [ ], DIVISION<br />
REMAINDER [ ]<br />
The following example demonstrates how parentheses influence the result of the operation.<br />
Initial state: Constant = 1000 (decimal)<br />
DoublewordD12 = 15000 (decimal)<br />
DoublewordD36 = 100 (decimal)<br />
DoublewordD100 = ?<br />
The specification of Accumulator and operand contents is given in decimal notation. The ten-place<br />
Accumulator thus permits the maximum possible Accumulator content of (2 147 483 647).<br />
8/95 <strong>TNC</strong> <strong>360</strong> 3 Commands 7-75
Command sequence without parentheses:<br />
Line Instruction Accumulator Content Operand Content<br />
x x x x x x x x x x<br />
1 L D12 1 5 0 0 0 1 5 0 0 0<br />
2 + K1000 1 6 0 0 0<br />
3 / D36 1 6 0 1 0 0<br />
4 = D100 1 6 0 1 0 0<br />
Commend sequence with parentheses:<br />
Line Instruction Accumulator Contents Operand Contents<br />
1 L D12<br />
2 + [<br />
3 L K1000<br />
4 / D36<br />
5 ]<br />
x x x x x x x x x x<br />
1 5 0 0 0 1 5 0 0 0<br />
1 5 0 0 0<br />
1 0 0 0<br />
7-76 <strong>TNC</strong> <strong>360</strong> 3 Commands 8/95<br />
1 0<br />
1 5 0 1 0<br />
Program-stack:<br />
1 0 0<br />
6 = D100 1 5 0 1 0 1 5 0 1 0<br />
1 5 0 0 0<br />
Line 1: The content of Doubleword D12 is loaded into the Word Accumulator.<br />
Line 2: Open parentheses: buffer the Accumulator content in the Program Stack.<br />
Line 3: A constant is loaded into the Word Accumulator.<br />
Line 4: The content of the Word Accumulator is divided by the content of Doubleword D12.<br />
Line 5: Close parentheses: Accumulator content is gated, corresponding to the command (+[, -[, x[<br />
...) with the content of the Program Stack.<br />
Line 6: The result of the complete logical process is assigned to Doubleword D100.
✎<br />
8/95 <strong>TNC</strong> <strong>360</strong> 3 Commands 7-77
3.8 Parentheses with comparison commands<br />
Execution time and code length are summarized respectively for the "open parenthesis" and the<br />
corresponding "close parenthesis" commands.<br />
3.8.1 EQUAL TO [ ] (==[ ]) (== [ ]<br />
Abbreviation for PLC Editor: == [ ] (EQUAL [ ])<br />
Logic Byte/Word/Double<br />
Execution time [µs] ---- 3.0 to 3.2<br />
Number of bytes ---- 6<br />
Operands: none<br />
3.8.2 LESS THAN [ ] ([ ]) > [ ]<br />
Abbreviation for PLC Editor: > [ ] (GREATER THAN [ ])<br />
Logic Byte/Word/Double<br />
Execution time [µs] ---- 3.0 to 3.2<br />
Number of bytes ---- 6<br />
Operands: none<br />
3.8.4 LESS THAN OR EQUAL TO [ ] (
3.8.5 GREATER THAN OR EQUAL TOL[ ] (>=[ ]) >= [ ]<br />
Abbreviation for PLC Editor: >= [ ] (GREATER EQUAL [ ])<br />
Logic Byte/Word/Double<br />
Execution time [µs] ---- 3.0 to 3.2<br />
Number of bytes ---- 6<br />
Operands: none<br />
3.8.6 NOT EQUAL TO [ ] ([ ]) [ ]<br />
Abbreviation for PLC Editor: [ ] (NOT EQUAL [ ])<br />
Logic Byte/Word/Double<br />
Execution time [µs] ---- 3.0 to 3.2<br />
Number of bytes ---- 6<br />
Operands: none<br />
Function of parentheses with comparison commands:<br />
The execution sequence in a ladder may be altered by the use of parentheses. The "openparentheses"<br />
command loads the contents of the Word Accumulator onto the Program Stack. The<br />
Accumulator is now available for the calculation of intermediate results.<br />
The "close-parentheses" instruction initiates the gating of the buffered value from the Program Stack<br />
with the content of the complete Word Accumulator. The result is loaded again into the<br />
Accumulator. The maximum nesting depth is 16 parentheses.<br />
A direct transition from Word to Logic execution takes place with comparison commands. If the<br />
comparison condition is "true", the Logic Accumulator is set to "1". If the condition is not fulfilled, the<br />
Logic Accumulator is set to "0".<br />
8/95 <strong>TNC</strong> <strong>360</strong> 3 Commands 7-79
Example:<br />
Initial state: Constant = 1000 (decimal)<br />
Doubleword D12 = 15000 (decimal)<br />
Doubleword D36 = 10 (decimal)<br />
Output O15 = ?<br />
The Accumulator contents and operand contents are shown in decimal notation. The ten-position<br />
Accumulator thus permits the maximum possible Accumulator content of 2 147 483 647.<br />
The Accumulator is again represented in binary notation after program line 5, as the transition to<br />
logic execution occurs here.<br />
Line Instruction Accumulator Contents Operand Contents<br />
1 L D12<br />
2 >= [<br />
3 L K1000<br />
4 x D36<br />
5 ]<br />
x x x x x x x x x x<br />
1 5 0 0 0<br />
1 5 0 0 0<br />
1 0 0 0<br />
1 0 0 0 0<br />
bit 31 . . . 7 0<br />
x x x x 1 x x x x x x x<br />
6 = O15 x x x x 1 x x x x x x x<br />
1<br />
Program-stack:<br />
1 5 0 0 0<br />
1 5 0 0 0<br />
Line 1: The content of Doubleword D12 is loaded into the Word Accumulator.<br />
Line 2: Open parentheses: buffering of the Accumulator content in the Program Stack.<br />
Line 3: Loading of a Constant into the Word Accumulator.<br />
Line 4: The content of the Word Accumulator is multiplied by the content of Doubleword D12.<br />
Line 5: Close parentheses: Word Accumulator content is gated, corresponding to the<br />
command(==[, >=[,
✎<br />
8/95 <strong>TNC</strong> <strong>360</strong> 3 Commands 7-81
3.9 Shift Commands<br />
3.9.1 SHIFT LEFT (
3.9.2 SHIFT RIGHT (>>) >><br />
Abbreviation for PLC Editor: >> (SHIFT RIGHT)<br />
Byte/Word/Double Constant<br />
Execution time [µs] 2.0 + 0.2 x n 2.0 + 0.2 x n<br />
Number of bytes 6 8<br />
Operands: B, W, D, K<br />
Operation:<br />
Since the sign bit (MSB) is included with this command, it is grouped in with arithmetic commands.<br />
For this reason and out of time considerations, this command should not be used for the isolation of bits.<br />
A SHIFT RIGHT instruction causes the contents of the Word Accumulator to be divided by two. For this<br />
purpose, the bits in the Accumulator are simply shifted by one place to the right. The number of the shift<br />
operations is determined via the operand. Thus the set bits, which are shifted beyond the Accumulator to<br />
the right, are lost; the Accumulator is filled according to the sign, from the left-hand side. With operand<br />
contents greater than 32, the operand value Modulo 32 is used, i.e. the integer remainder from the division<br />
(operand value)/32.<br />
Example:<br />
The content of the Doubleword D8 is to be shifted four times to the right and then stored in D12.<br />
Initial state: Doubleword D8 = 3E 80 (hex)<br />
Doubleword D12 = ?<br />
The Accumulator content is shown here in binary notation and the operand content in hexadecimal<br />
notation.<br />
Line Instruction Accumulator Content Operand<br />
Content<br />
xxxxxxxx xxxxxxxx xxxxxxxx xxxxxxxx<br />
1 L D8 00000000 00000000 00111110 10000000 00 00 3E 80<br />
2 >> K1 00000000 00000000 00011111 01000000<br />
3 >> K1 00000000 00000000 00001111 10100000<br />
4 >> K1 00000000 00000000 00000111 11010000<br />
5 >> K1 00000000 00000000 00000011 11101000<br />
6 = D12 00000000 00000000 00000011 11101000 00 00 03 E8<br />
Line 1: Load Doubleword D8 into the Accumulator.<br />
Line 2 to 5: The content of the Word Accumulator is shifted to the right by the number of bits<br />
specified in the operand. The complete operation can also be undertaken with the<br />
command >> K+4.<br />
Line 6: The result is stored in Doubleword D12.<br />
8/95 <strong>TNC</strong> <strong>360</strong> 3 Commands 7-83
✎<br />
7-84 <strong>TNC</strong> <strong>360</strong> 3 Commands 8/95
3.10 Bit Commands<br />
3.10.1 BIT SET (BS) BS<br />
Abbreviation for PLC Editor: BS (BIT SET)<br />
Byte/Word/Double Constant<br />
Execution time [µs] 2.0 to 2.4 2.0<br />
Number of bytes 6 8<br />
Operands: B, W, D, K<br />
Operation:<br />
With this command, each bit in the Accumulator can be acted on. The addressed bit is set to "1"<br />
through the use of the BS command. The selection (addressing) of the corresponding bit is derived<br />
from the content of the specified Operand or a Constant. In the bit numbering, bit 0 corresponds to<br />
the LSB and bit 31 the MSB. For operand contents larger than 32, the operand value Modulo 32 is<br />
used, i.e. the integer remainder from the division (operand value)/32.<br />
Example:<br />
Load Doubleword D8 in the Accumulator, set the bit 0 of the Accumulator to "1" and store the result<br />
in Doubleword D12.<br />
Initial state: Doubleword D8 = 3E 80 (hex)<br />
Doubleword D12 = ?<br />
Accumulator and operand contents are shown here in hexadecimal notation.<br />
Line Instruction Accumulator Content Operand Content<br />
xx xx xx xx<br />
1 L D8 00 00 3E 80 00 00 3E 80<br />
2 BS K+0 00 00 3E 81<br />
3 = D12 00 00 3E 81 00 00 3E 81<br />
Line 1: Load Doubleword D8 into the Accumulator.<br />
Line 2: The bit specified in the operand is set to 1.<br />
Line 3: The result is stored in Doubleword D12.<br />
8/95 <strong>TNC</strong> <strong>360</strong> 3 Commands 7-85
3.10.2 BIT RESET (BC) BC<br />
Abbreviation for PLC Editor: BC (BIT CLEAR)<br />
Byte/Word/Double Constant<br />
Execution time [µs] 2.2 to 2.6 2.2<br />
Number of bytes 6 8<br />
Operands: B, W, D, K<br />
Operation:<br />
With this command, each bit in the Accumulator can be acted on. The addressed bit is set to "0"<br />
through the use of the BC command. The selection (addressing) of the corresponding bit is derived<br />
from the content of the specified Operand or a Constant. In the bit numbering, bit 0 corresponds to<br />
the LSB and bit 31 the MSB. For operand contents larger than 32, the operand value Modulo 32 is<br />
used, i.e. the integer remainder from the division (operand value)/32.<br />
Example:<br />
Load Doubleword D8 in the Accumulator, set bit 0 of the Accumulator to "0" and store the result in<br />
Doubleword D12.<br />
Initial state: Doubleword D8 = 3E 81 (hex)<br />
Doubleword D12 = ?<br />
Accumulator and operand contents are shown here in hexadecimal notation.<br />
Line Instruction Accumulator Content Operand Content<br />
xx xx xx xx<br />
1 L D8 00 00 3E 81 00 00 3E 81<br />
2 BC K+0 00 00 3E 80<br />
3 = D12 00 00 3E 80 00 00 3E 80<br />
Line 1: Load Doubleword D8 into the Accumulator.<br />
Line 2: The bit specified in the operand is set to "0".<br />
Line 3: The result is stored in Doubleword D12.<br />
7-86 <strong>TNC</strong> <strong>360</strong> 3 Commands 8/95
3.10.3 BIT TEST (BT) BT<br />
Abbreviation for PLC Editor: BT (BIT TEST)<br />
Byte/Word/Double Constant<br />
Execution time [µs] 2.2 to 2.8 2.2 to 2.4<br />
Number of bytes 8 0<br />
Operands: B, W, D, K<br />
Operation:<br />
With this command, the status of each individual bit in the Accumulator may be interrogated. With<br />
BT commands, a direct transition from Word to Logic execution takes place. The BIT TEST tests the<br />
status of a bit from the Word Accumulator and then acts correspondingly on the Logic Accumulator.<br />
If the tested bit is "1", then the Logic Accumulator is also set to "1"; if it is "0" ,it is set to "0". The<br />
program continues in logic execution. The selection (addressing) of the corresponding bit is derived<br />
from the content of the specified Operand or a Constant. In the bit numbering, bit 0 corresponds to<br />
the LSB and bit 31 the MSB. For operand contents larger than 32, the operand value Modulo 32 is<br />
used, i.e. the integer remainder from the division (operand value)/32.<br />
Example:<br />
Load Doubleword D8 in the Accumulator, and assign the logic state of bit 0 to an Output.<br />
Initial state: Doubleword D8 = 3E 81 (hex)<br />
Output O12 = ?<br />
Word Accumulator and operand contents are shown here in hexadecimal notation, the Logic<br />
Accumulator in binary representation.<br />
Line Instruction Accumulator Content Operand Content<br />
xx xx xx xx<br />
1 L D8 00 00 3E 81 00 00 3E 81<br />
2 BT K+0 00 00 3E 81<br />
3 = O12 x x x x x x 1 x x x x x x x 1<br />
Line 1: Load Doubleword D8 into the Accumulator.<br />
Line 2: The bit specified in the operand is tested as to its status.<br />
Line 3: The Logic Accumulator is assigned to Output O12.<br />
8/95 <strong>TNC</strong> <strong>360</strong> 3 Commands 7-87
✎<br />
7-88 <strong>TNC</strong> <strong>360</strong> 3 Commands 8/95
3.11 Stack Operations<br />
It should be noted that with Stack operations all read/write operations on the Data Stack take place<br />
according to the LIFO principle (Last In – First Out).<br />
3.11.1 Load Data onto the Data Stack (PS)PS<br />
Abbreviation for PLC Editor: PS (PUSH)<br />
Logic Byte/Word Double Constant<br />
Execution time [µs] 4.2 5.4/5.0 5.5 4.2<br />
Number of bytes 24 26 22 24<br />
Logic Execution with the PS Command<br />
Operands: M, I, O, T, C<br />
Operation:<br />
With the PS command, data can be buffered. Thus the addressed operand is loaded onto the Data<br />
Stack. Since the Data Stack is organized as 16 bit, a minimum width of one Word must be used in<br />
writing to it. During this the operand value is copied into bit 7 of the current address in the Data<br />
Stack. The free bits of the reserved memory are undefined or unused. In the event of a Stack<br />
overflow, an error message will be issued.<br />
Memory allocation in the Data Stack:<br />
Word Execution with the PS Command<br />
Operands: B, W, D, K<br />
Bit 15 7 0<br />
x x x x x x x x L x x x x x x x<br />
Operation:<br />
With the PS command, data can be buffered. Thus the addressed memory area (B, W, D, K) is<br />
copied into the current address of the Data Stack. With Word execution, two Words are reserved as<br />
standard on the Data Stack per PS command. The operand is extended in the Stack with sign<br />
justification corresponding to the MSB. In the event of a Stack overflow, an error message will be<br />
issued.<br />
Memory allocation in the Data Stack upon saving of:<br />
Bit 31 15 7 0<br />
Byte XXXXXXXXXXXXXXXX XXXXXXXXBBBBBBBB<br />
Word XXXXXXXXXXXXXXXX WWWWWWWWWWWWWWWW<br />
Doubleword D D D D D D D DDDDDDDDD DDDDDDDDDDDDDDDD<br />
Constant KKKKKKKKKKKKKKKK KKKKKKKKKKKKKKKK<br />
8/95 <strong>TNC</strong> <strong>360</strong> 3 Commands 7-89
3.11.2 Acquire data from the data stack (PL)<br />
Abbreviation for PLC Editor: PL (PULL)<br />
Logic Byte/Word Double Constant<br />
Execution time [µs] 3.4 3.8 4.2 ----<br />
Number of bytes 20 20 18 ----<br />
Logic Execution with the PL Command<br />
Operands: M, I, O, T, C<br />
Operation:<br />
The PL command complements the PS command. Data which are saved with PUSH can be taken<br />
from the Data Stack again with PULL. With logic execution, bit 7 is copied from the current address<br />
of the Data Stack into the addressed operand with a PL command. If the Stack is empty, an error<br />
message will be issued.<br />
Logic Execution with the PL Command<br />
Operands: B, W, D<br />
Operation:<br />
The PL command complements the PS command. Data which are saved with PUSH can be taken<br />
from the Data Stack again with PULL. With Word execution, two Words are copied from the current<br />
address of the Data Stack into the addressed memory area with a PL command. If the Stack is<br />
empty, an error message will be issued.<br />
3.11.3 Load logic accumulator onto the data stack (PSL) PSL<br />
Abbreviation for PLC Editor: PSL (PUSH LOGICACCU)<br />
Execution time [µs] 3.0<br />
Number of bytes 20<br />
Operands: none<br />
Operation:<br />
The Logic Accumulator can be buffered with the PSL command. For this purpose, the Logic<br />
Accumulator is loaded onto the Data Stack. Since the Data Stack is organized as 16 bits, it must be<br />
written to with a minimum width of one Word. During this the content of the Logic Accumulator is<br />
copied into the current address of the Data Stack. The free bits of the reserved memory are<br />
undefined or unused. In the event of a Stack overflow, an error message will be issued.<br />
Memory allocation in the Data Stack:<br />
Bit 15 7 0<br />
x x x x x x x x L x x x x x x x<br />
7-90 <strong>TNC</strong> <strong>360</strong> 3 Commands 8/95
3.11.4 Load word accumulator onto the data stack (PSW) PSW<br />
Abbreviation for PLC Editor: PSW (PUSH WORDACCU)<br />
Execution time [µs] 3.4<br />
Number of bytes 20<br />
Operands: none<br />
Operation:<br />
The content of the Word Accumulator can be buffered with the PSW command. For this purpose,<br />
the Word Accumulator is copied into the Data Stack. The content of the Word Accumulator (32 bit)<br />
reserves two Words on the Data Stack. In the event of a stack overflow, an error message will be<br />
issued.<br />
3.11.5 Acquire logic accumulator from the data stack (PLL) PLL<br />
Abbreviation for PLC Editor: PLL (PULL LOGICACCU)<br />
Execution time [µs] 2.2<br />
Number of bytes 16<br />
Operands: none<br />
Operation:<br />
The PLL command complements the PSL command. With a PLL instruction, bit 7 from the current<br />
address of the Data Stack is copied into the Logic Accumulator. If the stack is empty, an error<br />
message will be issued.<br />
3.11.6 Acquire word accumulator from the data stack (PLW)<br />
Abbreviation for PLC Editor: PLW (PULL WORDACCU)<br />
Execution time [µs] 2.6<br />
Number of bytes 16<br />
Operands: none<br />
Operation:<br />
The PLW command complements the PSW command. With a PLW instruction, two Words are<br />
copied from the Data Stack into the Word Accumulator. If the stack is empty, an error message will<br />
be issued.<br />
8/95 <strong>TNC</strong> <strong>360</strong> 3 Commands 7-91
Examples for the commands PS, PL, PSL, PSW, PLL, PLW<br />
The Module 15 is to be called at a specific point in the program. After the return into the main<br />
program, the original Accumulator content is again required for further program run.<br />
Accumulator contents prior to the Call Module: 1A 44 3E 18<br />
Line Instruction Accumulator Contents<br />
49<br />
.<br />
.<br />
.<br />
50 PSW<br />
52 CM 15<br />
54 PLW<br />
55 .<br />
.<br />
.<br />
1 A 4 4 3 E 1 8<br />
1 A 4 4 3 E 1 8 8<br />
1 A 4 4 3 E 1 8<br />
Data stack:<br />
1 A 4 4<br />
3 E 1 8<br />
Line 50: Save the Word Accumulator onto the Data Stack.<br />
Line 52: Subprogram 15 is called up.<br />
Line 54: The original Accumulator contents are transferred back from the Data Stack and<br />
is available for further program run.<br />
Note:<br />
The sequence for stack operations is the same for all commands. Only the data width varies.<br />
7-92 <strong>TNC</strong> <strong>360</strong> 3 Commands 8/95
✎<br />
8/95 <strong>TNC</strong> <strong>360</strong> 3 Commands 7-93
3.12 Jump Commands<br />
3.12.1 Unconditional Jump (JP) JP<br />
Abbreviation for PLC Editor: JP (JUMP)<br />
Jump processed Jump not processed<br />
Execution time [µs] 2.2 ----<br />
Number of bytes 8<br />
Operands: jump address (LBL)<br />
Operation:<br />
A JP command instructs the processor to continue the program at the specified jump address<br />
(Label). This command interrupts a logic sequence.<br />
3.12.2 Jump if Logic Accumulator = 1 (JPT)<br />
Abbreviation for PLC Editor: JPT (JUMP IF TRUE)<br />
Jump processed Jump not processed<br />
Execution time [µs] 3.0 to 3.4 1.0 to 1.4<br />
Number of bytes 12 (10)<br />
Byte information in brackets:<br />
A shorter command is employed in certain high-priority program sequences.<br />
Operands: jump address (LBL)<br />
Operation:<br />
A JPT command is a conditional jump command. If the Logic Accumulator is "1", the program is<br />
continued from the specified jump address (Label). If the Logic Accumulator is "0" the jump is not<br />
processed. This command interrupts a logic sequence.<br />
3.12.3 Jump if Logic Accumulator = 0 (JPF) JPF<br />
Abbreviation for PLC Editor: JPF (JUMP IF FALSE)<br />
Jump processed Jump not processed<br />
Execution time [µs] 3.0 to 3.4 1.0 to 1.4<br />
Number of bytes 12 (10)<br />
Byte information in brackets:<br />
A shorter command is employed in certain high-priority program sequences.<br />
Operands: jump address (LBL)<br />
Operation:<br />
A JPF command is a conditional jump command. If the Logic Accumulator is "0", the program is<br />
continued from the specified jump address (Label). If the Logic Accumulator is "1", the jump is not<br />
processed. This command interrupts a logic sequence.<br />
7-94 <strong>TNC</strong> <strong>360</strong> 3 Commands 8/95
Example for the commands JP, JPT, JPF<br />
A certain program section is to be skipped, depending on Input 15.<br />
Initial state: Input I5 = 1<br />
Line Instruction Accumulator Content Operand Content<br />
Bit 31 . . . 7 0<br />
... x x x x x x X x x x x x x x<br />
1 L I5 ... x x x x x x 1 x x x x x x x 1<br />
2 JPT 10 ... x x x x x x 1 x x x x x x x<br />
3 L I3<br />
4 O M500<br />
5 = O20<br />
6 LBL 10<br />
7 L M100 ... x x x x x x 0 x x x x x x x 0<br />
•<br />
•<br />
•<br />
Line 1: Load the operand contents in the Accumulator.<br />
Line 2: Dependent on Input I5, a program jump is processed.<br />
Line 3: Skipped in this example.<br />
Line 4: Skipped in this example.<br />
Line 5: Skipped in this example.<br />
Line 6: Jump address: The program run is continued from here.<br />
8/95 <strong>TNC</strong> <strong>360</strong> 3 Commands 7-95
3.12.4 Call Module (CM) CM<br />
Abbreviation for PLC Editor: CM (CALL MODULE)<br />
Jump processed Jump not processed<br />
Execution time [µs] 5.0 ----<br />
Number of bytes 22<br />
Special Library Call:<br />
Execution time [µs] 6.2 ----<br />
Number of bytes 24<br />
Operands: jump address (LBL)<br />
Operation:<br />
A Call Module instructs the processor to leave the main program and process the Module<br />
designated by the jump address (LBL). Modules are independent subprograms and are terminated<br />
by the command EM. They can also be called at multiple points in the main program. This command<br />
interrupts a logic sequence.<br />
3.12.5 Call Module if Logic Accumulator = 1 (CMT) CMT<br />
Abbreviation for PLC Editor: CMT (CALL MODULE IF TRUE)<br />
Jump processed Jump not processed<br />
Execution time [µs] 6.8 to 7.2 1.0 to 1.4<br />
Number of bytes 26 (24)<br />
Special Library Call:<br />
Execution time [µs] 7.4 1.4<br />
Number of bytes 28<br />
Byte information in brackets:<br />
A shorter command is employed in certain high-priority program sequences.<br />
Operands: jump address (LBL)<br />
Operation:<br />
A CMT command is a conditional Call Module. If the Logic Accumulator is "1", the Module with the<br />
specified jump address (Label) is processed. If the Logic Accumulator is "0", the main program<br />
continues without a Call Module. This command interrupts a logic sequence.<br />
3.12.6 Call Module if Logic Accumulator = 0 (CMF) CMF<br />
Abbreviation for PLC Editor: CMF (CALL MODULE IF FALSE)<br />
Jump processed Jump not processed<br />
Execution time [µs] 6.8 to 7.2 1.0 to 1.4<br />
Number of bytes 26 (24)<br />
Special Library Call:<br />
Execution time [µs] 7.4 1.4<br />
Number of bytes 28<br />
7-96 <strong>TNC</strong> <strong>360</strong> 3 Commands 8/95
Byte information in brackets:<br />
A shorter command is employed in certain high-priority program sequences.<br />
Operands: jump address (LBL)<br />
Operation:<br />
A CMF command is a conditional Call Module. If the Logic Accumulator is "0", the Module with the<br />
specified jump address (Label) is processed. If the Logic Accumulator is "1", the main program<br />
continues without a Call Module. This command interrupts a logic sequence.<br />
Example for the commands CM, CMT, CMF<br />
A certain Module is to be called, depending on Input I5.<br />
Initial state: Input I5 = 0<br />
Line Instruction Accumulator Content Operand Content<br />
Bit 31 . . . 7 0<br />
... x x x x x x X x x x x x x x<br />
1 L I5 ... x x x x x x 0 x x x x x x x 0<br />
2 CMF 10 ... x x x x x x 0 x x x x x x x<br />
3 L M100 ... x x x x x x 1 x x x x x x x 1<br />
•<br />
•<br />
•<br />
499 EM<br />
500 LBL 10<br />
501 L I3 ... x x x x x x 0 x x x x x x x 0<br />
502 OM 500 ... x x x x x x 1 x x x x x x x 1<br />
503 = O20 ... x x x x x x 1 x x x x x x x 1<br />
504 EM<br />
Line 1: Load the operand contents in the Accumulator.<br />
Line 2: Dependent on Input I5, the Call Module is processed.<br />
Line 499: End Module of the main program.<br />
Line 500: Start of the Module, identified by LBL.<br />
Line 501: Instruction in the subprogram.<br />
Line 502: Instruction in the subprogram.<br />
Line 503: Instruction in the subprogram.<br />
Line 504: End Module: Effects the return to the main program.<br />
Line 3: The main program continues at this point once the Module is processed.<br />
8/95 <strong>TNC</strong> <strong>360</strong> 3 Commands 7-97
3.12.7 End of Module, Program End (EM) EM<br />
Abbreviation for PLC Editor: EM (END OF MODULE)<br />
Execution time [µs] 2.0<br />
Number of bytes 4<br />
Operands: none<br />
Operation:<br />
Every program and/or every subprogram (Module) is terminated with an EM command. An EM<br />
command in a Module initiates the return jump to the Call Module (CM, CMT, CMF). The program is<br />
continued with the instruction following the Call Module. The command EM is handled as program<br />
end criterion; thus subsequent program instructions can be reached using a jump address.<br />
3.12.8 Jump Label (LBL) LBL<br />
Abbreviation for PLC Editor: LBL (LABEL)<br />
Execution time [µs] 0<br />
Number of bytes 0<br />
Operands: 0 to 511<br />
Operation:<br />
The jump label defines a program position as an entry point for the CM and JP commands. Jump<br />
labels may be allocated addresses in the range 0 to 511.<br />
7-98 <strong>TNC</strong> <strong>360</strong> 3 Commands 8/95
✎<br />
8/95 <strong>TNC</strong> <strong>360</strong> 3 Commands 7-99
3.13 CASE statement<br />
3.13.1 Indexed call module (CASE) CASE<br />
Abbreviation for PLC Editor: CASE (CASE OF)<br />
Byte Word<br />
Execution time [µs] 12.0 12.0<br />
Number of bytes 46 44<br />
4 Bytes must be added to the length for each entry in the table (CM).<br />
Operands: B, W<br />
Operation:<br />
With the CASE command, a specific subprogram may be selected from a list of Call Modules (CM).<br />
These CM commands immediately follow the CASE command and are internally numbered in an<br />
ascending sequence from 0 to a maximum of 127. The content of the operands (B, W) addresses<br />
the required Module.<br />
3.13.2 End indexed Call Module (ENDC) ENDC<br />
Abbreviation for PLC Editor: ENDC (ENDCASE)<br />
Byte Word<br />
Execution time [µs] 0 0<br />
Number of bytes 0 0<br />
Operands: none<br />
Operation:<br />
The ENDC command is used in conjunction with the CASE command. It must immediately follow<br />
the list of CM commands.<br />
7-100 <strong>TNC</strong> <strong>360</strong> 3 Commands 8/95
Structure of a CASE statement:<br />
Internal Addressing (0 to max. 127)<br />
1 CASE B 150<br />
2 CM 100
✎<br />
7-102 <strong>TNC</strong> <strong>360</strong> 3 Commands 8/95
7<br />
4 PLC Modules<br />
A range of PLC Modules is available for certain PLC functions that cannot be performed with the<br />
PLC commands, or only in a complicated way. They are described below in more detail.<br />
4.1 Module 9000: Copy a marker block<br />
Module 9000 can be used to copy a block with a certain number of markers, beginning with the start<br />
address, in ascending order to another marker range, beginning at a certain target address.<br />
Care must be taken that the blocks do not overlap, and that there is adequate space for the copied<br />
block after the target address.<br />
Module call:<br />
PS K/B/W/D 1st Marker of the block to be copied (start address)<br />
PS K/B/W/D 1st Marker of the target address for copying<br />
PS K/B/W/D Length of the marker block<br />
CM 9000<br />
If the block is not copied correctly, marker M3171 will be set.<br />
4.2 Module 9001: Copy a Word block<br />
Module 9001 can be used to copy a block with a certain number of Bytes, Words or Doublewords,<br />
beginning with the start address, in ascending order to another area, beginning at a defined target<br />
address.<br />
The length is always given in Bytes.<br />
Care must be taken that the blocks do not overlap, and that there is adequate space for the copied<br />
block after the target address.<br />
Module call:<br />
PS K/B/W/D 1st Byte of the block which is to be copied (start address)<br />
PS K/B/W/D 1st Byte of target address for copying<br />
PS K/B/W/D Length of the block in Bytes<br />
CM 9001<br />
If the block is not copied correctly, marker M3171 will be set.<br />
8/95 <strong>TNC</strong> <strong>360</strong> 4 PLC Modules 7-103
4.3 Module 9010: Indexed reading of Byte<br />
Module 9011: Indexed reading of Word<br />
Module 9012: Indexed reading of Doubleword<br />
Modules 9010, 9011 and 9012 can be used to read a Byte, Word or Doubleword, and load the result<br />
onto the STACK. This allows indexed reading of the Word memory when a Variable is used to define<br />
the memory location.<br />
Module call:<br />
PS K/B/W/D Address of a Byte, where the contents address another Byte, the contents of<br />
which are to be copied to the target address.<br />
CM9010<br />
PL B Target address - Byte<br />
PS K/B/W/D Address of a Word, where the contents address another Word, the contents of<br />
which are to be copied to the target address.<br />
CM9011<br />
PL W Target address - Word<br />
PS K/B/W/D Address of a Doubleword, where the contents address another Doubleword,<br />
the contents of which are to be copied to the target address.<br />
CM 9012<br />
PL D Target address - Doubleword<br />
The addresses which are given must lie within the valid range (0 to 1023). For Word addressing the<br />
address must be divisible by two, for Doubleword addressing by four.<br />
If the Byte, Word or Doubleword is not read correctly, marker M3171 will be set.<br />
Example for Module 9010:<br />
B10<br />
B35<br />
B100<br />
Word memory<br />
35<br />
80<br />
80<br />
STACK<br />
35 (80)<br />
.<br />
PS B10<br />
CM9010<br />
PL<br />
.<br />
B100<br />
.<br />
7-104 <strong>TNC</strong> <strong>360</strong> 4 PLC Modules 8/95
4.4 Module 9020: Indexed writing of Byte<br />
Module 9021: Indexed writing of Word<br />
Module 9022: Indexed writing of Doubleword<br />
Modules 9020, 9021 and 9022 can be used to write the contents of a Byte, Word or Doubleword to<br />
a given address in the Word memory. This makes indexed writing possible in the Word memory,<br />
when a variable is used to define the memory cell.<br />
Module call:<br />
PS K/B/W/D Address of a Byte whose contents address another Byte into which the value of a<br />
second Byte is entered.<br />
PS K/B/W/D Address of the Byte where the value to be transferred is stored.<br />
CM 9020<br />
PS K/B/W/D Address of a Word, where the contents address another Word, where a value is to<br />
be entered from a second Word.<br />
PS K/B/W/D Address of the Word, where the value to be transferred is stored.<br />
CM 9021<br />
PS K/B/W/D Address of a Doubleword, where the contents address another Doubleword<br />
where a value is to be entered from a second Doubleword.<br />
PS K/B/W/D Address of the Doubleword, where the value to be transferred is stored.<br />
CM 9022<br />
The addresses which are given must lie within the valid range (0 to 1023). For Word addressing, the<br />
address must be divisible by two, and for Doubleword addressing by four.<br />
If the Byte, Word or Doubleword is not transferred correctly marker M3171 will be set.<br />
Example for Module 9020:<br />
B10<br />
B35<br />
B100<br />
Word memory<br />
35<br />
120<br />
120<br />
STACK<br />
8/95 <strong>TNC</strong> <strong>360</strong> 4 PLC Modules 7-105<br />
120<br />
35<br />
.<br />
PS B10<br />
PS B100<br />
CM9020<br />
.
4.5 Module 9032: Transfer machine parameter values to the PLC<br />
Module 9032 can be used to transfer the value of a machine parameter, designated by its number<br />
and index, to the PLC.<br />
The value of the machine parameter is transferred to the PLC as an integer. The decimal point is<br />
shifted by the number of possible places after the decimal point. An index must always be defined.<br />
For machine parameters without index, enter the value zero.<br />
Module call:<br />
PS K/B/W/D Number of the machine parameter, the value of which is to be read<br />
PS K/B/W/D Machine parameter index<br />
CM 9032<br />
PL B/W/D Address for machine parameter value<br />
If the machine parameter is read incorrectly, marker M3171 will be set.<br />
7-106 <strong>TNC</strong> <strong>360</strong> 4 PLC Modules 8/95
4.6 Module 9035: Transfer status information to the PLC<br />
Module 9035 can be used to transfer NC status information such as the selected handwheel axis,<br />
number and type of handwheel axes (bit coded) and handwheel interpolation factor to the PLC.<br />
Module call:<br />
PS B/W/D/K Type of NC status information<br />
CM 9035<br />
PL B/W/D NC status value<br />
If the data are incorrectly transferred, marker M3171 is be set.<br />
Type of NC status information: NC status value:<br />
0 ... 8 Not yet implemented<br />
9: Selected handwheel axis –1: No axis or several axes<br />
0: X axis<br />
1: Y axis<br />
2: Z axis<br />
10: Number and type of<br />
handwheel axes<br />
11: Handwheel interpolation<br />
factor X axis<br />
12: Handwheel interpolation<br />
factor Y axis<br />
13: Handwheel interpolation<br />
factor Z axis<br />
14: Handwheel interpolation<br />
factor IV axis<br />
3: IV axis<br />
Bit 0 +0 = X axis with handwheel axis<br />
+1 = X axis is handwheel axis<br />
Bit 1 +0 = Y axis is not handwheel axis<br />
+2 = Y axis is handwheel axis<br />
Bit 2 +0 = Z axis is not handwheel axis<br />
+4 = Z axis is handwheel axis<br />
Bit 3 +0 = IV axis is not handwheel axis<br />
+8 = IV axis is handwheel axis<br />
0 ... 10<br />
0 ... 10<br />
0 ... 10<br />
0 ... 10<br />
8/95 <strong>TNC</strong> <strong>360</strong> 4 PLC Modules 7-107
4.7 Module 9036: Transfer PLC status information to the NC<br />
Module 9036 transfers all or individual axes from the PLC to the NC (for display of interpolation<br />
factors and handwheel functions).<br />
Module call:<br />
PS B/W/D/K Type of PLC status information<br />
PS B/W/D/K PLC status value<br />
CM 9036<br />
PL B/W/D Status messages that are filed in the STACK:<br />
0: PLC status information was transferred<br />
1: Incorrect type of PLC status information<br />
2: Transferred PLC status information incorrect<br />
3: Write inhibited (e.g. through MP)<br />
When the PLC status information has been transferred, Marker M3171 is reset.<br />
Type of NC status information: PLC status value:<br />
0: Handwheel interpolation factor 0 ... 10<br />
X axis<br />
1: Handwheel interpolation factor 0 ... 10<br />
Y axis<br />
2: Handwheel interpolation factor 0 ... 10<br />
Z axis<br />
3: Handwheel interpolation factor 0 ... 10<br />
IV axis<br />
4: Handwheel interpolation factor 0 ... 10<br />
all axes<br />
5: Handwheel interpolation factor 0 ... 10<br />
all axes<br />
6 to 9 reserved<br />
10: jog distance limitation 0 to 50 mm<br />
50 = limit canceled<br />
7-108 <strong>TNC</strong> <strong>360</strong> 4 PLC Modules 8/95
4.8 Module 9040: Transfer coordinate values to the PLC<br />
Module 9040 transfers axis coordinates for all the NC axes to the PLC. Actual value, nominal value,<br />
reference value, servo lag and distance-to-go can be transferred. The values are loaded in the format<br />
1/1000 mm or 1/1000°, beginning at the given target address, in five Doublewords for the X, Y, Z,<br />
and 4th axes.<br />
Module call:<br />
PS K/B/W/D Target address for axis coordinates<br />
PS K/B/W/D Coordinate type<br />
0 = Actual value<br />
1 = Nominal value<br />
2 = Reference value<br />
3 = Servo lag<br />
4 = Distance-to-go<br />
CM 9040<br />
Regardless of whether individual axes are disabled by MP10, the values for all axes will always be<br />
read in. The coordinate value for an axis is undefined until the reference point for this axis has been<br />
passed over.<br />
If the transfer is incorrect, marker M3171 will be set.<br />
4.9 Data transfer by the PLC<br />
The modules described in this section enable the PLC to transfer data via the RS-232-C/V.24 or<br />
RS-422/V.11 data interfaces (see Chapter "Data Interface" for transfer parameters).<br />
The PLC assigns and enables the data interfaces with modules 9100 and 9101. The current status<br />
of the data interface is interrogated by module 9102.<br />
The transmitting and receiving buffers for the PLC are both 128 characters long. Each STRING<br />
terminates in an END character in the transmitting or receiving buffer and therefore a STRING can<br />
contain a maximum of 127 characters. Modules 9105 and 9106 can be used to transfer a block of<br />
binary values (bytes) from the word memory.<br />
Example: Transferring a binary block<br />
➞ B126<br />
.<br />
.<br />
11111010<br />
10000001<br />
.<br />
.<br />
.<br />
= $ FA<br />
= $ 81<br />
When transferring binary data from address<br />
B126 in word memory, the ASCII characters "F",<br />
"A", "8", "1" etc. are transmitted in succession via<br />
the interface.<br />
When binary data are transferred, every byte<br />
contains two ASCII characters. Therefore the<br />
transmitting and receiving buffers are 63 bytes<br />
long.<br />
8/95 <strong>TNC</strong> <strong>360</strong> 4 PLC Modules 7-109
4.9.1 Module 9100: Assign data interface<br />
Module 9100 assigns one of the interfaces (RS-232-C/V.24 or RS-422/V.11, for <strong>TNC</strong> <strong>360</strong> the<br />
RS-232-C) to the PLC, configures the transfer parameters and switches the interface to receive<br />
mode. The interface is also initialized and any fault indicators are reset. The data interface cannot be<br />
used by the input/output program of the NC operator interface because it is assigned to the PLC.<br />
The following constraints should be observed:<br />
- The assignment of an interface to the PLC is canceled whenever the PLC program is transferred.<br />
- Configuration for 19 200 baud is not possible. The baud rate is set in MP 9040. The data format is<br />
7 data bits, one even parity bit.<br />
Module call:<br />
PS K/B/W/D Interface 0 = RS-232-C/V.24<br />
(1 = RS-422/V.11)<br />
CM 9100<br />
If the module is incorrectly processed the interface is not assigned to the PLC and marker M3171 is<br />
set.<br />
Potential errors:<br />
- The interface is already assigned by the input/output program of the user interface.<br />
- The call parameters of the module are outside the permitted range.<br />
- The required baud rate is not available because of the way the other serial interface is<br />
configured. (19 200 baud).<br />
4.9.2 Module 9101: Enable data interface<br />
Module 9101 cancels the assignment of an interface to the PLC and makes it again available for the<br />
user's interface input/output program. Interface receive readiness is canceled.<br />
Module call:<br />
PS K/B/W/D Interface 0 = RS-232-C/V.24<br />
(1 = RS-422/V.11)<br />
CM 9101<br />
Marker M3171 is set if the assignment is not canceled.<br />
Potential errors:<br />
- The interface was not assigned to the PLC.<br />
- The call parameters of the module are outside the permitted range.<br />
7-110 <strong>TNC</strong> <strong>360</strong> 4 PLC Modules 8/95
4.9.3 Module 9102: Interface status<br />
Module 9102 reports all relevant status information about the data interfaces in bit-encoded form.<br />
The "Interface ready" information is not updated until the interface is assigned to either the PLC or<br />
the NC. If the interface is not assigned, the module reports the status that was valid prior to the last<br />
interface enable.<br />
Module call:<br />
PS K/B/W/D Interface 0 = RS-232-C/V.24<br />
(1 = RS-422/V.11)<br />
CM 9102<br />
PL B/W/D The status of the interface is bit-encoded and filed into the addressed storage area<br />
from the STACK.<br />
The following states are possible:<br />
Bit 0 = 1The interface is assigned to the NC.<br />
Bit 1 = 1The interface is assigned to the PLC.<br />
Bit 2 = 1The interface is ready.<br />
Bit 3 = 1The transmitting buffer is empty.<br />
Bit 4 = 1A transmit error has occurred.<br />
Bit 5 = 1The receiving buffer is full.<br />
Bit 6 = 1A receive error has occurred.<br />
Bit 7 = 1 The character for end of text ( or defined in MP5201.2) was received, i.e.<br />
the interface is no longer ready to receive.<br />
All higher-order bits in the STACK are deleted, combinations are possible.<br />
Marker M3171 is set if the call parameters of the module are outside the permitted range.<br />
8/95 <strong>TNC</strong> <strong>360</strong> 4 PLC Modules 7-111
4.9.4 Module 9105: Transmit binary data via data interface<br />
Module 9105 transfers a block of binary data from the word memory via the interfaces.<br />
The appropriate interface must be assigned to the PLC with module 9100 before module 9105 is<br />
called.<br />
Module call:<br />
PS K/B/W/D Interface 0 = RS-232-C/V.24<br />
(1 = RS-422/V.11)<br />
PS K/B/W/D Address of first byte in binary block<br />
(start address: 0 to 1023)<br />
PS K/B/W/D Length of binary block in bytes (0 to 63)<br />
CM 9105<br />
If the module is incorrectly processed the block of binary data is not transferred and marker M3171<br />
is set.<br />
Potential errors:<br />
- The call parameters are outside the permitted range.<br />
- The interface is not assigned to the PLC.<br />
- The transmitting buffer is not empty.<br />
- A part of the binary block is above address 1024<br />
(e.g. Start of binary block: 1020<br />
Length of binary block: 60<br />
=> End address 1080 is above the upper limit of 1024)<br />
- The previous transfer contained an error but the interface was not re-assigned with module 9100.<br />
7-112 <strong>TNC</strong> <strong>360</strong> 4 PLC Modules 8/95
4.9.5 Module 9106: Receive binary data via data interface<br />
Module 9106 reads a block of binary data from the receiving buffer of an interface into the word<br />
memory of the PLC. This process clears the receiving buffer.<br />
The length of the received binary block is fed back as the output.<br />
The appropriate interface must be assigned to the PLC with module 9100 before module 9106 is<br />
called.<br />
Module 9106 can only be run within a SUBMIT program.<br />
Module call:<br />
PS K/B/W/D Interface 0 = RS-232-C/V.24<br />
(1 = RS-422/V.11)<br />
PS K/B/W/D Address of first byte<br />
in binary block<br />
(Start address: 0 to 1023)<br />
CM 9106<br />
PL B/W/D Length of binary block in bytes<br />
If the module is incorrectly processed the block of binary data is not read into the word memory and<br />
marker M3171 is set.<br />
Potential errors:<br />
- The call parameters of the module are outside the permitted range.<br />
- The interface is not assigned to the PLC.<br />
- The receiving buffer contains no data.<br />
- The number of characters in the receiving buffer is uneven or greater than 126.<br />
- The binary block cannot be stored at the specified address because it is too long (start address +<br />
length > 1024).<br />
- The data in the receiving buffer contain characters that cannot be interpreted as hexadecimal<br />
values. Only the characters 0 to 9, A to F and control characters are permitted.<br />
8/95 <strong>TNC</strong> <strong>360</strong> 4 PLC Modules 7-113
4.9.6 Module 9120 Position an auxiliary axis<br />
A positioning movement is started by entering a target position (in the reference system), a feed<br />
rate, and a flag register. The axis is positioned in complete dependence on other processes in the<br />
control. However, it's path is not interpolated with other axes.<br />
Constraints:<br />
− The entered axis must have been activated through MP10 and declared as auxiliary axis through<br />
MP60.<br />
− The values for rapid traverse, analog voltage for rapid traverse, acceleration etc. must be<br />
correctly set in the machine parameters.<br />
− For axes with automatic display value reduction (modulo value in MP810.x) the axis is always<br />
moved in the direction of the shorter path to the target position, except when the target position<br />
is entered as an incremental value.<br />
− There is no monitoring to prevent violation of the limit switch limits!<br />
− The axis must be stationary. Any movement must first be canceled with module 9121.<br />
− If the axis was in reference run mode, this condition is canceled. The positioning movement is<br />
always added to the current counter value.<br />
− If the modules 9120, 9121 and 9122 are called repeatedly for the same axis during a PLC scan,<br />
the last command is executed.<br />
− If in this axis the "positioning error" status is set, it is erased.<br />
Possible errors:<br />
− The transferred axis does not exist.<br />
− The transferred axis was not declared through MP10 and MP60 to be an auxiliary axis.<br />
− The axis is already being positioned.<br />
Call:<br />
PS B/W/D/K (0 to 3 for X/Y/Z/4)<br />
PS B/W/D/K (in the reference system, format 0.001 mm)<br />
PS B/W/D/K (mm/min)<br />
PS B/W/D/K Bit 0 = 1: Target position incremental<br />
= 0: Target position absolute<br />
CM9120<br />
PL B/W/D <br />
0: Positioning was started<br />
1: The transferred axis does not exist<br />
2: The axis is not configured as an auxiliary axis<br />
3: The axis was already positioned<br />
4: The absolute position is outside the modulo range<br />
Error status after call: M3171 = 0: Positioning was correctly started<br />
= 1: Faulty positioning<br />
7-114 <strong>TNC</strong> <strong>360</strong> 4 PLC Modules 8/95
4.9.7 Module 9121 Stop an auxiliary axis<br />
A positioning movement that has been started with Module 9120 or Module 9123 can be canceled<br />
at any point with Module 9121.<br />
Constraints:<br />
− The entered axis must have been activated through MP10 and declared as auxiliary axis through<br />
MP60.<br />
− If the modules 9120, 9121 and 9122 are called repeatedly for the same axis during a PLC scan,<br />
the last command is executed.<br />
Possible errors:<br />
− The transferred axis does not exist.<br />
− The transferred axis was not declared through MP10 and MP60 to be an auxiliary axis.<br />
− The entered axis is already stationary.<br />
Call:<br />
PS B/W/D/K (0 to 3 for X/Y/Z/4)<br />
CM9121<br />
PL B/W/D <br />
0: Positioning movement is canceled<br />
1: Transferred axis does not exist<br />
2: Axis is not configured as an auxiliary axis<br />
3: The entered axis was already stationary<br />
Error status after call: M3171 = 0: Positioning movement is stopped<br />
= 1: Faulty execution<br />
4.9.8 Module 9122 Poll the status of an auxiliary axis<br />
For a certain axis a bit-encoded status word is transferred that provides information on the<br />
momentary condition of this axis.<br />
Constraints:<br />
− Status changed resulting from commands sent by the PLC to control the auxiliary axes (Modules<br />
9120, 9121, 9123) are not recognized until the next PLC scan.<br />
− After switch-on, Bit 1 (axis over reference point) is erased.<br />
− It is possible to position the axis even without first crossing over the reference mark.<br />
8/95 <strong>TNC</strong> <strong>360</strong> 4 PLC Modules 7-115
Possible errors:<br />
The transferred axis does not exist.<br />
Call:<br />
PS B/W/D/K (0 to 3 for X/Y/Z/4)<br />
CM9122<br />
PL B/W/D <br />
Bit 0: 1= Axis is auxiliary axis<br />
Bit 1: 1= Axis has traversed the reference point<br />
Bit 2: 1= Axis is positioned<br />
Bit 3: 1= Axis direction is negative<br />
Bit 4: 1= Positioning error has occurred<br />
Error status after call: M3171 = 0: Status was transferred<br />
= 1: Faulty execution<br />
4.9.9 Module 9123 Traverse the reference point of an auxiliary axis<br />
This module starts a positioning movement in a given direction that continues until a reference point<br />
has been traversed or the positioning movement has been canceled with the module 9121. Because<br />
of the possible problems finding a target position during referencing (direction reversal, etc.) it is<br />
necessary to stop when the reference point has been found.<br />
Constraints:<br />
− The entered axis must have been activated through MP10 and declared as auxiliary axis through<br />
MP60.<br />
− The values for rapid traverse, analog voltage for rapid traverse, acceleration etc. must be<br />
correctly set in the machine parameters.<br />
− There is no monitoring to prevent violation of the limit switch limits!<br />
− The axis must be stationary. Any movement must first be canceled with module 9121.<br />
− Feed rate override is not accounted for.<br />
− The condition "reference mark not yet traversed" is set for the axis.<br />
− An already existing reference point in this axis is erased, but not the position value of the axis.<br />
This is not re-initialized until the reference point has be traversed.<br />
− If the modules 9120, 9121 and 9122 are called repeatedly for the same axis during a PLC scan,<br />
the last command is executed.<br />
− If in this axis the "positioning error" status is set, it is erased.<br />
− The positioning movement is immediately canceled when the reference point is reached. Due to<br />
the braking path of the axis, however, it stops somewhat behind the reference point in the<br />
direction of traverse.<br />
7-116 <strong>TNC</strong> <strong>360</strong> 4 PLC Modules 8/95
Possible errors:<br />
− The transferred axis does not exist.<br />
− The transferred axis was not declared through MP10 and MP60 to be an auxiliary axis.<br />
− The axis is already being positioned.<br />
Call:<br />
PS B/W/D/K (0.to.3 for X/Y/Z/4)<br />
PS B/W/D/K (mm/min)<br />
PS B/W/D/K Bit 0 = 1: negative traverse direction<br />
= 0: positive traverse direction<br />
CM9123<br />
PL B/W/D <br />
0: Positioning was started<br />
1: The transferred axis does not exist<br />
2: The axis is not declared as an auxiliary axis<br />
3: The axis was already positioned<br />
Error status after call: M3171 = 0: Positioning was started<br />
= 1: Faulty execution<br />
4.9.10 Module 9124 Override for PLC axis<br />
An override value can be entered to influence the traversing speed of a PLC axis.<br />
Constraints:<br />
− The entered axis must have been activated through MP10 and declared as auxiliary axis through<br />
MP60.<br />
− The override value can lie between 0% and 100.00% (resolution 0.01%) and must be transferred<br />
as an integer (0 ... 10 000).<br />
− When movement starts, the last transferred override value is considered.<br />
− After a reset or after an interruption of the PLC program the override value in each PLC axis is<br />
set to 100.00%.<br />
− It is also possible to call the module while a PLC axis is moving.<br />
− The module can be called in the same PLC scan in addition to a module from the group<br />
(9120/9121/9123). It does not become effective, however, until the previously called module is<br />
finished.<br />
Possible errors:<br />
- The transferred axis does not exist.<br />
- The transferred axis was not declared through MP10 and MP60 to be an auxiliary axis.<br />
- The transferred override value is incorrect.<br />
8/95 <strong>TNC</strong> <strong>360</strong> 4 PLC Modules 7-117
Call:<br />
PS B/W/D/K (0..3 for X/Y/Z/IV)<br />
PS B/W/D/K (Format 0,01%)<br />
CM 9124<br />
PL B/W/D <br />
0: Override was set<br />
1: Transferred axis is invalid<br />
2: The axis is not defined as a PLC axis<br />
3: Override value is incorrect<br />
Error status after Call: M3171 =0: Override was set<br />
=1: For error condition see above<br />
4.9.11 Module 9150 Run an NC block<br />
With module 9150 the PLC can, during an active M/S/T output, define an NC block that is then<br />
executed after acknowledgment of the M/S/T strobe before the control continues with the NC<br />
program. An NC program can also be defined if a program is not being run. It is then executed<br />
immediately.<br />
Call:<br />
PS B/W/D/K <br />
PS B/W/D/K <br />
CM 9150<br />
PL B/W/D <br />
Error code: 0 = NC block was inserted<br />
1 = NC program was started, but no M/S/T strobe<br />
2 = Unknown error code<br />
3 = False address in the B/W/D range<br />
Error status after call: M3171 = 0 NC block was inserted<br />
= 1 for error condition see above<br />
At present the command code is implemented for TOOL CALL<br />
Parameters :<br />
B active elements bit-coded<br />
Bit 0 =1: Tool number, otherwise modal<br />
Bit 1 =1: Tool axis, otherwise modal<br />
Bit 2 =1: Spindle rpm, otherwise modal<br />
Bit 3 =0<br />
Bit 4 =0<br />
B Tool axis (0/1/2/3 = X/Y/Z/IV)<br />
W Tool number<br />
D Spindle rpm (format 0.001 rpm)<br />
7-118 <strong>TNC</strong> <strong>360</strong> 4 PLC Modules 8/95
✎<br />
8/95 <strong>TNC</strong> <strong>360</strong> 4 PLC Modules 7-119
✎<br />
7-120 <strong>TNC</strong> <strong>360</strong> 4 PLC Modules 8/95
5 Compatibility with <strong>TNC</strong> 355<br />
The flag ranges for the <strong>TNC</strong> 355 have also been used for the <strong>TNC</strong> <strong>360</strong> to enable PLC routines<br />
created for the <strong>TNC</strong> 355 to be run on the <strong>TNC</strong> <strong>360</strong> as well.<br />
However there are many functions that can be programmed much more simply with PLC words<br />
with the <strong>TNC</strong> <strong>360</strong>. PLC marker M2719 must be set to activate the strobes for word processing.<br />
Marker Function Set Reset<br />
M2719 Deactivate the <strong>TNC</strong> 355 mode PLC PLC<br />
0 = Activate strobes for marker range<br />
1 = Activate strobes for word processing<br />
M2719 = 1 M2719 = 0<br />
Meaning Marker Data Marker Data<br />
Start PLC Pos. X 2704 D528 2452 M2560 to M2564<br />
Start PLC Pos. Y 2705 D532 2453 M2565 to M2569<br />
Start PLC Pos. Z 2706 D536 2454 M2570 to M2574<br />
Start PLC Pos. IV 2707 D540 2455 M2575 to M2579<br />
Read out strobe for<br />
values in Q<br />
parameter (Q100<br />
to Q107)<br />
2713 D528 2809 M2560 to M2576<br />
Read out strobe – – 2599 M2560 to M2567<br />
tool number<br />
M2112 to M2119<br />
Read in strobe tool – – 2598 M2560 to M2567<br />
number<br />
M2572 to M2579<br />
Strobe datum 2716 D528 to D540 2819 MP4210.32 to<br />
correction<br />
MP4210.46<br />
Spindle orientation 2712 D592 2527 M2585 to M2589<br />
HEIDENHAIN recommend programming the PLC functions over the word range only. This makes<br />
the PLC program easy to read and a lot shorter.<br />
8/95 <strong>TNC</strong> <strong>360</strong> 5 Compatibility with <strong>TNC</strong> 355 7-121
5.1 PLC Program conversion<br />
PLC programs created for the <strong>TNC</strong> 355 can also be used on the <strong>TNC</strong> <strong>360</strong>.<br />
When these PLC programs are downloaded to the <strong>TNC</strong> <strong>360</strong> the following command codes are<br />
automatically modified:<br />
U → A<br />
UN → AN<br />
E → I<br />
A → O<br />
Z → C<br />
An EM block is automatically appended at the end of the PLC program.<br />
The programmer must ensure that the PLC program starts with a logic sequence.<br />
7-122 <strong>TNC</strong> <strong>360</strong> 5 Compatibility with <strong>TNC</strong> 355 8/95
5.2 Compatibility markers<br />
The table below lists the PLC markers that have only been retained for compatibility with the<br />
<strong>TNC</strong> 355. However the various PLC functions should be programmed with the <strong>TNC</strong> <strong>360</strong> using the<br />
appropriate PLC words.<br />
Marker Function Set Reset <strong>TNC</strong> <strong>360</strong>/335<br />
M2032 T Code 1st bit (lsb) NC NC<br />
M2033 T Code 2nd bit NC NC<br />
M2034 T Code 3rd bit NC NC<br />
M2035 T Code 4th bit NC NC W262<br />
M2036 T Code 5th bit NC NC W264<br />
M2037 T Code 6th bit NC NC<br />
M2038 T Code 7th bit NC NC<br />
M2039 T Code 8th bit (msb) NC NC<br />
M2050 Operating mode: Programming and editing NC NC<br />
M2051 Operating mode: <strong>Manual</strong> NC NC<br />
M2052 Operating mode: Electronic handwheel NC NC<br />
M2053 Operating mode: Positioning with manual input NC NC<br />
M2054 Operating mode: Program run/Single block NC NC W272<br />
M2055 Operating mode: Program run/Full sequence NC NC<br />
M2056 Operating mode: Test run NC NC<br />
M2057 Operating mode: Traversing the reference marks NC NC<br />
M2064 S Code 1st bit (lsb)<br />
M2065 S Code 2nd bit<br />
M2066 S Code 3rd bit<br />
M2067 S Code 4th bit<br />
M2068 S Code 5th bit W258<br />
M2069 S Code 6th bit<br />
M2070 S Code 7th bit<br />
M2071 S Code 8th bit (msb)<br />
M2072 M Code 1st bit (lsb)<br />
M2073 M Code 2nd bit<br />
M2074 M Code 3rd bit<br />
M2075 M Code 4th bit<br />
M2076 M Code 5th bit W260<br />
M2077 M Code 6th bit<br />
M2078 M Code 7th bit<br />
M2079 M Code 8th bit (msb)<br />
M2080 Minimum rpm from MP3020 1st bit (lsb)<br />
M2081 Minimum rpm from MP3020 2nd bit<br />
M2082 Minimum rpm from MP3020 3rd bit W1008<br />
M2083 Minimum rpm from MP3020 4th bit<br />
M2084 Minimum rpm from MP3020 5th bit<br />
M2085 Minimum rpm from MP3020 6th bit<br />
M2086 Minimum rpm from MP3020 7th bit<br />
M2087 Minimum rpm from MP3020 8th bit (msb)<br />
M2088 Increment from MP3020 1st bit (lsb)<br />
M2089 Increment from MP3020 2nd bit —<br />
M2090 Increment from MP3020 3rd bit<br />
M2091 Increment from MP3020 4th bit (msb)<br />
8/95 <strong>TNC</strong> <strong>360</strong> 5 Compatibility with <strong>TNC</strong> 355 7-123
Marker Function Set Reset <strong>TNC</strong> <strong>360</strong>/335<br />
M2104 G Code S Analog 1st bit (lsb) W256<br />
M2105 G Code S Analog 2nd bit<br />
M2106 G Code S Analog 3rd bit (msb)<br />
M2112 T Number (P number) 1st decade (lsb)<br />
M2113 T Number (P number) 1st decade<br />
M2114 T Number (P number) 1st decade<br />
M2115 T Number (P number) 1st decade (msb) W262<br />
M2116 T Number (P number) 2nd decade (lsb) W264<br />
M2117 T Number (P number) 2nd decade<br />
M2118 T Number (P number) 2nd decade<br />
M2119 T Number (P number) 2nd decade (msb)<br />
M2176 Code operating mode (lsb)<br />
M2177 Code operating mode W272<br />
M2178 Code operating mode<br />
M2179 Code operating mode (msb)<br />
M2186 Code number 84159 entered NC PLC D276<br />
M2192<br />
to<br />
M2239<br />
Markers controllable by MP4310.0, MP4310.1 and<br />
MP4310.2<br />
NC NC W976<br />
to<br />
W986<br />
M2452 Activate PLC positioning X axis PLC NC M2704<br />
M2453 Activate PLC positioning Y axis PLC NC M2705<br />
M2454 Activate PLC positioning Z axis PLC NC M2706<br />
M2455 Activate PLC positioning 4th axis PLC NC M2707<br />
M2468 Complement PLC positioning X axis NC PLC<br />
M2469 Complement PLC positioning Y axis NC PLC —<br />
M2470 Complement PLC positioning Z axis NC PLC<br />
M2471 Complement PLC positioning 4th axis NC PLC<br />
M2527 Activate spindle orientation PLC NC M2712<br />
M2543 Complement spindle orientation NC PLC —<br />
M2560<br />
to<br />
M2589<br />
BCD numerical values for PLC positioning, tool<br />
number, spindle orientation and Q parameters<br />
PLC PLC D528<br />
to<br />
D544<br />
M2597 Tool number: output mode, 0 = binary, 1 = BCD PLC PLC —<br />
M2598 Transfer of the tool number PLC PLC<br />
M2599 Transfer of the tool number PLC PLC<br />
M2800<br />
to<br />
M2807<br />
Key code PLC PLC W516<br />
M2808 Strobe marker for key code PLC NC M2813<br />
M2809 Activate numerical value transfer from PLC to NC PLC PLC M2713<br />
M2810 Data format of a numerical value in M2560-M2576 PLC PLC —<br />
M2811 Data format of a numerical value in M2560-M2576 PLC PLC —<br />
M2812 Data format of a numerical value in M2560-M2576 PLC PLC —<br />
M2817 Q number (lsb) PLC PLC W516<br />
M2818 Q number (msb) PLC PLC W516<br />
M2819 Activate datum correction PLC NC M2716<br />
M2832<br />
to<br />
M2839<br />
Key code of the pressed inhibited key NC NC W274<br />
7-124 <strong>TNC</strong> <strong>360</strong> 5 Compatibility with <strong>TNC</strong> 355 8/95
Marker Function Set Reset <strong>TNC</strong> <strong>360</strong>/335<br />
M3200<br />
to<br />
M3263<br />
Values from MP4310.3 to MP4310.6 NC NC W 976<br />
to<br />
W 968<br />
5.3 Incompatibility<br />
It has not been possible to maintain compatibility in all areas of the PLC programs. This is because<br />
the <strong>TNC</strong> 355 differs considerably from the <strong>TNC</strong> <strong>360</strong> both in memory organization and ergonomics.<br />
5.3.1 PLC Macros<br />
The following macro programs are available in the <strong>TNC</strong> 355 for controlling the toolchanger.<br />
M3264 Convert tool number or pocket number to binary code<br />
M3265 Increment actual value of pocket number<br />
M3266 Decrement actual value of pocket number<br />
M3267 Compare actual and nominal values of pocket number<br />
These macro programs are no longer available in the <strong>TNC</strong> <strong>360</strong>/<strong>TNC</strong> 335. The following PLC<br />
subroutines can be used in place of the macro programs.<br />
Convert tool number or pocket number to binary code<br />
M2032 to M2039 -> M3024 to M3031<br />
LBL 200 ;M3264 (<strong>TNC</strong> 355)<br />
L W262 ;T code in binary<br />
B= M3024 ;file in bit area<br />
== K+O<br />
= M3043 ;T code == O<br />
LB M3200 ;low byte from MP4310.3<br />
= B255 ;load MP4310.3<br />
LB M3024<br />
> B255<br />
= M3044 ;Tcode > MP4310.3 1 byte<br />
EM<br />
Increment actual value of pocket number<br />
(M3032 to M3039) = (M3032 to M3039) + 1<br />
LBL 210 ;B265 (<strong>TNC</strong> 355)<br />
LB M3200 ;low byte from MP4310.3<br />
= B255 ;number of mag. pockets<br />
LB M3032 ;actual value<br />
+ K+1 ;increment by 1<br />
B= M3032 ;<br />
JPT 211<br />
L K+1 ;load 1 as actual value<br />
B= M3032 ;<br />
EM<br />
Decrement actual value of pocket number<br />
(M3032 to M3039) = (M3032 to M3039) - 1<br />
LBL 220 ;M3266 (<strong>TNC</strong> 355)<br />
LB M3200 ;low byte from MP4310.3<br />
= B255 ;number of mag. pockets<br />
LB M3032 ;actual value<br />
- K+1 ;decrement by 1<br />
B= M3032 ;<br />
JPT 211<br />
L B255 ;load number of mag. pockets<br />
B= M3032 ;as actual value<br />
LBL221<br />
EM<br />
Compare actual and nominal values of pocket number<br />
LBL230 ;M3267 (<strong>TNC</strong> 355)<br />
LB M3032 ;read actual value from markers<br />
= B250 ;actual value<br />
LB M3024 ;read nominal value from markers<br />
= B252 ;nominal value<br />
LW M3200 ;read reduction and tool max<br />
= W254 ;high byte reduc. byte 254, low byte max. T byte 255<br />
L B250<br />
== B252 ;test actual/nominal for parity<br />
= M3040 ;actual== nominal<br />
JPT 231 ;if actual==nominal then end<br />
L B250 ;actual - nominal=>B248<br />
- B252<br />
= B248<br />
> K+0<br />
JPT 232<br />
L- B248<br />
= B248 ;B248:=Abs(actual - nominal)<br />
LBL232<br />
; Compute reduction<br />
L B255<br />
- B254<br />
L B255 ;Max. tool's<br />
>> K+1 ;DIV 2<br />
= B255 ;Max. tool's DIV 2<br />
L B252 ;nominal value<br />
> B250 ;actual value<br />
A[<br />
L B248 ;Abs (actual - nominal)<br />
5.3.2 Non-implemented markers<br />
Marker Function<br />
M2021 Nominal/actual speed difference over ranged<br />
M2024 Touch probe ready<br />
M2188 Checksum error for non-volatile Q parameters<br />
M2288 X axis was moving when program aborted<br />
M2289 Y axis was moving when program aborted<br />
M2290 Z axis was moving when program aborted<br />
M2291 Axis 4 was moving when program aborted<br />
M2510 Deactivate spindle override<br />
M2511 Deactivate feed rate override<br />
M2526 Switch X/Y or Z to 4th axis<br />
M2542 Complement for M2526<br />
M2590 Define the axis to be switched to 4th axis (lsb)<br />
M2591 Define the axis to be switched to 4th axis (msb)<br />
M2592 Tool number from M2560 to M2567<br />
M2593 Go to Hirth grid after NC STOP<br />
M2596 Select central tool file during active program run mode<br />
M2602 Define reference point traverse<br />
M2603 Axis sequence for reference point traverse (lsb)<br />
M2604 Axis sequence for reference point traverse<br />
M2605 Axis sequence for reference point traverse<br />
M2606 Axis sequence for reference point traverse<br />
M2607 Axis sequence for reference point traverse (msb)<br />
M2657 Display a second auxiliary function<br />
M2664 No standstill monitoring X axis<br />
M2665 No standstill monitoring Y axis<br />
M2666 No standstill monitoring Z axis<br />
M2667 No standstill monitoring axis 4<br />
M2820 Update the central tool file<br />
M2821 Strobe for updating the central tool file<br />
M2822 Strobe for % factor for spindle voltage<br />
M2823 Select ramp pairs for S analog<br />
5.3.3 PLC Cycle time<br />
The contouring controls of the <strong>TNC</strong> 355, <strong>TNC</strong> <strong>360</strong> and <strong>TNC</strong> 335 have different PLC cycle times. This<br />
must be remembered when using the timers and counters.<br />
Contouring Control PLC Cycle Time<br />
<strong>TNC</strong> 355 without<br />
extended memory<br />
20 ms<br />
<strong>TNC</strong> 355 with<br />
extended memory<br />
22 ms<br />
<strong>TNC</strong> <strong>360</strong> 24 ms<br />
<strong>TNC</strong> 335 24 ms<br />
7-128 <strong>TNC</strong> <strong>360</strong> 5 Compatibility with <strong>TNC</strong> 355 8/95
Data Interface – Contents 8<br />
1 Introduction 8-3<br />
1.1 Principles of data transfer 8-4<br />
1.1.1 Serial/parallel 8-4<br />
1.1.2 Asynchronous data format 8-5<br />
1.1.3 Checking data 8-7<br />
1.1.4 Data transfer rate 8-8<br />
1.2 Handshaking 8-9<br />
1.2.1 Hardware handshaking 8-9<br />
1.2.2 Software handshaking 8-9<br />
2 <strong>TNC</strong> data interfaces 8-10<br />
2.1 General 8-10<br />
2.2 RS-232-C/V.24 interface 8-10<br />
2.2.1 Hardware 8-10<br />
2.2.2 Signal levels 8-11<br />
2.2.3 Signal designation 8-11<br />
2.2.4 Pin layouts 8-13<br />
2.3 Data interface functions 8-14<br />
2.3.1 Saving/reading files 8-14<br />
2.3.2 Output to external devices 8-15<br />
2.3.3 Reading in and simultaneously executing programs (DNC operation) 8-15<br />
2.3.4 Communication between <strong>TNC</strong>s 8-15<br />
2.4 Data transmission protocols 8-15<br />
2.4.1 Standard transmission protocol 8-16<br />
2.4.2 Data transfer with Block Check Character (BCC) 8-17<br />
2.5 Configuration of the interface 8-22<br />
2.5.1 Selection of the interface 8-22<br />
2.5.2 Freely configurable interfaces 8-22<br />
2.6 External programming 8-28<br />
2.7 Interfacing with other equipment 8-28<br />
3 Standard Data Transmission Protocol 8-29<br />
3.1 General information 8-29<br />
3.1.1 Calling the program directory 8-29<br />
3.1.2 Outputting a selected program 8-31<br />
3.1.3 Outputting all programs 8-31<br />
3.1.4 Reading in selected program 8-31<br />
3.1.5 Reading in all programs 8-33<br />
3.1.6 Reading in an offered program 8-34<br />
8/95 <strong>TNC</strong> <strong>360</strong> 8-1
4 Data transfer with BCC 8-35<br />
4.1 General 8-35<br />
4.1.1 Calling a program directory 8-36<br />
4.1.2 Outputting a selected program 8-37<br />
4.1.3 Outputting all programs 8-37<br />
4.1.4 Reading in a selected program 8-38<br />
4.1.5 Reading in all programs 8-39<br />
4.1.6 Reading in an offered program 8-40<br />
5 Data transfer by PLC 8-42<br />
5.1 Configuration of PLC data interface 8-42<br />
6 Error messages 8-43<br />
6.1 <strong>TNC</strong> error messages 8-43<br />
6.2 HEIDENHAIN peripherals' error codes 8-44<br />
6.3 Data transmission software error messages 8-45<br />
8-2 <strong>TNC</strong> <strong>360</strong> 8/95
1 Introduction<br />
When operating a computer system (PC, Controller), a wide variety of peripherals, such as printers,<br />
external memories (floppy-disk drives; hard disks) or other computer systems, can be used in<br />
conjunction with the Central Processing Unit (CPU).<br />
A data interface makes is possible for the CPU and the peripherals to communicate.<br />
Communication requires facilities for transferring data to the peripherals and of course, physical<br />
connection via a transmission line. Peripheral device control and communication, via the interface, is<br />
generally the responsibility of the computer system. The computer system therefore has to meet<br />
certain requirements.<br />
The interfaces, which primarily consist of the physical links between the computer system and the<br />
peripherals, need appropriate software in order to control the transfer of information between the<br />
individual units. The relationship between hardware and software, which fully defines an interface, is<br />
illustrated by the following diagram:<br />
Computer Software Hardware Software Peripheral<br />
e.g. PC,<br />
Controller<br />
,QWHUIDFH<br />
e.g. Printer,<br />
external memory<br />
The "hardware" in the diagram covers all the physical components, such as circuit construction, pin<br />
layout, electrical characteristics, etc. The "software" includes, for example, the drivers for the output<br />
modules and is associated with both the operating software of the computer system and the<br />
peripherals.<br />
Due to the wide variety of computers, controllers and peripherals, standard interfaces have been<br />
introduced, which, in an ideal situation, enable extremely varied devices to be connected to each<br />
other.<br />
Such standards include, for example, the RS-232-C/V.24 interface, which is described in detail later.<br />
8/95 <strong>TNC</strong> <strong>360</strong> 1 Introduction 8-3
1.1 Principles of data transfer<br />
Since all information is conveyed as data, one first needs to become familiar with a few of the<br />
principles of data transfer. The term "Data" is used to describe all of the information which the<br />
computer is capable of collecting and processing.<br />
1.1.1 Serial/parallel<br />
Data can be transmitted in either serial or parallel format.<br />
Basically, data is coded in the computer system, e.g. as bytes (8 bits) and supplied to the interface in<br />
parallel.<br />
In the case of serial data transmission, the parallel information from the computer system has to be<br />
converted into a serial data-flow by using an USART (Universal Synchronous/Asynchronous<br />
Receiver/Transmitter).<br />
The receiver accepts the serial data-flow and converts it back again into parallel information.<br />
Speicher<br />
Memory<br />
0<br />
1<br />
1<br />
0<br />
1<br />
0<br />
1<br />
1<br />
Sender<br />
Transmitter<br />
Schnittstellen-Puffer<br />
Interface buffer<br />
MSB<br />
LSB<br />
0<br />
1<br />
1<br />
0<br />
1<br />
0<br />
1<br />
1<br />
0 1 1 0 1 0 1 1<br />
Übertragungsstrecke<br />
Transmission path<br />
Empfänger<br />
Receiver<br />
Schnittstellen-Puffer<br />
Interface buffer<br />
8-4 <strong>TNC</strong> <strong>360</strong> 1 Introduction 8/95<br />
0<br />
1<br />
1<br />
0<br />
1<br />
0<br />
1<br />
1<br />
MSB<br />
LSB<br />
Speicher<br />
Memory<br />
A parallel interface, on the other hand, does not need a USART: just a line driver. Typically, the<br />
connection between the computer system and a peripheral consists of a 36-way ribbon cable. Its<br />
maximum length is generally about 3 meters.<br />
0<br />
1<br />
1<br />
0<br />
1<br />
0<br />
1<br />
1
Speicher<br />
Memory<br />
0<br />
1<br />
1<br />
0<br />
1<br />
0<br />
1<br />
1<br />
Sender<br />
Transmitter<br />
Schnittstellen-Puffer<br />
Interface buffer<br />
MSB<br />
LSB<br />
0<br />
1<br />
1<br />
0<br />
1<br />
0<br />
1<br />
1<br />
0<br />
1<br />
1<br />
0<br />
1<br />
0<br />
1<br />
1<br />
Übertragungsstrecke<br />
Transmission path<br />
Empfänger<br />
Receiver<br />
Schnittstellen-Puffer<br />
Interface buffer<br />
8/95 <strong>TNC</strong> <strong>360</strong> 1 Introduction 8-5<br />
0<br />
1<br />
1<br />
0<br />
1<br />
0<br />
1<br />
1<br />
MSB<br />
LSB<br />
Speicher<br />
Memory<br />
One obvious advantage of serial data transmission becomes apparent when long distances have to<br />
be covered. With parallel transmission, the cost of the cable increases with every additional bit<br />
which has to be transmitted. In addition, the effect of interference on adjacent wires from sharp<br />
signal edges and electrical coupling is far greater over long lines than it is with serial transmission<br />
which is relatively slower and uses fewer wires.<br />
The comparatively slow speed of serial data transmission is, at the same time, its greatest<br />
drawback. Since the individual bits are sent along the line one after the other and each transfer takes<br />
a specified time, it takes far longer to send a binary word to the receiver than it would if conveyed by<br />
parallel transmission. As it happens, most peripheral devices work fairly slowly and cannot in fact<br />
cope with data transmitted at high speed. Serial data transmission is generally adequate for devices<br />
such as external memories or mechanical printers, especially as such devices have a large internal<br />
buffer for incoming characters.<br />
1.1.2 Asynchronous data format<br />
In order for communication to be established between two devices involved in data interchange,<br />
they have to use a common language.<br />
In the field of computer engineering, this language consists of digital coding of letters, figures and<br />
control characters.<br />
One of the most common codes is the ASCII code (American Standard Code for Information<br />
Interchange) which codes all characters with seven bits.<br />
In all, it is possible to code 2 7 = 128 characters. According to the ASCII code, the control character<br />
"Line Feed" or is coded with the following combination of bits:<br />
0 0 0 1 0 1 0 = 10 dec = 0A hex<br />
MSB LSB<br />
0<br />
1<br />
1<br />
0<br />
1<br />
0<br />
1<br />
1
The letter 'z' is represented by the following combination of bits:<br />
1 1 1 1 0 1 0 = 122 dec = 7A hex<br />
MSB LSB<br />
i.e. when the letter "z" is transmitted via a serial interface, the appropriate bits are sent one after the<br />
other. The ASCII code is shown in full in the Appendix.<br />
Proper data transmission requires the device concerned to interpret incoming data correctly and, in<br />
particular, to determine the start of a transmission. For this purpose, there is a synchronization<br />
process which ensures that the receiver detects the first bit of a character correctly. With an<br />
asynchronous data format, a start bit is sent before each data word and the word is then ended by<br />
one or two stop bits. One feature of this data format is that, starting from a quiescent state,<br />
transmission of a data word can begin at any time.<br />
A quiescent state exists before switch-on and is reverted to after each transmission. Before a data<br />
bit can be transmitted this has to be communicated to the receiver. Otherwise, if the first bit of the<br />
data word has the same value as the quiescent state, the receiver will not notice any difference<br />
from the quiescent state.<br />
A so-called "start bit" is used for this purpose:<br />
For the duration of a single bit, the transmitter emits a logic value which clearly differs from the<br />
quiescent state and which gives the receiver an opportunity to prepare its polling logic to read in the<br />
data bit. After the start bit has been sent, the data word is transmitted, bit by bit, starting with the<br />
LSB (Least Significant Bit). After the MSB (Most Significant Bit) of the data word, a so-called "parity<br />
bit" is inserted (see Section 1.1.3 "Checking data").<br />
The parity bit is followed by one or two stop bits. These final stop bits ensure that the receiver has<br />
enough time to recognize the transmitter again before the start of the next character.<br />
Synchronization is repeated before each character.<br />
The synchronization is repeated before every word and is valid for one character frame.<br />
Quiescent state<br />
Character frame<br />
Start 1st Bit2nd Bit3rd Bit4th Bit5th Bit6th<br />
Bit7th<br />
BitParity<br />
bit LSB MSB bit<br />
Data bits<br />
1 or 2<br />
stop bits<br />
Quiescent stat<br />
8-6 <strong>TNC</strong> <strong>360</strong> 1 Introduction 8/95
1.1.3 Checking data<br />
With an asynchronous character frame, transmission errors can be detected by using a parity-check<br />
procedure. A parity bit is sent in addition to the data bits. The evaluation of this bit enables the<br />
receiver to check the parity of received data.<br />
The parity bit can take three different forms; the same form of parity must be set at both interfaces.<br />
– No parity check<br />
Error detection is dispensed with.<br />
– Even parity<br />
The transmitter counts bits with a value of 1. If the number is odd, the parity bit is set to 1,<br />
otherwise it is cleared to 0. The sum of the set data bits and the parity bit is therefore always even.<br />
Upon receiving a word, the receiver counts all of the set bits, including the parity bit. If this count<br />
yields an odd number, there is a transmission error and the data word must be repeated, or an error<br />
message will be displayed.<br />
– Odd parity<br />
In this case, the parity bit is so chosen by the transmitter that the total number of all the set bits is<br />
odd. In this case, an error will be detected if the receiver observes an even number of set bits in its<br />
evaluation.<br />
Example:<br />
Letter: "z" 1111010<br />
Parity bit<br />
1 Even parity<br />
0 Odd parity<br />
8/95 <strong>TNC</strong> <strong>360</strong> 1 Introduction 8-7
1.1.4 Data transfer rate<br />
The data transfer rate of an interface is given in 'baud' and indicates the number of bits of data<br />
transmitted in one second.<br />
1 baud = [1 Bit<br />
s ]<br />
Common baud rates are:<br />
110, 150, 300, 600, 1200, 2400, 4800, 9600, 19 200 and 38 400 baud.<br />
The time taken to transmit one bit (t B ) can be calculated from the baud rate:<br />
"1"<br />
"0"<br />
t B<br />
t B =<br />
1<br />
Baud rate[ bits<br />
s ]<br />
For example, a baud rate of 19,200 baud will have a bit duration of t B = 52.083 μs.<br />
The number of characters transmitted per second can be calculated from the baud rate and the<br />
transmission format:<br />
Baud rate[<br />
Characters per second =<br />
bits<br />
s ]<br />
Number of bits per character<br />
Example:<br />
With a transmission format of seven data bits, one start bit, two stop bits and a data transfer rate of<br />
exactly 300 baud:<br />
300 Baud<br />
10 bits<br />
will be transmitted.<br />
= 30 characters per second<br />
8-8 <strong>TNC</strong> <strong>360</strong> 1 Introduction 8/95<br />
t
1.2 Handshaking<br />
A "handshake" procedure is often used in connection with interfaces. This means that two devices<br />
are, as it were, working "hand in hand" in order to control data transfer. A distinction is drawn<br />
between "software handshaking" and "hardware handshaking".<br />
Either hardware or software handshaking can be chosen for communication between two units.<br />
1.2.1 Hardware handshaking<br />
With this procedure, control of data transfer is executed by electrical signals. Important information,<br />
such as "Clear To send" (CTS), "Clear to receive", "Start transmission" and "Stop transmission", is<br />
signaled by the hardware.<br />
For example, when a computer character is to be transmitted, the CTS signal line (see Section 2.2<br />
"RS-232-C/V.24 interface") is checked to see whether it is active (ON). If it is, the character is<br />
transmitted. Otherwise the computer will delay transmission until the CTS line is switched to active.<br />
Hardware handshaking requires, as a minimum, two data lines - TxD and RxD, the RTS control line<br />
and the CTS signal line and a ground connection.<br />
1.2.2 Software handshaking<br />
With software handshake, control of data transfer is achieved by appropriate control characters<br />
transmitted via the data line. One such handshake is the XON/XOFF method, which is in widespread<br />
use on the RS-232-C/V.24 interface. The meaning "XON" is assigned to an ASCII code control<br />
character (DC1) and the meaning "XOFF" to another (DC3). Before transmitting a character, the<br />
computer checks whether the receiving unit is transmitting the XOFF character. If it is, it delays<br />
transmission until it receives the character XON, indicating that the connected unit is ready to<br />
receive further characters.<br />
Apart from the data lines (TxD, RxD), and ground, no other lines are needed for software<br />
handshaking.<br />
8/95 <strong>TNC</strong> <strong>360</strong> 1 Introduction 8-9
2 <strong>TNC</strong> data interfaces<br />
2.1 General<br />
The <strong>TNC</strong> <strong>360</strong> has a data interface, the RS-232-C/V.24. The HEIDENHAIN FE 401 floppy disk unit, ME<br />
101 magnetic tape unit and external devices with appropriate data interfaces (computers, printers,<br />
readers, punches) can be connected via the RS-232-C/V.24 interface.<br />
Two transmission protocols are available for data transfer:<br />
– Standard data transmission protocol<br />
– Data transfer with Block Check Character (BCC)<br />
The data format and control characters concerned are freely configurable within the framework of<br />
this protocol.<br />
2.2 RS-232-C/V.24 interface<br />
RS-232-C is the designation of a serial interface based on the EIA standard of the same name and is<br />
usable for transmission rates up to 19 200 bits/sec. Data transfer is executed asynchronously, with a<br />
start bit before each character and one or two stop bits after each character. The interface is<br />
designed for transmission distances of up to 20 meters.<br />
The RS-232-C interface has been adopted with slight modifications and has been introduced into<br />
Europe as the V.24 interface. The relevant German standard is DIN 66020.<br />
2.2.1 Hardware<br />
The physical connection between two RS-232-C/V.24 interfaces is an asymmetrical line, i.e. the<br />
common ground connection between transmitter and receiver is used as a return wire.<br />
Physical connections:<br />
TxD<br />
Sender<br />
Transmitter<br />
Übertragungsstrecke<br />
Transmission path<br />
Empfänger<br />
Receiver<br />
RxD TxD<br />
8-10 <strong>TNC</strong> <strong>360</strong> 2 <strong>TNC</strong> data interfaces 8/95<br />
RxD
2.2.2 Signal levels<br />
The RS-232-C/V.24 interface must differentiate between two different signal lines and their levels.<br />
Data lines:<br />
The data signals are defined as being logic "1" (MARK) over the range -3V to -15V and as logic "0"<br />
(SPACE) over the range +3V to +15V.<br />
Control and signal lines:<br />
These signals are defined as being ON (High) over the range +3V to +15V and as OFF (Low) over the<br />
range from -3V to -15V.<br />
For all of the signals, the voltage range from -3V to +3V is not defined as a logic level and can<br />
therefore not be evaluated.<br />
U [V]<br />
+ 15<br />
+ 13<br />
0<br />
– 13<br />
– 15<br />
Datensignale<br />
Data signals<br />
"0"<br />
SPACE<br />
"1"<br />
MARK<br />
2.2.3 Signal designation<br />
Steuer- und Meldesignal<br />
Control and message signal<br />
HIGH<br />
ON<br />
LOW<br />
OFF<br />
The RS-232-C/V.24 interface distinguishes between data lines, control/signal lines and the earth<br />
conductor.<br />
Data lines:<br />
TxD Transmitted data<br />
RxD Received data<br />
8/95 <strong>TNC</strong> <strong>360</strong> 2 <strong>TNC</strong> data interfaces 8-11
Control/signal lines:<br />
DCD (Data Carrier Detect): Received signal level. The DCD signal indicates<br />
to the transmitter that the information received<br />
at the receiver lies within the defined level.<br />
The DCD signal (pin 8) is not used by the <strong>TNC</strong>,<br />
i.e. the <strong>TNC</strong> delivers no signal from pin 8.<br />
DTR (Data Terminal Ready): This signal shows that the <strong>TNC</strong> is ready for service<br />
(e.g. receiving buffer full => DTR = Low).<br />
DSR (Data Set Ready): Peripheral ready for service.<br />
RTS (Request to Send): Hardware handshake:<br />
Output of the receiving unit<br />
CTS (Clear to Send): Hardware handshake:<br />
Output of the transmitting unit<br />
Earth conductor (cables for power supply):<br />
Chassis GND: Casing connection<br />
Signal GND: 0-Volt lines for all signals<br />
Chassis GND<br />
Transmitted data TxD<br />
Received data RxD<br />
Switch on transmission unit RTS<br />
Transmission readiness CTS<br />
Operational readiness DSR<br />
Received signal level DCD<br />
Terminal unit ready for service DTR<br />
Signal ground GND<br />
Peripheral <strong>TNC</strong><br />
8-12 <strong>TNC</strong> <strong>360</strong> 2 <strong>TNC</strong> data interfaces 8/95
2.2.4 Pin layouts<br />
The differences between the pin layouts of the logic unit and the adapter block of the <strong>TNC</strong> should be<br />
noted! The corresponding pin layouts are shown below (see the Chapter "Mounting and electrical<br />
installation").<br />
Chassis GND<br />
TXD<br />
RXD<br />
RTS<br />
CTS<br />
DSR<br />
Signal GND<br />
DTR<br />
1<br />
2<br />
3<br />
4<br />
5<br />
6<br />
7<br />
8<br />
9<br />
10<br />
11<br />
12<br />
13<br />
14<br />
15<br />
16<br />
17<br />
18<br />
19<br />
20<br />
V.24-Adapter-Block<br />
RS-232-C Adapter block<br />
1<br />
2<br />
3<br />
4<br />
5<br />
6<br />
7<br />
8<br />
9<br />
10<br />
11<br />
12<br />
13<br />
14<br />
15<br />
16<br />
17<br />
18<br />
19<br />
20<br />
•<br />
• •<br />
ws/br<br />
ws/br<br />
• • •WH/BN<br />
1<br />
2<br />
3<br />
4<br />
5<br />
6<br />
7<br />
8<br />
9<br />
10<br />
11<br />
12<br />
13<br />
14<br />
15<br />
16<br />
17<br />
18<br />
19<br />
20<br />
1<br />
2<br />
3<br />
4<br />
5<br />
6<br />
7<br />
WH/BN<br />
ge<br />
gn<br />
rs<br />
gr<br />
br<br />
rt<br />
GN<br />
YL<br />
GY<br />
PK<br />
BL<br />
RD<br />
1<br />
2<br />
3<br />
4<br />
5<br />
6<br />
7<br />
1<br />
2<br />
3<br />
4<br />
5<br />
6<br />
7<br />
GND Chassis<br />
RXD<br />
TXD<br />
CTS<br />
RTS<br />
DTR<br />
GND Signal<br />
8<br />
8 8<br />
9<br />
9 9<br />
10<br />
10 10<br />
11<br />
11 11<br />
12<br />
12 12<br />
13<br />
13 13<br />
14<br />
14 14<br />
15<br />
15 15<br />
16<br />
16 16<br />
17<br />
17 17<br />
18<br />
18 18<br />
19<br />
20<br />
bl BN<br />
19<br />
20<br />
19<br />
20 DSR<br />
Note: The LE and adapter block are connected with crossed lines.<br />
A 9-pin plug on a PC should have the following pin layout:<br />
Pin Allocation<br />
1 Do not use<br />
2 RxD<br />
3 TxD<br />
4 DTR<br />
5 GND<br />
6 DSR<br />
7 RTS<br />
8 CTS<br />
9 Do not use<br />
8/95 <strong>TNC</strong> <strong>360</strong> 2 <strong>TNC</strong> data interfaces 8-13<br />
•<br />
LE
2.3 Data interface functions<br />
The data interfaces on the <strong>TNC</strong> can be used to save data and files and read them back in again, to<br />
output programs to external devices (e.g. printers), to read in programs and simultaneously execute<br />
them and to carry out data transfer (communication) between <strong>TNC</strong>s.<br />
2.3.1 Saving/reading files<br />
The following table lists all the files which can be saved to external memory (floppy disk unit,<br />
magnetic tape unit and PC) and can be read back in from them.<br />
File Identification<br />
HEIDENHAIN-dialog NC program H<br />
ISO NC program D<br />
Machine parameters M<br />
Correction table S<br />
PLC program P<br />
After the appropriate key numbers for the PLC, the machine parameters and the correction table<br />
have been entered, these files can be written-to or read-from via the data interfaces.<br />
Data transfer is initiated with the EXT key as usual.<br />
Current values of Q parameters, PLC error messages and dialogs can also be outputted via the two<br />
interfaces (NC program: FN 15: PRINT).<br />
The magnetic tape unit is only suitable as an external data carrier to a limited extent, because only<br />
one file can be stored per cassette side. However, this file can contain several programs.<br />
Using the floppy disk unit, up to 256 programs (approximately 25,000 program blocks) can be<br />
stored. This represents a storage capacity of approximately 790 kilobytes.<br />
When transmitting and receiving a file the appropriate code file is outputted and read in again<br />
complete with a Block Check Character (BCC).<br />
If the file is stored in an external computer using HEIDENHAIN's <strong>TNC</strong>.EXE data transfer software, a<br />
new file extension is generated. This extension consists of the code and the letters NC.<br />
Example:<br />
If a ISO program is stored, it is given the file extension *.DNC.<br />
8-14 <strong>TNC</strong> <strong>360</strong> 2 <strong>TNC</strong> data interfaces 8/95
2.3.2 Output to external devices<br />
Any external device, e.g. computers, printers, readers and punches, can be addressed via the<br />
interface. For this purpose, the <strong>TNC</strong> has a freely configurable interface mode (EXT) which, within<br />
certain limits, permits any setting of the data format and control characters of the required data<br />
transmission protocol.<br />
The setting selected at the external devices must of course match the <strong>TNC</strong>. On printers, this is done<br />
by setting the DIP-switches or adjusting the transmission parameters.<br />
If data transfer to a computer is desired, appropriate data-transfer software must be installed. To<br />
help in this, HEIDENHAIN offer their <strong>TNC</strong>.EXE data transfer software, which permits transfer<br />
between <strong>TNC</strong> and a PC using a fixed transmission protocol.<br />
2.3.3 Reading in and simultaneously executing programs (DNC<br />
operation)<br />
In PROGRAM RUN mode, machine programs can be transmitted with "Block transfer" from an<br />
external memory via the serial data interface and be executed simultaneously (DNC operation). This<br />
allows machine programs which exceed the storage capacity of the control unit to be executed.<br />
After the program has started, executed blocks are erased and further blocks are continuously called<br />
from the external memory.<br />
If the program blocks are read into the <strong>TNC</strong> faster than they can be executed, the entire NC memory<br />
is initially fully loaded. If it is full, transfer is suspended until a storage space of one NC block is<br />
vacated by execution. Only then is transfer resumed, until once again the memory is filled.<br />
For DNC operation the data transfer protocol must be set with Block Check Character BCC (data<br />
checking).<br />
2.3.4 Communication between <strong>TNC</strong>s<br />
For certain applications, it is necessary for <strong>TNC</strong>s to be able to exchange data or to communicate<br />
with each other. This is made possible by the RS-232-C/V.24 interface.<br />
The simplest form of data exchange is the transfer of files (e.g. NC programs) from one <strong>TNC</strong> to<br />
another. To do this, the same transmission format (ME mode) must be set at both control units and<br />
transfer started. It must be ensured that the receiving control unit is the first to start.<br />
For the application "Positioning module", i.e. further NC axes are required, the positioning values<br />
have to be transmitted from the master logic unit to the slave logic unit. On this basis, data can be<br />
transferred to another <strong>TNC</strong> via the data interface, using PLC modules at the PLC level (see Section 5<br />
"Data transfer by PLC").<br />
2.4 Data transmission protocols<br />
The <strong>TNC</strong> enables data and files to be transferred using two different protocols (which can be<br />
selected via the interface setup or the machine parameters).<br />
8/95 <strong>TNC</strong> <strong>360</strong> 2 <strong>TNC</strong> data interfaces 8-15
These transmission protocols can be selected in three different operating modes, as follows:<br />
– ME Standard transmission protocol to match HEIDENHAIN<br />
magnetic tape unit (7 data bits, 1 start bit, 1 stop bit)<br />
Data transmission rate: 2400 baud<br />
– FE Transmission with Block Check Character and with fixed control<br />
characters (7 data bits, 1 start bit, 1 stop bit)<br />
Freely configurable baud rate<br />
– EXT Freely configurable operating modes: data format, transmission<br />
protocol and control characters can be freely set via machine<br />
parameters. Freely configurable baud rate.<br />
The following applies to data transmission protocols:<br />
– If a file which is read in is already stored in the <strong>TNC</strong>, is displays the message<br />
"ERASE=ENT / OVERREAD=NOENT".<br />
In this case the <strong>TNC</strong> aborts transmission with the appropriate handshake and does not continue<br />
transfer until after acknowledgment.<br />
In the event of an attempt to erase write-protected files, the error message "PROTECTED PGM" is<br />
displayed and the dialog "OVERREAD=ENT/END=NOENT". In this case, either the next file can be<br />
read in or the transfer can be aborted.<br />
– If a file has been read out and the data transfer menu has been terminated with the END key,<br />
the <strong>TNC</strong> outputs characters and (or ASCII characters according to setting in<br />
MP5010 in operating modes EXT).<br />
– If a transmission is terminated with the END-key, the error message "PROGRAM INCOMPLETE" is<br />
issued.<br />
2.4.1 Standard transmission protocol<br />
With this protocol, first of all the <strong>TNC</strong> transmits the character exactly 50 times. This is<br />
followed by the individual program blocks, which each end with the characters and .<br />
These blocks are transmitted in order, but they are not error checked. If the receiver's data buffer is<br />
full, the receiver has two alternatives for stopping and recommencing transmission:<br />
– Software handshake - Stopping transfer by sending character (XOFF), continuing transfer<br />
by sending character (XON).<br />
– Hardware handshake - By putting appropriate voltage level on the RTS and CTS control and signal<br />
lines of the RS-232-C/V.24 interface.<br />
8-16 <strong>TNC</strong> <strong>360</strong> 2 <strong>TNC</strong> data interfaces 8/95
Example: protocol for dialog program:<br />
.. 50 times<br />
0 BEGIN PGM 1 MM 1st program block<br />
1 TOOL DEF 1 L+0 R+3 2nd program block<br />
.<br />
.<br />
.<br />
26 END PGM 1 MM Program end<br />
Close data transfer menu<br />
Example of software handshake:<br />
Peripheral unit Transmission path<br />
Receiving buffer full<br />
<br />
Receiving buffer again<br />
ready to accept data<br />
<br />
Hardware handshake (see Section "Freely configurable interfaces").<br />
12 Z+Z FMAX <br />
13 Z–10 F100 M03 <br />
.<br />
.<br />
.<br />
8/95 <strong>TNC</strong> <strong>360</strong> 2 <strong>TNC</strong> data interfaces 8-17<br />
<strong>TNC</strong><br />
2.4.2 Data transfer with Block Check Character (BCC)<br />
This protocol, specific to HEIDENHAIN, works with different control characters and with additional<br />
data checking when transmitting.<br />
In the freely configurable operating modes (EXT), the following control characters - ,<br />
, , , , , - can be defined as arbitrary ASCII characters<br />
(see Section "Freely configurable interfaces").<br />
.<br />
.<br />
.
When a file is transferred, the first block, called the "header", is sent. It consists of the following<br />
characters:<br />
"H" "Name" "M" BCC<br />
(Start of Header): This character indicates the start of the header.<br />
The header contains 'H' - the code for the program (see Section "Saving/reading files"), 'Name' - the<br />
program name and 'M' - the transmission mode(E=input/A=output).<br />
This header ends with character , ending a data transfer block.<br />
The subsequent BCC (Block Check Character) provides additional confidence.<br />
In addition to the parity check of the individual characters (see Section "Checking data"), a parity<br />
check is carried out on a complete transmitted block. The BCC always supplements the individual<br />
bits of the transmitted characters of a data transfer block to give even parity.<br />
Example for formation of BCC:<br />
Character Bit 6 Bit 5 Bit 4 Bit 3 Bit 2 Bit 1 Bit 0<br />
SOH 0 0 0 0 0 0 1<br />
H 1 0 0 1 0 0 0<br />
1 0 1 1 0 0 0 1<br />
5 0 1 1 0 1 0 1<br />
E 1 0 0 0 1 0 1<br />
ETB 0 0 1 0 1 1 1<br />
BCC 0 0 1 1 1 1 1<br />
In this example, the HEIDENHAIN dialog (code 'H') has been used to write program '15' which is<br />
read in via the data interface ('E'). A parity bit is also formed for the BCC (with even parity, the parity<br />
bit of the BCC in this example is given a value '1').<br />
The character is sent after the BCC. This character (XON) is needed for a few devices,<br />
explicitly to demand a reply from them in order to start transfer again.<br />
At the end of each block, a check is conducted to see whether the block has been correctly<br />
transferred. To do this, the receiver forms a BCC from the received block and compares it with the<br />
received BCC. If the received and calculated BCCs are identical, the receiver sends character<br />
(= positive ACKnowledgment), i.e. the data block has been transferred without error.<br />
8-18 <strong>TNC</strong> <strong>360</strong> 2 <strong>TNC</strong> data interfaces 8/95
If the two BCCs are not identical, the receiver sends character (= Not AcKnowledged), i.e.<br />
the data block has been incorrectly transferred and the same block must be sent again. This process<br />
is repeated up to three times. An error message ("TRANSFERRED DATA INCORRECT N") is<br />
displayed, and transfer is aborted.<br />
If, however, this header is acknowledged with , the first data block can be transmitted:<br />
0 BEGIN PGM 1 MM BCC .<br />
The start of a data block is always indicated by control character . The other control<br />
characters in this block are identical to the control characters of the header.<br />
If the block is acknowledged with , the next program block is sent. In the event of a ,<br />
the same block must be repeated, and so on...<br />
If the last program block has been sent successfully (acknowledged with ), transmission<br />
ends with characters (End of Text) and (End of Transmission).<br />
Table of control characters:<br />
Character Meaning Description<br />
SOH Start of Header SOH indicates the start of the<br />
transfer of the data header. The<br />
header is a sequence of characters<br />
which contains the program number<br />
and information concerning the type<br />
of program and transmission mode.<br />
STX Start of Text STX indicates the start of the<br />
program block.<br />
ETB End of Text Block ETB ends a data transfer block. The<br />
character following ETB is used for<br />
data checking (BCC).<br />
DC1 Start data transfer (XON) DC1 starts data transfer after a stop.<br />
DC3 Stop data transfer (XOFF) DC3 stops data transfer.<br />
ETX End of Text ETX is sent at the end of the<br />
program.<br />
EOT End of Transmission EOT ends data transmission and<br />
produces the quiescent state. This<br />
character is sent by the <strong>TNC</strong> at the<br />
end of program input, and as an error<br />
to external devices<br />
ACK ACKnowledged ACK is sent by receiver when a data<br />
block has transferred without error.<br />
NAK Not AcKnowledged NAK is sent by the receiver when a<br />
data block has transferred<br />
incorrectly. The transmitter must<br />
transmit the data block again.<br />
8/95 <strong>TNC</strong> <strong>360</strong> 2 <strong>TNC</strong> data interfaces 8-19
Example:<br />
A pallet file with the name "8455" is to be sent to a peripheral unit (e.g. FE 401).<br />
FE 401 Transmission path<br />
<br />
.<br />
.<br />
.<br />
<br />
<br />
<br />
<br />
.<br />
.<br />
.<br />
<br />
.<br />
.<br />
.<br />
.<br />
.<br />
.<br />
PPP BCC <br />
"1st line" BCC <br />
8-20 <strong>TNC</strong> <strong>360</strong> 2 <strong>TNC</strong> data interfaces 8/95<br />
.<br />
.<br />
.<br />
.<br />
.<br />
.<br />
<strong>TNC</strong><br />
"10th line" BCC <br />
"10th line" BCC <br />
"11th line" BCC <br />
"last line" BCC <br />
The software handshake is very easy to achieve when transmitting with a BCC. The receiver sends<br />
neither a positive () nor a negative acknowledgment (), and the transmitter waits until<br />
it receives one of these characters. When the buffer in the receiver is again capable of accepting<br />
data, it again sends an and the transmitter continues its data transmission.<br />
It is also possible, however, to conduct the software handshake with control characters and<br />
. If hardware handshake (EXT) has been selected, it is identical to standard data transfer and<br />
to data transfer with a BCC (see Section "Freely configurable interfaces").<br />
8/95 <strong>TNC</strong> <strong>360</strong> 2 <strong>TNC</strong> data interfaces 8-21
2.5 Configuration of the interface<br />
2.5.1 Selection of the interface<br />
The following settings can be selected with the appropriate data format and the data transmission<br />
protocol.<br />
In addition to the three freely configurable operating modes EXT, there are two fixed modes (ME<br />
and FE). The FE mode must be set if the HEIDENHAIN floppy disk unit or an external computer<br />
using the <strong>TNC</strong>.EXE transmission software is connected. In this mode, the transmission protocol with<br />
Block Check Character is rigidly defined.<br />
The ME operating mode matches the HEIDENHAIN ME 101/ME 102 magnetic tape unit and must<br />
be selected if this is to be connected.<br />
In this mode, the standard transmission protocol is set.<br />
However, there is one important difference:<br />
The character is never sent because this character cannot be processed by the magnetic<br />
tape unit.<br />
2.5.2 Freely configurable interfaces<br />
The operating mode EXT is freely configurable via the machine parameters.<br />
The data format and the type of handshake are set in the MP 5020.<br />
Data bits<br />
Bit 0 can be set to determine whether transmission is to be with 7 or 8 data bits. Transmission with<br />
7 bits is normally used, but 8 bits are needed, especially for printer interfacing.<br />
BCC<br />
If calculation of the BCC produces a number less than $20 (i.e. a control character) then a "Space"<br />
character ($20) is sent in addition immediately before . The BCC will consequently always be<br />
greater than $20 and cannot therefore be recognized as a control character.<br />
8-22 <strong>TNC</strong> <strong>360</strong> 2 <strong>TNC</strong> data interfaces 8/95
Hardware handshaking<br />
Bit 2 can be set to determine whether the <strong>TNC</strong> stops transfer from an external device by using RTS.<br />
– Data output <strong>TNC</strong> -> EXT<br />
When the receiving buffer is full, the external device resets the RTS signal. The <strong>TNC</strong> thereby<br />
detects that the peripheral unit receiving buffer is full because of the CTS input.<br />
<strong>TNC</strong> EXT<br />
RTS<br />
–<br />
+<br />
CTS<br />
–<br />
+<br />
TxD<br />
–<br />
+<br />
RxD<br />
–<br />
+<br />
Start<br />
+ Positive voltage level<br />
– Negative voltage level<br />
Receiving<br />
buffer full<br />
Data Data<br />
Data<br />
– CTS<br />
+<br />
– RTS<br />
+<br />
– RxD<br />
+<br />
– TxD<br />
+<br />
– Data input EXT -> <strong>TNC</strong><br />
When the receiving buffer is full, the <strong>TNC</strong> removes the RTS signal, which is detected by the<br />
peripheral device at its CTS input.<br />
<strong>TNC</strong> EXT<br />
RTS<br />
–<br />
+<br />
CTS<br />
–<br />
+<br />
TxD<br />
–<br />
+<br />
RxD<br />
–<br />
+<br />
Start<br />
+ Positive voltage level<br />
– negative voltage level<br />
Receiving<br />
buffer full<br />
– CTS<br />
+<br />
– RTS<br />
+<br />
– RxD<br />
+<br />
– TxD<br />
+<br />
The DTR and DSR signals from the <strong>TNC</strong> indicate the operational status of the <strong>TNC</strong> and peripheral<br />
(these cannot be set via the machine parameters).<br />
8/95 <strong>TNC</strong> <strong>360</strong> 2 <strong>TNC</strong> data interfaces 8-23
DTR: Polled by peripheral; it is logic "1" if <strong>TNC</strong> is ready for service.<br />
DSR: Polled by <strong>TNC</strong>.<br />
LOW level => ext. data input/output not ready.<br />
HIGH level => ext. data input/output ready.<br />
Software handshaking<br />
Bit 3 determines whether the <strong>TNC</strong> stops transfer from an external device with control character<br />
. Transfer is resumed with character .<br />
If transfer is stopped with character , up to 12 characters can still be stored. The remaining<br />
incoming characters are lost. Software handshake is normally recommended when interfaces are<br />
connected to an external device.<br />
The following pin layout is possible for the external device:<br />
GND<br />
TXD<br />
RXD<br />
RTS<br />
CTS<br />
DSR<br />
GND<br />
DTR<br />
Peripheriegerät<br />
Peripheral unit<br />
1<br />
2<br />
3<br />
4<br />
5<br />
6<br />
7<br />
8<br />
9<br />
10<br />
11<br />
12<br />
13<br />
14<br />
15<br />
16<br />
17<br />
18<br />
19<br />
20<br />
•<br />
1<br />
2<br />
3<br />
4<br />
5<br />
6<br />
7<br />
8<br />
9<br />
10<br />
11<br />
12<br />
13<br />
14<br />
15<br />
16<br />
17<br />
18<br />
19<br />
20<br />
•<br />
•<br />
•<br />
•<br />
V.24-Adapter-Block<br />
RS-232-C Adapter block<br />
1<br />
2<br />
3<br />
4<br />
5<br />
6<br />
7<br />
8<br />
9<br />
10<br />
11<br />
12<br />
13<br />
14<br />
15<br />
16<br />
17<br />
18<br />
19<br />
20<br />
1<br />
2<br />
3<br />
4<br />
5<br />
6<br />
7<br />
8<br />
9<br />
10<br />
11<br />
12<br />
13<br />
14<br />
15<br />
16<br />
17<br />
18<br />
19<br />
20<br />
• • •ws/br<br />
• • •<br />
A HEIDENHAIN standard cable, ref. 242 869, is recommended.<br />
1<br />
2<br />
3<br />
4<br />
5<br />
6<br />
7<br />
8<br />
9<br />
10<br />
11<br />
12<br />
13<br />
14<br />
15<br />
16<br />
17<br />
18<br />
19<br />
20<br />
8-24 <strong>TNC</strong> <strong>360</strong> 2 <strong>TNC</strong> data interfaces 8/95<br />
1<br />
2<br />
3<br />
4<br />
5<br />
6<br />
7<br />
8<br />
9<br />
10<br />
11<br />
12<br />
13<br />
14<br />
15<br />
16<br />
17<br />
18<br />
19<br />
20<br />
ws/br<br />
•<br />
LE<br />
WH/BN<br />
ge<br />
gn<br />
rs<br />
gr<br />
br<br />
rt<br />
WH/BN<br />
GN<br />
Yl<br />
GY<br />
PK<br />
BL<br />
RD<br />
1<br />
2<br />
3<br />
4<br />
5<br />
6<br />
7<br />
1<br />
2<br />
3<br />
4<br />
5<br />
6<br />
7<br />
GND Chassis<br />
RXD<br />
TXD<br />
CTS<br />
RTS<br />
DTR<br />
GND Signal ground<br />
8 8<br />
9 9<br />
10 10<br />
11 11<br />
12 12<br />
13 13<br />
14 14<br />
15 15<br />
16 16<br />
17 17<br />
18 18<br />
bl BN<br />
19<br />
20<br />
19<br />
20 DSR<br />
If the <strong>TNC</strong> is transmitting data, it reacts both to hardware and software handshakes, regardless of<br />
the setting in the MP5020.<br />
If the <strong>TNC</strong> is receiving data, and no transmission stop is set in the MP5020, the <strong>TNC</strong> stops the<br />
peripheral unit with the software handshake.<br />
If transmission stop by both RTS and by DC3 is active, the <strong>TNC</strong> stops transfer with the hardware<br />
handshake.<br />
Character parity<br />
Bits 4 and 5 determine the type of parity check (see Section "Checking data").<br />
Stop bits<br />
Bits 6 and 7 determine the number of stop bits sent at the end of a character.
MP 5020 Operating mode EXT: Interface configuration<br />
Input range: 0 to 255<br />
Bit 07 or 8 data bits<br />
+0 = 7 data bits<br />
+1 = 8 data bits<br />
Bit 1Block check character<br />
+0 = any BCC<br />
+2 = BCC not control character<br />
Bit 2Transmission stop by RTS<br />
+0 = not active<br />
+4 = active<br />
Bit 3Transmission stop by DC3<br />
+0 = not active<br />
+8 = active<br />
Bit 4Character parity<br />
+0 = even<br />
+16 = uneven<br />
Bit 5Character parity<br />
+0 = not desired<br />
+ 32 = desired<br />
Bit 6/7 Stop bits<br />
Bit 6 Bit 7<br />
+0 = 1 1/2 stop bits Bit 0 0<br />
+64 = 2 stop bits Bit Bit 1 0<br />
+128 = 1 stop bit Bit Bit 0 1<br />
+192 = 1 stop bit Bit Bit 1 1<br />
For operating modes EXT, MP5030 defines the transmission protocol.<br />
MP5030.0 Operating mode EXT: Data transfer protocol<br />
Input: 0 or 1<br />
0 = "Standard data transfer"<br />
1 = "Transfer blockwise"<br />
8/95 <strong>TNC</strong> <strong>360</strong> 2 <strong>TNC</strong> data interfaces 8-25
For the control characters for the data transmission protocols ( , , ,<br />
, ), any other ASCII characters can be chosen using the following machine<br />
parameters (for table of ASCII characters, see Appendix). If these machine parameters are loaded<br />
with a zero, the standard settings given in brackets are active (as for FE operation).<br />
Two control characters are encoded in one machine parameter.<br />
The input is as follows:<br />
Input value Decimal code (1st control character) + 256 * Decimal code (2nd control character)<br />
MP5010<br />
MP5010.0<br />
Control characters for data transmission protocol<br />
1st control character for End of Text (ETX)<br />
2nd control character for Start of Text (STX)<br />
Input range: 0 to 32 382<br />
MP5010.3 1st control character for End of Transmission Block (ETB)<br />
2nd control character for Start of Heading (SOH)<br />
Input range: 0 to 32 382<br />
MP5010.4 1st control character for "Acknowledgment of reception" (ACK)<br />
2nd control character for Start of Heading (SOH)<br />
Input range: 0 to 32 382<br />
MP5010.5 Control character for "End of Transmission" (EOT)<br />
Input range: 0 to 32 382<br />
Example: The following ASCII characters are to be transmitted for start and end of text:<br />
End of text: ? = 63 dec<br />
Start of text: ! = 33 dec<br />
Input:<br />
MP5010.0 = 63 + 256 * 33 = 8511<br />
When selecting ASCII characters, it must be ensured that the control characters are not arbitrarily<br />
mixed and that no figures or letters which occur in the transferred text are used.<br />
For the file type, when transferring with Block Check Characters (see Section 2.3.1 "Saving/reading<br />
files"), an ASCII character must be entered for the file which is being output or input. With an input<br />
value of zero, the <strong>TNC</strong> automatically enters the correct type of file in the file header.<br />
8-26 <strong>TNC</strong> <strong>360</strong> 2 <strong>TNC</strong> data interfaces 8/95
The ASCII characters for input and output identification can also be freely defined.<br />
MP5010.1 1st ASCII character for data file during data input<br />
2nd ASCII character for input identification (E)<br />
Input range: 0 to 32 382<br />
MP5010.2 1st ASCII character for file type during data output<br />
2nd ASCII character for output identification (A)<br />
Input range: 0 to 32 382<br />
Example: If an ISO program should be output in the EXT mode, then:<br />
MP5010.2 = 68<br />
(or MP5010.2 = 0)<br />
8/95 <strong>TNC</strong> <strong>360</strong> 2 <strong>TNC</strong> data interfaces 8-27
2.6 External programming<br />
In the case of external programming and subsequent transfer, attention should be paid to the<br />
following:<br />
– or must be programmed at the start of the program and after each program<br />
block<br />
– After the end-of-program block and, in addition, the end-of-text control character must<br />
be programmed.<br />
– Blank characters between the individual words can be omitted in NC programs (HEIDENHAIN<br />
dialog).<br />
– When reading in DIN blocks, '*' is not needed at the end of the block<br />
– Comments are separated from the NC block by a semicolon ';'<br />
– Comments are stored only in PLC programs<br />
– Comments located in front of the program are not stored<br />
– Block numbers do not need to be programmed - they are generated by the <strong>TNC</strong> (only for dialog<br />
programming)<br />
2.7 Interfacing with other equipment<br />
Any other external devices can be interfaced with the <strong>TNC</strong> by using configurable operating modes<br />
EXT. For this purpose, machine parameters 5020 to 5030 permit relatively free adjustment of the<br />
data format, the data transmission protocol and the control characters.<br />
Consider the example of interfacing EXT with a printer using a serial interface (Example: NEC<br />
P7PLUS).<br />
The following setting is selected at the printer itself (see the Operating <strong>Manual</strong> of the printer<br />
concerned):<br />
– Serial interface<br />
– Data bits<br />
– Even character parity<br />
– XON/XOFF protocol (software handshake)<br />
– 9600 baud<br />
The following settings (EXT) are made at the <strong>TNC</strong>:<br />
MP5020 = 169 8 data bits (+1)<br />
Any BCC character (+0)<br />
Transfer stop by RTS not active (+0)<br />
Transfer stop by DC3 active (+8)<br />
Character parity even (+0)<br />
Character parity wanted (+32)<br />
1 stop bit (+128)<br />
MP5030 = 0 Standard data transfer<br />
In the <strong>TNC</strong>, the EXT operating mode must still be assigned to the RS-232 interface and the baud rate<br />
set to 9600 (see the <strong>TNC</strong> <strong>360</strong> User's <strong>Manual</strong>).<br />
8-28 <strong>TNC</strong> <strong>360</strong> 2 <strong>TNC</strong> data interfaces 8/95
3 Standard Data Transmission Protocol<br />
3.1 General information<br />
This protocol is set as standard in operating mode ME and can also be optionally selected for<br />
operating modes EXT via the machine parameters. In the following, the control characters which are<br />
sent and received with this protocol are listed for the various transmission alternatives. When<br />
outputting a file, the character is sent exactly 50 times at the start of the file. When reading<br />
in, however, the control unit ignores this character. Therefore it is of no importance how often the<br />
peripheral unit sends the character before the file.<br />
If, however, ME mode is set instead of EXT, attention must be paid to the following:<br />
All the programs in a file which end with the end-of-text character are stored in the magnetic<br />
tape unit ME. The ME transmits this file with all the programs to the control unit. The <strong>TNC</strong> then<br />
selects the appropriate program and stores it.<br />
A further important difference between EXT mode in the standard protocol and ME mode is that the<br />
character is never sent in ME mode because the magnetic tape unit is incapable of<br />
processing this character.<br />
In this protocol, if an error is to be signaled to the <strong>TNC</strong>, the following sequence of instructions must<br />
be sent:<br />
'ERROR NUMBER'<br />
Listed below are the transmission protocols for the various alternatives for data output and input.<br />
EXT mode is set:<br />
– Control character for "End of Text" - <br />
– Control character for "End of Transmission" - <br />
– Software handshake<br />
3.1.1 Calling the program directory<br />
Using the menu item "Program Directory", the list of file names can be requested from an external<br />
memory and displayed in the <strong>TNC</strong>.<br />
If the external directory is requested, the <strong>TNC</strong> sends control character .<br />
If the request is immediately interrupted with the END key, the <strong>TNC</strong> sends characters <br />
and no directory is read in.<br />
If the request is not interrupted, the peripheral unit sends all of the external programs in order. Their<br />
names are then shown in the <strong>TNC</strong>.<br />
8/95 <strong>TNC</strong> <strong>360</strong> 3 Standard Data Transmission Protocol 8-29
1st file<br />
2nd file<br />
Last<br />
file<br />
Peripheral unit<br />
<br />
1st line of file <br />
.<br />
.<br />
.<br />
Last line of file <br />
<br />
1st line of file <br />
.<br />
.<br />
.<br />
Last line of file <br />
.<br />
.<br />
.<br />
<br />
1st line of file <br />
.<br />
.<br />
.<br />
Last line of file <br />
<br />
Transmission path<br />
<br />
8-30 <strong>TNC</strong> <strong>360</strong> 3 Standard Data Transmission Protocol 8/95<br />
.<br />
.<br />
.<br />
<strong>TNC</strong><br />
<br />
<br />
3.1.2 Outputting a selected program<br />
The <strong>TNC</strong> outputs all of the program lines in order. The peripheral unit can stop transmission with<br />
character and start it again with character .<br />
Peripheral unit Transmission path<br />
.<br />
.<br />
.<br />
<br />
<br />
3.1.3 Outputting all programs<br />
.<br />
.<br />
.<br />
.<br />
.<br />
.<br />
. . .<br />
1st line of file <br />
8/95 <strong>TNC</strong> <strong>360</strong> 3 Standard Data Transmission Protocol 8-31<br />
<strong>TNC</strong><br />
5th line of file <br />
6th line of file <br />
Last line of file <br />
The procedure is similar to the protocol described in Section 3.1.2 "Outputting a selected program".<br />
The <strong>TNC</strong> arranges all the programs in order and transmits them. No control character is sent<br />
between the individual files.<br />
3.1.4 Reading in selected program<br />
If a file is read in from a peripheral unit (e.g. a PC), the corresponding name must be indicated in the<br />
<strong>TNC</strong> and the <strong>TNC</strong> be started first, i.e. the <strong>TNC</strong> outputs the character . Transmission of the file<br />
concerned is then initiated at the peripheral unit.<br />
When the entire file has been transferred, the <strong>TNC</strong> sends character .
Peripheral unit Transmission path<br />
<br />
1st line of file <br />
.<br />
.<br />
.<br />
Last line of file <br />
<br />
<br />
In this transfer method, the <strong>TNC</strong> can stop transmission with and continue it with .<br />
If the file name in the first line of the file and the name indicated in the <strong>TNC</strong> are not identical, the<br />
<strong>TNC</strong> reads each block in and searches for the file name concerned.<br />
If the END PGM-block has been read in, and the selected name is not known, the <strong>TNC</strong> remains<br />
static without an error message, and transfer must be terminated with the END key.<br />
Example: Reading in program 100.H.<br />
Peripheral unit<br />
<br />
1st line PGM100 <br />
.<br />
.<br />
.<br />
Last line PGM 100 <br />
8-32 <strong>TNC</strong> <strong>360</strong> 3 Standard Data Transmission Protocol 8/95<br />
.<br />
.<br />
.<br />
Transmission path<br />
.<br />
.<br />
.<br />
<strong>TNC</strong><br />
<strong>TNC</strong><br />
100.H "START"<br />
<br />
<br />
If, in this case, the last PGM-block ends without the character, transfer is terminated<br />
without an error message but the data is not stored. This means that a program on the data<br />
medium with incorrect program name will be overlooked.
3.1.5 Reading in all programs<br />
If both the peripheral unit and the <strong>TNC</strong> have been started, the following protocol is followed:<br />
Peripheral unit<br />
<br />
Last line of file 1
3.1.6 Reading in an offered program<br />
After commencement of transfer, the peripheral unit sends the first program module until the<br />
receiving buffer of the <strong>TNC</strong> is full. The <strong>TNC</strong> then stops transmission with and awaits<br />
acknowledgment from the user. If the file is to be transferred, the <strong>TNC</strong> sends and the<br />
program is read in and stored. Otherwise the file is in fact read in but not stored. If hardware<br />
handshaking is set, transfer by using the RTS signal is stopped and restarted.<br />
Peripheral unit<br />
<br />
1st line of file 1
4 Data transfer with BCC<br />
4.1 General<br />
HEIDENHAIN <strong>TNC</strong>s, as well as allowing data transfer with the standard data transmission protocol,<br />
also allow data transfer with a Block Check Character (BCC).<br />
This protocol is set for the following modes:<br />
- FE mode<br />
- EXT mode (choice)<br />
The data transmission protocols are identical in these modes.<br />
In the following, the transmission protocols are listed for the various file input and output<br />
possibilities. FE mode is set.<br />
If an error occurs at a peripheral device, the following block must be sent to the <strong>TNC</strong>.<br />
"Error text"BCC<br />
Peripheral unit<br />
"Error" BCC <br />
Transmission path<br />
<br />
<br />
The received error message is displayed in the <strong>TNC</strong>, but can be acknowledged and erased with the<br />
CE key.<br />
8/95 <strong>TNC</strong> <strong>360</strong> 4 Data transfer with BCC 8-35<br />
<strong>TNC</strong>
4.1.1 Calling a program directory<br />
If the "Program Directory" menu item is selected, the <strong>TNC</strong> outputs a header without a program<br />
name. The peripheral then starts to output the files to the <strong>TNC</strong>, but, after the first file block has been<br />
sent, the <strong>TNC</strong> immediately requests the next file.<br />
Peripheral unit<br />
<br />
Name 1 BCC <br />
<br />
Name 2 BCC <br />
.<br />
.<br />
.<br />
Last name BCC <br />
<br />
Transmission path<br />
The program names read in are displayed in the <strong>TNC</strong>.<br />
<br />
BCC
4.1.2 Outputting a selected program<br />
The following protocol is followed:<br />
Peripheral unit<br />
<br />
<br />
.<br />
.<br />
.<br />
<br />
Transmission path <strong>TNC</strong><br />
.<br />
.<br />
.<br />
1st line of file BCC
4.1.4 Reading in a selected program<br />
If a file is to be read in from an external memory, the <strong>TNC</strong> sends a header with the file name<br />
concerned, whereupon the peripheral sends the file.<br />
Peripheral unit<br />
<br />
1st line of file BCC <br />
.<br />
.<br />
.<br />
Last line of file BCC <br />
<br />
Transmission path <strong>TNC</strong><br />
Name BCC
4.1.5 Reading in all programs<br />
In this case the <strong>TNC</strong> sends a header without a program name, and the peripheral unit sends the first<br />
file. The <strong>TNC</strong> again outputs a header without a program name, the next program is sent and so on.<br />
Peripheral unit<br />
<br />
1st line PGM1 BCC <br />
.<br />
.<br />
.<br />
Last line PGM1 BCC <br />
<br />
.<br />
.<br />
.<br />
Last line of last file <br />
BCC <br />
<br />
Transmission path <strong>TNC</strong><br />
BCC <br />
<br />
<br />
BCC <br />
<br />
BCC <br />
<br />
If the control is set to ISO programming, the central tool file (if activated via machine parameters)<br />
will also be read in.<br />
8/95 <strong>TNC</strong> <strong>360</strong> 4 Data transfer with BCC 8-39<br />
.<br />
.<br />
.<br />
.<br />
.<br />
.
4.1.6 Reading in an offered program<br />
In this mode, the <strong>TNC</strong> first of all sends a header without a program name. The peripheral unit then<br />
starts data transfer, until it is stopped by the <strong>TNC</strong>. The <strong>TNC</strong> interrupts transfer by not sending a<br />
positive acknowledgment (no ) and awaits acknowledgment.<br />
If a positive acknowledgment is given, then the program is read in. Otherwise a header is<br />
immediately sent again.<br />
8-40 <strong>TNC</strong> <strong>360</strong> 4 Data transfer with BCC 8/95
Peripheral unit<br />
<br />
1st line PGM1 BCC <br />
2nd line PGM1 BCC <br />
3rd line PGM1 BCC <br />
4th line PGM1 BCC <br />
.<br />
.<br />
.<br />
3rd line PGM2 BCC <br />
<br />
1st line PGM3 BCC <br />
.<br />
.<br />
.<br />
Last line of last PGM <br />
BCC <br />
<br />
Transmission path <strong>TNC</strong><br />
BCC <br />
<br />
<br />
"Read in program Yes/No"<br />
Yes<br />
8/95 <strong>TNC</strong> <strong>360</strong> 4 Data transfer with BCC 8-41<br />
.<br />
.<br />
.<br />
"Read in program Yes/No"<br />
BCC <br />
<br />
.<br />
.<br />
.<br />
<br />
BCC <br />
<br />
The number of blocks transmitted before the <strong>TNC</strong> stops to await acknowledgment will depend on<br />
the transfer rate set. At a low data transfer rate, the <strong>TNC</strong> will stop after the first block.
5 Data transfer by PLC<br />
Using PLC modules (for description see Chapter "PLC programming", Section "PLC modules"), data<br />
can be transferred by the PLC via the RS-232-C/V.24 or RS-232-C/V.24 data interface. These<br />
modules, for example, permit communication between two logic units at PLC level via the interface.<br />
5.1 Configuration of PLC data interface<br />
When data is transmitted by the PLC, use of the interface is inhibited by the input/output program of<br />
the user interface. The user has the possibility of configuring the PLC interface according to the FE<br />
or ME mode, or to configure it freely.<br />
The appropriate control characters and the data format for EXT are set in the machine parameters,<br />
which are described in detail in Section "Freely configurable interfaces". In addition, the baud rate for<br />
transfer can be selected via MP5040.<br />
MP5040 Data transfer rate for PLC interface<br />
Input range: 0 to 9<br />
0 = 110 baud 5 = 2400 baud<br />
1 = 150 baud 6 = 4800 baud<br />
2 = 300 baud 7 = 9600 baud<br />
3 = 600 baud 8 = 19 200 baud<br />
4 = 1200 baud 9 = 38 400 baud<br />
8-42 <strong>TNC</strong> <strong>360</strong> 5 Data transfer by PLC 8/95
6 Error messages<br />
6.1 <strong>TNC</strong> error messages<br />
Listed below are the error messages for data transfer, which are displayed at the <strong>TNC</strong>. In most<br />
cases the messages are self-explanatory.<br />
Error messages occurring only in ME mode:<br />
WRONG MODE<br />
TRANSFERRED DATA INCORRECT<br />
WRONG PROGRAM DATA<br />
ME: END OF TAPE<br />
DATA CARRIER FULL<br />
DATA CARRIER EMPTY<br />
DATA CARRIER WRITE-PROTECTED<br />
General error messages:<br />
INTERFACE ALREADY ASSIGNED<br />
Transfer is already taking place via interface, or data transfer has not been completed.<br />
PROGRAM INCOMPLETE<br />
Transfer has been interrupted or the file has not ended correctly (no END character or END block).<br />
EXT. OUTPUT/INPUT NOT READY<br />
Interface is not connected; peripheral unit is switched off of faulty.<br />
TRANSFERRED DATA INCORRECT X<br />
X can assume the values A to H, K or L (error codes).<br />
The error message TRANSFERRED DATA INCORRECT N is displayed if, in the case of data transfer<br />
with Block Check Character (BCC), a Not acknowledged (control character ) has been<br />
received three times.<br />
The remaining error codes (A to H) in this error message indicate that an error has been detected in<br />
the received module. The error can have the following causes, with no assignment to the code<br />
letters:<br />
– Same baud rate not set at <strong>TNC</strong> and peripheral unit<br />
– Parity bit wrong<br />
– Incorrect data frame (e.g. no stop bit)<br />
– Receiving module of interface faulty<br />
Error code K or L is only displayed for transfer with standard data transmission protocol:<br />
K: When an error was transmitted to <strong>TNC</strong>, character not sent after the character.<br />
L: The wrong error number was received after the error sequence . (Error number<br />
range: 0 to 7).<br />
8/95 <strong>TNC</strong> <strong>360</strong> 6 Error messages 8-43
6.2 HEIDENHAIN peripherals' error codes<br />
These error messages refer to the FE 401 floppy disk unit and to magnetic tape unit ME 101/<br />
ME 102. With the FE 401 floppy disk unit connected, one of the following error codes could be<br />
outputted by the <strong>TNC</strong>:<br />
Error code Meaning<br />
ERR: 001 Wrong instruction code<br />
ERR: 002 Illegal program name<br />
ERR: 003 Defective data transmission<br />
ERR: 004 Program incomplete<br />
ERR: 010 Program not on floppy disk<br />
ERR: 011 Program protected against erasure<br />
ERR: 012 Program storage in progress<br />
ERR: 013 Program directory full<br />
ERR: 014 Floppy disk full<br />
ERR: 100 Floppy disk not formatted<br />
ERR: 101 Sector number too large<br />
ERR: 102 Drive not ready<br />
ERR: 103 Floppy disk write-protected<br />
ERR: 104 Data on floppy disk defective<br />
ERR: 105 Sectors not found<br />
ERR: 106 Check sum defective<br />
ERR: 107 Disk controller faulty<br />
ERR: 108 DMA faulty<br />
If a magnetic tape unit is connected, the following error codes could be sent to the <strong>TNC</strong> and an<br />
appropriate error message outputted:<br />
Error code Error message<br />
TRANSFERRED DATA INCORRECT<br />
DATA CARRIER MISSING<br />
DATA CARRIER WRITE-PROTECTED<br />
WRONG OPERATING MODE<br />
WRONG PROGRAM DATA<br />
DATA CARRIER EMPTY<br />
PROGRAM INCOMPLETE<br />
ME: END OF TAPE<br />
A detailed description of these peripherals can be found in the appropriate operating manual.<br />
8-44 <strong>TNC</strong> <strong>360</strong> 6 Error messages 8/95
6.3 Data transmission software error messages<br />
If data is transferred using the HEIDENHAIN - <strong>TNC</strong>.EXE data transmission program then the<br />
following error messages might be displayed at the <strong>TNC</strong>:<br />
DATA CARRIER @: IS FULL<br />
Data carrier >@:< full.<br />
FILE NAME NOT PROGRAM NAME<br />
Name of NC program and name of file do not match.<br />
INSTRUCTION NOT ALLOWED<br />
Request instruction issued by control unit is not allowed.<br />
PROGRAM INCOMPLETE<br />
NC program does not contain an end block.<br />
PROGRAM NOT PRESENT<br />
File requested by control unit does not exist in currently configured access path.<br />
PROTECTED FILE<br />
File which is protected with read-only or hidden attribute is likely to be overwritten.<br />
SEARCH FEATURE NOT ALLOWED<br />
Search feature not included in number of acceptable characters.<br />
TRANSFERRED DATA INCORRECT<br />
Attempts to transmit block to control unit has failed four times.<br />
TRANSFERRED DATA INCORRECT N<br />
There was no acknowledgment ACK within a defined time<br />
A precise description of this software is given in the User's <strong>Manual</strong> of the transmission software.<br />
8/95 <strong>TNC</strong> <strong>360</strong> 6 Error messages 8-45
OEM Cycles – Contents<br />
1 Introduction 9-2<br />
1.1 Creating OEM cycles 9-3<br />
1.2 Dialogues for OEM cycles 9-6<br />
1.3 Output in binary code 9-6<br />
2 "Bolt Hole Circle" OEM-Cycle Example 9-7<br />
3 Calling OEM Cycles 9-8<br />
3.1 Calls in a HEIDENHAIN dialogue program 9-8<br />
3.2 Calls in an ISO program 9-9<br />
8/95 <strong>TNC</strong> <strong>360</strong> 9-1
1 Introduction<br />
OEM cycles (customized macros) are programmed in HEIDENHAIN dialogue as NC programs.<br />
OEM cycles cannot be created in ISO format!<br />
By using these cycles in a main program created in the HEIDENHAIN dialogue or in accordance with<br />
ISO, repetitive machining tasks or machine-specific functions can be executed with a single call. The<br />
execution of OEM cycles can be influenced by parameter transfer (see also <strong>TNC</strong> User's <strong>Manual</strong>).<br />
OEM cycles can be divided into "DEF-active" and "CALL-active" OEM cycles. The DEF-active cycles<br />
are effective immediately upon definition, without CYCL CALL, M89 or M99. The CALL-active cycles<br />
must be called with a CYCL CALL, M89 or M99.<br />
Up to 32 different OEM cycles can be produced, tested and stored in the NC program memory.<br />
In order not to tie up the NC program memory (RAM) with the OEM cycles and their dialogues, it is<br />
possible to store this data in the PLC EPROM.<br />
Permitted functions in OEM cycles<br />
– Tool call.<br />
– M functions apart from M02, M30, M06, without program-run stop.<br />
– Nesting OEM cycles:<br />
Other OEM cycles or standard cycles can be called in the OEM cycles (nesting depth four levels).<br />
– Calling OEM cycles from a main programs that is transmitted "blockwise" and executed<br />
simultaneously. The OEM cycles must be stored in the control unit memory (EPROM or RAM).<br />
– Calling HEIDENHAIN dialogue or ISO programs in OEM cycles. The called programs are not<br />
displayed.<br />
Functions not permitted in OEM cycles<br />
– M functions M02, M30, M06 with program-run stop.<br />
– Programmed STOP block.<br />
– Definition of cycle 14 "Contour":<br />
Cycle 14 "Contour" must be defined in the main program.<br />
– Repetition of sections of program with CALL LBL ... REP .../...:<br />
OEM cycles with program-section repeats stored in PLC EPROM cannot be executed. However,<br />
program-section repeats can also be programmed via the Q parameter function (IF ... GOTO LBL<br />
...) (see the "Bolt hole circle" example).<br />
9-2 <strong>TNC</strong> <strong>360</strong> 1 Introduction 8/95
1.1 Creating OEM cycles<br />
Programming an OEM-cycle and is only possible if the program number is in the range 99 999 968 to<br />
99 999 999. Each of these program names is permanently assigned a cycle number (e.g. program<br />
number 99999968 represents OEM-cycle 68).<br />
After creating a program with the above number and pressing LBL SET and then ENT, the control<br />
asks whether you wish to program a DEF-active or CALL-active cycle.<br />
DEF-active cycle<br />
If the OEM cycles are to be active in the NC program immediately after the definition, a "DEF-active"<br />
OEM-cycle is programmed with the ENT key, e.g. cycle for coordinate transformation.<br />
CALL-active cycle<br />
If the OEM cycles are to be activated later in the NC program via CYCL-CALL, M98 or M99, a CALLactive<br />
OEM-cycle is programmed with the NO ENT key, e.g. for a machining cycle.<br />
Up to 15 dialogue numbers can then be input. The first dialogue number is always assigned to the<br />
designation of the OEM cycles. The remaining numbers are assigned to the Q parameters in<br />
ascending order.<br />
If fewer than 15 dialogues are to be programmed, the dialogue block can end with END. If more<br />
than 15 parameters are to be entered (maximum 32), the DLG DEF block or the DLG CAL block<br />
must be entered repeatedly in the OEM cycle. Only five entries are evaluated in the third DLG block<br />
The parameter assignment can be shifted via MP7250 so that DEF-active and CALL-active cycles do<br />
not address the same parameters Q1 to Q14.<br />
Example cycle:<br />
0 BEGIN PGM 99999968 MM<br />
1 DLG-DEF 0/2/8/99<br />
.<br />
.<br />
.<br />
15 END PGM 99999968 MM<br />
Using machine parameter MP7240, it is possible to inhibit program input for [Program number] =<br />
[OEM cycles number].<br />
If MP7240 has a value 0, no program with the program number of an OEM-cycle which is held in the<br />
EPROM can be input or read into the NC program memory.<br />
If MP7240 has a value 1, the program-number range of the OEM cycles can also be used when the<br />
OEM cycles are held in the PLC EPROM. If a OEM cycles is generated in the NC program memory<br />
and if at the same time there is a OEM cycles with the same number in the PLC EPROM, then the<br />
OEM cycles in the NC program memory will be executed at a cycle call.<br />
8/95 <strong>TNC</strong> <strong>360</strong> 1 Introduction 9-3
In the NC program, when defining the OEM cycles created with dialogue support, Q parameters are<br />
assigned specified input values. The Q-parameter numbers are automatically generated by the <strong>TNC</strong><br />
(Q1 to Q32). In order to prevent the same Q-parameter numbers being generated for DEF-active and<br />
CALL-active cycles, the difference between Q-parameter numbers can be specified with MP7250.<br />
The input values of the OEM cycles are assigned in ascending order of magnitude to the Q<br />
parameters Q1 to Q14. The input values for the cycle are assigned to Q parameters Q[1 + MP7250]<br />
to Q[14 + MP7250].<br />
Example for MP7250 = 30<br />
Parameter number in OEM-cycle with<br />
CALL-active DEF-active<br />
Cycle parameter 1 Q1 Q31<br />
Cycle parameter 2 Q2 Q32<br />
. . .<br />
. . .<br />
. . .<br />
Cycle parameter 14 Q14 Q44<br />
MP7251 determines whether the values of the Q parameters which are changed in the OEM cycles<br />
by calculation or assignment are globally transferred to the calling program (e.g. in the case of<br />
"nesting" of OEM cycles). With machine parameter MP7251, the range of Q parameters from Q[100<br />
- MP7251] to Q99 is defined as "global".<br />
Example for global local Q parameters:<br />
MP7251 = 40<br />
Q [100 – 40] = Q60=> Q60 to Q99 are global Q parameters and<br />
Q1 to Q59 are local Q parameters<br />
MP7251 = 40 MP7251 < 40<br />
Q1 = local Q60 = global Q1 = local Q60 = local<br />
BEGIN PGM 100 MM<br />
FN0: Q1 = +1 +1 +0 +1 +0<br />
FN0: Q60 = +5 +1 +5 +1 +5<br />
CYCL DEF 69.0 OEMCYCLE 1 +1 +5 +1 +5<br />
CYCL DEF 69.1 Q1 = +2 +2 +5 +2 +5<br />
BEGIN PGM 99999969 MM<br />
DLG–DEF 0/32<br />
FN1: Q1 = Q1 + 10 +12 +5 +12 +5<br />
FN1: Q60 = Q60 + 10 +12 +15 +12 +15<br />
END PGM 99999969 MM<br />
STOP +2 +15 +2 +5<br />
END PGM 100 MM<br />
9-4 <strong>TNC</strong> <strong>360</strong> 1 Introduction 8/95
MP7240 Inhibit program input for [Program number] = [OEM-cycle number in<br />
EPROM].<br />
Input value 0 or 1<br />
0 = inhibit<br />
1 = not inhibit<br />
MP7250 Difference between Q-parameter number for "CALL-active" and "DEF-active"<br />
block in OEM cycles<br />
Input range: 0 to 50<br />
MP7251 Number of global Q parameters transferred from OEM-cycle to calling<br />
program.<br />
Input range: 0 to 100<br />
OEM cycles stored in the PLC EPROM can be inhibited in the PLC program via flags M2240 to<br />
M2271. Inhibited cycles cannot be defined in NC programs.<br />
If programs with definitions of inhibited or non-existent OEM cycles are transferred to the control<br />
unit, an error message "PGM 999999.. UNAVAILABLE" is generated during program call. The<br />
program cannot be run.<br />
Flag Function Set Reset<br />
M2240 Inhibit OEM-cycle 68 PLC PLC<br />
M2241 Inhibit OEM-cycle 69 PLC PLC<br />
M2242 Inhibit OEM-cycle 70 PLC PLC<br />
. .<br />
. .<br />
. .<br />
M2271 Inhibit OEM-cycle 99 PLC PLC<br />
8/95 <strong>TNC</strong> <strong>360</strong> 1 Introduction 9-5
1.2 Dialogues for OEM cycles<br />
The dialogue numbers defined in the OEM-cycle determine the text to be displayed from the PLC<br />
EPROM<br />
The following dialogue texts for the designation of the OEM-cycle and the input parameters are files<br />
in the standard PLC-EPROM.<br />
Dialogue number in OEM-cycle Standard dialogue in PLC EPROM<br />
0 USER CYCL<br />
1 CYCL PARAMETER 01<br />
2 CYCL PARAMETER 02<br />
. .<br />
. .<br />
. .<br />
99 CYCL PARAMETER 99<br />
Instead of these standard dialogues up to 100 customized dialogues can be filed in the PLC-EPROM.<br />
1.3 Output in binary code<br />
If the OEM cycles have been fully tested, they can be output together with the PLC program in<br />
binary form for EPROM programming. It is possible to output both the files located in the PLC<br />
EPROM and those in the NC program memory in binary code. An accurate description of file output<br />
via the data interface is given in Chapter "PLC-programming".<br />
9-6 <strong>TNC</strong> <strong>360</strong> 1 Introduction 8/95
2 "Bolt Hole Circle" OEM-Cycle Example<br />
The following "Bolt hole circle" program is an example of an OEM-cycle. (This cycle has not been<br />
loaded in the control unit!) The Z-axis acts as the tool axis. The first hole in the circle is at 0 o . The<br />
OEM-cycle calculates the angular position of the holes from the number of holes. The drilling<br />
positions are approached in succession in an anti-clockwise direction, and the holes are made<br />
automatically with an in-feed. Before the cycle is called, the tool is held at the safety clearance.<br />
Q4<br />
Y<br />
Q3<br />
Q2<br />
0°<br />
X<br />
Input parameters:<br />
Q1 = Number of holes<br />
Q2 = Radius of bolt hole circle<br />
Q3 = X coordinate of center of bolt hole circle<br />
Q4 = Y coordinate of center of bolt hole circle<br />
Q5 = Safety clearance for Z axis<br />
(negative input)<br />
Q6 = Hole depth in Z axis (negative input)<br />
Q7 = Drilling feed<br />
"Bolt hole circle" OEM-cycle<br />
0 BEGIN 99999968 MM<br />
1 DLG-CALL 0/1/2/3/4/5/6/7 Dialogue block<br />
2 FN1: Q6 = +Q6 + +Q5 Distance traversed in Z<br />
3 FN4: Q50 = +<strong>360</strong> DIV + Q1 Angle increment<br />
4 FN0: Q60 = +0 Start angle<br />
5 CC X+Q3 Y+Q4 Center of bolt hole circle<br />
6 LBL 11 Jump label<br />
7 LP PR +Q2 PA +Q60 R0 FMAX Approach drilling position<br />
8 L IZ +Q6 FQ7 Drilling with feed<br />
9 L IZ –Q6 FMAX Clear<br />
10 FN 1: Q60 = +Q60 + +Q50 Next angle<br />
11 FN12: IF +Q60 LT +<strong>360</strong> GOTO LBL 11 Last bore?<br />
12 END PGM 99999968 MM<br />
Dialogues for "Bolt hole circle" OEM-cycle<br />
Dialogue DIALOGUE<br />
No.<br />
0 BOLT HOLE CIRCLE<br />
1 NUMBER OF HOLES?<br />
2 RADIUS?<br />
3 X COORDINATE CC?<br />
4 Y COORDINATE CC?<br />
5 SAFETY CLEARANCE?<br />
6 TOTAL HOLE DEPTH?<br />
7 <strong>DR</strong>ILLING FEED RATE?<br />
8/95 <strong>TNC</strong> <strong>360</strong> 2 "Bolt Hole Circle" OEM-Cycle Example 9-7
3 Calling OEM Cycles<br />
OEM cycles in the NC program memory or PLC EPROM can be defined, called and executed both in<br />
HEIDENHAIN dialogue programs and in ISO programs.<br />
3.1 Calls in a HEIDENHAIN dialogue program<br />
In the HEIDENHAIN dialogue program, OEM cycles are defined as standard cycles (see "Dialogue<br />
Programming" in the <strong>TNC</strong> <strong>360</strong> User's <strong>Manual</strong>).<br />
The dialogue for cycle definition is initiated with the CYCL DEF key. The desired cycle is selected<br />
either by skimming through the pages using the vertical arrow keys or by GOTO and input of the<br />
cycle number (e.g. 68). The cycle is entered with the ENT key.<br />
The individual parameters are input via the numeric keyboard and entered with ENT.<br />
In the case of a "DEF-active" OEM-cycle, the cycle is effective immediately after definition. Once<br />
defined, a "CALL-active" OEM-cycle can be called and hence activated either via "CYCL CALL" or<br />
M99.<br />
Example:<br />
0 BEGIN PGM 1000 MM<br />
1 BLK FORM 0.1 Z X+0 Y+0 Z–20 Definition of blank<br />
2 BLK FORM 0.2 X+100 Y+100 Z+0 For test/program-run graphics<br />
3 TOOL DEF 1 L+0 R+2 Tool definition<br />
4 TOOL CALL 1 Z S1000 Tool call<br />
5 L Z+2 R0 FMAX M3 Approach safety clearance<br />
6 CYCL DEF 68.0 Bolt hole circle Definition of cycle 68 "Bolt hole circle"<br />
7 CYCL DEF 68.1 Q1=+8 Q2=+40 Q3=+60<br />
8 CYCL DEF 68.2 Q4=+50 Q5=–2 Q6=–20<br />
9 CYCL DEF 68.3 Q7=+100<br />
10 CYCL CALL Call cycle<br />
11 END PGM 1000 MM<br />
9-8 <strong>TNC</strong> <strong>360</strong> 3 Calling OEM Cycles 8/95
3.2 Calls in an ISO program<br />
In an ISO program, OEM cycles are not called via a G- function but via key "D" and the cycle number<br />
(e.g. D88).<br />
The individual parameters are input via the numeric keyboard and entered with ENT.<br />
In the case of a "DEF-active" OEM-cycle, the cycle is effective immediately after definition. Once<br />
defined, a "CALL-active" OEM-cycle can be called and hence activated either via G79 or M99.<br />
Example:<br />
% 1000 G71 *<br />
N10 G30 G17 X+0 Y+0 Z–20 *<br />
Definition of blank<br />
N20 G31 G90 X+100 Y+100 Z+0 *<br />
For test/program-run graphics<br />
N30 G99 T1 L+0 R+2 *<br />
Tool definition<br />
N40 T1 G17 S1000 *<br />
Tool call<br />
N50 G00 G40 G90 Z+2 M3 *<br />
Safety clearance<br />
N60 D68 P1+8 P2+40 P3+60<br />
P4+50 P5–2 P6–20 P7+100 *<br />
Call of cycle 68 "Bolt hole circle"<br />
N70 G79 *<br />
N99999 % 1000 G71 *<br />
Cycle active<br />
8/95 <strong>TNC</strong> <strong>360</strong> 3 Calling OEM Cycles 9-9
Positioning Module – Contents<br />
1 PLC Positioning Module 10-2<br />
1.1 Introduction 10-2<br />
1.2 Hardware 10-3<br />
1.3 EMERGENCY STOP routine 10-5<br />
1.4 Reference signal evaluation 10-6<br />
1.5 Connecting the positioning module 10-6<br />
8/95 <strong>TNC</strong> <strong>360</strong> 10-1
1 PLC Positioning Module<br />
1.1 Introduction<br />
A hardware version of the LE <strong>360</strong> – the LE 234.003 – can be used in conjunction with the<br />
<strong>TNC</strong> 407/<strong>TNC</strong> 415 as a positioning module.<br />
In this way the <strong>TNC</strong> 407/<strong>TNC</strong> 415 can be expanded by up to 4 auxiliary axes. PLC inputs and outputs<br />
of the LE 234.003 can also be used.<br />
The positioning module can be used for controlling tool changers and pallet feed as well as rotary<br />
axes and swivel heads.<br />
The NC software of the <strong>TNC</strong> <strong>360</strong> can also be run on the LE 234.003, i.e. all the functions of the <strong>TNC</strong><br />
<strong>360</strong> are also possible with the positioning module.<br />
This <strong>Technical</strong> <strong>Manual</strong> is therefore also applicable to the LE 234.003.<br />
10-2 <strong>TNC</strong> <strong>360</strong> 1 PLC Positioning Module 8/95
1.2 Hardware<br />
The differences in the hardware of the LE 234.003 from the LE <strong>360</strong> C are:<br />
- the connector X25 contains the RS-232-/V.24 and the RS-422/V.11 interfaces<br />
- The measuring system input X4 (sine-wave) has been dropped<br />
- The measuring system input X5 (square-wave) has been added<br />
24V<br />
X31<br />
X1<br />
X2<br />
X3<br />
X5<br />
X6<br />
X11<br />
X12<br />
X8<br />
X9<br />
Connecting cable<br />
LE 234.003<br />
Pin layout<br />
B<br />
X21 X24<br />
X22<br />
X25<br />
X26<br />
X23 X27<br />
Id.-Nr. 265 479 ..<br />
max. 50 m<br />
Control-loop board<br />
X1 = Measuring system 1 (∼)<br />
X2 = Measuring system 2 (∼)<br />
X3 = Measuring system 3 (∼)<br />
X5 = Measuring system 5 ( )<br />
X6 = Measuring system S ( )<br />
X8 = Nominal value output 1,2,3,4,S<br />
X9 = Visual display unit (only for<br />
commissioning)<br />
B = Signal ground<br />
X21 = PLC output<br />
X22 = PLC input<br />
X23 = <strong>TNC</strong> keyboard (TE)<br />
(only for commissioning)<br />
X24 = Power supply 24 V for PLC<br />
X25 = Data interface RS-422/V.11<br />
(RS-232/V.24)<br />
X31 = Power supply 24 V for LE<br />
X11, X12 and X26 are not needed,<br />
X4 is not available.<br />
LE 407/415<br />
8/95 <strong>TNC</strong> <strong>360</strong> 1 PLC Positioning Module 10-3
X25 Data interface RS-422/V.11 and RS-232/V.24-C<br />
Flange socket with female insert (25-pin)<br />
Pin Number Assignment Assignment<br />
RS-422/V.11 RS-232/V.24-C<br />
1 Screen<br />
2 RxD<br />
3 TxD<br />
4 CTS<br />
5 RTS<br />
6 DTR<br />
7 GND Signal<br />
8<br />
9<br />
10<br />
11<br />
12<br />
13<br />
14<br />
Vacant<br />
___<br />
RxD<br />
___<br />
CTS<br />
___<br />
TxD<br />
___<br />
RTS<br />
___<br />
DSR<br />
___<br />
DTR<br />
15 DTR<br />
16, 17, 18 Vacant<br />
19 GND Signal<br />
20 DSR DSR<br />
21 RxD<br />
22 CTS<br />
23 TxD<br />
24 RTS<br />
25 Housing Ext. screen<br />
GND housing<br />
X5 Measuring system input 5 ( )<br />
Pin Number<br />
1<br />
Assignment<br />
___<br />
Ua2<br />
2 + 5V (UP) 3<br />
4<br />
Ua0<br />
___<br />
Ua0<br />
5<br />
6<br />
7<br />
Ua1<br />
___<br />
Ua1<br />
___<br />
UaS<br />
8 Ua2<br />
9 (contact spring) Screen = Housing<br />
10 0 V (UP) 11 0 V (UP) 12 + 5V (UP) 10-4 <strong>TNC</strong> <strong>360</strong> 1 PLC Positioning Module 8/95
1.3 EMERGENCY STOP routine<br />
After the <strong>TNC</strong> has been switched on, the internal EMERGENCY STOP switch-off is checked, i.e. for<br />
each processor the power supply is briefly switched off.<br />
Appropriate circuitry must ensure that the positioning module does not function if an error occurs<br />
during the NC check, i.e. that the voltage for the acknowledgment is mutually switched off. The<br />
circuit illustrated below can fulfill this function. The check is started at the same time that the control<br />
voltage is switched on.<br />
EMERGENCY STOP<br />
buttons<br />
Control<br />
voltage<br />
on<br />
LE 407/415<br />
After control voltage is switched on, the switch is opened<br />
by each microprocessor for a short time.<br />
X41/34 X44/2 X44/1 X42/4<br />
"Control<br />
operational"<br />
k1<br />
k3<br />
K1<br />
EMERGENC STOP<br />
buttons<br />
Control<br />
voltage<br />
on<br />
24V Cannot<br />
be switched<br />
off<br />
+ –<br />
24 V<br />
PLC<br />
24V Can be<br />
switched off<br />
k1<br />
LE 234.003<br />
Acknowledgement<br />
"Control operational"<br />
After control voltage is switched on, the switch is opened<br />
by each microprocessor for a short time.<br />
X21/34 X24/2 X24/1 X22/4<br />
"Control<br />
operational"<br />
k1<br />
K3<br />
24V Cannot<br />
be switched<br />
off<br />
8/95 <strong>TNC</strong> <strong>360</strong> 1 PLC Positioning Module 10-5<br />
+ –<br />
24 V<br />
PLC<br />
24V Can be<br />
switched off<br />
k3<br />
Acknowledgement<br />
"Control operational"
1.4 Reference signal evaluation<br />
After the reference signal evaluation in the NC axes, the reference signal evaluation of the PLC axes<br />
must be started, either automatically or (e.g. with NC switch-on) or manually with special keys. PLC<br />
positioning is not possible until the reference signals have been evaluated.<br />
1.5 Connecting the positioning module<br />
The positioning module hardware is connected at the RS-422/V.11 interface with a special cable (Id.-<br />
Nr. 265 479).<br />
The software is connected through the PLC of the master control (<strong>TNC</strong> 407 or <strong>TNC</strong> 415). The<br />
modules 9100, 9101, 9102, 9105 and 9106 were developed for this purpose. They make it possible<br />
to activate the RS-422/V.11 data interface and to transmit and receive binary data.<br />
These modules are described in Chapter 7 "PLC-programming".<br />
The PLC program for the positioning module can be written either with the LE 234.003 itself (which<br />
must be connected to the BE 212 visual display unit and the TE 355 A/B keyboard), or on a PC with<br />
the PLC programming software from HEIDENHAIN.<br />
Please contact your HEIDENHAIN representative if you have any questions regarding the PLC<br />
programming software.<br />
10-6 <strong>TNC</strong> <strong>360</strong> 1 PLC Positioning Module 8/95
7-Bit ASCII Code<br />
Character DEC OCT HEX<br />
NUL 000 000 00<br />
SOH 001 001 01<br />
STX 002 002 02<br />
ETX 003 003 03<br />
EOT 004 004 04<br />
ENQ 005 005 05<br />
ACK 006 006 06<br />
BEL 007 007 07<br />
BS 008 010 08<br />
HT 009 011 09<br />
LF 010 012 0A<br />
VT 011 013 0B<br />
FF 012 014 0C<br />
CR 013 015 0D<br />
SO 014 016 0E<br />
SI 015 017 0F<br />
DLE 016 020 10<br />
DC1 (X-ON) 017 021 11<br />
DC2 018 022 12<br />
DC3 (X-OFF) 019 023 13<br />
DC4 020 024 14<br />
NAK 021 025 15<br />
SYN 022 026 16<br />
ETB 023 027 17<br />
CAN 024 030 18<br />
EM 025 031 19<br />
SUB 026 032 1A<br />
ESC 027 033 1B<br />
FS 028 034 1C<br />
GS 029 035 1D<br />
RS 030 036 1E<br />
US 031 037 1F<br />
SP 032 040 20<br />
! 033 041 21<br />
" 034 042 22<br />
# 035 043 23<br />
$ 036 044 24<br />
% 037 045 25<br />
& 038 046 26<br />
´ 039 047 27<br />
( 040 050 28<br />
) 041 051 29<br />
* 042 052 2A<br />
+ 043 053 2B<br />
, 044 054 2C<br />
- 045 055 2D<br />
. 046 056 2E<br />
/ 047 057 2F<br />
8/95 <strong>TNC</strong> <strong>360</strong>/<strong>TNC</strong> 335 7-Bit ASCII Code 11-1
Character DEC OCT HEX<br />
0 048 060 30<br />
1 049 061 31<br />
2 050 062 32<br />
3 051 063 33<br />
4 052 064 34<br />
5 053 065 35<br />
6 054 066 36<br />
7 055 067 37<br />
8 056 070 38<br />
9 057 071 39<br />
: 058 072 3A<br />
; 059 073 3B<br />
< 060 074 3C<br />
= 061 075 3D<br />
> 062 076 3E<br />
? 063 077 3F<br />
@ 064 100 40<br />
A 065 101 41<br />
B 066 102 42<br />
C 067 103 43<br />
D 068 104 44<br />
E 069 105 45<br />
F 070 106 46<br />
G 071 107 47<br />
H 072 110 48<br />
I 073 111 49<br />
J 074 112 4A<br />
K 075 113 4B<br />
L 076 114 4C<br />
M 077 115 4D<br />
N 078 116 4E<br />
O 079 117 4F<br />
P 080 120 50<br />
Q 081 121 51<br />
R 082 122 52<br />
S 083 123 53<br />
T 084 124 54<br />
U 085 125 55<br />
V 086 126 56<br />
W 087 127 57<br />
X 088 130 58<br />
Y 089 131 59<br />
Z 090 132 5A<br />
[ 091 133 5B<br />
\ 092 134 5C<br />
] 093 135 5D<br />
^ 094 136 5E<br />
– 095 137 5F<br />
11-2 <strong>TNC</strong> <strong>360</strong> 7-Bit ASCII Code8/95
Character DEC OCT HEX<br />
` 096 140 60<br />
a 097 141 61<br />
b 098 142 62<br />
c 099 143 63<br />
d 100 144 64<br />
e 101 145 65<br />
f 102 146 66<br />
g 103 147 67<br />
h 104 150 68<br />
i 105 151 69<br />
j 106 152 6A<br />
k 107 153 6B<br />
l 108 154 6C<br />
m 109 155 6D<br />
n 110 156 6E<br />
o 111 157 6F<br />
p 112 160 70<br />
q 113 161 71<br />
r 114 162 72<br />
s 115 163 73<br />
t 116 164 74<br />
u 117 165 75<br />
v 118 166 76<br />
w 119 167 77<br />
x 120 170 78<br />
y 121 171 79<br />
z 122 172 7A<br />
{ 123 173 7B<br />
¦ 124 174 7C<br />
} 125 175 7D<br />
~ 126 176 7E<br />
DEL 127 177 7F<br />
8/95 <strong>TNC</strong> <strong>360</strong>/<strong>TNC</strong> 335 7-Bit ASCII Code 11-3
✎<br />
11-4 <strong>TNC</strong> <strong>360</strong> 7-Bit ASCII Code8/95
Subject Index<br />
A<br />
Acceleration........................................................................................................................ 4-55<br />
Acceleration, determination................................................................................................ 4-229<br />
Acceleration, optimizing ..................................................................................................... 4-238<br />
Acknowledgment of S-code ............................................................................................... 4-92<br />
Active axes ......................................................................................................................... 4-6<br />
Actual - nominal value transfer ........................................................................................... 4-78<br />
Actual position capture....................................................................................................... 4-121<br />
ADDITION (+) ................................................................................................................... 7-57<br />
ADDITION [ ] (+[ ]) ............................................................................................................ 7-74<br />
Address allocation ..............................................................................................................7-14<br />
Addressing the word memory............................................................................................ 7-14<br />
Ambient temperature ......................................................................................................... 3-8<br />
Analog inputs...................................................................................................................... 4-176<br />
Analog voltage.................................................................................................................... 4-56<br />
AND (A)............................................................................................................................. 7-44<br />
AND [ ] (A[ ])...................................................................................................................... 7-70<br />
AND NOT (AN)..................................................................................................................7-46<br />
AND NOT [ ] (AN[ ])...........................................................................................................7-70<br />
Angle encoders................................................................................................................... 3-19<br />
Angular measurement........................................................................................................ 4-7<br />
APE..................................................................................................................................... 3-30<br />
Arithmetic Commands........................................................................................................ 7-57<br />
Assembly hints................................................................................................................... 3-8<br />
ASSIGN (=) ....................................................................................................................... 7-34<br />
ASSIGN BYTE (B=)........................................................................................................... 7-36<br />
ASSIGN DOUBLEWORD (D=) ......................................................................................... 7-36<br />
ASSIGN WORD (W=) ....................................................................................................... 7-36<br />
Assignment of the analogue outputs ................................................................................. 4-14<br />
Assignment of the measuring system inputs .................................................................... 4-13<br />
Automatic cyclical offset adjustment ................................................................................. 4-64<br />
Axes in motion.................................................................................................................... 4-77<br />
Axes in position .................................................................................................................. 4-76<br />
Axis designation ................................................................................................................. 4-12<br />
Axis-direction keys, memory function for........................................................................... 4-149<br />
Axis-enable ......................................................................................................................... 4-75<br />
Axis-error compensation .................................................................................................... 4-22<br />
B<br />
Backlash compensation...................................................................................................... 4-22<br />
Baud ................................................................................................................................... 8-8<br />
Baud rate ............................................................................................................................ 8-8<br />
BCC .................................................................................................................................... 8-18<br />
BIT RESET (BC) ...............................................................................................................7-86<br />
Bit Commands....................................................................................................................7-85<br />
BIT SET (BS) ..................................................................................................................... 7-85<br />
BIT TEST (BT) ................................................................................................................... 7-87<br />
Block Check Character ....................................................................................................... 8-18<br />
Block-number step size for ISO programs ......................................................................... 4-133<br />
Buffer battery ..................................................................................................................... 3-16<br />
8/95 <strong>TNC</strong> <strong>360</strong> Subject Index 12-1
C<br />
Call Module (CM)..............................................................................................................7-96<br />
Cascade control.................................................................................................................. 4-52<br />
CASE Statement................................................................................................................. 7-100<br />
Change signal, S-code ........................................................................................................ 4-92<br />
Checking absolute position of distance-coded REF marks................................................. 4-9<br />
Checking amplitude of measuring system signals ............................................................. 4-9<br />
Checking data..................................................................................................................... 8-7<br />
Checking edge separation of measuring system signals ................................................... 4-10<br />
CN 123................................................................................................................................ 5-14 – 5-23<br />
Code for M function ........................................................................................................... 4-138<br />
Code number...................................................................................................................... 4-134; 5-3<br />
Coded output of spindle speed .......................................................................................... 4-92<br />
Commands ......................................................................................................................... 7-27<br />
Commissioning................................................................................................................... 4-227<br />
Comparisons....................................................................................................................... 7-63<br />
Compatibility markers......................................................................................................... 7-123<br />
Compatibility with <strong>TNC</strong> 355................................................................................................ 7-121<br />
Compensation for reversal errors....................................................................................... 4-23<br />
Configuration of the interface............................................................................................. 8-22<br />
Connection box................................................................................................................... 3-23<br />
Constant feed rate in corners............................................................................................. 4-67<br />
Constant feed rate in corners with M90 ............................................................................ 4-68<br />
Contour Lines ..................................................................................................................... 4-158<br />
Control is ready................................................................................................................... 4-107<br />
Control with feed forward control ...................................................................................... 4-61<br />
Control with feed forward control, optimizing.................................................................... 4-237<br />
Control with lag, optimizing................................................................................................ 4-233<br />
Control with servo lag......................................................................................................... 4-53<br />
Controlled ........................................................................................................................... 4-75<br />
Cooling................................................................................................................................ 3-8<br />
Correction table .................................................................................................................. 4-25; 4-26<br />
Counters ............................................................................................................................. 7-20<br />
Counting direction ..............................................................................................................4-8<br />
Current tool axis ................................................................................................................. 4-14<br />
Cycle call............................................................................................................................. 4-140<br />
Cycle inhibit ........................................................................................................................ 4-127<br />
Cycles................................................................................................................................. 4-127<br />
D<br />
Data bits ............................................................................................................................. 8-22<br />
Data interface ..................................................................................................................... 3-32<br />
Data transfer....................................................................................................................... 8-4<br />
Data transfer by PLC .......................................................................................................... 8-42<br />
Data transfer by the PLC .................................................................................................... 7-109<br />
Data transfer PLC ...............................................................................................................7-15<br />
Data transfer rate ............................................................................................................... 8-8<br />
Data transfer with Block Check Character (BCC) ............................................................... 8-17<br />
Data transmission protocol................................................................................................. 8-29<br />
Data transmission protocols............................................................................................... 8-15<br />
Datum................................................................................................................................. 4-110<br />
Datum correction................................................................................................................ 4-194<br />
DBB Double Ball Bar system.............................................................................................. 4-23<br />
12-2 <strong>TNC</strong> <strong>360</strong> Subject Index 8/95
Decimal sign....................................................................................................................... 4-135<br />
Degree of protection .......................................................................................................... 3-11<br />
Dialog language .................................................................................................................. 4-135<br />
Dialogues for OEM cycles.................................................................................................. 9-6<br />
Digitizing feed rate in normal direction............................................................................... 4-156<br />
Digitizing with TS 120......................................................................................................... 4-155<br />
Digitizing, maximum deflection of stylus ........................................................................... 4-156<br />
Digitizing, number of oscillations in normal direction ......................................................... 4-156<br />
Digitizing, optimizing the scanning sequence .................................................................... 4-161<br />
Digitizing, scanning Cycles ................................................................................................. 4-158<br />
Dimensions......................................................................................................................... 3-58<br />
Direction of traverse...........................................................................................................4-8<br />
Direction of traverse for referencing .................................................................................. 4-49<br />
Display "Control is ready".................................................................................................... 4-119<br />
Display of current gear range ............................................................................................. 4-121<br />
Display spindle power ........................................................................................................ 4-120<br />
DIVISION (/) ...................................................................................................................... 7-60<br />
DIVISION [ ] (/[ ]) ............................................................................................................... 7-74<br />
E<br />
Edge evaluation of the PLC inputs ..................................................................................... 7-21<br />
Electrical noise immunity.................................................................................................... 3-8<br />
EMERGENCY STOP ........................................................................................................... 4-109<br />
EMERGENCY STOP DEFECTIVE ....................................................................................... 4-109<br />
EMERGENCY STOP routine............................................................................................... 4-107<br />
EMERGENCY STOP routine, testing.................................................................................. 4-231<br />
Encoder cables ................................................................................................................... 3-21<br />
Encoder inputs.................................................................................................................... 3-20<br />
Encoder monitoring ............................................................................................................ 4-9<br />
Encoders............................................................................................................................. 3-19; 4-6<br />
End indexed Call Module (ENDC)..................................................................................... 7-100<br />
End of Module, Program End (EM)................................................................................... 7-98<br />
EPROM creation................................................................................................................. 7-21<br />
EPROM operation............................................................................................................... 7-21<br />
EPROM sockets ................................................................................................................. 2-9<br />
EPROM test ....................................................................................................................... 4-136<br />
EQUAL TO (==)................................................................................................................ 7-63<br />
EQUAL TO [ ] (==[ ])......................................................................................................... 7-78<br />
Error messages .................................................................................................................. 4-122<br />
EXCLUSIVE OR (XO) ........................................................................................................ 7-52<br />
EXCLUSIVE OR [ ] (XO[ ]) ................................................................................................. 7-71<br />
EXCLUSIVE OR NOT (XON) ............................................................................................. 7-54<br />
EXCLUSIVE OR NOT [ ] (XON[ ]) ...................................................................................... 7-71<br />
EXT operating mode........................................................................................................... 8-28<br />
External EMERGENCY STOP ............................................................................................. 4-107<br />
External programming ........................................................................................................ 8-28<br />
F<br />
Feed for PLC positioning .................................................................................................... 4-33<br />
Feed potentiometer............................................................................................................ 4-116<br />
Feed rate display ................................................................................................................ 4-116<br />
Feed rate enable................................................................................................................. 4-75<br />
Feed rate for leaving the reference end-position ............................................................... 4-49<br />
8/95 <strong>TNC</strong> <strong>360</strong> Subject Index 12-3
Feed rate for traversing the reference marks..................................................................... 4-49<br />
Feed rate override .............................................................................................................. 4-117<br />
File types ............................................................................................................................ 4-133<br />
File types – disable ............................................................................................................. 4-133<br />
Flashing PLC error message .............................................................................................. 4-123<br />
G<br />
Gear change ....................................................................................................................... 4-86<br />
Gear change, Acknowledgment of..................................................................................... 4-87<br />
Gear change, jog voltage for .............................................................................................. 4-87<br />
Gear code ........................................................................................................................... 4-86<br />
Gear range.......................................................................................................................... 4-82<br />
Gear range, S-analogue voltage for .................................................................................... 4-83<br />
Gear ranges, spindle speed for .......................................................................................... 4-83<br />
Gear-code change signal .................................................................................................... 4-87<br />
Graphic simulation.............................................................................................................. 4-113<br />
Graphics display ................................................................................................................. 4-113<br />
GREATER THAN (>) ......................................................................................................... 7-65<br />
GREATER THAN [ ] (>[ ]) .................................................................................................. 7-78<br />
GREATER THAN OR EQUAL TO (>=)............................................................................... 7-67<br />
GREATER THAN OR EQUAL TOL[ ] (>=[ ])...................................................................... 7-79<br />
Gross positioning error A.................................................................................................... 4-71<br />
Gross positioning error B.................................................................................................... 4-72<br />
Gross positioning error C.................................................................................................... 4-72<br />
Gross positioning error D.................................................................................................... 4-73<br />
Gross positioning error E.................................................................................................... 4-64<br />
Gross positioning error A.................................................................................................... 4-70<br />
H<br />
Handshaking....................................................................................................................... 8-9<br />
Handwheel adapter HRA 110............................................................................................. 3-37; 4-172<br />
Handwheel HR 130 ............................................................................................................ 3-34; 4-169<br />
Handwheel HR 330 ............................................................................................................ 3-33; 4-169<br />
Handwheel HR 332 ............................................................................................................ 3-35; 4-169<br />
Handwheel input ................................................................................................................ 3-33<br />
Handwheel keys................................................................................................................. 4-169<br />
Handwheel, count direction for .......................................................................................... 4-167<br />
Handwheel, minimum subdivision factor for...................................................................... 4-167<br />
Handwheel ......................................................................................................................... 4-166<br />
Hardware components....................................................................................................... 3-4<br />
Hardware handshaking....................................................................................................... 8-9<br />
Hardware version ............................................................................................................... 2-7<br />
Heat generation.................................................................................................................. 3-8<br />
Hirth coupling ..................................................................................................................... 4-183<br />
Humidity ............................................................................................................................. 3-9<br />
I<br />
Incremental jog positioning ................................................................................................ 4-178<br />
Indexed Call Module (CASE)............................................................................................. 7-100<br />
Inhibited key ....................................................................................................................... 4-141<br />
Integral factor ..................................................................................................................... 4-65<br />
Integral factor, optimizing................................................................................................... 4-242<br />
12-4 <strong>TNC</strong> <strong>360</strong> Subject Index 8/95
Interface RS-232-C/V.24 ..................................................................................................... 8-10<br />
Interpolation factor ............................................................................................................. 4-7; 5-6<br />
ISO programs ..................................................................................................................... 4-133<br />
J<br />
Jump Commands ............................................................................................................... 7-94<br />
Jump if Logic Accumulator = 0 (JPF) ................................................................................ 7-94<br />
Jump if Logic Accumulator = 1 (JPT) ................................................................................. 7-94<br />
Jump Label (LBL)..............................................................................................................7-98<br />
K<br />
Key code............................................................................................................................. 4-141<br />
Key simulation .................................................................................................................... 4-141<br />
Kink point............................................................................................................................ 4-59<br />
kv factor.............................................................................................................................. 4-55; 4-63<br />
L<br />
Lag monitoring.................................................................................................................... 4-70<br />
Lead-screw pitch error........................................................................................................ 4-25<br />
LESS THAN (
Mechanical vibration........................................................................................................... 3-9<br />
Memory test....................................................................................................................... 4-136<br />
Modul 9120 Position an auxiliary axis................................................................................. 7-114<br />
Module 9000\: Copy a marker block................................................................................... 7-103<br />
Module 9001\: Copy a Word block ..................................................................................... 7-103<br />
Module 9010\: Indexed reading of Byte ............................................................................. 7-104<br />
Module 9011\: Indexed reading of Word............................................................................ 7-104<br />
Module 9012\: Indexed reading of Doubleword................................................................. 7-104<br />
Module 9020\: Indexed writing of Byte.............................................................................. 7-105<br />
Module 9021\: Indexed writing of Word............................................................................. 7-105<br />
Module 9022\: Indexed writing of Doubleword.................................................................. 7-105<br />
Module 9032\: Transfer machine parameter values to the PLC......................................... 7-106<br />
Module 9035\: Transfer status information to the PLC ...................................................... 7-107<br />
Module 9036\: Transfer PLC status information to the NC ................................................ 7-108<br />
Module 9040\: Transfer coordinate values to the PLC ....................................................... 7-109<br />
Module 9100\: Assign data interface.................................................................................. 7-110<br />
Module 9101\: Enable data interface.................................................................................. 7-110<br />
Module 9102\: Interface status .......................................................................................... 7-111<br />
Module 9105\: Transmit binary data via data interface....................................................... 7-112<br />
Module 9106\: Receive binary data via data interface........................................................ 7-113<br />
Module 9121 Stop an auxiliary axis .................................................................................... 7-115<br />
Module 9122 Poll the status of an auxiliary axis ............................................................... 7-115<br />
Module 9123 Traverse the reference point of an auxiliary axis.......................................... 7-116<br />
Module 9124 Override for PLC axis ................................................................................... 7-117<br />
Module 9150 Run an NC block.......................................................................................... 7-118<br />
Module call if Logic Accumulator = 0 (CMF) .................................................................... 7-96<br />
Module call if Logic Accumulator = 1 (CMT) .................................................................... 7-96<br />
Module technique............................................................................................................... 7-13<br />
Monitoring functions .......................................................................................................... 4-69<br />
Monitoring the analog voltage............................................................................................ 4-72<br />
Mounting position...............................................................................................................3-9<br />
Movement-monitoring........................................................................................................ 4-72<br />
MULTIPLICATION (x) ....................................................................................................... 7-59<br />
MULTIPLICATION [ ] (x[ ]) ................................................................................................ 7-74<br />
Multiplication factor............................................................................................................ 4-59<br />
N<br />
NC power supply................................................................................................................ 3-14<br />
Nominal value output.......................................................................................................... 3-23<br />
Nominal value potential ...................................................................................................... 3-23<br />
Nonlinear axis error compensation..................................................................................... 4-25<br />
Normal direction ................................................................................................................. 4-156<br />
NOT EQUAL TO [ ] ([ ])................................................................................................. 7-79<br />
O<br />
OEM cycles ........................................................................................................................ 9-3<br />
OEM cycles, calling ............................................................................................................ 9-8<br />
Offset adjustment .............................................................................................................. 4-64; 4-243<br />
Offset adjustment by code number ................................................................................... 4-64<br />
Offset adjustment with integral factor ............................................................................... 4-65<br />
Open control loop...............................................................................................................4-78<br />
Operand directory...............................................................................................................7-14<br />
12-6 <strong>TNC</strong> <strong>360</strong> Subject Index 8/95
Operating mode.................................................................................................................. 4-141<br />
OR (O)............................................................................................................................... 7-48<br />
OR [ ] (O[ ])........................................................................................................................ 7-70<br />
OR NOT (ON).................................................................................................................... 7-50<br />
OR NOT [ ] (ON[ ])............................................................................................................. 7-70<br />
orientation........................................................................................................................... 4-94<br />
Overlap factor..................................................................................................................... 4-129<br />
P<br />
Parentheses........................................................................................................................ 7-70; 7-74<br />
Path dependent lubrication................................................................................................. 4-19<br />
PLC – Main menu............................................................................................................... 7-6<br />
PLC auxiliary axes............................................................................................................... 4-36<br />
PLC axes............................................................................................................................. 4-36<br />
PLC Cycle time................................................................................................................... 7-128<br />
PLC error messages........................................................................................................... 4-122; 7-24<br />
PLC Functions .................................................................................................................... 7-5<br />
PLC I/O unit ........................................................................................................................ 3-45<br />
PLC I/O unit PL 410............................................................................................................ 3-49<br />
PLC input, fast.................................................................................................................... 4-69<br />
PLC Input/Output board...................................................................................................... 3-11<br />
PLC Input/Output unit......................................................................................................... 3-5<br />
PLC inputs .......................................................................................................................... 3-40<br />
PLC Modules ...................................................................................................................... 7-103<br />
PLC operation, select ......................................................................................................... 7-5<br />
PLC outputs........................................................................................................................ 3-40<br />
PLC positioning................................................................................................................... 4-33<br />
PLC positioning module...................................................................................................... 3-2<br />
PLC power supply .............................................................................................................. 3-15<br />
PLC Program conversion.................................................................................................... 7-122<br />
PLC program creation......................................................................................................... 7-12<br />
PLC program editing........................................................................................................... 7-6<br />
PLC program Transferring .................................................................................................. 7-10<br />
PLC program, erase............................................................................................................ 7-8<br />
PLC program, transfer from EPROM ................................................................................. 7-8<br />
PLC program, translate....................................................................................................... 7-8<br />
PLC TABLE function........................................................................................................... 7-10<br />
PLC text window................................................................................................................ 4-122<br />
PLC TRACE function........................................................................................................... 7-9<br />
PLC utilization, processing time, memory.......................................................................... 7-8<br />
Pocket coding..................................................................................................................... 4-199<br />
Pocket coding, fixed ........................................................................................................... 4-199<br />
Pocket coding, variable....................................................................................................... 4-199<br />
Pocket milling ..................................................................................................................... 4-129<br />
Point-to-point and straight-cut control ................................................................................ 4-246<br />
Polarity of the nominal value potential ............................................................................... 4-8<br />
Polarity of the S-analogue voltage ...................................................................................... 4-81<br />
Position approach, optimizing............................................................................................. 4-240<br />
Position control loop...........................................................................................................4-52<br />
Position display................................................................................................................... 4-114<br />
Position display step........................................................................................................... 4-114<br />
Position loop gain ............................................................................................................... 4-55<br />
Position monitoring............................................................................................................. 4-70; 4-71<br />
8/95 <strong>TNC</strong> <strong>360</strong> Subject Index 12-7
positioning error.................................................................................................................. 4-70; 4-71<br />
Positioning module ............................................................................................................. 3-2<br />
Positioning window ............................................................................................................ 4-73<br />
Potential steps.................................................................................................................... 4-58<br />
Power consumption ........................................................................................................... 2-5<br />
Power supply...................................................................................................................... 3-14<br />
PROCESSOR CHECK ERROR M ....................................................................................... 3-15<br />
Program, end of.................................................................................................................. 4-136<br />
Programming station .......................................................................................................... 4-135<br />
Pull Stack (PLL)................................................................................................................. 7-91<br />
Pull Stack (PLW) ............................................................................................................... 7-91<br />
Pull Stack (PL)..................................................................................................................... 7-90<br />
Q<br />
Q parameters, overwriting ................................................................................................. 4-136<br />
R<br />
Radial acceleration.............................................................................................................. 4-67<br />
RAM operation ...................................................................................................................7-21<br />
RAM test ............................................................................................................................ 4-136<br />
Ramp slope for S-analogue voltage.................................................................................... 4-82<br />
Rapid traverse..................................................................................................................... 4-55<br />
Reference end-position ...................................................................................................... 4-39; 4-50<br />
Reference marks ................................................................................................................ 4-37<br />
reference marks, passing over ........................................................................................... 4-39<br />
Reference point .................................................................................................................. 4-110<br />
RELAY EXT. DC VOLTAGE MISSING................................................................................. 4-109<br />
REMAINDER (MOD) ........................................................................................................ 7-61<br />
REMAINDER [ ] (MOD[ ]) ................................................................................................. 7-75<br />
RESET (R) ......................................................................................................................... 7-40<br />
RESET NOT (RN) .............................................................................................................. 7-42<br />
Residual voltage ................................................................................................................. 4-71<br />
Rigid tapping....................................................................................................................... 4-104<br />
Rigid tapping, Acceleration ramp for .................................................................................. 4-105<br />
Rotary axes......................................................................................................................... 4-115<br />
Rotary axis, display mode for ............................................................................................. 4-115<br />
Rotational axis .................................................................................................................... 4-12<br />
RS-232-C/V.24 .................................................................................................................... 3-32<br />
Run duration timers............................................................................................................ 4-118<br />
Run duration, display of...................................................................................................... 4-118<br />
Run-in behavior................................................................................................................... 4-62<br />
S<br />
S code................................................................................................................................. 4-92<br />
Sag...................................................................................................................................... 4-25<br />
Scale datum point............................................................................................................... 4-110<br />
Scaling factor...................................................................................................................... 4-131<br />
Scanning range................................................................................................................... 4-158<br />
S-code table........................................................................................................................ 4-93<br />
Secondary linear axis.......................................................................................................... 4-13<br />
Sequence for traversing reference marks .......................................................................... 4-49<br />
Servo accuracy ................................................................................................................... 4-57<br />
12-8 <strong>TNC</strong> <strong>360</strong> Subject Index 8/95
Servo lag............................................................................................................................. 4-55<br />
Servo positioning of the NC-axes ....................................................................................... 4-52<br />
SET (S) .............................................................................................................................. 7-39<br />
Set commands ................................................................................................................... 7-39<br />
SET NOT (SN)................................................................................................................... 7-41<br />
Shift Commands................................................................................................................. 7-82<br />
SHIFT LEFT () ............................................................................................................ 7-83<br />
Signal period ....................................................................................................................... 4-6<br />
Signal subdivision ............................................................................................................... 4-7<br />
Software handshaking........................................................................................................ 8-9<br />
Software limit switch.......................................................................................................... 4-16<br />
Software limit switch ranges.............................................................................................. 4-233<br />
Software number.................................................................................................................2-6<br />
Software option.................................................................................................................. 2-8<br />
Software protection module............................................................................................... 2-8<br />
Software version ................................................................................................................2-6<br />
Special Tools....................................................................................................................... 4-197<br />
Specifications ..................................................................................................................... 2-3<br />
Spindle................................................................................................................................ 4-80<br />
Spindle control loop, open .................................................................................................. 4-94<br />
Spindle display, expanded .................................................................................................. 4-120<br />
Spindle orientation.............................................................................................................. 4-80; 4-94<br />
Spindle orientation, kv factor for ........................................................................................ 4-96<br />
Spindle orientation, ramp slope.......................................................................................... 4-94<br />
Spindle override.................................................................................................................. 4-85<br />
Spindle positioning window................................................................................................ 4-96<br />
Spindle power..................................................................................................................... 4-120<br />
Spindle preset..................................................................................................................... 4-96<br />
Spindle rotation, direction of............................................................................................... 4-81<br />
Spindle rpm, analog output................................................................................................. 4-81<br />
Spindle run-in characteristic ............................................................................................... 4-105<br />
Spindle speed ..................................................................................................................... 4-81<br />
Spindle, count direction of the measuring system signals................................................. 4-82<br />
Spindle, transient response on acceleration....................................................................... 4-105<br />
Spindle-enable .................................................................................................................... 4-82<br />
Spindle-speed for spindle-orientation ................................................................................. 4-94<br />
Spindle-speed output.......................................................................................................... 4-80<br />
Stack Operations ................................................................................................................7-89<br />
Standard transmission protocol.......................................................................................... 8-16<br />
Standstill monitoring...........................................................................................................4-73<br />
Status display ..................................................................................................................... 4-114<br />
Status display, cancel ......................................................................................................... 4-120<br />
Stiction................................................................................................................................ 4-23<br />
Strobe signal for M function ................................................................................................. 4-138<br />
Subdivision factor ............................................................................................................... 4-166<br />
SUBTRACTION (–)............................................................................................................ 7-58<br />
SUBTRACTION [ ] (–[ ])..................................................................................................... 7-74<br />
Summary of connections ................................................................................................... 3-12<br />
T<br />
Tapping ............................................................................................................................... 4-100<br />
8/95 <strong>TNC</strong> <strong>360</strong> Subject Index 12-9
Tapping with floating tap holder ......................................................................................... 4-100; 4-103<br />
Tapping without floating tap holder.................................................................................... 4-104<br />
Tapping, ramp slope for...................................................................................................... 4-101<br />
Temperature compensation ............................................................................................... 4-30<br />
Thread pitch........................................................................................................................ 4-104<br />
Timers................................................................................................................................. 7-17<br />
<strong>TNC</strong> keyboard..................................................................................................................... 3-4; 3-56<br />
Tool changer ....................................................................................................................... 4-196<br />
Tool length, calculation of................................................................................................... 4-114<br />
Tool magazine, number of pockets in ................................................................................ 4-214<br />
Tool table ............................................................................................................................ 4-196<br />
Touch Probe ....................................................................................................................... 4-151<br />
Touch probe feed rate ........................................................................................................ 4-152<br />
Touch probe maximum measuring range........................................................................... 4-152<br />
Touch probe system input.................................................................................................. 3-28<br />
Touch probe system, selection of ...................................................................................... 4-152<br />
TRACE BUFFER, DISPLAY................................................................................................. 7-10<br />
TRACE, END....................................................................................................................... 7-10<br />
TRACE, START ................................................................................................................... 7-10<br />
Transient response............................................................................................................. 4-62<br />
Transient response, optimizing........................................................................................... 4-239<br />
Transmission format........................................................................................................... 8-8<br />
Traverse direction, testing.................................................................................................. 4-232<br />
Traverse ranges.................................................................................................................. 4-16<br />
TS 120 ................................................................................................................................ 3-29<br />
TS 511 ................................................................................................................................ 3-30<br />
Tuning of the drive amplifier............................................................................................... 4-228<br />
U<br />
Unconditional jump (JP).................................................................................................... 7-94<br />
UNEQUAL ()................................................................................................................. 7-68<br />
User parameters................................................................................................................. 4-133; 5-2<br />
User parameters, dialogs for ............................................................................................. 4-134<br />
V<br />
VDU display ........................................................................................................................ 4-14<br />
Visual display unit ............................................................................................................... 3-5; 3-26<br />
VM 101A ............................................................................................................................. 4-25<br />
voltage step........................................................................................................................ 4-58<br />
W<br />
Weight ................................................................................................................................ 2-5<br />
Wrong spindle speed.......................................................................................................... 4-88<br />
12-10 <strong>TNC</strong> <strong>360</strong> Subject Index 8/95