6 Data acquisition 6.1 Data acquisition with Simatic WinCC
6 Data acquisition 6.1 Data acquisition with Simatic WinCC
6 Data acquisition 6.1 Data acquisition with Simatic WinCC

You also want an ePaper? Increase the reach of your titles
YUMPU automatically turns print PDFs into web optimized ePapers that Google loves.
6 <strong>Data</strong> <strong>acquisition</strong><br />
<strong>6.1</strong> <strong>Data</strong> <strong>acquisition</strong> <strong>with</strong> <strong>Simatic</strong> <strong>WinCC</strong><br />
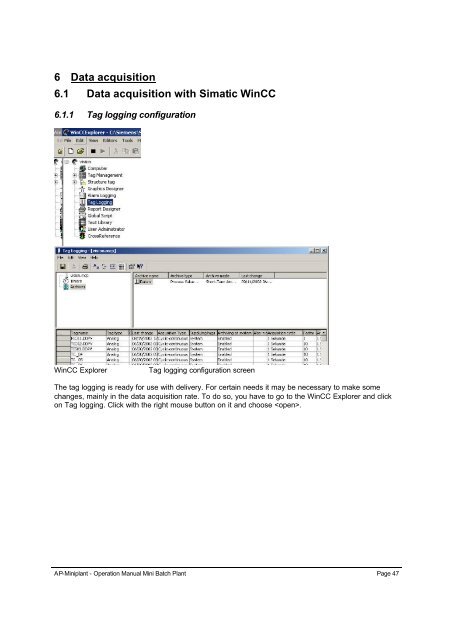
<strong>6.1</strong>.1 Tag logging configuration<br />
<strong>WinCC</strong> Explorer Tag logging configuration screen<br />
The tag logging is ready for use <strong>with</strong> delivery. For certain needs it may be necessary to make some<br />
changes, mainly in the data <strong>acquisition</strong> rate. To do so, you have to go to the <strong>WinCC</strong> Explorer and click<br />
on Tag logging. Click <strong>with</strong> the right mouse button on it and choose .<br />
AP-Miniplant - Operation Manual Mini Batch Plant Page 47
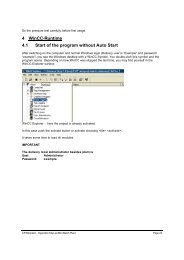
IMPORTANT:<br />
With the <strong>WinCC</strong> Runtime license you get the right to do 1-hour configuration. After this hour<br />
you will be asked to save your changes. To proceed, you will have to close and restart the<br />
<strong>WinCC</strong> Explorer.<br />
Archive Parameters.<br />
Tag logging configuration screen will open. If you<br />
select the properties of the „Daten“ archive and<br />
open the „Archive Parameters“ register, you find<br />
top right the number of entries in your archive. This<br />
is the number of values stored in the archive before<br />
new values will override them. You should not<br />
select a value > 65000 if you want to use the data<br />
in Microsoft Excel. Under this value you find the<br />
number of byte/entry. This multiplied by the number<br />
of entries will be the size needed on hard disc.<br />
ATTENTION:<br />
Old values will be erased by new ones after the<br />
number of entries is reached.<br />
For the tags you can determine the cycle time for each value separately. It is recommended to use<br />
quick rates only for values where you expect quick changes.<br />
There is a difference between <strong>acquisition</strong> of the system and the archiving. Under the point<br />
„Archiving/Display“ you can enter a factor from how many actual values there should be made one<br />
stored value. In the second register „Parameters“ you can enter the way how the stored value shall be<br />
made from the actual values. Standard is „Mean value“ here.<br />
Minimum <strong>acquisition</strong> and archiving time of this system is 1 Second.<br />
Archive tag, name and cycle time<br />
Parameters for archive variable<br />
AP-Miniplant - Operation Manual Mini Batch Plant Page 48
<strong>6.1</strong>.2 Using the stored data<br />
<strong>Data</strong> will be stored in the project path. Standard for all systems is:<br />
[Projektpfad]\wincproj\[Projektdateiname]\PDE\[Prozesswertarchiv] \[Variablenname].<br />
For your system when delivered the path is:<br />
C:\Siemens\Step7\S7proj\P377\wincproj\vision\PDE\Daten\TIC01.DDPV.DBF<br />
Where the latter is the tag name followed by .DBF for the dbase file.<br />
This file can only be opened <strong>with</strong> write protect. This file stores the data in a ring buffer, that means that<br />
oldest data is deleted first when the buffer is full.<br />
IMPORTANT<br />
Always work <strong>with</strong> a copy of the original data. Save it as an *.xls file<br />
Right click on the value you need and then select open <strong>with</strong> -> Microsoft Excel for Windows.<br />
Excel File <strong>with</strong> data of TIC01, reactor temperature<br />
To get useful Time information from the first column apply the following strings to the 4 th to 6 th column,<br />
the example is for row 2:<br />
=CONCATENATE(MID(RC[-3],7,2),".",MID(RC[-3],5,2),".",MID(RC[-3],1,4))<br />
=CONCATENATE(MID(RC[-4],9,2),":",MID(RC[-4],11,2),":",MID(RC[-4],13,2),",",MID(RC[-4],15,3))<br />
=SECOND(RC[-1])+MINUTE(RC[-1])*60+HOUR(RC[-1])*3600<br />
The functions do the following:<br />
Extract a date from column 1<br />
Extract a time from column 1<br />
Calculate the time in seconds from 0 a clock.<br />
These 3 functions in row 2 can be copied to all the other rows. You can mark the complete worksheet<br />
clicking to left in the corner and apply sort on the first row. Then you can search for the time interval<br />
you are looking for.<br />
AP-Miniplant - Operation Manual Mini Batch Plant Page 49
Excel file after adding the functions in column 4, 5 and 6.<br />
You can also use <strong>WinCC</strong> report system to do this job, but it is not flexible enough for research plants.<br />
6.2 <strong>Data</strong> <strong>acquisition</strong> <strong>with</strong> the recipe system<br />
Recipe data will be filed during a recipe in the table data in the recipe workbook recipe.xls. After the<br />
recipe they will be filed <strong>with</strong> the name of the experiment and run in the path<br />
„C:\Siemens\Step7\S7proj\P375\Rezeptsteuerung\\<strong>Data</strong>“.<br />
Where is the name of the operator. The path shown above must exist. It will not be<br />
created automatically.<br />
It is necessary that the name of each data file is unique. The system does not allow to start the recipe<br />
before it has a unique number.<br />
To create the file name, the system uses project, experiment and run number. These 3 numbers,<br />
separated <strong>with</strong> underlines “_”, will form the file name.<br />
If you want to do data <strong>acquisition</strong> during the recipe, you will have to chose the data <strong>acquisition</strong> active<br />
click box.<br />
The following settings can be changed in the data table of the recipe.xls workbook:<br />
Headlines in the „<strong>Data</strong>“-worksheet.<br />
Diagram names can be changed in row 2 beginning from column 4. The colors are used to combine<br />
variables <strong>with</strong> diagrams. All variable names in row 300 which have the same background color as the<br />
one in row 2 <strong>with</strong> the Diagram name, are shown in this diagram.<br />
AP-Miniplant - Operation Manual Mini Batch Plant Page 50
In row 299 above the text names are situated which belong to the variables beneath it. Is one of the<br />
text names printed fat, it will be shown in the variable table or the experiment.<br />
The relevant data is in different lines. In line 100 the variables are defined for the data collected every<br />
time the step changes. The data for the sample starts in line 199.<br />
Line 300 the variable names define the cyclic data, which is written to this table in 5 s cycle time. The<br />
variable name must be written exactly the same way it is in <strong>WinCC</strong>. The connection, here S7P/ for<br />
process variables, must precede the name.<br />
To show a variable in the table which gives an reduced overview about the experiment, the name in<br />
the line 299 must be in bold letters.<br />
IMPORTANT:<br />
Changes in the table „data“ in the recipe.xls refer to all the following Experiments <strong>with</strong> recipe. Old<br />
experiments are not affected.<br />
AP-Miniplant - Operation Manual Mini Batch Plant Page 51
6.2.1 Working <strong>with</strong> data<br />
After pressing the button, you will see this window.<br />
On the left side you see your experiments (empty!).<br />
You can use the predefined report or make your own reports using MS-Excel functionality.<br />
The first button will send the report to a printer, the second one to the screen. In the second case you<br />
have to go through the screens closing the active one <strong>with</strong> .<br />
First page of the protocol, press to proceed, you will get a table of values and after that some<br />
predefined diagrams. You always have to proceed <strong>with</strong> the button.<br />
Manual data input allows the manual change of the header data.<br />
switches to recipe input menu<br />
closes the open Experiment *.xls-files<br />
will rebuild the x-t-Diagrams or the data<br />
will stop this program and give you access to Excel.<br />
AP-Miniplant - Operation Manual Mini Batch Plant Page 52