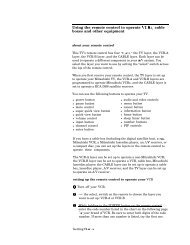
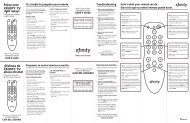
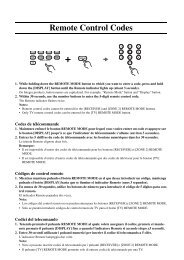
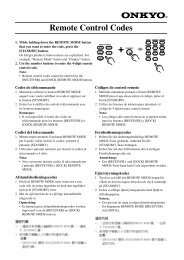
Using the remote controlm
Using the remote controlm
Using the remote controlm

You also want an ePaper? Increase the reach of your titles
YUMPU automatically turns print PDFs into web optimized ePapers that Google loves.
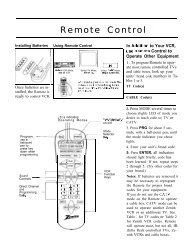
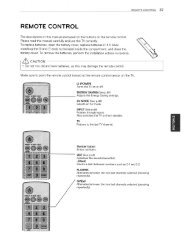
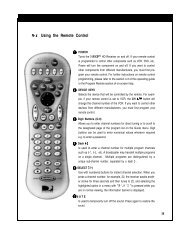
Installing <strong>remote</strong> control To install or replace <strong>the</strong> <strong>remote</strong> control batteries:<br />
batteries 1. Locate <strong>the</strong> battery compartment on <strong>the</strong> back of <strong>the</strong> <strong>remote</strong> control.<br />
Programming <strong>the</strong><br />
<strong>remote</strong> control<br />
‘;’ MUTE<br />
0<br />
2. Remove <strong>the</strong> battery compartment cover.<br />
3. Insert two “AAA” size batteries as shown, observing <strong>the</strong> correct polarity.<br />
4. Replace <strong>the</strong> battery compartment cover.<br />
Installing batteries in <strong>the</strong> <strong>remote</strong> control<br />
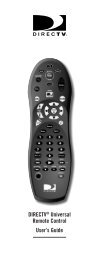
You can operate your TV, VCR, and Audio/Video receiver using your HRMC-8<br />
or HMRC-9 <strong>remote</strong> control. Use <strong>the</strong> Code Scanning or Code Entry method to<br />
program <strong>the</strong> <strong>remote</strong> control. Code scanning may be more time-consuming, but<br />
you don’t need to know manufacturer’s control codes. <strong>Using</strong> <strong>the</strong> Code entry<br />
method may be quicker, but you’ll need to know <strong>the</strong> correct manufacturer’s<br />
control codes for each component you want to operate.<br />
1. Aim your <strong>remote</strong> control at <strong>the</strong> component you want to use.<br />
2. Hold down <strong>the</strong> desired device button (TV, for example).<br />
3. Press <strong>the</strong> MUTE button for one second.<br />
4. Release both buttons toge<strong>the</strong>r.<br />
Code scanning To use this method:<br />
<strong>Using</strong> <strong>the</strong> <strong>remote</strong> control<br />
5. The device button (in this example, <strong>the</strong> TV button) glows and remains lit.<br />
If <strong>the</strong> button does not light, repeat <strong>the</strong> previous steps.<br />
6. Use one of <strong>the</strong> two programming methods described above.<br />
1. Repeatedly tap <strong>the</strong> top part of <strong>the</strong> CHANNEL (CH) button.<br />
2. Continue to step through <strong>the</strong> codes until <strong>the</strong> component turns off, indicating<br />
you have found <strong>the</strong> correct component code. If you accidentally pass a code<br />
that responds or realize you may not have been aiming <strong>the</strong> <strong>remote</strong> control at<br />
<strong>the</strong> component, tap <strong>the</strong> lower part of <strong>the</strong> CHANNEL (CH) button to step<br />
backward through <strong>the</strong> codes.<br />
3. Press <strong>the</strong> <strong>remote</strong> control POWER button to verify <strong>the</strong> proper code by<br />
turning <strong>the</strong> device on and off.<br />
4. Press <strong>the</strong> device button (in this example, TV) again to lock in <strong>the</strong> code.