Ultrospec 2100 pro User Manual
Ultrospec 2100 pro User Manual
Ultrospec 2100 pro User Manual

Create successful ePaper yourself
Turn your PDF publications into a flip-book with our unique Google optimized e-Paper software.
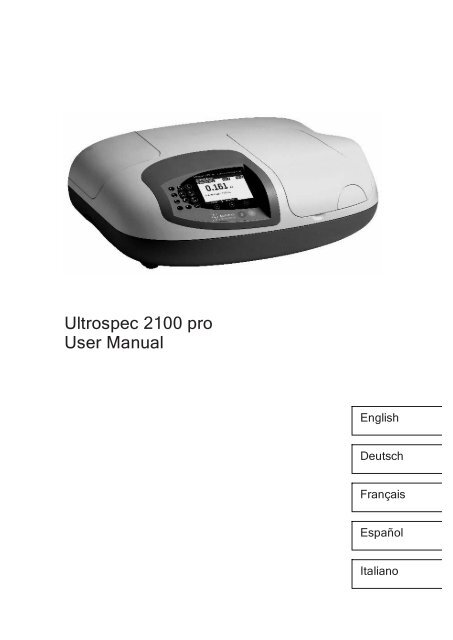
<strong>Ultrospec</strong> <strong>2100</strong> <strong>pro</strong><br />
<strong>User</strong> <strong>Manual</strong><br />
English<br />
Deutsch<br />
Français<br />
Español<br />
Italiano
Declaration of Conformity<br />
This is to certify that the <strong>Ultrospec</strong> <strong>2100</strong> <strong>pro</strong> UV/Visible Spectrophotometer<br />
Part number 80-2112-21 / 22 / 27 / 28<br />
Serial number 79000 onwards<br />
manufactured by Biochrom Ltd. conforms to the requirements of the following Directives-:<br />
73/23/EEC & 89/336/EEC<br />
Standards to which conformity is declared<br />
EN 61 010-1: 2001<br />
Safety requirements for electrical equipment for measurement, control and<br />
laboratory use.<br />
EN 61326: 1998<br />
Electrical equipment for measurement, control and laboratory use – EMC<br />
requirements<br />
Signed: Dated: 23 nd October 2002<br />
David Parr<br />
Managing Director<br />
Biochrom Ltd<br />
Postal address Telephone Telefax<br />
Biochrom Ltd +44 1223 423723 +44 1223 420164<br />
22 Cambridge Science Park<br />
Milton Road e mail: enquiries@biochrom.co.uk website: http://www.biochrom.co.uk<br />
Cambridge CB4 0FJ<br />
England<br />
Registered in England No: 974213<br />
Registered Office: 22 Cambridge Science Park, Milton Road, Cambridge CB4 4FJ, England.<br />
Biochrom Ltd<br />
Certificate No. 890333
CONTENTS<br />
UNPACKING, POSITIONING AND INSTALLATION 2<br />
Essential Safety Notes 3<br />
OPERATION 4<br />
Introduction 4<br />
Keypad and display 5<br />
Basic Modes (1) 6<br />
Absorbance (1.1) 6<br />
% Transmission (1.2) 6<br />
Factor Concentration (1.3) 6<br />
Applications (2) 7<br />
Wavescan (2.1) 7<br />
Simple Kinetics (2.2) 8<br />
Reaction Rate (2.3) 9<br />
Standard Curve (2.4) 10<br />
Multiwave and Equation Entry (2.5) 11<br />
Nucleic Modes (3) 12<br />
Methods A (4), B (5) and C (6) 13<br />
System Utilities 14<br />
Output to Printer 16<br />
Seiko DPU-414 (1) 16<br />
Epson FX-80+ / Epson 9 pin (2) 16<br />
Text printer (no graphics) (3) 16<br />
HP PCL 3 (4) 16<br />
Epson 24 pin (ESC P) (5) 16<br />
Download to Spreadsheet 17<br />
Messages 17<br />
ACCESSORIES 18<br />
Multiple Cell Holder Accessories 18<br />
Single Cell Holder Accessories 19<br />
Other Accessories, consumables etc 20<br />
SWIFT II Applications Software 21<br />
MAINTENANCE 22<br />
After Sales Support 22<br />
Fuse Replacement 22<br />
Cleaning and General Care 23<br />
APPENDIX 24<br />
Text entry 24<br />
Good Laboratory Practice 25<br />
Least squares regression analysis and linearity 26<br />
SPECIFICATION AND WARRANTY 27<br />
___________________________________________________________________<br />
Issue 06 - 12/2003 <strong>Ultrospec</strong> <strong>2100</strong> <strong>pro</strong>, English 1
Unpacking, Positioning and Installation<br />
• Inspect the instrument for any signs of damage caused in transit. If any<br />
damage is discovered, inform your supplier immediately.<br />
• Ensure your <strong>pro</strong>posed installation site conforms to the environmental<br />
conditions for safe operation:<br />
Indoor use only<br />
Temperature 10°C to 40°C<br />
Maximum relative humidity of 80 % up to 31°C decreasing linearly to 50 %<br />
at 40°C<br />
• The instrument must be placed on a hard flat surface, for example a laboratory<br />
bench or table, which can take its weight (13 kg) such that air is allowed to<br />
circulate freely around the instrument.<br />
• Ensure that the cooling fan inlets and outlets are not obstructed; position at<br />
least 2 inches from the wall.<br />
• This equipment must be connected to the power supply with the power cord<br />
supplied and must be earthed (grounded). It can be used on 90 - 240V<br />
supplies.<br />
• Switch on the instrument and check that the display works (see Operation).<br />
• To enter laboratory name, operator name, instrument asset number details, and<br />
current date/time, refer to System Utilities.<br />
If this equipment is used in a manner not specified or in environmental conditions<br />
not ap<strong>pro</strong>priate for safe operation, the <strong>pro</strong>tection <strong>pro</strong>vided by the equipment may be<br />
impaired and instrument warranty withdrawn.<br />
___________________________________________________________________<br />
2 <strong>Ultrospec</strong> <strong>2100</strong> <strong>pro</strong>, English Issue 06 - 12/2003
Essential Safety Notes<br />
There are a number of warning labels and symbols on your instrument. These are<br />
there to inform you where potential danger exists or particular caution is required.<br />
Before commencing installation, please take time to familiarise yourself with these<br />
symbols and their meaning.<br />
Accessories<br />
Caution (refer to accompanying documents).<br />
Background colour is yellow, symbol and outline are black.<br />
WARNING<br />
WARNING<br />
UV RADIATION UV RADIATION IS HARMFUL TO YOUR EYES<br />
HOT If power is restored with this cover removed,<br />
eye <strong>pro</strong>tection must be worn<br />
• Care should be taken when handling all heated accessories.<br />
• Ensure that the cell compartment lid is closed when operating cell changers<br />
and the sipper.<br />
• It is essential that the baseplate plug supplied with single cell accessories is<br />
fitted to optimise air flow and to prevent light ingress.<br />
___________________________________________________________________<br />
Issue 06 - 12/2003 <strong>Ultrospec</strong> <strong>2100</strong> <strong>pro</strong>, English 3
OPERATION<br />
Introduction<br />
Your UV/Visible spectrophotometer is a stand alone, simple-to-use instrument with<br />
a high-resolution liquid crystal display (LCD), and a comprehensive range of<br />
spectrophotometry measurements can be undertaken.<br />
It works on the basis of light from the xenon lamp being directed by a fixed mirror<br />
through the monochromator inlet slit. This passes through one of several<br />
(dependent on wavelength selected) filters mounted on filter quadrant: the filtered<br />
light is then directed onto the holographic grating which <strong>pro</strong>duces light of the<br />
selected wavelength. The light then leaves the monochromator via the exit slit, and<br />
mirrors focus and direct the light into the sample compartment. This passes<br />
through your cell, containing the sample of interest, and then a defocusing lens to a<br />
solid state detector unit. The resulting signal is then filtered and displayed.<br />
Your spectrophotometer has the following capabilities:<br />
• Basic Modes for<br />
-Absorbance<br />
-% Transmission<br />
-Factor Concentration<br />
• Application Modes for<br />
- Wavescan (Wavelength Scanning )<br />
- Simple Kinetics<br />
- Reaction Rate<br />
- Standard Curve<br />
- Multiple Wavelength (Multi Wavelength Equation Entry)<br />
• Stored parameters for Nucleic Acid quantification and purity checking<br />
- DNA<br />
- RNA<br />
- Oligonucleotide<br />
• 18 user defined methods, in 3 groups of 6<br />
- Methods A, B, C<br />
• Print results from the instrument display in graphical format<br />
• Download of results directly to Excel for manipulation and archiving, via a<br />
serial interface lead to a PC<br />
• Self test diagnostics for GLP purposes<br />
A range of accessories further enhances the capability of the instrument.<br />
The home page <strong>pro</strong>vides access to user modes, system utilities and accessory<br />
identification and set-up.<br />
___________________________________________________________________<br />
4 <strong>Ultrospec</strong> <strong>2100</strong> <strong>pro</strong>, English Issue 06 - 12/2003
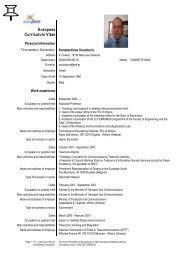
Keypad and display<br />
Press the soft key on the keypad directly below the corresponding option on the<br />
display (F1, F2 and F3) to select that option. For example, on the home page<br />
(above):<br />
press F1 to take you to System Utilities<br />
press F2 to identify the type of cell changer / holder that has been fitted<br />
press F3 to toggle the display back-light on/off (display contrast can be<br />
changed within System (F1)<br />
Press:<br />
• to print result if auto-print is off, or to re-print result if auto-print is on<br />
← to back space in order to correct text and characters in ap<strong>pro</strong>priate boxes<br />
to start making measurements and print results (green run key)<br />
to stop making measurements or entering parameters and return to the<br />
home page; use as an “escape mechanism” (red stop key)<br />
Press the corresponding number on the keypad to enter the user mode choices; for<br />
example 1 followed by 1 is Absorbance mode, whereas 2 followed by 4 is Standard<br />
Curve Mode.<br />
___________________________________________________________________<br />
Issue 06 - 12/2003 <strong>Ultrospec</strong> <strong>2100</strong> <strong>pro</strong>, English 5
Basic Modes (1)<br />
Absorbance (1.1)<br />
Absorbance mode measures the amount of light that has passed through a sample<br />
relative to a blank (this can be air). The <strong>pro</strong>cedure is as follows:<br />
Enter ap<strong>pro</strong>priate wavelength and press OK (F3)<br />
Insert reference and press green run key. The cell changer, if fitted,<br />
automatically moves to position 2 and displays the result for the reference<br />
measurement (0.000)<br />
Xenon lamp based instruments are “press to read”, whereas deuterium /<br />
tungsten lamp instruments measure continuously. Thus to monitor<br />
sample stabilisation, the simple kinetics mode must be used<br />
This reference value is used for subsequent samples until changed<br />
Insert samples as required and press (repeat as necessary)<br />
To go back and change the wavelength press Method (F1)<br />
% Transmission (1.2)<br />
Transmission mode measures the amount of light that has passed through a sample<br />
relative to a blank (this can be air), but displays the result as a percentage. The<br />
<strong>pro</strong>cedure is as follows:<br />
Enter ap<strong>pro</strong>priate wavelength and press OK (F3)<br />
Insert reference and press green run key<br />
This reference value is used for subsequent samples until changed<br />
Insert samples as required and press (repeat as necessary)<br />
To go back and change the wavelength press Method (F1)<br />
Factor Concentration (1.3)<br />
Concentration mode is used when a conversion factor is known, and converts the<br />
absorbance measurement for a sample at a specific wavelength into a concentration,<br />
by a simple multiplication of absorbance x factor. The <strong>pro</strong>cedure is as follows:<br />
Enter ap<strong>pro</strong>priate wavelength and press OK (F3)<br />
Enter known factor (range 0.01-9999) and press OK (F3)<br />
To enter a negative factor press – (F1); the reference should have a<br />
higher absorbance than the samples<br />
Insert reference and press green run key<br />
This reference value is used for subsequent samples until changed<br />
Insert samples as required and press (repeat as necessary)<br />
To go back and change the wavelength or factor press Method (F1)<br />
___________________________________________________________________<br />
6 <strong>Ultrospec</strong> <strong>2100</strong> <strong>pro</strong>, English Issue 06 - 12/2003
Applications (2)<br />
Wavescan (2.1)<br />
An absorption spectrum can be obtained from your instrument; this enables simple<br />
identification of peak height and position. A reference scan has to be obtained first.<br />
The <strong>pro</strong>cedure is as follows:<br />
Enter start wavelength (range 190-890nm) and press OK (F3)<br />
Enter end wavelength (range 200-900nm) and press OK (F3)<br />
Select scan speed as ap<strong>pro</strong>priate; slow (1), medium (2), fast (3) or survey (4).<br />
The scan speed depends on the wavelength range due to the wide range in<br />
baseline energy and this in turn affects data interval, so the figures are<br />
nominal.<br />
Select if the peak check table is required; if selected, a table of wavelengths<br />
and absorbance maxima for up to 20 peaks can be printed out<br />
Nominal scan speed, nm/min<br />
Slow 250<br />
Medium 750<br />
Fast 1800<br />
Survey 3000<br />
Insert reference and press green run key to obtain reference spectrum<br />
This reference spectrum is used for subsequent samples until changed<br />
Insert samples as required and press (repeat as necessary)<br />
Press Data (F3) to access data points; these can be viewed by moving the<br />
cursor (F2 and F1) a peak is indicated by a flag symbol<br />
For rapid movement, press 4 / 6 to go to left / right side of the graph, or<br />
5 to go the centre<br />
Press 2 to zoom in (8 to zoom out)<br />
To go back and change the parameters press Method (F1)<br />
___________________________________________________________________<br />
Issue 06 - 12/2003 <strong>Ultrospec</strong> <strong>2100</strong> <strong>pro</strong>, English 7
Simple Kinetics (2.2)<br />
Simple kinetics studies to investigate the shape of an assay curve can be readily<br />
performed. The wavelength of interest is entered together with the time interval at<br />
which absorbances are to be read: the results are displayed graphically, simulating a<br />
chart recorder output. The <strong>pro</strong>cedure is as follows:<br />
Enter ap<strong>pro</strong>priate wavelength and press OK (F3)<br />
Select time units; seconds (1) or minutes (2)<br />
Enter the duration of the assay and press OK (F3)<br />
Enter the time interval; minimum 2, maximum 60 seconds<br />
Select if the actual absorbance time data should be printed with the results<br />
Insert reference and press green run key<br />
This reference value is used for subsequent samples until changed<br />
Insert samples as required and press (repeat as necessary)<br />
To see the assay on the whole display, press Data (F3); to return press OK (F3)<br />
Data points can be viewed by moving the cursor (F2 and F1); this<br />
enables the identification of slope start and end times, for example<br />
To go back and change the parameters press Method (F1)<br />
NOTE<br />
This mode should be used to check sample stabilisation prior to kinetics studies, for<br />
example, since the xenon lamp is not a continuous output source (unlike deuterium<br />
and tungsten lamps).<br />
___________________________________________________________________<br />
8 <strong>Ultrospec</strong> <strong>2100</strong> <strong>pro</strong>, English Issue 06 - 12/2003
Reaction Rate (2.3)<br />
Reagent test kits are routinely used for the enzymatic determination of compounds in<br />
food, beverage and clinical laboratories by measuring NAD / NADH conversion at 340<br />
nm. The change in absorbance over a specified time period can be used to <strong>pro</strong>vide useful<br />
information when an ap<strong>pro</strong>priate factor, defined in the reagent kit <strong>pro</strong>tocol, is applied.<br />
Note that reaction rate and enzyme activity can be calculated if the factor used takes<br />
account of the absorbance difference per unit time, as opposed to the absorbance<br />
difference per se.<br />
The correlation (quality of line fit) is calculated from 10 equally spaced absorbance / time<br />
points during the course of the experiment. The <strong>pro</strong>cedure is as follows:<br />
Enter ap<strong>pro</strong>priate wavelength and press OK (F3)<br />
Select time units; seconds (1) or minutes (2)<br />
Enter delay time (or lag time), if applicable and press OK (F3)<br />
Enter the duration of the assay and press OK (F3)<br />
Enter factor required to convert slope to meaningful units and press OK (F3)<br />
Insert reference and press green run key<br />
This reference value is used for subsequent samples until changed<br />
Insert samples as required and press (repeat as necessary)<br />
The assay is shown graphically as it <strong>pro</strong>ceeds and reverts to show<br />
The result (total change in absorbance over the reaction time as defined by<br />
the intercepts multiplied by the factor), slope and the line quality (a<br />
coefficient of determination of > 95 % is expected if the assay was carried<br />
out over a linear section). The slope is always presented as Abs/min, even<br />
in seconds mode<br />
Start and final absorbances, as well as absorbance difference<br />
To see the assay on the whole display, press Graph (F3); to return press OK (F3)<br />
Data points can be viewed by pressing Data (F1) moving the cursor (F2 and F1)<br />
To go back and change the parameters press Method (F1)<br />
___________________________________________________________________<br />
Issue 06 - 12/2003 <strong>Ultrospec</strong> <strong>2100</strong> <strong>pro</strong>, English 9
Standard Curve (2.4)<br />
The construction of a multi point calibration curve from standards of known<br />
concentration in order to quantify unknown samples is a fundamental use of a<br />
spectrophotometer; a common example is the Bradford determination for <strong>pro</strong>teins. This<br />
instrument has the advantage of being able to store this curve as a method. The<br />
<strong>pro</strong>cedure to construct the standard curve is as follows:<br />
Press Standards (F3) followed by New (F1) and confirm (F3)<br />
[this step is not necessary if this mode is being used for the first time]<br />
Enter ap<strong>pro</strong>priate wavelength and press OK (F3)<br />
Select Curve Fit method; Single Point (1), Linear Regression (2) or Linear<br />
Interpolation (3)<br />
Enter number of standards (2-12) and press OK (F3)<br />
Enter number of replicates (1-3) and press OK (F3)<br />
Enter concentration of first standard and press (F3)<br />
To include a zero concentration standard, include this in the number of<br />
standards to be entered and enter 0.00 for concentration; use a blank when<br />
required to enter standard 1<br />
Enter concentrations of other standards as <strong>pro</strong>mpted<br />
Insert reference and press green run key<br />
This reference value is used for subsequent samples until changed<br />
Insert standards as required and press followed by OK (F3), repeating as<br />
necessary to construct the standard curve. Values can be written down if required.<br />
Press Standards (F3) to see the standard curve, press OK (F3) to return<br />
If in linear regression mode, the values for the slope, intercept and coefficient<br />
of determination are printed out<br />
Insert reference and press green run key<br />
This reference value is used for subsequent samples until changed<br />
Insert samples as required and press (repeat as necessary)<br />
To go back and change the parameters press Method (F1)<br />
___________________________________________________________________<br />
10 <strong>Ultrospec</strong> <strong>2100</strong> <strong>pro</strong>, English Issue 06 - 12/2003
Multiwave and Equation Entry (2.5)<br />
The measurement of Absorbance values at specific wavelengths and combining<br />
these with ap<strong>pro</strong>priate factors is a means of overcoming interference effects in<br />
several applications. By using the equation entry facility, post measurement<br />
calculations can be done automatically and the end result displayed for the operator.<br />
This is a very powerful facility indeed for the busy industrial, QC or environmental<br />
testing laboratory. Up to 5 absorbances at different wavelengths can be measured<br />
and factors applied to them; an overall dilution factor can be applied to the<br />
completed equation. The <strong>pro</strong>cedure is as follows, and is best described using an<br />
example:<br />
Write the equation out in front of you, ensuring there are no syntax errors<br />
Enter the title; this will be shown with the result on the display and print out,<br />
so should be descriptive (see Appendix)<br />
Enter the equation (see Appendix)<br />
Insert reference and press green run key<br />
This reference value is used for subsequent samples until changed<br />
Insert samples as required and press (repeat as necessary)<br />
To go back and change the parameters press Method (F1)<br />
___________________________________________________________________<br />
Issue 06 - 12/2003 <strong>Ultrospec</strong> <strong>2100</strong> <strong>pro</strong>, English 11
Nucleic Modes (3)<br />
Nucleic acids can be quantified at 260 nm because it is well established that a<br />
solution of DNA or RNA with an optical density of 1.0 has a concentration of 50 or<br />
40 µg/ml, respectively, in a 10mm pathlength cell. Oligonucleotides, as a rule of<br />
thumb, have a corresponding factor of 33 µg/ml, although this does vary with base<br />
composition.<br />
Extracting nucleic acids from cells is accompanied by <strong>pro</strong>tein, and extensive<br />
purification is required to separate the <strong>pro</strong>tein impurity. The 260/280 ratio gives an<br />
indication of purity; it is only this, however, and not a definitive assessment. Pure<br />
DNA and RNA preparations have expected ratios of ≥ 1.8 and ≥ 2.0, respectively;<br />
deviations from this indicate the presence of <strong>pro</strong>tein impurity in the sample, but<br />
care must be taken in interpretation of results. An elevated absorbance at 230 nm<br />
can indicate the presence of impurities as well; 230 nm is near the absorbance<br />
maximum of peptide bonds and also indicates buffer contamination since Tris,<br />
EDTA and other buffer salts absorb at this wavelength. When measuring RNA<br />
samples, the 260/230 ratio should be > 2.0; a ratio lower than this is generally<br />
indicative of contamination with guanidinium thiocyanate, a reagent commonly<br />
used in RNA purification and which absorbs over the 230 - 260 nm range.<br />
Background correction at a wavelength totally separate from the nucleic acid and<br />
<strong>pro</strong>tein peaks at 260 and 280 nm, respectively, is sometimes used to compensate for<br />
the effects of background absorbance. The wavelength used is 320 nm and it can<br />
allow for the effects of turbidity, high absorbance buffer solution and the use of<br />
reduced aperture cells.<br />
The instrument calculates concentration, displays 260/280 and 260/230 ratios, and<br />
compensates for dilution and use of cells that do not have 10mm pathlength. A<br />
wavelength scan of a sample can also be obtained for visual inspection of integrity.<br />
The <strong>pro</strong>cedure is as follows for DNA (3.1), RNA (3.2) and oligo (3.3):<br />
Enter pathlength of cell; 10mm (1), 5mm (2), 2mm (3), 1mm (4) or 0.5mm<br />
(5)<br />
Select units; µg/ml (1), ng/µl (2) or µg/µl (3)<br />
Select if background correction at 320 nm is required<br />
Select if sample scan is required (scans 220 to 330 nm, with autoscaling)<br />
Enter dilution factor<br />
[Oligo (3.3) only; enter conversion factor. If not known, use 33]<br />
Insert reference and press green run key<br />
This reference scan is used for subsequent samples until changed<br />
Insert samples as required and press (repeat as necessary)<br />
___________________________________________________________________<br />
12 <strong>Ultrospec</strong> <strong>2100</strong> <strong>pro</strong>, English Issue 06 - 12/2003
To go back and change the parameters press Method (F1)<br />
Press Graph to view the sample spectrum<br />
Methods A (4), B (5) and C (6)<br />
After defining parameters in any of the applications, and prior to measuring a<br />
sample, a method can be saved. To save a method:<br />
press stop to return to the home page<br />
select one of the three method banks (4, 5, or 6)<br />
press save (F1) and choose an unfilled method by pressing the ap<strong>pro</strong>priate number<br />
enter the method name (see below) and press OK (F3)<br />
A stored method is available as an option directly on the instrument menu.<br />
To change parameters, the method must be deleted first. To delete a method:.<br />
press stop to return to the home page<br />
select one of the three method banks<br />
press delete (F2) and select the required method by pressing the ap<strong>pro</strong>priate<br />
number; you are asked to confirm this.<br />
Entry of alphanumeric characters for print outs and method names<br />
Remove default characters, if necessary, using ←<br />
Press ap<strong>pro</strong>priate key on keypad to cycle through options of lower case letter,<br />
numbers and upper case letters (for example pressing key 2 cycles through<br />
abc2ABC). Note that a space is entered using key 1, which cycles between<br />
1_1_)<br />
Press another key to move to next letter. To enter a doubled letter (eg AA) or<br />
number (eg 00), press > (F2) and then the ap<strong>pro</strong>priate key again.<br />
Delete incorrect characters using ←<br />
Complete entry by pressing OK (F3)<br />
An example of name entry is given in the Appendix.<br />
___________________________________________________________________<br />
Issue 06 - 12/2003 <strong>Ultrospec</strong> <strong>2100</strong> <strong>pro</strong>, English 13
System Utilities<br />
After selecting the system option (F1) on the home page, there is initial<br />
information, including the calibration status of the instrument and the date of the<br />
last full GLP calibration (see above). The GLP calibration details can be printed<br />
out for record purposes by pressing F2 if required; note they are printed<br />
automatically depending on the specified GLP calibration interval (see below).<br />
Set up<br />
To adjust the contrast of the display to suit lighting conditions, press Contrast 6 or<br />
Contrast 5 to decrease or increase (F1 or F2, respectively).<br />
Clock (1)<br />
Press OK (F3) to cycle through year, month, day, hour, minute and use F1 or F2 to<br />
adjust the parameter down or up, as ap<strong>pro</strong>priate.<br />
Customise (2)<br />
Instrument description (for example asset number), operator name and replacement<br />
group names for Methods A, B and C (for example application types or operator<br />
name if a multi-user environment) can be entered here. To enter a name, press<br />
ap<strong>pro</strong>priate key on keypad to cycle through options of lower case letter, numbers<br />
and upper case letters (for example pressing key cycles through abc2ABC).<br />
Preferences (3)<br />
Set your preferences as follows:<br />
Sample number <strong>pro</strong>mpt no / yes (enables entry of sample number between 1-<br />
999 prior to running an experiment, rather than starting from Sample = 1<br />
again).<br />
Autoprint on / off (if off, results can be printed manually using . key<br />
Printer<br />
Default graph scale (0 – 3, 0 – 2, 0 – 1, 0 – 0.5 and Autoscale)<br />
Confirm exit from application no / yes<br />
Key click on / off<br />
___________________________________________________________________<br />
14 <strong>Ultrospec</strong> <strong>2100</strong> <strong>pro</strong>, English Issue 06 - 12/2003
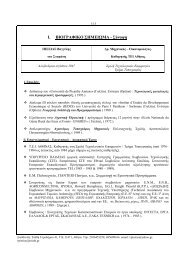
GLP (4)<br />
Refer to Appendix for more information. This option determines whether GLP is<br />
on or off in terms of printing and reporting the results; the calibration interval for<br />
GLP, however, is always on and can be done automatically at pre-defined time<br />
intervals (always on, daily, weekly, monthly, quarterly). If GLP is on, the results<br />
are printed automatically after calibration; they can also be printed on demand<br />
using Print (F2) on the System page. Note that the GLP print out will show the<br />
date for when the full calibration was done (“Calibrated”), and that this can be<br />
different to the date of instrument operation (“Date”); this is shown on the example<br />
below. If the date is the same, “Calibrated” shows the time that it was done<br />
instead.<br />
Press “More…” (F3) on the system page to view the GLP results on the instrument<br />
display.<br />
<strong>Ultrospec</strong> <strong>2100</strong> <strong>pro</strong> GLP Report<br />
Instrument <strong>Ultrospec</strong> <strong>2100</strong> <strong>pro</strong><br />
Operator A T Dadd<br />
Date 22 September 2000<br />
Time 10:00:17<br />
Serial No. 79500<br />
Version 4190 V1.0<br />
Calibrated 21 September 2000<br />
Instrument Life 25.6 Hours<br />
Service 10 September 2000<br />
Bandwidth<br />
(2.0 – 3.0nm) 2.9 PASS<br />
Wavelength Accuracy<br />
881.9nm (± 1 nm) 881.9 PASS<br />
Absorbance Accuracy<br />
220nm (1.763 – 1.781A) 1.772 PASS<br />
340nm (1.633 – 1.665A) 1.649 PASS<br />
500nm (1.477 – 1.491A) 1.484 PASS<br />
Stray Light<br />
220 nm (
Output to Printer<br />
The graphics capability of the instrument means that the following requirements for<br />
printer compatibility should be fulfilled:<br />
• The printer must not be USB only style; parallel Centronics is required<br />
• The printer must not be designed to work with MS Windows only (GDI type);<br />
these are less expensive printers and can only function when connected to a PC<br />
with the ap<strong>pro</strong>priate driver installed<br />
If in doubt, check with the printer manufacturer.<br />
Note that printer output is always in black and white even on colour printers.<br />
Seiko DPU-414 (1)<br />
If obtained in your country, it should already be configured <strong>pro</strong>perly.<br />
If not, set software DIP SW2 to American character set.<br />
Epson FX-80+ / Epson 9 pin (2)<br />
Includes Epson FX 850 and similar.<br />
Text printer (no graphics) (3)<br />
Use for any class of parallel printer; no graphics or accents on text are printed.<br />
HP PCL 3 (4)<br />
Intended for printers such as HP LaserJet II/III/4, HP DeskJet 500, HP DeskJet<br />
690C.<br />
The printer must be HP PCL level 3 or greater; HP DeskJet 700, 820 and 1000<br />
series printers do not fulfil this requirement and cannot be used<br />
Use for letter or A4 sized paper (European)<br />
Epson 24 pin (ESC P) (5)<br />
For use with Epson 24 pin dot matrix printers and older inkjet printers such as the<br />
Stylus 400.<br />
Output is automatic when the key is pressed and auto-print (in Preferences) is<br />
on. If auto-print is off, results can be printed on demand using the . key.<br />
___________________________________________________________________<br />
16 <strong>Ultrospec</strong> <strong>2100</strong> <strong>pro</strong>, English Issue 06 - 12/2003
Download to Spreadsheet<br />
Results can be downloaded directly to Excel when the PC has the Spreadsheet<br />
Interface Software installed (80-2110-73) and the two are linked with the serial<br />
cable (80-2105-97); detailed instructions are supplied with the software. Thus<br />
absorbance / wavelength data comprising a scan, for example, can be picked up as<br />
columns of numbers and converted to a more conventional graph using the<br />
spreadsheet; results can then be formatted or manipulated as ap<strong>pro</strong>priate prior to<br />
inclusion in reports or archiving / saving to hard disk.<br />
Results from all modes of use on the instrument can be output in this way. Output<br />
is automatic when the key is pressed.<br />
Messages<br />
Most messages are self-explanatory and relate to use of the instrument.<br />
Others relate to the calibration of the instrument on switch on:<br />
This instrument has<br />
failed 1 or more GLP<br />
tests<br />
One or more of the parameters tested for during GLP<br />
calibration is out of specification (see Appendix). You can<br />
accept this status and continue to use the instrument as normal,<br />
but you may to contact your local service engineer<br />
Failed to find Abs Failed to calibrate <strong>pro</strong>perly; contact local service engineer<br />
Failed to find Ref 1 Failed to calibrate <strong>pro</strong>perly; contact local service engineer<br />
Failed to align filters Failed to calibrate <strong>pro</strong>perly; contact local service engineer<br />
Failed to align grating Failed to calibrate <strong>pro</strong>perly; contact local service engineer<br />
___________________________________________________________________<br />
Issue 06 - 12/2003 <strong>Ultrospec</strong> <strong>2100</strong> <strong>pro</strong>, English 17
ACCESSORIES<br />
If an accessory is changed, press the accessory button on the home page (F2) to<br />
initialise the instrument in order that the ap<strong>pro</strong>priate accessory can be identified.<br />
Depending on the accessory type, a list of options is presented.<br />
Multiple Cell Holder Accessories<br />
Install by removing accessory in place, replacing with the new one, turning<br />
the central mounting screw until it is finger tight and pressing the accessory<br />
button on the home page.<br />
All multiple cell holders have the option of being used as a single cell holder.<br />
This means that there will be no rotation after pressing run.<br />
Description Part number Comments<br />
4 position cell changer 80-2106-01 Accommodates cells 10-50mmm in<br />
8 position water heated<br />
cell changer<br />
pathlength<br />
80-2109-70 Requires a water-circulating bath.<br />
Locate round extension of tube<br />
restrainer into top of cell changer<br />
thumb screw. Thread tubes through<br />
the tube guide and attach this to the<br />
instrument base using the screws<br />
<strong>pro</strong>vided. Replace the front blanking<br />
plug on the cell compartment lid<br />
6 position Peltier heated 80-2106-04<br />
with the new one that is <strong>pro</strong>vided.<br />
Requires Temperature Control Unit<br />
cell changer<br />
(80-2105-49). Insert into socket 3.<br />
8 position cell changer 80-2108-01 Spare, if required<br />
___________________________________________________________________<br />
18 <strong>Ultrospec</strong> <strong>2100</strong> <strong>pro</strong>, English Issue 06 - 12/2003
Single Cell Holder Accessories<br />
Install by removing accessory in place, replacing, if necessary, the baseplate<br />
plug supplied and positioning the single cell holder so that the arrow is on the<br />
front face and it locates in place. Then push the finger locks backwards so<br />
that they lock into position. Press the accessory button on the home page<br />
Description Part number Comments<br />
Cell holder, 10mm pathlength 80-2106-05<br />
Cell holder, for sample<br />
stirring<br />
80-2108-10 Requires magnetic flea and controller<br />
Cell holder, 50mm pathlength 80-2106-07<br />
Cell holder, 100 mm<br />
pathlength<br />
80-2107-14<br />
Ultramicrovolume cell holder 80-2106-06 Use with 5 µl cell (80-2103-68) and<br />
70 µl cell (80-2103-69)<br />
Microvolume cell holder 80-2106-09 Use with 50 µl cell (80-2076-38)<br />
Cylindrical cell holder 80-2106-10 Up to 100 mm pathlength cylindrical<br />
cells<br />
Water heated cell holder 80-2106-08 10-40 mm pathlength.<br />
Requires a water-circulating bath..<br />
Replace the front blanking plug on<br />
the cell compartment lid with the<br />
new one that is <strong>pro</strong>vided..<br />
HPLC cell holder 80-2106-11 Flowcell volume is 8 µl, pathlength<br />
is 2.5mm. Thread wires through one<br />
hole of the tube guide and attach this<br />
to the instrument base using the<br />
screws <strong>pro</strong>vided. Replace the front<br />
blanking plug on the cell<br />
compartment lid with the new one<br />
that is <strong>pro</strong>vided.<br />
Peltier cell holder 80-2106-13 Set required temp in range 20-49 °C.<br />
Insert into socket 2.<br />
Electrical cell holder 80-2106-12 Set required temperature: off, 25, 30,<br />
37 °C. Insert into socket 2.<br />
Tm Programmable heated cell 80-2106-14 Supplied with SWIFT Tm software.<br />
holder<br />
Temp range 20-105°C. Used for<br />
DNA/RNA denaturing studies.<br />
Requires Temperature Control Unit<br />
(80-2105-49). Insert into socket 3<br />
___________________________________________________________________<br />
Issue 06 - 12/2003 <strong>Ultrospec</strong> <strong>2100</strong> <strong>pro</strong>, English 19
Other Accessories, consumables etc<br />
Description Part number Comments<br />
Sipper 80-2112-15 Use if a large number of samples for<br />
single readings is required.<br />
Requires single cell holder (80-2106-05<br />
or 80-2106-13). 10mm flowcell and<br />
tubing supplied, together with separate<br />
Temperature<br />
Control Unit<br />
user instructions.<br />
80-2105-49 Required to supply the extra power<br />
required by the 6 position Peltier heated<br />
cell changer (80-2106-04) and Tm<br />
Programmable heated cell holder (80-<br />
2106-14).<br />
PC support plinth 80-2112-14 For portable PC<br />
Printer stand 80-2112-13 For Seiko DPU-414 thermal printer<br />
Dust cover 80-2106-19 Spare<br />
Consumables and other items<br />
Pump head tubes (6) for Sipper 80-2080-74<br />
PTFE flowcell tubing with connectors 80-2055-13<br />
Replacement flowcell (including tubing) 80-2080-60<br />
Autosampler Interface kit 80-2104-96<br />
Serial interface cable for connection to PC<br />
(D9 male instrument to D9 PC)<br />
80-2105-97<br />
Spreadsheet Interface Software 80-2110-73<br />
Centronics parallel printer interface cable 80-2071-87<br />
Separate information giving details on serial and parallel interface connections, if<br />
required, is available from a Service Engineer with your local supplier, whom you<br />
should contact for further details.<br />
___________________________________________________________________<br />
20 <strong>Ultrospec</strong> <strong>2100</strong> <strong>pro</strong>, English Issue 06 - 12/2003
SWIFT II Applications Software<br />
SWIFT II comprises application modules for wavelength scanning, reaction<br />
kinetics, quantification, multi wavelength, time drive and fraction analysis, and can<br />
be used to enhance the software already included on the spectrophotometer.<br />
Specific application packages consist of groups of modules for general analytical<br />
purposes, biochemistry and molecular biology (SWIFT II - LAB), and for method<br />
development and quality control (SWIFT II - METHOD).<br />
80-2108-26 SWIFT II - LAB - for general analytical purposes,<br />
Wavelength Scanning, Reaction Kinetics, Quantification, Time<br />
Drive<br />
80-2108-31 SWIFT II - METHOD - for method development,<br />
Wavelength Scanning, Reaction Kinetics, Quantification, Time<br />
Drive, Multi Wavelength Fraction Analysis<br />
Recommended PC for <strong>pro</strong>per operation<br />
For optimum performance, an IBM compatible 486 or greater personal computer<br />
running Microsoft Windows 95, 98 or NT is required. The PC should have a<br />
minimum of 8MB RAM, 200Mb hard disk, a 1.44 MB 3.5 inch floppy disk drive, a<br />
serial mouse installed, and free COMMS serial port and VGA graphics. Any<br />
printer supported by Microsoft Windows 95 can be used. Contact your supplier for<br />
further information.<br />
___________________________________________________________________<br />
Issue 06 - 12/2003 <strong>Ultrospec</strong> <strong>2100</strong> <strong>pro</strong>, English 21
MAINTENANCE<br />
After Sales Support<br />
We supply support agreements that help you to fulfil the demands of regulatory<br />
guidelines concerning GLP/GMP.<br />
Calibration, certification using filters traceable to international standards<br />
Certificated engineers and calibrated test equipment<br />
Ap<strong>pro</strong>ved to ISO 9001 standard<br />
Choice of agreement apart from break down coverage can include<br />
Preventative maintenance<br />
Certification<br />
When using calibration standard filters, insert such that the flat surface is facing<br />
away from the spring end of the cell holder<br />
<strong>User</strong> maintenance is restricted to changing the mains fuse. For any other<br />
maintenance operation, including fitting a replacement xenon lamp, contact your<br />
local supplier.<br />
Fuse Replacement<br />
1) Switch off the instrument and disconnect the power supply cord. The fuse<br />
holder can only be opened if the power supply plug has been removed, and is<br />
located in the power input socket on the back panel of the instrument.<br />
2) Slide the fuse holder open by pulling at the notch.<br />
3) Place fuses (1.0A, 5mm x 20mm, FST) into the fuse holder and slide back<br />
into position.<br />
4) Reconnect the power supply cord and switch on the instrument.<br />
Fuses are not normally consumed in an instrument's lifetime. If they blow<br />
repeatedly contact your supplier.<br />
___________________________________________________________________<br />
22 <strong>Ultrospec</strong> <strong>2100</strong> <strong>pro</strong>, English Issue 06 - 12/2003
Cleaning and General Care<br />
External cleaning<br />
• Switch off the instrument and disconnect the power cord.<br />
• Use a soft damp cloth.<br />
• Clean all external surfaces<br />
• A mild liquid detergent may be used to remove stubborn marks.<br />
• Sample compartment spillages<br />
• Switch off the instrument and disconnect the power cord.<br />
• The cell holders, baseplate and sample compartment are all coated in a<br />
chemical resistant finish. Strong concentration of sample, however, may affect<br />
the surface, and spillages should be dealt with immediately.<br />
• Observe all necessary precautions if dealing with samples or solvents that are<br />
hazardous.<br />
• There is a small drain hole in the sample compartment to allow excess liquid to<br />
drain away. Liquids will drain onto the bench or table under the<br />
spectrophotometer or if preferred, this drain hole can be connected to waste<br />
using suitable tubing.<br />
• Remove the cell holder and clean separately.<br />
• Use a soft dry cloth to mop out the sample compartment. Replace the cell<br />
holder.<br />
• Reconnect the power cord and switch on the instrument.<br />
___________________________________________________________________<br />
Issue 06 - 12/2003 <strong>Ultrospec</strong> <strong>2100</strong> <strong>pro</strong>, English 23
APPENDIX<br />
Text entry<br />
The following example shows how to enter a title and equation in Multiwave. The<br />
principles are identical, however, for other text entry options such as Method<br />
Names.<br />
To enter the title “Copper 10”:<br />
Use ← to remove any text still there<br />
Press 2 repeatedly until “C” appears<br />
Press 6 repeatedly until “o” appears<br />
Press 7 repeatedly until “p” appears<br />
Press F2 to move to next place<br />
Press 7 to enter a second “p”<br />
Press 3 repeatedly until “e” appears<br />
Press 7 repeatedly until “r” appears<br />
Press 1 to initiate entry of a space<br />
Press F2 to move to next place, then F2 again to enter the space<br />
Press 1 repeatedly until “1” appears<br />
Press 0 to enter “0”<br />
Press OK (F3) to confirm the name entry<br />
To enter the equation “((Abs511*12.5) – (Abs 720*0.3))*100”<br />
Use ← to remove any entries still there<br />
Press F2 twice to enter “((“<br />
Press F1,1 to enter the first absorbance, A1 (wavelength value is defined later)<br />
Press F1, 3 to enter the * sign<br />
Enter numerical factor 12.5 using the keypad, press F3<br />
Press F2 to close the first bracket, “)”<br />
Press F1, 2 to enter the minus sign<br />
Press F2 to enter “(“<br />
Press F1, 2 to enter the second absorbance, A2 (wavelength value is defined<br />
later)<br />
Press F1, 3 to enter the * sign<br />
Enter numerical factor 0.3 using the keypad, press F3<br />
Press F2 twice to close the brackets, “))”<br />
Press F3 to confirm the equation is correct<br />
The two wavelengths for A1 and A2 now have to be defined, enter 511 and 720<br />
when <strong>pro</strong>mpted<br />
The dilution factor (*100) now has to be entered; enter 100<br />
___________________________________________________________________<br />
24 <strong>Ultrospec</strong> <strong>2100</strong> <strong>pro</strong>, English Issue 06 - 12/2003
Good Laboratory Practice<br />
Good laboratory Practice (GLP) concerns being able to trace experimental results to an<br />
instrument, an operator and the time the result was obtained so that a laboratory can<br />
<strong>pro</strong>ve that the instrument was functioning correctly or not. Laboratory, operator and<br />
internal instrument reference names can be entered on the spectrophotometer.<br />
If the GLP option is on, during calibration or re-calibration the instrument self-checks its<br />
integrity for GLP purposes. The GLP test of this instrument is essentially a “confidence<br />
test” that it is performing as it was when manufactured and tested. For absolute<br />
measurements, an annual certification service agreement with your supplier is<br />
recommended. The integrity of the instrument for GLP purposes is quantified from:<br />
the calibration status of the instrument<br />
the bandwidth (this is assessed during calibration by measuring the zero order beam<br />
width)<br />
the wavelength accuracy by comparing to the 881.9 nm xenon emission line<br />
the values of built in absorbance filters compared to when the instrument was<br />
manufactured (or last serviced by an accredited engineer)<br />
the instrumental stray light<br />
The expected values are given in parentheses on the GLP print out after calibration; the<br />
range of acceptance is defined by the technical specification of the instrument.<br />
In the unlikely event that the instrument fails calibration or goes out of specification, a<br />
message will appear on the display. In this event, the following should be checked:-<br />
is the cell compartment lid closed <strong>pro</strong>perly<br />
is a sample in the light beam - if so, remove it<br />
is the baseplate plug in place (single cell accessory)<br />
is the in-fill panel at the front of the cell compartment in place<br />
Pressing OK after the message "GLP Calibration Fail" appears confirms that you<br />
have accepted the instrument status. If you are working in a regulated environment<br />
such as a drug discovery laboratory that generates data for GLP/GMP activities or<br />
reports, you should not use the instrument and contact your local service engineer.<br />
___________________________________________________________________<br />
Issue 06 - 12/2003 <strong>Ultrospec</strong> <strong>2100</strong> <strong>pro</strong>, English 25
Least squares regression analysis and linearity<br />
The slope (or best straight line) and intercept in a kinetics assay or standard curve<br />
determination is calculated from a least squares linear regression of the data. The<br />
following equations are used, where n is the number of data points:<br />
Slope<br />
=<br />
∑<br />
∑<br />
∑ ∑<br />
∑ ∑<br />
x y−n xy<br />
x x−n 2<br />
x<br />
( )<br />
∑ ∑ * /<br />
Intercept = y − x slope n<br />
Linearity is an estimate of the “goodness of fit” of the least squares linear<br />
regression analysis, a perfect fit being 100%. It is used in both the Reaction Rate<br />
and Standard Curve modes, and is expressed by a coefficient of determination (r 2 ),<br />
calculated using the following equation:<br />
Quality<br />
= 100*<br />
∑ x∑<br />
y − n∑<br />
2<br />
2<br />
( ∑ x)<br />
− n∑<br />
x )( ∑ y)<br />
2<br />
2<br />
( − n y )<br />
___________________________________________________________________<br />
26 <strong>Ultrospec</strong> <strong>2100</strong> <strong>pro</strong>, English Issue 06 - 12/2003<br />
xy<br />
∑
SPECIFICATION AND WARRANTY<br />
Wavelength range 190 - 900nm<br />
Monochromator 1200 lines/mm Aberration corrected concave grating<br />
Maximum scanning speed 3000 nm/minute<br />
Spectral bandwidth < 3nm<br />
Wavelength accuracy ± 1nm<br />
Wavelength re<strong>pro</strong>ducibility ± 0.5nm<br />
Light source xenon lamp<br />
Detectors two silicon photodiodes<br />
Photometric range - 3.000 to 3.000A, -9999 to 9999 concentration<br />
units, 0.1 to 200%T<br />
Photometric accuracy ± 0.5% or ± 0.003A to 3.000A at 546 nm, whichever<br />
is the larger<br />
Photometric re<strong>pro</strong>ducibility within 0.5% of absorbance value to 3.000A at 546<br />
nm<br />
Stability ± 0.001A per hour at 340nm at 0A<br />
Stray light
This <strong>pro</strong>duct has been designed and manufactured by Biochrom Ltd, 22 Cambridge<br />
Science Park, Milton Road, Cambridge CB4 0FJ, UK.<br />
___________________________________________________________________<br />
28 <strong>Ultrospec</strong> <strong>2100</strong> <strong>pro</strong>, English Issue 06 - 12/2003
___________________________________________________________________<br />
Issue 06 - 12/2003 <strong>Ultrospec</strong> <strong>2100</strong> <strong>pro</strong>, English 29