Download manual (PDF file). - esd electronics, Inc.
Download manual (PDF file). - esd electronics, Inc.
Download manual (PDF file). - esd electronics, Inc.

You also want an ePaper? Increase the reach of your titles
YUMPU automatically turns print PDFs into web optimized ePapers that Google loves.
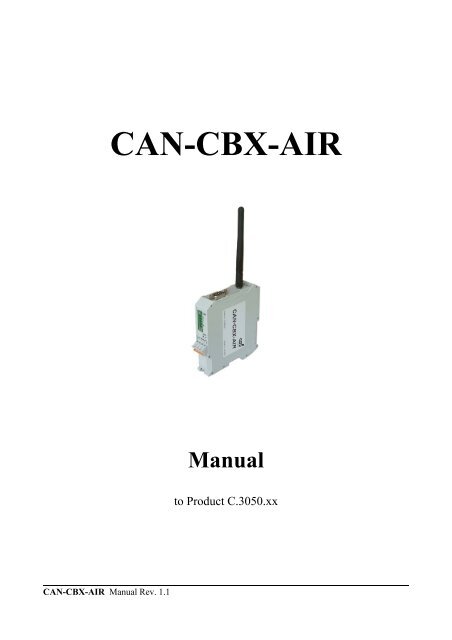
CAN-CBX-AIR Manual Rev. 1.1<br />
CAN-CBX-AIR<br />
Manual<br />
to Product C.3050.xx
Document-File:<br />
Date of Print: 08.07.2005<br />
PCB version: Rev. 1.0<br />
Changes in the chapters<br />
I:\texte\Doku\MANUALS\CAN\CBX\AIR\English\CAN-CBX-AIR_11 .en9<br />
The changes in the user’s <strong>manual</strong> listed below affect changes in the hardware as well as changes in the<br />
description of the facts only.<br />
Chapter Changes versus previous version<br />
- First English version<br />
Technical details are subject to change without notice.<br />
CAN-CBX-AIR Manual Rev. 1.1
CAN-CBX-AIR Manual Rev. 1.1<br />
N O T E<br />
The information in this document has been carefully checked and is believed to be entirely reliable. <strong>esd</strong><br />
makes no warranty of any kind with regard to the material in this document, and assumes no<br />
responsibility for any errors that may appear in this document. <strong>esd</strong> reserves the right to make changes<br />
without notice to this, or any of its products, to improve reliability, performance or design.<br />
<strong>esd</strong> assumes no responsibility for the use of any circuitry other than circuitry which is part of a product<br />
of <strong>esd</strong> gmbh.<br />
<strong>esd</strong> does not convey to the purchaser of the product described herein any license under the patent rights<br />
of <strong>esd</strong> gmbh nor the rights of others.<br />
<strong>esd</strong> electronic system design gmbh<br />
Vahrenwalder Str. 207<br />
30165 Hannover<br />
Germany<br />
Phone: +49-511-372 98-0<br />
Fax: +49-511-372 98-68<br />
E-mail: info@<strong>esd</strong>-<strong>electronics</strong>.com<br />
Internet: www.<strong>esd</strong>-<strong>electronics</strong>.com<br />
USA / Canada:<br />
<strong>esd</strong> <strong>electronics</strong> <strong>Inc</strong>.<br />
12 Elm Street<br />
Hatfield, MA 01038-0048<br />
USA<br />
Phone: +1-800-732-8006<br />
Fax: +1-800-732-8093<br />
E-mail: us-sales@<strong>esd</strong>-<strong>electronics</strong>.com<br />
Internet: www.<strong>esd</strong>-<strong>electronics</strong>.us
Contents Page<br />
1. Overview .................................................................... 3<br />
2. Hardware Installation ......................................................... 4<br />
2.1 Connecting Diagram .................................................... 4<br />
2.2 LED- and Connector View ............................................... 5<br />
2.3 Coding Switch ......................................................... 7<br />
2.4 Installation of the Module Using Optional In-Rail Bus Connector ................. 9<br />
2.5 Remove the CAN-CBX Module from the Optional In-Rail Bus .................. 10<br />
3. Technical Data .............................................................. 11<br />
3.1 General Technical Data ................................................. 11<br />
3.2 Microcontroller ....................................................... 11<br />
3.3 CAN Interface ........................................................ 12<br />
3.4 Serial Interface ........................................................ 12<br />
3.5 Radio Communication .................................................. 12<br />
3.6 Software ............................................................. 13<br />
3.7 Order Information ..................................................... 13<br />
4. Description of the Units ....................................................... 14<br />
4.1 CAN Interface ........................................................ 14<br />
4.1.1 Interface Circuit ............................................... 14<br />
4.2 Serial Interfaces ....................................................... 15<br />
4.2.1 Default Setting of the CAN-CBX-AIR Module ....................... 15<br />
4.2.2 Configuration ................................................. 15<br />
4.2.3 Connection of the RS-232-Interface ................................ 15<br />
5. Configuration of the CAN-CBX-AIR-Module .................................... 16<br />
5.1 Serial Interface and Coding Switches ...................................... 16<br />
5.2 Commands ........................................................... 16<br />
5.3 Change Configuration .................................................. 21<br />
6. Connector Assignment ....................................................... 22<br />
6.1 Serial Interface (X100, 9-pin DSUB socket) ................................. 22<br />
6.2 CAN-Bus (X200, 5-pin COMBICON-Style) ................................ 24<br />
6.3 CAN and Power Supply Voltage via In-Rail-Bus X210 ....................... 25<br />
6.4 Power Supply Voltage X500 ............................................. 26<br />
7. Correctly Wiring Electrically Isolated CAN Networks ............................. 27<br />
8. CAN-Bus Troubleshooting Guide .............................................. 31<br />
8.1 Termination .......................................................... 31<br />
8.2 CAN_H/CAN_L Voltage ............................................... 32<br />
8.3 Ground ............................................................. 32<br />
8.4 CAN Transceiver Resistance Test ........................................ 33<br />
CAN-CBX-AIR Manual Rev. 1.1 1
2<br />
This page is intentionally left blank.<br />
CAN-CBX-AIR Manual Rev. 1.1
1. Overview<br />
C<br />
A<br />
N<br />
B<br />
U<br />
S<br />
CAN Connector<br />
MC1,5/5-GF38<br />
ME-MAX<br />
Bus Connector<br />
Power Connector<br />
MSTBO 2,5/4-<br />
G1LKMGY<br />
Electrical Isolation<br />
Physical<br />
CAN<br />
Layer<br />
Power Supply<br />
24 V(DC)<br />
+5 V=<br />
DC/DC<br />
Converter<br />
LEDs<br />
+5 V=<br />
CAN<br />
Microcontroller<br />
MB90497<br />
Transmitter/<br />
Receiver<br />
Serial<br />
Interface<br />
Fig. 1: Block diagram of the CAN-CBX-AIR module<br />
Overview<br />
Coding Switches<br />
CAN Baud Rate<br />
CANopen Node-ID<br />
DSUB9<br />
Connector<br />
The CAN-CBX-AIR module is designed for wireless radio communication of separated CAN networks.<br />
A CAN-CBX-AIR-Bridge comprises two CAN-CBX-AIR modules.<br />
The CAN-CBX-AIR module is equipped with a MB90F543 microcontroller, which buffers the CANdata<br />
in a local SRAM. The firmware is stored in the Flash memory. Parameters are stored in a serial<br />
EEPROM.<br />
The power supply voltage and the CAN bus signals can be fed via the In-Rail-bus connector, integrated<br />
in the mounting rail, or via individual connectors.<br />
The ISO 11898-compliant CAN interface allows a maximum data transfer rate of 1 Mbit/s. The CAN<br />
interface is electrically isolated from other units by optocouplers and a DC/DC-converter.<br />
The CANopen node-ID of the CAN-CBX-AIR module and the CAN bit rate can be easily set via three<br />
coding switches.<br />
The serial RS-232 interface for service and development can be connected via a DSUB9 connector.<br />
CAN-CBX-AIR Manual Rev. 1.1 3<br />
Antenna<br />
i
Hardware Installation<br />
2. Hardware Installation<br />
2.1 Connecting Diagram<br />
4<br />
Fig. 2: Connections of the CAN-CBX-AIR module<br />
For the signal assignments of the connectors in table form refer to page 22.<br />
CAN-CBX-AIR Manual Rev. 1.1
2.2 LED- and Connector View<br />
Hardware Installation<br />
Fig. 3: Position of the LEDs and connectors in the front panel<br />
CAN-CBX-AIR Manual Rev. 1.1 5
LED<br />
Label<br />
6<br />
Hardware Installation<br />
LED<br />
Color<br />
LED<br />
No.<br />
T yellow 140A Traffic<br />
R yellow 140B Radio Quality<br />
C yellow 140C CAN State<br />
Name LED State Indication<br />
on transmission in process<br />
short blinking data package is transmitted or received<br />
off no data transmission<br />
on radio signal ok<br />
blinking<br />
radio signal disturbed, the worse the signal,<br />
the faster the blinking<br />
on CAN-Bus ok<br />
blinking<br />
CAN-Bus signal disturbed, the worse the<br />
signal, the faster the blinking<br />
P yellow 140D Power on 24 V-power supply voltage<br />
Table 1: Indication of the LEDs<br />
During operation the LED state ‘off’ is not defined for the LEDs Radio Quality, CAN State and Power,<br />
i.e. the LEDs are only off, if the module is turned off.<br />
CAN-CBX-AIR Manual Rev. 1.1
2.3 Coding Switch<br />
Fig. 4: Position of the coding switches<br />
Hardware Installation<br />
After switching on the module the position of the coding switches is read and evaluated by the<br />
firmware. Changes of the settings therefore have to be made before switching on the module, because<br />
changes of the settings are not determined during operation.<br />
Node-ID<br />
The address range of the CAN-CBX-AIR module can be set hexadecimal from 01 h to FF h, i.e. decimal<br />
from 1 to 255.<br />
The higher-order bits (higher-order nibble) are set via coding switch HIGH, the lower-order bits are<br />
set via coding switch LOW.<br />
Attention:<br />
Please pay attention that the node-ID of the one module has to correspond with the node-ID of<br />
the other module!<br />
For updating the firmware the coding switches have to be set to 00 h.<br />
CAN-CBX-AIR Manual Rev. 1.1 7
Baud rate<br />
8<br />
Hardware Installation<br />
The baud rate can be set with the coding switch BAUD.<br />
Values from 0 h to F h can be set via the coding switch. The values of the baud rate can be taken from<br />
the following table:<br />
Setting Baud rate [Kbit/s] Setting Baud rate [Kbit/s]<br />
0 1000 8 66.6<br />
1 666.6 9 50<br />
2 500 A 33.3<br />
3 333.3 B 20<br />
4 250 C 12.5<br />
5 166 D 10<br />
6 125 E 800<br />
7 100 F<br />
Table 2: Index of the baud rate<br />
Setting via serial<br />
configuration<br />
Note: To select the baud rate via serial configuration (see page 17) the coding switch has to be<br />
set to F h.<br />
CAN-CBX-AIR Manual Rev. 1.1
Hardware Installation<br />
2.4 Installation of the Module Using Optional In-Rail Bus Connector<br />
If the CAN bus signals and the power supply voltage shall be fed via the In-Rail bus, please proceed<br />
as follows:<br />
Figure 5: Mounting rail with bus connector<br />
1. Position the In-Rail bus connector on the mounting rail and snap it onto the mounting rail using<br />
slight pressure. Plug the bus connectors together to contact the communication and power<br />
signals (in parallel with one). The bus connectors can be plugged together before or after<br />
mounting the CAN-CBX modules.<br />
2. Place the CAN-CBX module with the DIN rail guideway on the top edge of the mounting rail.<br />
Figure 6 : Mounting CAN-CBX modules<br />
3. Swivel the CAN-CBX module onto the mounting rail in pressing the module downwards<br />
CAN-CBX-AIR Manual Rev. 1.1 9
10<br />
Hardware Installation<br />
according to the arrow as shown in figure 6. The housing is mechanically guided by the DIN<br />
rail bus connector.<br />
4. When mounting the CAN-CBX module the metal foot catch snaps on the bottom edge of the<br />
mounting rail. Now the module is mounted on the mounting rail and connected to the In-Rail<br />
bus via the bus connector. Connect the bus connectors and the In-Rail bus if not already done.<br />
Figure 7: Mounted CAN-CBX module<br />
2.5 Remove the CAN-CBX Module from the Optional In-Rail Bus<br />
If the CAN-CBX module is connected to the In-Rail bus please proceed as follows:<br />
Release the module from the mounting rail in moving the foot catch (see figure 7) downwards (e.g. with<br />
a screwdriver). Now the module is detached from the bottom edge of the mounting rail and can be<br />
removed.<br />
Note: It is possible to remove entire individual devices from the whole without interrupting the<br />
In-Rail bus connection, because the contact chain will not be interrupted.<br />
CAN-CBX-AIR Manual Rev. 1.1
3. Technical Data<br />
3.1 General Technical Data<br />
Power supply voltage<br />
Connectors<br />
Temperature range<br />
Hardware Installation<br />
nominal voltage 24 V/DC ±10%,<br />
current consumption (at 20 C): 60 mA (typically)<br />
X100 (DSUB9, socket) - Serial interface<br />
X200 (5-pin COMBICON connector) - CAN interface<br />
X210 (ME-MAX-TRAG5, Phoenix Contact TBUS-connector) -<br />
CAN interface and power supply voltage via In-Rail-Bus<br />
X300 (SMA-coaxial-socket, Multicomp, inner conductor : female) -<br />
antenna connector<br />
X500 (4-pol.COMBICON plug with spring-cage connection) - 24Vpower<br />
supply voltage<br />
0...50 C ambient temperature<br />
(-20 C ... +70 C on request)<br />
Humidity max. 90%, non-condensing<br />
Dimensions<br />
Weight approx. 125 g<br />
3.2 Microcontroller<br />
Microcontroller MB90F543<br />
Memory<br />
width: 22 mm, height: 100 mm, depth: 115 mm<br />
(including hat rail mounting and connector projection, but without<br />
antenna)<br />
SRAM: internal in MB90F543, 6 Kbyte<br />
Flash-EPROM: internal in MB90F543, 128 Kbyte<br />
EEPROM: serial SPI-EEPROM<br />
CAN-CBX-AIR Manual Rev. 1.1 11
Hardware Installation<br />
3.3 CAN Interface<br />
Number of CAN interfaces 1 x CAN<br />
Connection<br />
12<br />
CAN controller<br />
Electrical isolation of CAN<br />
interfaces from other units<br />
Physical CAN Layer<br />
3.4 Serial Interface<br />
Controller MB90F543<br />
Interface<br />
5-pol. COMBICON with spring-cage connection<br />
or via Phoenix Contact TBUS-connector (In-Rail-Bus)<br />
MB90F543, CAN 2.0A/B,<br />
11- and 29-bit CAN identifier<br />
Connection 9-pin DSUB socket<br />
3.5 Radio Communication<br />
Antenna connector<br />
(at CAN-CBX-AIR)<br />
via optocouplers and DC/DC-converter<br />
reference voltage: 300 V/DC, 250 V/AC<br />
Transmitting frequency 2.44 GHz (ISM-band)<br />
Transceiver<br />
Antenna<br />
Range<br />
CAN-CBX-AIR CAN-CBX-AIR<br />
Physical Layer according to ISO 11898,<br />
transfer rate programmable from 10 Kbit/s up to 1 Mbit/s<br />
RS-232,<br />
only the signals TxD, RxD and GND are supported<br />
SMA-connector, coaxial socket (inner conductor: female)<br />
typical peak power output: + 2 dBm,<br />
typical Rx sensitivity for BER = 10 -4 : - 80 dBm<br />
connector of the antenna: coaxial SMA-connector<br />
(inner conductor: male),<br />
impedance: 50 Ohm nominal,<br />
antenna gain: 2.0 dBi<br />
in open field approx. 15 m<br />
CAN-CBX-AIR Manual Rev. 1.1
3.6 Software<br />
Update update option via serial interface<br />
3.7 Order Information<br />
CAN-CBX-AIR<br />
Hardware Installation<br />
Type Properties Order No.<br />
CAN-CBX-AIR-Bridge<br />
Wireless CAN-Bridge<br />
CAN according to ISO 11898, bit rate up to 1 Mbit/s,<br />
electrically isolated, 2.4 GHz ISM-band, 24 V/DC,<br />
hat rail mounting<br />
2x C.3050.02,<br />
Transfer range in open field approx. 15 m<br />
C.3050.02<br />
C.3050.04<br />
CAN-CBX-AIR-ME Manual in English 1*) C.3050.21<br />
CAN-CBX-AIR-ENG<br />
Engineering Manual in English 2*)<br />
Contents: Circuit diagrams, PCB top overlay drawing,<br />
data sheets of significant components<br />
1*) If module and <strong>manual</strong> are ordered together, the <strong>manual</strong> is free of charge.<br />
2*) This <strong>manual</strong> is liable for costs, please contact our support.<br />
C.3050.25<br />
CAN-CBX-AIR Manual Rev. 1.1 13
14<br />
CRX0<br />
Description of the Units<br />
4. Description of the Units<br />
4.1 CAN Interface<br />
4.1.1 Interface Circuit<br />
10K<br />
CTX0 GND<br />
to<br />
Microcontroller<br />
DC/DC<br />
S7U-0505<br />
VCC<br />
+ +<br />
VC05D150<br />
5V<br />
10µF<br />
GND<br />
-<br />
5V<br />
-<br />
CAN_GND<br />
VCC<br />
GND<br />
VCCin<br />
IN<br />
GNDin<br />
VCCout<br />
OUT<br />
2.2M<br />
2.2nF/250V~<br />
Optical Coupler<br />
HCPL7710<br />
ENABLE<br />
GNDout<br />
VCCout<br />
OUT<br />
ENABLE<br />
GNDout<br />
Optical Coupler<br />
HCPL7710<br />
VCCin<br />
IN<br />
GNDin<br />
+5V<br />
+5V<br />
TX<br />
VDD<br />
BUSL<br />
RX BUSH<br />
R/GND<br />
+5V<br />
CAN Transceiver<br />
TJA1050<br />
GND<br />
CAN-bus driver<br />
+5V<br />
ADD-On option (X7-X8) for other Physical Layers<br />
Fig. 8: Circuit of the CAN interface<br />
Reference potential M24<br />
Power supply voltage P24<br />
CAN_GND<br />
CAN_H<br />
CAN_L<br />
X210<br />
In-Rail-Bus<br />
X200<br />
MC1,5/5-GF-3,81<br />
CAN_L<br />
CAN_H<br />
CAN_GND<br />
Shield<br />
n.c.<br />
4T, 4B<br />
5T, 5B<br />
3T, 3B<br />
1T, 1B<br />
2T, 2B<br />
CAN-CBX-AIR Manual Rev. 1.1<br />
2<br />
4<br />
1<br />
3<br />
5
4.2 Serial Interfaces<br />
4.2.1 Default Setting of the CAN-CBX-AIR Module<br />
Bit rate: 9600 Baud<br />
Data bits: 8<br />
Parity: no<br />
Stop bit: 1<br />
Handshake: no<br />
4.2.2 Configuration<br />
TxD<br />
RxD<br />
GND<br />
3<br />
2<br />
TxD<br />
RxD<br />
5 GND<br />
Description of the Units<br />
The serial interface is controlled by the MB90F543 microcontroller.<br />
The bit rate is 9600 Baud. Set the user’s terminal / PC to this value. The bit rate of the CAN-CBX-AIR<br />
module can not be changed.<br />
4.2.3 Connection of the RS-232-Interface<br />
Below, the wiring of the serial interface is shown. The figure is used to explain the short terms of the<br />
signals as used in the chapter Connector Assignments. The signal description is given exemplary for<br />
the connection of the CAN-CBX-AIR to a PC.<br />
Note: For the connection of the CAN-CBX-AIR module to the RS-232 interface of the PC a<br />
nullmodem is necessary (if not already considered by the configuration of the serial lines).<br />
local<br />
signalterms<br />
CAN-CBX-AIR<br />
(Terminal, DEE)<br />
pin numbers of the 9-pole DSUB connector<br />
of the CAN-CBX-AIR module<br />
pin number of the 9-pole DSUB connector<br />
of the CAN-CBX-AIR module<br />
PC<br />
(Modem, DÜE)<br />
Fig. 9: Connecting diagram of the RS-232 interface<br />
CAN-CBX-AIR Manual Rev. 1.1 15<br />
3<br />
2<br />
5
Configuration<br />
5. Configuration of the CAN-CBX-AIR-Module<br />
This chapter describes the procedure for the configuration of the CAN-CBX-AIR, which can easily be<br />
done e.g. by means of the program ‘Hyperterminal’ of Windows.<br />
5.1 Serial Interface and Coding Switches<br />
The serial interface of the PC has to be configured with the values which are described in chapter<br />
Default Setting of CAN-CBX-Modules, (see page 15).<br />
Attention: The settings of the coding switches are only read by the firmware when the module<br />
is switched on. Thus changes of the settings have to be made before switching on<br />
the module. Changes of the settings during operation have no effect (see page 7).<br />
5.2 Commands<br />
After the power supply has been switched on the CAN-CBX-AIR module wakes up and puts out a<br />
message in the hyperterminal.<br />
Now you can enter the commands directly and acknowledge with >EnterEnter<<br />
output: B0 : 6<br />
CAN-CBX-AIR Manual Rev. 1.1
Configuration<br />
Bn:HexIndex The baud rate can only be set via software, if the coding switch is set to the<br />
value F h when the module is switched on.<br />
By means of command Bn: you can select the bit rate of the CAN net with the<br />
net number n, with: n= 0 for net 0<br />
If values between 0 h and F h are read for the HexIndex, the bit rate is configured<br />
according to the following table:<br />
HexIndex Baud rate [Kbit/s] HexIndex Baud rate [Kbit/s]<br />
0 1000 8 66.6<br />
1 666.6 9 50<br />
2 500 A 33.3<br />
3 333.3 B 20<br />
4 250 C 12.5<br />
5 166 D 10<br />
6 125 E 800<br />
7 100 F reserved<br />
Table 3: Index of the baud rate<br />
In the following example the bit rate of net 0 (n=0) is to be configured to<br />
10 Kbit/s. From Table 3 you get the HexIndex = D. Your input therefore is as<br />
follows:<br />
Input : B0:D >Enter<<br />
Bn:8000yyzz Alternatively you can configure the bit-timing register of the MB90F543<br />
component used, directly. In this case the register value for the bit-timing<br />
registers BTR0 and BTR1 is specified directly.<br />
Here is: n: 0... net number<br />
yy: value for BTR0<br />
zz: value for BTR1<br />
Please refer to the <strong>manual</strong>s of the controller MB90F543 for the correct way to<br />
determine the bit timing and the bit rate from the register values.<br />
The <strong>manual</strong> can e.g. be downloaded from the Fujitsu-Homepage:<br />
http://www.fme.gsdc.de/gsdc.htm?products/mb90495g.htm<br />
Choose the ‘MB90F540/545G Series Hardware Manual VX-xx’.<br />
CAN-CBX-AIR Manual Rev. 1.1 17
Configuration<br />
I0:ID Net 0 I1:ID Net 1<br />
This command assigns an identifier of CAN-net 1 to an identifier of CAN-net 0.<br />
The identifier ID Net 0, which is received by the local CAN net, is transmitted<br />
with identifier ID Net 1 on the CAN net which is connected via the transmission<br />
path.<br />
18<br />
Note:<br />
If you want to configure 29-bit CAN identifier (value range bit 28...bit 0), bit 29<br />
has to be set to indicate the 29-bit identifier to the system (20000000 h according<br />
to CANopen)!<br />
In the example below the 29 bit identifier 3456789 h of the net 0 is mapped to the<br />
11-bit identifier 543 h of net 1.<br />
Input: I0:23456789 I1:543 >Enter<<br />
In the following example the 11-bit identifier ID Net 0 = 200 h is mapped to the<br />
11-bit identifier ID Netz 1 = 300 h.<br />
Input: I0:200 I1:300 >Enter<<br />
CAN-CBX-AIR Manual Rev. 1.1
Configuration<br />
M0:1:zzzzzzzzzzzzzzzzzzzzzzzzzzzzzz<br />
With this command masks for 29-bit identifiers can be defined.<br />
This way all identifiers of particular areas of identifiers can be assigned.<br />
Here is: 0: 0... net in which the identifiers are to be received<br />
1: 1... net in which the filtered CAN frames are to be<br />
transmitted: always 1 for the net transmitted<br />
via the transmission path.<br />
z...z: 0,1,x... mask<br />
0: the according bit has to be logically 0<br />
1: the according bit has to be logically 1<br />
x: the status of the according bit does not<br />
matter<br />
Attention: Please note that the bits are numbered from right to left.<br />
The first bit from the left is therefore bit 30!<br />
The mask must always have the full length of 30 bits (29 bits + 30th bit to<br />
distinguish between 11-bit and 29-bit identifiers).<br />
The first bit is the distinction bit, the following bit is the MSB of the CAN<br />
identifier, etc.<br />
Bit 30 Meaning<br />
0 11-bit identifier<br />
1 29-bit identifier<br />
x 11- and 29-bit identifier<br />
In the following example only the odd identifiers between 0 h and FF h are let<br />
through from net 0 to net 1:<br />
Input: M0:1:0000000000000000000000xxxxxxx1<br />
>Enter<<br />
If more than one mask has been defined for one direction, one identifier has to<br />
pass all masks (AND links) in order to be mapped in the other net. At the<br />
moment 2 masks are possible for each direction.<br />
CAN-CBX-AIR Manual Rev. 1.1 19
Configuration<br />
The current configuration of the CAN-CBX-AIR module from the previous examples can be displayed<br />
by means of command R.<br />
20<br />
Input: R >Enter<<br />
Output: B0:6<br />
I0:200 I1:300<br />
I0:23456789 I1:543<br />
M0:1:0000000000000000000000xxxxxxx1<br />
E After the configuration has been successfully completed, the configured data is<br />
stored in the configuration memory by means of command E. Only after the<br />
data have been stored the changes become effective.<br />
The CAN-CBX-AIR module is now in RUN status and meets the desired bridge<br />
function.<br />
Input: E >Enter<<br />
C You can delete a configuration again by means of the command C. The<br />
command deletes all identifier assignments and resets the CAN bit rates to the<br />
default value of HexIndex 6, that is a bit rate of 125 Kbit/s. The configuration<br />
memory is also deleted.<br />
Input: C >Enter<<br />
CAN-CBX-AIR Manual Rev. 1.1
5.3 Change Configuration<br />
Configuration<br />
It is not possible to modify single parameters of an existing configuration. You have to call the<br />
command C (see page 20) to clear all parameters. After that you have to configure the CAN-CBX-AIR<br />
again with the correct parameters. Do not forget to call the command E to store the new data to the<br />
configuration memory after the configuration.<br />
CAN-CBX-AIR Manual Rev. 1.1 21
22<br />
Connector Assignment<br />
6. Connector Assignment<br />
6.1 Serial Interface (X100, 9-pin DSUB socket)<br />
Pin Position:<br />
Pin Assignment:<br />
Signal Pin Signal<br />
- 1<br />
RxD (Input) 2<br />
TxD (Output) 3<br />
- 4<br />
GND 5<br />
9-pin DSUB socket<br />
Signal description:<br />
RxD/TxD ... receive and transmit data<br />
GND ... reference potential<br />
- ... reserved<br />
6 -<br />
7 -<br />
8 -<br />
9 -<br />
CAN-CBX-AIR Manual Rev. 1.1
Connecting cable for the serial interface<br />
5 4 3 2 1<br />
9 8 7 6<br />
P1:<br />
(PC)<br />
1<br />
2<br />
3<br />
4<br />
5<br />
6<br />
7<br />
8<br />
9<br />
Connector Assignment<br />
Below the connecting cable of the serial interface (RS-232) of the CAN-CBX-AIR module to a PC is<br />
shown.<br />
P1<br />
DSUB female<br />
9-pole<br />
P2:<br />
(CAN-CBX-AIR Module)<br />
1<br />
RxD<br />
2 RxD<br />
TxD<br />
3 TxD<br />
CAN-CBX-AIR Manual Rev. 1.1 23<br />
GND<br />
5 4 3 2 1<br />
9 8 7 6<br />
4<br />
5<br />
6<br />
7<br />
8<br />
9<br />
GND<br />
P2<br />
DSUB female<br />
9-pole<br />
local signal<br />
names used<br />
at CAN-CBX-Module
Connector Assignment<br />
6.2 CAN-Bus (X200, 5-pin COMBICON-Style)<br />
The CAN-Bus connector can have spring-cage connections or screw connections. Wires with a cross<br />
section of up to 2.5 mm² fit in the terminal blocks.<br />
Signal description:<br />
24<br />
Pin Position: Pin Assignment:<br />
1<br />
2<br />
3<br />
4<br />
5<br />
Pin Signal<br />
1 CAN_GND<br />
2 CAN_L<br />
3 Shield<br />
4 CAN_H<br />
5 n.c.<br />
CAN_L, CAN_H ... CAN signals<br />
CAN_GND ... reference potential of the local CAN physical layer<br />
Shield ... shielding<br />
(connected with the shield contact of the case, which has a connection to the<br />
mounting rail)<br />
n.c. ... not connected<br />
Adapter Cable from 5-pin Mini-Combicon (with spring-cage-connection) to 9-pin DSUB:<br />
The 9-pin DSUB<br />
connector is<br />
assigned in<br />
accordance with<br />
CiA DS 102.<br />
CAN-CBX-AIR Manual Rev. 1.1
6.3 CAN and Power Supply Voltage via In-Rail-Bus X210<br />
Connector: Bus connector MEMAX<br />
ME 22,5 TBUS 1,5/5-ST-3,81 KMGY<br />
Signal description:<br />
Pin Position:<br />
Pin Assignment:<br />
Pin Signal<br />
5 M24 (GND)<br />
4 P24 (+24 V)<br />
3 CAN_GND<br />
2 CAN_L<br />
1 CAN_H<br />
S FE (PE_GND)<br />
CAN_L,<br />
CAN_H ... CAN signals<br />
CAN_GND ... reference potential of the local CAN physical layers<br />
P24... power supply voltage +24 V<br />
M24... reference potential<br />
FE... functional earth contact (EMC)<br />
Connector Assignment<br />
CAN-CBX-AIR Manual Rev. 1.1 25
Connector Assignment<br />
6.4 Power Supply Voltage X500<br />
Connector type: Mini-Combicon connector, MSTBO 2,5/4-G1LKMGY<br />
26<br />
Pin Position:<br />
Pin Assignment:<br />
Pin 4 3 2 1<br />
Signal - -<br />
Refer to the connecting diagram (page 4).<br />
Signal description:<br />
P24... power supply voltage +24 V<br />
M24... reference potential<br />
M24<br />
(GND)<br />
P24<br />
(+ 24 V)<br />
CAN-CBX-AIR Manual Rev. 1.1
CAN_H<br />
CAN_L<br />
CAN_GND<br />
Shielded wire with<br />
transposed wires<br />
120 Ohm<br />
DSUB9 connector<br />
(female or male)<br />
CAN_GND<br />
DSUB9 connector<br />
(female or male)<br />
pin designation<br />
(at wire shield)<br />
pin designation<br />
1<br />
2<br />
n.c.<br />
CAN_L<br />
n.c. 1<br />
2<br />
3<br />
3<br />
4 n.c.<br />
n.c. 4<br />
5 n.c.<br />
n.c. 5<br />
6<br />
7<br />
n.c.<br />
CAN_H<br />
n.c. 6<br />
7<br />
8 n.c.<br />
n.c. 8<br />
9 n.c.<br />
n.c. 9<br />
connector case n.c.<br />
n.c. connector case<br />
n.c. = not connected<br />
Wiring<br />
7. Correctly Wiring Electrically Isolated CAN Networks<br />
Generally all instructions applying for wiring regarding an electromagnetic compatible installation,<br />
wiring, cross sections of wires, material to be used, minimum distances, lightning protection, etc. have<br />
to be followed.<br />
The following general rules for the CAN wiring must be followed:<br />
1.<br />
2.<br />
3.<br />
A CAN net must not branch (exception: short dead-end feeders) and has to be terminated<br />
by the wave impedance of the wire (generally 120 W ±10%) at both ends (between the<br />
signals CAN_L and CAN_H and not at GND)!<br />
A CAN data wire requires two twisted wires and a wire to conduct the reference potential<br />
(CAN_GND)!<br />
For this the shield of the wire should be used!<br />
The reference potential CAN_GND has to be connected to the earth potential (PE) at one<br />
point. Exactly one connection to earth has to be established!<br />
4. The bit rate has to be adapted to the wire length.<br />
5. Dead-end feeders have to kept as short as possible (l < 0.3 m)!<br />
6.<br />
7.<br />
8.<br />
When using double shielded wires the external shield has to be connected to the earth<br />
potential (PE) at one point. There must be not more than one connection to earth.<br />
A suitable type of wire (wave impedance ca. 120 ±10%) has to be used and the voltage<br />
loss in the wire has to be considered!<br />
CAN wires should not be laid directly next to disturbing sources. If this cannot be avoided,<br />
double shielded wires are preferable.<br />
Wire structure Signal assignment of wire and connection of earthing and terminator<br />
CAN wire with connectors<br />
Figure: Structure and connection of wire<br />
CAN-CBX-AIR Manual Rev. 1.1 27<br />
120 Ohm<br />
earth (PE)
Cabling<br />
28<br />
Wiring<br />
for devices which have only one CAN connector per net use T-connector and dead-end feeder<br />
(shorter than 0.3 m) (available as accessory)<br />
CAN-Board<br />
Net 1<br />
e.g. PCI/405,<br />
CAN-USB,<br />
VME-CAN2, etc.<br />
Net 2<br />
Connecting<br />
CAN_GND to<br />
Protective Conductor PE<br />
Terminator<br />
PE<br />
with PE Connector<br />
T-Connector<br />
Order-no.: C.1311.03<br />
l < 0,3 m<br />
Terminal Resistance<br />
CAN-CBM-<br />
DIO8<br />
T-Connector<br />
C.1311.03<br />
CAN-Cable<br />
Order-no.: C.1323.03<br />
l < 0,3 m<br />
CAN-CBM-<br />
AI4<br />
T-Connector<br />
C.1311.03<br />
CAN-Cable<br />
Order-no.: C.1323.03<br />
CAN_H<br />
CAN_L<br />
CAN_GND<br />
l < 0,3 m<br />
CAN-CBM-<br />
COM1<br />
T-Connector<br />
C.1311.03<br />
Female Connector<br />
Male Connector<br />
Male Terminator<br />
(Order-no.: C.1302.01)<br />
Female Terminator<br />
(Order-no.: C.1301.01)<br />
l < 0,3 m<br />
CAN-Cable<br />
Order-no.: C.1323.03<br />
Figure: Example for correct wiring (when using single shielded wires)<br />
use external terminator, because this can later be found again more easily!<br />
T-Connector<br />
C.1311.03<br />
Terminator<br />
l < 0,3 m<br />
e.g.<br />
CAN-SPS Interface<br />
CSC595/2<br />
or<br />
CAN-PC Board<br />
9-pin DSUB-terminator with male and female contacts and earth terminal are available as<br />
accessories<br />
Earthing<br />
CAN_GND has to be conducted in the CAN wire, because the individual <strong>esd</strong> modules are<br />
electrically isolated from each other!<br />
CAN_GND has to be connected to the earth potential (PE) at exactly one point in the net!<br />
each CAN user without electrically isolated interface works as an earthing, therefore: do not<br />
connect more than one user without potential separation!<br />
Earthing CAN e.g. be made at a connector<br />
CAN-CBX-AIR Manual Rev. 1.1
Wire Length<br />
Wiring<br />
Optical couplers are delaying the CAN signals. By using fast optical couplers and testing each<br />
board at 1 Mbit/s, however, <strong>esd</strong> CAN guarantee a reachable length of 37 m at 1 Mbit/s for most<br />
<strong>esd</strong> CAN modules within a closed net without impedance disturbances like e.g. longer dead-end<br />
feeders. (Exception: CAN-CBM-DIO8, -AI4 and AO4 (these modules work only up to 10 m with<br />
1 Mbit/s))<br />
Bit rate<br />
[Kbit/s]<br />
1000<br />
800<br />
666.6<br />
500<br />
333.3<br />
250<br />
166<br />
125<br />
100<br />
66.6<br />
50<br />
33.3<br />
20<br />
12.5<br />
10<br />
Typical values of reachable<br />
wire length with <strong>esd</strong><br />
interface l max [m]<br />
37<br />
59<br />
80<br />
130<br />
180<br />
270<br />
420<br />
570<br />
710<br />
1000<br />
1400<br />
2000<br />
3600<br />
5400<br />
7300<br />
CiA recommendations<br />
(07/95) for reachable wire<br />
lengths l min [m]<br />
25<br />
50<br />
-<br />
100<br />
-<br />
250<br />
-<br />
500<br />
650<br />
-<br />
1000<br />
-<br />
2500<br />
-<br />
5000<br />
Table: Reachable wire lengths depending on the bit rate when using <strong>esd</strong>-CAN interfaces<br />
CAN-CBX-AIR Manual Rev. 1.1 29
Wiring<br />
Examples for CAN Wires<br />
30<br />
Manufacturer Type of wire<br />
U.I. LAPP GmbH<br />
Schulze-Delitzsch-Straße 25<br />
70565 Stuttgart<br />
Germany<br />
www.lappkabel.de<br />
ConCab GmbH<br />
Äußerer Eichwald<br />
74535 Mainhardt<br />
Germany<br />
www.concab.de<br />
SAB Bröckskes GmbH&Co. KG<br />
Grefrather Straße 204-212b<br />
41749 Viersen<br />
Germany<br />
www.sab-brockskes.de<br />
e.g.<br />
UNITRONIC ®-BUS CAN UL/CSA (UL/CSA approved)<br />
UNITRONIC ®-BUS-FD P CAN UL/CSA (UL/CSA approved)<br />
e.g.<br />
BUS-PVC-C (1 x 2 x 0,22 mm²) Order No.: 93 022 016 (UL appr.)<br />
BUS-Schleppflex-PUR-C (1 x 2 x 0,25 mm²) Order No.: 94 025 016 (UL appr.)<br />
e.g.<br />
SABIX ® CB 620 (1 x 2 x 0,25 mm²) Order No.: 56202251<br />
CB 627 (1 x 2 x 0,25 mm²) Order No.: 06272251 (UL appr.)<br />
Note: Completely configured CAN wires can be ordered from <strong>esd</strong>.<br />
CAN-CBX-AIR Manual Rev. 1.1
8. CAN-Bus Troubleshooting Guide<br />
CAN-Bus Troubleshooting Guide<br />
The CAN-Bus Troubleshooting Guide is a guide to find and eliminate the most frequent hardware-error<br />
causes in the wiring of CAN-networks.<br />
120 <br />
CAN_H<br />
CAN_L<br />
CAN_GND<br />
8.1 Termination<br />
Figure: Simplified diagram of a CAN network<br />
CAN_H<br />
CAN_L<br />
CAN_GND<br />
2 3<br />
V V<br />
The termination is used to match impedance of a node to the impedance of the transmission line being<br />
used. When impedance is mismatched, the transmitted signal is not completely absorbed by the load<br />
and a portion is reflected back into the transmission line. If the source, transmission line and load<br />
impedance are equal these reflections are eliminated. This test measures the series resistance of the<br />
CAN data pair conductors and the attached terminating resistors.<br />
To test it, please<br />
1. Turn off all power supplies of the attached CAN nodes.<br />
2. Measure the DC resistance between CAN_H and CAN_L at the middle and ends of<br />
the network 1 (see figure above).<br />
The measured value should be between 50 and 70 .<br />
If the value is below 50 , please make sure that:<br />
- there is no short circuit between CAN_H and CAN_L wiring<br />
- there are not more than two terminating resistors<br />
- the nodes do not have faulty transceivers.<br />
If the value is higher than 70 , please make sure that:<br />
- there are no open circuits in CAN_H or CAN_L wiring<br />
- your bus system has two terminating resistors (one at each end) and that they are 120 each.<br />
CAN-CBX-AIR Manual Rev. 1.1 31<br />
120 <br />
<br />
1
CAN-Bus Troubleshooting Guide<br />
8.2 CAN_H/CAN_L Voltage<br />
Each node contains a CAN transceiver that outputs differential signals. When the network<br />
communication is idle the CAN_H and CAN_L voltages are approximately 2.5 volts. Faulty<br />
transceivers can cause the idle voltages to vary and disrupt network communication.<br />
To test for faulty transceivers, please<br />
1. Turn on all supplies.<br />
2. Stop all network communication.<br />
3. Measure the DC voltage between CAN_H and GND 2 (see figure above).<br />
4. Measure the DC voltage between CAN_L and GND 3 (see figure above).<br />
32<br />
Normally the voltage should be between 2.0 V and 4.0 V.<br />
If it is lower than 2.0 V or higher than 4.0 V, it is possible that one or more nodes have faulty<br />
transceivers. For a voltage lower than 2.0 V please check CAN_H and CAN_L conductors for<br />
continuity. For a voltage higher than 4.0 V, please check for excessive voltage.<br />
To find the node with a faulty transceiver please test the CAN transceiver resistance (see next page).<br />
8.3 Ground<br />
The shield of the CAN network has to be grounded at only one location. This test will indicate if the<br />
shielding is grounded in several places.<br />
To test it, please<br />
1. Disconnect the shield wire from the ground.<br />
2. Measure the DC resistance between Shield and ground.<br />
3. Connect Shield wire to ground.<br />
The resistance should be higher than 1 M . If it is lower, please search for additional grounding of<br />
the shield wires.<br />
CAN-CBX-AIR Manual Rev. 1.1
8.4 CAN Transceiver Resistance Test<br />
CAN-Bus Troubleshooting Guide<br />
CAN transceivers have one circuit that controls CAN_H and another circuit that controls CAN_L.<br />
Experience has shown that electrical damage to one or both of the circuits may increase the leakage<br />
current in these circuits.<br />
To measure the current leakage through the CAN circuits, please use an ohm-meter and:<br />
1. Disconnect the node from the network. Leave the node unpowered 4 (see figure below).<br />
2. Measure the DC resistance between CAN_H and CAN_GND 5 (see figure below).<br />
3. Measure the DC resistance between CAN_L and CAN_GND 6 (see figure below).<br />
Normally the resistance should be between 1 M and 4 M . If it is not within this range, the CAN<br />
transceiver is probably faulty.<br />
CAN-Node<br />
CAN-<br />
Transceiver<br />
CAN_H<br />
CAN_L<br />
CAN_GND<br />
Power<br />
4 Disconnect<br />
Power !<br />
5 6<br />
CAN-CBX-AIR Manual Rev. 1.1 33<br />
<br />
<br />
Disconnect<br />
CAN !<br />
Figure: Simplified diagram of a CAN node<br />
4