UTM Antispam Filtering for Security Devices - Juniper Networks
UTM Antispam Filtering for Security Devices - Juniper Networks
UTM Antispam Filtering for Security Devices - Juniper Networks
Create successful ePaper yourself
Turn your PDF publications into a flip-book with our unique Google optimized e-Paper software.
<strong>UTM</strong> <strong>Antispam</strong> <strong>Filtering</strong> <strong>for</strong> <strong>Security</strong> <strong>Devices</strong><br />
16<br />
Step-by-Step<br />
Procedure<br />
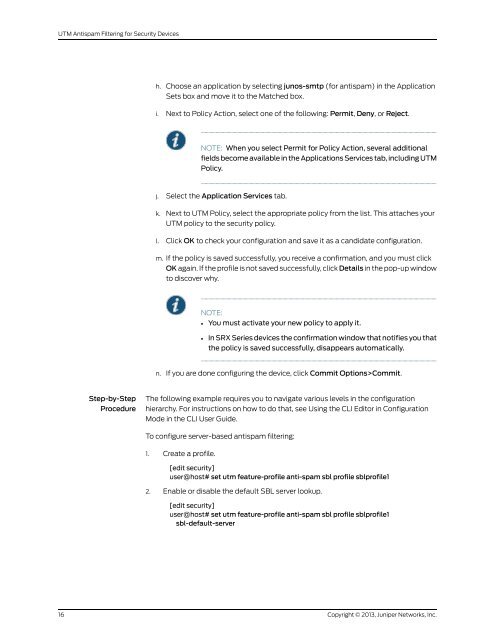
h. Choose an application by selecting junos-smtp (<strong>for</strong> antispam) in the Application<br />
Sets box and move it to the Matched box.<br />
i. Next to Policy Action, select one of the following: Permit, Deny, or Reject.<br />
NOTE: When you select Permit <strong>for</strong> Policy Action, several additional<br />
fields become available in the Applications Services tab, including <strong>UTM</strong><br />
Policy.<br />
j. Select the Application Services tab.<br />
k. Next to <strong>UTM</strong> Policy, select the appropriate policy from the list. This attaches your<br />
<strong>UTM</strong> policy to the security policy.<br />
l. Click OK to check your configuration and save it as a candidate configuration.<br />
m. If the policy is saved successfully, you receive a confirmation, and you must click<br />
OK again. If the profile is not saved successfully, click Details in the pop-up window<br />
to discover why.<br />
NOTE:<br />
• You must activate your new policy to apply it.<br />
• In SRX Series devices the confirmation window that notifies you that<br />
the policy is saved successfully, disappears automatically.<br />
n. If you are done configuring the device, click Commit Options>Commit.<br />
The following example requires you to navigate various levels in the configuration<br />
hierarchy. For instructions on how to do that, see Using the CLI Editor in Configuration<br />
Mode in the CLI User Guide.<br />
To configure server-based antispam filtering:<br />
1. Create a profile.<br />
[edit security]<br />
user@host# set utm feature-profile anti-spam sbl profile sblprofile1<br />
2. Enable or disable the default SBL server lookup.<br />
[edit security]<br />
user@host# set utm feature-profile anti-spam sbl profile sblprofile1<br />
sbl-default-server<br />
Copyright © 2013, <strong>Juniper</strong> <strong>Networks</strong>, Inc.


