FileMaker Pro 3 Windows Install and New Feature Guide
FileMaker Pro 3 Windows Install and New Feature Guide
FileMaker Pro 3 Windows Install and New Feature Guide

You also want an ePaper? Increase the reach of your titles
YUMPU automatically turns print PDFs into web optimized ePapers that Google loves.
Welcome to <strong>FileMaker</strong> <strong>Pro</strong><br />
About this guide<br />
Using this book<br />
Getting customer support<br />
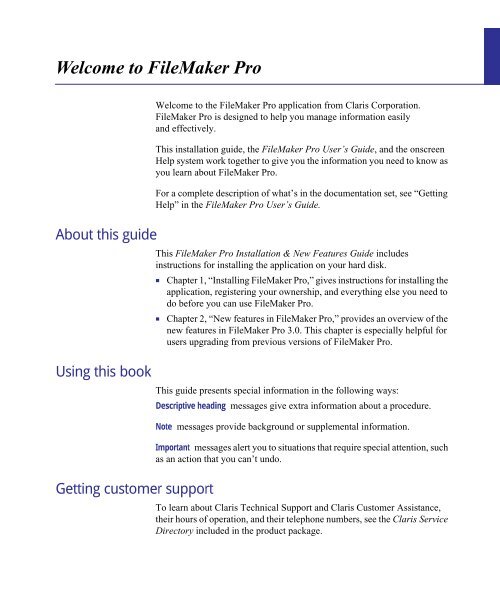
Welcome to the <strong>FileMaker</strong> <strong>Pro</strong> application from Claris Corporation.<br />
<strong>FileMaker</strong> <strong>Pro</strong> is designed to help you manage information easily<br />
<strong>and</strong> effectively.<br />
This installation guide, the <strong>FileMaker</strong> <strong>Pro</strong> User’s <strong>Guide</strong>, <strong>and</strong> the onscreen<br />
Help system work together to give you the information you need to know as<br />
you learn about <strong>FileMaker</strong> <strong>Pro</strong>.<br />
For a complete description of what’s in the documentation set, see “Getting<br />
Help” in the <strong>FileMaker</strong> <strong>Pro</strong> User’s <strong>Guide</strong>.<br />
This <strong>FileMaker</strong> <strong>Pro</strong> <strong>Install</strong>ation & <strong>New</strong> <strong>Feature</strong>s <strong>Guide</strong> includes<br />
instructions for installing the application on your hard disk.<br />
1 Chapter 1, “<strong>Install</strong>ing <strong>FileMaker</strong> <strong>Pro</strong>,” gives instructions for installing the<br />
application, registering your ownership, <strong>and</strong> everything else you need to<br />
do before you can use <strong>FileMaker</strong> <strong>Pro</strong>.<br />
1 Chapter 2, “<strong>New</strong> features in <strong>FileMaker</strong> <strong>Pro</strong>,” provides an overview of the<br />
new features in <strong>FileMaker</strong> <strong>Pro</strong> 3.0. This chapter is especially helpful for<br />
users upgrading from previous versions of <strong>FileMaker</strong> <strong>Pro</strong>.<br />
This guide presents special information in the following ways:<br />
Descriptive heading messages give extra information about a procedure.<br />
Note messages provide background or supplemental information.<br />
Important messages alert you to situations that require special attention, such<br />
as an action that you can’t undo.<br />
To learn about Claris Technical Support <strong>and</strong> Claris Customer Assistance,<br />
their hours of operation, <strong>and</strong> their telephone numbers, see the Claris Service<br />
Directory included in the product package.
Blank<br />
&<br />
Blind<br />
Page IV
Chapter 1: <strong>Install</strong>ing <strong>FileMaker</strong> <strong>Pro</strong><br />
What you need<br />
This book gives you step-by-step instructions for installing <strong>FileMaker</strong> <strong>Pro</strong><br />
software for <strong>Windows</strong>. In this chapter, you find the instructions for installing<br />
<strong>FileMaker</strong> <strong>Pro</strong> on your hard disk.<br />
Note These instructions assume that you’re familiar with st<strong>and</strong>ard mouse<br />
techniques such as clicking <strong>and</strong> dragging. If you need more information<br />
about mouse techniques or working with disks, see the documentation that<br />
came with your <strong>Windows</strong> software.<br />
Before you begin installing, you must know how you plan to use<br />
<strong>FileMaker</strong> <strong>Pro</strong>.<br />
1 On a st<strong>and</strong>-alone computer—you want to use <strong>FileMaker</strong> <strong>Pro</strong> on your<br />
computer, <strong>and</strong> you don’t plan to share files with other users over a network.<br />
1 With networking—you want to use <strong>FileMaker</strong> <strong>Pro</strong> on your computer, <strong>and</strong><br />
you plan to share <strong>FileMaker</strong> <strong>Pro</strong> files with other PCs using IPX/SPX or<br />
TCP/IP networking.<br />
Networks If you’re not sure which network you’re using, ask your network<br />
administrator before you begin installation.<br />
Note If you are new to Microsoft <strong>Windows</strong> 95, see the documentation<br />
provided with <strong>Windows</strong> 95 for information about <strong>Windows</strong> conventions <strong>and</strong><br />
how to use the mouse <strong>and</strong> keyboard.<br />
PC minimum requirements<br />
To install <strong>and</strong> use <strong>FileMaker</strong> <strong>Pro</strong> for <strong>Windows</strong>, you need the following<br />
minimum equipment <strong>and</strong> software:<br />
1 an Intel compatible 486/33 PC running <strong>Windows</strong> 95, <strong>Windows</strong> NT 3.51<br />
or greater, <strong>Windows</strong> for Workgroups 3.11, or <strong>Windows</strong> 3.1<br />
1 8 MB of RAM (16 MB recommended with <strong>Windows</strong> NT 3.51)<br />
1 a CD-ROM drive or a high-density 3.5-inch floppy disk drive<br />
1 a hard disk<br />
<strong>Windows</strong> 3.1 users You must install Win32s 1.30c before installing<br />
<strong>FileMaker</strong> <strong>Pro</strong>. See “<strong>Install</strong>ing Win32s” on page 1-2 for instructions.
1-2 <strong>FileMaker</strong> <strong>Pro</strong> <strong>Install</strong>ation & <strong>New</strong> <strong>Feature</strong>s <strong>Guide</strong><br />
Networking requirements<br />
<strong>Windows</strong> 95 <strong>Windows</strong> NT<br />
IPX/SPX -compatible<br />
<strong>Pro</strong>tocol<br />
Before you begin<br />
<strong>Install</strong>ing Win32s<br />
To share files among users on a network, you need to have the following<br />
additional software <strong>and</strong> hardware installed on your PC:<br />
1 a <strong>Windows</strong>-compatible network card<br />
1 the software driver for your network card<br />
1 the appropriate IPX/SPX network protocol or TCP/IP network protocol<br />
for <strong>Windows</strong> 95, <strong>Windows</strong> NT, <strong>Windows</strong> for Workgroups, or<br />
<strong>Windows</strong> 3.1<br />
Note <strong>FileMaker</strong> <strong>Pro</strong> 3.0v3 supports only IPX/SPX networking under<br />
<strong>Windows</strong> 3.1.<br />
You can use one of the following solutions to share files on a PC or mixed<br />
MacOS computer <strong>and</strong> PC network.See the documentation that came with<br />
<strong>Windows</strong> or your network card for more information.<br />
NWLink IPX/SPX<br />
Compatible Transport<br />
<strong>Windows</strong> for<br />
Workgroups <strong>Windows</strong> 3.1 MacOS<br />
Novell NetWare Client<br />
Software Shell version<br />
3.26 or later<br />
TCP/IP TCP/IP MS TCP/IP-32 version<br />
3.11b<br />
IPX/SPX-compatible<br />
protocol<br />
MacIPX version 1.2.1<br />
Not supported MacTCP 2.0.6 or later or<br />
Apple Open Transport<br />
1.0.8 or later<br />
Before you begin the installation process, lock your <strong>FileMaker</strong> <strong>Pro</strong> disks. For<br />
the 3.5-inch disks, slide the tab in the upper-right corner of the disk so that<br />
the small “window” is open. The CD-ROM is already write-protected.<br />
If you are using <strong>Windows</strong> 3.1 or <strong>Windows</strong> for Workgroups 3.11, you need<br />
to install Win32s 1.30c before installing <strong>FileMaker</strong> <strong>Pro</strong>. If you have already<br />
installed Win32s version 1.30c or later, skip to “<strong>Install</strong>ing <strong>FileMaker</strong> <strong>Pro</strong>”<br />
on page 1-4. After installing Win32s, you will still be able to run all the<br />
applications you currently use. If an earlier version of Win32s is installed on<br />
your system, you can use the following procedure to update it.
Enable 32-bit disk access<br />
To install Win32s:<br />
<strong>Install</strong>ing <strong>FileMaker</strong> <strong>Pro</strong> 1-3<br />
1. Open the 386 Enhanced control panel <strong>and</strong> change the virtual memory type<br />
to Permanent.<br />
2. Make sure the swap file size is at least 20480 KB.<br />
3. Select Use 32-Bit Disk Access <strong>and</strong> Use 32-Bit File Access, if available.<br />
4. Click OK.<br />
If you made changes, you’ll need to restart <strong>Windows</strong> before installing<br />
Win32s.<br />
Enable 32-Bit File Access<br />
5. <strong>Install</strong> Win32s.<br />
Insert the Win32s Disk1. In the <strong>Pro</strong>gram Manager, choose Run from the<br />
File menu <strong>and</strong> type a:Setup.exe from the <strong>Pro</strong>gram Manager. Follow<br />
the Win32s setup instructions.<br />
6. When the Win32s installation is complete, the Freecell Setup dialog<br />
box appears.<br />
Claris recommends that you install <strong>and</strong> run the game Freecell, because it<br />
can help verify your Win32s software installation if a problem arises later.<br />
7. Restart the machine before installing <strong>FileMaker</strong> <strong>Pro</strong>.<br />
Change virtual<br />
memory type to<br />
Permanent<br />
Set swap file to at<br />
least 20480 KB
1-4 <strong>FileMaker</strong> <strong>Pro</strong> <strong>Install</strong>ation & <strong>New</strong> <strong>Feature</strong>s <strong>Guide</strong><br />
<strong>Install</strong>ing <strong>FileMaker</strong> <strong>Pro</strong><br />
You must use the installation program to install <strong>FileMaker</strong> <strong>Pro</strong>—you can’t<br />
install <strong>FileMaker</strong> <strong>Pro</strong> by dragging files to your hard disk.<br />
The CD-ROM contains information, such as additional templates <strong>and</strong><br />
support information, not found in the disk set. The floppy disks are included<br />
as a convenience for users who do not have CD-ROM drives. If you have a<br />
CD-ROM drive, you should use the CD-ROM disc; you do not need to use<br />
the floppy disks.<br />
If you don’t have a CD-ROM drive The floppy disks included with<br />
<strong>FileMaker</strong> <strong>Pro</strong> 3.0 contain the application <strong>and</strong> all the files you need to<br />
start working.<br />
If you’re on a network You need to know which type of network you’re using.<br />
If you’re not sure which network option to choose, check with your network<br />
administrator before you begin installation.<br />
<strong>Install</strong>ing with <strong>Windows</strong> 95<br />
To install <strong>FileMaker</strong> <strong>Pro</strong> from the CD-ROM:<br />
1. Insert the CD-ROM disc into the CD-ROM drive.<br />
2. Follow the instructions provided on the screen.<br />
Important Because the CD-ROM contains additional templates <strong>and</strong> other<br />
information not available on floppy disk, you should install from the floppy<br />
disks only if you do not have a CD-ROM drive.<br />
To install <strong>FileMaker</strong> <strong>Pro</strong> from the floppy disks:<br />
1. Start <strong>Windows</strong> 95.<br />
2. Click the Start button <strong>and</strong> then point to Settings.<br />
3. Click Control Panel.<br />
4. Double-click Add/Remove <strong>Pro</strong>grams.
You see the Add/Remove <strong>Pro</strong>grams <strong>Pro</strong>perties dialog box.<br />
5. Click <strong>Install</strong>.<br />
<strong>Install</strong>ing <strong>FileMaker</strong> <strong>Pro</strong> 1-5<br />
6. When you see the prompt, insert Disk 1 into the floppy disk drive.<br />
7. Click Next.<br />
The installation program finds the setup file for <strong>FileMaker</strong> <strong>Pro</strong> (SETUP.EXE).<br />
8. Click Finish.<br />
9. Follow the installation instructions provided on the screen.
1-6 <strong>FileMaker</strong> <strong>Pro</strong> <strong>Install</strong>ation & <strong>New</strong> <strong>Feature</strong>s <strong>Guide</strong><br />
After the installation program copies all the files, it creates a menu item<br />
for <strong>FileMaker</strong> <strong>Pro</strong> in the Start menu.<br />
Default location for the <strong>FileMaker</strong> <strong>Pro</strong> menu item in the Start menu<br />
If you are using the IPX/SPX network protocol to host <strong>FileMaker</strong> <strong>Pro</strong> databases To<br />
allow the maximum number of guests (25), your IPX/SPX connections must<br />
be set to 30 or greater. The <strong>FileMaker</strong> <strong>Pro</strong> <strong>Install</strong>er checks this setting <strong>and</strong><br />
adjusts it automatically, if necessary, during installation.<br />
<strong>Install</strong>ing with <strong>Windows</strong> NT, <strong>Windows</strong> for Workgroups, or <strong>Windows</strong> 3.1<br />
Important You need to install Win32s before installing on <strong>Windows</strong> for<br />
Workgroups or <strong>Windows</strong> 3.1. “<strong>Install</strong>ing Win32s” on page 1-2.<br />
To install <strong>FileMaker</strong> <strong>Pro</strong> with <strong>Windows</strong> NT 3.51, <strong>Windows</strong> for Workgroups,<br />
or <strong>Windows</strong> 3.1:<br />
1. Start <strong>Windows</strong>.<br />
2. If you are installing from the CD-ROM, place the disc in the CD-ROM<br />
drive. If you are installing from floppy disks, insert Disk 1 in the floppy disk<br />
drive.<br />
3. Choose Run from the <strong>Pro</strong>gram Manager’s File menu.<br />
4. If you are installing from the CD-ROM, type the drive letter <strong>and</strong> the path<br />
of the setup comm<strong>and</strong> in the Comm<strong>and</strong> Line box (for example, d:\setup)<br />
<strong>and</strong> click OK.<br />
If you are installing from 3.5-inch floppy disks, type the drive letter<br />
<strong>and</strong> then the setup comm<strong>and</strong> in the Comm<strong>and</strong> Line box (for example,<br />
a:\setup) <strong>and</strong> click OK.<br />
5. Follow the installation instructions provided on the screen.
Adjusting network software<br />
<strong>Install</strong>ing <strong>FileMaker</strong> <strong>Pro</strong> 1-7<br />
Depending on the networking protocol you’re using, you may have to<br />
modify settings on the host <strong>and</strong>/or guest computers.<br />
If you are using the IPX/SPX protocol with <strong>Windows</strong> 95, you might need<br />
to increase the number of IPX/SPX connections. To allow the maximum<br />
number of guests (25), your IPX/SPX connections must be set to 40 or<br />
greater. The <strong>FileMaker</strong> <strong>Pro</strong> <strong>Install</strong>er checks this setting <strong>and</strong> adjusts it<br />
automatically, if necessary, during installation. Consider increasing the SPX<br />
connections in the Network control panel if you cannot connect the desired<br />
number of guests. You do not need to modify settings on <strong>Windows</strong> NT.<br />
If you are using the IPX/SPX network with <strong>Windows</strong> 3.1 or <strong>Windows</strong> for<br />
Workgroups 3.11, you should use the Novell NetWare Client Shell version<br />
3.26 or higher to share <strong>FileMaker</strong> <strong>Pro</strong> files. The <strong>FileMaker</strong> <strong>Pro</strong> <strong>Install</strong>er<br />
checks the IPX/SPX connections setting <strong>and</strong> adjusts it automatically.<br />
Important <strong>FileMaker</strong> networking over IPX/SPX will not work if the<br />
Microsoft IPX/SPX compatible driver is installed.<br />
Note You’ll need to change Novell NetWare settings in order to network<br />
<strong>FileMaker</strong> <strong>Pro</strong>. To share <strong>FileMaker</strong> <strong>Pro</strong> files over the network, your machine<br />
must be a fully configured NetWare client.<br />
To share <strong>FileMaker</strong> <strong>Pro</strong> database files:<br />
1 Use the <strong>Windows</strong> Setup program to set the network to the appropriate<br />
NetWare option (usually NetWare 3.26 <strong>and</strong> above).<br />
1 Add the following entries to your NET.CFG (or SHELL.CFG) file:<br />
GET LOCAL TARGET STACKS=10<br />
SPX CONNECTIONS=40<br />
Get local target stacks needs to be set on all guest machines. SPX connections<br />
should be set on the host machine if it will host more than twelve guests or on<br />
guest machines using additional SPX applications. Consider increasing the<br />
SPX connections if you cannot connect the desired number of guests.
1-8 <strong>FileMaker</strong> <strong>Pro</strong> <strong>Install</strong>ation & <strong>New</strong> <strong>Feature</strong>s <strong>Guide</strong><br />
Registering your software<br />
Take a minute to register <strong>FileMaker</strong> <strong>Pro</strong> in one of the following ways:<br />
1 complete <strong>and</strong> mail the postage-paid product registration card<br />
1 call (800) 356-6657 to register by phone<br />
1 use the onscreen registration database by clicking the Register button in the<br />
<strong>New</strong> Database dialog box, which you see when you start <strong>FileMaker</strong> <strong>Pro</strong>.<br />
You can fax the completed registration card to Claris or send it by mail.<br />
Keep the part of the registration card with your serial number on it in a<br />
safe place.<br />
Adjusting the <strong>FileMaker</strong> <strong>Pro</strong> cache<br />
<strong>FileMaker</strong> <strong>Pro</strong> maintains an internal cache of portions of your database.<br />
Depending on your computer’s memory configuration, you may want to<br />
adjust the cache size to improve performance.<br />
You may want to consider increasing the cache size if you plan to:<br />
1 work on a large database file<br />
1 work on several database files at once<br />
1 host database files<br />
1 use a database file that contains many graphics<br />
1 insert a large graphic into a database file<br />
You may want to consider decreasing the cache size if you plan to:<br />
1 run several applications at the same time <strong>and</strong> you have a limited amount<br />
of memory (RAM) installed<br />
Note By changing the <strong>FileMaker</strong> <strong>Pro</strong> cache size, you also affect the amount<br />
of memory needed to run <strong>FileMaker</strong> <strong>Pro</strong>.<br />
For more information on managing memory, see the documentation that<br />
came with your computer.<br />
Changing the cache size<br />
To change the cache size <strong>FileMaker</strong> <strong>Pro</strong> uses:<br />
1. In <strong>FileMaker</strong> <strong>Pro</strong>, choose Preferences from the Edit menu.<br />
You see the Preferences dialog box.
Changing the network protocol<br />
2. Click the Memory tab at the top of the dialog box.<br />
3. Type a number in the Attempt cache size of box.<br />
<strong>Install</strong>ing <strong>FileMaker</strong> <strong>Pro</strong> 1-9<br />
4. Click Done.<br />
The next time you start <strong>FileMaker</strong> <strong>Pro</strong>, the new cache size is used.<br />
During installation, you chose a network protocol (or No Networking) for<br />
<strong>FileMaker</strong> <strong>Pro</strong>. You can change the network protocol at any time.<br />
You must choose a network protocol if you want to share <strong>FileMaker</strong> <strong>Pro</strong> files<br />
over a network, either as a guest or as a host. For more information about<br />
your network, consult your network administrator.<br />
Important The network protocol setting in <strong>FileMaker</strong> <strong>Pro</strong> must be the same<br />
on the host <strong>and</strong> guest computers.<br />
To change the network protocol:<br />
1. Start <strong>FileMaker</strong> <strong>Pro</strong> 3.0.<br />
2. Choose Preferences from the Edit menu.<br />
You see the Preferences dialog box. If necessary, click the General tab to<br />
bring the General preferences to the front.
1-10 <strong>FileMaker</strong> <strong>Pro</strong> <strong>Install</strong>ation & <strong>New</strong> <strong>Feature</strong>s <strong>Guide</strong><br />
3. Choose a network protocol from the Network <strong>Pro</strong>tocol pop-up menu.<br />
Changes to this setting don’t take effect until you quit <strong>FileMaker</strong> <strong>Pro</strong> <strong>and</strong><br />
then start it again.<br />
Opening files from previous versions<br />
<strong>FileMaker</strong> <strong>Pro</strong> 3.0 can open both <strong>Windows</strong> <strong>and</strong> Macintosh files created by<br />
<strong>FileMaker</strong> <strong>Pro</strong> 2.0 or later.<br />
<strong>FileMaker</strong> <strong>Pro</strong> 1.0 databases To use a database created by <strong>FileMaker</strong> <strong>Pro</strong> 1.0,<br />
you must first convert it on a Macintosh with version 2.0 or later <strong>and</strong> then<br />
open it in <strong>FileMaker</strong> <strong>Pro</strong> for <strong>Windows</strong>.<br />
To use files created with <strong>FileMaker</strong> <strong>Pro</strong> 2.x, you must convert them to<br />
<strong>FileMaker</strong> <strong>Pro</strong> 3.0.<br />
To convert <strong>and</strong> open a file:<br />
1. Start <strong>FileMaker</strong> <strong>Pro</strong> 3.0.<br />
2. Choose Open from the File menu <strong>and</strong> select the file you want to convert<br />
in the Open dialog box.<br />
You see the conversion dialog box.
<strong>Install</strong>ing <strong>FileMaker</strong> <strong>Pro</strong> 1-11<br />
3. Type a name to rename the original file, or uncheck the Rename old file<br />
checkbox to retain the name of the file.<br />
The original file remains in the older format.<br />
After you click OK, you see another dialog box where you can name the<br />
file that will be created <strong>and</strong> saved in the new format. You cannot use the<br />
converted file with versions of <strong>FileMaker</strong> <strong>Pro</strong> earlier than 3.0.<br />
4. Click Save to start the conversion.<br />
<strong>FileMaker</strong> <strong>Pro</strong> converts the file <strong>and</strong> opens it.<br />
Where files are stored on your hard disk<br />
File or folder Description<br />
The following table shows the files <strong>and</strong> folders you can install, <strong>and</strong> the preferred<br />
location for them on your hard disk. If you use the Typical installation, the<br />
<strong>FileMaker</strong> <strong>Pro</strong> <strong>Install</strong>er installs all the files you need in their preferred locations.<br />
Preferred location<br />
on <strong>Windows</strong> 95<br />
FILEMAKER PRO.EXE Application file <strong>FileMaker</strong> <strong>Pro</strong> 3.0 folder \FM<strong>Pro</strong>30<br />
README.WRI Text document about <strong>FileMaker</strong> <strong>Pro</strong> <strong>FileMaker</strong> <strong>Pro</strong> 3.0 folder \FM<strong>Pro</strong>30<br />
CLLNGENU.DLL Claris Spelling engine module <strong>FileMaker</strong> <strong>Pro</strong> 3.0 folder \FM<strong>Pro</strong>30<br />
CLSPELL.DLL Claris Spelling engine module <strong>FileMaker</strong> <strong>Pro</strong> 3.0 folder \FM<strong>Pro</strong>30<br />
FMENGINE.DLL <strong>FileMaker</strong> application module <strong>FileMaker</strong> <strong>Pro</strong> 3.0 folder \FM<strong>Pro</strong>30<br />
FMOLE.DLL <strong>FileMaker</strong> application module <strong>FileMaker</strong> <strong>Pro</strong> 3.0 folder \FM<strong>Pro</strong>30<br />
FMRSRC.DLL <strong>FileMaker</strong> application module <strong>FileMaker</strong> <strong>Pro</strong> 3.0 folder \FM<strong>Pro</strong>30<br />
FMATM16.DLL Support for Adobe Type Manager<br />
(<strong>Windows</strong> 95 only)<br />
FMATM32.DLL Support for Adobe Type Manager<br />
(<strong>Windows</strong> 95 only)<br />
<strong>FileMaker</strong> <strong>Pro</strong> 3.0 folder \FM<strong>Pro</strong>30<br />
<strong>FileMaker</strong> <strong>Pro</strong> 3.0 folder \FM<strong>Pro</strong>30<br />
Preferred location on<br />
<strong>Windows</strong> for Workgroups<br />
<strong>and</strong> <strong>Windows</strong> 3.1
1-12 <strong>FileMaker</strong> <strong>Pro</strong> <strong>Install</strong>ation & <strong>New</strong> <strong>Feature</strong>s <strong>Guide</strong><br />
File or folder Description<br />
FMTOOLS.DLL <strong>FileMaker</strong> application module <strong>FileMaker</strong> <strong>Pro</strong> 3.0 folder \FM<strong>Pro</strong>30<br />
FMPRO30.HLP <strong>FileMaker</strong> <strong>Pro</strong> online help document <strong>FileMaker</strong> <strong>Pro</strong> 3.0 folder \FM<strong>Pro</strong>30<br />
TEMPLATE Folder containing predesigned<br />
templates that help you use <strong>FileMaker</strong><br />
<strong>Pro</strong> right away<br />
EXAMPLES Folder containing database examples<br />
that use the relational capabilities of<br />
<strong>FileMaker</strong> <strong>Pro</strong> 3.0<br />
<strong>FileMaker</strong> <strong>Pro</strong> 3.0 folder \FM<strong>Pro</strong>30<br />
<strong>FileMaker</strong> <strong>Pro</strong> 3.0 folder \FM<strong>Pro</strong>30<br />
TUTORIAL.FP3 <strong>FileMaker</strong> <strong>Pro</strong> Tutorial database Tutorial folder in the<br />
<strong>FileMaker</strong> <strong>Pro</strong> 3.0 folder<br />
FMIPX32.NET IPX/SPX network plug-in System folder in the<br />
<strong>FileMaker</strong> <strong>Pro</strong> 3.0 folder<br />
FMTCP32.NET TCP/IP network plug-in System folder in the<br />
<strong>FileMaker</strong> <strong>Pro</strong> 3.0 folder<br />
CWORKS.IMP ClarisWorks Database<br />
translation filter<br />
Preferred location<br />
on <strong>Windows</strong> 95<br />
System folder in the<br />
<strong>FileMaker</strong> <strong>Pro</strong> 3.0 folder<br />
DBF.IMP DBF Database translation filter System folder in the<br />
<strong>FileMaker</strong> <strong>Pro</strong> 3.0 folder<br />
FMBMP32.FLT BMP graphic filter System folder in the<br />
<strong>FileMaker</strong> <strong>Pro</strong> 3.0 folder<br />
FMCGM32.FLT CGM graphic filter System folder in the<br />
<strong>FileMaker</strong> <strong>Pro</strong> 3.0 folder<br />
FMDRW32.FLT DRW graphic filter System folder in the<br />
<strong>FileMaker</strong> <strong>Pro</strong> 3.0 folder<br />
FMGIF32.FLT GIF graphic filter System folder in the<br />
<strong>FileMaker</strong> <strong>Pro</strong> 3.0 folder<br />
FMHPGL2.FLT HPGL graphic filter System folder in the<br />
<strong>FileMaker</strong> <strong>Pro</strong> 3.0 folder<br />
FMMAC32.FLT MacPaint graphic filter System folder in the<br />
<strong>FileMaker</strong> <strong>Pro</strong> 3.0 folder<br />
FMPCX32.FLT PCX graphic filter System folder in the<br />
<strong>FileMaker</strong> <strong>Pro</strong> 3.0 folder<br />
FMPIC32.FLT PIC graphic filter System folder in the<br />
<strong>FileMaker</strong> <strong>Pro</strong> 3.0 folder<br />
FMSLD32.FLT Lotus SLD graphic filter System folder in the<br />
<strong>FileMaker</strong> <strong>Pro</strong> 3.0 folder<br />
FMTIFF32.FLT TIFF graphic filter System folder in the<br />
<strong>FileMaker</strong> <strong>Pro</strong> 3.0 folder<br />
Preferred location on<br />
<strong>Windows</strong> for Workgroups<br />
<strong>and</strong> <strong>Windows</strong> 3.1<br />
\FM<strong>Pro</strong>30\Tutorial<br />
\FM<strong>Pro</strong>30\System<br />
\FM<strong>Pro</strong>30\System<br />
\FM<strong>Pro</strong>30\System<br />
\FM<strong>Pro</strong>30\System<br />
\FM<strong>Pro</strong>30\System<br />
\FM<strong>Pro</strong>30\System<br />
\FM<strong>Pro</strong>30\System<br />
\FM<strong>Pro</strong>30\System<br />
\FM<strong>Pro</strong>30\System<br />
\FM<strong>Pro</strong>30\System<br />
\FM<strong>Pro</strong>30\System<br />
\FM<strong>Pro</strong>30\System<br />
\FM<strong>Pro</strong>30\System<br />
\FM<strong>Pro</strong>30\System
File or folder Description<br />
FMWMF32.FLT Metafile graphic filter System folder in the<br />
<strong>FileMaker</strong> <strong>Pro</strong> 3.0 folder<br />
Where to go from here<br />
<strong>Install</strong>ing <strong>FileMaker</strong> <strong>Pro</strong> 1-13<br />
\FM<strong>Pro</strong>30\System<br />
CTL3d32.DLL <strong>Windows</strong> 3-D interface not applicable \<strong>Windows</strong>\System<br />
NWNETAPI.DLL Novell Networking software not applicable \<strong>Windows</strong>\System<br />
NWIPXSPX.DLL Novell Networking software not applicable \<strong>Windows</strong>\System<br />
FMIPX16.DLL IPX network plug in module not applicable \FM<strong>Pro</strong>30\System<br />
FMCOMM16.DLL <strong>FileMaker</strong> application module not applicable \FM<strong>Pro</strong>30\System<br />
FMCOMM32.DLL <strong>FileMaker</strong> application module not applicable \FM<strong>Pro</strong>30\System<br />
USENGLSH.MSP The primary dictionary of 100,000<br />
words that <strong>FileMaker</strong> <strong>Pro</strong> uses to spell<br />
check your files<br />
USER.USP The dictionary that stores your<br />
customized list of spelling exceptions<br />
<strong>and</strong> additions to the US English -<br />
Spelling dictionary<br />
Preferred location<br />
on <strong>Windows</strong> 95<br />
Preferred location on<br />
<strong>Windows</strong> for Workgroups<br />
<strong>and</strong> <strong>Windows</strong> 3.1<br />
Claris folder \<strong>Windows</strong>\Claris<br />
Claris folder \<strong>Windows</strong>\Claris<br />
Location of the <strong>FileMaker</strong> <strong>Pro</strong> 3.0 folder In <strong>Windows</strong> 95, the <strong>FileMaker</strong> <strong>Pro</strong><br />
folder is located by default in the Claris Corp folder in the <strong>Pro</strong>gram Files<br />
folder. In <strong>Windows</strong> NT, <strong>Windows</strong> for Workgroups, <strong>and</strong> <strong>Windows</strong> 3.1, the<br />
<strong>FileMaker</strong> <strong>Pro</strong> directory is located by default in the root directory.<br />
Location of the Claris folder In <strong>Windows</strong> 95, the Claris folder is located by<br />
default in the Claris Corp folder in the <strong>Pro</strong>gram Files folder. In <strong>Windows</strong> NT,<br />
<strong>Windows</strong> for Workgroups, or <strong>Windows</strong> 3.1, the Claris directory is located in<br />
the <strong>Windows</strong> directory. If a Claris directory exists from a previous<br />
installation of a Claris product, the existing location is used.<br />
After you install <strong>FileMaker</strong> <strong>Pro</strong>, you can immediately begin working with<br />
the application. Here are some suggestions on where to go in the<br />
documentation to get started:<br />
1 If you’re new to databases, read chapter 1, “<strong>FileMaker</strong> <strong>Pro</strong> basics,” in the<br />
<strong>FileMaker</strong> <strong>Pro</strong> User’s <strong>Guide</strong> to learn basic database concepts.<br />
1 If you’re new to <strong>FileMaker</strong> <strong>Pro</strong>, work through the online tutorial, which is<br />
automatically copied to your hard disk when you do a typical installation.<br />
1 If you’ve used <strong>FileMaker</strong> <strong>Pro</strong> before, read chapter 2 of this manual to find<br />
out about the new features available in <strong>FileMaker</strong> <strong>Pro</strong> 3.0.
Blank<br />
&<br />
Blind<br />
Page 1-14
Chapter 2: <strong>New</strong> features in <strong>FileMaker</strong> <strong>Pro</strong><br />
Relational database capability<br />
This chapter introduces the new features available in <strong>FileMaker</strong> <strong>Pro</strong> 3.0.<br />
<strong>FileMaker</strong> <strong>Pro</strong> 3.0 supports relational features that you can use to display the<br />
contents of a field from another database file. You can display records from<br />
the related file in a layout of the current file.<br />
A relational database is one or more discrete database files that contain all<br />
the data you need to do your work. In a relational database, each occurrence<br />
of data is stored in only one file at a time, but you can access <strong>and</strong> work with<br />
that data from any file.<br />
In this relational database, the Customer layout displays invoices from the Invoices file.<br />
The two files are related by the Cust ID field.<br />
For more information about relational databases, see chapter 10, “Using data<br />
from related files,” in the <strong>FileMaker</strong> <strong>Pro</strong> User’s <strong>Guide</strong>.<br />
Object linking <strong>and</strong> embedding (OLE)<br />
Now you can use OLE 2.0 with <strong>FileMaker</strong> <strong>Pro</strong>. Using OLE, you can combine<br />
information from other applications with information in <strong>FileMaker</strong> <strong>Pro</strong> files.<br />
You can also use drag <strong>and</strong> drop to move objects between files.<br />
You can store an OLE object in a container field or place it on a layout. If the<br />
OLE server supports editing, you can edit the OLE object in <strong>FileMaker</strong> <strong>Pro</strong>.<br />
For more information about using OLE with <strong>FileMaker</strong> <strong>Pro</strong>, see appendix D,<br />
“Linking <strong>and</strong> embedding objects,” in the <strong>FileMaker</strong> <strong>Pro</strong> User’s <strong>Guide</strong>.
2-2 <strong>FileMaker</strong> <strong>Pro</strong> <strong>Install</strong>ation & <strong>New</strong> <strong>Feature</strong>s <strong>Guide</strong><br />
Improved networking<br />
Enhanced calculations<br />
ScriptMaker enhancements<br />
You can now use the Preferences dialog box to choose the network protocol<br />
that <strong>FileMaker</strong> <strong>Pro</strong> uses to communicate over a network. For more<br />
information about setting this preference, see “Choosing a network protocol”<br />
in chapter 1 of this manual.<br />
<strong>FileMaker</strong> <strong>Pro</strong> now ships with TCP/IP support for Macintosh <strong>and</strong> <strong>Windows</strong>.<br />
For more information about networking, see chapter 1, “<strong>Install</strong>ing <strong>FileMaker</strong><br />
<strong>Pro</strong>,” in this manual.<br />
<strong>FileMaker</strong> <strong>Pro</strong> 3.0 can be used with <strong>FileMaker</strong> <strong>Pro</strong> Server 3.0 for enhanced<br />
performance <strong>and</strong> to allow up to 100 guests to share databases. <strong>FileMaker</strong> <strong>Pro</strong><br />
Server 3.0 supports simultaneous AppleTalk, IPX/SPX, <strong>and</strong> TCP/IP networking<br />
with both Macintosh <strong>and</strong> <strong>Windows</strong> guests. Guests can use the protocol of their<br />
choice to network with <strong>FileMaker</strong> <strong>Pro</strong>. (AppleTalk networking is not available<br />
for <strong>Windows</strong> guests.) For more information, see the documentation provided<br />
with <strong>FileMaker</strong> <strong>Pro</strong> Server 3.0 (available separately).<br />
The enhanced user interface for defining calculations gives you easy access<br />
to more than 45 new <strong>and</strong> improved functions. In addition, you control when<br />
<strong>FileMaker</strong> <strong>Pro</strong> calculates the results, saving space in the database file. For<br />
more information about calculations, see “Underst<strong>and</strong>ing formulas” in<br />
chapter 2 of the <strong>FileMaker</strong> <strong>Pro</strong> User’s <strong>Guide</strong>.<br />
With the new script steps available in the ScriptMaker feature, you can:<br />
1 control script execution (create If/Else <strong>and</strong> looping procedures, allow user<br />
abort, capture script errors)<br />
1 manage windows (freeze or refresh windows, toggle or lock the status<br />
area, set the zoom level)<br />
1 manage data entry (paste the result of a calculation, set the contents of a<br />
field, perform a replace, revert the contents of a record)<br />
1 dial phone numbers<br />
1 show messages to the user<br />
1 go to a related record or portal row<br />
1 open the Preferences dialog box
<strong>New</strong> features in <strong>FileMaker</strong> <strong>Pro</strong> 2-3<br />
1 correct a word while spell checking<br />
1 set spelling options, such as check spelling while you type<br />
1 change your spell checking dictionaries<br />
1 modify your User Dictionary<br />
1 specify which portal row record to delete<br />
1 <strong>and</strong> much more...<br />
Scripts can now be executed when a file is opened <strong>and</strong>/or when a file is closed.<br />
You can use the Duplicate button to quickly duplicate scripts or script steps.<br />
For more information about using ScriptMaker, see chapter 5, “Using<br />
ScriptMaker <strong>and</strong> buttons,” in the <strong>FileMaker</strong> <strong>Pro</strong> User’s <strong>Guide</strong>.<br />
Browse <strong>and</strong> Find mode improvements<br />
Text editing enhancements<br />
You can now revert changes after you modify a record or a find request.<br />
You can save space in a database file by storing graphics by reference. With<br />
this feature, you can store a graphic once but display it in many places<br />
throughout the database.<br />
<strong>FileMaker</strong> <strong>Pro</strong> now supports <strong>and</strong> works with empty found sets.<br />
You can replace a field’s contents with other text, serial numbers, or a<br />
calculation result.<br />
For more information about these features, see chapter 4, “Working with<br />
information in records,” in the <strong>FileMaker</strong> <strong>Pro</strong> User’s <strong>Guide</strong>.<br />
Additional text editing features allow you to:<br />
1 insert tabs in fields <strong>and</strong> text objects<br />
1 use a new text ruler to format text in fields <strong>and</strong> text objects<br />
1 specify paragraph margins, indentation, <strong>and</strong> spacing above <strong>and</strong> below a<br />
paragraph (in addition to line spacing)<br />
1 format text in text objects or fields on a paragraph-by-paragraph basis<br />
For more information about working with text <strong>and</strong> graphics on a layout, see<br />
chapter 3, “Laying out <strong>and</strong> arranging information,” in the <strong>FileMaker</strong> <strong>Pro</strong><br />
User’s <strong>Guide</strong>.
2-4 <strong>FileMaker</strong> <strong>Pro</strong> <strong>Install</strong>ation & <strong>New</strong> <strong>Feature</strong>s <strong>Guide</strong><br />
Field definition improvements<br />
More flexibility with value lists<br />
<strong>New</strong> options in Layout mode<br />
With the new options for field definitions, you can:<br />
1 use global fields to show the same value in every record<br />
1 validate data entry by calculation or a value list<br />
1 auto-enter a value from the previous record or based on the result of<br />
a calculation<br />
1 specify a custom validation message<br />
In addition, you can define new storage options for text, number, date, time,<br />
<strong>and</strong> calculation fields. You can specify:<br />
1 whether <strong>FileMaker</strong> <strong>Pro</strong> should always index the field, index the field<br />
when required, or never index the field<br />
1 what language to use for indexing text<br />
1 whether to store a calculated value or to calculate the value when it is required<br />
For more information, see “Choosing data entry options” in chapter 2 of the<br />
<strong>FileMaker</strong> <strong>Pro</strong> User’s <strong>Guide</strong>.<br />
Value lists are no longer attached to specific fields. This change means that<br />
one value list can be shared by several fields. In addition, you can base a<br />
value list on the contents of a field.<br />
You can now edit a value list:<br />
1 during data entry<br />
1 during layout design, even over a network<br />
For more information, see “Defining value lists” in chapter 3 of the<br />
<strong>FileMaker</strong> <strong>Pro</strong> User’s <strong>Guide</strong>.<br />
<strong>New</strong> features in Layout mode allow you to:<br />
1 insert the contents of a field into a text object on a layout using merge fields<br />
1 define buttons more easily using a new button tool<br />
1 edit the text within buttons or groups without having to ungroup or<br />
undefine the button
More powerful file h<strong>and</strong>ling<br />
Automatic database creation<br />
Exp<strong>and</strong>ed import <strong>and</strong> export<br />
<strong>New</strong> features in <strong>FileMaker</strong> <strong>Pro</strong> 2-5<br />
1 remove a layout from the Layout pop-up menu that appears in<br />
Browse mode<br />
1 work with additional zoom levels<br />
1 set custom page margins for your layouts<br />
1 use a new context pop-up menu to edit a selection in both Layout <strong>and</strong><br />
Browse modes<br />
Sample data in Layout mode now comes from your own records, so you can<br />
design your layouts more accurately.<br />
Label layout creation has been simplified. The new interface avoids the need<br />
to use sliding.<br />
For more information about layouts, see chapter 3, “Laying out <strong>and</strong><br />
arranging information,” in the <strong>FileMaker</strong> <strong>Pro</strong> User’s <strong>Guide</strong>.<br />
<strong>FileMaker</strong> <strong>Pro</strong> file sizes are no longer limited to 32 MB. In additon, you can<br />
now have up to 50 database files open at the same time. For more information,<br />
see “Managing files” in chapter 1 of the <strong>FileMaker</strong> <strong>Pro</strong> User’s <strong>Guide</strong>.<br />
<strong>FileMaker</strong> <strong>Pro</strong> can automatically create a new <strong>FileMaker</strong> <strong>Pro</strong> database from<br />
a file created in another application. Simply open a file (such as a tabseparated<br />
text file) in <strong>FileMaker</strong> <strong>Pro</strong>, <strong>and</strong> a new database file is automatically<br />
created, containing the fields from the original file, a St<strong>and</strong>ard layout <strong>and</strong> a<br />
Columnar report layout, <strong>and</strong> the data. For more information, see “Importing<br />
data into a new file” in chapter 8 of the <strong>FileMaker</strong> <strong>Pro</strong> User’s <strong>Guide</strong>.<br />
<strong>New</strong> import <strong>and</strong> export features allow you to:<br />
1 import <strong>and</strong> export in additional file formats<br />
1 create field definitions while setting up an import<br />
1 apply auto-entry options while importing data<br />
For more information about importing <strong>and</strong> exporting, see chapter 8,<br />
“Importing <strong>and</strong> exporting data,” in the <strong>FileMaker</strong> <strong>Pro</strong> User’s <strong>Guide</strong>,
2-6 <strong>FileMaker</strong> <strong>Pro</strong> <strong>Install</strong>ation & <strong>New</strong> <strong>Feature</strong>s <strong>Guide</strong><br />
<strong>New</strong> ways to limit user access<br />
You can disable all or most of the menus using new access privileges, <strong>and</strong><br />
you can disable the status area using ScriptMaker. For more information see<br />
chapter 7, “Networking <strong>and</strong> access privileges,” <strong>and</strong> chapter 5, “Using<br />
ScriptMaker <strong>and</strong> buttons,” in the <strong>FileMaker</strong> <strong>Pro</strong> User’s <strong>Guide</strong>.<br />
U95609-019B