Chapter 1 Introduction to Autodesk Inventor - Goodheart-Willcox
Chapter 1 Introduction to Autodesk Inventor - Goodheart-Willcox
Chapter 1 Introduction to Autodesk Inventor - Goodheart-Willcox

You also want an ePaper? Increase the reach of your titles
YUMPU automatically turns print PDFs into web optimized ePapers that Google loves.
This sample chapter is for review purposes only. Copyright © The <strong>Goodheart</strong>-<strong>Willcox</strong> Co., Inc. All rights reserved.<br />
Learning Objectives<br />
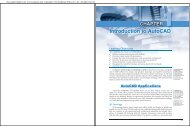
CHAPTER<br />
<strong>Introduction</strong><br />
<strong>to</strong> Au<strong>to</strong>desk<br />
Inven<strong>to</strong>r<br />
After completing this chapter, you will be able <strong>to</strong> do the following:<br />
✓ Describe the primary Au<strong>to</strong>desk Inven<strong>to</strong>r file types.<br />
✓ Explain the concept of parametric modeling.<br />
✓ Define the elements of a part model.<br />
✓ Perform basic file activities, such as creating, opening, saving, and<br />
closing files.<br />
✓ Describe the Au<strong>to</strong>desk Inven<strong>to</strong>r user interface.<br />
✓ Control the multiple document interface.<br />
✓ Access application options.<br />
✓ Locate and use help resources.<br />
Au<strong>to</strong>desk Inven<strong>to</strong>r, referred <strong>to</strong> as Inven<strong>to</strong>r throughout this textbook, combines<br />
three-dimensional (3D) solid modeling with two-dimensional (2D) drawing capabilities.<br />
See Figure 1-1. Inven<strong>to</strong>r is a powerful computer-aided design and drafting<br />
(CADD) system that allows you <strong>to</strong> start with very basic product design ideas and end<br />
with a virtual pro<strong>to</strong>type and a complete set of working drawings.<br />
Inven<strong>to</strong>r can be adapted <strong>to</strong> use and conform <strong>to</strong> a variety of mechanical drafting<br />
standards. This textbook focuses on using Inven<strong>to</strong>r according <strong>to</strong> the American National<br />
Standards Institute (ANSI) and the American Society of Mechanical Engineers (ASME)<br />
design and drafting standards. Other common standards, such as the American<br />
Welding Society (AWS) standards, are also presented when appropriate.<br />
Inven<strong>to</strong>r Files<br />
Inven<strong>to</strong>r uses different files <strong>to</strong> prepare 3D part, assembly, and presentation models,<br />
as well as 2D drawings. Each file serves a specific design and documentation purpose.<br />
A basic design may require only a single part file or a part file and drawing file.<br />
Complex projects that include multiple items may require hundreds of part, assembly,<br />
presentation, and drawing files.<br />
1<br />
part: An item<br />
or product or an<br />
element of an<br />
assembly.<br />
Figure 1-1.<br />
Inven<strong>to</strong>r provides <strong>to</strong>ols <strong>to</strong> create three-dimensional solid models and two-dimensional<br />
drawings.<br />
B<br />
.394<br />
.886 4X .541(=2.165)<br />
(.541)<br />
.886 .394<br />
1.772 .394<br />
2.657 .394<br />
3.543<br />
3.937<br />
NOTES:<br />
1. INTERPRET DIMENSIONS AND TOLERANCES PER ASME Y14.5M-1994.<br />
2. REMOVE ALL BURRS AND SHARP EDGES.<br />
.492<br />
5X Ø5.000<br />
THRU<br />
Ø 10.000 5.000<br />
Ø.005<br />
M A B C M<br />
.984<br />
Part Files<br />
Part files are used <strong>to</strong> create single parts and sheet metal parts. Figure 1-2 shows<br />
an example of a part. You can create a part in a part file or build it in place while<br />
you are working in an assembly file. When created in place, each part is saved as a<br />
unique part file. Part files are referenced in<strong>to</strong> assembly files as parts for assemblies<br />
and weldments, and in<strong>to</strong> drawing files <strong>to</strong> create 2D part drawings. Part files have the<br />
file extension .ipt.<br />
2 Inven<strong>to</strong>r and Its Applications 2009<br />
.984<br />
C<br />
2X R.394<br />
8X R.394<br />
.394<br />
A<br />
8X R.197<br />
1.969<br />
8X Ø.394<br />
Ø.005<br />
M A B<br />
Ø.005<br />
M<br />
UNLESS OTHERWISE SPECIFIED<br />
APPROVALS<br />
DATE<br />
DIMENSIONS ARE IN INCHES (IN.)<br />
TOLERANCES:<br />
.X<br />
± .1<br />
DRAWN DPM 6/20/2008 MADSEN DESIGNS INC.<br />
.XX<br />
± .01<br />
CHECKED<br />
.XXX DPM<br />
± .005<br />
TITLE<br />
ANGULAR: ± 10'<br />
APPROVED<br />
FINISH: 62μIN.<br />
SLIDE BAR HINGE<br />
THIRD ANGLE PROJECTION<br />
MATERIAL<br />
SAE 51410<br />
FINISH<br />
SIZE DWG NO.<br />
CAGE CODE<br />
ALL OVER B<br />
09-00125<br />
REV<br />
0<br />
DO NOT SCALE DRAWING<br />
SCALE<br />
SHEET<br />
1:1<br />
1 OF 1
Figure 1-2.<br />
An example of a<br />
C-clamp body<br />
created in a part file.<br />
Assembly Files<br />
Assembly files are used <strong>to</strong> create assemblies, subassemblies, and weldments.<br />
Parts and subassemblies used <strong>to</strong> build an assembly are known as components. An<br />
example of an assembly is shown in Figure 1-3. You can develop an assembly in a<br />
separate assembly file or create it in place as a subassembly while you are working in<br />
an assembly file. When created in place, each assembly is saved as a unique assembly<br />
file. Assembly files are referenced in<strong>to</strong> other assembly files as subassemblies, in<strong>to</strong><br />
presentation files for creation of exploded and animated assemblies, and in<strong>to</strong> drawing<br />
files <strong>to</strong> create assembly drawings. Assembly files have the extension .iam.<br />
Presentation Files<br />
Presentation files are used <strong>to</strong> create exploded, animated, and stylized assembly<br />
models that show how separate parts and subassemblies interact within the full<br />
assembly. See Figure 1-4. Presentation files have an .ipn extension and reference<br />
existing assembly files. They are also referenced in<strong>to</strong> drawing files <strong>to</strong> create exploded<br />
assembly drawings.<br />
Figure 1-3.<br />
An example of a<br />
C-clamp developed<br />
in an assembly file.<br />
weldment: An<br />
assembly in which<br />
parts are fixed<br />
<strong>to</strong>gether with welds.<br />
components: The<br />
individual parts<br />
and subassemblies<br />
used <strong>to</strong> create an<br />
assembly.<br />
<strong>Chapter</strong> 1 <strong>Introduction</strong> <strong>to</strong> Au<strong>to</strong>desk Inven<strong>to</strong>r 3<br />
drawings: 2D<br />
representations of<br />
models containing<br />
views, dimensions,<br />
and annotations.<br />
Figure 1-4.<br />
This presentation of<br />
a C-clamp contains<br />
trails, or connection<br />
graphics between<br />
components that<br />
show their relative<br />
positions in the<br />
assembly.<br />
Drawing Files<br />
Drawing files are used <strong>to</strong> create 2D drawings. See Figure 1-5. Drawings reference<br />
existing part, assembly, and presentation files. Drawing files can have the extension<br />
.idw or .dwg.<br />
Figure 1-5.<br />
A drawing file should contain enough information <strong>to</strong> describe the part or assembly<br />
completely. This drawing is used <strong>to</strong> document the design of a C-clamp body.<br />
14<br />
9.5<br />
9.5<br />
25.45<br />
20.65<br />
14<br />
2X R6.35<br />
50.8<br />
M10x1.5 - 6H<br />
NOTES:<br />
1. INTERPRET DIMENSIONS AND TOLERANCES PER ASME Y14.5M-1994.<br />
2. REMOVE ALL BURRS AND SHARP EDGES.<br />
19<br />
14<br />
14<br />
19<br />
14<br />
101.6<br />
14<br />
4 Inven<strong>to</strong>r and Its Applications 2009<br />
Trail<br />
Trail<br />
UNLESS OTHERWISE SPECIFIED<br />
APPROVALS<br />
DATE<br />
DIMENSIONS ARE IN MILLIMETERS (mm)<br />
TOLERANCES:<br />
.X<br />
± 0.5<br />
DRAWN<br />
DPM 6/20/2008 GOODHEART-WILLCOX<br />
.XX<br />
± 0.05<br />
.XXX<br />
±0.005<br />
CHECKED<br />
TITLE<br />
ANGULAR: ± 10'<br />
APPROVED<br />
FINISH:<br />
3.2μm<br />
C-CLAMP BODY<br />
THIRD ANGLE PROJECTION MATERIAL<br />
SAE 4140<br />
FINISH<br />
SIZE<br />
CAGE CODE DWG NO.<br />
ALL OVER A3<br />
09-98089<br />
REV<br />
0<br />
DO NOT SCALE DRAWING<br />
SCALE 1:1<br />
SHEET 1 OF 1
Web site<br />
Exercise 1-1<br />
Access the Student Web site (www.g-wlearning.com/CAD/Inven<strong>to</strong>rApps2009),<br />
select <strong>Chapter</strong> 1 from the <strong>Chapter</strong> Materials drop-down list, and select<br />
and complete Exercise 1-1.<br />
Parametric Solid Modeling<br />
Inven<strong>to</strong>r works on the concept of parametric solid modeling. Parameters can be<br />
adjusted <strong>to</strong> make changes <strong>to</strong> the model, but if the modifications conflict with other<br />
geometry, the model cannot be built without errors. The parametric concept is also<br />
referred <strong>to</strong> as intelligence because of the way model information is s<strong>to</strong>red and managed<br />
in a database.<br />
Parametric Association<br />
The easiest way <strong>to</strong> understand the basic principle of parametric association is<br />
<strong>to</strong> study the size of a parametrically created geometric shape. For example, the first<br />
circle shown in Figure 1-6 was drawn with a 1″ diameter. Adding a dimension <strong>to</strong> the<br />
circle that defines the circle diameter as 2″ changes the size of the circle according<br />
<strong>to</strong> the 2″ diameter dimension. When a new diameter of 3″ is applied <strong>to</strong> the circle, the<br />
size of the circle changes from two <strong>to</strong> three inches in diameter. This example shows<br />
how the size of the circle is associated with the circle dimension. The size of the<br />
circle changes only when the parametric value of the dimension is edited.<br />
Parametric modeling allows you <strong>to</strong> control every aspect of a model and drawing<br />
during and after the design and documentation process. In the parametric modeling<br />
world of Inven<strong>to</strong>r, you begin a design with a basic 2D shape and develop it in<strong>to</strong> a<br />
complex 3D model. As you learn <strong>to</strong> use Inven<strong>to</strong>r, you will recognize and work with the<br />
parametric relationships between model and drawing elements throughout the entire<br />
design process. Planning how <strong>to</strong> build a model and thinking about how it relates <strong>to</strong><br />
future parts, assemblies, and drawings is an important step in beginning a design.<br />
Throughout this book, you will explore many examples of parametric relationships<br />
and learn how <strong>to</strong> work within the parametric Inven<strong>to</strong>r environment.<br />
Figure 1-6.<br />
After creating the circle, you can control its size by assigning a dimension.<br />
Drawn at<br />
1″ diameter<br />
Added a 2″ diameter<br />
dimension<br />
Changed the dimension <strong>to</strong> 3″<br />
parametric solid<br />
modeling: A form<br />
of modeling in which<br />
parameters and<br />
constraints drive<br />
the model form and<br />
function <strong>to</strong> produce<br />
models that contain<br />
object volume and<br />
mass data that<br />
can be used <strong>to</strong><br />
analyze internal<br />
and external object<br />
characteristics.<br />
parameters:<br />
Characteristics that<br />
control the size,<br />
shape, and position<br />
of model geometry.<br />
<strong>Chapter</strong> 1 <strong>Introduction</strong> <strong>to</strong> Au<strong>to</strong>desk Inven<strong>to</strong>r 5<br />
constraints:<br />
Parameters that<br />
control the size,<br />
location, and<br />
position of model<br />
elements, including<br />
sketches and<br />
features.<br />
fully constrained<br />
model: A model that<br />
has no freedom of<br />
movement.<br />
Understanding Constraints<br />
Constraints are added in the form of dimensions and geometric associations. The use<br />
of well-defined constraints preserves specific design intentions, even as revisions are made.<br />
For example, if the center of a ∅10 mm hole in a square plate must be 12 mm away from<br />
a specific edge, a constraint in the form of a dimension identifying the 12 mm distance is<br />
added. If the edge is moved, the hole moves also, maintaining the 12 mm distance.<br />
Constraints define model elements and protect your model and design ideas. An<br />
under-constrained model is shown in Figure 1-7. As you progress through the design<br />
process, you will often fully constrain the model <strong>to</strong> ensure that your design is accurate.<br />
However, an over-constrained model—one that contains <strong>to</strong>o many constraints—<br />
generates a modeling failure and a warning. See Figure 1-8. Over-constrained and<br />
modeling failure situations must be resolved before you can create a model.<br />
Part Model Elements<br />
Part models are the primary solid models. They are used <strong>to</strong> form subassemblies,<br />
assemblies, and 2D part drawings. A part model begins as a sketch or group of sketches<br />
that are then used <strong>to</strong> construct a feature. Additional features are added <strong>to</strong> the initial<br />
feature <strong>to</strong> create a part model.<br />
Sketches and Sketched Features<br />
A sketch is typically the first item you create when developing a model. See<br />
Figure 1-9. Sketches are used <strong>to</strong> create sketched features. Typically, every part model<br />
contains at least one sketch and at least one sketched feature. Most of the time, the<br />
sketch: A 2D<br />
drawing that<br />
provides the<br />
profile or guide<br />
for developing a<br />
sketched feature.<br />
sketched features:<br />
Features such Figure 1-7.<br />
as extrusions, The hole can be moved horizontally because it is not fully constrained.<br />
revolutions, sweeps,<br />
lofts, and coils that This hole is not fixed in<br />
are built from a the horizontal direction<br />
sketch.<br />
6 Inven<strong>to</strong>r and Its Applications 2009
Figure 1-8.<br />
This warning appears when you try <strong>to</strong> add a dimension that causes an over-constrained situation.<br />
Figure 1-9.<br />
This simple sketch<br />
has two dimensions<br />
that control the<br />
object’s size.<br />
This dimension<br />
is not needed<br />
base feature is produced as a sketched feature. Ribs, embossments, and some holes<br />
are also sketched features. See Figure 1-10.<br />
Placed Features<br />
Placed features include shells, fillets, chamfers, threads, and face drafts. See<br />
Figure 1-11. Generating placed features requires adding size dimensions and selecting<br />
a location, such as a point or edge.<br />
base feature: The<br />
initial model feature,<br />
on which all others<br />
are based.<br />
placed features:<br />
Features added <strong>to</strong><br />
an existing feature<br />
without using a<br />
sketch.<br />
<strong>Chapter</strong> 1 <strong>Introduction</strong> <strong>to</strong> Au<strong>to</strong>desk Inven<strong>to</strong>r 7<br />
work features:<br />
Reference or<br />
construction<br />
features that direct<br />
the location and<br />
arrangement of<br />
other features.<br />
Figure 1-10.<br />
These sketched features are added <strong>to</strong> the base feature.<br />
Extruded sketched<br />
features<br />
Figure 1-11.<br />
Threads, fillets,<br />
and chamfers are<br />
a few of the placed<br />
features available in<br />
Inven<strong>to</strong>r.<br />
Work Features<br />
Embossment created from<br />
text on a sketch<br />
Fillet<br />
Work features are used for construction and reference purposes. They serve as a<br />
basis for creating part geometry and features in areas where no other geometry is available.<br />
Work features include work planes, work axes, and work points. See Figure 1-12.<br />
Work features may be placed anywhere on a feature or in 3D space. Like other features,<br />
work features are parametrically associated with a model.<br />
8 Inven<strong>to</strong>r and Its Applications 2009<br />
Rib<br />
Threads<br />
Base feature<br />
Chamfer
Figure 1-12.<br />
Work features<br />
are used <strong>to</strong> build<br />
and control other<br />
features.<br />
Figure 1-13.<br />
An example of a<br />
catalog feature. This<br />
feature contains<br />
three holes and a<br />
round.<br />
Work<br />
plane<br />
Catalog feature<br />
Work<br />
point<br />
<strong>Chapter</strong> 1 <strong>Introduction</strong> <strong>to</strong> Au<strong>to</strong>desk Inven<strong>to</strong>r 9<br />
Work<br />
axis<br />
Catalog Features<br />
Catalog features are similar <strong>to</strong> placed features, because you can place a catalog<br />
feature on<strong>to</strong> an existing feature. However, catalog features are often far more complex<br />
than a standard shell, fillet, chamfer, or face draft. See Figure 1-13. Catalog features<br />
include design elements such as iFeatures and derived components.<br />
Feature Patterns<br />
Once you create a feature, such as a hole, you may copy it in<strong>to</strong> an arrangement<br />
called a feature pattern. Inven<strong>to</strong>r feature patterns include rectangular patterns, circular<br />
patterns, and mirrored features. Examples of feature patterns are shown in Figure 1-14.<br />
iFeature: An<br />
existing feature or<br />
set of features you<br />
create and then<br />
save and s<strong>to</strong>re in a<br />
catalog <strong>to</strong> be used<br />
in other models.<br />
derived<br />
components:<br />
Features that can<br />
contain a complete<br />
model consisting of<br />
several features, or<br />
even multiple parts;<br />
often used as a<br />
base feature.<br />
feature pattern:<br />
An arrangement<br />
of copied existing<br />
features, generating<br />
occurrences of the<br />
features.<br />
Exercise 1-2<br />
Access the Student Web site (www.g-wlearning.com/CAD/Inven<strong>to</strong>rApps2009),<br />
select <strong>Chapter</strong> 1 from the <strong>Chapter</strong> Materials drop-down list, and select<br />
and complete Exercise 1-2.<br />
Getting Started<br />
icon: A small When Inven<strong>to</strong>r is first installed, Windows creates an Inven<strong>to</strong>r icon, which is<br />
graphic representing<br />
an application, file, displayed on the Windows desk<strong>to</strong>p and in the list of programs available from the<br />
or <strong>to</strong>ol.<br />
Start menu. One of the quickest methods <strong>to</strong> start Inven<strong>to</strong>r is <strong>to</strong> double-click on the<br />
Inven<strong>to</strong>r desk<strong>to</strong>p icon. Another option is <strong>to</strong> pick the Start but<strong>to</strong>n in the lower-left<br />
corner of the Windows desk<strong>to</strong>p, move the cursor <strong>to</strong> Programs and hold it there or<br />
pick, and then select Au<strong>to</strong>desk, Au<strong>to</strong>desk Inven<strong>to</strong>r 2009, and finally Au<strong>to</strong>desk Inven<strong>to</strong>r<br />
Professional 2009.<br />
The Open dialog box appears by default when you start Inven<strong>to</strong>r. See Figure 1-15.<br />
The Open dialog box is used <strong>to</strong> locate and open existing files. Options are also available<br />
for accessing the New File dialog box and for activating and managing projects.<br />
templates: Files<br />
with predefined<br />
settings that are<br />
used <strong>to</strong> begin new<br />
documents.<br />
Figure 1-14.<br />
Use patterns <strong>to</strong> create multiple copies of a feature or group of features.<br />
Rectangular Pattern Circular Pattern Mirrored Feature<br />
Web site<br />
Beginning a New File<br />
Pick the New File but<strong>to</strong>n in the Quick Start area of the Open dialog box <strong>to</strong> begin a<br />
new file using the New File dialog box. See Figure 1-16. This dialog box is the primary<br />
<strong>to</strong>ol used <strong>to</strong> access templates for creating new Inven<strong>to</strong>r parts, assemblies, presentations,<br />
and drawings. The New File dialog box can also be accessed by selecting the<br />
New… option on the File pull-down menu, typing [Ctrl]+[N], or picking the New but<strong>to</strong>n<br />
on the Inven<strong>to</strong>r Standard <strong>to</strong>olbar.<br />
10 Inven<strong>to</strong>r and Its Applications 2009
Figure 1-15.<br />
The default display shown when you first launch Inven<strong>to</strong>r includes the Open dialog box.<br />
Pick <strong>to</strong> access<br />
the New File<br />
dialog box<br />
Pick <strong>to</strong> access<br />
the Open<br />
dialog box<br />
Figure 1-16.<br />
Templates for<br />
creating new files<br />
are located in tabs<br />
along the <strong>to</strong>p of the<br />
New File dialog box.<br />
New and Open options are available<br />
from the File pull-down menu<br />
Pick <strong>to</strong> begin<br />
a new file<br />
Sheet metal<br />
part<br />
This but<strong>to</strong>n becomes<br />
available after certain<br />
files are selected<br />
Contains templates based on choosing English<br />
or metric during program installation<br />
Contains templates based on U.S. Cus<strong>to</strong>mary units<br />
Contains templates based on metric units<br />
Standard<br />
drawing<br />
Standard<br />
assembly<br />
Standard<br />
drawing<br />
Standard<br />
presentation<br />
Standard part<br />
Weldment<br />
(welded<br />
assembly)<br />
<strong>Chapter</strong> 1 <strong>Introduction</strong> <strong>to</strong> Au<strong>to</strong>desk Inven<strong>to</strong>r 11<br />
When Au<strong>to</strong>CAD is<br />
configured <strong>to</strong> display<br />
a screen menu, the<br />
commands appear in<br />
a separate screen.<br />
NOTE<br />
The New but<strong>to</strong>n on the Inven<strong>to</strong>r Standard <strong>to</strong>olbar, shown in<br />
Figure 1-15, is a fl yout that contains Assembly, Drawing, Part, and<br />
Presentation options. These selections are used <strong>to</strong> quickly access<br />
a new standard part, assembly, drawing, or presentation template<br />
fi le. The templates located in the New fl yout but<strong>to</strong>n are those found<br />
in the Templates folder and listed in the Default tab of the New File<br />
dialog box.<br />
By default, the New File dialog box contains Default, English, and Metric tabs. On<br />
each tabbed page are Inven<strong>to</strong>r template files, represented by unique icons. You can<br />
specify the Default tab as English or Metric when you install the program, based on the<br />
units you typically use. The English and Metric tabs hold templates with specific units<br />
for each Inven<strong>to</strong>r file type, including ANSI in the English tab, and ANSI, BSI, DIN, GB,<br />
ISO, and JIS in the Metric tab.<br />
Sheet metal and weldment templates are also available in the New File dialog box.<br />
These templates are not actually separate file types, as indicated by the .ipt and .iam file<br />
extensions. They are template files that are preset for specific model applications. A<br />
sheet metal template au<strong>to</strong>matically provides the <strong>to</strong>ols used <strong>to</strong> create a sheet metal part.<br />
A weldment template offers the welding <strong>to</strong>ols necessary <strong>to</strong> create a weldment.<br />
To begin a new file, double-click on the template icon. You can also pick the icon<br />
and then pick the OK but<strong>to</strong>n in the lower-right portion of the New File dialog box <strong>to</strong><br />
start a new file.<br />
When Au<strong>to</strong>CAD is<br />
configured <strong>to</strong> display<br />
a screen menu, the<br />
commands appear in<br />
a separate screen.<br />
Web site<br />
NOTE<br />
The tabs and template fi les displayed in the New File dialog box are<br />
fully cus<strong>to</strong>mizable. To specify the tabs and templates shown in the<br />
New File dialog box, use projects or create new tabs in the default<br />
template folder. Projects and templates are introduced in <strong>Chapter</strong> 2.<br />
Exercise 1-3<br />
Access the Student Web site (www.g-wlearning.com/CAD/Inven<strong>to</strong>rApps2009),<br />
select <strong>Chapter</strong> 1 from the <strong>Chapter</strong> Materials drop-down list, and select<br />
and complete Exercise 1-3.<br />
Opening an Existing File<br />
Use the Open dialog box, shown in Figure 1-15, <strong>to</strong> access existing Inven<strong>to</strong>r files<br />
and <strong>to</strong> import non-native CADD files in<strong>to</strong> Inven<strong>to</strong>r. Access the Open dialog box from<br />
the New File dialog box by picking the Open but<strong>to</strong>n in the Quick Start area. The Open<br />
dialog box can also be accessed by selecting the Open… option from the File pull-down<br />
menu, typing [Ctrl]+[O]; or picking the Open but<strong>to</strong>n on the Inven<strong>to</strong>r Standard <strong>to</strong>olbar.<br />
12 Inven<strong>to</strong>r and Its Applications 2009
When Au<strong>to</strong>CAD is<br />
configured <strong>to</strong> display<br />
a screen menu, the<br />
commands appear in<br />
a separate screen.<br />
NOTE<br />
You can open existing fi les directly from Microsoft Windows<br />
Explorer, or you may be able <strong>to</strong> fi nd fi les using the quick document<br />
access area located near the bot<strong>to</strong>m of the File pull-down menu. This<br />
area lists the path and fi le name of several previously used documents.<br />
The fi les are listed in the order they were opened, and each<br />
path is associated with a number. Number 1 is the most recently<br />
opened fi le.<br />
When you access the Open dialog box, the folder assigned <strong>to</strong> the active project<br />
is displayed, allowing you <strong>to</strong> quickly access files associated with the active project.<br />
However, you can navigate <strong>to</strong> any file on your computer or the network. Files do not<br />
have <strong>to</strong> be in the active project <strong>to</strong> be opened. The Open dialog box functions much like<br />
similar dialog boxes found in other Windows applications.<br />
Use the Files of type drop-down list <strong>to</strong> specify the type of files <strong>to</strong> display in the<br />
Open dialog box. Then use the Look in drop-down list, the Go To Last Folder Visited,<br />
Up One Level, Create New Folder, and View Menu but<strong>to</strong>ns along the <strong>to</strong>p of the dialog<br />
box, and the Preview area as needed <strong>to</strong> locate the desired file. Once you select a file,<br />
the Options... but<strong>to</strong>n may become available. Picking this but<strong>to</strong>n opens the File Open<br />
Options dialog box. The choices available in this dialog box vary depending on the<br />
selected file type. To open a file, double-click on the file icon, or pick the icon and then<br />
pick the Open but<strong>to</strong>n in the lower-right portion of the New File dialog box.<br />
When Au<strong>to</strong>CAD is<br />
configured <strong>to</strong> display<br />
a screen menu, the<br />
commands appear in<br />
a separate screen.<br />
Web site<br />
PROFESSIONAL TIP<br />
If you forget where an Inven<strong>to</strong>r fi le has been placed, you can use the<br />
Windows search <strong>to</strong>ol <strong>to</strong> fi nd it, but Inven<strong>to</strong>r also has a method of<br />
fi nding fi les that may be quicker. The Inven<strong>to</strong>r search <strong>to</strong>ol is conveniently<br />
located in the Open dialog box. Pick the Find... but<strong>to</strong>n <strong>to</strong> open<br />
the Find: Inven<strong>to</strong>r Files dialog box.<br />
NOTE<br />
Double-clicking on an Inven<strong>to</strong>r fi le in Microsoft Windows Explorer<br />
causes Inven<strong>to</strong>r <strong>to</strong> start, if it is not already running, and opens the<br />
selected fi le.<br />
Exercise 1-4<br />
Access the Student Web site (www.g-wlearning.com/CAD/Inven<strong>to</strong>rApps2009),<br />
select <strong>Chapter</strong> 1 from the <strong>Chapter</strong> Materials drop-down list, and select<br />
and complete Exercise 1-4.<br />
Saving Your Work<br />
A model or drawing you want <strong>to</strong> keep must be saved. Typically, the first step<br />
in creating a model or drawing is <strong>to</strong> save the file in an appropriate location using a<br />
descriptive name or code. Then, as you work, save the file frequently; at least every five<br />
<strong>to</strong> ten minutes, in case of a sudden loss of power or a computer problem that may cause<br />
the loss of your file.<br />
<strong>Chapter</strong> 1 <strong>Introduction</strong> <strong>to</strong> Au<strong>to</strong>desk Inven<strong>to</strong>r 13<br />
Using the Save Tool<br />
A quick way <strong>to</strong> save your work is <strong>to</strong> pick the Save but<strong>to</strong>n on the Inven<strong>to</strong>r Standard<br />
<strong>to</strong>olbar. You can also select the Save option from the File pull-down menu or type<br />
[Ctrl]+[S]. The Save <strong>to</strong>ol resaves the file if it has already been saved, or opens the Save As<br />
dialog box if the file has not previously been saved. See Figure 1-17. The Save As dialog<br />
box functions much like similar dialog boxes found in other Windows applications.<br />
The file type listed in the Files of type drop-down list should be set <strong>to</strong> the current<br />
file type. Use the Look in drop-down list or the but<strong>to</strong>ns along the <strong>to</strong>p of the dialog box<br />
as needed <strong>to</strong> locate the file. Pick the Options... but<strong>to</strong>n <strong>to</strong> open the File Save Options<br />
dialog box, which controls the method of generating a preview image for the file. This<br />
image is displayed in the Preview area of the File Open dialog box. Pick the Save but<strong>to</strong>n<br />
<strong>to</strong> complete the save.<br />
Using the Save As Tool<br />
The Save As <strong>to</strong>ol, which displays the Save As dialog box, is available by picking<br />
the Save As… option from the File pull-down menu. When you use the Save As <strong>to</strong>ol,<br />
the original file closes, and the newly saved file with the specified name appears. For<br />
example, if you are working on a part named LARGE PLATE and want <strong>to</strong> use the file<br />
as a basis for a small plate design, use the Save As <strong>to</strong>ol <strong>to</strong> save a copy of the part titled<br />
SMALL PLATE. The LARGE PLATE file closes and the SMALL PLATE file appears, ready<br />
for modification. You will use the Save As <strong>to</strong>ol throughout the exercises and problems<br />
in this textbook <strong>to</strong> save an existing file using a different name.<br />
Using the Save Copy As Tool<br />
The Save Copy As <strong>to</strong>ol is available by picking the Save Copy As… option from<br />
the File pull-down menu. Selecting this <strong>to</strong>ol displays the Save Copy As dialog box,<br />
which is similar <strong>to</strong> the Save As... dialog box. When you use the Save Copy As <strong>to</strong>ol, the<br />
original file does not close. The copy is saved <strong>to</strong> the specified location and does not<br />
open. Use the Save Copy As <strong>to</strong>ol when you want <strong>to</strong> continue working on the original<br />
file, but make a copy as a design state backup or for use at a later time.<br />
The Save Copy As <strong>to</strong>ol is also used <strong>to</strong> save an Inven<strong>to</strong>r file as a non-native or alternative<br />
format, such as IGES, JPEG, or STEP. These file formats may be necessary when<br />
Figure 1-17.<br />
The Save As dialog box appears if the current file has not been saved.<br />
The list of file types is restricted<br />
<strong>to</strong> match the current type<br />
Type the new file name in this box<br />
14 Inven<strong>to</strong>r and Its Applications 2009
you are collaborating with others or when you need <strong>to</strong> create an image from what is<br />
shown on-screen. Savable file formats are available from the Save as type drop-down<br />
list in the Save Copy As dialog box.<br />
Closing a File<br />
One of the quickest methods of closing a file, without ending the Inven<strong>to</strong>r session,<br />
is <strong>to</strong> pick the Close but<strong>to</strong>n on the right side of the file window title bar. Other options<br />
include double-clicking on the file icon on the file window title bar, and selecting the<br />
Close option from the File pull-down menu.<br />
When Au<strong>to</strong>CAD is<br />
configured <strong>to</strong> display<br />
a screen menu, the<br />
commands appear in<br />
a separate screen.<br />
NOTE<br />
Many design projects require that multiple fi les be open. To save<br />
changes <strong>to</strong> all open fi les, use the Save All <strong>to</strong>ol. To close all open<br />
fi les, use the Close All <strong>to</strong>ol. Both <strong>to</strong>ols are available from the File<br />
pull-down menu.<br />
Exiting Inven<strong>to</strong>r<br />
To exit Inven<strong>to</strong>r, pick the Close but<strong>to</strong>n located in the upper-right corner of the<br />
Inven<strong>to</strong>r window, double-click the Inven<strong>to</strong>r window title bar, select Exit from the File<br />
pull-down menu, or pick the Inven<strong>to</strong>r icon located in the upper-left corner of the Inven<strong>to</strong>r<br />
window and select Close. When you close a file or exit Inven<strong>to</strong>r, several alert boxes may<br />
appear, depending on the situation. For example, if you have not saved your work, you<br />
are asked if you want <strong>to</strong> save the file before closing.<br />
Web site<br />
Exercise 1-5<br />
Access the Student Web site (www.g-wlearning.com/CAD/Inven<strong>to</strong>rApps2009),<br />
select <strong>Chapter</strong> 1 from the <strong>Chapter</strong> Materials drop-down list, and select<br />
and complete Exercise 1-5.<br />
The Inven<strong>to</strong>r Interface<br />
Interface, or user interface, items include devices such as the keyboard and mouse<br />
<strong>to</strong> input data, and the moni<strong>to</strong>r <strong>to</strong> receive information. The Inven<strong>to</strong>r graphical user<br />
interface (GUI), shown in Figure 1-18, includes both standard Microsoft Windows<br />
functions and specialized Inven<strong>to</strong>r items. The specialized interface <strong>to</strong>ols and options<br />
are used for preparing models and drawings and are described when appropriate<br />
throughout this textbook.<br />
The Inven<strong>to</strong>r interface constantly changes as you develop a part, assembly, presentation,<br />
or drawing. Only the <strong>to</strong>ols and options that apply <strong>to</strong> the current work environment<br />
and design or drafting task are available. For example, the part file interface is<br />
displayed in Part mode and contains the <strong>to</strong>ols and options required <strong>to</strong> create parts.<br />
Interface items such as the panel bar and pull-down menu options au<strong>to</strong>matically change<br />
as you progress through each design phase and work with different file types.<br />
interface (user<br />
interface): The<br />
<strong>to</strong>ols and techniques<br />
used <strong>to</strong> provide<br />
information <strong>to</strong> and<br />
receive information<br />
from a computer<br />
application.<br />
graphical user<br />
interface (GUI):<br />
On-screen<br />
interface items.<br />
<strong>Chapter</strong> 1 <strong>Introduction</strong> <strong>to</strong> Au<strong>to</strong>desk Inven<strong>to</strong>r 15<br />
floating: Describes<br />
interface items,<br />
displayed within a<br />
border, that can<br />
be freely resized<br />
or moved.<br />
docked: Describes<br />
interface items<br />
that are locked<br />
in<strong>to</strong> position on<br />
an edge of the<br />
Inven<strong>to</strong>r window<br />
(<strong>to</strong>p, bot<strong>to</strong>m, left,<br />
or right).<br />
Figure 1-18.<br />
Elements of the Inven<strong>to</strong>r interface.<br />
Panel bar Shortcut and hot keys Toolbar but<strong>to</strong>ns Dialog box<br />
Browser bar Shortcut menu Communication center but<strong>to</strong>n<br />
When Au<strong>to</strong>CAD is<br />
configured <strong>to</strong> display<br />
a screen menu, the<br />
commands appear in<br />
a separate screen.<br />
Interface Terminology<br />
NOTE<br />
This textbook focuses on the default Inven<strong>to</strong>r interface. Only<br />
default interface items are shown throughout this textbook, except<br />
in specifi c situations that require additional information.<br />
Figure 1-19 provides a list and description of interface terms used throughout<br />
this textbook. Become familiar with these terms and reference Figure 1-19 as you<br />
learn Inven<strong>to</strong>r.<br />
Controlling Windows and Interface Items<br />
The Inven<strong>to</strong>r program and graphics windows are similar <strong>to</strong> other windows within<br />
the Windows operating system. To minimize, maximize, or close the Inven<strong>to</strong>r window or<br />
individual graphics windows, pick the small control icon in the upper-left corner, which<br />
displays a standard window control menu, or pick the appropriate icon in the upperright<br />
corner. Window sizing operations are the same as those for any other window.<br />
Several Inven<strong>to</strong>r interface items, including the Inven<strong>to</strong>r and graphics windows,<br />
can float or be docked. Different options and functions are available, depending on<br />
the particular interface item and whether the item is floating or docked. Some items,<br />
16 Inven<strong>to</strong>r and Its Applications 2009
Figure 1-19.<br />
Common interface terms and descriptions.<br />
Term Description<br />
Alias A keyboard key or key combination used <strong>to</strong> define and access a<br />
command or <strong>to</strong>ol.<br />
But<strong>to</strong>n A but<strong>to</strong>n on the screen or mouse.<br />
Command An instruction issued <strong>to</strong> the computer.<br />
Cursor The primary means of pointing <strong>to</strong> and selecting objects within the<br />
Inven<strong>to</strong>r window.<br />
Default A value maintained by the computer until you change it.<br />
[Enter] (↵) The [Enter] key on the keyboard.<br />
Function key One of the keys labeled [F1]–[F12] along the <strong>to</strong>p of the keyboard.<br />
Glyph A graphic representation, typically initiating an action, symbol, or<br />
function. For example, a perpendicular glyph represents a<br />
perpendicular geometric situation.<br />
Graphics window The largest area in the Inven<strong>to</strong>r window, where modeling and<br />
drawing occur.<br />
Hover Use the mouse <strong>to</strong> move the cursor over an item and hold the cursor<br />
at the location <strong>to</strong> display additional information or options.<br />
Icon An image identifying or depicting the function of an interface item.<br />
Key A key on the keyboard.<br />
Option An aspect of a command or <strong>to</strong>ol that can be selected.<br />
Pick or click Use the left mouse but<strong>to</strong>n <strong>to</strong> select an item on the screen.<br />
Tool A command used <strong>to</strong> perform a specific task. For example, the Line<br />
<strong>to</strong>ol is used <strong>to</strong> draw lines.<br />
such as the graphics window, have a title bar at the <strong>to</strong>p or side. The close and minimize<br />
or maximize options are often available, and most items can be resized. Some floating<br />
items, such as <strong>to</strong>olbars and panels, include grab bars.<br />
When Au<strong>to</strong>CAD is<br />
configured <strong>to</strong> display<br />
a screen menu, the<br />
commands appear in<br />
a separate screen.<br />
NOTE<br />
The graphics windows can be adjusted and positioned only within<br />
the Inven<strong>to</strong>r window.<br />
Using Shortcut Menus<br />
Shortcut menus, also known as pop-up, cursor, and right-click menus, are used extensively<br />
in Inven<strong>to</strong>r. See Figure 1-20. The option at the <strong>to</strong>p of a shortcut menu allows you<br />
<strong>to</strong> quickly access the previously selected <strong>to</strong>ol or option. Some menu options have a<br />
small arrow <strong>to</strong> the right of the option name. When you pick one of these options, a<br />
cascading menu appears. See Figure 1-21.<br />
grab bars: Two thin<br />
bars at the <strong>to</strong>p or left<br />
edge of a docked or<br />
floating item; used<br />
<strong>to</strong> move the item.<br />
shortcut menus:<br />
Menus that allow<br />
access <strong>to</strong> <strong>to</strong>ols and<br />
options by rightclicking<br />
anywhere in<br />
the graphics window<br />
or on an object or<br />
selection.<br />
cascading menu:<br />
A secondary menu<br />
that contains options<br />
related <strong>to</strong> the chosen<br />
menu item.<br />
<strong>Chapter</strong> 1 <strong>Introduction</strong> <strong>to</strong> Au<strong>to</strong>desk Inven<strong>to</strong>r 17<br />
context-sensitive<br />
shortcut menu:<br />
Menu in which only<br />
items associated<br />
with the current<br />
work environment<br />
and application are<br />
displayed.<br />
pull-down menus:<br />
A text-based menu<br />
input system in<br />
which options<br />
appear when you<br />
pick the menu name.<br />
Figure 1-20.<br />
The shortcut menu that appears depends on the item under the cursor when you right-click.<br />
Cursor is on the Cursor is on a sketch<br />
graphics window<br />
in the browser<br />
Figure 1-21.<br />
Cascading menus<br />
are available from<br />
shortcut menus and<br />
from pull-down<br />
menu options that<br />
have a flyout arrow.<br />
You can access the <strong>to</strong>ols and options available from shortcut menus using many of<br />
the other interface techniques. However, because shortcut menus are context sensitive<br />
and positioned near the cursor, you can improve the speed with which you perform<br />
tasks and access options that may otherwise be difficult <strong>to</strong> find. A shortcut menu often<br />
provides the quickest method for accessing a <strong>to</strong>ol or option. Therefore, shortcut menu<br />
access is presented first in this textbook for <strong>to</strong>ols and options that are best accessed<br />
from a shortcut menu.<br />
Using Pull-Down Menus<br />
Cursor is on a feature<br />
in the browser<br />
Arrow indicates<br />
that cascading menu<br />
is available<br />
Cascading menu<br />
The pull-down menu bar, shown in Figure 1-22, houses the pull-down menus that<br />
are available for the particular work environment. Pick a pull-down menu <strong>to</strong> reveal the<br />
options for that menu. Then move the cursor down and up <strong>to</strong> highlight and select the<br />
desired menu option. Like shortcut menus, some pull-down menu options display an<br />
arrow <strong>to</strong> the right of the menu selection, indicating that a cascading menu of related<br />
options is available. To close the currently selected menu without opening another<br />
menu, press the [Esc] key, pick outside of the menu list, or pick on the menu bar. If you<br />
18 Inven<strong>to</strong>r and Its Applications 2009
Figure 1-22.<br />
The View pulldown<br />
menu is an<br />
example of the many<br />
pull-down menus<br />
available in Inven<strong>to</strong>r.<br />
want <strong>to</strong> change <strong>to</strong> a different menu, move the cursor over the specified menu name or<br />
pick the menu name.<br />
A <strong>to</strong>ol or option accessible from a pull-down menu is presented as a graphic in<br />
the margin of this textbook, like the example shown in the margin. The graphic in this<br />
example represents the process of picking the File pull-down menu, then hovering<br />
over and selecting the Save option <strong>to</strong> activate the Save <strong>to</strong>ol.<br />
When Au<strong>to</strong>CAD is<br />
configured <strong>to</strong> display<br />
a screen menu, the<br />
commands appear in<br />
a separate screen.<br />
Pick the menu name<br />
<strong>to</strong> display options<br />
NOTE<br />
You can also access menus and menu options using menu accelera<strong>to</strong>r<br />
keys. One method involves holding down the [Alt] key while<br />
pressing the key that corresponds <strong>to</strong> the underlined character in<br />
the menu. Another option involves the use of control keys, which<br />
are shown <strong>to</strong> the right of the option name and allow you <strong>to</strong> access<br />
certain <strong>to</strong>ols by pressing and holding the [Ctrl] key while pressing a<br />
second key. Once a menu appears, you can also use the up, down,<br />
right, and left arrow keys <strong>to</strong> move <strong>to</strong> different items in the menus.<br />
Press [Enter] <strong>to</strong> select a highlighted item. Despite the name, using<br />
accelera<strong>to</strong>r keys is usually a more diffi cult means of selecting <strong>to</strong>ols<br />
from the menu system.<br />
The Inven<strong>to</strong>r Standard Toolbar<br />
Toolbars display <strong>to</strong>ol but<strong>to</strong>ns arranged in<strong>to</strong> groups of similar <strong>to</strong>ols that are separated<br />
by thin lines. Many <strong>to</strong>olbars are available that apply <strong>to</strong> specific tasks, but by<br />
default, only the Inven<strong>to</strong>r Standard <strong>to</strong>olbar is shown. See Figure 1-23. Toolbars have<br />
features similar <strong>to</strong> pull-down menus.<br />
Some <strong>to</strong>olbar but<strong>to</strong>ns have an arrow <strong>to</strong> the right of the but<strong>to</strong>n, known as a flyout.<br />
See Figure 1-24. These but<strong>to</strong>ns work the same as other <strong>to</strong>olbar but<strong>to</strong>ns. To use the<br />
flyout, select the arrow next <strong>to</strong> the but<strong>to</strong>n. This opens the other options associated with<br />
the but<strong>to</strong>n. In most cases, when you pick a flyout option, the selected but<strong>to</strong>n becomes<br />
active and is displayed on the <strong>to</strong>olbar on the <strong>to</strong>p level of the flyout, hiding the rest of<br />
the but<strong>to</strong>ns.<br />
Menu Browser<br />
File<br />
> Save<br />
<strong>to</strong>ol but<strong>to</strong>ns:<br />
But<strong>to</strong>ns in a <strong>to</strong>olbar,<br />
each with a specific<br />
icon, that activate a<br />
<strong>to</strong>ol or option.<br />
flyout: A but<strong>to</strong>n<br />
that presents<br />
additional, related<br />
<strong>to</strong>ol but<strong>to</strong>ns,<br />
much like a<br />
cascading menu.<br />
<strong>Chapter</strong> 1 <strong>Introduction</strong> <strong>to</strong> Au<strong>to</strong>desk Inven<strong>to</strong>r 19<br />
Toolbar<br />
Inven<strong>to</strong>r<br />
Standard<br />
> Save<br />
Figure 1-23.<br />
These detail images of the Inven<strong>to</strong>r Standard <strong>to</strong>olbar show the types of features that may be<br />
found on all <strong>to</strong>olbars.<br />
Figure 1-24.<br />
Pick the flyout arrow<br />
next <strong>to</strong> some but<strong>to</strong>ns<br />
<strong>to</strong> see additional <strong>to</strong>ol<br />
but<strong>to</strong>ns.<br />
This textbook focuses on the default interface display, which includes only the<br />
Inven<strong>to</strong>r Standard <strong>to</strong>olbar. A <strong>to</strong>ol or option accessible from the Inven<strong>to</strong>r Standard <strong>to</strong>olbar<br />
is presented as a graphic in the margin of this textbook, like the example shown in the<br />
margin. The graphic in this example represents the process of picking the Save but<strong>to</strong>n<br />
<strong>to</strong> activate the Save <strong>to</strong>ol.<br />
Web site<br />
Material color list box<br />
Supplemental Material<br />
Pick <strong>to</strong> close the <strong>to</strong>olbar<br />
New File but<strong>to</strong>n Separa<strong>to</strong>r bar<br />
Flyout for the<br />
New but<strong>to</strong>n<br />
Additional Toolbars<br />
Additional Inven<strong>to</strong>r <strong>to</strong>olbars are available and can be displayed in the<br />
Inven<strong>to</strong>r window. These <strong>to</strong>olbars are usually application- or task-specific. For<br />
more information on displaying and using <strong>to</strong>olbars, go <strong>to</strong> the Student Web<br />
site (www.g-wlearning.com/CAD/Inven<strong>to</strong>rApps2009) and select <strong>Chapter</strong> 1 in the<br />
<strong>Chapter</strong> Materials drop-down list. In the Supplemental Material section, select<br />
Additional Toolbars.<br />
20 Inven<strong>to</strong>r and Its Applications 2009
Using the Panel Bar<br />
The panel bar, shown in Figure 1-25, provides a list of design <strong>to</strong>ols available for<br />
creating sketches, models, and drawings, depending on the specific work environment.<br />
Only the <strong>to</strong>ols and options used for creating parts are available in the panel bar<br />
while you are working on a part. The specific <strong>to</strong>ols displayed in the panel bar change<br />
as you move from one design stage <strong>to</strong> another. For example, only sketch <strong>to</strong>ols are available<br />
while you are working on a part in sketch mode. When you finish the sketch, the<br />
Part Features panel bar appears. In addition, only <strong>to</strong>ols that can be used in the current<br />
design stage are available for selection; all others are shaded.<br />
Click on the current panel bar title, such as 2D Sketch Panel, or right-click on<br />
or beside any of the panel bar <strong>to</strong>ols <strong>to</strong> display a shortcut menu of options. Select a<br />
panel bar mode from the shortcut menu <strong>to</strong> change manually from one list of options<br />
<strong>to</strong> another. By default, the panel bar displays each <strong>to</strong>ol with both an icon and the name<br />
of the <strong>to</strong>ol, as shown in Figure 1-25A. This helps you <strong>to</strong> recognize <strong>to</strong>ols when you<br />
first begin <strong>to</strong> work with Inven<strong>to</strong>r. Deselect the Display Text with Icons option from the<br />
shortcut menu <strong>to</strong> display only <strong>to</strong>ol but<strong>to</strong>ns. This is helpful if you want a smaller panel<br />
bar display, allowing for a larger graphics window. See Figure 1-25B.<br />
When Au<strong>to</strong>CAD is<br />
configured <strong>to</strong> display<br />
a screen menu, the<br />
commands appear in<br />
a separate screen.<br />
NOTE<br />
The panel bar can be moved and resized, and it can be docked or<br />
fl oat in the graphics window.<br />
A <strong>to</strong>ol or option accessible from the panel bar is presented as a graphic in the<br />
margin of this textbook, like the example shown in the margin. The graphic in this<br />
example represents the process of picking the Extrude but<strong>to</strong>n from the Part Features<br />
panel bar <strong>to</strong> activate the Extrude <strong>to</strong>ol.<br />
Keyboard Shortcuts<br />
An alternative method <strong>to</strong> access some Inven<strong>to</strong>r <strong>to</strong>ols and options is <strong>to</strong> type a<br />
keyboard character or combination of characters. For example, press the [Ctrl] and<br />
[S] keys, a combination identified in this textbook as [Ctrl]+[S], <strong>to</strong> activate the Save <strong>to</strong>ol.<br />
Figure 1-25.<br />
A—The panel bar<br />
displayed with<br />
names <strong>to</strong> aid in<br />
identifying <strong>to</strong>ols.<br />
B—The panel bar<br />
with the Display<br />
Text with Icons<br />
option deselected<br />
<strong>to</strong> conserve screen<br />
space.<br />
A B<br />
panel bar: A<br />
panel-like window<br />
that appears by<br />
default on the left<br />
side of the Inven<strong>to</strong>r<br />
graphics window.<br />
Panel bars are the<br />
primary location<br />
for accessing<br />
design <strong>to</strong>ols.<br />
Panel<br />
Part Features<br />
<strong>Chapter</strong> 1 <strong>Introduction</strong> <strong>to</strong> Au<strong>to</strong>desk Inven<strong>to</strong>r 21<br />
Extrude<br />
Type<br />
E<br />
browser bar<br />
(browser): A panel<br />
that displays all the<br />
items in the current<br />
model or drawing.<br />
However, accessing <strong>to</strong>ols from a shortcut or pull-down menu, <strong>to</strong>olbar, or the panel bar<br />
can offer advantages over typing at the keyboard. One benefit is that you do not need<br />
<strong>to</strong> memorize <strong>to</strong>ol aliases and combinations. As an Inven<strong>to</strong>r user, you decide which <strong>to</strong>ol<br />
selection technique works best for you. A combination of <strong>to</strong>ol selection methods often<br />
proves most effective.<br />
When Au<strong>to</strong>CAD is<br />
configured <strong>to</strong> display<br />
a screen menu, the<br />
commands appear in<br />
a separate screen.<br />
NOTE<br />
Even though you may choose not <strong>to</strong> access <strong>to</strong>ols by typing keyboard<br />
shortcuts, you must still enter certain values at the keyboard. For<br />
example, you may have <strong>to</strong> enter the diameter of a circle using<br />
the keyboard.<br />
A <strong>to</strong>ol or option that is accessible by typing is presented as a graphic in the<br />
margin of this textbook, like the example shown in the margin. The graphic in this<br />
example represents the process of pressing the E key on the keyboard <strong>to</strong> activate the<br />
Extrude <strong>to</strong>ol.<br />
Web site<br />
Pressing the [Esc] key is a fast and easy way <strong>to</strong> exit a <strong>to</strong>ol. The [Delete]<br />
key is a quick way <strong>to</strong> remove an item, and may be the only way <strong>to</strong><br />
delete certain selections or settings from a dialog box. Press the [Enter]<br />
key or space bar <strong>to</strong> access the previously selected <strong>to</strong>ol.<br />
Supplemental Material<br />
Character Keys and Key Combinations<br />
Many individual character key and key combination shortcuts are available<br />
for accessing Inven<strong>to</strong>r <strong>to</strong>ols and options. For a list of keyboard shortcuts,<br />
go <strong>to</strong> the Student Web site (www.g-wlearning.com/CAD/Inven<strong>to</strong>rApps2009) and<br />
select <strong>Chapter</strong> 1 in the <strong>Chapter</strong> Materials drop-down list. In the Supplemental<br />
Material section, select Character Keys and Key Combinations.<br />
Using the Browser Bar<br />
PROFESSIONAL TIP<br />
The browser bar, or browser, provides a his<strong>to</strong>rical reference of model design and<br />
drafting. See Figure 1-26. The number and type of items available in the browser<br />
varies depending on the current model type, work environment, and design stage.<br />
For example, a browser shown when a part file is open typically displays the name of<br />
the file and an icon on <strong>to</strong>p, followed by the Origin folder and all of the origin options,<br />
followed by individual sketches and features. End of Part displays last, unless it has<br />
been moved. An item in the browser is active when all other items are shown with a<br />
gray background.<br />
When Au<strong>to</strong>CAD is<br />
configured <strong>to</strong> display<br />
a screen menu, the<br />
commands appear in<br />
a separate screen.<br />
NOTE<br />
Items in the browser are listed in the order they were created or<br />
inserted, although it is possible in some cases <strong>to</strong> drag and drop<br />
browser items up or down in the list.<br />
22 Inven<strong>to</strong>r and Its Applications 2009
Figure 1-26.<br />
The browser bar<br />
contains information<br />
regarding the<br />
objects in a model<br />
or drawing. The<br />
browser in this<br />
figure is associated<br />
with a part file<br />
that contains two<br />
sketched features<br />
and a placed feature.<br />
Many of the items displayed in the browser are arranged in a tree structure, which<br />
contains parent nodes and child nodes. A sketched feature is an example of a parent<br />
node. The sketch from which the feature was created is the associated child node.<br />
The Origin folder is another example of a parent node. To display child nodes, pick<br />
the Expand but<strong>to</strong>n (+ symbol) <strong>to</strong> the left of the object name or right-click on the object<br />
name and select Expand All Children. To hide child nodes, pick the Collapse but<strong>to</strong>n<br />
(– symbol) <strong>to</strong> the left of the object name or right-click on the object name and select<br />
Collapse All Children.<br />
When Au<strong>to</strong>CAD is<br />
configured <strong>to</strong> display<br />
a screen menu, the<br />
commands appear in<br />
a separate screen.<br />
Using the Status Bar<br />
Pick <strong>to</strong> collapse<br />
the branch<br />
Pick <strong>to</strong> expand<br />
the branch<br />
The Origin folder contains<br />
planes, axes, and a center<br />
point <strong>to</strong> position and<br />
orient geometry<br />
Parent node<br />
Child node<br />
NOTE<br />
The browser can be moved and resized, and it can be docked or<br />
fl oat in the graphics window.<br />
The status bar is located along the bot<strong>to</strong>m of the Inven<strong>to</strong>r window. See Figure 1-27.<br />
The status bar is divided in<strong>to</strong> panes that display and control a variety of drawing aids<br />
and <strong>to</strong>ols. The left side of the status bar provides information about a <strong>to</strong>ol option by<br />
displaying a help string. For example, if you highlight New... in the File pull-down menu,<br />
the help string in the status bar is Create a new document. When you access the Line <strong>to</strong>ol<br />
<strong>to</strong> sketch a line, the help string is Select start of line, drag off endpoint for tangent arc.<br />
Figure 1-27.<br />
The status bar displayed when a part file is open.<br />
Help string<br />
Sketch resources<br />
Number of<br />
occurrences<br />
Number of<br />
open documents<br />
Displays<br />
memory<br />
usage<br />
Pick <strong>to</strong> access the<br />
Communication<br />
Center<br />
parent node: An<br />
item in the tree<br />
structure, similar<br />
<strong>to</strong> a folder, that is<br />
associated with<br />
subordinate<br />
child nodes.<br />
child node:<br />
Subordinate nodes<br />
that create, are<br />
associated with, or<br />
are consumed by a<br />
parent node item.<br />
help string: A short<br />
text description of<br />
what happens if<br />
you select a <strong>to</strong>ol<br />
or option over<br />
which the cursor<br />
is hovering; or, if a<br />
<strong>to</strong>ol is selected, a<br />
prompt indicating the<br />
appropriate action.<br />
<strong>Chapter</strong> 1 <strong>Introduction</strong> <strong>to</strong> Au<strong>to</strong>desk Inven<strong>to</strong>r 23<br />
dialog box: A<br />
window-like part of<br />
the user interface<br />
that contains various<br />
kinds of information<br />
and settings.<br />
The items on the right side of the status bar include a coordinate display field<br />
or sketch constraint information, number of occurrences in the document, number<br />
of open documents, memory usage, and a link <strong>to</strong> the Communication Center. Status<br />
bar items appropriate <strong>to</strong> basic Inven<strong>to</strong>r functions are described when applicable<br />
throughout this textbook.<br />
Using Dialog Boxes<br />
Pick any menu selection or but<strong>to</strong>n displaying an ellipsis (…) <strong>to</strong> activate a dialog<br />
box. See Figure 1-28. The cursor is used <strong>to</strong> set variables and select items in a dialog<br />
box. In addition, many dialog boxes include images, previews, or other methods <strong>to</strong><br />
help you select appropriate options. When you pick a but<strong>to</strong>n in a dialog box that is<br />
followed by an ellipsis, another dialog box appears. You must make a selection from<br />
the second dialog box before you can return <strong>to</strong> the original dialog box. A but<strong>to</strong>n with<br />
an arrow icon requires you <strong>to</strong> make a selection in the drawing area.<br />
Figure 1-28.<br />
Pick a menu option or <strong>to</strong>ol but<strong>to</strong>n that includes an ellipsis (…) <strong>to</strong> display a dialog box.<br />
Tabs<br />
Preview box<br />
Check box<br />
Radio but<strong>to</strong>n<br />
Edit box<br />
Command but<strong>to</strong>n<br />
Ellipsis indicates a dialog<br />
box is available<br />
Drop-down list<br />
This dialog box<br />
appears when<br />
Print... is picked<br />
24 Inven<strong>to</strong>r and Its Applications 2009
Web site<br />
Supplemental Material<br />
Features of Dialog Boxes<br />
Dialog boxes contain many of the same features found in other interface<br />
items, including icons, text, but<strong>to</strong>ns, and flyouts. For more information<br />
about these features, go <strong>to</strong> the Student Web site (www.g-wlearning.<br />
com/CAD/Inven<strong>to</strong>rApps2009) and select <strong>Chapter</strong> 1 in the <strong>Chapter</strong> Materials<br />
drop-down list. In the Supplemental Material section, select Features of<br />
Dialog Boxes.<br />
Identifying Tooltips<br />
Many but<strong>to</strong>ns found in <strong>to</strong>olbars, the panel bar, and dialog boxes provide <strong>to</strong>oltips<br />
<strong>to</strong> help you understand and recognize the but<strong>to</strong>n. Figure 1-29 shows the <strong>to</strong>oltip for the<br />
Open but<strong>to</strong>n on the Inven<strong>to</strong>r Standard <strong>to</strong>olbar. The <strong>to</strong>oltip tells you that the but<strong>to</strong>n you<br />
see activates the Open <strong>to</strong>ol.<br />
Web site<br />
Web site<br />
Figure 1-29.<br />
Place the cursor over<br />
a but<strong>to</strong>n <strong>to</strong> reveal<br />
the but<strong>to</strong>n name as a<br />
<strong>to</strong>oltip.<br />
Exercise 1-6<br />
Access the Student Web site (www.g-wlearning.com/CAD/Inven<strong>to</strong>rApps2009),<br />
select <strong>Chapter</strong> 1 from the <strong>Chapter</strong> Materials drop-down list, and select<br />
and complete Exercise 1-6.<br />
Supplemental Material<br />
Using the Cus<strong>to</strong>mize Dialog Box<br />
The Cus<strong>to</strong>mize dialog box is a basic <strong>to</strong>ol for cus<strong>to</strong>mizing the Inven<strong>to</strong>r<br />
interface. It can be used <strong>to</strong> define settings for the work environment, <strong>to</strong>olbars,<br />
and <strong>to</strong>ols. For more information on using the Cus<strong>to</strong>mize dialog box,<br />
go <strong>to</strong> the Student Web site (www.g-wlearning.com/CAD/Inven<strong>to</strong>rApps2009)<br />
and select <strong>Chapter</strong> 1 in the <strong>Chapter</strong> Materials drop-down list. In the<br />
Supplemental Material section, select Using the Cus<strong>to</strong>mize Dialog Box.<br />
Tooltip for the<br />
Open but<strong>to</strong>n<br />
<strong>to</strong>oltip: A small text<br />
box that displays<br />
when you hover<br />
over a but<strong>to</strong>n,<br />
giving information<br />
about the function<br />
of the but<strong>to</strong>n.<br />
<strong>Chapter</strong> 1 <strong>Introduction</strong> <strong>to</strong> Au<strong>to</strong>desk Inven<strong>to</strong>r 25<br />
multiple document<br />
interface: An<br />
interface that<br />
allows you <strong>to</strong> have<br />
several documents<br />
or document views<br />
open at the same<br />
time. Also called<br />
multiple design<br />
interface.<br />
Managing Multiple Documents<br />
You can use individual file Window Control pull-down menus and the Windows<br />
pull-down menu <strong>to</strong> manage the multiple document interface. The Window Control<br />
pull-down menu for an Inven<strong>to</strong>r file is accessed by picking the Inven<strong>to</strong>r file icon.<br />
If the file window is maximized, the Window Control pull-down menu is located<br />
<strong>to</strong> the left of the pull-down menu bar. If the file window is res<strong>to</strong>red or minimized,<br />
the Window Control pull-down menu is located in the graphics window <strong>to</strong> the left<br />
of the file menu bar. The menu options available when you select a file icon function<br />
much like program window control menu options. However, when you res<strong>to</strong>re,<br />
move, size, minimize, maximize, or close a file window, the operation affects only<br />
the file window, not the entire program. The Next option allows you <strong>to</strong> <strong>to</strong>ggle among<br />
multiple open files.<br />
The Window pull-down menu, shown in Figure 1-30, contains options for controlling<br />
the multiple document interface. Pick the New Window option <strong>to</strong> create a new<br />
window for the active file. Additional windows enable you <strong>to</strong> have several design<br />
views open and accessible at once. The Cascade option arranges all windows in a<br />
cascading fashion. See Figure 1-31A. The Arrange All option arranges all windows in<br />
a way that shows each window in its entirety. See Figure 1-31B.<br />
The names of all currently open documents are displayed at the bot<strong>to</strong>m of the<br />
Window pull-down menu. Refer again <strong>to</strong> Figure 1-30. The file name with a check mark<br />
next <strong>to</strong> it is currently the active window. To make a different window active, pick its<br />
file name.<br />
Web site<br />
Figure 1-30.<br />
Use the Window<br />
pull-down menu<br />
<strong>to</strong> create a new<br />
window, position the<br />
current windows,<br />
and view the list of<br />
open files. A check<br />
appears next <strong>to</strong> the<br />
active file.<br />
Exercise 1-7<br />
Access the Student Web site (www.g-wlearning.com/CAD/Inven<strong>to</strong>rApps2009),<br />
select <strong>Chapter</strong> 1 from the <strong>Chapter</strong> Materials drop-down list, and select<br />
and complete Exercise 1-7.<br />
Currently<br />
active<br />
document<br />
This window was created when<br />
the New Window option was selected<br />
while Frame.ipt was active<br />
Currently open<br />
documents<br />
26 Inven<strong>to</strong>r and Its Applications 2009
Figure 1-31.<br />
Positioning windows in Inven<strong>to</strong>r using the Cascade option (A), and the Arrange All option (B).<br />
A<br />
B<br />
Controlling Application Options<br />
Application options are located in the Application Options dialog box. See<br />
Figure 1-32. To display this dialog box, select Application Options… from the Tools<br />
pull-down menu. Application options are general program settings and preferences<br />
and are not specific <strong>to</strong> any particular file. However, many application options do<br />
help configure specific work environments, as well as design and drafting tasks.<br />
For example, options in the Sketch tab of the Application Options dialog box control<br />
functions specific <strong>to</strong> preparing sketches.<br />
Menu Browser<br />
Tools<br />
> Application<br />
Options…<br />
<strong>Chapter</strong> 1 <strong>Introduction</strong> <strong>to</strong> Au<strong>to</strong>desk Inven<strong>to</strong>r 27<br />
Figure 1-32.<br />
The General tab of the Application Options dialog box. This dialog box controls many general,<br />
file, and environment-specific program settings.<br />
Application options control an extensive number of Inven<strong>to</strong>r functions. For<br />
example, the User name text box on the General tab, shown in Figure 1-32, is used<br />
<strong>to</strong> redefine your username, which is used in multiple applications <strong>to</strong> indicate who<br />
has worked on a file. Another example in the General tab is the Start-up action check<br />
box. When selected, this check box allows you <strong>to</strong> choose <strong>to</strong> display the Open dialog<br />
box, display the New File dialog box, or immediately begin a new file using a selected<br />
template when you launch Inven<strong>to</strong>r.<br />
As you learn Inven<strong>to</strong>r, you will become familiar with many application options,<br />
and you may need <strong>to</strong> adjust the settings <strong>to</strong> fit your needs. You should explore the<br />
Application Options dialog box and learn <strong>to</strong> recognize the purpose and usefulness of<br />
each option. This textbook focuses on the default application options. Specific options<br />
are covered only if they require adjustment in order <strong>to</strong> improve productivity, accomplish<br />
certain tasks, accommodate design and drafting standards, or require explanation<br />
for basic Inven<strong>to</strong>r applications. These options are described when applicable<br />
throughout this textbook.<br />
Web site<br />
Exercise 1-8<br />
Pick a tab <strong>to</strong><br />
access specific<br />
application<br />
options<br />
Pick <strong>to</strong> apply<br />
options before<br />
closing<br />
Access the Student Web site (www.g-wlearning.com/CAD/Inven<strong>to</strong>rApps2009),<br />
select <strong>Chapter</strong> 1 from the <strong>Chapter</strong> Materials drop-down list, and select<br />
and complete Exercise 1-8.<br />
28 Inven<strong>to</strong>r and Its Applications 2009
Figure 1-33.<br />
The Au<strong>to</strong>desk Inven<strong>to</strong>r Help dialog box contains several <strong>to</strong>ols <strong>to</strong> help you understand various<br />
areas of Inven<strong>to</strong>r.<br />
Type keywords <strong>to</strong><br />
display matching<br />
help <strong>to</strong>pics<br />
Access help<br />
information<br />
organized in<br />
a book-like<br />
format with<br />
expandable<br />
“chapters”<br />
Search for<br />
specific<br />
words<br />
and phrases<br />
Getting Help<br />
Inven<strong>to</strong>r includes an extensive help file system that provides learning resources<br />
and can be used <strong>to</strong> receive answers <strong>to</strong> questions. You can select from a variety of help<br />
<strong>to</strong>ols in the Help pull-down menu, including links that open the Au<strong>to</strong>desk Inven<strong>to</strong>r<br />
Help dialog box, Inven<strong>to</strong>r and Vault tu<strong>to</strong>rials, the New Features Workshop, and other<br />
learning <strong>to</strong>ols.<br />
The Help but<strong>to</strong>n, next <strong>to</strong> the Help pull-down menu, opens the Au<strong>to</strong>desk Inven<strong>to</strong>r<br />
Help dialog box. See Figure 1-33. The help file system is similar <strong>to</strong> other Windowsbased<br />
help files. It allows you <strong>to</strong> further explore areas of Inven<strong>to</strong>r and receive answers<br />
<strong>to</strong> any questions you may encounter. You can also access the Au<strong>to</strong>desk Inven<strong>to</strong>r Help<br />
dialog box by selecting Help Topics from the Help pull-down menu, pressing the [F1]<br />
key; or picking the Help but<strong>to</strong>n on numerous dialog boxes, the panel bar, or the browser.<br />
Picking a Help but<strong>to</strong>n in a dialog box opens the Au<strong>to</strong>desk Inven<strong>to</strong>r Help dialog box<br />
with information specific <strong>to</strong> the content of the dialog box.<br />
Define and<br />
display help<br />
<strong>to</strong>pics as<br />
favorites<br />
<strong>Chapter</strong> 1 <strong>Introduction</strong> <strong>to</strong> Au<strong>to</strong>desk Inven<strong>to</strong>r 29<br />
Web site<br />
<strong>Chapter</strong> Test<br />
Answer the following questions. Write your answers on a separate sheet of paper or go <strong>to</strong> the<br />
Student Web site (www.g-wlearning.com/CAD/Inven<strong>to</strong>rApps2009), select the correct chapter<br />
from the <strong>Chapter</strong> Materials drop-down list, and complete the electronic chapter test.<br />
1. Define parts in the context of the Inven<strong>to</strong>r software.<br />
2. Describe the basic use of part files and specify the part file extension.<br />
3. What is an assembly?<br />
4. What name is given <strong>to</strong> an assembly in which parts are fixed <strong>to</strong>gether with welds?<br />
5. What are components?<br />
6. Identify the basic use of assembly files and specify the assembly file extension.<br />
7. Explain the relationship between assemblies and subassemblies.<br />
8. What name is given <strong>to</strong> the connection graphics between components that show<br />
how each component fits in<strong>to</strong> an assembly?<br />
9. What are tweaks?<br />
10. Describe the basic use of presentation files and specify the presentation file<br />
extension.<br />
11. What is the purpose of a drawing in Inven<strong>to</strong>r?<br />
12. Describe the basic use of drawing files and provide two possible file extensions<br />
for these files.<br />
13. What is parametric solid modeling?<br />
14. In the context of solid modeling, what is a parameter?<br />
15. Why is the parametric concept referred <strong>to</strong> as intelligence?<br />
16. What is the purpose of a database in Inven<strong>to</strong>r?<br />
17. What are constraints?<br />
18. Describe the basic function of a sketch.<br />
19. Define the term placed feature and identify at least three examples of objects that<br />
can be placed features.<br />
20. Describe the basic function of work features.<br />
21. What is a feature pattern?<br />
22. What dialog box appears by default when you start Inven<strong>to</strong>r?<br />
23. What are templates, and what are they used <strong>to</strong> create?<br />
24. Define interface and identify at least two items that are included in a typical<br />
computer interface.<br />
25. What is the Inven<strong>to</strong>r graphical user interface (GUI), and what does it include?<br />
26. What does it mean when an interface item is floating?<br />
27. Describe the appearance of a docked interface item.<br />
28. What is the purpose of a multiple document interface?<br />
29. Which dialog box in Inven<strong>to</strong>r allows you <strong>to</strong> control general program settings and<br />
preferences that are not specific <strong>to</strong> a particular model or file, and how can you<br />
access this dialog box?<br />
30. How can you access the extensive Inven<strong>to</strong>r help file system and learning resources?<br />
30 Inven<strong>to</strong>r and Its Applications 2009
Problems<br />
Launch Inven<strong>to</strong>r and complete the activities described in each problem. When you are finished,<br />
continue working with Inven<strong>to</strong>r or exit if necessary.<br />
1. Perform the following tasks:<br />
A. Begin a new Inven<strong>to</strong>r file of your choice.<br />
B. Explore the Inven<strong>to</strong>r pull-down menu system by picking any of the menu<br />
titles and moving the cursor down and up through the menu options.<br />
C. Pick the File pull-down menu and highlight the New... option. Notice the help<br />
string displayed in the status bar.<br />
D. Pick the Open... option on the File pull-down menu <strong>to</strong> display the Open<br />
dialog box.<br />
E. Pick the Cancel but<strong>to</strong>n <strong>to</strong> close the Open dialog box.<br />
F. Explore cascading submenus by highlighting the Toolbar option on the View<br />
pull-down menu.<br />
G. Press the [Esc] key or pick outside of the menu <strong>to</strong> close the View pulldown<br />
menu.<br />
2. Perform the following tasks:<br />
A. Begin a new Inven<strong>to</strong>r part file and explore the default part interface.<br />
B. Close the part file without saving.<br />
C. Begin a new Inven<strong>to</strong>r assembly file and explore the default assembly interface.<br />
D. Close the assembly file without saving.<br />
E. Begin a new Inven<strong>to</strong>r drawing file and explore the default drawing interface.<br />
F. Close the drawing file without saving.<br />
G. Begin a new Inven<strong>to</strong>r presentation file and explore the default presentation<br />
interface.<br />
H. Close the presentation file without saving.<br />
3. Perform the following tasks:<br />
A. Open blade_main.ipt from the following folder: Au<strong>to</strong>desk/Inven<strong>to</strong>r 2009/Samples/<br />
Models/Assemblies/Scissors/ Components<br />
Locate and explore the panel bar.<br />
B. Pick the panel bar title, Part Features, and deselect the Display Text with Icons<br />
option. Observe the changes in the panel bar. Pick the panel bar title again<br />
and select Display Text with Icons <strong>to</strong> show the text once again.<br />
C. Locate and explore the default browser.<br />
D. Drag the End of Part indica<strong>to</strong>r up and above Sketch4 and notice the changes.<br />
E. Pick the Expand [+] but<strong>to</strong>n <strong>to</strong> the left of the Origin folder <strong>to</strong> expand all children.<br />
F. Right-click on the Origin folder and select Collapse All Children.<br />
G. Close blade_main.ipt without saving.<br />
4. Perform the following tasks:<br />
A. Begin a new Inven<strong>to</strong>r part file.<br />
B. Locate and explore the Inven<strong>to</strong>r Standard <strong>to</strong>olbar.<br />
C. Select Toolbars > Inven<strong>to</strong>r Precise Input <strong>to</strong> open the Inven<strong>to</strong>r Precise Input<br />
<strong>to</strong>olbar, and dock the <strong>to</strong>olbar by double-clicking its name.<br />
D. Place the cursor over several <strong>to</strong>olbar but<strong>to</strong>ns and observe the <strong>to</strong>oltip and help<br />
strings provided.<br />
E. Pick one of the flyout but<strong>to</strong>ns located in the Inven<strong>to</strong>r Standard <strong>to</strong>olbar, select one<br />
of the flyout options <strong>to</strong> initiate a <strong>to</strong>ol, and modify the flyout but<strong>to</strong>n displayed.<br />
<strong>Chapter</strong> 1 <strong>Introduction</strong> <strong>to</strong> Au<strong>to</strong>desk Inven<strong>to</strong>r 31<br />
Basic<br />
Basic<br />
Medium<br />
Medium<br />
Drawing Problems - <strong>Chapter</strong> 1<br />
Drawing Problems - <strong>Chapter</strong> 1<br />
Medium<br />
Advanced<br />
Advanced<br />
Advanced<br />
5. Write a brief description of the Inven<strong>to</strong>r interface. Include answers <strong>to</strong> the following<br />
questions: What is an interface? What are the primary Inven<strong>to</strong>r interface items,<br />
and how do they function? Reflect on the concept of a computer software interface.<br />
Are some of the Inven<strong>to</strong>r interface items similar <strong>to</strong> those in other programs<br />
you have used? Submit a hard copy of your description <strong>to</strong> your drafting instruc<strong>to</strong>r<br />
or supervisor.<br />
6. Write a short description of each of the four Inven<strong>to</strong>r file types. Include information<br />
about file extensions and the circumstances in which each file type should<br />
be used. Reflect on the capabilities of Inven<strong>to</strong>r. How is Inven<strong>to</strong>r similar and<br />
different from other CADD programs you may have used? Submit a hard copy<br />
of your description <strong>to</strong> your drafting instruc<strong>to</strong>r or supervisor.<br />
7. Write a brief report on each part model element and the importance of constraints<br />
and parametric associations in parametric solid modeling. Reflect on your understanding<br />
of parametric modeling, and describe your experience with working<br />
in parametric situations. Submit a hard copy of your report <strong>to</strong> your drafting<br />
instruc<strong>to</strong>r or supervisor.<br />
8. Create a new part file and draw a freehand sketch of the standard Inven<strong>to</strong>r<br />
screen display. Label each of the screen areas and the interface items described<br />
in this chapter.<br />
32 Inven<strong>to</strong>r and Its Applications 2009