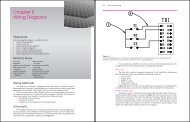
Chapter 1 Introduction to Autodesk Inventor - Goodheart-Willcox
Chapter 1 Introduction to Autodesk Inventor - Goodheart-Willcox
Chapter 1 Introduction to Autodesk Inventor - Goodheart-Willcox

Create successful ePaper yourself
Turn your PDF publications into a flip-book with our unique Google optimized e-Paper software.
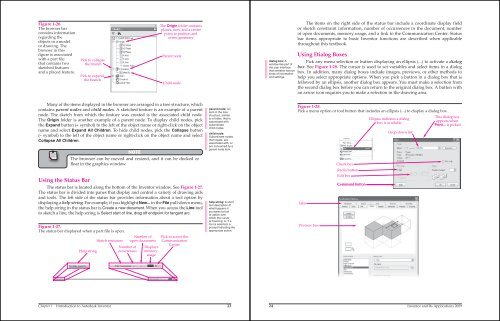
Figure 1-26.<br />
The browser bar<br />
contains information<br />
regarding the<br />
objects in a model<br />
or drawing. The<br />
browser in this<br />
figure is associated<br />
with a part file<br />
that contains two<br />
sketched features<br />
and a placed feature.<br />
Many of the items displayed in the browser are arranged in a tree structure, which<br />
contains parent nodes and child nodes. A sketched feature is an example of a parent<br />
node. The sketch from which the feature was created is the associated child node.<br />
The Origin folder is another example of a parent node. To display child nodes, pick<br />
the Expand but<strong>to</strong>n (+ symbol) <strong>to</strong> the left of the object name or right-click on the object<br />
name and select Expand All Children. To hide child nodes, pick the Collapse but<strong>to</strong>n<br />
(– symbol) <strong>to</strong> the left of the object name or right-click on the object name and select<br />
Collapse All Children.<br />
When Au<strong>to</strong>CAD is<br />
configured <strong>to</strong> display<br />
a screen menu, the<br />
commands appear in<br />
a separate screen.<br />
Using the Status Bar<br />
Pick <strong>to</strong> collapse<br />
the branch<br />
Pick <strong>to</strong> expand<br />
the branch<br />
The Origin folder contains<br />
planes, axes, and a center<br />
point <strong>to</strong> position and<br />
orient geometry<br />
Parent node<br />
Child node<br />
NOTE<br />
The browser can be moved and resized, and it can be docked or<br />
fl oat in the graphics window.<br />
The status bar is located along the bot<strong>to</strong>m of the Inven<strong>to</strong>r window. See Figure 1-27.<br />
The status bar is divided in<strong>to</strong> panes that display and control a variety of drawing aids<br />
and <strong>to</strong>ols. The left side of the status bar provides information about a <strong>to</strong>ol option by<br />
displaying a help string. For example, if you highlight New... in the File pull-down menu,<br />
the help string in the status bar is Create a new document. When you access the Line <strong>to</strong>ol<br />
<strong>to</strong> sketch a line, the help string is Select start of line, drag off endpoint for tangent arc.<br />
Figure 1-27.<br />
The status bar displayed when a part file is open.<br />
Help string<br />
Sketch resources<br />
Number of<br />
occurrences<br />
Number of<br />
open documents<br />
Displays<br />
memory<br />
usage<br />
Pick <strong>to</strong> access the<br />
Communication<br />
Center<br />
parent node: An<br />
item in the tree<br />
structure, similar<br />
<strong>to</strong> a folder, that is<br />
associated with<br />
subordinate<br />
child nodes.<br />
child node:<br />
Subordinate nodes<br />
that create, are<br />
associated with, or<br />
are consumed by a<br />
parent node item.<br />
help string: A short<br />
text description of<br />
what happens if<br />
you select a <strong>to</strong>ol<br />
or option over<br />
which the cursor<br />
is hovering; or, if a<br />
<strong>to</strong>ol is selected, a<br />
prompt indicating the<br />
appropriate action.<br />
<strong>Chapter</strong> 1 <strong>Introduction</strong> <strong>to</strong> Au<strong>to</strong>desk Inven<strong>to</strong>r 23<br />
dialog box: A<br />
window-like part of<br />
the user interface<br />
that contains various<br />
kinds of information<br />
and settings.<br />
The items on the right side of the status bar include a coordinate display field<br />
or sketch constraint information, number of occurrences in the document, number<br />
of open documents, memory usage, and a link <strong>to</strong> the Communication Center. Status<br />
bar items appropriate <strong>to</strong> basic Inven<strong>to</strong>r functions are described when applicable<br />
throughout this textbook.<br />
Using Dialog Boxes<br />
Pick any menu selection or but<strong>to</strong>n displaying an ellipsis (…) <strong>to</strong> activate a dialog<br />
box. See Figure 1-28. The cursor is used <strong>to</strong> set variables and select items in a dialog<br />
box. In addition, many dialog boxes include images, previews, or other methods <strong>to</strong><br />
help you select appropriate options. When you pick a but<strong>to</strong>n in a dialog box that is<br />
followed by an ellipsis, another dialog box appears. You must make a selection from<br />
the second dialog box before you can return <strong>to</strong> the original dialog box. A but<strong>to</strong>n with<br />
an arrow icon requires you <strong>to</strong> make a selection in the drawing area.<br />
Figure 1-28.<br />
Pick a menu option or <strong>to</strong>ol but<strong>to</strong>n that includes an ellipsis (…) <strong>to</strong> display a dialog box.<br />
Tabs<br />
Preview box<br />
Check box<br />
Radio but<strong>to</strong>n<br />
Edit box<br />
Command but<strong>to</strong>n<br />
Ellipsis indicates a dialog<br />
box is available<br />
Drop-down list<br />
This dialog box<br />
appears when<br />
Print... is picked<br />
24 Inven<strong>to</strong>r and Its Applications 2009