Vitavit Premium.pdf - Hip Pressure Cooking
Vitavit Premium.pdf - Hip Pressure Cooking
Vitavit Premium.pdf - Hip Pressure Cooking

You also want an ePaper? Increase the reach of your titles
YUMPU automatically turns print PDFs into web optimized ePapers that Google loves.
620-001-00-921<br />
Fissler GmbH, Harald-Fissler-Str.1, 55743 Idar-Oberstein, Germany<br />
Tel. +49 6781-403-0, Fax. +49 6781-403-321<br />
www.fissler.de, www.fissler.com<br />
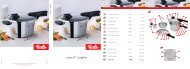
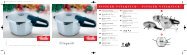
vitavit ® premium<br />
Freu dich aufs Kochen.<br />
0709/20/BAST<br />
vitavit ® premium<br />
vitavit ®<br />
<br />
Freu dich aufs Kochen.<br />
Fissler vitavit ® premium Fissler vitavit ® premium<br />
D<br />
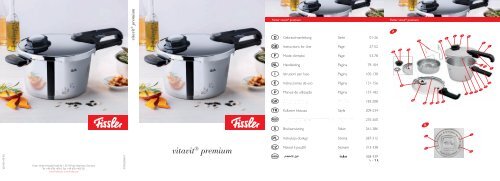
Gebrauchsanleitung 10 Seite 01-26 <br />
11 <br />
G Instructions for Use Page 27-52<br />
12 <br />
F<br />
n<br />
-1<br />
. <br />
<br />
<br />
. – 2<br />
. – 3<br />
Mode d’emploi 13 Page 53-78 <br />
Handleiding 14 Pagina 79-104 <br />
I<br />
15<br />
Istruzioni per l’uso<br />
16<br />
Pagina<br />
<br />
105-130<br />
<br />
E Instrucciones de uso 17 Página 131-156 <br />
18<br />
P Manual de utilização<br />
19<br />
Página<br />
<br />
157-182<br />
<br />
g 183-208<br />
T Kullanım kılavuzu Sayfa 209-234<br />
q 235-260<br />
S Bruksanvisning Sidan 261-286<br />
25 <br />
k Instrukcja obsługi Strona 287-312<br />
26 <br />
a CZ Návod k použití<br />
– 2<br />
Seznam 313-338<br />
ARA a<br />
English<br />
<br />
<br />
368-339<br />
<br />
1 29 - <br />
2 30 <br />
3<br />
5 <br />
6 <br />
7 <br />
8 <br />
9 <br />
20 <br />
21 <br />
22 <br />
23 <br />
24 <br />
27 <br />
28 <br />
A<br />
22<br />
23 24<br />
21<br />
22<br />
25<br />
20 19 18<br />
B<br />
b<br />
a<br />
16<br />
17<br />
5<br />
6<br />
7<br />
15<br />
4<br />
14<br />
c<br />
d<br />
8<br />
3<br />
12 +<br />
13<br />
11<br />
9<br />
1<br />
10<br />
2
Fissler vitavit ® premium Fissler vitavit ® premium Fissler vitavit ® Fissler vitavit premium<br />
® premium<br />
C D<br />
F G<br />
I<br />
L<br />
J<br />
M<br />
E<br />
H<br />
K<br />
N<br />
070405fissler Blue Point Um.qxd 23.04.2007 12:26 Uhr Seite 2<br />
O<br />
R<br />
U<br />
X<br />
FISSLER BLUE-POINT FISSLER BLUE-POINT<br />
070405fissler Blue Point Um.qxd 23.04.2007 12:26 Uhr Seite 2<br />
P<br />
Q<br />
C D E<br />
F<br />
S<br />
b<br />
G<br />
a<br />
I V<br />
J W<br />
K<br />
T<br />
H<br />
max<br />
Y-2<br />
Y-3<br />
Y-4<br />
L M N<br />
FISSLER BLUE-POINT FISSLER BLUE-POINT<br />
C D E<br />
F<br />
b<br />
G<br />
a<br />
I J K<br />
H<br />
max<br />
Y-1<br />
Y-5<br />
Y-9<br />
Z-1<br />
Z-5<br />
L M N<br />
O Y-6<br />
Y-7 P Y-8<br />
Q<br />
O P Q<br />
R S T<br />
Y-10<br />
R S T<br />
U V W<br />
Z-2<br />
Y-11<br />
Z-3<br />
Y-12<br />
U V W<br />
Z-4<br />
EG-Konformitätserklärung / EC-Declaration of Conformity/ Déclaration de conformité de l’UE / EG-Conformiteitsverklaring /<br />
Dichiarazione di conformità CE / Declaración CE de Conformidad / Declaração de conformidade CE / ¢‹ÏˆÛË ˘ÌÌfiÚʈÛ˘<br />
∂˘Úˆ·˚΋˜ ∫ÔÈÓfiÙËÙ·˜ / Avrupa Toplulu¤u uygunluk sertifikas› / EU-konformitetsintyg / Oświadczenie zgodności z wymogami<br />
Unii Euripejskiej / Prohlášení o shodě EG /<br />
Fissler GmbH · Harald-Fissler-Straße 1 · 55743 Idar-Oberstein<br />
bestätigt, EG-Konformitätserklärung dass die Dampfdrucktöpfe / EC-Declaration / certifies of that Conformity/ the pressure Déclaration cookers / de certifie conformité que les de autocuiseurs l’UE / EG-Conformiteitsverklaring / verklaart dat de snel- /<br />
kookpannen Dichiarazione / Si di certifica conformità che CE le pentole / Declaración a pressione CE de / certifica Conformidad que las / Declaração ollas a presión de conformidade / declara que CE as panelas / ¢‹ÏˆÛË de ˘ÌÌfiÚʈÛ˘<br />
pressão /<br />
ÈÛÙÔÔÈ›, ∂˘Úˆ·˚΋˜ fiÙÈ ∫ÔÈÓfiÙËÙ·˜ ÔÈ ¯‡ÙÚ˜ Ù·¯‡ÙËÙ·˜ / Avrupa Toplulu¤u Ì ·ÙÌfi uygunluk / flu düdüklü sertifikas› tencerelerin / EU-konformitetsintyg / bekräftar härmed, / Oświadczenie att ångtryckkokarna zgodności / oświadcza, z wymogami że<br />
Unii szybkowary Euripejskiej ciśnieniowe / Prohlášení / potvrzuje, o shodě že EG tlakové / hrnce /<br />
Fissler GmbH · Harald-Fissler-Straße 1 · 55743 Idar-Oberstein<br />
mit folgenden harmonisierten EG-Richtlinien übereinstimmen:<br />
conform bestätigt, to dass the die following Dampfdrucktöpfe harmonized / EC certifies guidelines: that the pressure cookers / certifie que les autocuiseurs / verklaart dat de snel-<br />
sont kookpannen conformes / Si aux certifica directives che le suivantes pentole vitavit a de pressione l’Union Européenne:<br />
/ certifica que las ollas a presión / declara que as panelas de pressão /<br />
met ÈÛÙÔÔÈ›, de volgende fiÙÈ ÔÈ geharmoniseerde ¯‡ÙÚ˜ Ù·¯‡ÙËÙ·˜ EG-richtlijnen Ì ·ÙÌfi / flu düdüklü overeenkomen: tencerelerin / bekräftar 97/23/EG härmed, att ångtryckkokarna (Modul A,B) / oświadcza, że<br />
sono szybkowary conformi ciśnieniowe alle seguenti / potvrzuje, Direttive CE že tlakové armonizzate: hrnce /<br />
DIN EN 12778<br />
responden a las siguientes directivas CE armonizadas:<br />
estão em conformidade com as seguintes directivas CE harmonizadas:<br />
Û˘Ì›ÙÔ˘Ó Ì ÙȘ ·Ú·Î¿Ùˆ ÂÓ·ÚÌÔÓÈṲ̂Ó˜ ηÙ¢ı˘ÓÙ‹ÚȘ Ô‰ËÁ›Â˜ Ù˘ ∂˘Úˆ·˚΋˜ ∫ÔÈÓfiÙËÙ·˜:<br />
gösterilen mit folgenden Avrupa harmonisierten Toplulu¤u yönetmeliklerine EG-Richtlinien uygun übereinstimmen:<br />
oldu¤unu tasdik eder:<br />
överensstämmer conform to the following med följande harmonized EU-direktiv: EC guidelines:<br />
spełnaiją sont conformes następujące aux directives harmonizujące suivantes normy de l’Union Unii Europejskiej: Européenne: 97/23/EG (Modul A,B)<br />
splňují met de volgende požadavky geharmoniseerde harmonizované EG-richtlijnen směrnice EG: overeenkomen:<br />
sono conformi alle seguenti Direttive CE armonizzate:<br />
DIN EN 12778<br />
responden a las siguientes directivas CE armonizadas:<br />
Idar-Oberstein,<br />
estão em conformidade<br />
23.0 3. 09<br />
com as seguintes directivas CE harmonizadas:<br />
Û˘Ì›ÙÔ˘Ó Ì ÙȘ ·Ú·Î¿Ùˆ ÂÓ·ÚÌÔÓÈṲ̂Ó˜ ηÙ¢ı˘ÓÙ‹ÚȘ Ô‰ËÁ›Â˜ Ù˘ ∂˘Úˆ·˚΋˜ ∫ÔÈÓfiÙËÙ·˜:<br />
gösterilen Avrupa Toplulu¤u yönetmeliklerine uygun<br />
Georg<br />
oldu¤unu<br />
Thaller<br />
tasdik<br />
(Sprecher)<br />
eder:<br />
/ Dipl.-Ing. Heribert Bollinger (Geschäftsführer)<br />
Ort<br />
överensstämmer<br />
und Datum der<br />
med<br />
Ausstellung<br />
följande EU-direktiv:<br />
Name, Funktion und Unterschrift der Befugten<br />
Place<br />
spełnaiją<br />
and<br />
następujące<br />
date of issue<br />
harmonizujące normy Unii Europejskiej:<br />
Name, job function and signature of authorized person<br />
Lieu<br />
splňují<br />
et<br />
požadavky<br />
date:<br />
harmonizované směrnice EG:<br />
Nom, fonction et signature du responsable<br />
Plaats en datum van de verklaring Naam, functie en handtekening van de bevoegde persoon<br />
Luogo e data del rilascio Nome, qualifica e firma dell’incaricato<br />
Lugar Idar-Oberstein, y fecha de 23.0 emisión 3. 09<br />
Nombre, función y firma de la persona autorizada<br />
Local e data de emissão Georg Nome, Thaller função (Sprecher) e assinatura / Dipl.-Ing. do responsável Heribert Bollinger (Geschäftsführer)<br />
∆fiÔ˜ Î·È ËÌÂÚÔÌËÓ›·˜ Ù˘ ¤Î‰ÔÛ˘ ŸÓÔÌ·, ·ÚÌÔ‰ÈfiÙËÙ· Î·È ˘ÔÁÚ·Ê‹ ÙÔ˘ ÂÍÔ˘ÛÈÔ‰ÔÙË̤ÓÔ˘<br />
Yer Ort ve und tarih Datum der Ausstellung Name, Yetkilinin Funktion ad›, görevi und ve Unterschrift imzas› der Befugten<br />
Ort Place och and datum date för of issue utfärdande Namn, Name, job befattning function och and underskrift signature of av authorized behörig medarbetare person<br />
Miejsce Lieu et date: i data wystawienia nazwisko, Nom, fonction funkcja et signature i podpis du upoważnionego<br />
responsable<br />
Místo Plaats a en datum datum vystavení van de verklaring Naam, Jméno, functie funkce en a podpis handtekening oprávněné van osoby de bevoegde persoon<br />
Luogo e data del rilascio Nome, qualifica e firma dell’incaricato<br />
Lugar y fecha de emisión Nombre, función y firma de la persona autorizada<br />
Local e data de emissão Nome, função e assinatura do responsável<br />
∆fiÔ˜ Î·È ËÌÂÚÔÌËÓ›·˜ Ù˘ ¤Î‰ÔÛ˘ ŸÓÔÌ·, ·ÚÌÔ‰ÈfiÙËÙ· Î·È ˘ÔÁÚ·Ê‹ ÙÔ˘ ÂÍÔ˘ÛÈÔ‰ÔÙË̤ÓÔ˘<br />
Yer ve tarih Yetkilinin ad›, görevi ve imzas›<br />
Ort och datum för utfärdande Namn, befattning och underskrift av behörig medarbetare<br />
Miejsce i data wystawienia nazwisko, funkcja i podpis upoważnionego<br />
Místo a datum vystavení Jméno, funkce a podpis oprávněné osoby<br />
® premium<br />
Idar-Oberstein, 29.05.09
G Instructions for Use<br />
Thank you for your confidence ...<br />
and congratulations on the purchase of your new<br />
vitavit ® pressure cooker. The latest generation of Fissler<br />
pressure cookers is based on more than 55 years of<br />
experience. <strong>Pressure</strong> cookers are as modern as ever<br />
when it comes to quickly preparing delicious meals<br />
while preserving nutrients – and the vitavit ® sets new<br />
standards in user-friendliness and design.<br />
Your new pressure cooker has been meticulously<br />
crafted in Germany. To ensure that you will be able to<br />
enjoy it for a very long time and that it will have a long<br />
service life, please follow these instructions carefully.<br />
We hope you will enjoy trying out everything your<br />
vitavit ® has to offer. Bon appétit!<br />
Contents<br />
1. How pressure cooking works<br />
2. Safety information<br />
3. Description and advantages of the vitavit ®<br />
4. Before using for the first time<br />
5. Information on using your pressure cooker<br />
6. <strong>Cooking</strong> with the vitavit ®<br />
7. Depressurizing the vitavit ®<br />
8. Ways to use your pressure cooker<br />
9. <strong>Cooking</strong> times<br />
10. Cleaning and care<br />
11. Questions and answers<br />
12. Maintenance and replacement parts<br />
13. Warranty and service<br />
D<br />
GB<br />
F<br />
NL<br />
I<br />
E<br />
P<br />
GR<br />
TR<br />
RUS<br />
S<br />
PL<br />
CZ<br />
ARA<br />
27
28<br />
How pressure cooking works<br />
1. How pressure cooking works<br />
The basic principle of pressure cooking hasn’t changed since the first pressure cooker was invented. Foods are<br />
cooked in a tightly closed vessel under pressure, at temperatures of over 100°C, since the high pressure that develops<br />
inside the pot raises the boiling point of water. This shortens their cooking times substantially. <strong>Cooking</strong> with a<br />
pressure cooker saves a great deal of (cooking) time – about 70 percent on average.<br />
Time in minutes<br />
90<br />
80<br />
70<br />
Time in minutes<br />
60<br />
90<br />
50<br />
80<br />
40<br />
70<br />
30<br />
60<br />
20<br />
50<br />
10<br />
40<br />
0<br />
30<br />
20<br />
10<br />
Vitamin<br />
0<br />
C (%) Potatoes Stew Beef rolls Red cabbage Boiled chicken<br />
The exclusion of harmful atmospheric oxygen and the shorter cooking times also make it possible to cook the<br />
100<br />
<strong>Cooking</strong> time in<br />
<strong>Cooking</strong> time in<br />
pressure cooker<br />
normal pot<br />
methods. And you can taste this, 90 too, for the foods’ own flavor is surprisingly intense.<br />
80<br />
Vitamin C (%)<br />
70<br />
100<br />
60<br />
90<br />
50<br />
80<br />
40<br />
70<br />
30<br />
60<br />
20<br />
50<br />
10<br />
40<br />
0<br />
9<br />
34<br />
25<br />
65 65<br />
50<br />
15<br />
50<br />
77<br />
20<br />
66<br />
47<br />
42<br />
Spinach<br />
34<br />
Broccoli Brussels sprouts Red cabbage Kohlrabi<br />
90<br />
Potatoes Stew Beef rolls Red cabbage Boiled chicken<br />
78<br />
8<br />
<strong>Cooking</strong> time in<br />
pressure cooker<br />
42<br />
60<br />
66<br />
Vitamin convent<br />
with conventional<br />
cooking (%)<br />
30<br />
47<br />
60<br />
64<br />
<strong>Cooking</strong> time in<br />
normal pot<br />
foods very gently. Vitamins, minerals and aroma are preserved to a far greater extent than with conventional cooking<br />
30<br />
20<br />
10<br />
0<br />
9<br />
25<br />
15<br />
65 65<br />
77<br />
20<br />
66<br />
Spinach Broccoli Brussels sprouts Red cabbage Kohlrabi<br />
90<br />
78<br />
8<br />
60<br />
66<br />
Vitamin convent<br />
with conventional<br />
cooking (%)<br />
30<br />
60<br />
64<br />
Vitamin convent<br />
with pressure<br />
cooking (%)<br />
Vitamin convent<br />
with pressure<br />
cooking (%)
2. Safety information<br />
Instructions for use<br />
Safety information<br />
• Read the Instructions for Use and all other information thoroughly before you use the vitavit ® . Incorrect use can<br />
be dangerous.<br />
• Do not let anyone use the pressure cooker before reading the Instructions for Use.<br />
• If you give your pressure cooker to anyone, make sure you also provide the Instructions for Use.<br />
Supervision<br />
• Never use the pressure cooker near children.<br />
Uses for the pressure cooker<br />
• Only use the pressure cooker for the purposes described in the Instructions for Use. (See Chapter 8)<br />
• Never use the pressure cooker or pressure skillet in the oven.The handles, valves, and safety mechanisms would<br />
be damaged by the high temperatures.<br />
• When deep-frying in the pressure cooker, do not cover it, and only fill it halfway with oil. Never deep-fry under<br />
pressure! (See Chapter 8)<br />
• <strong>Pressure</strong> cookers may not be used for medical purposes – especially not as sterilizers, as pressure cookers are not<br />
designed to reach the temperatures necessary for sterilizing.<br />
• Do not cook applesauce or stewed fruits in a pressure cooker, because pockets of steam often form that can<br />
spatter up when the cooker is opened and cause scalding.<br />
• If you have cooked meat with skin that can swell when under pressure, do not pierce it as long as the skin is<br />
swollen, as this could result in burns.<br />
Safety and maintenance<br />
• Each time you use your pressure cooker, make sure beforehand that none of the valves and safety mechanisms are<br />
damaged or dirty and that they function properly. This is the only way to guarantee that it will operate safely. You<br />
will find information on this in Chapter 5.<br />
• Do not alter the pressure cooker – especially the safety mechanisms – in any way, other than performing the<br />
maintenance measures mentioned in the Instructions for Use. Do not oil the valves.<br />
• Regularly replace parts that are subject to wear, such as the silicone gasket and other rubber parts, with original<br />
Fissler replacement parts after you have used the pressure cooker about 400 times or, at the latest, after 2 years.<br />
Parts that show visible damage (e.g. tears, discolorations or deformations) or that do not fit correctly must be<br />
replaced immediately. Otherwise, this could affect how well and how safely your pressure cooker works.<br />
• Use only original Fissler replacement parts. It is especially important for you to only use pots and lids for the same<br />
model, as well as other replacement parts that are intended specifically for your cooker. (See Chapter 12)<br />
Operation of the pressure cooker<br />
• The cooker is under pressure when in use. Incorrect use can result in burns. Make sure that the cooker is properly<br />
closed before you build pressure.You will find information on this in Chapter 4. Never use the pressure cooker<br />
with the lid placed loosely on top of it.<br />
• Only use the heat sources that are mentioned in Chapter 5.<br />
• Make sure that the pressure cooker contains liquid before you heat it up. Not doing so could result in damage to<br />
the cooker and the burner.<br />
Minimum amount: 200-300 ml of water, depending on the diameter of your cooker. (See „min“ marking)<br />
D<br />
GB<br />
F<br />
NL<br />
I<br />
E<br />
P<br />
GR<br />
TR<br />
RUS<br />
S<br />
PL<br />
CZ<br />
ARA<br />
29
5. Control valve<br />
- to set the cooking setting<br />
- with the traffic light indicator<br />
- with a vent for automatic pressure limitation (pressure guard)<br />
- removable for easy cleaning<br />
- with depressurizing setting and gradual pressure release<br />
6. Traffic light system<br />
- helps to regulate the energy source<br />
7. Openings for steam release<br />
- when the selected cooking setting is exceeded<br />
- for depressurizing with the control valve<br />
- for steaming without pressure<br />
8. Positioning aid<br />
- for simple positioning of the lid<br />
9. Groove for positioning aid<br />
- for inserting the positioning aid<br />
10. Nonslip pot handle<br />
11. Flame guard<br />
- protects the handles when used on gas stoves<br />
12. Volume marking<br />
- with „min” marking for the minimum amount of liquid<br />
- with „½” marking for the maximum amount of foods that rise<br />
- with „max” marking for the maximum amount of normal foods<br />
13. Measuring scale<br />
- for simple measuring of liquids – without a measuring cup<br />
14. Conical pot bodies<br />
- for stacking pots, even those with the same diameter<br />
15. CookStar all-stove base<br />
- for optimal heat properties on all types of stoves, including induction<br />
16. Helper handle<br />
- with deep recessed grip for safe carrying<br />
17. Safety nubs (safety mechanism)<br />
- prevents pressure from building if the cooker is not closed properly<br />
18. Fissler Euromatic (safety mechanism)<br />
- for automatic pressure building<br />
- prevents pressure building if the cooker is not properly closed<br />
- automatically limits pressure<br />
- prevents the cooker from being opened as long as there is pressure<br />
19. Fastening screw for lid handle<br />
- no tools are needed<br />
- with a flat gasket, fixed in the lid<br />
20. Silicone gasket (safety mechanism)<br />
- made of high-quality silicone<br />
- with safety pockets to limit pressure<br />
21. Bell-shaped nut for fastening the control valve<br />
- with recessed grips, can be easily removed without tools<br />
22. Silicone membrane<br />
- for sealing the traffic light indicator<br />
Description and advantages of the vitavit ®<br />
D<br />
GB<br />
F<br />
NL<br />
I<br />
E<br />
P<br />
GR<br />
TR<br />
RUS<br />
S<br />
PL<br />
CZ<br />
ARA<br />
31
32<br />
Schnellkochen Description and kurz advantages erklärt of the vitavit ® / Before using for the first time<br />
23. Molded valve seal<br />
- for sealing the control valve<br />
24. Valve base seal<br />
- to seal the valve base<br />
25. Insets for steaming (depending on model)<br />
- elongated perforations for optimum penetration of steam<br />
- with ridged surface for free steam flow, even with large items<br />
- with a tripod stand<br />
See Fig. B<br />
a. CE symbol (ensures that the cooker complies with the EC directive for pressure cookers)<br />
b. Nominal capacity (not equal to usable capacity)<br />
c. Maximum operating pressure (maximum permissible steam release pressure of the valve)<br />
d. Manufacturing date (calendar week/year)<br />
4. Before using for the first time<br />
Make sure you understand how the cooker is used before you try it out.<br />
Opening the cooker<br />
See Fig. C<br />
Press the release button (Fig. A-2) on the lid handle in the direction shown by the arrow, and turn the lid to the right<br />
as far as possible. Now you can remove the lid.<br />
Positioning aid<br />
On the lid, there is a metal tab that says “Close” (Fig. A-8).The counterpart to it is a groove (Fig. A-9) in the pot<br />
handle. This makes it easy to place the lid in the correct position.<br />
Closing the cooker<br />
See Fig. D<br />
To put the lid on the cooker, hold it slightly slanted, place the positioning aid in the groove on the pot handle, and<br />
then lower it. The correct position for the lid is also indicated by red dots on the positioning aid and the pot handle. If<br />
these dots are perfectly aligned, the lid can be put on the pot.<br />
See Fig. E<br />
To close, turn the lid to the left as far as possible, until the cooker locks with an audible “click.”<br />
Locking indicator<br />
See Fig. F<br />
The locking indicator (Fig. A-3) in the lid handle will tell you whether the cooker is correctly closed and ready to use:<br />
Green = The cooker is properly closed and ready for use.<br />
Red = The cooker is not properly closed, and no pressure can be built up.<br />
Cleaning<br />
Wash the pot, lid and silicone gasket thoroughly before using the pressure cooker for the first time. This will remove<br />
any traces of polishing dust and minor impurities.
We recommend the subsequent use of Fissler Stainless Steel Care (or another product for the care of stainless steel<br />
cookware) for the pot and lid. This will make the stainless steel more resistant to the influences of salts and acidic<br />
substances. Residues of the care product should be thoroughly washed off. Use the care product as needed or when<br />
you notice changes in the appearance of the stainless steel surface.<br />
5. Information on using your pressure cooker<br />
Safety mechanisms<br />
Your vitavit ® pressure cooker is equipped with various mechanisms that automatically make your pressure cooker<br />
safe. Before you use the pressure cooker, and each time you use it, be sure to check that the following safety mechanisms<br />
are functioning properly. Never alter these in any way. Make sure that the control valve and the lid handle<br />
are properly and firmly attached before you begin to cook. You will find information on this in Chapter 10.<br />
Control valve (Fig. A-5)<br />
See Fig. G<br />
Remove the control valve from the lid and turn it to Setting 2. Use your finger to check whether the traffic light<br />
indicator(1) and the valve body(2) can move freely and spring back.<br />
Euromatic (Fig. A-18)<br />
See Fig. H+I<br />
Make sure that the Euromatic is clean and can move freely in the lid.The o-ring must lie completely in the groove<br />
provided for it.<br />
See Fig. J<br />
Use your finger to check whether the white ball in the Euromatic does not stick and can move freely and spring<br />
back.<br />
Silicone gasket (Fig. A-20) and safety nubs (Fig. A-17)<br />
See Fig. K<br />
Make sure that the silicone gasket and the edge of the lid are clean, that the silicone gasket has not been damaged,<br />
and that the safety nubs can move freely. Insert the silicone gasket so that it lies completely flat, under the part of the<br />
edge that curves inward, on the inside of the lid. The silicone gasket must fit in front of the safety nubs, that is, pressed<br />
away from the edge of the lid.<br />
Filling capacity<br />
See Fig. L<br />
Please note the following information on filling amounts. A scale found on the inside of the pot will make it easier to<br />
measure these amounts.<br />
„min“<br />
Depending on the diameter of the pressure cooker, at least 200-300 ml of liquid is necessary to produce steam,<br />
regardless of whether you are using an inset or not. Never use the pressure cooker without having this minimum<br />
amount of liquid (see „min“ marking).<br />
Ø 18 cm: 200 ml<br />
Ø 22 cm: 250 ml<br />
Ø 26 cm: 300 ml<br />
Before using for the first time / Information on using your pressure cooker<br />
D<br />
GB<br />
F<br />
NL<br />
I<br />
E<br />
P<br />
GR<br />
TR<br />
RUS<br />
S<br />
PL<br />
CZ<br />
ARA<br />
33
Information on using your pressure cooker / <strong>Cooking</strong> with the vitavit ®<br />
Induction: Always place the cooker in the center of the cooking zone. The base of the pot should be the same size<br />
as or larger than the cooking zone. Otherwise, it is possible that the cooking zone will not be triggered by the pot<br />
base.<br />
Special information for induction stoves: To prevent overheating and damage to the cookware as a result of the<br />
high induction power, never heat the cooker up empty or unattended. Please also adhere to the Instructions for Use<br />
provided by the stove manufacturer. A humming sound may come from your cooker while it is in use. This sound has<br />
technical reasons and does not indicate that there is a defect in your stove or cookware.<br />
Tips for saving energy<br />
- When cooking at the gentle or speed setting, regulate the energy source so that the traffic light indicator does not<br />
enter the red area and the valve does not begin to release steam.<br />
- When cooking at the pressureless steaming setting, regulate the energy source so that only a slight plume of steam<br />
is released from the lid handle or control valve.<br />
- Use a burner that is the right size. (See notes above)<br />
- Choose cookware that is the right size for the amount of food you are preparing.<br />
- Take advantage of the heat stored in the base. Turn off the heat source even before the end of the cooking period,<br />
so that you can use the cooling off period.<br />
6. <strong>Cooking</strong> with the vitavit ®<br />
Numerous cooking methods are possible in your pressure cooker: stewing or braising, steaming with the inset,<br />
sautéing and deep-frying (without the lid), as well as thawing, preserving, and extracting juice. You will find more<br />
information on ways to use your pressure cooker, as well as on how to use the insets, in Chapter 8.<br />
Preparing<br />
Place the ingredients called for in your recipe in the pressure cooker. Make sure you observe the specified filling<br />
capacities. (See Chapter 5)<br />
Then place the lid on the cooker and close it. If the locking indicator (Fig. A-3) in the lid handle is green, the cooker is<br />
ready to start cooking. (See Chapter 4)<br />
Selecting the cooking setting<br />
See Fig. M<br />
Select the desired cooking setting on the control valve (Fig. A-5). The table of cooking times (Chapter 9) will give you<br />
suggestions for this.<br />
Setting 1, approx. 110°C (Gentle Setting)<br />
(45 kPa operating pressure)<br />
for delicate foods, such as fish or vegetables<br />
Setting 2, approx. 116°C (Speed Setting)<br />
(75 kPa operating pressure)<br />
for all other foods, such as meats or stews<br />
D<br />
35<br />
GB<br />
F<br />
NL<br />
I<br />
E<br />
P<br />
GR<br />
TR<br />
RUS<br />
S<br />
PL<br />
CZ<br />
ARA
36<br />
<strong>Cooking</strong> with the vitavit ®<br />
Steaming without pressure<br />
In addition to the gentle and speed settings, you can also select a setting for steaming without pressure or for conventional<br />
cooking. Since this setting operates without pressure, the additional instructions in Chapter 6 and 7 do not<br />
apply here. You will find additional information on the pressureless steaming setting in Chapter 8.<br />
Building pressure and expelling air<br />
Set your heat source to high to heat up the pressure cooker. Steam will escape from under the lid handle (Fig. A-1),<br />
along with the atmospheric oxygen that can destroy vitamins. This process can take a few minutes. As soon as the<br />
Euromatic closes and no more steam is expelled, pressure will begin to build up.The traffic light indicator (Fig. A-6)<br />
will soon begin to rise.<br />
Traffic light system<br />
See Fig. N<br />
No matter which cooking setting you select (Setting 1 or 2), the traffic light indicator will show you three different<br />
colors. Much like a traffic light, these colors tell you the temperature in the cooker and help you to regulate the<br />
energy source.<br />
Yellow ring:<br />
“The selected cooking setting will soon be reached. You can turn down the heat.”<br />
Depending on the kind of stove and what you are cooking, you may need to reduce the energy sooner or later. For<br />
solid burners or glass ceramic cooking surfaces at the beginning of the yellow ring, for induction or gas toward the<br />
end of the yellow ring.<br />
Green ring:<br />
“The selected cooking setting has been reached. The actual cooking time begins now.”<br />
Adjust the energy source so that the traffic light indicator remains in the green area during the entire cooking period.<br />
Red ring:<br />
“The temperature in the cooker is too high. The cooker will automatically begin to release steam to regulate the<br />
temperature. You need to turn down the heat source.”<br />
The energy source should be regulated so that the traffic light indicator does not enter the red zone. Otherwise, the<br />
cooker will lose liquid due to the release of steam.<br />
Important:<br />
Make sure that the liquid in the pressure cooker never completely vaporizes. (See information in Chapter 5.)<br />
<strong>Cooking</strong> times<br />
The actual cooking time begins once the selected cooking setting (green ring) has been reached. You will find the<br />
cooking times for various foods in Chapter 9.
38<br />
Depressurizing<br />
Method 2<br />
“Depressurizing setting on the control valve”<br />
See Fig. P<br />
If you turn the control valve little by little toward the depressurizing setting, steam will be released under the control<br />
valve (Fig. A-7). You can decide whether the steam should be released gently or more quickly. The larger the steps<br />
you activate in the control valve, the greater the amount of steam released. Finally, set the control valve at the<br />
depressurizing setting, and wait until no more steam is released. Shake the cooker gently and repeat this step until no<br />
more steam escapes. Once the cooker is fully depressurized, the Euromatic will sink.The release button can now be<br />
pressed completely to open the cooker.<br />
Note:<br />
Never turn the control valve directly from Setting 1 or 2 to the depressurizing setting, as the steam release would<br />
be extremely strong and food could be ejected as well. Always turn the control valve little by little until it reaches the<br />
depressurizing setting.<br />
Method 3<br />
“Let it cool off”<br />
If you would like to take advantage of the residual energy in the cooker, use this method. Shortly before the end of<br />
the cooking time, take the cooker off the stove and just let it gradually cool down until the traffic light indicator has<br />
sunk completely.<br />
Then press the release button gently in order to release any residual pressure. When no more steam escapes, let<br />
go of the button, shake the cooker gently, and then press the release button again. Repeat this step until no more<br />
steam escapes.When the cooker is fully depressurized, the Euromatic will sink again.Then the release button can be<br />
pressed in fully to open the cooker.<br />
This method is especially good for foods with longer cooking times.<br />
Method 4<br />
“Depressurize under running water”<br />
See Fig. Q<br />
If the escaping steam bothers you, cool off the cooker under running water. Just place the cooker in the sink and let<br />
cold water run over the side of the lid (not over the lid handle or control valve) until the traffic light indicator has<br />
sunk completely.<br />
Then press the release button gently to release any residual pressure. When no more steam escapes, let go of<br />
the button, shake the cooker gently, and then press the release button again. Repeat this step until no more steam<br />
escapes.When the cooker is fully depressurized, the Euromatic will sink.Then the release button can be pressed<br />
down fully to open the cooker.
40<br />
Ways to use your pressure cooker<br />
<strong>Cooking</strong> rice<br />
Rice can be cooked in the pressure cooker without an inset.To prepare brown rice:<br />
• Place rice and water in a 1:2 ratio in the pressure cooker.<br />
• Add salt as desired.<br />
• Add at least the minimum amount of liquid.<br />
• Close the cooker.<br />
• Select Setting 2 and build pressure until the proper temperature has been reached (green ring).<br />
• Cook about 7-9 minutes at Setting 2, then depressurize and open the cooker.<br />
• Or else remove the cooker from the stove, set it aside, and let the rice simmer gently for about 15 minutes.Then<br />
open the cooker.<br />
Note: Rice can also be cooked in the unperforated inset. Pour at least the minimum amount of liquid into the cooker.<br />
Then put the unperforated inset containing rice and water (ratio about 1:1) in the cooker.<br />
<strong>Cooking</strong> fish<br />
Fish can be cooked in its own juice, with the minimum amount of liquid, at the bottom of the cooker or else<br />
steamed in the perforated inset.<br />
Note: Fish is generally cooked at Setting 2. See Chapter 9.<br />
Deep-frying<br />
Foods can only be deep-fried in the pressure cooker without the lid!<br />
To prevent burns caused by foaming or spattering oil, make sure that the pot you use is high enough.<br />
• Fill the cooker at most half full („½“ marking) with fat.<br />
• Heat the fat at medium. Do not overheat it.<br />
• The right temperature for deep-frying has been reached if bubbles immediately form around the handle of a<br />
wooden spoon when it is dipped in the hot fat.<br />
• Never cover the cooker!<br />
Steaming<br />
This means cooking foods in steam at temperatures of around 100°C. Hot steam surrounds the food and condenses<br />
on its surface. The food does not lie in the water while it is being cooked. This is why you need to use the perforated<br />
inset for steaming. Depending on the model, the inset may be included or else sold separately.<br />
• Add a minimum of 200-300 ml of liquid (see „min“ marking) to the pressure cooker. If desired, also add herbs,<br />
seasonings or wine.<br />
• Place the food in the perforated inset and place the inset on top of the tripod in the cooker.<br />
• Close the cooker.<br />
• Select the steaming setting and build pressure.<br />
• No pressure is built up, and the traffic light indicator does not rise.<br />
• You will know that the water is boiling and the right temperature has been reached by the fact that steam is<br />
expelled around the lid handle and/or control valve.<br />
• Turn down the energy source.
• A slight release of steam during the cooking process is normal.<br />
• Make sure that the liquid in the cooker does not boil off completely!<br />
• The cooking times for steaming are approximately the same as for normal cooking<br />
(though they tend to be a little longer).<br />
The steaming setting can also be used without the inset for conventional cooking without pressure.<br />
Note:<br />
When cooking with the steaming setting, you can open the cooker at any time to stir or season the food. If the energy<br />
source is too high, the cooker may become locked for reasons of safety and the release button cannot be pressed<br />
in to open the cooker. If this should happen, remove the cooker from the stove,, wait just a moment, and you will be<br />
able to open the cooker again.<br />
Preparing frozen foods<br />
Frozen foods can be very easily prepared in the pressure cooker.<br />
• Meat:Thaw a bit before browning.<br />
• Foods without sauce: Place in the cooker in the perforated inset.<br />
• Foods with sauce: Place in the cooker in the unperforated inset.<br />
• Place at least 200-300 ml of liquid (see „min“ marking) in the pressure cooker.<br />
• Close the cooker.<br />
• Select the cooking level and build pressure. (See Chapter 6)<br />
Preserving<br />
The pressure cooker can also be used for preserving foods. Depending on the size of the preserving jars, you should<br />
use the 4.5 l model or larger.<br />
• Fill the jars up to about one finger’s breadth under the edge and close them.<br />
• Place at least 200-300 ml of liquid (see „min“ marking) in the pressure cooker.<br />
• Place the preserving jars in the cooker in the perforated inset.<br />
• Close the cooker.<br />
• Select the cooking setting and build pressure. (See Chapter 6)<br />
Preserving times:<br />
Marmelade Setting 1 1-2 min.<br />
Fruits/pickled vegetables Setting 1 8-10 min.<br />
Vegetables/meat Setting 2 20-25 min.<br />
Ways to use your pressure cooker<br />
Do not depressurize the cooker quickly, but let it cool off slowly, otherwise the jars could burst!<br />
D<br />
GB<br />
F<br />
NL<br />
I<br />
E<br />
P<br />
GR<br />
TR<br />
RUS<br />
S<br />
PL<br />
CZ<br />
ARA<br />
41
42<br />
Ways to use your pressure cooker<br />
Extracting juice<br />
Both the perforated and the unperforated insets are needed for extracting juice from small amounts of fruit.<br />
• Prepare the fruit.<br />
• Add at least 200-300 ml of liquid (see „min“ marking) to the pressure cooker.<br />
• Place the fruit in the perforated inset.<br />
• Put the perforated inset on the unperforated inset, and put this in the cooker.<br />
• Close the cooker.<br />
• Select Setting 2 and build pressure. (See Chapter 6)<br />
Juice extraction times:<br />
Berries Setting 2 12 min.<br />
Fruits with pits Setting 2 18 min.<br />
Fruits with cores Setting 2 25 min.<br />
Do not depressurize the cooker quickly, but let it cool off slowly.<br />
Sterilizing<br />
Baby bottles or other items for use in the home (not for medical use) can be sterilized in the pressure cooker.<br />
• Place at least 200-300 ml of liquid (see „min“ marking) in the pressure cooker.<br />
• Place the bottles with their opening pointed downward in the perforated inset.<br />
• Close the cooker.<br />
• Select Setting 2, build pressure, and sterilize for 20 minutes.<br />
Do not depressurize the cooker quickly, but let it cool off slowly.<br />
<strong>Cooking</strong> a whole meal<br />
By using the insets, you can prepare several foods at the same time, one on top of the other.<br />
Rules:<br />
• Cook fish over vegetables.<br />
• Cook vegetables over meat.<br />
• Foods with similar cooking times should be placed in the cooker and cooked at the same time.<br />
• For foods with different cooking times, first place the food with the longest cooking time in the cooker and start<br />
cooking it. When the remaining cooking time of this food is the same as the cooking time of the other foods,<br />
remove the cooker from the stove, depressurize and open it, add the other foods, and then finish cooking.<br />
• Since some steam will escape when the cooker is opened, at least 300 ml of liquid should be added to begin with.<br />
Example:<br />
Beef roulades (20 min.) with boiled potatoes (8 min.)<br />
First place the roulades in the cooker and cook them at Setting 2 for 12 minutes. Then remove the cooker from the<br />
burner, depressurize it, open the cooker, and place the potatoes in the cooker in the perforated inset over the roulades<br />
by using the tripod. Close the cooker, build pressure, and cook at Setting 2 for an additional 8 minutes.
44<br />
<strong>Cooking</strong> times<br />
Pork<br />
Spicy pork stew / Goulash 15-20 min. Setting 2<br />
Pork roast 25-30 min. Setting 2<br />
Pork shank 30-35 min. Setting 2<br />
Pork knuckle, fresh 30-40 min. Setting 2<br />
Veal and beef<br />
Veal Stroganoff 5-6 min. Setting 2<br />
Roast veal 15-20 min. Setting 2<br />
Veal shank 15-20 min. Setting 2<br />
Beef goulash 15-20 min. Setting 2<br />
Beef shank (for soup) 20-25 min. Setting 2<br />
Roulades / Roast fillet 20-25 min. Setting 2<br />
Sauerbraten / Roast loin 25-30 min. Setting 2<br />
Roast beef 30-40 min. Setting 2<br />
Boiled beef 40-60 min. Setting 2<br />
Poultry<br />
Chicken breast/leg 10-15 min. Setting 2<br />
Turkey breast/drumstick 20-25 min. Setting 2<br />
Stewing/Soup chicken 25-35 min. Setting 2<br />
(depending on size and age)<br />
Game and lamb<br />
Saddle of deer about 15 min. Setting 2<br />
Roast deer venison about 20 min. Setting 2<br />
Elk venison stew 15-20 min. Setting 2<br />
Roast elk venison about 25 min. Setting 2<br />
Wild boar goulash 15-20 min. Setting 2<br />
Roast wild boar about 25 min. Setting 2<br />
Roast hare 15-20 min. Setting 2<br />
Lamb stew 10-15 min. Setting 2<br />
Roast lamb 15-20 min. Setting 2<br />
Fish<br />
Fish stew 3-4 min. Setting 1<br />
Salmon 5-6 min. Setting 1<br />
Halibut 6-7 min. Setting 1<br />
Haddock 6-7 min. Setting 1<br />
Ocean perch 7-8 min. Setting 1<br />
Soups and stews<br />
Vegetable soup 4-6 min. Setting 2<br />
Potato soup 6-8 min. Setting 2<br />
Goulash soup 10-15 min. Setting 2<br />
Beef broth 35-40 min. Setting 2<br />
Vegetables<br />
Artichokes (whole) 15-20 min. Setting 1<br />
Cauliflower/broccoli (florets) 2-3 min. Setting 1<br />
Cauliflower (whole) 8-10 min. Setting 1<br />
Green beans (fresh) 5-7 min. Setting 1<br />
Kohlrabi (pieces) 5-8 min. Setting 1<br />
Corn on the cob 5-6 min. Setting 1<br />
Mixed vegetables 5-6 min. Setting 1<br />
Carrots 4-6 min. Setting 1<br />
Green/red peppers 1-2 min. Setting 1<br />
Red/white cabbage (strips) 7-10 min. Setting 1<br />
White asparagus (whole) 5-7 min. Setting 1<br />
Savoy cabbage (strips) 7-10 min. Setting 1<br />
Boiled potatoes (in quarters) 8-10 min. Setting 2<br />
Jacket potatoes (whole) 12-15 min. Setting 2<br />
Legumes and grains<br />
Lentils (not presoaked) 10-15 min. Setting 2<br />
Peas (shelled, not presoaked) 12-15 min. Setting 2<br />
Barley 15-20 min. Setting 2<br />
Millet, buckwheat 6-7 min. Setting 2<br />
(do not leave to swell)<br />
Brown rice 7-9 min. Setting 2<br />
(do not leave to swell)<br />
Oats, wheat, barley, rye, 8-9 min. Setting 2<br />
spelt, unripe spelt grain<br />
(leave to swell)<br />
Depressurize the cooker and allow<br />
the contents to swell after cooking<br />
in the closed pot for about 15 minutes.
10. Cleaning and care<br />
Cleaning<br />
Always wash the pressure cooker after you have used it.<br />
- Remove the silicone gasket from the lid and wash it by hand.<br />
- Remove the control valve and wipe it off with a moist cloth.<br />
- Remove the lid handle when needed (at the latest, when it looks dirty) and rinse it under running water.<br />
- The pot, lid (without the silicone gasket, control valve, and lid handle), and insets can also be placed in the dishwasher.<br />
Please note:<br />
- To clean, use clear, hot water and dishwashing liquid and a dishwashing sponge or a soft brush. Do not use pointed,<br />
rough or sharp objects. If the inside or bottom is very dirty, you can use the rough side of the sponge.<br />
- Do not let food residues dry onto the cooker, and do not store foods in the cooker for a long time, as this could<br />
cause stains in the stainless steel and changes in the surface.<br />
- To maintain the stainless steel surface, use Fissler Stainless Steel Care regularly. It is outstanding for removing rainbow<br />
discolorations or films.<br />
- When cleaning the cooker parts in the dishwasher, use only conventional household dishwashing products in the<br />
amounts recommended by the manufacturer. Do not use industrial detergents or highly concentrated cleaning<br />
products.<br />
Mounting the control valve and lid handle<br />
Control valve (Fig. A-5)<br />
To remove: See Fig. R<br />
Loosen the bell-shaped nut (Fig. A-21) by turning it in a counter-clockwise direction, and remove the control valve<br />
and the nut.<br />
To mount: See Fig. S<br />
Insert the control valve in the proper place in the lid, from the top, screw in the bell-shaped nut in a clockwise direction<br />
from the bottom, and tighten firmly.<br />
Lid handle (Fig. A-1)<br />
To remove: See Fig. T<br />
Remove the lid handle by turning the lid screw (Fig. A-19) on the inside of the lid in a counter-clockwise direction.<br />
To mount: See Fig. U<br />
Hold the lid handle in your hand and place the lid on it in the appropriate position. Turn the lid screw in a clockwise<br />
direction and tighten it firmly.<br />
Storage<br />
The silicone gasket should be stored in a dark place (protected from sunlight and UV radiation), dry and clean.The<br />
silicone gasket will last longer if you place the lid upside down on top of the pot after it is cleaned, so that the ring<br />
will not be crushed.<br />
Maintenance<br />
Cleaning and care<br />
The parts of the pressure cooker that are subject to wear must be replaced regularly. You will find additional information<br />
on this in Chapter 12.<br />
D<br />
GB<br />
F<br />
NL<br />
I<br />
E<br />
P<br />
GR<br />
TR<br />
RUS<br />
S<br />
PL<br />
CZ<br />
ARA<br />
45
46<br />
Questions and answers<br />
11. Questions and answers<br />
Important: Always turn off the energy source and let the pressure cooker cool off before you attempt to eliminate<br />
a problem.<br />
Problem Possible reason How to correct the problem<br />
When the cooker is<br />
building pressure, steam<br />
escapes longer than usual<br />
from under the lid handle<br />
(the Euromatic).<br />
No steam escapes when<br />
the cooker is building<br />
pressure.<br />
Steam and/or drops of<br />
water escape at the edge<br />
of the lid before the traffic<br />
light indicator begins to<br />
rise.<br />
You have selected the pressureless<br />
steaming setting or a different setting<br />
below Setting 1.<br />
The cooker is not closed properly. (The<br />
indicator in the lid handle is red.)<br />
The heat source is not high enough.<br />
The cooking zone is not the right size for<br />
the pressure cooker.<br />
The lid handle is loose.<br />
The Fissler Euromatic or its o-ring is dirty<br />
or damaged.<br />
Too little liquid was placed in the cooker.<br />
The heat source is not set high enough.<br />
The silicone gasket is not properly in<br />
place.<br />
The silicone gasket is dirty or damaged.<br />
The cooker is not closed properly. (The<br />
indicator in the lid handle is red).<br />
With pressureless steaming, it is normal<br />
for some steam to escape. If you want to<br />
cook with pressure in a closed system,<br />
select Setting 1 or 2. (See Chapters 6<br />
and 8)<br />
Close the cooker properly. (See Chapter<br />
4) (The indicator in the lid handle is<br />
green.)<br />
Set the heat source at its highest level.<br />
Place the pressure cooker on a cooking<br />
zone with the right size. (See Chapter 5)<br />
Tighten the fastening screw of the lid<br />
handle on the inside of the lid.<br />
Clean or replace the part.<br />
(See Chapter 13)<br />
Add the minimum amount of liquid<br />
(200-300 ml). (See Chapter 5)<br />
Set the heat source on high.<br />
Insert the silicone gasket properly. (See<br />
Chapter 5)<br />
Clean or replace the silicone gasket.<br />
Close the cooker properly.<br />
(See Chapter 4)<br />
(The indicator in the lid handle is green).
Questions and answers<br />
Problem Possible reason How to correct the problem<br />
The traffic light indicator<br />
does not rise.<br />
Steam is escaping near the<br />
control valve.<br />
Steam is escaping under<br />
the lid handle (near the<br />
Euromatic), although the<br />
traffic light indicator has<br />
already risen.<br />
Steam is escaping near the lid handle.<br />
Steam is escaping at the edge of the lid.<br />
Too little liquid was placed in the cooker.<br />
The control valve is not attached correctly<br />
and firmly.<br />
The molded valve seal, valve base seal, or<br />
silicone membrane is missing, defective,<br />
or incorrectly attached.<br />
The temperature is too high for the<br />
selected cooking setting. (The traffic light<br />
indicator is red.)<br />
You have selected the pressureless<br />
steaming setting or a different setting<br />
below Setting 1.<br />
The control valve is not attached correctly<br />
and firmly.<br />
The molded valve seal, valve base seal, or<br />
silicone membrane is missing, defective,<br />
or incorrectly attached.<br />
The lid handle is loose.<br />
The flat gasket for the fastening screw of<br />
the lid handle or the o-ring for the Euromatic<br />
is missing, defective, or mounted<br />
incorrectly.<br />
If a great deal of steam is released, the<br />
Euromatic may have been triggered as<br />
a safety mechanism. This happens if the<br />
valve is dirty or defective.<br />
See previous page.<br />
See previous page.<br />
Add the minimum amount of liquid<br />
(200-300 ml). (See Chapter 5)<br />
Attach the control valve correctly and<br />
tighten the bell-shaped nut.<br />
(See Chapter 10)<br />
Replace the seal or attach it correctly.<br />
(See Chapter 12)<br />
Turn the heat source down. Adjust the<br />
energy source so that the traffic light<br />
indicator remains green during the entire<br />
cooking period. (See Chapter 6)<br />
With pressureless steaming, it is normal<br />
for some steam to escape. If you would<br />
like to cook with pressure in a closed<br />
system, select Setting 1 or 2.<br />
(See Chapters 6 and 8).<br />
Attach the control valve correctly and<br />
tighten the bell-shaped nut.<br />
(See Chapter 10)<br />
Replace the seal or attach it correctly.<br />
(See Chapter 12)<br />
Tighten the fastening screw of the lid<br />
handle on the inside of the lid.<br />
Replace the gasket or o-ring or mount it<br />
correctly. (See Chapter 12)<br />
Remove the control valve and clean or<br />
replace it. (See Chapter 10 and 12)<br />
D<br />
47<br />
GB<br />
F<br />
NL<br />
I<br />
E<br />
P<br />
GR<br />
TR<br />
RUS<br />
S<br />
PL<br />
CZ<br />
ARA
48<br />
Questions and answers<br />
Problem Possible reason How to correct the problem<br />
A great deal of steam is<br />
escaping from the edge of<br />
the lid, although the traffic<br />
light indicator has already<br />
risen.<br />
Steam is escaping from<br />
under the round cover<br />
cap for the lid handle or<br />
the release button.<br />
The cooker is difficult<br />
to close, or the release<br />
button does not pop out<br />
when it closes.<br />
The cooker cannot be<br />
opened.<br />
The silicone gasket is defective.<br />
The silicone gasket has been triggered<br />
as a safety mechanism. This happens if<br />
the valve and the Euromatic are dirty or<br />
defective.<br />
Replace the silicone gasket.<br />
(See Chapter 5 and 12)<br />
Have the cooker checked by Fissler<br />
Customer Service.<br />
A seal is defective. Replace the lid handle or have it checked<br />
by Fissler Customer Service.<br />
The lid and/or pot handle are not correctly<br />
mounted.<br />
The lid handle is defective.<br />
The silicone gasket is not properly in<br />
place.<br />
The cooker is not properly closed.<br />
(The indicator in the lid handle is red.)<br />
There is still pressure in the cooker.<br />
The Euromatic is jammed.<br />
The lid handle is loose. The fastening screw has not been<br />
tightened.<br />
The handles on the pot<br />
are loose.<br />
The handle screws have not been<br />
tightened.<br />
Check how the handles are mounted<br />
and tighten screws if necessary.<br />
Replace the lid handle.<br />
Insert the silicone gasket properly.<br />
(See Chapter 5)<br />
Close the cooker properly.<br />
(See Chapter 4)<br />
(The indicator in the lid handle is green.)<br />
Depressurize the cooker.<br />
(See Chapter 7)<br />
Let go of the release button. Push the lid<br />
handle a little to the left.<br />
Tighten the fastening screw of the lid<br />
handle on the inside of the lid.<br />
Tighten the screws with a screwdriver.
12. Maintenance and replacement parts<br />
Please note<br />
Replace parts that are subject to wear, such as the silicone gasket and other rubber parts, regularly after you have<br />
cooked with it about 400 times, or after 2 years at the latest, with original Fissler replacement parts. Parts that show<br />
visible damage (e.g. tears, discolorations or deformations) or that do not fit correctly must be replaced immediately.<br />
Otherwise, the functioning and safety of your pressure cooker could be affected.<br />
Information on replacing parts<br />
Silicone gasket (Fig. A-20)<br />
See Chapter 5.<br />
Maintenance and replacement parts<br />
Silicone membrane (Fig. A-22)<br />
See Fig. V<br />
Detach the control valve from the lid and remove the old silicone membrane. Place the new silicone membrane on<br />
the plastic rod of the traffic light indicator and press the edge onto the metal push rod as far as the beginning of the<br />
thread.<br />
Molded valve seal (Fig. A-23)<br />
See Fig. W<br />
Detach the control valve from the lid and remove the old seal. Select Setting 2 on the control valve, because this will<br />
make it easier to mount the seal. First place the new seal over the metal push rod, then press the other side all the<br />
way up over the tappet. Make sure that the molded valve seal is tightly placed around the control valve.<br />
Valve base seal (Fig. A-24)<br />
See Fig. X<br />
Detach the control valve from the lid and remove the old seal. Put the new seal in place and make sure that the seal<br />
is perfectly flat on both sides of the lid.<br />
O-ring for Euromatic (Fig. A-18)<br />
See Fig. I<br />
The o-ring is removed/mounted on the inside of the lid. Make sure that the ring lies totally in the groove provided<br />
for it.<br />
Euromatic (Fig. A-18)<br />
To remove/mount the Euromatic, you must first remove the lid handle.This is very simple, as you only have to loosen<br />
the screw on the inside of the lid.You can remove the Euromatic from the lid as soon as you have removed the<br />
o-ring. For mounting, guide the new Euromatic without the o-ring through the lid so that the side with the white ball<br />
is on the inside of the lid. Then you can mount the o-ring as described above.<br />
D<br />
GB<br />
F<br />
NL<br />
I<br />
E<br />
P<br />
GR<br />
TR<br />
RUS<br />
S<br />
PL<br />
CZ<br />
ARA<br />
49
50<br />
Maintenance and replacement parts<br />
Replacement parts<br />
Replacement parts Diameter Article Number<br />
Silicone gasket (Fig. Y-1) 18 cm 600-000-18-795<br />
22 cm 600-000-22-795<br />
26 cm 600-000-26-795<br />
Pot handle for pressure skillet (Fig. Y-2) 18 cm 620-100-01-850<br />
22 cm 620-300-02-850<br />
26 cm 620-700-04-850<br />
Pot handle for pressure cooker (Fig. Y-2) 18 cm 620-100-02-850<br />
22 cm 620-300-04-850<br />
26 cm 620-700-08-850<br />
Helper handle for pressure skillet (Fig. Y-3) 18 cm 600-100-01-840<br />
22 cm 600-300-02-840<br />
26 cm 600-700-04-840<br />
Helper handle for pressure cooker (Fig. Y-3) 18 cm 600-100-02-840<br />
22 cm 600-300-04-840<br />
26 cm 600-700-08-840<br />
Lid handle (Fig. Y-4) all 620-000-00-770<br />
Control valve (Fig. Y-5) all 620-000-00-700<br />
Bell-shaped nut for control valve (Fig. Y-6) all 610-000-00-734<br />
Silicone membrane (Fig. Y-7) all 610-000-00-711<br />
Molded valve seal (Fig. Y-8) all 610-000-00-706<br />
Valve base seal (Fig. Y-9) all 610-000-00-733<br />
Set consisting of silicone membrane, molded<br />
valves seal, valve base seal (Fig. Y-7, 8, 9)<br />
all 610-000-01-706<br />
Euromatic, complete (Fig.Y-10) all 011-631-00-750<br />
O-ring for Euromatic (Fig.Y-11) all 011-631-00-760<br />
Fastening screw for lid handle, with flat<br />
gasket (Fig. Y-12)<br />
all 600-000-00-712
Accessories<br />
Accessories Diameter Article Number<br />
Perforated inset (incl. tripod) (Fig. Z-1) 18 cm 610-100-00-800<br />
22 cm 610-300-00-800<br />
26 cm 610-700-00-800<br />
Unperforated inset (incl. tripod) (Fig. Z-2) 22 cm 610-300-00-820<br />
26 cm 610-700-00-820<br />
Additional lid, glass (Fig. Z-3) 22 cm 021-641-22-600<br />
Additional lid, metal (Fig. Z-4) 22 cm 623-000-22-700<br />
26 cm 623-000-26-700<br />
Deep-frying basket (Fig. Z-5) 26 cm 022-656-04-600<br />
All replacement parts can be purchased from your Fissler retailer or in the specialty departments of department<br />
stores. Our Customer Service Department will also be happy to help you. (For addresses, see Chapter 13).<br />
You will find a list of dealers, as well as additional information, at www.fissler.com.<br />
Maintenance and replacement parts<br />
D<br />
GB<br />
F<br />
NL<br />
I<br />
E<br />
P<br />
GR<br />
TR<br />
RUS<br />
S<br />
PL<br />
CZ<br />
ARA<br />
51
52<br />
Warranty and service<br />
13. Warranty and service<br />
All Fissler products are meticulously manufactured from high-quality materials. The quality of our products is checked<br />
several times during the manufacturing process. On completion, they are subjected to a stringent final check.<br />
3-year manufacturer’s warranty<br />
This is why we provide a 3-year warranty on all of our pressure cookers beginning with the date of purchase. In the<br />
event of a complaint, please return the complete item, together with the sales receipt, to your retailer or send it,<br />
carefully packaged, directly to Fissler Customer Service (address below).<br />
Not included in this warranty are all parts that are subject to wear, such as the:<br />
- silicone gasket<br />
- molded valve seal<br />
- valve base seal<br />
- silicone membrane<br />
- o-ring for Euromatic<br />
- flat gasket for the fastening screw of the lid handle<br />
No warranty is granted for damage resulting from the following:<br />
- incorrect or improper use<br />
- faulty or negligent handling<br />
- incorrectly executed repairs<br />
- the use of replacement parts that are not original Fissler parts<br />
- chemical or physical influences on the product surfaces<br />
- noncompliance with the Instructions for Use<br />
10-year availability guarantee for replacement parts<br />
All functional parts of your pressure cooker can be obtained for at least 10 years after the product is discontinued.<br />
Customer Service address<br />
Fissler GmbH<br />
Customer Service Department<br />
Harald-Fissler-Str. 10<br />
D-55768 Hoppstädten-Weiersbach, Germany<br />
Phone: +49 6781 403 556<br />
For additional information, go to www.fissler.com