fissler blue-point - Hip Pressure Cooking
fissler blue-point - Hip Pressure Cooking
fissler blue-point - Hip Pressure Cooking

Create successful ePaper yourself
Turn your PDF publications into a flip-book with our unique Google optimized e-Paper software.
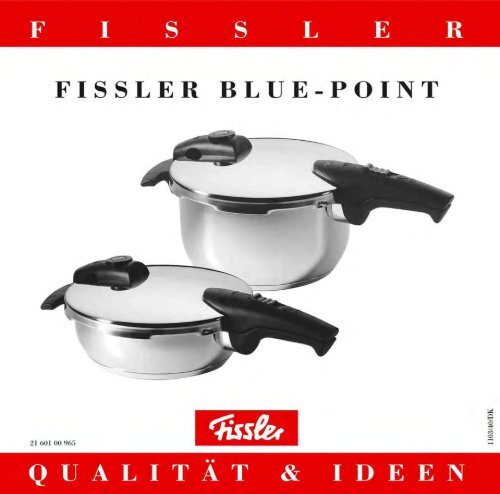
FISSLER BLUE-POINT<br />
Contents<br />
Page<br />
1. Safety instructions ..............................19<br />
2. Description of the<br />
pressure cooker ..................................21<br />
3. The <strong>blue</strong>-<strong>point</strong> pressure<br />
cooker safety systems............................22<br />
4. About the pressure cooker ....................22<br />
5. How the pressure cooker works ..............23<br />
6. Before using for the first time ................23<br />
7. Basic information ................................23<br />
8. The pressure cooking process ................26<br />
9. Care instructions ................................28<br />
10. Questions and answers ..........................29<br />
11. Replacement parts ..............................32<br />
12. <strong>Cooking</strong> times ....................................34<br />
13. The Fissler warranty ............................35<br />
Dear Customer,<br />
Congratulations on your new Fissler pressure<br />
cooker! It will enable you to cook foods quickly,<br />
yet gently. You will be saving up to 70 % of the<br />
usual cooking time and up to 50 % of the energy<br />
you would normally need – without sacrificing vitamins<br />
or natural flavor. The foods cooked in your<br />
pressure cooker will be healthful and delicious.<br />
These Instructions for Use will tell you about the<br />
various functions and design details which make it<br />
easy and safe for you to cook in your pressure<br />
cooker. You will soon know all about it.<br />
Please follow the Instructions<br />
for Use very carefully,<br />
to prevent problems<br />
which might result from<br />
improper handling. Remember that the cooker<br />
is under pressure when it is in operation.<br />
We hope that you will enjoy cooking healthful and<br />
nutritious foods with your Fissler pressure cooker.<br />
Sincerely,<br />
Your Fissler Company<br />
This product complies with the provisions of EU Directive 97/23/EC<br />
on pressure equipment.<br />
Conformity to this Directive is indicated by the CE marking.-
FISSLER BLUE-POINT<br />
1. Safety instructions<br />
• Read the Instructions for Use carefully before using<br />
your pressure cooker for the first time. Do not<br />
permit anyone who is not familiar with these Instructions<br />
to use the cooker.<br />
• Keep children away from the pressure cooker<br />
when it is being used.<br />
• Only use the pressure cooker for the purposes described<br />
in the Instructions for Use.<br />
• Never place the pressure cooker or pressure skillet<br />
in the oven, as this would destroy plastic and<br />
rubber parts and the safety mechanisms. Do not<br />
cover the pressure skillet or pressure cooker when<br />
deep-frying.<br />
• Only use the pressure cooker with the heat sources<br />
which are described in the Instructions for Use<br />
(see Chapter 2).<br />
• <strong>Pressure</strong> cookers are not to be used for medical<br />
purposes, especially not as sterilizers, as pressure<br />
cookers are not designed to reach the temperatures<br />
necessary for sterilization.<br />
• Before using your pressure cooker, and each time<br />
you use it, check to make sure that the safety mechanisms<br />
are not damaged or dirty (see Chapter 7).<br />
• Do not alter the safety mechanisms, except for the<br />
maintenance measures described in the Instructions<br />
for Use. Do not repair or oil the valves! Use<br />
only original Fissler replacement parts (see Chapter<br />
11), to ensure that your pressure cooker will<br />
function properly and safely.<br />
• Make sure that parts which wear out, such as the<br />
rubber gasket, silicone membrane, O-ring for the<br />
Euromatic, and valve base seal, are replaced after<br />
1-2 years at the latest by Fissler original replacement<br />
parts. Replace parts which show discolorations,<br />
have cracks or other damage, or do not<br />
fit correctly with Fissler original replacement<br />
parts before using the pressure cooker again.<br />
• Make sure that you only use your Fissler pressure<br />
cooker with the Fissler pressure cooker lid for the<br />
same model.<br />
• Never use your pressure cooker without adding<br />
liquid, as this could result in damage from overheating<br />
to the cooker and the burner. Adhere<br />
strictly to the following content amounts:<br />
Minimum: 1 /4 liter (2 cups) of liquid.<br />
Maximum: 2/3 of the volume of the pressure<br />
cooker. For foods which foam or rise (e.g. rice,<br />
legumes, broths, or dried vegetables), 1 /2of the volume<br />
of the cooker.<br />
Use the volume indicator inside the cooker and additional<br />
information in Chapter 7.
FISSLER BLUE-POINT<br />
• <strong>Pressure</strong> cookers are under pressure when in use!<br />
Not adhering to the Instructions for Use can lead<br />
to burns and scalding. Make sure that the cooker<br />
is properly closed before it is heated up (see Chapter<br />
7).<br />
• Keep an eye on the pressure cooker while cooking,<br />
especially the indicator rod. Regulate the energy<br />
level so that the indicator rod does not rise above<br />
the desired cooking setting. In this case, if the energy<br />
level is not decreased, steam will escape<br />
through the valve. <strong>Cooking</strong> times will change, and<br />
a total loss of liquid can result in damage to the<br />
cooker and burner.<br />
• Move the pressure cooker very carefully when it is<br />
under pressure. Do not touch the hot outer surfaces<br />
of the pressure cooker, as you could burn<br />
yourself by doing so! Only touch the handles when<br />
cooking, and use potholder gloves when necessary.<br />
• <strong>Pressure</strong> cookers must be shaken before opening.<br />
This will prevent pockets of steam which might be<br />
caught within the food from spattering up when the<br />
pressure cooker is opened and scalding you. Do<br />
not cook applesauce or stewed fruits in a pressure<br />
cooker.<br />
• Never try to force the pressure cooker open. Do<br />
not open it before you are certain that the steam inside<br />
has been expelled completely. Follow the instructions<br />
for opening the cooker (Chapter 8).<br />
• Always keep your hands, head and body out of the<br />
danger zone when releasing steam from the pressure<br />
cooker! Be particularly careful about this<br />
when depressurizing with the safety slide.<br />
• If you have cooked meat with skin (e.g. tongue) or<br />
sausage with casing which can swell when under<br />
pressure, do not pierce the skin as long as it is<br />
swollen. This could result in scalding!<br />
• If the pressure cooker – or any of its parts – is damaged<br />
or does not function as described in the Instructions<br />
for Use, do not use the pressure cooker.<br />
Get in touch with your Fissler retailer or Fissler<br />
Customer Service immediately.<br />
• Feel free to contact your Fissler retailer or Fissler<br />
Customer Service if you have any questions after<br />
reading the Instructions for Use. They will be<br />
pleased to help you.<br />
• Keep these Instructions for Use in a safe place.
FISSLER BLUE-POINT<br />
2. Description of the<br />
pressure cooker<br />
See Fig. A<br />
1. Fissler safety handle for safe handling<br />
2. Ergonomically designed safety slide for determining<br />
the cooking method, releasing steam, and<br />
unlocking the cooker<br />
3. Fissler Euromatic safety valve, located below the<br />
front part of the lid handle<br />
4. Colored mark on the pot handle and stamp on the<br />
lid, for correct positioning of the lid<br />
5. Easy-care control valve unit with safety mechanism<br />
6. Extra large indicator rod with marks for the<br />
Gentle Setting and the Speed Setting, located in<br />
the control valve unit<br />
7. Valve base seal, for sealing the main control valve<br />
8. Silicone membrane, to protect the indicator rod<br />
9. Screw for removing the control valve unit<br />
10.Rubber gasket<br />
11.Side handle, for safe handling<br />
12.Flame protection zone for handles, for cooking<br />
on gas stoves<br />
13.Base with integrated base stamp.<br />
Base for optimum heat absorption, distribution<br />
and storage<br />
The Super Thermic base is suited for<br />
use on gas and electric stoves (solid<br />
burners or glass ceramic cooking surfaces).<br />
The Fissler CookStar all-stove base<br />
can also be used on gas and electric<br />
stoves, as well as induction stoves.<br />
The base stamp contains the information below:<br />
See Fig. B<br />
a – Nominal capacity (not equal to usable capacity)<br />
b – Maximum permissible steam release pressure on<br />
the control valve<br />
c – Date manufactured (calendar week/year)<br />
d – CE mark<br />
14. Steamer set, with the perforated inset and tripod<br />
stand. (<strong>Pressure</strong> cookers are also available without<br />
steamer sets. Steamer sets can be purchased<br />
separately in stores.)
FISSLER BLUE-POINT<br />
3. The <strong>blue</strong>-<strong>point</strong> pressure<br />
cooker safety systems<br />
• Control valve unit:<br />
1. with the indicator rod with markings for the<br />
Gentle Setting and the Speed Setting<br />
2. with pressure limitation function (If the Speed<br />
Setting is exceeded, the control valve automatically<br />
shuts off, at a maximum of 1.5 bar.)<br />
• Fissler Euromatic:<br />
1. for automatic depressurizing of the cooker<br />
2. as a residual pressure block (When the safety<br />
slide is under pressure, it is blocked by the valve<br />
gate and cannot be opened. The pressure<br />
cooker can only be opened when it is completely<br />
pressureless.)<br />
3. with a safety function if the lid has been closed<br />
incorrectly (The valve does not seal the opening<br />
in the lid and thus does not permit pressure to<br />
build.)<br />
4. with a pressure limitation function (If there is a<br />
defect in the safety valve in the control valve unit,<br />
the Euromatic automatically expels steam.)<br />
• Rubber gasket<br />
• Safety slide in the lid handle (works with Euromatic):<br />
1. to determine the cooking method (with or without<br />
pressure)<br />
2. to reduce pressure by releasing steam<br />
3. to unlock the lid before it is removed<br />
• Lid with bayonet locking system: ensures secure<br />
closure under operating pressure<br />
• Safety handle for safe handling<br />
4. About the pressure cooker<br />
The <strong>blue</strong>-<strong>point</strong> pressure cooker makes perfect cooking<br />
results easy. You can choose between cooking<br />
under pressure and conventional cooking without<br />
pressure. The marking on the lid handle makes this<br />
easy: For pressure cooking, after closing the cooker,<br />
you set the safety slide at the closed position . In<br />
this position, steam can build up.<br />
The cooking process begins automatically with the<br />
Fissler Euromatic, which expels the air from the<br />
pressure cooker. This means that the oxygen in the<br />
air, which can destroy important vitamins during<br />
cooking, cannot affect the vitamin content and<br />
aroma.<br />
The extra large indicator rod shows the cooking setting:<br />
At the Gentle Setting (1st ring), for vegetables<br />
and other delicate foods, the temperature is approximately<br />
109°C (about 0.4 bar). At the Speed Setting<br />
(2nd ring), for stews or meat dishes, it is approximately<br />
116°C (about 0.8 bar). If the operating pressure<br />
for the Speeding Setting in the pressure cooker<br />
is exceeded, steam is released automatically, at a<br />
maximum of 1.5 bar.<br />
If vegetables are cooked in the perforated inset in<br />
steam instead of in water, most of the water-soluble<br />
vitamins are preserved.<br />
For conventional cooking without pressure, after<br />
closing the cooker, set the safety slide at the open<br />
position .
FISSLER BLUE-POINT<br />
5. How the pressure cooker<br />
works<br />
Steam is formed in the closed cooker, which must always<br />
contain a certain amount of liquid. Air is expelled<br />
through the Fissler Euromatic, which then<br />
closes automatically.<br />
The pressure in the cooker is built up, the temperature<br />
increases, and the indicator rod rises. Now you<br />
have to turn down the burner.<br />
When the desired cooking setting has been reached,<br />
the actual cooking time begins. The indicator rod<br />
tells you how high the pressure is in the cooker at any<br />
given moment.<br />
After the cooking time has elapsed, the pressure<br />
cooker must be depressurized completely (see Chapter<br />
8). Only then can it be opened.<br />
6. Before using for the first<br />
time<br />
Wash the cooker and the lid thoroughly with dishwashing<br />
liquid. Then fill the cooker about halfway<br />
with water and boil at the Speed Setting (2nd ring),<br />
as described in these Instructions.<br />
7. Basic information<br />
Opening the cooker<br />
See Fig. C<br />
• Push the safety slide forward to the open position<br />
and<br />
See Fig. D<br />
• turn the lid in the opposite direction to that shown<br />
by the arrow, until the red dot on the pot handle and<br />
the circle on the lid are lined up. Then lift the lid.<br />
Before cooking<br />
See Fig. E<br />
Check to see that the valve gate in the control valve<br />
unit can move freely, by gently pushing it upward<br />
from the inside of the lid through the valve base seal<br />
with a suitable object. If it springs back easily, it will<br />
function properly.<br />
See Fig. F<br />
Check to see that the indicator rod can move freely,<br />
by gently pushing it upward. If it springs back easily,<br />
it will function properly.<br />
See Fig. G<br />
Check to see that the Fissler Euromatic (a) does not<br />
stick and is loosely in place in the lid and can move<br />
freely, by shaking it gently.<br />
Check to see that the rubber gasket (b) is correctly in<br />
place in the lid.<br />
What and how to cook in the pressure cooker and<br />
pressure skillet
FISSLER BLUE-POINT<br />
You can use the pressure cooker for almost any kind<br />
of cooking: boiling, braising, steaming and browning.<br />
Make sure that you always have the proper amount<br />
in the pressure cooker when it is closed. The volume<br />
indicator inside the cooker will help you when<br />
adding liquids.<br />
See Fig. H<br />
Maximum volume:<br />
The maximum volume for common foods is 2/3 of the<br />
pressure cooker’s capacity (upper mark).<br />
For foods which swell or foam (e.g. legumes, rice,<br />
noodles, broths, or dried vegetables), the volume<br />
may not exceed the lower mark. The cooker is then<br />
half full.<br />
Minimum volume:<br />
Please remember that the cooker must always contain<br />
at least 1/4 liter (2 cups) of liquid when you are<br />
cooking with or without the inset.<br />
Important:<br />
Always add enough liquid for steam to form, and<br />
make sure that the liquid in the pressure cooker<br />
does not evaporate completely. Never allow the<br />
cooker to “cook until dry,” as the resulting overheating<br />
could damage the cooker (e.g. melt the<br />
base or damage the safety mechanisms) and the<br />
burner. In case of overheating, never remove the<br />
cooker from the burner. Simply turn off the<br />
burner and let the cooker cool down for a while<br />
on it. Have the pressure cooker checked by<br />
Fissler Customer Service before you use it again.<br />
<strong>Cooking</strong> without the inset<br />
Preparing meat<br />
See Fig. I<br />
1.Browning with fat:<br />
–Turn the burner to medium high to high, and heat<br />
up the pressure cooker on it.<br />
– Conduct the water drop test*. As soon as the<br />
cooker is hot enough, add fat.<br />
– Brown the meat on the bottom of the cooker, reducing<br />
the heat if necessary. Then add the other<br />
ingredients as usual.<br />
– Use the amount of liquid called for in your recipe,<br />
but at least 2 cups, or a good 1/4 liter.<br />
– Close the cooker (see Chapter 7).<br />
–Turn the burner to high.<br />
2.Browning without fat:<br />
–Turn the burner to medium high to high, and heat<br />
up the pressure cooker on it.<br />
– Conduct the water drop test*. As soon as the<br />
cooker is hot enough…<br />
– Place the meat in the hot pressure skillet or on the<br />
bottom of the pressure cooker, reducing the heat if<br />
necessary. If the meat “sticks” to the bottom, do<br />
not try to remove it. After about 2 minutes, it will<br />
loosen by itself.<br />
If you have cooked meat with skin (e.g. tongue) or<br />
sausage with casing which can swell when under<br />
pressure, do not pierce the skin as long as it is<br />
swollen. This could result in scalding!<br />
* Water drop test: When drops of water sprinkled<br />
onto the bottom of the cooker “dance around,” the<br />
right temperature for frying has been reached.<br />
Preparing soups and stews<br />
Soups and stews should always be cooked without<br />
the inset. The cooker must never be more than 2/3
FISSLER BLUE-POINT<br />
full. In the case of foods which swell or foam a great<br />
deal, only half full. First place the soup in the cooker,<br />
leaving it uncovered, and bring to a boil two or three<br />
times, so that you can scoop off the foam, stir, and<br />
then close the cooker.<br />
Do not prepare stewed fruits or applesauce in a pressure<br />
cooker! Disregarding this warning may result in<br />
scalding!<br />
<strong>Cooking</strong> in the perforated inset<br />
Vegetables, fish, and other delicate foods can be<br />
cooked in the perforated inset, with or without the<br />
tripod.<br />
See Fig. J<br />
Preparing vegetables and potatoes<br />
• Pour a minimum of 2 cups (a good 1/4 liter) of<br />
liquid into the pressure cooker. If desired, add<br />
herbs, seasonings or wine.<br />
• Place the trimmed vegetables in the perforated inset,<br />
then set it on top of the tripod in the cooker.<br />
• Close the cooker.<br />
• Turn the burner to high.<br />
Preparing fish<br />
After adding the minimum amount of liquid, cook<br />
the fish in its own juice at the bottom of the cooker,<br />
or else steam it in the perforated inset.<br />
<strong>Cooking</strong> in the unperforated inset<br />
Please remember that the unperforated inset may<br />
only be used together with the tripod (or the perforated<br />
inset).<br />
Note: Replacement sets can also be purchased separately<br />
in stores.<br />
Deep-frying in the pressure cooker<br />
• For deep-frying in the pressure cooker, the cooker<br />
must always be open, without a lid. Only fill the<br />
cooker halfway, in order to prevent burns due to<br />
foaming oil or grease spatters. Make sure that you<br />
do not overheat the fat.<br />
Conventional cooking (without pressure)<br />
Once the cooker is closed, make sure that the safety<br />
slide is in the open position . No steam will be<br />
formed, and the indicator rod will not rise. It is normal<br />
for steam to escape from under the lid handle.<br />
Closing the cooker<br />
See Fig. K<br />
Put on the lid so that the circular marking on the lid<br />
and the red dot on the pot handle are lined up. The<br />
safety slide should be in the open position .<br />
See Fig. L<br />
To lock, turn the lid in the direction shown by the<br />
arrow (clockwise) as far as possible.<br />
See Fig. M<br />
The lid handle, pot handle, and side handle are now<br />
aligned.<br />
See Fig. N<br />
For pressure cooking, pull the safety slide back as<br />
far as possible. The cooker is now locked, and the<br />
safety slide is in the closed position.<br />
See Fig. O<br />
For conventional cooking, without pressure, the<br />
slide must be set at open and may not be changed<br />
during cooking.
FISSLER BLUE-POINT<br />
8. The pressure cooking<br />
process<br />
To begin cooking<br />
Place the pressure cooker on the proper burner:<br />
<strong>Pressure</strong> cooker diam.<br />
18 cm<br />
22 cm<br />
26 cm<br />
Always begin with the burner at high. When using a<br />
gas stove, make sure that the flame does not go beyond<br />
the edge of the pot base.<br />
When cooking begins, the temperature rises and the<br />
process begins automatically. Steam escapes from<br />
under the lid handle, taking with it the oxygen in the<br />
air, which can destroy vitamins and minerals. This<br />
process may take a few minutes. The Fissler Euromatic<br />
valve closes automatically. Shortly afterwards,<br />
the indicator rod begins to rise. The first<br />
white ring becomes visible.<br />
See Fig. P<br />
• The Gentle Setting (1st ring) means gentle cooking.<br />
It is especially suited for delicate foods like vegetables<br />
or fish.<br />
See Fig Q<br />
Burner diam.<br />
14.5 cm<br />
18 cm<br />
21 or 22 cm, 18 cm<br />
• The Speed Setting (2nd ring) means fast cooking.<br />
It is especially suited for foods which must be<br />
cooked longer, such as soups, meats or stews.<br />
Turn down the heat<br />
• If you want to cook very gently at the Gentle Setting<br />
(1st ring), turn down the heat on your stove<br />
shortly before the first white ring becomes visible.<br />
The first white ring must remain visible during the<br />
entire cooking period.<br />
• If you want to cook very quickly at the Speed Setting<br />
(2nd ring), turn down the heat just about when<br />
the first white ring has become completely visible.<br />
The second white ring must remain visible during<br />
the entire cooking period.<br />
If the indicator rod continues to rise after the second<br />
ring has become visible, you will hear a hissing<br />
sound, and the excess steam will escape through the<br />
main control valve. This means that the temperature<br />
is too high and the burner must be turned down, or<br />
else the liquid will evaporate completely.<br />
The cooking time begins<br />
At the gentle setting (1st ring), the cooking time begins<br />
as soon as the first white ring is visible. At the<br />
speed setting (2nd ring), it begins as soon as the second<br />
ring is also completely visible. <strong>Cooking</strong> times can<br />
be found in the tables (see Chapter 12). These cooking<br />
times are only guidelines, however. The actual<br />
cooking time depends on the quality and size of the<br />
items being cooked, as well as personal taste. It is a<br />
good idea to use a kitchen timer, such as the magic<br />
timer.<br />
End of the cooking time<br />
When the cooking time has elapsed, remove the pressure<br />
cooker from the stove and depressurize it.
FISSLER BLUE-POINT<br />
Important:<br />
Never force the cooker open. It may only be<br />
opened if the indicator rod has fallen back into its<br />
socket completely, no more steam is escaping,<br />
and the safety slide can be easily moved to the end<br />
position . Always shake the cooker before you<br />
open it. This will prevent pockets of steam which<br />
might be caught within the food from spattering<br />
up when the pressure cooker is opened. If you do<br />
not do so, you are in serious danger of suffering<br />
burns and scalding by the escaping steam and<br />
food.<br />
There are three different ways of depressurizing the<br />
cooker:<br />
1. Cool the cooker under running water<br />
See Fig. R<br />
Hold the cooker under the water tap and run gently<br />
flowing cold water over the lid – but not over the handle<br />
or control valve unit – until the indicator rod has<br />
fallen back into its socket completely. Do not place<br />
the cooker in water.<br />
Shake the cooker, and then move the safety slide toward<br />
the open position . If steam still escapes,<br />
push the slide to the closed position and then hold<br />
the cooker under the water tap again Repeat this until<br />
no escaping steam can be seen or heard and the<br />
safety slide can be easily moved into the open position<br />
. Then open the cooker.<br />
2. Release steam<br />
See Fig. S<br />
You can use the safety slide to release steam. To do<br />
so, move the safety slide toward the open position<br />
and hold it there. Steam will stream out of the lid<br />
handle and over the lid. When the indicator rod has<br />
fallen back into its socket completely and no more<br />
steam is escaping, close the safety slide and shake the<br />
cooker. Then move the safety slide toward the open<br />
position again, so that the remaining steam can<br />
escape. Keep repeating these steps until no escaping<br />
steam can be seen or heard and the safety slide can<br />
be easily moved into the open position . Then<br />
open the cooker.<br />
Important:<br />
Do not use this depressurizing method when<br />
cooking soups, vegetables, stews, tongue, or<br />
other foods which are pulpy or which tend to rise<br />
or foam. Applesauce and stewed fruits should not<br />
be made in a pressure cooker. Failure to observe<br />
this may result in scalding!<br />
3. Set aside to cool off<br />
With this method, it takes quite a while for the temperature<br />
to fall. It should thus not be used for foods<br />
with very short cooking times, such as fish or vegetables,<br />
for they can easily become overcooked while the<br />
cooker is cooling down. It doesn’t matter, however, if<br />
a pea soup cooks a little longer than planned.<br />
When the indicator rod is no longer visible, shake<br />
the cooker gently, then move the safety slide toward<br />
the open position . If steam is still escaping, close
FISSLER BLUE-POINT<br />
the safety slide and shake the cooker gently. Repeat<br />
this until no escaping steam can be seen or heard and<br />
the safety slide can be easily moved into the open position<br />
. Then open the cooker.<br />
Opening during cooking<br />
If you should need to open the pressure cooker during<br />
the cooking process, it must be depressurized<br />
first as described here. The lid will be hot, so be careful<br />
when opening and closing it! Only touch the handles,<br />
to avoid burning yourself.<br />
Remember that you are interrupting the cooking<br />
process by opening the cooker. When you continue<br />
cooking, you must adjust the remaining cooking time<br />
and set the timer accordingly.<br />
9. Care instructions<br />
Wash the pressure cooker each time it is used. The<br />
pot and lid can be washed by hand in the usual way<br />
or placed in the dishwasher. Do not place the gasket<br />
in the dishwasher, as it might be damaged by the<br />
dishwasher detergent.<br />
Use Fissler Stainless Steel Cleanser to remove water<br />
spots and to give your pressure cooker a brilliant<br />
shine. Do not use steel wool or abrasive scouring<br />
powders or liquids.<br />
Cleaning the valves<br />
See Fig. T<br />
Each time you use the pressure cooker, wash the control<br />
valve unit by holding the opening under running<br />
hot water.<br />
Also wash the valve base seal and the silicone membrane.<br />
See Fig. U<br />
If the control valve is dirty, remove the entire unit.<br />
To do so, loosen the screw in the inside of the lid,<br />
using a coin, for example.<br />
See Fig. V<br />
Remove the control valve unit completely and wash<br />
it under running water. After the control valve unit<br />
and the lid have been washed, mount the valve on its<br />
holder again, attaching it with the screw.<br />
Food particles should be removed from the Euromatic<br />
safety valve under running water. It does not<br />
have to be removed to do so.<br />
For a longer service life<br />
The rubber gasket will last longer if you place the lid<br />
upside down on top of the pressure cooker after it<br />
has been washed.<br />
Note:<br />
Depending on how often you use your pressure<br />
cooker, you should replace the rubber gasket,<br />
the silicone membrane, the O-ring for the Euromatic,<br />
and the valve base seal every 1-2 years. In<br />
case of damage (tears or cracks, deformation on<br />
the edges, hardening or discoloration), these<br />
parts should be replaced immediately. Failure to<br />
do so may affect proper functioning and safety.
FISSLER BLUE-POINT<br />
10. Questions and answers<br />
Problem<br />
The Fissler Euromatic expels steam<br />
longer than usual at the beginning.<br />
No steam escapes from the Fissler<br />
Euromatic at the beginning.<br />
Steam escapes at the edge of the lid.<br />
The indicator rod does not rise.<br />
Possible reason<br />
The safety slide is not in the closed<br />
position .<br />
The Fissler Euromatic valve or its Oring<br />
is soiled or damaged.<br />
The cooker is not closed properly.<br />
The pressure cooker is not on a<br />
burner of the correct size.<br />
The heat source is not set at high.<br />
There is too little liquid in the cooker.<br />
The rubber gasket is not properly in<br />
place.<br />
The rubber gasket is dirty or<br />
damaged.<br />
The cooker is not closed properly.<br />
There is too little liquid in the cooker.<br />
The rubber gasket is damaged or<br />
hardened.<br />
The Fissler Euromatic or its O-ring is<br />
dirty or damaged.<br />
How to correct problem<br />
Push the safety slide into the closed<br />
position .<br />
Clean or replace these parts.<br />
Close cooker properly.<br />
Place the pressure cooker on a burner<br />
of the correct size.<br />
Set the heat source at its highest setting.<br />
Add the minimum amount (1/4 liter)<br />
of liquid.<br />
Insert the gasket properly.<br />
Clean or replace the part.<br />
Close the cooker properly.<br />
Add the minimum amount (1/4 liter)<br />
of liquid.<br />
Insert a new gasket.<br />
Clean or replace the parts.
FISSLER BLUE-POINT<br />
Problem<br />
Steam escapes around the control<br />
valve unit.<br />
Steam escapes around the control<br />
valve unit before the 2nd ring is<br />
visible.<br />
The Fissler Euromatic releases<br />
steam although the indicator rod has<br />
already risen.<br />
Possible reason<br />
The control valve unit is not attached<br />
correctly and firmly.<br />
The O-ring for the fastening screw is<br />
defective, incorrectly mounted or<br />
missing.<br />
The valve base seal is missing.<br />
The safety slide is not in the closed<br />
position .<br />
The silicone membrane is not mounted<br />
or is damaged.<br />
This is normal. If a very large<br />
amount of steam escapes, however,<br />
this means that the temperature is<br />
too high.<br />
The valve base seal is hardened,<br />
damaged, deformed or dirty.<br />
The silicone membrane is defective.<br />
The control valve unit is damaged or<br />
dirty.<br />
The control valve unit is not firmly<br />
attached.<br />
The control valve unit is dirty.<br />
How to correct problem<br />
Attach the control valve unit correctly,<br />
and screw it firmly in place.<br />
Attach an intact O-ring correctly on<br />
the fastening screw.<br />
Insert the valve base seal.<br />
Move the safety slide to the closed<br />
position .<br />
Mount or replace the silicone<br />
membrane.<br />
Turn down the heat source – and then<br />
you can continue cooking as usual.<br />
Make sure that the indicator rod rises<br />
enough for the correct white ring to<br />
remain visible.<br />
Clean or replace the valve base seal.<br />
Replace the silicone membrane.<br />
Clean or replace the control valve<br />
unit.<br />
Attach the control valve unit firmly.<br />
Turn off the burner and let the<br />
pressure cooker cool down. Take the<br />
control valve unit apart and clean it.
FISSLER BLUE-POINT<br />
Problem<br />
The handles are loose.<br />
If you think something is wrong, turn the burner off and let the pressure cooker cool down.<br />
Note:<br />
Possible reason<br />
The control valve unit is damaged.<br />
The screws for the handles are not<br />
firmly tightened.<br />
How to correct problem<br />
Turn off the burner and let the<br />
pressure cooker cool down. Replace<br />
the control valve unit with a new<br />
replacement part.<br />
Tighten the screws with a screwdriver.<br />
If a part is defective, do not continue to use your pressure cooker. Replace it immediately. Use only original<br />
Fissler replacement parts (see Chapter 11). Any other replacement parts can affect how well and safely<br />
your cooker works. Make sure that your Fissler pressure cookers are only used with Fissler pressure<br />
cooker lids.<br />
If you are unable to solve a problem or correct a defect, contact your Fissler retailer, the specialty department<br />
of your department store, or Fissler Customer Service.
FISSLER BLUE-POINT<br />
11. Replacement parts<br />
Please note:<br />
Depending on how often you use your pressure cooker, you should replace the rubber gasket, the silicone<br />
membrane, the O-ring for the Euromatic, and the valve base seal every 1-2 years. In case of damage (tears or<br />
cracks, deformation on the edge, hardening or discoloration), these parts should be replaced immediately.<br />
Failure to do so may affect proper functioning and safety.<br />
Description Diameter Ordering number<br />
Pot handle, <strong>Pressure</strong> cooker 18 cm 21 601 02 630<br />
complete 22 cm 21 641 00 630<br />
26 cm 21 671 00 630<br />
<strong>Pressure</strong> skillet 22 cm 21 641 02 630<br />
26 cm 21 671 04 630<br />
Lid handle, complete All sizes 21 641 01 660<br />
Side handle, <strong>Pressure</strong> cooker 18 cm 21 601 02 640<br />
complete 22 cm 21 641 00 640<br />
26 cm 21 671 00 640<br />
<strong>Pressure</strong> skillet 22 cm 21 641 02 640<br />
26 cm 21 671 04 640<br />
Control valve unit, complete, 18 cm 21 601 02 700<br />
with fastening screw 22 /26 cm 21 641 00 700<br />
Valve base seal All sizes 20 653 00 740<br />
Silicone membrane All sizes 20 653 00 720<br />
Fastening screw All sizes 21 641 00 770
FISSLER BLUE-POINT<br />
Description Diameter Ordering number<br />
Euromatic incl. O-ring All sizes 11 631 00 750<br />
O-ring for Euromatic All sizes 11 631 00 760<br />
Rubber gasket 18 cm 38 617 00 205<br />
22 cm 38 667 00 205<br />
26 cm 38 687 00 205<br />
The O-ring of the Euromatic is detached/attached on the inner side of the lid. First push the safety slide forward<br />
toward the open position , which will make it easier to change the O-ring. Make sure that the gasket<br />
lies completely in its groove.<br />
Accessories Diameter Ordering number<br />
Perforated inset 18 cm 21 625 02 610<br />
22 cm 21 633 04 610<br />
26 cm 21 656 06 610<br />
Unperforated inset 22 cm 21 633 04 620<br />
26 cm 21 656 06 620<br />
Tripod 18 cm 21 625 02 630<br />
22 cm 18 621 04 630<br />
26 cm 21 656 08 630<br />
All replacement parts can be purchased from your Fissler retailer or in the specialty departments of department<br />
stores. Or else contact Fissler Customer Service directly.
FISSLER BLUE-POINT<br />
12. <strong>Cooking</strong> times<br />
The cooking times shown here are intended as guidelines<br />
and apply to an amount suitable for 4 portions,<br />
cooked at the Speed Setting. Using the Gentle Setting<br />
will increase the cooking time by about 50 %, but this<br />
will still be far less than would be necessary with conventional<br />
cooking. The exact cooking times depend<br />
upon the size and freshness of the food. It won’t take<br />
long for you to develop a feeling for this.<br />
Meat<br />
Beef Stroganoff.................................... 7 Min.<br />
Chicken (depends on size/weight) ........ 20-25 Min.<br />
Collared beef ................................ 15-20 Min.<br />
Goulash ...................................... 15-20 Min.<br />
Ham, boiled .................................. 30-35 Min.<br />
Ham, roast.................................... 20-25 Min.<br />
Pork knuckle ................................ 30-40 Min.<br />
Pork roast .................................... 25-30 Min.<br />
Pork shank .................................. 25-35 Min.<br />
Ribs with sauerkraut<br />
and potatoes.................................. 10-12 Min.<br />
Roast beef .................................... 40-50 Min.<br />
Sauerbraten.................................. 30-35 Min.<br />
Turkey leg .................................... 25-35 Min.<br />
Veal roast, rabbit............................ 15-20 Min.<br />
Veal fricassee ...................................... 5 Min.<br />
Fish/Game<br />
Fish in white wine with potatoes ............ 6-8 Min.<br />
Haddock ........................................ 4-6 Min.<br />
Leg of venison ................................ 25-30 Min.<br />
Steamed fish with potatoes .................. 6-8 Min.<br />
Stews<br />
Cabbage stew .................................... 15 Min.<br />
Irish stew.......................................... 20 Min.<br />
Lentils (presoaked) with<br />
bacon and potatoes ............................ 3-5 Min.<br />
Serbian meat and rice stew<br />
with mushrooms .............................. 8-10 Min.<br />
Soups<br />
Beef broth (depends on<br />
meat weight).................................. 35-40 Min.<br />
Chicken soup (depends on<br />
size/age of chicken).......................... 25-35 Min.<br />
Goulash soup ................................ 10-15 Min.<br />
Minestrone .................................... 8-10 Min.<br />
Pea soup (not presoaked) .................. 20-25 Min.<br />
Potato soup...................................... 5-6 Min.<br />
Pot-au-feu .................................... 20-25 Min.<br />
Rice soup ........................................ 6-8 Min.<br />
Semolina soup .................................. 3-5 Min.<br />
Tomato soup with rice ........................ 6-8 Min.<br />
Vegetable soup .................................. 4-8 Min.<br />
Vegetables<br />
Beets .......................................... 15-25 Min.<br />
Black salsify .................................... 4-5 Min.<br />
Cabbage (red or white), kale................ 8-10 Min.<br />
Cauliflower .................................... 2-3 Min.<br />
Cauliflower, whole ............................ 4-6 Min.<br />
Mushrooms ...................................... 6-8 Min.<br />
Peas .............................................. 3-4 Min.<br />
Peppers, stuffed................................ 6-8 Min.<br />
Potatoes, jacket .............................. 8-10 Min.<br />
Potatoes, peeled ................................ 6-8 Min.
FISSLER BLUE-POINT<br />
Sauerkraut ......................................2-3 Min.<br />
Vegetables, mixed ..............................5-6 Min.<br />
Legumes<br />
Peas, whole, unshelled,<br />
not presoaked ................................45-55 Min.<br />
Peas, whole, unshelled,<br />
presoaked ....................................12-15 Min.<br />
Peas, shelled, whole,<br />
not presoaked ....................................15 Min.<br />
Large lentils, unshelled,<br />
not presoaked ................................10-15 Min.<br />
Large lentils, unshelled,<br />
presoaked ........................................3-5 Min.<br />
White beans, germinated......................3-5 Min.<br />
Grains<br />
Raw brown rice, oats, wheat,<br />
barley, rye, spelt, all approx. .................. 9 Min.<br />
(Depressurize cooker and allow<br />
to puff with closed lid).......................... 15 Min.<br />
Buckwheat, millet, both ........................ 6 Min.<br />
(Do not allow to puff after cooking)<br />
13. The Fissler warranty<br />
For all Fissler pressure cookers and pressure skillets,<br />
Fissler grants the owner a three-year warranty<br />
on all functional parts (excluding parts which are<br />
subject to wear, such as the rubber gasket, silicone<br />
membrane, the O-ring for the Euromatic, and valve<br />
base seal).<br />
Improper use will result in a cancellation of the warranty.<br />
10-year availability guarantee for replacement<br />
parts<br />
All functional parts of your pressure cooker – from<br />
the rubber gasket to the complete lid handle – can be<br />
obtained, even after your warranty has elapsed,<br />
from retailers who carry Fissler products, from specialty<br />
departments in department stores, or directly<br />
from:<br />
Fissler GmbH<br />
Customer Service Department<br />
D-55768 Hoppstädten-Weiersbach<br />
Germany<br />
Tel. +49 6781/403-556