HD-Connect MI manual - Convergent Design, experts in HDMI, SD ...
HD-Connect MI manual - Convergent Design, experts in HDMI, SD ...
HD-Connect MI manual - Convergent Design, experts in HDMI, SD ...
You also want an ePaper? Increase the reach of your titles
YUMPU automatically turns print PDFs into web optimized ePapers that Google loves.
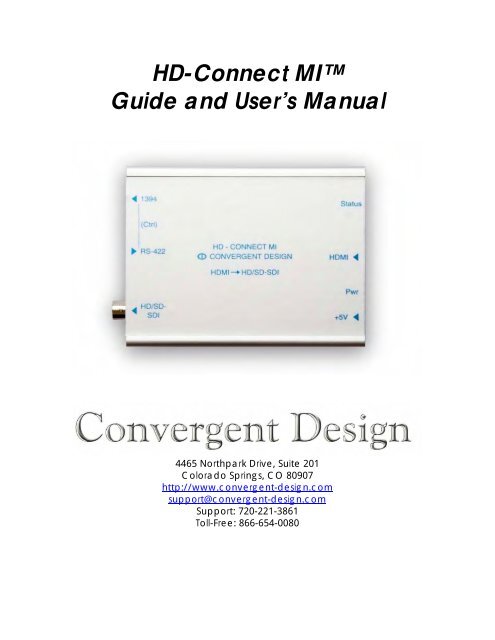
<strong>HD</strong>-<strong>Connect</strong> <strong>MI</strong><br />
Guide and User’s Manual<br />
4465 Northpark Drive, Suite 201<br />
Colorado Spr<strong>in</strong>gs, CO 80907<br />
http://www.convergent-design.com<br />
support@convergent-design.com<br />
Support: 720-221-3861<br />
Toll-Free: 866-654-0080
©2007 <strong>Convergent</strong> <strong>Design</strong>, Inc. All Rights Reserved. No part of this publication may be<br />
reproduced, stored <strong>in</strong> a retrieval system, or transmitted, <strong>in</strong> any form or by any means,<br />
electronic, mechanical, photocopy<strong>in</strong>g, record<strong>in</strong>g or otherwise, without prior written<br />
permission.<br />
Table of Contents<br />
1 GETTING STARTED .........................................................................................4<br />
1.1 Welcome .................................................................................................................................................. 4<br />
1.2 FCC Compliance .................................................................................................................................... 4<br />
1.3 Shipp<strong>in</strong>g Contents .................................................................................................................................. 4<br />
2 <strong>HD</strong>-CONNECT <strong>MI</strong> ..........................................................................................4<br />
2.1 Overview.................................................................................................................................................. 4<br />
2.2 Features ................................................................................................................................................... 5<br />
2.3 Functional Block Diagram..................................................................................................................... 6<br />
3 INSTALLATION AND QUICK START ..............................................................7<br />
3.1 <strong>Connect</strong>ions............................................................................................................................................. 7<br />
3.2 Status LED .............................................................................................................................................. 8<br />
4 CONTROLLING <strong>HD</strong>-CONNECT <strong>MI</strong> ...............................................................9<br />
4.1 Preparation ............................................................................................................................................. 9<br />
4.2 Us<strong>in</strong>g the Control Application............................................................................................................... 9<br />
5 UPDATING <strong>HD</strong>-CONNECT <strong>MI</strong>.....................................................................14<br />
5.1 Preparation ........................................................................................................................................... 14<br />
5.2 Us<strong>in</strong>g the Update Application.............................................................................................................. 15<br />
5.3 Rollbacks ............................................................................................................................................... 21<br />
6 TIPS AND TROUBLESHOOTING...................................................................22<br />
6.1 Operat<strong>in</strong>g Tips...................................................................................................................................... 22<br />
<strong>HD</strong>-<strong>Connect</strong> <strong>MI</strong> Guide and User’s Manual. 2
6.2 Troubleshoot<strong>in</strong>g Guide ........................................................................................................................ 26<br />
7 SAFETY AND E<strong>SD</strong> PRECAUTIONS...............................................................28<br />
8 SPECIFICATIONS...........................................................................................29<br />
8.1 Inputs..................................................................................................................................................... 29<br />
8.2 Outputs.................................................................................................................................................. 29<br />
8.3 Physical.................................................................................................................................................. 30<br />
8.4 Power ..................................................................................................................................................... 30<br />
8.5 Temperature Ranges............................................................................................................................ 31<br />
8.6 Humidity................................................................................................................................................ 31<br />
9 RMA AND WARRANTY ..................................................................................32<br />
9.1 Conditions of the Warranty................................................................................................................. 32<br />
9.2 Obta<strong>in</strong><strong>in</strong>g an RMA............................................................................................................................... 33<br />
<strong>HD</strong>-<strong>Connect</strong> <strong>MI</strong> Guide and User’s Manual. 3
1 Gett<strong>in</strong>g Started<br />
1.1 Welcome<br />
Congratulations on select<strong>in</strong>g <strong>Convergent</strong> <strong>Design</strong> <strong>HD</strong>-<strong>Connect</strong> <strong>MI</strong>. <strong>HD</strong>-<strong>Connect</strong><br />
<strong>MI</strong> is shipped from the factory <strong>in</strong> the most secure packag<strong>in</strong>g available. Please<br />
<strong>in</strong>spect the content of the package and make sure to email us if you f<strong>in</strong>d any<br />
shipp<strong>in</strong>g damage or miss<strong>in</strong>g components.<br />
1.2 FCC Compliance<br />
This professional equipment has been tested and found to comply with the<br />
provisions for a Class A digital device under part 15 of the FCC rules. These<br />
provisions are designed to provide reasonable protection aga<strong>in</strong>st radio-frequency<br />
emissions by digital devices <strong>in</strong> a commercial environment. This device may<br />
<strong>in</strong>terfere with radio and television reception <strong>in</strong> residential areas and is required to<br />
accept all <strong>in</strong>terference received, <strong>in</strong>clud<strong>in</strong>g that which may cause undesired<br />
operation.<br />
1.3 Shipp<strong>in</strong>g Contents<br />
Your <strong>HD</strong>-<strong>Connect</strong> <strong>MI</strong> should come packaged with the follow<strong>in</strong>g:<br />
1) <strong>HD</strong>-<strong>Connect</strong> <strong>MI</strong><br />
2) Power Supply with Changeable Plugs<br />
3) Quick Start Guide<br />
2 <strong>HD</strong>-<strong>Connect</strong> <strong>MI</strong><br />
2.1 Overview<br />
The <strong>Convergent</strong> <strong>Design</strong> <strong>HD</strong>-<strong>Connect</strong> <strong>MI</strong> is an <strong>HD</strong><strong>MI</strong> to <strong>HD</strong>/<strong>SD</strong>-<strong>SD</strong>I converter<br />
featur<strong>in</strong>g embedded audio and time-code. This unique product converts the<br />
uncompressed (YCbCr 4:2:2 or RGB 4:4:4) video and audio from <strong>HD</strong><strong>MI</strong> devices<br />
<strong>in</strong>clud<strong>in</strong>g Sony/JVC camcorders and decks <strong>in</strong>to the <strong>HD</strong>/<strong>SD</strong>-<strong>SD</strong>I format used <strong>in</strong><br />
professional video applications. The <strong>HD</strong>-<strong>Connect</strong> <strong>MI</strong> offers two dist<strong>in</strong>ct<br />
advantages over other <strong>HD</strong>V converters: DV as well as <strong>HD</strong>V support and the<br />
ability to playback both 1080i and 720p tapes from a s<strong>in</strong>gle deck (see FAQs for<br />
more details). Users can connect the <strong>HD</strong>/<strong>SD</strong>-<strong>SD</strong>I output to their NLE systems<br />
<strong>HD</strong>-<strong>Connect</strong> <strong>MI</strong> Guide and User’s Manual. 4
and convert <strong>HD</strong>V through <strong>HD</strong><strong>MI</strong> to DVCPro<strong>HD</strong>. The unit can also convert DV to<br />
uncompressed <strong>SD</strong>, as well as <strong>HD</strong>V to uncompressed <strong>HD</strong> <strong>in</strong> real-time.<br />
Additionally, the <strong>HD</strong>-<strong>Connect</strong> <strong>MI</strong> converts RS-422 deck commands to 1394, so<br />
the <strong>HD</strong>V deck/camcorder can be directly controlled from an edit<strong>in</strong>g application.<br />
Offl<strong>in</strong>e/ Onl<strong>in</strong>e workflows as well as batch captures are easily supported. F<strong>in</strong>ally,<br />
tape dubs from <strong>HD</strong>V to <strong>HD</strong>CAM or DigiBeta entail only a s<strong>in</strong>gle coax connection<br />
via the <strong>HD</strong>/<strong>SD</strong>-<strong>SD</strong>I cable which carries video, audio and time-code.<br />
The <strong>HD</strong>-<strong>Connect</strong> <strong>MI</strong> is your <strong>HD</strong><strong>MI</strong> connection, br<strong>in</strong>g<strong>in</strong>g <strong>HD</strong>V and DV to your<br />
studio and edit bays as well as support<strong>in</strong>g over-the-air playout.<br />
2.2 Features<br />
1) <strong>HD</strong><strong>MI</strong>→ <strong>HD</strong>/<strong>SD</strong>-<strong>SD</strong>I Conversion (with emedded audio & time code)<br />
2) <strong>HD</strong>V, DV and AVC<strong>HD</strong> Playback support<br />
3) <strong>HD</strong><strong>MI</strong> <strong>in</strong>put formats: 1080i60, 1080i59.94, 1080i50, 1080p30,<br />
1080p29.97, 1080p25, 1080p24, 1080p23.98, 720p60, 720p59.94,<br />
720p50, 486i29.97, 576i25<br />
4) DVI support (for formats match<strong>in</strong>g listed <strong>HD</strong><strong>MI</strong> <strong>in</strong>put formats)<br />
5) YUV 4:2:2 or RGB 4:4:4 <strong>HD</strong><strong>MI</strong> support.<br />
6) <strong>HD</strong>V Deck Control via RS-422 →1394 translation.<br />
7) Cross Conversion and down-scale as provided by the deck. (see<br />
compatibility chart available on website).<br />
8) Elim<strong>in</strong>ates Long-GOP (<strong>HD</strong>V) edit<strong>in</strong>g (and associated render times) by<br />
enabl<strong>in</strong>g REAL-TIME conversion of <strong>HD</strong>V to DNx<strong>HD</strong>, DVCPro<strong>HD</strong> and other<br />
I-Frame Codecs<br />
9) 1394-based Firmware Updates.<br />
10) 100% digital, no A/D or D/A conversions.<br />
11) Compatible with Sony <strong>HD</strong>Cam & DigiBeta Decks<br />
12) NOTE: Will not convert <strong>HD</strong>CP encrypted content<br />
13) Color Bar Output.<br />
14) Extremely low latency (< 100 μ sec)<br />
15) Ability to force 1080i, 720p, and <strong>SD</strong> (486i or 576i) from <strong>HD</strong><strong>MI</strong> devices that<br />
would not otherwise support these formats (eg. Sony <strong>HD</strong>G-HC3).<br />
<strong>HD</strong>-<strong>Connect</strong> <strong>MI</strong> Guide and User’s Manual. 5
2.3 Functional Block Diagram<br />
<strong>MI</strong><br />
<strong>HD</strong> - <strong>Connect</strong> <strong>MI</strong><br />
1394<br />
(Control)<br />
1394<br />
Interface<br />
RS-422<br />
RS-422<br />
Deck<br />
Command/<br />
Cntrl<br />
Micro<br />
Controller<br />
1394 Deck<br />
Commands/<br />
Time Code<br />
Control<br />
Video<br />
Processor<br />
Video<br />
Audio<br />
<strong>HD</strong><strong>MI</strong><br />
Receiver<br />
<strong>HD</strong><strong>MI</strong><br />
Video<br />
Audio<br />
Timecode<br />
<strong>HD</strong>/<strong>SD</strong>-<strong>SD</strong>I<br />
<strong>HD</strong>/<strong>SD</strong>-<strong>SD</strong>I<br />
Driver<br />
Figure 1 Functional Block Diagram of <strong>HD</strong>-<strong>Connect</strong><br />
<strong>HD</strong>-<strong>Connect</strong> <strong>MI</strong> Guide and User’s Manual. 6
3 Installation and Quick Start<br />
3.1 <strong>Connect</strong>ions<br />
Refer to Figure 2 and the descriptions below when connect<strong>in</strong>g <strong>HD</strong>-<strong>Connect</strong> <strong>MI</strong>.<br />
Figure 2 <strong>Connect</strong>ors on the <strong>HD</strong>-<strong>Connect</strong> <strong>MI</strong><br />
1) 1394 Control: <strong>Connect</strong> to your <strong>HD</strong>V camera/deck for device control.<br />
2) RS-422: <strong>Connect</strong> to your <strong>SD</strong>I based edit<strong>in</strong>g system for RS-422 → 1394.<br />
3) <strong>HD</strong>/<strong>SD</strong>-<strong>SD</strong>I Out: <strong>Connect</strong> to your monitor, NLE system, or dub target.<br />
The <strong>HD</strong><strong>MI</strong> format from your <strong>HD</strong><strong>MI</strong> source determ<strong>in</strong>es output format. See<br />
Tips and Troubleshoot<strong>in</strong>g for descriptions of how to select video formats<br />
on various devices.<br />
4) DC +5V <strong>in</strong>: <strong>Connect</strong> the supplied DC power supply unit. Warn<strong>in</strong>g: Use<br />
only the power supply provided by <strong>Convergent</strong> <strong>Design</strong>, Inc. Damage<br />
to the unit caused by connection to other power supplies is not<br />
covered by warranty.<br />
5) Status LED: User <strong>in</strong>terface <strong>in</strong>dicators for operation of the box. LED to the<br />
right of the <strong>HD</strong><strong>MI</strong> connector <strong>in</strong>dicates Status.<br />
<strong>HD</strong>-<strong>Connect</strong> <strong>MI</strong> Guide and User’s Manual. 7
6) Power LED: Indicates power connected to the unit.<br />
7) <strong>HD</strong><strong>MI</strong> In: <strong>Connect</strong> to your <strong>HD</strong><strong>MI</strong> source (Note: Source video/audio must<br />
not be encrypted).<br />
1394 (Deck Control & TC)<br />
<strong>HD</strong>-<strong>Connect</strong> <strong>MI</strong><br />
<strong>Connect</strong>ion Diagram<br />
<strong>HD</strong><strong>MI</strong><br />
(Video &<br />
Audio)<br />
<strong>HD</strong>-<strong>Connect</strong> <strong>MI</strong><br />
<strong>HD</strong>V Deck/Camcorder<br />
with <strong>HD</strong><strong>MI</strong><br />
<strong>HD</strong>/<strong>SD</strong>-<strong>SD</strong>I (Video + Audio + TC)<br />
RS-422 Control<br />
Figure 3 <strong>Connect</strong>ion Diagram<br />
NLE<br />
3.2 Status LED<br />
The Status LED (Light Emitt<strong>in</strong>g Diode) to the right of the <strong>HD</strong><strong>MI</strong> connector (Item 5<br />
above) <strong>in</strong>dicates the status of the <strong>HD</strong>-<strong>Connect</strong> <strong>MI</strong>. When operat<strong>in</strong>g properly,<br />
this LED will rema<strong>in</strong> on when video is flow<strong>in</strong>g, and will be off when there is no<br />
video flow (e.g., color bars are generated). If the light is flash<strong>in</strong>g, it is for one of<br />
two reasons:<br />
<strong>HD</strong>-<strong>Connect</strong> <strong>MI</strong> Guide and User’s Manual. 8
1) (2 flashes) The <strong>in</strong>com<strong>in</strong>g <strong>HD</strong><strong>MI</strong> video is <strong>HD</strong>CP encrypted. <strong>HD</strong>-<strong>Connect</strong><br />
<strong>MI</strong> can only stream unencrypted video.<br />
2) (3 flashes) The <strong>in</strong>com<strong>in</strong>g <strong>HD</strong><strong>MI</strong> video is not of a format that the box can<br />
handle (see Features above for a list of supported formats).<br />
4 Controll<strong>in</strong>g <strong>HD</strong>-<strong>Connect</strong> <strong>MI</strong><br />
4.1 Preparation<br />
When select<strong>in</strong>g options <strong>in</strong> the Control App, occasionally the <strong>HD</strong>-<strong>Connect</strong> <strong>MI</strong><br />
will lose track of the 1394 upl<strong>in</strong>k and may give you alert messages. If so, we<br />
recommend unplugg<strong>in</strong>g and re-plugg<strong>in</strong>g the 1394 connection or power cycl<strong>in</strong>g<br />
the box.<br />
4.2 Us<strong>in</strong>g the Control Application<br />
PC & Mac<br />
1) <strong>Connect</strong> the <strong>HD</strong>-<strong>Connect</strong> <strong>MI</strong> to your computer us<strong>in</strong>g the 1394 port. You<br />
must wait for your computer to recognize the box before the control<br />
application will work. This may take up to 30 seconds for either W<strong>in</strong>dows<br />
XP or Mac.<br />
2) Open and run the control application. Click on the “Open” or “Refresh”<br />
button under the “Control” tab. The application will then display the current<br />
firmware version. Figure 4 shows a screenshot of the application.<br />
<strong>HD</strong>-<strong>Connect</strong> <strong>MI</strong> Guide and User’s Manual. 9
Figure 4 <strong>HD</strong>-<strong>Connect</strong> <strong>MI</strong> control application screen.<br />
3) Perform the desired control operation as described below.<br />
Control Operations<br />
The operations available <strong>in</strong> the control application are described below. Follow<strong>in</strong>g<br />
your selection of a list item, checkbox, or radio button, a message should appear<br />
confirm<strong>in</strong>g that your selection has been successfully loaded <strong>in</strong>to your <strong>HD</strong>-<br />
<strong>Connect</strong> <strong>MI</strong> box once you select “Apply”. Figures 5-7 show the use of the<br />
control app for each operation. The <strong>in</strong>terface for the PC and the Mac are identical<br />
<strong>in</strong> operation.<br />
1) Device Control. The device-control dropdown list allows selection of a<br />
template represent<strong>in</strong>g a certa<strong>in</strong> RS-422 controller or a set of controllers.<br />
The text box should display the controller currently selected. Click on the<br />
arrow to show the list and click on the text identify<strong>in</strong>g the deck control<br />
template the <strong>HD</strong>-<strong>Connect</strong> <strong>MI</strong> should use. Once selected and applied,<br />
the blue text should display a confirmation message. By default, <strong>HD</strong>-<br />
<strong>Connect</strong> <strong>MI</strong> comes pre-loaded with “F<strong>in</strong>al Cut Pro” selected. Figure 5<br />
illustrates.<br />
<strong>HD</strong>-<strong>Connect</strong> <strong>MI</strong> Guide and User’s Manual.<br />
10
Figure 5 Device Control selection confirmation.<br />
<strong>HD</strong>-<strong>Connect</strong> <strong>MI</strong> Guide and User’s Manual.<br />
11
2) Timecode Offset. This sett<strong>in</strong>g allows you to add an offset to the timecode<br />
that will be reported to an RS-422 controller. Should you have other<br />
pieces of equipment downstream from <strong>HD</strong>-<strong>Connect</strong> <strong>MI</strong> that add further<br />
frame delays through your setup, you may wish to set an additional offset<br />
here.<br />
Figure 6 Timecode Offset Selection.<br />
<strong>HD</strong>-<strong>Connect</strong> <strong>MI</strong> Guide and User’s Manual.<br />
12
3) Output Format. This sett<strong>in</strong>g allows you to choose the video output format<br />
from the follow<strong>in</strong>g options:<br />
Native – camera/deck output sett<strong>in</strong>gs determ<strong>in</strong>e format; use this<br />
sett<strong>in</strong>g if connected to an <strong>HD</strong>V deck<br />
1080i – force 1080i output from camera<br />
720p – force 720p output from camera<br />
486i – force NTSC <strong>SD</strong> output from camera<br />
576i – force PAL <strong>SD</strong> output from camera<br />
Options that force output to a particular format work well for devices that<br />
do not themselves have a menu selection for output formats. Figure 7<br />
shows selection of “Force <strong>SD</strong>” as an example.<br />
Figure 7 Input Format Selection<br />
4) Color Bars. This selects the output test pattern when your <strong>HD</strong><strong>MI</strong> source is<br />
turned off or the <strong>HD</strong><strong>MI</strong> cable is disconnected. Figure 8 illustrates the<br />
various selections.<br />
<strong>HD</strong>-<strong>Connect</strong> <strong>MI</strong> Guide and User’s Manual.<br />
13
Figure 8 Color Bars Selection<br />
5) Drop Frame. This sett<strong>in</strong>g has no effect <strong>in</strong> PAL mode. For the sake of<br />
NTSC, check the box if you want <strong>HD</strong>-<strong>Connect</strong> <strong>MI</strong> to report dropframe<br />
timecodes by default or uncheck it if you want <strong>HD</strong>-<strong>Connect</strong> <strong>MI</strong> to report<br />
non-dropframe timecodes by default. Timecodes will follow the condition<br />
of this checkbox on power-up or when you apply a change <strong>in</strong> the state of<br />
the checkbox. Thereafter reported timecodes will follow the selected<br />
format only until timecodes queried from a controlled device suggest a<br />
change is needed. If <strong>HD</strong>-<strong>Connect</strong> <strong>MI</strong> is report<strong>in</strong>g dropframe timecodes<br />
and detects a timecode valid only for non-dropframe material, it will switch<br />
to report<strong>in</strong>g non-dropframe timecodes. Similarly, if <strong>HD</strong>-<strong>Connect</strong> <strong>MI</strong> is<br />
report<strong>in</strong>g non-dropframe timecodes and f<strong>in</strong>ds a timecode sequence valid<br />
only <strong>in</strong> dropframe material, it will beg<strong>in</strong> report<strong>in</strong>g dropframe timecodes.<br />
Note that <strong>HD</strong>-<strong>Connect</strong> <strong>MI</strong> can only detect a change <strong>in</strong> timecode at the<br />
beg<strong>in</strong>n<strong>in</strong>g of each m<strong>in</strong>ute, except those end<strong>in</strong>g <strong>in</strong> zero (00, 10, 20, 30, 40,<br />
and 50). This means that <strong>MI</strong> may not immediately detect a change <strong>in</strong> the<br />
dropframe sense at a scene boundary. It may take up to two m<strong>in</strong>utes,<br />
though more typically up to one m<strong>in</strong>ute, to notice from queried timecodes<br />
that the dropframe sense of the timecodes has changed.<br />
5 Updat<strong>in</strong>g <strong>HD</strong>-<strong>Connect</strong> <strong>MI</strong><br />
5.1 Preparation<br />
To prepare for updat<strong>in</strong>g the <strong>HD</strong>-<strong>Connect</strong> <strong>MI</strong>, complete the follow<strong>in</strong>g steps:<br />
<strong>HD</strong>-<strong>Connect</strong> <strong>MI</strong> Guide and User’s Manual.<br />
14
1) Download and <strong>in</strong>stall the update and control application from the website.<br />
Go to the <strong>HD</strong>-<strong>Connect</strong> <strong>MI</strong> downloads page at http://www.convergentdesign.com/<strong>MI</strong>downloads.htm<br />
. Here you may download the latest code<br />
updates for either PC or Mac.<br />
2) In order to run the control application, you will need the Java Runtime<br />
Environment 1.4.1 or better. If you need this to be <strong>in</strong>stalled on your<br />
mach<strong>in</strong>e, follow the <strong>in</strong>structions on the product downloads page where the<br />
<strong>in</strong>stallation files are located.<br />
3) <strong>Connect</strong> the <strong>HD</strong>-<strong>Connect</strong> <strong>MI</strong> to your computer via the 1394 port. It is<br />
recommended that the control and update application not be run alongside<br />
other applications that use the 1394 port.<br />
5.2 Us<strong>in</strong>g the Update Application<br />
Follow the <strong>in</strong>structions below to complete the update process us<strong>in</strong>g either a PC<br />
or a Mac.<br />
PC<br />
1) <strong>Connect</strong> the <strong>HD</strong>-<strong>Connect</strong> <strong>MI</strong> to your computer us<strong>in</strong>g the 1394 port. You<br />
must wait for your computer to recognize the box before the update<br />
application will work. This may take up to 30 seconds. It is recommended<br />
you wait for 30 seconds.<br />
2) Install the update and control application by runn<strong>in</strong>g the <strong>in</strong>stallation file.<br />
Figure 9 shows the <strong>in</strong>stallation process.<br />
<strong>HD</strong>-<strong>Connect</strong> <strong>MI</strong> Guide and User’s Manual.<br />
15
Figure 9 Install<strong>in</strong>g the Control Application the PC & Mac<br />
<strong>HD</strong>-<strong>Connect</strong> <strong>MI</strong> Guide and User’s Manual.<br />
16
3) From the Start Menu, open the newly <strong>in</strong>stalled application<br />
“Hd<strong>Connect</strong><strong>MI</strong>Controller”. When the application first starts, it will check<br />
onl<strong>in</strong>e for available updates. You will be prompted to update it upon first<br />
use, click ok. When the update is f<strong>in</strong>ished, you will need to restart the<br />
application. Figure 10 shows the dialog w<strong>in</strong>dow.<br />
Figure 10 Control Application Ask<strong>in</strong>g for Updates<br />
4) Open the Control Application aga<strong>in</strong>. Click on the “Firmware Update” tab,<br />
and click the “Open” or “Refresh” button to check the current software<br />
loaded <strong>in</strong>to the <strong>HD</strong>-<strong>Connect</strong> <strong>MI</strong>, and display the newest version to<br />
update to. Figure 11 illustrates.<br />
<strong>HD</strong>-<strong>Connect</strong> <strong>MI</strong> Guide and User’s Manual.<br />
17
Figure 11 Us<strong>in</strong>g the Update Application<br />
5) Before updat<strong>in</strong>g, be sure that no <strong>HD</strong><strong>MI</strong> cable is plugged <strong>in</strong>to the <strong>HD</strong><strong>MI</strong><br />
<strong>in</strong>put of your unit. Click on the “Update” button to beg<strong>in</strong> the update. It is<br />
recommended that you record the current version before updat<strong>in</strong>g the box,<br />
so that you can roll back to it if the new version does not work. This<br />
process takes 3-6 m<strong>in</strong>utes. Dur<strong>in</strong>g that time DO NOT unplug the box. A<br />
<strong>HD</strong>-<strong>Connect</strong> <strong>MI</strong> Guide and User’s Manual.<br />
18
success w<strong>in</strong>dow will appear when the update is complete. See Figure 12<br />
for a screenshot of a complete update.<br />
Figure 12 Update Application <strong>in</strong> Action.<br />
Mac<br />
6) Once the update is complete, close the application. <strong>HD</strong>-<strong>Connect</strong> <strong>MI</strong> will<br />
automatically switch between update and normal mode.<br />
1) For the Mac OSX, the procedure for <strong>in</strong>stallation is identical to the PC.<br />
Follow the <strong>in</strong>structions as before. Figure 13 shows the Mac <strong>in</strong>staller<br />
w<strong>in</strong>dow.<br />
<strong>HD</strong>-<strong>Connect</strong> <strong>MI</strong> Guide and User’s Manual.<br />
19
Figure 13 Mac OSX Installer Screen<br />
2) Open the <strong>HD</strong>-<strong>Connect</strong> <strong>MI</strong> Update Application w<strong>in</strong>dow itself, us<strong>in</strong>g F<strong>in</strong>der<br />
to locate the Applications, and select “Hd<strong>Connect</strong><strong>MI</strong>Controller”. Figure 14<br />
illustrates this.<br />
Figure 14 F<strong>in</strong>der <strong>in</strong> OSX<br />
<strong>HD</strong>-<strong>Connect</strong> <strong>MI</strong> Guide and User’s Manual.<br />
20
3) When you open the application, it should appear as <strong>in</strong> Figure 15. Use the<br />
exact same procedure for PC to update the box. Click the “Refresh”<br />
button, then click the “Update” button. The update should take around<br />
three to five m<strong>in</strong>utes. Dur<strong>in</strong>g that time DO NOT unplug the box.<br />
Figure 15 Mac Update Application<br />
5.3 Rollbacks<br />
Firmware updates will appear periodically on the website. If you update your <strong>HD</strong>-<br />
<strong>Connect</strong> <strong>MI</strong> as described above and f<strong>in</strong>d problems with the box <strong>in</strong> your<br />
application, you can roll back to a previous code version us<strong>in</strong>g the Control App.<br />
To do this, with the box <strong>in</strong> Update mode, click on the “L<strong>in</strong>ks/Downloads” tab.<br />
Click on “Refresh List”. Us<strong>in</strong>g the drop down menu, select the code you wish to<br />
use. This tells the Control App what code to load when it is restarted. Close the<br />
Control App, restart it and allow it to download the appropriate code, then<br />
proceed with the normal update procedure. Figure 16 below shows the<br />
“L<strong>in</strong>ks/Downloads” tab.<br />
<strong>HD</strong>-<strong>Connect</strong> <strong>MI</strong> Guide and User’s Manual.<br />
21
Figure 16 Code Rollback Feature <strong>in</strong> the Control App<br />
6 Tips and Troubleshoot<strong>in</strong>g<br />
6.1 Operat<strong>in</strong>g Tips<br />
The follow are recommendations for video-edit<strong>in</strong>g workflow and operation of <strong>HD</strong>-<br />
<strong>Connect</strong> <strong>MI</strong> with other products that may appear <strong>in</strong> your configuration.<br />
1) Equipment Warm-Up Time. Turn on deck/camera and <strong>HD</strong>-<strong>Connect</strong><br />
<strong>MI</strong> for at least 5 m<strong>in</strong>utes prior to use. This lets the crystal oscillators<br />
<strong>in</strong>side the camera/deck and <strong>HD</strong>-<strong>Connect</strong> <strong>MI</strong> warm up and stabilize <strong>in</strong><br />
frequency.<br />
2) Cont<strong>in</strong>uous Timecode and Leaders <strong>in</strong> Video Capture. For purposes of<br />
search<strong>in</strong>g <strong>in</strong> the course of a batch capture, it is best to have a tape<br />
without timecode breaks. A camera <strong>in</strong> free-run timecode mode will<br />
cont<strong>in</strong>ue to advance its <strong>in</strong>ternal timecode while the camera is not<br />
record<strong>in</strong>g. This can create significant gaps <strong>in</strong> timecode from one clip<br />
record<strong>in</strong>g to the next and may cause problems <strong>in</strong> later searches. Even<br />
greater problems arise when there are multiple <strong>in</strong>stances of the same<br />
timecode on a s<strong>in</strong>gle tape. For best results, the camera should be set <strong>in</strong><br />
record-run mode with a desired start<strong>in</strong>g timecode and the timecode not<br />
reset until the full tape has been recorded. This should cause the<br />
<strong>HD</strong>-<strong>Connect</strong> <strong>MI</strong> Guide and User’s Manual.<br />
22
camera to beg<strong>in</strong> advanc<strong>in</strong>g its <strong>in</strong>ternal timecode only each time the<br />
record button is pushed. It is also recommended that the first scene<br />
recorded on a tape have a leader of 30 seconds or more of sacrificial<br />
material <strong>in</strong> order to prevent a reverse search from overrunn<strong>in</strong>g the<br />
timecodes on the tape. There should also be a leader before each<br />
subsequent scene at least as long as the preroll dur<strong>in</strong>g batch capture.<br />
The recommended preroll time for a batch capture is 6 seconds<br />
3) Avoid<strong>in</strong>g Multiple IEEE-1394 Devices. On any reset of the 1394 bus<br />
(e.g., on power-up or plugg<strong>in</strong>g or unplugg<strong>in</strong>g a 1394 device), <strong>HD</strong>-<br />
<strong>Connect</strong> <strong>MI</strong> searches the bus for the first <strong>HD</strong>V device it can f<strong>in</strong>d.<br />
Where there is more than one, any beyond the first are ignored. The<br />
order <strong>in</strong> which devices are queried may change from one reset to the<br />
next, so it is best never to have more than a s<strong>in</strong>gle <strong>HD</strong>V device plugged<br />
<strong>in</strong> at the same time. With more than one device on the bus send<strong>in</strong>g out<br />
queries <strong>in</strong> the wake of a bus reset (e.g., <strong>HD</strong>-<strong>Connect</strong> <strong>MI</strong> and a PC or<br />
Mac), communications between <strong>HD</strong>-<strong>Connect</strong> <strong>MI</strong> and an <strong>HD</strong>V device<br />
may fail. This is known to happen with the Canon XLH1 camera. This<br />
seems to result from queries from <strong>HD</strong>-<strong>Connect</strong> <strong>MI</strong> and the computer<br />
arriv<strong>in</strong>g at the <strong>HD</strong>V device too close to one another. It is best,<br />
especially with the Canon camera, to <strong>in</strong>clude only <strong>HD</strong>-<strong>Connect</strong> <strong>MI</strong><br />
and a s<strong>in</strong>gle <strong>HD</strong>V device on the 1394 bus and plug a computer <strong>in</strong> only<br />
to run the controller application for <strong>HD</strong>-<strong>Connect</strong> <strong>MI</strong>.<br />
4) Avoid<strong>in</strong>g Avid Auto-Configure. Rather than use Avid’s automatic deck<br />
configuration, select Generic Play Deck as a specific device-control<br />
template.<br />
5) When us<strong>in</strong>g the Sony HVR-M25U Deck. The default fast forward and<br />
rew<strong>in</strong>d speed of the deck is too fast for <strong>HD</strong>-<strong>Connect</strong> <strong>MI</strong> to perform<br />
batch captures properly. The deck needs to be set to the “Shuttlemax”<br />
speed. To change this sett<strong>in</strong>g, go to the ma<strong>in</strong> menu on the deck, scroll<br />
down to “VTR Set”, with<strong>in</strong> that submenu go to “FF/Rew Speed”, the<br />
default sett<strong>in</strong>g is “FF/Rew”. Simply select “Shuttlemax”, and batch<br />
captures should work properly. Under the In/Out Rec Sett<strong>in</strong>gs, force the<br />
deck to <strong>HD</strong>V mode (not Auto or DV).<br />
6) Handl<strong>in</strong>g Dropframe/Non-Dropframe Timecodes. Added automatic<br />
dropframe/non-dropframe timecode report<strong>in</strong>g for material that is not<br />
PAL <strong>SD</strong> or <strong>HD</strong> at 50 fps. Previously <strong>HD</strong>-<strong>Connect</strong> <strong>MI</strong> reported<br />
dropframe or non-dropframe timecodes based only on the state of the<br />
Drop Frame checkbox <strong>in</strong> the <strong>HD</strong>-<strong>Connect</strong> <strong>MI</strong> Controller application. It<br />
reported an error (one LED flash every five seconds) on encounter<strong>in</strong>g<br />
timecodes of the opposite sense. In this firmware version, timecodes<br />
follow the condition of the Drop Frame checkbox only on power-up or<br />
when the user changes that checkbox through the Controller.<br />
Thereafter timecodes follow the current format until timecodes queried<br />
from the controlled device suggest a change is needed. If <strong>MI</strong> is<br />
report<strong>in</strong>g dropframe timecodes and detects a timecode valid only for<br />
<strong>HD</strong>-<strong>Connect</strong> <strong>MI</strong> Guide and User’s Manual.<br />
23
non-dropframe material, it will switch to report<strong>in</strong>g non-dropframe<br />
timecodes. Similarly, if <strong>MI</strong> is report<strong>in</strong>g non-dropframe timecodes and<br />
f<strong>in</strong>ds a timecode sequence valid only <strong>in</strong> dropframe material, it will beg<strong>in</strong><br />
report<strong>in</strong>g dropframe timecodes. Note that <strong>MI</strong> can only detect a change<br />
<strong>in</strong> format at the beg<strong>in</strong>n<strong>in</strong>g of each m<strong>in</strong>ute other than those end<strong>in</strong>g <strong>in</strong><br />
zero (00, 10, 20, 30, 40, and 50). This means that <strong>MI</strong> will not<br />
immediately detect a change <strong>in</strong> the dropframe sense at a scene<br />
boundary. It may take up to two m<strong>in</strong>utes, though more typically up to<br />
one m<strong>in</strong>ute, to notice from queried timecodes that the dropframe sense<br />
of the timecodes has changed.<br />
7) Offl<strong>in</strong>e/Onl<strong>in</strong>e Workflow. While <strong>HD</strong>-<strong>Connect</strong> <strong>MI</strong> will allow you to use<br />
your RS-422 controller to navigate through a tape <strong>in</strong> an <strong>HD</strong>V device, it is<br />
best to reserve this capability for a rough look at source material rather<br />
than for logg<strong>in</strong>g <strong>in</strong> and out po<strong>in</strong>ts for later batch capture. Due to the<br />
GOP (Group Of Pictures) structure of MPEG video and the transport<br />
limitations of <strong>HD</strong>V devices, navigation can be quite choppy compared to<br />
navigation through a tape on an RS-422-controlled deck. For ease of<br />
clip logg<strong>in</strong>g, it may be better to capture an entire tape at a low<br />
resolution, decompose the captured material through an edit<strong>in</strong>g<br />
application <strong>in</strong>to clips that will be a part of the f<strong>in</strong>al project, and then<br />
capture just those clips aga<strong>in</strong> at the desired f<strong>in</strong>al resolution.<br />
Two scenarios illustrate this approach. In the first, the DV scenario,<br />
material from source tapes is captured directly us<strong>in</strong>g a DV edit<strong>in</strong>g<br />
application and the DV output from an <strong>HD</strong>V device. In the second, the<br />
<strong>SD</strong>I scenario, source material is captured <strong>in</strong>stead from the <strong>SD</strong>I output<br />
on <strong>HD</strong>-<strong>Connect</strong> <strong>MI</strong> connected to an <strong>SD</strong>I card <strong>in</strong>stalled <strong>in</strong> the edit<strong>in</strong>g<br />
computer. The discussion below focuses on the advantages and<br />
disadvantages of these two scenarios.<br />
The DV scenario supports a simple offl<strong>in</strong>e capture and edit process that<br />
can be accomplished on a laptop. S<strong>in</strong>ce the material is captured <strong>in</strong> a<br />
format (DV) available as a direct output of the camera, the offl<strong>in</strong>e stage<br />
of the process does not require any equipment beyond the camera and<br />
the edit<strong>in</strong>g computer. Given m<strong>in</strong>imal equipment and the relatively low<br />
DV data rate, material could easily be captured and edited <strong>in</strong> the field.<br />
For Avid users, DV also opens up the possibility of capture and edit on<br />
low-cost Xpress Pro systems followed by full-resolution capture and<br />
f<strong>in</strong>ish<strong>in</strong>g on high-end Avid products. Of course, captur<strong>in</strong>g and edit<strong>in</strong>g <strong>in</strong><br />
DV will mean that editors have no choice but to work with lower-quality<br />
standard-def<strong>in</strong>ition video. Another problem <strong>in</strong> the DV scenario is that<br />
timecode for the offl<strong>in</strong>e capture will be from one device <strong>in</strong> one mode (the<br />
camera <strong>in</strong> DV mode), while the f<strong>in</strong>al onl<strong>in</strong>e capture will be from a<br />
different device <strong>in</strong> a different mode (<strong>HD</strong>-<strong>Connect</strong> <strong>MI</strong> <strong>in</strong> <strong>HD</strong> mode). It<br />
<strong>HD</strong>-<strong>Connect</strong> <strong>MI</strong> Guide and User’s Manual.<br />
24
may be necessary to set a timecode offset <strong>in</strong> the capture application to<br />
ensure that the logged DV <strong>in</strong>po<strong>in</strong>ts and outpo<strong>in</strong>ts correspond to the<br />
correct frames dur<strong>in</strong>g f<strong>in</strong>al onl<strong>in</strong>e capture through <strong>HD</strong>-<strong>Connect</strong> <strong>MI</strong>. In<br />
addition, some <strong>HD</strong>V devices will not down-convert to <strong>SD</strong> and provide a<br />
DV output, so this scenario would not be possible with all <strong>HD</strong>V devices.<br />
While the need for an <strong>SD</strong>I capture card (<strong>HD</strong> or <strong>SD</strong>) <strong>in</strong> the <strong>SD</strong>I scenario<br />
elim<strong>in</strong>ates the possibility of captur<strong>in</strong>g and edit<strong>in</strong>g on a laptop or with<br />
Avid Xpress Pro, the <strong>SD</strong>I offl<strong>in</strong>e/onl<strong>in</strong>e scenario elim<strong>in</strong>ates the<br />
difference <strong>in</strong> timecode source, s<strong>in</strong>ce clips are captured through <strong>HD</strong>-<br />
<strong>Connect</strong> <strong>MI</strong> at both offl<strong>in</strong>e and onl<strong>in</strong>e stages. Also, the <strong>SD</strong>I scenario<br />
allows the selection of a number of different codecs for video<br />
compression dur<strong>in</strong>g the offl<strong>in</strong>e tape capture. With <strong>SD</strong>-<strong>SD</strong>I output from<br />
<strong>HD</strong>-<strong>Connect</strong> <strong>MI</strong> set <strong>in</strong> <strong>SD</strong> mode, a software DV codec could achieve<br />
the same sav<strong>in</strong>gs <strong>in</strong> disk space as <strong>in</strong> the DV scenario. For higherquality<br />
material dur<strong>in</strong>g offl<strong>in</strong>e capture and edit, <strong>HD</strong>-<strong>Connect</strong> <strong>MI</strong> could<br />
be set <strong>in</strong> <strong>HD</strong> mode and a DVC-Pro-<strong>HD</strong> or DNx<strong>HD</strong> codec used to<br />
compress captured video. Recapture of just the f<strong>in</strong>al project clips could<br />
then be done at the full <strong>HD</strong> data rate. The <strong>SD</strong>I scenario is also more<br />
universal than the DV scenario, s<strong>in</strong>ce it covers an <strong>HD</strong>V source such as<br />
the JVC BR-<strong>HD</strong>50 deck that do not down-convert to DV.<br />
The table below summarizes the advantages and disadvantages of the<br />
DV and <strong>SD</strong>I scenarios.<br />
Advantages<br />
DV Offl<strong>in</strong>e Capture<br />
• Laptop ok<br />
• Avid Xpress Pro ok<br />
• M<strong>in</strong>imal equipment<br />
• Low data rate<br />
<strong>SD</strong>I Offl<strong>in</strong>e Capture<br />
• <strong>SD</strong> or <strong>HD</strong><br />
• Choice of <strong>SD</strong> or <strong>HD</strong><br />
codecs (DV, DVC Pro <strong>HD</strong>,<br />
etc.)<br />
• Ok for <strong>HD</strong>V device<br />
without down-conversion<br />
Disadvantages<br />
• Lower offl<strong>in</strong>e quality<br />
• <strong>SD</strong> only<br />
• DV compression only<br />
• May need timecode<br />
offset <strong>in</strong> edit app<br />
• Requires <strong>HD</strong>V<br />
• No laptop<br />
• No Xpress Pro<br />
<strong>HD</strong>-<strong>Connect</strong> <strong>MI</strong> Guide and User’s Manual.<br />
25
device that downconverts<br />
6.2 Troubleshoot<strong>in</strong>g Guide<br />
1) No video output from the box.<br />
• Confirm output from your <strong>HD</strong><strong>MI</strong> source by plugg<strong>in</strong>g directly <strong>in</strong>to an<br />
<strong>HD</strong><strong>MI</strong> monitor.<br />
• Confirm colorbar output from by unplugg<strong>in</strong>g the <strong>HD</strong><strong>MI</strong> cable and<br />
plugg<strong>in</strong>g its <strong>SD</strong>I output <strong>in</strong>to an <strong>SD</strong>I monitor, if you have one available.<br />
• If you are try<strong>in</strong>g to connect to an <strong>SD</strong>I monitor and is putt<strong>in</strong>g out an <strong>HD</strong><br />
<strong>SD</strong>I stream, is your monitor <strong>HD</strong>-capable or is it limited to <strong>SD</strong>-<strong>SD</strong>I?<br />
• If you are try<strong>in</strong>g to connect <strong>SD</strong>I to an NLE system, does the expected<br />
format <strong>in</strong> the NLE capture sett<strong>in</strong>gs exactly match the format from your<br />
<strong>HD</strong>-<strong>Connect</strong> <strong>MI</strong>? Unplug <strong>HD</strong><strong>MI</strong> and use the Controller application to<br />
select appropriate colorbar formats for test<strong>in</strong>g (1080i50, 1080i60, etc.).<br />
• On a Sony <strong>HD</strong><strong>MI</strong> source device, set the <strong>HD</strong>V/DV SEL option under the<br />
In/Out Rec menu to <strong>HD</strong>V.<br />
2) Box failed to update<br />
• Make sure the computer recognizes the box before updat<strong>in</strong>g.<br />
• Roll back to a previous work<strong>in</strong>g version.<br />
3) RS-422 Deck control does not work.<br />
• Select a generic play deck as the deck template <strong>in</strong> the NLE software.<br />
• Ensure that the RS-422 cable is connected from <strong>HD</strong>-<strong>Connect</strong> <strong>MI</strong> to<br />
the correct serial port on your NLE system.<br />
• Ensure that a 1394 cable is connected from <strong>HD</strong>-<strong>Connect</strong> <strong>MI</strong> to your<br />
<strong>HD</strong><strong>MI</strong> source device.<br />
• Ensure that 1394 control is enabled on the controlled device and that<br />
the device allows remote control and is not set to allow only local<br />
control.<br />
4) Batch Capture Problems.<br />
• On a Sony device, set the FF/Rew Speed option to SHUTTLE MAX.<br />
• Set NLE preroll to 6 seconds.<br />
<strong>HD</strong>-<strong>Connect</strong> <strong>MI</strong> Guide and User’s Manual.<br />
26
5) I only see color bars when I turn on the box.<br />
• When there is no <strong>HD</strong><strong>MI</strong> device, the <strong>HD</strong>-<strong>Connect</strong> <strong>MI</strong> displays color<br />
bars <strong>in</strong> the selected output mode.<br />
<strong>HD</strong>-<strong>Connect</strong> <strong>MI</strong> Guide and User’s Manual.<br />
27
7 Safety and E<strong>SD</strong> Precautions<br />
1) Always connect the box to specified power source: 100 to 240 V AC,<br />
50/60 Hz. DO NOT use any power supply other than the one supplied<br />
with the <strong>HD</strong>-<strong>Connect</strong> <strong>MI</strong>, as this voids the warranty.<br />
2) Do not operate the unit <strong>in</strong> an unprotected outdoor <strong>in</strong>stallation or <strong>in</strong> wet<br />
areas. Do not expose this product to ra<strong>in</strong> or snow.<br />
3) Keep the operat<strong>in</strong>g temperature between 5º C and 40º C (40º F and<br />
104º F). Avoid conditions which would cause moisture condensation<br />
on the outside cover.<br />
4) There are no user serviceable components <strong>in</strong>side the box. Only a<br />
qualified technician should perform servic<strong>in</strong>g of the unit. Open<strong>in</strong>g the<br />
box may void the warranty.<br />
5) Do not pour water or any other fluid over the box. Avoid the use of<br />
sharp objects near the box as they may scratch the anodized<br />
alum<strong>in</strong>um case or damage the DIP switch and board.<br />
6) Clean only with water with a damp cloth.<br />
7) CAUTION: Electrostatic Discharge (E<strong>SD</strong>) can damage components <strong>in</strong><br />
this product. Although <strong>HD</strong>-<strong>Connect</strong> <strong>MI</strong> has countermeasures to this<br />
hazard <strong>in</strong>stalled <strong>in</strong>side, it is always best to avoid damage by us<strong>in</strong>g<br />
extra caution when adjust<strong>in</strong>g the DIP switch sett<strong>in</strong>gs. Always ground<br />
yourself (by touch<strong>in</strong>g a grounded metal object) to discharge any static<br />
prior to adjust<strong>in</strong>g the DIP switches.<br />
8) Do not touch exposed connector p<strong>in</strong>s and do not <strong>in</strong>sert any metal<br />
objects <strong>in</strong> the connectors.<br />
9) Ensure that all connections made to the box (<strong>in</strong>clud<strong>in</strong>g at the “other<br />
end of the cable”) are made <strong>in</strong> E<strong>SD</strong> safe environments.<br />
10) Always transport and store the box <strong>in</strong> the static protected bag <strong>in</strong>cluded<br />
with the <strong>HD</strong>-<strong>Connect</strong> <strong>MI</strong><br />
<strong>HD</strong>-<strong>Connect</strong> <strong>MI</strong> Guide and User’s Manual.<br />
28
8 Specifications<br />
8.1 Inputs<br />
<strong>HD</strong><strong>MI</strong><br />
Formats:<br />
• 1920x1080i, 60Hz<br />
• 1920x1080i, 59.94Hz<br />
• 1920x1080i, 50Hz<br />
• 1920x1080p, 30Hz<br />
• 1920x1080p, 29.97Hz<br />
• 1920x1080p, 25Hz<br />
• 1920x1080p, 24Hz<br />
• 1920x1080p, 23.98Hz<br />
• 1280x720p, 60Hz<br />
• 1280x720p, 59.94Hz<br />
• 1280x720p, 50Hz<br />
• 720x486i, 29.97Hz<br />
• 720x576i, 25Hz<br />
• YUV 4:2:2 or RGB 4:4:4 for all formats<br />
• 8-bit video, 24-bit audio at 48kHz (2 channel support now, 8 channel<br />
com<strong>in</strong>g soon)<br />
8.2 Outputs<br />
<strong>HD</strong>-<strong>SD</strong>I<br />
Standards:<br />
• Video Format: SMPTE 274M (1080i), 296M (720p)<br />
• <strong>SD</strong>I Video: 4:2:2 SMPTE 292M<br />
• SMPTE High Def Color Bars RP-219<br />
• 4 Channel Embedded Audio (8 channels added soon)<br />
• Audio: 24-bit, 48Khz, SMPTE 299M<br />
Formats:<br />
• Same as for Inputs above.<br />
<strong>HD</strong>-<strong>Connect</strong> <strong>MI</strong> Guide and User’s Manual.<br />
29
<strong>Connect</strong>ors: 75 Ω BNC<br />
<strong>SD</strong>-<strong>SD</strong>I<br />
Standards:<br />
• Video Format: SMPTE 125M<br />
• <strong>SD</strong>I Video: 4:2:2 SMPTE 259M-C<br />
• SMPTE Standard Def Color Bars RP-178<br />
• 4 Channel Embedded Audio<br />
• 20-bit, 48Khz, SMPTE 272M-A<br />
Formats:<br />
• 720x480i, 29.97Hz, 4:3<br />
• 720x576i, 25Hz, 4:3<br />
<strong>Connect</strong>ors: 75 Ω BNC<br />
Embedded Time Code<br />
Standards:<br />
• SMPTE RP-188 (<strong>HD</strong>), VITC (<strong>SD</strong>)<br />
• <strong>SD</strong> NTSC L<strong>in</strong>es: 14, 16, 277, 279<br />
• <strong>SD</strong> PAL L<strong>in</strong>es: 14, 16, 327, 329<br />
• <strong>HD</strong> 1080i L<strong>in</strong>es: 14, 16, 577, 579<br />
8.3 Physical<br />
Dimensions<br />
• 4” (101 mm) deep X 1.75” (44 mm) high X 6” (152 mm) wide<br />
Weight<br />
• 1 lb. (0.5 kg)<br />
8.4 Power<br />
Range<br />
• AC Power: 100 to 240 V AC (50/60 Hz)<br />
• Unit Input Power: +3.6 to 5.25V, center positive, 2.5mm jack<br />
Maximum Operat<strong>in</strong>g<br />
• 3W<br />
<strong>HD</strong>-<strong>Connect</strong> <strong>MI</strong> Guide and User’s Manual.<br />
30
8.5 Temperature Ranges<br />
Operat<strong>in</strong>g<br />
• 40º F to 104º F (5º C to 40º C)<br />
Storage<br />
• -5ºF to 140ºF (-20º C to 60º C)<br />
8.6 Humidity<br />
Operat<strong>in</strong>g<br />
• Less than 80% (non-condens<strong>in</strong>g)<br />
Storage<br />
• Less than 90% (non-condens<strong>in</strong>g)<br />
<strong>HD</strong>-<strong>Connect</strong> <strong>MI</strong> Guide and User’s Manual.<br />
31
9 RMA and Warranty<br />
9.1 Conditions of the Warranty<br />
<strong>Convergent</strong> <strong>Design</strong> reserves the right to determ<strong>in</strong>e if a repair is subject to the<br />
warranty agreement. Damages caused by products be<strong>in</strong>g dropped or mishandled<br />
is not covered by this warranty. Also damage caused by over-voltage conditions<br />
on any of the I/O connectors is not covered by this warranty. Use of any power<br />
supply other than the one provided automatically voids the warranty.<br />
There are no user-serviceable parts <strong>in</strong>side the cab<strong>in</strong>et. Open<strong>in</strong>g the cab<strong>in</strong>et<br />
voids the warranty. Transit damage caused by <strong>in</strong>adequate packag<strong>in</strong>g also<br />
<strong>in</strong>validates the warranty agreement. Please ship the unit <strong>in</strong> its orig<strong>in</strong>al packag<strong>in</strong>g,<br />
if possible.<br />
All products are shipped prepaid to <strong>Convergent</strong> <strong>Design</strong>. For <strong>in</strong>surance reasons,<br />
<strong>Convergent</strong> <strong>Design</strong> cannot accept any product that is returned via U.S. Postal<br />
Service. Returns will be accepted from Federal Express, UPS, DHL, or other<br />
comparable freight carrier. <strong>Convergent</strong> <strong>Design</strong> returns the product via a prepaid<br />
two-day delivery service with<strong>in</strong> the cont<strong>in</strong>ental United States, only if the product<br />
is under warranty and subsequently found to be faulty. Out-of-warranty repaired<br />
products are shipped at customer’s expense. Turnaround time for warranty<br />
repairs normally will not exceed 48 hours (exclud<strong>in</strong>g shipp<strong>in</strong>g time), unless<br />
extraord<strong>in</strong>ary fault conditions exist. A failure analysis report is returned with each<br />
product.<br />
Labor and defects are covered for the warranty period stated on your orig<strong>in</strong>al<br />
<strong>in</strong>voice from the orig<strong>in</strong>al date of purchase. Only the orig<strong>in</strong>al purchaser of the<br />
products is covered under this warranty. The warranty is non-transferable. If you<br />
discover a defect, please refer to our Return Merchandise Policy below. The<br />
warranty covers all <strong>Convergent</strong> <strong>Design</strong> hardware defective <strong>in</strong> material or<br />
workmanship. Software is warranted <strong>in</strong> a separate written statement<br />
accompany<strong>in</strong>g the software. Dur<strong>in</strong>g the warranty period, <strong>Convergent</strong> <strong>Design</strong>, at<br />
its option, will repair or replace product or product components, which <strong>in</strong> its<br />
op<strong>in</strong>ion prove defective. Parts and components used <strong>in</strong> the repair process may<br />
be recycled or repaired, at <strong>Convergent</strong> <strong>Design</strong>’s discretion. This warranty service<br />
will be performed at no charge to the registered owner, provided the product is<br />
shipped prepaid to <strong>Convergent</strong> <strong>Design</strong>. <strong>Convergent</strong> <strong>Design</strong> will return the<br />
repaired product via a like carrier, <strong>in</strong> the cont<strong>in</strong>ental United States with<strong>in</strong> 48<br />
hours, shipp<strong>in</strong>g time excluded. <strong>Convergent</strong> <strong>Design</strong> reserves the right to<br />
determ<strong>in</strong>e whether a needed repair is subject to the warranty as per its<br />
provisions sated here<strong>in</strong>. Transit damage caused by <strong>in</strong>adequate pack<strong>in</strong>g violates<br />
the warranty. The warranty will be void if, <strong>in</strong> the op<strong>in</strong>ion of <strong>Convergent</strong> <strong>Design</strong>,<br />
<strong>HD</strong>-<strong>Connect</strong> <strong>MI</strong> Guide and User’s Manual.<br />
32
the product has been damages through accident, misuse, misapplication, or as a<br />
result of service or modification performed not authorized <strong>in</strong> writ<strong>in</strong>g by<br />
<strong>Convergent</strong> <strong>Design</strong>.<br />
WARNING: The follow<strong>in</strong>g are not covered under warranty:<br />
• Damage due to the use of a power supply other than that supplied with<br />
<strong>HD</strong>-<strong>Connect</strong> <strong>MI</strong>.<br />
• Damage caused by improper connections to external 1394 devices<br />
supply<strong>in</strong>g power over the 1394 cable.<br />
9.2 Obta<strong>in</strong><strong>in</strong>g an RMA<br />
It is our policy that all material and repair returns, whether <strong>in</strong> warranty or not, are<br />
only accepted if an RMA (Return Merchandise Authorization) number has been<br />
issued for the products be<strong>in</strong>g returned. Any unauthorized shipments will be<br />
returned, un-repaired at the customer’s expense.<br />
Damaged or defective <strong>Convergent</strong> <strong>Design</strong> products that are purchased from<br />
<strong>Convergent</strong> <strong>Design</strong> may be returned for replacement only. <strong>Convergent</strong> <strong>Design</strong><br />
will not accept returns for any other reason. All eligible returns require a Return<br />
Merchandise Authorization (RMA) number. E-mail <strong>Convergent</strong> <strong>Design</strong>, Inc. at<br />
support@convergent-design.com to obta<strong>in</strong> an RMA number. Items must be<br />
returned with<strong>in</strong> 10 days of receiv<strong>in</strong>g your RMA number. Returned product must<br />
be <strong>in</strong> its orig<strong>in</strong>al packag<strong>in</strong>g with all contents <strong>in</strong>cluded and must have the RMA<br />
number clearly marked on the outside of the package.<br />
RMA numbers and return address may be obta<strong>in</strong>ed from Technical Support.<br />
<strong>Convergent</strong> <strong>Design</strong>, Inc.<br />
4465 Northpark Drive<br />
Suite 201<br />
Colorado Spr<strong>in</strong>gs, CO 80907<br />
EMAIL: support@convergent-design.com<br />
WEBSITE: http://www.convergent-design.com<br />
VOICE: (720) 221-3861 or (866) 654-0080<br />
<strong>HD</strong>-<strong>Connect</strong> <strong>MI</strong> Guide and User’s Manual.<br />
33
<strong>HD</strong>-<strong>Connect</strong> <strong>MI</strong> Guide and User’s Manual.<br />
34


