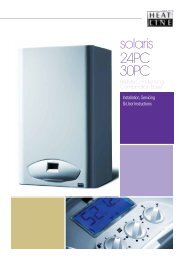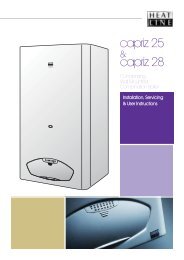
CaprizPlus Instructions for use - Heatline
CaprizPlus Instructions for use - Heatline
CaprizPlus Instructions for use - Heatline

You also want an ePaper? Increase the reach of your titles
YUMPU automatically turns print PDFs into web optimized ePapers that Google loves.
19.4.1 Pump (head only)<br />
• Drain the boiler heating circuit as described in the appropriate<br />
chapter "Draining".<br />
• Disconnect the electrical plug (22) from the main board.<br />
• Remove the four cap head screws (20).<br />
• Carefully remove the pump head (21) together with cable.<br />
Do not strain cable.<br />
• Reconnect wiring to new pump head and fi t cover.<br />
• Fit the new pump head by repeating the operations in<br />
reverse.<br />
19.4.2 Automatic air vent<br />
• Drain the boiler heating circuit as described in the appropriate<br />
chapter "Draining".<br />
• Remove the retaining clip (19).<br />
• Remove the automatic air vent (17).<br />
• Fit the new automatic air vent and ‘O’ ring ensuring the vent<br />
cap is left loose.<br />
• Refi ll, vent and pressurise the boiler.<br />
19.4.3 Low water pressure sensor<br />
• Drain the boiler heating circuit as described in the appropriate<br />
chapter "Draining".<br />
• Disconnect the electrical lead (4).<br />
• Remove the retaining clip (6), remove the low water pressure<br />
sensor (5).<br />
• Fit the new low water pressure sensor.<br />
• Refi ll vent and pressurise the boiler.<br />
19.4.4 Safety discharge valve<br />
• Drain the boiler heating circuit as described in the appropriate<br />
chapter "Draining".<br />
• Remove the low water pressure sensor as described in the<br />
previous section.<br />
• Undo the safety discharge valve union and remove the pipe.<br />
19.4.5 Flow sensor and impeller<br />
• Remove the the electrical connection (12).<br />
• Unclip the fl ow sensor (13).<br />
• Unscrew the impeller housing (28) and remove the impeller.<br />
19.4.6 Bypass<br />
• Drain the boiler heating circuit as described in the appropriate<br />
chapter "Draining".<br />
• Remove the bypass valve retaining nut (26) to remove the<br />
bypass from its housing (25).<br />
• After replacing the bypass, refi ll, vent and pressurise the<br />
boiler.<br />
19.4.7 3 way valve motor and diverter valve<br />
• Drain the boiler heating circuit as described in the appropriate<br />
chapter "Draining".<br />
• Disconnect the electrical plug (2).<br />
• Remove the retaining clip (3).<br />
• Remove the three way valve motor (1).<br />
• Remove the diverter valve retaining nut.<br />
• Remove the diverter valve.<br />
• Fit new three way valve motor and diverter valve assembly.<br />
• Refi ll, vent and pressurise the boiler.<br />
19.4.8 Plate-to-plate heat exchanger<br />
• Drain the boiler heating and domestic hot water circuits as<br />
described in the appropriate chapter "Draining".<br />
• Remove the two securing screws (23).<br />
• Remove the plate-to-plate heat exchanger (16).<br />
• When replacing the plate-to-plate heat exchanger, ensure that<br />
the four rubber sealing washers are fi tted into the hydroblock.<br />
NOTE: The plate-to-plate heat exchanger only fi ts one way.<br />
• Refi ll, vent and pressurise the boiler.<br />
• Disconnect the Central Heating isolation valve.<br />
• Remove the securing clips and withdraw the safety discharge<br />
valve plastic housing (29).<br />
• Remove the safety discharge valve.<br />
• Fit new ‘O’ ring. Refi ll, vent and pressurise the boiler.<br />
- 42 - Service Call 0844 736 9138, Technical Help (Chargeable) Call 0906 802 0253