SuperVista Integration Instructions - Image Works
SuperVista Integration Instructions - Image Works
SuperVista Integration Instructions - Image Works

Create successful ePaper yourself
Turn your PDF publications into a flip-book with our unique Google optimized e-Paper software.
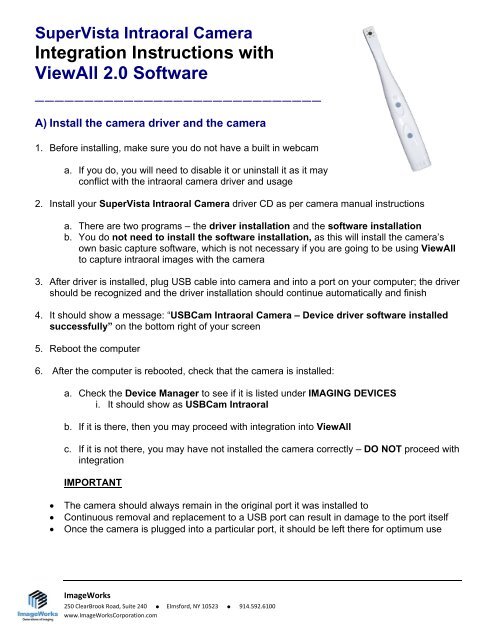
<strong>SuperVista</strong> Intraoral Camera<br />
<strong>Integration</strong> <strong>Instructions</strong> with<br />
ViewAll 2.0 Software<br />
_____________________________<br />
A) Install the camera driver and the camera<br />
1. Before installing, make sure you do not have a built in webcam<br />
a. If you do, you will need to disable it or uninstall it as it may<br />
conflict with the intraoral camera driver and usage<br />
2. Install your <strong>SuperVista</strong> Intraoral Camera driver CD as per camera manual instructions<br />
a. There are two programs – the driver installation and the software installation<br />
b. You do not need to install the software installation, as this will install the camera’s<br />
own basic capture software, which is not necessary if you are going to be using ViewAll<br />
to capture intraoral images with the camera<br />
3. After driver is installed, plug USB cable into camera and into a port on your computer; the driver<br />
should be recognized and the driver installation should continue automatically and finish<br />
4. It should show a message: “USBCam Intraoral Camera – Device driver software installed<br />
successfully” on the bottom right of your screen<br />
5. Reboot the computer<br />
6. After the computer is rebooted, check that the camera is installed:<br />
a. Check the Device Manager to see if it is listed under IMAGING DEVICES<br />
i. It should show as USBCam Intraoral<br />
b. If it is there, then you may proceed with integration into ViewAll<br />
c. If it is not there, you may have not installed the camera correctly – DO NOT proceed with<br />
integration<br />
IMPORTANT<br />
• The camera should always remain in the original port it was installed to<br />
• Continuous removal and replacement to a USB port can result in damage to the port itself<br />
• Once the camera is plugged into a particular port, it should be left there for optimum use<br />
<strong>Image</strong><strong>Works</strong><br />
250 ClearBrook Road, Suite 240 • Elmsford, NY 10523 • 914.592.6100<br />
www.<strong>Image</strong><strong>Works</strong>Corporation.com
B) Integrating your camera with ViewAll<br />
1. You should only attempt to install the camera with ViewAll version 2.0 or higher<br />
2. First be sure you have installed the right version of ViewAll by clicking Help-About ViewAll<br />
3. It should show the software version number<br />
a. Once you confirm you have installed ViewAll continue<br />
<strong>Image</strong><strong>Works</strong><br />
250 ClearBrook Road, Suite 240 • Elmsford, NY 10523 • 914.592.6100<br />
www.<strong>Image</strong><strong>Works</strong>Corporation.com
4. To make ViewAll recognize the <strong>SuperVista</strong> Camera correctly, click on IMAGE DEVICES and<br />
confirm that the entry TWAIN – USBCam Intraoral Camera is listed and in bold<br />
5. Then click on that device so that it has a bold bullet appearing to the left as shown below:<br />
<strong>Image</strong><strong>Works</strong><br />
250 ClearBrook Road, Suite 240 • Elmsford, NY 10523 • 914.592.6100<br />
www.<strong>Image</strong><strong>Works</strong>Corporation.com
Note: You do not have to have the EVA digital x-ray sensor installed on this computer<br />
(as is the case in the example above - as the EVA is not in bold which means no sensor<br />
is attached). The camera and sensor work independently of one another. You may<br />
however connect both devices to the same computer<br />
6. Your camera is now integrated with ViewAll software<br />
B) Testing the camera<br />
1. Pick a patient, then Click the acquire tab<br />
2. On the top right side of screen, where it says “Select an acquisition template”, make sure to<br />
change the selection to “1 x 1 template”. Note: This step is optional. The <strong>SuperVista</strong> Camera<br />
can acquire into any template<br />
3. Use the drop down arrow to choose this selected option from the list<br />
<strong>Image</strong><strong>Works</strong><br />
250 ClearBrook Road, Suite 240 • Elmsford, NY 10523 • 914.592.6100<br />
www.<strong>Image</strong><strong>Works</strong>Corporation.com
4. Click on START ENDO EXPOSURE MODE on the left top icon<br />
5. Turn the power button of the camera ON (bottom button on the face of the camera’s white side)<br />
6. Move the camera around – in and out – side to side – of the patient’s mouth until you focus on<br />
the picture you want<br />
7. When you are ready to capture the image, press the camera’s top button (either the top button<br />
on the white side of the camera or the grey side, whichever is more convenient, based on the<br />
way you are taking the picture)<br />
8. The frame will freeze and capture the image. A beeping sound will occur to let you know that it<br />
captured the image. The live video feed will then be returned for you to take the next picture<br />
9. Take the next picture<br />
10. When done capturing pictures, click the X in the red small box to abort any more capture<br />
<strong>Image</strong><strong>Works</strong><br />
250 ClearBrook Road, Suite 240 • Elmsford, NY 10523 • 914.592.6100<br />
www.<strong>Image</strong><strong>Works</strong>Corporation.com
11. It should then show the last image taken and a message CAPTURE ABORTED<br />
12. To view all pictures taken click CHART VIEW tab on top right<br />
13. It should display all camera pictures captured with last one enlarged as below<br />
14. You may use all the ViewAll tools as you do with digital x-rays captured<br />
<strong>Image</strong><strong>Works</strong><br />
250 ClearBrook Road, Suite 240 • Elmsford, NY 10523 • 914.592.6100<br />
www.<strong>Image</strong><strong>Works</strong>Corporation.com