MANUALE UTENTI
MANUALE UTENTI
MANUALE UTENTI

Create successful ePaper yourself
Turn your PDF publications into a flip-book with our unique Google optimized e-Paper software.
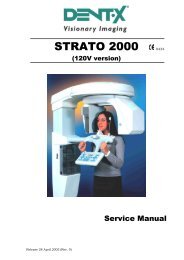
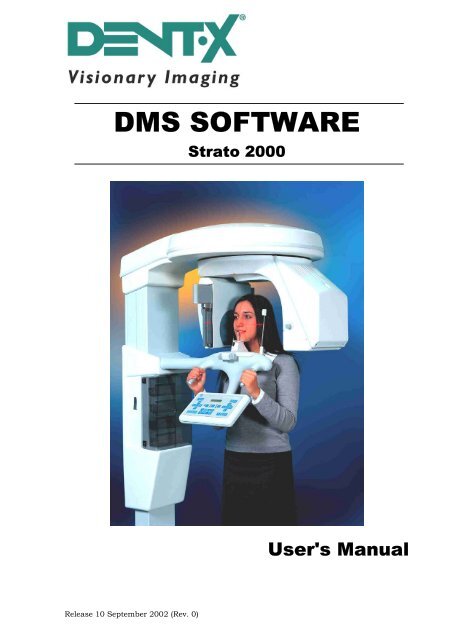
DMS SOFTWARE<br />
Strato 2000<br />
User's Manual<br />
Release 10 September 2002 (Rev. 0)
USER'S MANUAL<br />
Contents<br />
Contents<br />
1. D.M.S. SOFTWARE 1<br />
1.1 Preliminary requirements.......................................................................1<br />
1.2 Hardware installation.............................................................................2<br />
1.3 Installation of DMS software ..................................................................3<br />
1.4 U.C.A. packages.....................................................................................4<br />
2. STARTING THE PROGRAM 5<br />
2.1 User Information....................................................................................6<br />
3. DATA BASE 7<br />
3.1 To create a New DataBase ......................................................................8<br />
3.2 To open a Data Base ..............................................................................9<br />
3.3 Structure of a Data Base......................................................................10<br />
3.4 To Change Password ............................................................................11<br />
3.5 To Rename a Data Base .......................................................................12<br />
3.6 To Delete a Data Base ..........................................................................13<br />
4. PATIENTS FILE 14<br />
4.1 Patients List.........................................................................................16<br />
4.1.1 Insert a new patient into Data Base.................................................... 17<br />
4.1.2 Modify a patient’s data ....................................................................... 19<br />
4.1.3 Delete a patient from Data Base ......................................................... 20<br />
4.1.4 Search for a patient in Data Base ....................................................... 21<br />
4.2 Exams List...........................................................................................22<br />
4.2.1 More data concerning an exam ........................................................... 24<br />
4.2.2 Assign an exam .................................................................................. 25<br />
4.2.3 Repeat an Exam ................................................................................. 26<br />
4.2.4 Delete an Exam from the Data Base ................................................... 27<br />
4.2.5 Printing the label of an exam .............................................................. 28<br />
4.2.6 Layout of labels .................................................................................. 29<br />
4.3 The Virtual Keyboard ...........................................................................32<br />
4.4 Export/Import .....................................................................................34<br />
4.4.1 Export ................................................................................................ 34<br />
4.4.2 Import ................................................................................................ 41<br />
4.5 Print ....................................................................................................43<br />
(Rev. 0) i<br />
DMS SOFTWARE Strato 2000
USER'S MANUAL<br />
Contents<br />
5. U.C.A. (USER CUSTOMISABLE APPLICATIONS) 45<br />
5.1 Verification of available applications.....................................................46<br />
5.2 Installation of new application packages...............................................47<br />
5.3 Deactivating old applications................................................................52<br />
6. USER OPTIONS 53<br />
7. SERVICE 54<br />
8. DOCUMENTATION 55<br />
This publication can only be reproduced, transmitted, transcribed or translated into<br />
any human or computer language with the written consent of VILLA SISTEMI<br />
MEDICALI S.p.a.<br />
This manual is the English translation of the Italian original manual version.<br />
DMS SOFTWARE Strato 2000 ii<br />
(Rev. 0)
USER'S MANUAL<br />
D.M.S. software<br />
1. D.M.S. SOFTWARE<br />
DMS software (Data Management System) is a system which enables the<br />
user to monitor, manage and customise STRATO 2000 simulating the<br />
user’s interface on a remote PC.<br />
The system enables the complete management of the patient’s file and of<br />
the exams carried out, keeping a historical file of the display data of every<br />
exam.<br />
Moreover, thanks to U.C.A. (User Customisable Applications) technology,<br />
update packages may be installed autonomously, enlarging the system’s<br />
applications quickly and easily.<br />
In this way the system becomes configurable with a unique flexibility and<br />
it is ready to accommodate any change both in your needs and in the<br />
availability of new examination methods.<br />
1.1 Preliminary requirements<br />
DMS software and the new applicable UCA packages can be installed on<br />
a standard PC with the following minimum requirements:<br />
• CPU<br />
Pentium 100 MHz or more<br />
• RAM Memory 64 MB minimum<br />
• Operational system Windows 98, ME, 2000, NT<br />
• Graphic card 800x600, 65535 colour or more<br />
• CD-ROM Reader yes<br />
• Serial port standard RS 232 – 9 pole connector<br />
The initial installation of the software requires about 20 MB space on<br />
hard disk. Additional space will be necessary for files created by the DMS<br />
software during use.<br />
<br />
NOTE:<br />
DMS Software must be installed on your PC before new UCA expansion<br />
packages can be installed.<br />
A serial communication RS232C cable, included in the initial STRATO<br />
2000 equipment, is also required for connecting with STRATO 2000.<br />
(Rev. 0) 1<br />
DMS SOFTWARE Strato 2000
USER'S MANUAL<br />
D.M.S. software<br />
1.2 Hardware installation<br />
Once you are sure about your preliminary requirements, you can proceed<br />
with installing the hardware.<br />
The only operation necessary is the connection of the serial cable<br />
between STRATO 2000 and your PC.<br />
Before connecting the cable, be sure both STRATO 2000 and PC are off.<br />
The STRATO 2000 serial connector is situated on the left side of the base<br />
of the equipment.<br />
Connect one end of this cable to the connector and the other to a serial<br />
port of your PC.<br />
Usually PCs have two serial ports named "COM 1" and "COM 2". Take<br />
note of which of the two ports you have connected the cable so as to set<br />
the software in the right way, when requested.<br />
The connectors at the two ends of the cable are completely the same and<br />
interchangeable.<br />
DMS SOFTWARE Strato 2000 2<br />
(Rev. 0)
USER'S MANUAL<br />
D.M.S. software<br />
1.3 Installation of DMS software<br />
When you buy DMS software from your supplier, you will be given a CD<br />
thanks to which, after connecting the serial cable, you will be able to<br />
install the software on your PC:<br />
1. Switch STRATO 2000 on and put it into the "patient’s entry" position.<br />
2. Switch on your PC.<br />
3. Put the CD into the reader. The installation program will start<br />
automatically.<br />
4. If installation does not start automatically, open "My computer",<br />
select the CD reader (usually "D:") and execute the "SETUP"<br />
application.<br />
5. Now follow the instruction displayed on the screen.<br />
At the end of the installation, a new folder named "STRATO 2000 DMS"<br />
will be created in the "Program" folder of "Start" menu.<br />
Now, if necessary, you are ready to install your UCA exam packages<br />
autonomously.<br />
(Rev. 0) 3<br />
DMS SOFTWARE Strato 2000
USER'S MANUAL<br />
D.M.S. software<br />
1.4 U.C.A. packages<br />
If you bought your UCA programs at the same time as STRATO 2000, you<br />
will have been given the equipment already enabled to these applications.<br />
It is not necessary to install the UCA packages.<br />
If you decide to order an UCA package after installing STRATO 2000:<br />
1. Contact the licensed supplier and tell him your unit’s serial number.<br />
2. The supplier will contact Villa and in a short time the requested<br />
package will be delivered.<br />
<br />
NOTE:<br />
You will find your equipment’s serial number on a label under the<br />
STRATO 2000 keyboard:<br />
For every UCA exam package you have bought you will get:<br />
- a CD ROM with a letter containing three codes, necessary for<br />
installing new exam programs<br />
- any additional hardware accessories.<br />
Now you can proceed with installing your UCA packages. To install UCA<br />
packages:<br />
1. Start the STRATO 2000 DMS program following the instructions in<br />
chapter 2 "Start of the program".<br />
2. Install your UCA packages according to the procedure described in<br />
paragraph 5.2 "Installation of new application packages".<br />
DMS SOFTWARE Strato 2000 4<br />
(Rev. 0)
USER'S MANUAL<br />
Starting the program<br />
2. STARTING THE PROGRAM<br />
To start:<br />
1. Switch STRATO 2000 on and put it into the "patient’s entry" position.<br />
2. Switch on the PC.<br />
3. Select the "STRATO 2000 DMS" program from the Start menu of the<br />
Windows application bar (press Start button, select Programs to<br />
visualise the menu list and click on STRATO2000 DMS option).<br />
If it is the first time you have started the program the User Information<br />
window will open (see paragraph 2.1), or the DataBase Selection window<br />
(see chapter 3) will be visualised.<br />
(Rev. 0) 5<br />
DMS SOFTWARE Strato 2000
USER'S MANUAL<br />
Starting the program<br />
2.1 User Information<br />
If it is the first time you have started DMS software, after selecting the<br />
"STRATO 2000 DMS" program from Start menu, an User Information<br />
window will open from which you can:<br />
• insert the personal data of your practice<br />
•<br />
•<br />
select the program language, visualising the drop-down list Program<br />
language<br />
show the serial port ("COM1", "COM2") of the PC to which you have<br />
connected the connection cable with STRATO 2000<br />
• choose the teeth numbering method you want.<br />
Pressing the "OK" button the DataBase Selection window will open<br />
(chapter 3).<br />
<br />
NOTE:<br />
All these data can be inserted or modified even later, through the User<br />
Options function (chapter 6).<br />
<br />
NOTE:<br />
The language you select on the software is independent from the<br />
language used on the keyboard of the machine.<br />
DMS SOFTWARE Strato 2000 6<br />
(Rev. 0)
USER'S MANUAL<br />
Data base<br />
3. DATA BASE<br />
STRATO 2000 software makes it possible to create and manage more<br />
than one Data Base and so it allows several doctors to use the same<br />
machine, keeping their own patients’ data confidential.<br />
Once you have selected "STRATO 2000 DMS" program from Start menu<br />
and parameter initialisation has been carried out, if required, the<br />
DataBase Selection window will open, from which you can:<br />
• create a new Data Base<br />
• access an existing Data Base<br />
• change password to a Data Base<br />
• rename a Data Base<br />
• eliminate a Data Base.<br />
Every Data Base is characterised by:<br />
• a name<br />
• a password (not mandatory) known only by authorised personnel<br />
which are chosen and inserted by the user when a Data Base is created.<br />
<br />
NOTE:<br />
To access any operation on a Data Base it is necessary to know and<br />
insert both these data (when password exists too).<br />
(Rev. 0) 7<br />
DMS SOFTWARE Strato 2000
USER'S MANUAL<br />
Data base<br />
3.1 To create a New DataBase<br />
If you want to create a new Data Base in which to insert your patients’<br />
names:<br />
1. Select "New DB" from the DataBase Selection window. The New<br />
DataBase window will open.<br />
2. Give a name to the new Data Base and insert it into the "DataBase<br />
Name" box<br />
If a Data Base with the same name already exists a "Warning"<br />
message will appear and you will have to give a different name to the<br />
new Data Base.<br />
3. Choose a password for the new Data Base and insert it into the<br />
"Password" box.<br />
4. Insert the same password into the "Confirm Password" box.<br />
5. Press "OK".<br />
If the operation has been executed in a correct way, the name of the new<br />
Data Base will appear in the drop-down list Select a DB in the DataBase<br />
Selection window.<br />
To close the New DataBase window without creating a new Data Base<br />
press "Cancel".<br />
<br />
NOTE:<br />
The system makes it possible to create a new Data Base without<br />
password. This can be inserted afterwards with the "Change Password"<br />
box from the DataBase Selection window (paragraph 3.4).<br />
On the contrary it is mandatory to give a name to the new Data Base. If<br />
you do not do that and the "OK" key is pressed, an "error" appears.<br />
DMS SOFTWARE Strato 2000 8<br />
(Rev. 0)
USER'S MANUAL<br />
Data base<br />
3.2 To open a Data Base<br />
To access a Data Base:<br />
1. Visualise the drop-down list Select a DB from the DataBase<br />
Selection window and select the name of the Data Base you wish to<br />
open.<br />
2. If it is the first time you have started STRATO 2000 DMS or if a Data<br />
Base has never been created, the "Select a DB" box will be<br />
empty/blank. To work with STRATO 2000 program it is necessary to<br />
create a new Data Base (paragraph 3.1).<br />
3. Insert, if existing, the Data Base password.<br />
4. Press "OK".<br />
If all operations have been executed in a correct way, the system tries to<br />
establish a connection with STRATO 2000 and the window concerning<br />
the selected Data Base is visualised on the screen.<br />
If, on the contrary, at this point the following message appears:<br />
this means that the PC has not been able to establish the connection<br />
with STRATO 2000. This may be due to the following causes:<br />
Cause<br />
STRATO 2000 is off.<br />
The serial cable is not<br />
connected<br />
The selected "COM" port is<br />
not the one actually in use<br />
Remedy<br />
Start STRATO 2000, wait<br />
until it has completed the<br />
initialisation phase and try<br />
again<br />
Check that the cable has been<br />
connected correctly and try<br />
again<br />
Select the right port in the<br />
"User’s options" menu<br />
If you insert a non valid password, a WRONG PASSWORD message<br />
appears on the screen and the Data Base is not opened.<br />
Therefore you must repeat the operation.<br />
(Rev. 0) 9<br />
DMS SOFTWARE Strato 2000
USER'S MANUAL<br />
Data base<br />
3.3 Structure of a Data Base<br />
When you open a Data Base, a window appears on the screen. Its<br />
heading gives the name of the office where STRATO 2000 is installed and<br />
the name of the selected Data Base.<br />
From this window you can:<br />
• manage the patients’ file and the exams executed (Patients File)<br />
• install new application packages (U.C.A.) autonomously<br />
• change the system’s initialisation layouts (User Options)<br />
• look up documentation concerning STRATO 2000 (Documentation).<br />
<br />
NOTE:<br />
The "Service" function contains the equipment’s adjustment parameters,<br />
checkable exclusively by technical staff. Access to this function is<br />
therefore protected by a password, known only by service technicians<br />
(see chapter 7).<br />
DMS SOFTWARE Strato 2000 10<br />
(Rev. 0)
USER'S MANUAL<br />
Data base<br />
3.4 To Change Password<br />
The "STRATO 2000 DMS" program makes it possible to change your Data<br />
Base password at any time following a few instructions:<br />
1. Press "Change Password" from the DataBase Selection window. The<br />
Change Password window will open.<br />
2. Insert the current password where requested and press Ok. Two new<br />
boxes will appear.<br />
3. Choose a new password and insert it in both the "New Password" field<br />
and the "Confirm password" field.<br />
4. Press "OK".<br />
To close the Change Password window without changing your Data Base<br />
password press "Cancel".<br />
<br />
NOTE:<br />
If you have forgotten your password there is no possible way to access<br />
Data Base and the information it contains.<br />
Therefore you are advised to keep a note of your password in a safe place.<br />
(Rev. 0) 11<br />
DMS SOFTWARE Strato 2000
USER'S MANUAL<br />
Data base<br />
3.5 To Rename a Data Base<br />
If you wish to change the name of your Data Base, you can do this by<br />
following a few instructions:<br />
1. Press "Rename DB" from the DataBase Selection window. The<br />
"DataBase Renaming" window will open.<br />
2. Choose a new name for your Data Base and insert it into the "New<br />
name" field.<br />
3. Insert the Password of the Data Base whose name you are changing.<br />
4. Press "OK".<br />
At this point the new name will appear in the Select a DB drop-down list<br />
of the DataBase Selection window in place of the old name.<br />
To close the DataBase Renaming window without giving a new name to<br />
your Data Base press "Cancel".<br />
<br />
NOTE:<br />
Be sure your Data Base is closed before renaming it. In fact if you try to<br />
rename an active Data Base, the system will deny the operation and will<br />
visualise an error message.<br />
If you want to rename the Data Base you are working on we advise you<br />
to:<br />
1. Close DMS.<br />
2. Restart DMS, without opening any Data Base.<br />
3. Select and rename the Data Base you want to change the name of.<br />
DMS SOFTWARE Strato 2000 12<br />
(Rev. 0)
USER'S MANUAL<br />
Data base<br />
3.6 To Delete a Data Base<br />
To delete a Data Base and all information it contains:<br />
1. Visualise the Select a DB drop-down list from the DataBase<br />
Selection window and select the name of the Data Base you wish to<br />
eliminate.<br />
2. Select "Delete DB" from the DataBase Selection window. The<br />
Database delete window will appear.<br />
3. Check to ensure that the name of the Data Base you wish to delete is<br />
correct.<br />
4. Insert, if existing, the Data Base password.<br />
5. Confirm password.<br />
6. Press "OK".<br />
7. The system informs that the selected DataBase has been removed.<br />
Press "OK".<br />
<br />
NOTE:<br />
Be sure your Data Base is closed before delete it. In fact if you try to<br />
delete an active Data Base, the system will deny the operation and will<br />
visualise an error message.<br />
If you want to delete the Data Base you are working on we advise you to:<br />
1. Close the DMS.<br />
2. Restart the DMS, without opening any Data Base.<br />
3. Select and delete the Data Base you want to change the name of.<br />
(Rev. 0) 13<br />
DMS SOFTWARE Strato 2000
USER'S MANUAL<br />
Patients’ File<br />
4. PATIENTS FILE<br />
The Patients File window is sub-divided into two form named Patients<br />
List and Exams List.<br />
The Patients List contains the patients’ personal data, such as:<br />
• identification code<br />
• name<br />
• surname<br />
• birth date<br />
• gender<br />
• address<br />
• telephone.<br />
Which will be filled in by the operator when inserting a new patient.<br />
An Exams List is associated to each patient, composed of:<br />
• exam date<br />
• exam time<br />
• exam type<br />
• parameters regarding patient (adult/child, size, jaw)<br />
• parameters regarding all exposure (kV, mA, time of exposure).<br />
These data are automatically transferred from STRATO 2000 to PC after<br />
executing every exam.<br />
<br />
NOTE:<br />
For some types of exam the filed data can be different from the standard<br />
ones, because some exams do not request the layout of all mentioned<br />
parameters, while others request additional information to the normal<br />
ones (paragraph 4.2.1).<br />
For more detailed information about the display of exams, see the<br />
STRATO 2000 User's Manual.<br />
The Patients File window has a service toolbar, composed of 10 buttons,<br />
which makes it possible to:<br />
•<br />
create a connection to STRATO 2000, if this has not been<br />
established (1)<br />
• open the virtual keyboard (2)<br />
• go back to the DataBase Selection form (3)<br />
• insert a new patient in the file (4)<br />
• modify a patient’s data already in the patients’ list (5)<br />
• delete a patient and all his exams from file (6)<br />
DMS SOFTWARE Strato 2000 14<br />
(Rev. 0)
USER'S MANUAL<br />
Patients’ file<br />
• search for a patient in the list quickly (7)<br />
• export any information in the Data Base (8)<br />
• import new data into a Data Base (9)<br />
• print interesting data (10).<br />
1 2 3 4 5 6 7 8 9 10<br />
<br />
NOTE:<br />
These icons are not always active, but they are deactivated when the<br />
corresponding functions do not have any meaning in the current job<br />
conditions.<br />
(Rev. 0) 15<br />
DMS SOFTWARE Strato 2000
USER'S MANUAL<br />
Patients’ File<br />
4.1 Patients List<br />
You can file the personal data of all patients in the Patients List.<br />
This file contains a default patient called "ZZZ Dummy", the function of<br />
which will be explained in paragraph 4.2 "Exams List".<br />
This patient cannot be modified or deleted.<br />
You can choose to order the list according to:<br />
• code<br />
• surname<br />
• name<br />
selecting your choice with the mouse in row "Order by".<br />
When you position your mouse on the Patients List and click the right<br />
key, you open a menu from which you can select directly the following<br />
functions:<br />
• New patient (paragraph 4.1.1 "Insert a new patient into Data Base")<br />
• Modify Patient (paragraph 4.1.2 "Modify the data of a patient")<br />
• Delete Patient (paragraph 4.1.3 "Delete a patient from Data Base")<br />
• Search Patient (paragraph 4.1.4 "Search for a patient in Data Base")<br />
• Print (paragraph 4.5 "Print")<br />
which will be described in detail in the following paragraphs.<br />
DMS SOFTWARE Strato 2000 16<br />
(Rev. 0)
USER'S MANUAL<br />
Patients’ file<br />
4.1.1 Insert a new patient into Data Base<br />
To insert a new patient into the Patients List:<br />
1. Click the New Patient icon given in the service toolbar, or,<br />
alternatively, select the "New Patient" function by clicking with the<br />
right mouse button from the Patients List form.<br />
The New Patient form will appear.<br />
2. Allocate an identification code to the new patient and insert it into<br />
the Code box.<br />
The code must have a maximum length of 8 characters and can be<br />
composed of a combination of numbers and letters.<br />
3. Fill in the fields concerning the patient’s personal data.<br />
4. Press "OK".<br />
The patient will be inserted into the already existing list.<br />
<br />
NOTE:<br />
The CODE, NAME and SURNAME fields are mandatory. If one of these<br />
fields is not filled in, an ERROR window will appear and it will not be<br />
possible to confirm the new patient’s insertion.<br />
This system makes it possible to manage patients with the same name<br />
and surname, but does not allow duplication of the codes insides every<br />
Data Base. In fact when a patient is inserted, the system executes a<br />
check to be sure that the new patient’s code is not the same as an<br />
existing code. If this happens, you are requested to insert a valid code<br />
(therefore different).<br />
(Rev. 0) 17<br />
DMS SOFTWARE Strato 2000
USER'S MANUAL<br />
Patients’ File<br />
<br />
NOTE:<br />
The Birth Date field of the New Patient has a pre-set value, as an<br />
example of the size by which the datum is visualised.<br />
To insert the right date:<br />
1. Visualise the Birth Date drop-down list.<br />
2. Choose the month of birth using the arrows on the side of the<br />
calendar.<br />
3. Select the birth day with the mouse.<br />
4. Day and month of birth will automatically be updated.<br />
5. Insert the year of birth manually.<br />
Alternatively you can insert the full date of birth manually.<br />
To close the New Patient form without inserting any new patient press<br />
"Cancel".<br />
<br />
NOTE:<br />
The patient "ZZZ Dummy" has been created so that it is always the last<br />
position in the Patients List.<br />
Therefore, it is impossible to insert a patient with a code, name or<br />
surname that is alphabetically subsequent to the virtual patient’s code,<br />
name or surname.<br />
DMS SOFTWARE Strato 2000 18<br />
(Rev. 0)
USER'S MANUAL<br />
Patients’ file<br />
4.1.2 Modify a patient’s data<br />
To modify a patient’s personal data already inserted in the Patients List:<br />
1. Select the desired patient from the Patients List.<br />
2. Press the Modify Patient icon, or, if you prefer, select the same<br />
function clicking with the right mouse button. The Modification<br />
Patient form will appear.<br />
3. Modify the data you wish to update.<br />
4. Press "OK" to confirm operation.<br />
To close the Modify Patient form without changing any information,<br />
press "Cancel".<br />
<br />
NOTE:<br />
The "CODE" field cannot be modified.<br />
(Rev. 0) 19<br />
DMS SOFTWARE Strato 2000
USER'S MANUAL<br />
Patients’ File<br />
4.1.3 Delete a patient from Data Base<br />
To delete a patient and his exams from your file:<br />
1. Select the patient you wish to delete from the Patients List.<br />
2. Click the Delete Patient icon from the service toolbar, or,<br />
alternatively, select the same function clicking with the right mouse<br />
button. A window will appear asking you to confirm the operation.<br />
3. Press "YES" if you want to eliminate the patient from the Patients<br />
List permanently.<br />
4. The patient will be deleted from the Patients List of your Data Base.<br />
5. Press "NO" if you do not want to eliminate the patient from your file<br />
permanently.<br />
DMS SOFTWARE Strato 2000 20<br />
(Rev. 0)
USER'S MANUAL<br />
Patients’ file<br />
4.1.4 Search for a patient in Data Base<br />
STRATO 2000 DMS has a Patient Search function which enables you to<br />
look for a patient inserted in your Data Base quickly:<br />
1. Press the Patient Search icon from service toolbar, or, alternatively,<br />
select the same function from the Patients List form clicking with<br />
the right mouse button. The Patient Search form will appear.<br />
2. Fill in completely or partially at least one of the requested fields<br />
(CODE, NAME, SURNAME).<br />
3. Confirm by pressing the "Search" button corresponding to the search<br />
method specified (CODE or SURNAME/NAME).<br />
<br />
NOTE:<br />
The "Search" confirmation buttons are deactivated until the fields to<br />
which they refer are filled in, even partially.<br />
Once the search has started, the Patients List is ordered by code, by<br />
surname, or by name according to the search method you have used and<br />
the first patient meeting the inserted data is highlighted.<br />
To visualise the complete patients list again use the arrows on your<br />
keyboard.<br />
If no patient meeting the supplied search data is found in the file, a<br />
RECORD NOT FOUND window is visualised.<br />
<br />
NOTE:<br />
The system executes the search exclusively according to the selected<br />
method; if you want to select the search by CODE, it is unnecessary to<br />
insert the patient’s name and surname and, analogously, if you want to<br />
execute the search by SURNAME/NAME it is pointless to insert the code.<br />
<br />
NOTE:<br />
If you want to execute the search by SURNAME/NAME it is not necessary<br />
to fill in both fields, even if the completeness of the information helps to<br />
solve ambiguity.<br />
(Rev. 0) 21<br />
DMS SOFTWARE Strato 2000
USER'S MANUAL<br />
Patients’ File<br />
4.2 Exams List<br />
DMS software makes it possible to file all the exams you carry out by<br />
STRATO 2000 in your Data Base.<br />
In fact, through the RS 232 serial connection, when you carry out an<br />
exam, the equipment communicates with your PC and sends it all the<br />
exposure parameters you have selected.<br />
To file an exam in your Data Base:<br />
1. Switch on the PC.<br />
2. Start the DMS software.<br />
3. Be sure your PC is connected to STRATO 2000. Remember, to<br />
connect PC to the machine after opening DMS software, just click on<br />
the first button of the toolbar (see chapter 4).<br />
4. Select the patient you are working on in the Patients List.<br />
5. Open the corresponding Exams List by selecting the Exams List form<br />
or clicking twice on the selected patient.<br />
6. Lay out the exam parameters from STRATO 2000 keyboard or directly<br />
from your PC by the Virtual keyboard (paragraph 4.3).<br />
7. Carry out the exam pressing the STRATO 2000 X-ray button.<br />
In this way the exam you have executed is filed into your Data Base in<br />
the Exams List relating to the selected patient.<br />
<br />
NOTE:<br />
If you wish to carry out several exams on the same patient you must reselect<br />
the patient from the Patients List before carrying out each new<br />
exam. If the operation is not repeated, the exam will be stored in the<br />
Exams List of the ZZZ Dummy assistance patient from which it can then<br />
be transferred into the right position by the "Assign" function.<br />
The introduction of the virtual patient default prevents an exam that has<br />
been wrongly carried out before selecting the patient from the Patients<br />
List, from being stored in the Exams List of the wrong patient without<br />
displaying a warning message (and therefore with little possibility of<br />
noticing the mistake).<br />
DMS SOFTWARE Strato 2000 22<br />
(Rev. 0)
USER'S MANUAL<br />
Patients’ file<br />
When you open a patient’s Exams List, the system allows you to put the<br />
list in order:<br />
• by Exam Date<br />
• by Exam Type<br />
selecting your option in the "Order by" row.<br />
By clicking on the right mouse button in the Exams List form you can:<br />
•<br />
•<br />
visualise other possible data concerning the selected exam<br />
(paragraph 4.2.1 "More data concerning an exam")<br />
• repeat an exam (paragraph 4.2.3 "Repeat an exam")<br />
•<br />
move the exam into another Exams List (paragraph 4.2.2 "Assign an<br />
exam")<br />
eliminate an exam from Data Base (paragraph 4.2.4 "Delete an exam<br />
from Data Base")<br />
• print the exam label (paragraph 4.2.5 "Print the exam label").<br />
(Rev. 0) 23<br />
DMS SOFTWARE Strato 2000
USER'S MANUAL<br />
Patients’ File<br />
4.2.1 More data concerning an exam<br />
Some additional exam parameters are memorised in addition to the<br />
standard ones for three types of exams (Ceph, Sinus and Implant)<br />
After selecting the exam about which you wish to know additional data:<br />
•<br />
•<br />
select the Supplementary exam data sub-window of the Exams<br />
List, or<br />
open the functions menu clicking with the right mouse button and<br />
select the "Other Data" function, or<br />
• click twice on the selected exam.<br />
The Supplementary exam data window will appear containing additional<br />
information regarding the selected exam.<br />
DMS SOFTWARE Strato 2000 24<br />
(Rev. 0)
USER'S MANUAL<br />
Patients’ file<br />
4.2.2 Assign an exam<br />
The program provides for the need to transfer an exam from the patient’s<br />
Exams List to another patient’s Exams List, as a result, for example, of<br />
mistake in selecting the patient before the beginning of the exam.<br />
Moreover this function makes it possible to assign to the correct patient,<br />
an exam which, due to the reasons already explained in paragraph 4.2,<br />
has been inserted into the virtual patient "ZZZ Dummy" Exams List.<br />
To assign a patient with his corresponding exam:<br />
1. Take note of the receiver patient’s identification code.<br />
2. Select the exam you wish to transfer.<br />
3. Open the function menu by clicking with the right mouse button.<br />
4. Select the "Assign" function; the Assign exam form will appear.<br />
5. Insert the code of the patient to whom you wish to associate the<br />
exam.<br />
6. Press "OK".<br />
To close the Assign exam form without executing any transfer, press<br />
"Cancel".<br />
If a non valid code is inserted, the system will visualise a NON-EXISTENT<br />
CODE message.<br />
(Rev. 0) 25<br />
DMS SOFTWARE Strato 2000
USER'S MANUAL<br />
Patients’ File<br />
4.2.3 Repeat an Exam<br />
"STRATO 2000 DMS" Software offers the possibility of repeating, after a<br />
while, an exam with the same parameters previously used, enabling you<br />
to get perfectly comparable images.<br />
To repeat an exam:<br />
1. Select the exam you wish to repeat.<br />
2. Open the function menu with the right mouse button and select the<br />
"Repeat Exam" function.<br />
This operation will transfer to STRATO 2000 all the parameters used to<br />
get that exam.<br />
Now just confirm the exam on STRATO 2000 and press the X-ray button.<br />
DMS SOFTWARE Strato 2000 26<br />
(Rev. 0)
USER'S MANUAL<br />
Patients’ file<br />
4.2.4 Delete an Exam from the Data Base<br />
To delete an exam from a patient’s Exams List and therefore from the<br />
Data Base:<br />
1. Select the exam you wish to delete.<br />
2. Open the function menu by clicking with the right mouse button and<br />
select the "Eliminate Exam" function. The system asks you to confirm<br />
the operation.<br />
3. Press "YES" if you wish to eliminate the exam from your Data Base<br />
permanently; press "NO" if you want to restore the exam.<br />
(Rev. 0) 27<br />
DMS SOFTWARE Strato 2000
USER'S MANUAL<br />
Patients’ File<br />
4.2.5 Printing the label of an exam<br />
The STRATO 2000 DMS system allows you to print labels directly for the<br />
identification of X-rays films:<br />
1. Select the exam of which you wish to print the label from the Exams<br />
List.<br />
2. Open the function menu by clicking with the right mouse button and<br />
select the "Print Exam" function; the Label Settings form will appear<br />
(see paragraph 4.2.6).<br />
3. Insert the characteristic data of the label size you want to use<br />
following the indications mentioned in the following paragraph.<br />
4. Press the Print key. The print layout preview will be visualised.<br />
In the top part of the Preview form you will find a print toolbar with<br />
12 icons, from which you can:<br />
• visualise the complete print page, thanks to the zoom out (1)<br />
• visualise the print page in standard size (2)<br />
• enlarge the details of the print page, thanks to the zoom in (3)<br />
•<br />
•<br />
•<br />
•<br />
• change the printing options (8)<br />
• start the print (9)<br />
•<br />
visualise the first page if the document is composed of several<br />
pages (4)<br />
visualise the page previous to the current one if the document is<br />
composed of several pages (5)<br />
visualise the page following the current one if the document is<br />
composed of several pages (6)<br />
visualise the last page if the document is composed of several<br />
pages (7)<br />
save the printing document on Hard Disk or floppy disk in QRP<br />
format (10)<br />
• open a document previously saved in QRP format (11)<br />
• close the print page (12).<br />
1 2 3 4 5 6 7 8 9 10 11 12<br />
5. Edit the print parameters pressing the Print Setup icon (8) on the<br />
bar at the top of the screen.<br />
6. Insert the sheet of labels into your printer.<br />
7. Start print pressing the Print icon (9).<br />
DMS SOFTWARE Strato 2000 28<br />
(Rev. 0)
USER'S MANUAL<br />
Patients’ file<br />
4.2.6 Layout of labels<br />
When you activate the "Print Exam" function the following Label Settings<br />
windows shows up, subdivided in 5 sub-window:<br />
• Page format<br />
• Page settings<br />
• Label settings<br />
• Layout<br />
• Graphic schematisation of a label sheet.<br />
<br />
Page format<br />
From this sub-window you can:<br />
1. Select the format of the work sheet where you wish to print your<br />
labels by selecting it from the drop-down list Format.<br />
2. Save a new page format you have laid out (Save As).<br />
3. Modify an existing format, keeping the same name (Update).<br />
4. Delete a previously saved format (Delete).<br />
<br />
NOTE:<br />
In the drop-down menu "Format" you will find the default format "A4"<br />
that can be used as a template for adjusting the settings according to the<br />
type of label sheets you use.<br />
(Rev. 0) 29<br />
DMS SOFTWARE Strato 2000
USER'S MANUAL<br />
Patients’ File<br />
<br />
Page settings<br />
•<br />
•<br />
Horizontal Dimension: insert the measurement in millimetres of<br />
the horizontal side of the sheet you are using<br />
Vertical Dimension: insert the measurement in millimetres of<br />
the vertical side of the sheet you are using<br />
• Margins:<br />
–<br />
–<br />
–<br />
–<br />
Upper: insert the measurement in millimetres of the distance<br />
between the upper margin of the sheet and the upper margin<br />
of the first row of labels<br />
Lower: insert the measurement in millimetres of the distance<br />
between the lower margin of the sheet and the lower margin<br />
of the last row of labels<br />
Left: insert the measurement in millimetres of the distance<br />
between the left margin of the sheet and the left margin of the<br />
first column of labels<br />
Right: insert the measurement in millimetres of the distance<br />
between the right margin of the sheet and the right margin of<br />
the last column of labels.<br />
<br />
NOTE:<br />
Laying out the "Margins" parameters, the system helps you by<br />
highlighting in red the meaning of the selected fields in the<br />
schematisation of the label sheet.<br />
<br />
WARNING:<br />
If the margins of the label sheet are smaller than the ones pre-set for the<br />
printer, the labels may not be completely printed.<br />
In this case it will be necessary to modify some parameters in the label<br />
layouts.<br />
<br />
Label settings<br />
In the "Label settings" sub-window you define all information<br />
concerning the label format you wish to use in the printing.<br />
• Number of labels:<br />
– Number of columns: insert the number of the label columns<br />
contained in your label sheet<br />
– Number of rows: insert the number of label rows contained in<br />
your label sheet<br />
• Label Size:<br />
– Width: insert the measurement in millimetres of the width of<br />
each label<br />
– Height: insert the measurement in millimetres of the height of<br />
each label<br />
DMS SOFTWARE Strato 2000 30<br />
(Rev. 0)
USER'S MANUAL<br />
Patients’ file<br />
• Separator spaces:<br />
– Horizontal: insert the measurement in millimetres of the<br />
space separating two side by side labels on the same row<br />
– Vertical: insert the measurement in millimetres of the space<br />
separating two following labels on the same column.<br />
<br />
NOTE:<br />
When you select one of the fields contained in this sub-window, its<br />
meaning is highlighted in red on the graphic schematisation of your work<br />
sheet at the side.<br />
If the requested data are not directly supplied on the box of sheets you<br />
are using, it will be necessary to use a ruler where necessary.<br />
<br />
WARNING:<br />
The inserted data must be consistent with the ones supplied in "Label<br />
settings", meaning that the sum of label measurements, separator<br />
spaces and margins, horizontally and vertically, must correspond to the<br />
size, respectively horizontally and vertically, of the sheet.<br />
Otherwise the system will visualise an error message and you will have to<br />
modify the supplied layouts.<br />
<br />
Layout<br />
From this sub-window you can select in which label of your label<br />
sheet you wish to print.<br />
• Column n°: insert the number of the column you wish to print<br />
• Row n°: insert the number of the row you wish to print.<br />
Now you can start printing.<br />
(Rev. 0) 31<br />
DMS SOFTWARE Strato 2000
USER'S MANUAL<br />
Patients’ File<br />
4.3 The Virtual Keyboard<br />
STRATO 2000 software gives you the possibility of setting the exam type<br />
and parameters directly from your PC.<br />
After selecting the patient from the Patients List, press the Virtual<br />
Keyboard icon on the service toolbar.<br />
A window showing an exact copy of the keyboard on the machine will<br />
appear.<br />
<br />
NOTE<br />
The Virtual Keyboard icon works only if the connection with<br />
STRATO 2000 is activated<br />
<br />
NOTE:<br />
Some keys on the virtual keyboard are automatically deactivated for<br />
safety reasons since they would cause the machine to move when<br />
selected.<br />
In the following picture the active keys on the virtual keyboard are<br />
highlighted, that is the keys you can select directly from your PC to set<br />
the exam you wish to execute. In the keys description, the Active keys are<br />
indicated by an "A".<br />
Their activation corresponds to the one in the real keyboard of<br />
STRATO 2000 and therefore they are activated only in correspondence of<br />
certain exam procedures.<br />
All parameters the system requires to set and that you will see visualised<br />
on the virtual keyboard display, as well as on the machine console, are<br />
filed in Data Base after the exam has been carried out.<br />
DMS SOFTWARE Strato 2000 32<br />
(Rev. 0)
USER'S MANUAL<br />
Patients’ file<br />
1 2<br />
22 23<br />
DISPLAY<br />
6<br />
3<br />
11 12 13<br />
24<br />
28<br />
5 7<br />
14 15 16 17<br />
27<br />
25<br />
4<br />
26<br />
8 9 10<br />
21<br />
20<br />
19<br />
18<br />
29 30 31<br />
1. Ready for X-rays warning light<br />
2. X-rays emission warning light<br />
3. Manual increase of kV, sec or mA (A)<br />
4. Manual decrease of kV, sec or mA (A)<br />
5. Select KV for manual change (A)<br />
6. Select sec for manual change (A)<br />
7. Select mA for manual change (A)<br />
8. Exam execution as a test, without ray<br />
emission (A)<br />
9. Reset (A)<br />
10. Position of patient centring (A)<br />
11. Anatomic selection: adult/child (A)<br />
12. Anatomic selection: patient’s size (A)<br />
13. Anatomic selection: arch opening (A)<br />
14. Select implant programs (A)<br />
15. Select ceph programs (A)<br />
16. Select SINUS program (A)<br />
17. For future programs<br />
18. For future programs<br />
19. Select panoramic programs (A)<br />
20. Select ATM open mouth/closed mouth<br />
programs (A)<br />
21. Select biaxial ATM program (A)<br />
22. Switch on centring laser<br />
23. For future uses<br />
24. Cursor movement for parameters selection (A)<br />
25. Cursor movement for parameters selection (A)<br />
26. Cursor movement for parameters selection (A)<br />
27. Cursor movement for parameters selection (A)<br />
28. "Enter" key: operation confirmation (A)<br />
29. Upward vertical movement<br />
30. Consent for vertical movement<br />
31. Downward vertical movement<br />
(Rev. 0) 33<br />
DMS SOFTWARE Strato 2000
USER'S MANUAL<br />
Patients’ File<br />
4.4 Export / Import<br />
Thanks to the export and import functions you can transfer the data<br />
contained in a Data Base into another Data base.<br />
To execute this operation you must:<br />
1. Export your data into a text file (see paragraph 4.4.1 "Export").<br />
2. Import the text file into the new Data Base (see paragraph 4.4.2<br />
"Import").<br />
4.4.1 Export<br />
DMS system gives the possibility of exporting your data on a text file,<br />
which you can then import into another Data Base.<br />
To export a Data Base:<br />
1. Select the "Export Data Base" icon on the service toolbar placed<br />
under the Data Base heading.<br />
2. On the screen the "save with name" window will be visualised, from<br />
which you must choose the folder where you want to save the new<br />
text file containing the data of your Data Base.<br />
3. Give a name to the file and insert it into the "Name File" field.<br />
4. Select in the "Save as" drop-down list the "Import/Export DataBase<br />
files (*.txt)" option.<br />
5. Press Save.<br />
The system informs you that the operation has been executed<br />
correctly.<br />
DMS SOFTWARE Strato 2000 34<br />
(Rev. 0)
USER'S MANUAL<br />
Patients’ file<br />
<br />
NOTE:<br />
If a file already exists with the same name given to the export file, the<br />
system asks you if you wish to substitute the existing file with the new<br />
one.<br />
If you wish to keep the old file, you will have to give another name to the<br />
file you are exporting.<br />
The exported file can be read, for instance, by Microsoft Excel or the<br />
database or spreadsheet programs.<br />
If you wish to visualise the file in Excel:<br />
1. Select "Microsoft Excel" from Start menu.<br />
2. Look for the folder where you have saved the exported file and open<br />
it, remembering to select the "Text file (*.txt)" option in the "type of<br />
file" drop-down list. An "Auto-composition text import" window will<br />
appear.<br />
3. Select the following fields:<br />
• Type of file Delimited<br />
• Start to import from row 1<br />
• File origin Windows (ANSI).<br />
• Separator ; (Semicolon)<br />
• patient’s code to whom the exam is associated<br />
•<br />
•<br />
Press Next.<br />
4. Select:<br />
Press Next.<br />
5. Press End.<br />
The Excel sheet containing your Data Base will be visualised.<br />
The new file contains all of your Data Base data organised as in the<br />
picture.<br />
Each row corresponds to an exam, giving the following associated data:<br />
patient’s personal data (surname, name, date of birth, sex, address,<br />
telephone)<br />
data associated to the exam (date and time when the exam was<br />
carried out, type, exposure parameters, additional data).<br />
(Rev. 0) 35<br />
DMS SOFTWARE Strato 2000
USER'S MANUAL<br />
Patients’ File<br />
<br />
NOTE:<br />
A patient’s name will appear each time he/she has an exam and<br />
therefore each time the exam is recorded in the Exams List.<br />
<br />
NOTE:<br />
A lot of data, such as, for example, the type of exam carried out, are<br />
coded.<br />
The meanings of these codes are shown in the following table.<br />
Code<br />
Exam type<br />
0 Panoramic<br />
1 Left emipanoramic<br />
2 Right emipanoramic<br />
3 Maxillary Sinus<br />
4 Left L/L Sinus<br />
5 Improved orthogonality dentition<br />
6 Frontal dentition<br />
7 Open mouth/closed mouth TMJ<br />
8 Biaxial TMJ<br />
9 Postero/Anterior TMJ<br />
10 Cephalometry<br />
11 Implant<br />
12 Right L/L sinus<br />
DMS SOFTWARE Strato 2000 36<br />
(Rev. 0)
USER'S MANUAL<br />
Patients’ file<br />
(Rev. 0) 37<br />
DMS SOFTWARE Strato 2000
USER'S MANUAL<br />
Patients’ File<br />
Code<br />
Adult/Child<br />
0 Adult<br />
1 Child<br />
Code<br />
Patient’s size<br />
0 Small<br />
1 Medium<br />
2 Large<br />
Code<br />
Jaw<br />
0 Narrow<br />
1 Regular<br />
2 Large<br />
Code<br />
Tooth according to<br />
European codification<br />
Tooth according to<br />
American codification<br />
00 11 08<br />
01 12 07<br />
02 13 06<br />
03 14 05<br />
04 15 04<br />
05 16 03<br />
06 17 02<br />
07 18 01<br />
08 21 09<br />
09 22 10<br />
10 23 11<br />
11 24 12<br />
12 25 13<br />
13 26 14<br />
14 27 15<br />
15 28 16<br />
16 31 24<br />
17 32 23<br />
18 33 22<br />
19 34 21<br />
20 35 20<br />
21 36 19<br />
22 37 18<br />
23 38 17<br />
24 41 25<br />
DMS SOFTWARE Strato 2000 38<br />
(Rev. 0)
USER'S MANUAL<br />
Patients’ file<br />
Code<br />
Tooth according to<br />
European codification<br />
Tooth according to<br />
American codification<br />
25 42 26<br />
26 43 27<br />
27 44 28<br />
28 45 29<br />
29 46 30<br />
30 47 31<br />
31 48 32<br />
Code<br />
Type of Implant<br />
0 Reduced (2 slices)<br />
1 Complete (2 slices)<br />
Code<br />
Longitudinal Thickness – Implant<br />
0 4 mm<br />
1 6 mm<br />
2 8 mm<br />
Code<br />
Transversal Thickness – Implant<br />
0 2 mm<br />
1 3 mm<br />
2 4 mm<br />
Code<br />
Slice Distance – Complete Implant<br />
0 2 mm<br />
1 3 mm<br />
2 4 mm<br />
Code<br />
Type of Collimator for Cephalometry<br />
0 18x24 cm<br />
1 24x30 cm<br />
2 Inch Format<br />
Code<br />
Soft Tissues Filter<br />
In the table the real value is multiplied by 10<br />
The Cassette Format is given in the last column of the exported table.<br />
They can assume the values of 0, 1, 2, 3, but their meaning varies<br />
according to the codes of the type of collimator used for cephalometry.<br />
(Rev. 0) 39<br />
DMS SOFTWARE Strato 2000
USER'S MANUAL<br />
Patients’ File<br />
These values are given in the following table:<br />
Code Collimator Code cassette format<br />
Cassette format<br />
0 0 18x24 Asymmetric<br />
0 1 18x24 Symmetrical<br />
0 2 24x18 Asymmetrical<br />
0 3 30x24 Symmetrical<br />
1 0 18x24 Asymmetrical<br />
1 1 24x30 Symmetrical<br />
1 2 24x30 Asymmetrical<br />
1 3 30x24 Symmetrical<br />
2 0 8x10 Asymmetrical<br />
2 1 8x10 Symmetrical<br />
2 2 10x8 Asymmetrical<br />
2 3 12x10 Symmetrical<br />
<br />
WARNING:<br />
If you change the data contained in the exported file, it will be impossible<br />
to import your data into another Data Base, because the system is not<br />
able to recognise this file as an Import\Export file.<br />
You are therefore strongly advised not to tamper with this file!<br />
<br />
NOTE:<br />
Export can be used to make a back-up of your data, copying, for<br />
example, the exported text file onto floppy disk or CD ROM.<br />
DMS SOFTWARE Strato 2000 40<br />
(Rev. 0)
USER'S MANUAL<br />
Patients’ file<br />
4.4.2 Import<br />
Thanks to the import function you can transfer into your Data Base the<br />
data previously exported from another Data Base.<br />
In order to start the import:<br />
1. Select the Import Data Base icon on the service toolbar placed under<br />
the Data Base heading.<br />
2. The Open window will be visualised on the screen, from which you<br />
will choose the exported file you want to import into your Data Base<br />
from the folder where it was previously saved.<br />
3. Press Open.<br />
If all operations have been carried out correctly, the Import Progress<br />
Form sub-window will appear.<br />
4. Start import by clicking on the Start button.<br />
The scroll bar in the sub-window shows the Import Progress.<br />
(Rev. 0) 41<br />
DMS SOFTWARE Strato 2000
USER'S MANUAL<br />
Patients’ File<br />
<br />
NOTE:<br />
During the import process the system makes a comparison between the<br />
code of each patient to import and those of all patients inserted into the<br />
recipient Data Base.<br />
• If the "new" patient’s code does not correspond with any of the<br />
existing ones, the patient of the data Base to import is filed into the<br />
recipient Data Base with its original code.<br />
• If the "new" patient’s code is already present in the recipient Data<br />
Base, the system makes a comparison between the name and the<br />
surname of these patients:<br />
–<br />
–<br />
if these correspond, the patient’s exam list is updated<br />
if these are different, the "new" patient and all information<br />
connected to him are not imported.<br />
<br />
NOTE:<br />
At the end of the import, a window is visualised on the monitor where:<br />
• The correctness of the import is confirmed if this has been executed<br />
without any problem<br />
• The causes preventing the import of some data are reported, if the<br />
system has not been able to complete the operation.<br />
The patients’ data not imported are not lost, but they are collected in a<br />
*.bad file, where * shows the name of the Data Base.<br />
It is possible to retrieve the data by correcting and importing this file,<br />
even though you are advised not to tamper with it.<br />
DMS SOFTWARE Strato 2000 42<br />
(Rev. 0)
USER'S MANUAL<br />
Patients’ file<br />
4.5 Print<br />
Using the "STRATO 2000 DMS" program you can print according to your<br />
needs:<br />
• data regarding a patient (personal data and relevant list of exams)<br />
•<br />
the complete Data Base (patients’ list together with relevant lists of<br />
exams)<br />
• patients’ list (complete with personal data).<br />
To access the printing functions proceed as described below.<br />
<br />
NOTE:<br />
If you wish to print only information regarding one patient, select his<br />
name from the Patients List before executing printing operations.<br />
1. Press the "Print" icon on the service toolbar. The Print Type<br />
Selection window will open.<br />
2. Select the type of print you wish to execute.<br />
3. Press "OK".<br />
or:<br />
1. Put the mouse pointer on the Patients List window.<br />
2. Click with the right mouse button; select the "Print" function to<br />
visualise the sub-menu.<br />
3. Choose and click the type of print you wish to execute.<br />
(Rev. 0) 43<br />
DMS SOFTWARE Strato 2000
USER'S MANUAL<br />
Patients’ File<br />
After executing one of the operation sequences just described, the<br />
preview of the selected print will appear on the screen. In the following<br />
picture there is an example of a print page.<br />
In the top part of the printing page, independently from the selected<br />
print, a toolbar, identical to the one described in paragraph 4.2.5,<br />
appears, the icons of which have the same meaning as the ones already<br />
seen.<br />
DMS SOFTWARE Strato 2000 44<br />
(Rev. 0)
USER'S MANUAL<br />
U.C.A. (User Customisable Applications)<br />
5. U.C.A. (User Customisable<br />
Applications)<br />
U.C.A. technology makes it possible to expand the applications of the<br />
system quickly and easily thanks to software updating packages which<br />
you can install autonomously via your PC.<br />
There are 5 boxes in the U.C.A. function:<br />
•<br />
•<br />
•<br />
the first contains the Univocal Identication Code (U.I.C.) of the<br />
equipment, which identifies in a univocal way your STRATO 2000<br />
unit. This code, stored permanently inside STRATO 2000, represents<br />
a kind of "signature" unique to each unit and it is automatically read<br />
by STRATO 2000 when you access the UCA window.<br />
the following four boxes are connected to the four UCA expansion<br />
packages. Inside them you must digit the activation codes of the<br />
respective updating packages.<br />
When opening this window you can:<br />
verify which application packages are already installed in<br />
STRATO 2000<br />
• install new applications<br />
• disable old applications.<br />
<br />
NOTE:<br />
In UCA expansion packages there is no Cephalometry because its<br />
activation requires a technician to assemble the cephalometric arm.<br />
(Rev. 0) 45<br />
DMS SOFTWARE Strato 2000
USER'S MANUAL<br />
U.C.A. (User Customisable Applications)<br />
5.1 Verification of available applications<br />
When you open the U.C.A. window, you can easily verify which<br />
application packages are already available on your STRATO 2000.<br />
On the left of each box an indicator displays the activation state of the<br />
corresponding application. This is:<br />
• red, when the application is not activated<br />
• green, when the application packages is active.<br />
DMS SOFTWARE Strato 2000 46<br />
(Rev. 0)
USER'S MANUAL<br />
U.C.A. (User Customisable Applications)<br />
5.2 Installation of new application packages<br />
After ordering a new application package from your retailer, you will<br />
receive:<br />
- a CD ROM<br />
- a letter containing three codes<br />
- any additional hardware accessories.<br />
The codes in the letter are:<br />
• The Serial number of your STRATO 2000.<br />
The serial number of your equipment can be found on a label under<br />
the STRATO 2000 keyboard:<br />
• The Univocal Identification Code (UIC) of your unit.<br />
This code is permanently stored inside STRATO 2000 and represents<br />
a kind of "signature" unique to each unit. This is automatically read<br />
by the equipment when you access the UCA window.<br />
• The Activation Code of the correspondent exam package.<br />
This code is univocally connected to the UIC of each unit. This means<br />
that your package cannot be installed, and therefore cannot work, on<br />
another unit identified by a different UIC.<br />
<br />
WARNING:<br />
Before proceeding with the following operations, be sure that the first<br />
code printed on the letter ("equipment s/n") corresponds to the serial<br />
number of the equipment you own.<br />
If the serial numbers do not correspond, contact the retailer, or Villa<br />
Sistemi Medicali.<br />
You are now ready to install the new application packages.<br />
(Rev. 0) 47<br />
DMS SOFTWARE Strato 2000
USER'S MANUAL<br />
U.C.A. (User Customisable Applications)<br />
The procedure is divided into three steps.<br />
<br />
Uninstall DMS software<br />
In order to keep compatibility between the software and the machine,<br />
before actually updating your STRATO 2000 you must uninstall the<br />
DMS program that may be present on your PC.<br />
1. Close the "STRATO 2000 DMS" program.<br />
2. Select "Settings" from the Start menu and open "Control Panel".<br />
3. Click twice on the "Application installation" function. The<br />
"Application installation" window will open.<br />
4. Choose "STRATO 2000 DMS" in the list of applications and press<br />
the "Add/Clear" key. You will be asked to confirm the operation.<br />
Confirm (press YES).<br />
5. The system will start to uninstall and will ask for further<br />
confirmation about files to delete. Click "YES TO ALL" and then<br />
YES again.<br />
6. If all operations are carried out correctly the system<br />
communicates that it has finished the uninstall. Press OK.<br />
<br />
NOTE:<br />
The uninstall operation does not clear office data or any information<br />
contained in the existing data base. These will be automatically loaded<br />
into your file at the end of the updating procedure.<br />
<br />
Installation of Firmware and Software upgrades<br />
Now you are ready to update your system.<br />
1. Insert the CD ROM you have received.<br />
2. Install the new version of "STRATO 2000 DMS" following the<br />
same procedure described in paragraph 1.3.<br />
3. Switch STRATO 2000 on and verify that the equipment is<br />
connected to the PC.<br />
4. Start the "STRATO 2000 DMS" program, leaving the CD ROM in<br />
the CD reader.<br />
5. The system automatically carries out a compatibility check with<br />
the machine and if necessary proceeds with a firmware 1 update.<br />
DMS SOFTWARE Strato 2000 48<br />
(Rev. 0)
USER'S MANUAL<br />
U.C.A. (User Customisable Applications)<br />
1firmware: software built-in the machine which controls movement of the equipment.<br />
(Rev. 0) 49<br />
DMS SOFTWARE Strato 2000
USER'S MANUAL<br />
U.C.A. (User Customisable Applications)<br />
In this case messages will appear on the monitor that will guide you<br />
in updating your unit.<br />
The detailed description of these procedures will be enclosed with the<br />
update CDs.<br />
6. You must repeat the switch-on procedure of your STRATO 2000 unit<br />
at the end of these operations, following the instructions given in<br />
paragraph 6.2 of STRATO 2000 User's Manual.<br />
The equipment will be returned to the patient’s entry position.<br />
<br />
NOTE:<br />
Further to the firmware updating procedure necessary for guaranteeing<br />
that the machine functions in association with the "STRATO 2000 DMS"<br />
software, the exam programs already set in your STRATO 2000 could be<br />
updated according to the latest technological progress.<br />
In this case you can find all information concerning the new<br />
specifications in the on-line User's Manual (see chapter 8).<br />
<br />
Activation of new application packages<br />
Now STRATO 2000 is ready to enable the new application packages.<br />
1. Be sure that the PC and STRATO 2000 are communicating with<br />
each other, by pressing the connection icon on the service toolbar<br />
inside the patients’ file (chapter 4).<br />
2. Select the U.C.A. window.<br />
The PC communicates with STRATO 2000 and will read the U.I.C.<br />
This code will be automatically visualised in the corresponding<br />
box.<br />
If the univocal identification code is not visualised automatically,<br />
press the "Read" key to force its reading in the machine.<br />
3. Take the letter supplied together with the updating CD and check<br />
that the U.I.C. mentioned in this corresponds to the one<br />
visualised on your PC.<br />
4. Insert the activation code contained in your letter in the box<br />
associated with the application you are installing.<br />
5. Press the "Update" button.<br />
The new application will be loaded and enabled inside your<br />
STRATO 2000.<br />
The process requires a period of time ranging from some seconds<br />
to a few minutes.<br />
6. If a "Warning" message is visualised, check the connection to<br />
STRATO 2000 and repeat the operation.<br />
DMS SOFTWARE Strato 2000 50<br />
(Rev. 0)
USER'S MANUAL<br />
U.C.A. (User Customisable Applications)<br />
The indicator next to the box corresponding to the application package<br />
installed turns green and from now on you are enabled to carry out the<br />
exams of the new package with your STRATO 2000.<br />
<br />
NOTE:<br />
The installation of new updating packages in the future may require<br />
additional operations to the ones listed above.<br />
These operation will be widely described in the documentation which will<br />
be supplied together with each package.<br />
<br />
NOTE:<br />
If you need further assistance in the installation process contact your<br />
retailer, or Villa Sistemi Medicali Technical Service at the following E-<br />
mail address:<br />
service_support@villasm.com<br />
For any request for assistance always remember to quote the serial<br />
number of your equipment and, if possible, the U.I.C. code.<br />
(Rev. 0) 51<br />
DMS SOFTWARE Strato 2000
USER'S MANUAL<br />
U.C.A. (User Customisable Applications)<br />
5.3 Deactivating old applications<br />
In the UCA window you can deactivate an application package on your<br />
machine, if necessary.<br />
To disable an application:<br />
1. After entering the UCA window, select the "Disable" key next to the<br />
application you wish to disable.<br />
2. Press the "Update" key corresponding to the application you wish to<br />
disable.<br />
The application package will be disabled from your STRATO 2000, the<br />
code will be eliminated from the box connected to it and the activation<br />
state indicator will turn red.<br />
DMS SOFTWARE Strato 2000 52<br />
(Rev. 0)
USER'S MANUAL<br />
User options<br />
6. USER OPTIONS<br />
By opening the User Options window you can modify the parameters with<br />
which you have initialised the program when you first opened your<br />
"STRATO 2000 DMS" (paragraph 2.1).<br />
Moreover in this window you can read:<br />
- The software version installed on your PC<br />
- The firmware version built-in your machine<br />
- The version of the configuration area<br />
<br />
NOTE:<br />
STRATO 2000 must be on in order to be able to read the firmware version<br />
and the configuration version in the corresponding boxes and the<br />
connection between the machine and the PC must be activated.<br />
The versions could change after executing some updates, as described in<br />
paragraph 5.2 "Installation of new application packages".<br />
(Rev. 0) 53<br />
DMS SOFTWARE Strato 2000
USER'S MANUAL<br />
Service<br />
7. SERVICE<br />
You can modify the configuration parameters of STRATO 2000 from the<br />
Service window. For safety reasons access to this function is reserved for<br />
service technicians only.<br />
When the Service icon in the function toolbar is clicked a window will<br />
appear asking for a password to be introduced that is known only by<br />
authorised technicians.<br />
To close this window press Cancel.<br />
DMS SOFTWARE Strato 2000 54<br />
(Rev. 0)
USER'S MANUAL<br />
Documentation<br />
8. DOCUMENTATION<br />
This window contains the icons corresponding to the documentation<br />
concerning STRATO 2000, supplied in Acrobat Reader format.<br />
To open one of these files click twice on the icon you are interested in.<br />
<br />
NOTE:<br />
The free-of-charge "Acrobat Reader" program must be installed on your<br />
computer for you to be able to consult the documentation files supplied<br />
with STRATO 2000 DMS software. This, however, can be downloaded<br />
from the installation CD supplied by Villa Sistemi Medicali.<br />
(Rev. 0) 55<br />
DMS SOFTWARE Strato 2000
USER'S MANUAL<br />
Documentation<br />
THIS PAGE IS INTENTIONALLY LEFT BLANK<br />
DMS SOFTWARE Strato 2000 56<br />
(Rev. 0)
Cod. 6909902303_Rev.0<br />
250 Clearbrook Rd.<br />
Elmsford, NY USA<br />
Tel. (914) 592-6100<br />
Fax (914) 592-6148<br />
www.Dent-X.com