EVAsoft User Manual - Image Works
EVAsoft User Manual - Image Works
EVAsoft User Manual - Image Works

You also want an ePaper? Increase the reach of your titles
YUMPU automatically turns print PDFs into web optimized ePapers that Google loves.
<strong>Image</strong><strong>Works</strong><br />
Generations of Imaging<br />
<strong>EVAsoft</strong><br />
Dental Imaging Software<br />
<strong>User</strong> <strong>Manual</strong>
Revision Record<br />
Title: <strong>EVAsoft</strong> Software <strong>User</strong> <strong>Manual</strong><br />
P/N: 0000062022<br />
Revision Effective Date Description<br />
Number<br />
1.0 September 1 2010 Initial Draft<br />
2.0,2.1,2.2 Not Applicable These revisions not released.<br />
2.3 February 15 2012 Update to Version 2.3<br />
Added description of feature and GUI changes<br />
Added regulatory information<br />
<strong>Image</strong><strong>Works</strong> is an ISO 9001 certified establishment.<br />
Copyright notice<br />
Copyright © 2012 AFP Imaging Corp d/b/a <strong>Image</strong><strong>Works</strong>. All Rights Reserved. This manual shall not wholly or in part, in<br />
any form or by any means, electronic, mechanical, including photocopying, be reproduced or transmitted without the<br />
authorized, written consent of <strong>Image</strong><strong>Works</strong>.<br />
This manual has been produced to assist in providing instruction for the <strong>EVAsoft</strong> and EVA products. Every effort has been<br />
made to make the information in this guide as accurate as possible. The authors of this guide shall have neither liability<br />
nor responsibility to any person or entity with respect to any loss or damages in connection with or arising from the<br />
information contained in this manual.<br />
Trademarks<br />
EVA, Dent-x, AFP Imaging, ViewAll, Sensor Armor and <strong>Image</strong><strong>Works</strong> are all registered trademarks of AFP Imaging<br />
Corporation and its subsidiaries. Any additional software products named in this document are claimed as trademarks or<br />
registered trademarks of their respective companies.<br />
Regulatory notes<br />
<strong>Image</strong><strong>Works</strong> provides you with the following information regarding the regulatory status of <strong>EVAsoft</strong> and EVA.<br />
United States of America<br />
A 510(k) premarket notification for the EVA and software (<strong>EVAsoft</strong>) was submitted to the United States Food<br />
and Drug Administration and received clearance as a class II Medical Device. The K number for this product is K030647.<br />
Canada<br />
EVA and software (<strong>EVAsoft</strong>) as EVA Digital Dental X-Ray System is licensed for sale and use in Canada. This product<br />
possesses a Class 2 Medical Device License issued 12-31-2010, by the Therapeutic Products Programme of Health Canada.<br />
Europe<br />
According to the guidelines stated in Directive 93/42/EEC of the European Community, EVA and software (<strong>EVAsoft</strong>) as EVA<br />
Digital Dental X-Ray System is a Class IIa Medical Device. EVA satisfies the requirements for bearing the CE mark on its<br />
labeling. Our authorized representative in the European Community is:<br />
<strong>Image</strong><strong>Works</strong> is an ISO 9001 certified establishment<br />
2
Computer Requirements:<br />
The computer requirements are documented separately. Please contact your dealer, <strong>Image</strong><strong>Works</strong> or our website www.<br />
imageworkscorporation.com for a copy of these requirements.<br />
Responsibility for equipment management attributable to the user:<br />
Each state, province and country may have specific requirements to operate the equipment. The intended users of this<br />
equipment should be medical professionals who are familiar with and comply with the relevant local laws and regulations<br />
when operating the equipment. The user is also required to use and maintain this equipment as described in this manual.<br />
Required Maintenance and Inspection:<br />
<strong>EVAsoft</strong> Software is designed to be operated on a PC type computer running one of the approved operating system versions.<br />
Daily:<br />
Monthly:<br />
Annually:<br />
Backup data<br />
Upload and apply Operating system patches and security fixs.<br />
Check the free capacity of the hard drives particularly on the server/host.<br />
Check the validity of the daily backups.<br />
Check for updates on the <strong>Image</strong><strong>Works</strong>Corporation.com web site.<br />
Review list of users and if necessary passwords.<br />
Durability Period:<br />
As a software product <strong>EVAsoft</strong> has no intrinsic lifespan limitation, however as it must work in a compatible environment<br />
the supported lifetime of the product is defined as seven (7) years from the software release date or the published ‘end of<br />
mainstream support’ for the operating system used, whichever is earlier.<br />
Actions to be taken in the case of an accident:<br />
1. In the event of an accident immediately stop using the equipment.<br />
2. Provide appropriate first aid and other emergency medical assistance as required by the accident conditions.<br />
3. If necessary, turn off and disconnect the equipment. Shutdown and power down the computer.<br />
4. Immediately contact the dealer where the equipment was purchase. If you cannot contact the dealer, contact<br />
<strong>Image</strong><strong>Works</strong>.<br />
3
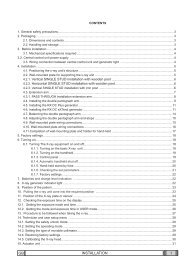
Table of Contents<br />
REVISION RECORD & REGULATORY NOTES...........................................................................2<br />
COMPUTER REQUIREMENTS................................................................................................... 3<br />
TABLE OF CONTENTS.............................................................................................................4-5<br />
ABOUT THIS PRODUCT............................................................................................................. 6<br />
EVASOFT OVERVIEW................................................................................................................ 7<br />
EVASOFT LOG-IN FEATURE..................................................................................................................8-9<br />
DETAILED TAB DESCRIPTIONS............................................................................................................. 10<br />
Patient Tab..................................................................................................................................................................................10<br />
Stack and Work Areas................................................................................................................................................... 11<br />
Patient/<strong>Image</strong> Searching............................................................................................................................................. 12<br />
Selecting the Active Patient and Study..................................................................................................................... 13<br />
Patient Tab Toolbar........................................................................................................................................................ 14<br />
Acquire Tab................................................................................................................................................................................15<br />
Capturing an <strong>Image</strong>...................................................................................................................................................... 15<br />
Acquire Tab Toolbar....................................................................................................................................................... 17<br />
Diagnosis View Tab....................................................................................................................................................................18<br />
Annotation Tools/Demographic Overlays............................................................................................................... 20<br />
Diagnosis View Toolbars.............................................................................................................................................. 21<br />
View All Tools and Tooth Number Editor Windows............................................................................................................22<br />
Chart View Tabs & Toolbar........................................................................................................................................... 23<br />
THE IMAGE TRANSFER SYSTEM............................................................................................................ 25<br />
EVASOFT FILE MENU............................................................................................................................. 26<br />
EVASOFT EDIT MENU............................................................................................................................ 26<br />
EVASOFT IMAGE DEVICES MENU......................................................................................................... 26<br />
EVASOFT TOOLS MENU......................................................................................................................... 26<br />
EVASOFT PREVIEW & HELP MENU....................................................................................................... 28<br />
ENHANCEMENT TOOL DESCRIPTIONS................................................................................................ 29<br />
Angle Measurement...................................................................................................................................................... 29<br />
Brightness/Contrast/Gama......................................................................................................................................... 28<br />
Crop................................................................................................................................................................................... 29<br />
Salt & Pepper................................................................................................................................................................... 29<br />
Edge Enhance.................................................................................................................................................................. 29<br />
Equalization.................................................................................................................................................................... 29<br />
Flip/Rotate....................................................................................................................................................................... 29<br />
Gamma............................................................................................................................................................................. 29<br />
Invert................................................................................................................................................................................. 29<br />
Linear Stretch.................................................................................................................................................................. 30<br />
Local Linear Stretch....................................................................................................................................................... 30<br />
Physical <strong>Image</strong> Calibration.......................................................................................................................................... 30<br />
Physical <strong>Image</strong> Measurement..................................................................................................................................... 30<br />
Sharpen............................................................................................................................................................................ 30<br />
Soften................................................................................................................................................................................ 30<br />
USM................................................................................................................................................................................... 30<br />
Window/Level/Gamma................................................................................................................................................ 30<br />
ENHANCEMENT TOOL DESCRIPTIONS (CONT’D)............................................................................... 31<br />
Pseudo Color, Histogram & Threshold...................................................................................................................... 31<br />
4
Appendix A........................................................................................................................................ 32<br />
Layout Editor.................................................................................................................................... 32<br />
Appendix B........................................................................................................................................ 33<br />
Print PDF Reports.............................................................................................................................. 33-34<br />
Appendix C........................................................................................................................................ 35<br />
Network Setup................................................................................................................................... 35-36<br />
Appendix D........................................................................................................................................ 37<br />
Tools>Options................................................................................................................................... 37-43<br />
5
About This Product<br />
Theory of Performance<br />
The <strong>EVAsoft</strong> Dental Imaging Software application is designed to acquire, display, organize, store and output digital<br />
radiographic images for dental diagnostics. The software is a useful interface for all <strong>Image</strong><strong>Works</strong>’s digital dental X-Ray<br />
imaging equipment. In order to capture radiographic and other images, <strong>EVAsoft</strong> must have an active patient selected.<br />
Once the digital radiographic image and/or images are acquired, <strong>EVAsoft</strong> will store the images in the patient database<br />
as DICOM files. After an image has been acquired it is automatically saved and displayed on a computer monitor.<br />
A suite of image processing tools are available for the operator to enhance the displayed image for their particular<br />
diagnostic analysis. Such enhancement tools include, but are not limited to: Magnify, Gamma, Window and Level,<br />
Linear Stretch, and Equalize. Each anatomical template used to acquire digital X-ray images has a layout for viewing the<br />
images together. The Chart View tab allows the user to view the selected patient’s images in these pre-defined layouts.<br />
<strong>EVAsoft</strong> also implements specific DICOM operations. Please refer to the <strong>EVAsoft</strong> DICOM Conformance Statement for<br />
details.<br />
Important Considerations:<br />
The software is not intended to replace the skill and judgment of a qualified medical practitioner. The software should<br />
only be used by people who have been appropriately trained in the software’s functions, capabilities and limitations.<br />
The users should be aware of the limitations in the accuracy and correctness of the output data displayed on the screen,<br />
printed, or exported from <strong>EVAsoft</strong>. The quality of the image and text data is dependent on quality and accuracy of the<br />
input data, the user’s interaction with the data, the quality, characteristics, and settings of the display device or printer,<br />
and the necessity to interpolate the data for display purposes.<br />
While <strong>EVAsoft</strong> has been extensively tested, it is impossible to completely test any piece of software, and errors may<br />
remain in the software. It is possible that an error could manifest as an incorrect measurement or image. <strong>User</strong>s must<br />
be aware of the potential for errors. <strong>EVAsoft</strong> saves images together with patient information (as DICOM files), both<br />
when saving to the local database and when exporting from <strong>EVAsoft</strong>. It is important and in some jurisdictions legally<br />
required that this data is protected from access by unauthorized persons.<br />
<strong>User</strong>s should be aware that certain views make use of interpolated data. This is data that is created by <strong>EVAsoft</strong> based<br />
on the original data set. Interpolated data may give the appearance of healthy tissue in situations where pathology<br />
that is near or smaller than the imaging/display resolution may be present. On occasion, interpolated data may also<br />
include image artifacts which should not be interpreted as real pathology.<br />
Product Registration<br />
<strong>EVAsoft</strong> requires a license to use beyond the 30 day full version trail period. To register your <strong>EVAsoft</strong> Software Via the<br />
internet, go to Help > License Registration, or call technical support and register over the phone.<br />
For most current information on this software please visit our <strong>EVAsoft</strong> support page at:<br />
www.imageworkscorporation.com/evasoftsup<br />
Contact Information<br />
Technical Support: (914) 592-6100<br />
Fax: (914) 592-6148<br />
E-mail:<br />
support@imageworkscoroporation.com<br />
Web:<br />
www.<strong>Image</strong><strong>Works</strong>Corporation.com<br />
6
<strong>EVAsoft</strong> Overview<br />
<strong>EVAsoft</strong> has been designed using a Tabbed interface.<br />
Each tab is designated a specific set of tasks. There are two general areas within each tabbed area. To the left is the<br />
main imaging area (or screen). To the right is an expandable and collapsable smaller area referred to as the “Stack”. The<br />
“Stack” usually contains certain tools or options that directly pertain to the purpose of the main tab that it falls under.<br />
For example, patient search criteria are found under the stack of the PATIENT tab. Tooth charts, patient information,<br />
exposure details, etc are found under the stack of the ACQUIRE tab. Tools, demographics and annotation tools are<br />
found unde ther stack of the DIAGNOSIS tab.<br />
There are also sub-tabs present in both the main area or screen as well as in the stack areas.<br />
The Patient Tab is designed for designating the active patients, as well as accompanying active studies. Additions of<br />
new patients (either with full information or emergency patients whereby their information may be filled in later),<br />
editing existing patient information and conducting various searches under a wide variety of criteria are all possible<br />
within this section.<br />
The Acquire Tab is designed for the purpose of acquiring images. The user is presented with a number of acquisition<br />
templates from which to choose from a drop-down list in the stack. From the template, the user may decide to remain<br />
with the default sequence of exposures or select a new one. In addition to sequential mode is the Endo mode. This<br />
allows the user to take exposures on a given tooth one at a time or select the sequence on-the-fly. The stack (under<br />
Acquire Tab) also has fields for entering information about exposure data. This information should be entered just<br />
prior to each exposure (if desired) and as such, will then be automatically added to each image in their corresponding<br />
DICOM tags.<br />
The Diagnosis View Tab is designed to allow the user to view and edit one image at a time. All of the image<br />
enhancement tools and filters are located in this tab, as well as annotation tools and demographic data overlays.<br />
The Chart View Tab is designed to view images from a study in a predefined layout. The user can also drag and drop<br />
images into different positions on the chart.<br />
7
<strong>EVAsoft</strong> Log-In Feature<br />
<strong>EVAsoft</strong> has the optional use of login accounts. It is recommended that each user create an account name and<br />
password. At start-up <strong>EVAsoft</strong> displays the Login window shown below. The login system can be set up to require user<br />
names and passwords, user names without passwords or no user name or password.<br />
To add user accounts and/or edit user accounts, including setting up passwords, go to Edit > <strong>User</strong> Accounts<br />
8
To make changes to the <strong>User</strong> Login Preferences, go to Tools < Options, in the General preferences area.<br />
For further explanations of the Options Window, see Appendix D.<br />
9
Detailed Tab Descriptions<br />
Patient Tab<br />
The Patient Tab is the entry point into the software. In this tab the user can create new patients, find existing patients<br />
and edit patient information. Click on “Results of Last Search” tab and then “Recent Patients” in the right-hand stack.<br />
Stack and Work Areas<br />
Each tab area has two main working areas. On the right-hand side of the area is what is called the “stack”. The stack<br />
may be collapsed and expanded as needed and has various subjects that are applicable to whatever tab is selected.<br />
For example, in the Patient tab, the stack on the right has search criteria for sorting through patients, ID numbers, etc.<br />
One of the features of this stack is the ability to display DICOM Worklist Patients.<br />
The area on the left is the working area. Both the working area and the stack area have their own smaller tabs. The<br />
Diagnosis View tab, in particular, has a number of smaller tabs in the stack area that pertain to tools, demographics,<br />
annotations, etc.<br />
10
Create a New Patient<br />
To create a new Patient, click the New Patient button.<br />
The following window will open where the user can enter all the patient information.<br />
Make sure to hit the “enter” key after entering the patient’s birthdate.<br />
Create an Emergency Patient<br />
To create an Emergency patient, click the Anonymous Patient button.<br />
This will create a patient with the Date and Time as the patient’s name. Use this patient to capture images right away<br />
and then update the patient information afterwards. Quickly find emergency patients by selecting the “Anonymous<br />
Patients Only” quick search button from the right-hand stack area.<br />
11
Patient/<strong>Image</strong> Searching<br />
Search tools are divided into two categories: quick search buttons and detailed searching.<br />
The following quick searches are available:<br />
The user can search for the Patient Name and/or Patient ID by entering the text in the corresponding text box<br />
and clicking the “Find” button. Only patients with the matching criteria will be displayed. The user can also<br />
choose dates<br />
that images were captured on or in between, again clicking the “Find” button to apply the search. Only patients with<br />
images captured on the selected date or in the selected date range will be displayed.<br />
Use the Dentist, Tooth Number and <strong>Image</strong> Comment searches to only display patients that match those criteria.<br />
Once a search is complete, the list of patients will be displayed. Click on the Plus (+) sign next the patient’s name to see<br />
that patient’s list of studies and images.<br />
12
Selecting the Active Patient and Study<br />
Start in the “Results of Last Search” Tab.<br />
To select the Active Patient, the user must Double-Click on the patient’s name.<br />
To select the Active Study, the user must Double-Click on the study name.<br />
Use the Clear button to deselect the Active patient and study.<br />
Click on the Patient Information subtab to edit, or delete that information.<br />
The “Merge Study” button allows one to combine multiple studies into a single study.<br />
The “Transfer Study” button allows one to transfer a study from one patient to another.<br />
Click once on a study and the Thumbnail images will be displayed in the Filmstrip.<br />
Double-click on the study to open the study in the Chart View Tab, to set that study as the Active Study.<br />
Returning to the Patient Tab, the active patient and study will be displayed in the status box.<br />
Click this icon to unselect the patient/study: This shows the patient and study selected.<br />
13
Patient selected, no Study selected:<br />
No Patient or Study selected:<br />
Patient Tab Toolbar<br />
Add Patient Button<br />
Add Stat Patient Button<br />
Deselect Patient Button<br />
Print PDF Report<br />
Status Box<br />
Exports a File(s)<br />
Exports a DICOM directory<br />
DICOM send (must have an account or server set-up for this)<br />
Collapses the “Stack”<br />
Expands the “Stack”<br />
14
Acquire Tab<br />
The acquire tab is where the user can acquire images for the active patient. If no active patient is selected, the acquire<br />
module will prompt the user to select a patient, or create an anonymous patient to continue.<br />
In order to acquire images, there must be a selected hardware device. If a device has already been selected, it will be<br />
displayed in the title bar of the <strong>EVAsoft</strong> window. If no device has been selected, the title bar will display “View Station”.<br />
See below for more details on selecting a device.<br />
Capturing an <strong>Image</strong><br />
NOTE: If desired, enter kVp, mAs, etc prior to taking the X-Ray.<br />
The user must complete four steps in order to capture a digital X-Ray image. The following steps will demonstrate<br />
using an EVA sensor.<br />
After opening the <strong>EVAsoft</strong> software and logging-in, the user must:<br />
1. Select the active patient in the Patient Tab.<br />
2. Select the correct hardware from the <strong>Image</strong> Devices drop-down menu.<br />
3. Go to the Acquire Tab area and select an acquisition template from the menu in the stack (if something<br />
other than the default tooth template is desired).<br />
4. Select the acquisition mode: Either single shot or sequential.<br />
15
The first step is selecting a patient. In the Patient tab, find the desired patient and Double-Click on the patient’s name.<br />
This patient is now set as the Active Patient. (See page 12 for detailed description of setting the active patient).<br />
The second step is to select the hardware device that you will be using. This step is not often required because the<br />
software remembers the last device that was selected.<br />
Go to the Imaging Devices drop-down menu and the following window will open:<br />
Select the desired hardware, for example, “EVA”. The active hardware will be displayed in the title bar of <strong>EVAsoft</strong>.<br />
Note<br />
Only hardware that is available on the system will be displayed in this window.<br />
The third step is to select an acquisition template. This must be done from within the Acquire Tab. The user can choose<br />
an Acquisition Template from the drop down list. Once a template has been selected, the user can remain with the<br />
default sequence of exposures or change the sequence. The default template is determined based on the age of the<br />
active patient. If a patient 12 years old or younger is active, the pedo template is shown.<br />
Important Note: When a template is displayed, the first region to be taken will have the numeral “1” shown on it.<br />
This will be the first of a predetermined order of exposures that are determined in the “Layout Editor” (which will be<br />
discussed later). This order may be altered immediately prior to taking exposures by clicking on the regions<br />
desired. Then, upon entering the Sequential mode, the X-rays will be taken in that new order.<br />
In Single Shot mode, subsequent exposures will be taken on the same tooth position until/unless a different<br />
position is chosen prior to the next exposure.<br />
The fourth step in acquiring an image, is to select an acquisition mode: Single Shot or Sequential.<br />
If one wants to change this on the fly, simply click on the “Stop Acquisition” button in the Acquire Tab and reselect the<br />
mode desired.<br />
Once an Acquire button is pressed, the software will tell the hardware to be ready to acquire an image, and the Acquire<br />
Status (traffic light signal) will change to green when ready. Now the user can operate the X-Ray.<br />
This Icon toggles Acquire<br />
Status Traffic Light off and<br />
on<br />
Acquire Status Traffic Light<br />
16
Once the image data is received it is displayed and a thumbnail of the image is added to the filmstrip.<br />
Each acquire session will be saved as a new study for the Active Patient. The exception to this rule is if the Active<br />
Patient has a study that is not more that 36 hours old. In this case, the user will be asked, upon entering the Acquire<br />
Tab, to append to the last study or start a new one.<br />
Acquire Tab Toolbar<br />
Acquire Tab “Stack”<br />
Rotate CCW Rotate CW Mirror L/R<br />
Start Single Acquisition Mode<br />
Button<br />
Start Continuous Acquisition Mode<br />
Button<br />
Stop Acquisition Button<br />
Retake Exposure Button<br />
Skip Ahead to Next Exposure Button<br />
Re-Set Exposure Sequence Button<br />
Acquire Status “StopLight” ON/OFF Button<br />
Status Windows<br />
Expand/Collapse<br />
Stack Buttons<br />
17
Diagnosis View Tab<br />
At any time the user can double-click on an image or thumbnail and it will<br />
automatically open in the Diagnosis View Tab.<br />
NOTE: The default grid layout for the Diagnosis Tab is 2-up.<br />
Above the image are several tool buttons. To the right of the image is the stack. The stack contains all the image<br />
manipulation tools, annotation tools and demographic information overlay tools. The stack area is minimized by<br />
default to allow the image to have maximum viewing area.<br />
Simply click on the collapse/expand buttons.<br />
To apply an enhancement tool from the Toolbox, click on the add button<br />
and select the tool from the list that<br />
appears. This will add the tool to the Stack. The stack performs each tool in order, from top to bottom. Full descriptions<br />
of each tool can be found in the Enhancement Tool Descriptions section of this document.<br />
18
Drop-down list of tools that appears in the stack from<br />
clicking on the “Add a new operator to the stack”<br />
button<br />
Enable all operators in the stack<br />
Disable all operators in the stack<br />
Remove all operators from the stack<br />
Here is an example of the Gamma tool being chosen.<br />
Note that it is highlighted with a red bar that indicates<br />
it is active.<br />
After each tool has been adjusted, the user can click on the red bar and it will become gray and in-active. The user can<br />
click on the “Enable All” or “Disable All” buttons which will toggle all enhancements on and off.<br />
19
Annotation Tools<br />
To apply annotation tools, click on the Annotations Tab in the Stack area. Then click the Add button and you will get a<br />
list of Annotation tools to choose from.<br />
Add Button<br />
Annotations Tab<br />
Demographic Info Tab<br />
Annotations list<br />
Demographic Data Overlays<br />
To apply demographic data overlays onto the image, click on the Demographic Info Tab in the stack area. Then click on<br />
the Add button and select the “Demographic Overlay” menu item. The demographic overlay tool will be added to the<br />
stack. The user can choose what data information to display from the Demographic Overlay Window drop-down list.<br />
The user can also choose what corner of the image to display the information. Click on “Done” to finish the operation.<br />
After the desired operators have been applied<br />
to the image, click the Save button to<br />
save the changes. This save action will add the<br />
tools from the stack into the patient database.<br />
The next time the user opens that image, the<br />
tools will automatically be re-applied to the<br />
image, and added to the Stack.<br />
Important Note: No changes are ever made<br />
to the actual <strong>Image</strong> File! All tools that<br />
are applied to the image are saved in the<br />
database. When the image is opened again,<br />
the tools are re-applied to the original<br />
image data. To see the original image again,<br />
the user can simply turn off all the items in<br />
the stack by clicking oneither the “Disable<br />
all stack items” button or the Modified/<br />
Original button.<br />
20
Grouping Enhancement Tools for future re-use<br />
The user can save the enhancement tools and the adjustments made to those tools so that they can be applied to<br />
other images. To save a group of enhancements tools that are currently in the stack, simply right-click on the image<br />
and select the “Send to…” option form the pop-up menu. The “Transfer <strong>Image</strong>…” window will open. Click on the<br />
“Custom Enhancement” button. “Add New” will appear. The “Custom Enhancement Label” window will open where<br />
the user can assign a name to the new group of enhancements. Then click OK.<br />
When a new image is opened in the Diagnosis View Tab, the user can click on the “Apply Custom Enhancements”<br />
button and select the name of the group to apply to the image. The “Apply Custom Enhancements” button will<br />
remember the last group that was used and show that one at the top of the list until a different group is selected.<br />
This grouping also applies to Demographic Information Overlays. Add the Demographic information to the stack and<br />
then right-click on the image. In the “Transfer <strong>Image</strong>…” window, choose the “Custom Overlay ” button. Enter a name<br />
and click OK.<br />
Diagnosis View Tab Toolbars (Upper)<br />
Clear<br />
current<br />
image<br />
Save<br />
current<br />
image<br />
Print<br />
current<br />
image<br />
Undo/Redo<br />
View Original/<br />
Modified<br />
<strong>Image</strong><br />
Fit image to<br />
window - (Zoom<br />
percentage)<br />
Drag mouse to<br />
define region to<br />
zoom in to<br />
Zoom in<br />
Zoom out<br />
Magnification<br />
Spotlight<br />
Diagnosis View Tab Toolbars (Upper Cont’d)<br />
Caries Increase<br />
Spotlight Gamma<br />
Decrease<br />
Gamma<br />
View<br />
All<br />
Tools<br />
Measure<br />
Invert<br />
<strong>Image</strong><br />
21
Clicking on the “View All Tools” button brings<br />
up the View All Tools Window (Shown Below).<br />
View All Tools Window<br />
Edit Tooth Numbers<br />
Toggle Annotations On/Off<br />
The View All Tools Window features a comprehensive set of tools. Two<br />
unique tools are the “Toggle Annotations On/Off” and the “Edit Tooth<br />
Numbers” tools. Clicking on the Edit Tooth Numbers button brings up the<br />
following window:<br />
22
Chart View Tab<br />
Once a study of images is captured, they can be viewed in the Chart View Tab. If the images were acquired using one<br />
of the Acquisition Templates, then they can be viewed in a predefined layout that has been designed for that template.<br />
This will allow the user to see the images as if they were in an image chart. The user can also select any study for the<br />
active patient from the study drop-down list located in the upper tool bar. The rotate and mirror buttons only apply for<br />
images that are selected (as denoted by a green checkmark).<br />
Chart View Tab Toolbar<br />
Removes the Currently visible layout<br />
from the Study<br />
Adds Empty Layout to the Study<br />
Print Chart<br />
Rotate<br />
CCW<br />
Rotate<br />
CW<br />
Reload images to get updates<br />
Mirror<br />
23<br />
Study<br />
drop-down<br />
list<br />
Expand/Collapse<br />
Filmstrip<br />
Status Window
An Individual image can be removed from the layout by<br />
right-clicking on the image and selecting the “Remove<br />
from Chart” option in the pop-up menu.<br />
Multiple images may be dragged from the filmstrip to<br />
a single position on any given chart. To reveal multiple<br />
images in a given position, right click on the thumbnail<br />
image. The following box should appear:<br />
When it says “Send <strong>Image</strong>s”, the plural of <strong>Image</strong> means<br />
there is more than one image. By clicking on “Send<br />
<strong>Image</strong>s”, the Transfer <strong>Image</strong>s Window should appear.<br />
Clicking above any image in the filmstrip will show this dialogue<br />
which allows one to create a filmstrip window that can float above all<br />
open applications. This is handy for charting, etc.<br />
The following information applies only when one is in the “Chart View” tab:<br />
Double clicking a radiograph that is on the chart will send all radiogphs (taken on that chart location) to the<br />
“Diagnosis View” tab. Only these same images will be displayed in the “filmstrip”.<br />
This applies to all studies taken on a given patient.<br />
Transfer <strong>Image</strong>s Window<br />
This window appears when an image is<br />
right-clicked on and the “Send <strong>Image</strong>”<br />
or “Send <strong>Image</strong>s” option is clicked.<br />
It provides for copying, previewing,<br />
printing, e-mailing, and exporting in a<br />
variety of file formats as well as other<br />
options.<br />
24
The <strong>Image</strong> Transfer System<br />
In order to transfer images from tab to tab, between patients, into other file formats, across the internet and to other<br />
locations, the <strong>Image</strong> Transfer System was created. To send an image to a different location, right-click on the image or<br />
thumbnail, and select the “Send <strong>Image</strong>(s)” item from the pop-up menu. This will open the “Transfer <strong>Image</strong>s” window.<br />
The selected image(s) will be shown<br />
as well as the options for where<br />
that/those image(s) can be sent.<br />
Click on the location to which you<br />
wish to send the image(s) and it/<br />
they will be sent directly as in the<br />
case of Copy to system clipboard,<br />
Preview to preview window, or<br />
Diagnosis View where it lands<br />
directly into and launches the<br />
Diagnosis View Tab.<br />
Other options launch further windows to work from. Send Email launches the available e-mail client. At the same time,<br />
all the selected images are exported as .JPG files, placed in a .ZIP archive and put on the computer desktop. File Export<br />
opens a “Save” dialog box with options for multiple file types. Print <strong>Image</strong> sends the image to the printer.<br />
Save as .... will open a dialog box that allows you to move the image(s) to an alternate patient under a new study. No<br />
demographic data will be changed in this instance.<br />
Edit DICOM Header Tags will allow you to change metadata embedded within the image, but it is strongly<br />
recommended that this be done only by those experienced with those features.<br />
25
<strong>EVAsoft</strong> File Menu<br />
Import <strong>Image</strong>… can be used to import an image file.<br />
Import DICOM Dir… can be used to import DICOM<br />
directory patient information and image files.<br />
Switch <strong>User</strong>s… allows the user to change the user account<br />
that is logged in.<br />
Change Password can only be used by the administrator<br />
user to change user account passwords.<br />
Exit will close the software.<br />
<strong>EVAsoft</strong> Edit Menu<br />
Undo/Redo last changes made.<br />
Tracability Logs brings up a window that facilitates tracking<br />
activity within the program such as log-ins & outs, new<br />
image acquisitions, etc. See Appendix A for more details<br />
<strong>User</strong> Accounts, Dentist List and Facility List allows the<br />
user to edit the information and add new items.<br />
The Layout Editor tool is useful for creating new Acquire<br />
Template layouts.<br />
See Appendix A for more details.<br />
<strong>Image</strong> Recycle Bin allows the user to undelete images or<br />
completely remove images from the <strong>EVAsoft</strong> database.<br />
Custom Overlays and Enhancements that have been<br />
created by a user can be edited.<br />
<strong>EVAsoft</strong> <strong>Image</strong> Devices Menu<br />
The <strong>Image</strong> Devices Menu is used to select a hardware<br />
device to capture images with.<br />
<strong>EVAsoft</strong> Tools Menu<br />
Check For Updates launches a web browser and goes to<br />
the <strong>Image</strong><strong>Works</strong> webpage containing the latest <strong>EVAsoft</strong><br />
software version.<br />
Back-up Utility allows the user to select a location to backup<br />
all necessary files, in case of a Hardware Failure. This tool<br />
should be used regularly!<br />
Check Database Connection will verify that a network<br />
database connection is healthy.<br />
Hard-Drive Clean-up will remove deleted image files from<br />
the hard-drive to free up space for new images.<br />
Replicate All Files Locally is used for Network Mode. It<br />
will create copies of all <strong>Image</strong> files locally to improve the<br />
image loading time.<br />
26
<strong>EVAsoft</strong> Tools Menu (Cont’d)<br />
Change Language can be used to toggle between English<br />
and other languages.<br />
Monitor Calibration can be used to adjust your monitor<br />
settings for ideal viewing.<br />
Import Pro<strong>Image</strong> Database is for current Pro<strong>Image</strong><br />
customers who have upgraded to <strong>EVAsoft</strong>. This will import<br />
all Patient and image information into <strong>EVAsoft</strong>. This tool<br />
will create NEW image files in DICOM format in the <strong>EVAsoft</strong><br />
database. Please check that you have enough Hard-drive<br />
space before using this tool. It is strongly recommended to<br />
contact Tech Support at <strong>Image</strong><strong>Works</strong> before attempting to<br />
use this tool. Additional one-time charges may apply.<br />
DICOM Settings allows the user to edit the information<br />
needed to configure Send, Receive and Worklist functions<br />
for multiple servers.<br />
Options This tool contains a number of general settings<br />
that the user can choose from. See Appendix D.<br />
DICOM Configuration Settings Window<br />
27
<strong>EVAsoft</strong> Preview Menu<br />
Manage tool allows the user to create or delete preview<br />
windows. As the windows are created, they will be<br />
appended to the preview menu.<br />
Clear All Windows will clear all images from the active<br />
preview windows.<br />
<strong>EVAsoft</strong> Help Menu<br />
Online Help will Launch the default internet provider and<br />
open the <strong>Image</strong><strong>Works</strong> website and the <strong>EVAsoft</strong> support<br />
page.<br />
<strong>User</strong>’s <strong>Manual</strong> launches the <strong>User</strong> <strong>Manual</strong>.<br />
License Registration allows the user to enter the serial<br />
number that came with the <strong>EVAsoft</strong> CD. Based on this<br />
number, the software generates a Challenge Code. Both<br />
numbers must be supplied to <strong>Image</strong><strong>Works</strong>, either online or<br />
by phone, to receive the activation code that will register<br />
the software installation.<br />
List Active Nodes shows a list of all computers on site that<br />
are running <strong>EVAsoft</strong>.<br />
About <strong>EVAsoft</strong> tells the user information about the<br />
software.<br />
28
Enhancement Tool Descriptions<br />
Angle Measurement<br />
Measures a single angle on the image.<br />
Brightness/Contrast/Gamma<br />
This is a combination tool that allows the user to adjust the<br />
contrast and brightness without saturating the image. The<br />
gamma level can also be adjusted in this tool.<br />
Crop<br />
Select an area of the image to apply the image manipulation<br />
tools to.<br />
Salt & Pepper<br />
Smooth areas in which noise is noticeable while leaving<br />
complex areas of the image untouched. The effect is that<br />
grain or other “Salt and Pepper” noise is reduced without<br />
severely affecting edges.<br />
Edge Enhance<br />
Enhances the local discontinuities at the boundaries of<br />
different objects (edges) in the image to make the edges<br />
more visible to the human eye.<br />
Equalization<br />
Linearizes the number of pixels in an image based on the<br />
specified (RGB, YUV or GRAY) color space. This can be used<br />
to bring out the detail in dark areas of an image.<br />
Flip/Rotate<br />
Change the orientation of the image. Options include<br />
mirroring horizontally and vertically, as well as rotating by<br />
90, 180 or 270 degrees.<br />
Gamma<br />
Increase or Decrease the level of Gamma correction, which<br />
changes the contrast of the mid-range image data. This<br />
helps distinguish bone from soft tissue.<br />
Invert<br />
Inverts the colors in the image so that a positive image<br />
becomes a negative and a negative image becomes a<br />
positive.<br />
29
Enhancement Tool Descriptions (Cont’d)<br />
Linear Stretch<br />
Maximize the contrast of the image by stretching a selected<br />
portion of the image histogram across all possible values in a<br />
linear fashion.<br />
Local Linear Stretch<br />
A very sophisticated linear stretch performed on multiple<br />
smaller overlapping areas of the image.<br />
Physical <strong>Image</strong> Calibration<br />
Enter the known distance, in millimeters, between two<br />
points on the image. This is a relative calibration which is not<br />
traceable.<br />
Physical <strong>Image</strong> Measurement<br />
Measures the distance between up to 10 points on a calibrated<br />
image. Due to the possibllity of geometric distortion in the<br />
radiograph, use caution when interpreting measurements.<br />
Sharpen<br />
Performs a High-Pass filter operation.<br />
Soften<br />
Performs a Low-Pass filter operation.<br />
Some Filter Analogies:<br />
Low Pass<br />
• bass<br />
• opaque<br />
• muted/dull<br />
• soft<br />
• blurry<br />
• pliable<br />
High Pass<br />
• treble<br />
• transparent<br />
• intense/vivid<br />
• harsh/edgy<br />
• sharp<br />
• brittle<br />
USM<br />
Unsharp Mask - A technique used to enhance the edges of<br />
an image. The unsharpen mask tends to show more details in<br />
areas of an image that are normally more difficult to see.<br />
Window/Level/Gamma<br />
Adjusts window, level and gamma settings in one user<br />
interface.<br />
Window/Level/Gamma adjustment window<br />
30
Enhancement Tool Descriptions (Cont’d)<br />
Pseudo Color & Threshold may be found in the “All<br />
Tools Window”, accessed by clicking on this icon found in the<br />
Diagnosis View Tab:<br />
Pseudo Color<br />
Apply color to a grayscale image, with matching grayscale<br />
intensities assigned one color. This filter applies only in a<br />
temporary manner and cannot be saved.<br />
Before<br />
Histogram<br />
This shows a graphical representation of the image data.<br />
After<br />
Threshold<br />
Selects a pixel intensity value to highlight in the image. The<br />
user can also select different colors and how far from the<br />
original pixel value to highlight. This filter applies only in a<br />
temporary manner and cannot be saved.<br />
31
Appendix A<br />
Layout Editor<br />
Select Layout Editor from the Edit menu. The following window will open:<br />
To create a custom layout, click on the New Layout Button.<br />
If there is an image file you wish to use as the background to the layout, select File < Import <strong>Image</strong> and import the<br />
image into <strong>EVAsoft</strong>, to any tab. Then in the layout editor, click on the Schematic button and select the imported image<br />
file!<br />
Now add Regions, each region must have a unique name.<br />
Move the Region marker to the corresponding region in the schematic.<br />
32
Appendix B<br />
Print PDF Reports<br />
From the Patient Tab, clicking on the PDF report button<br />
will bring up a small word processor as shown:<br />
33
Appendix B (Cont’d)<br />
Print PDF Reports<br />
There is a filmstrip at the bottom of this window that contains the radiographs of the current patient/study.<br />
Patient, Provider and Facility Information tabs allow this information to be entered easily.<br />
The File drop-down menu provides for opening existing reports, creating new reports, saving as an <strong>EVAsoft</strong> file,<br />
printing a PDF file, or closing the window. Font and Color drop-down menus are for font sizing and color.<br />
34
Appendix C<br />
Network Setup<br />
<strong>EVAsoft</strong> can be set up to run in two (2) modes: Stand-Alone OR Network.<br />
The mode of operation should be decided at the time of installation.<br />
Stand-Alone mode should be used for any installation that will only use one computer to acquire and view images<br />
using <strong>EVAsoft</strong>. Simply select the Stand-Alone mode during the InstallShield window as shown below. No additional steps<br />
are required.<br />
Network mode should be used for installations where several different computers will be used to acquire and view<br />
images with <strong>EVAsoft</strong>.<br />
To have multiple computers connect to ONE <strong>EVAsoft</strong> database, one installation must HOST the database. The Host<br />
computer must ALWAYS be on and <strong>EVAsoft</strong> must ALWAYS be running. The only registration required in network mode is<br />
the host. This should be done first before installing any of the clients.<br />
Step One: The first installation should be done on the computer (preferably a server) that will be hosting the Database.<br />
Choose the “Network Mode and Host the database” option during the InstallShield window as shown below.<br />
Step Two: All additional computers should be installed as clients, to do that select “Network Mode and connect to<br />
already hosted database” option during the InstallShield window as shown below.<br />
NOTE: The mode of operation, whether it is Network or Stand-Alone has nothing to do with <strong>EVAsoft</strong>’s ability to send<br />
DICOM images over an existing network. Network mode is simply to ensure that multiple installations of <strong>EVAsoft</strong> can<br />
utilize a central or common HOST database.<br />
35
In order for all the CLIENT computers to find the HOST, the user may need to enter the computer name of the Host<br />
computer/server.<br />
To find the computer name, right-click on My Computer and select Properties from the pop-up menu. Click on the<br />
Computer Name tab, as shown below. The Full computer name should be entered on the client computers, if <strong>EVAsoft</strong><br />
cannot automatically find the Host.<br />
36
Appendix D<br />
Tools > Options:<br />
<strong>EVAsoft</strong> has a set of option preferences that can be set for various default values used within the software. These can<br />
range from pixel sizing on the monitor used, to acquisition preferences, to login and password information, amongst<br />
many other features. Here are the options offered:<br />
The General preferences option<br />
allows you to set the number of<br />
undo/redo operations. It also will let<br />
you choose whether or not a login<br />
is required and if so, whether or not<br />
a password is required.<br />
The Diagnosis View window<br />
allows one to set the number<br />
of millimeters per screen pixel.<br />
The choice can be made as to<br />
whether or not a custom overlay<br />
(demographics) will be displayed on<br />
acquired images as a default. If so,<br />
the type of overlay can be specified<br />
here as well.<br />
In addition, there are radio buttons<br />
at the bottom that allows one to<br />
choose the grid layout. The grid<br />
layout can be set to display one, two<br />
or four images at a time.<br />
37
Appendix D (Cont’d)<br />
Tools > Options:<br />
The Practice Management Bridge<br />
window allows one to choose<br />
whether or not the program will be<br />
operating in Practice Management<br />
Mode as well as whether the<br />
program starts in the Patient Tab or<br />
Acquire Tab.<br />
The Acquire Tab Options window<br />
allows one to choose between<br />
Single Capture or Sequence<br />
Capture modes. The default tooth<br />
numbering system may also be<br />
chosen. The default layout as well as<br />
default age for the pedo toothchart<br />
and enabling of systems sounds<br />
along with desired sound type may<br />
be chosen.<br />
There is also a check box that can<br />
be used to automatically restart<br />
Twain devices. This is most useful in<br />
eliminating the need to constantly<br />
click the start button with devices<br />
such as cameras.<br />
38
Appendix D (Cont’d)<br />
Tools > Options:<br />
The Default Facility window allows<br />
one to choose a facility from the<br />
drop-down list.<br />
The Default Dentist window allows<br />
one to choose a dentist from the<br />
drop-down list.<br />
39
Appendix D (Cont’d)<br />
Tools > Options:<br />
These options should not be<br />
altered except by authorized<br />
technical support or IT<br />
personnel.<br />
TheDistributed File System window<br />
allows one to choose the location<br />
of the volume and its maximum<br />
capacity.<br />
40
Appendix D (Cont’d)<br />
Tools > Options:<br />
The Demographics Display window<br />
allows one to set the horizontal<br />
and vertical offsets for type. Line<br />
spacing, relative font size and<br />
maximun number of lines for<br />
the corner of the image may be<br />
specified.<br />
The DICOM Export Settings window<br />
allows one to choose between the<br />
.dic and .dcm extensions OR no file<br />
extension at all when exporting an<br />
image in the DICOM format.<br />
41
Appendix D (Cont’d)<br />
Tools > Options:<br />
The Patient Setup window allows<br />
one to choose whether or not there<br />
is automatic incrementing of Patient<br />
ID’s and what number they start<br />
with.<br />
Note: This is for new patients only.<br />
The Chart View options window<br />
contains a checkbox that will turn<br />
on or off filters that may have been<br />
applied from the Diagnosis View<br />
Tab.<br />
Having this box unchecked allows<br />
the charts to load faster.<br />
42
Appendix D (Cont’d)<br />
Tools > Options:<br />
EVA Preferences in the Options<br />
menu is for technical support only.<br />
43