Instruction manual - Medion
Instruction manual - Medion
Instruction manual - Medion

Create successful ePaper yourself
Turn your PDF publications into a flip-book with our unique Google optimized e-Paper software.
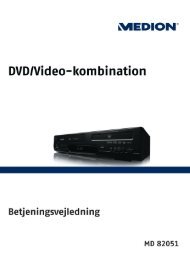
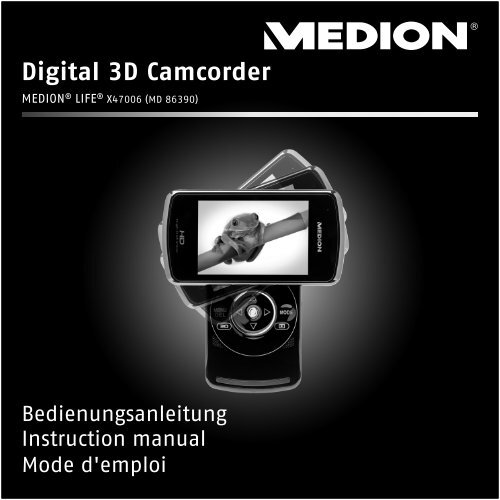
Digital 3D Camcorder<br />
MEDION ® LIFE ® X47006 (MD 86390)<br />
Bedienungsanleitung<br />
<strong>Instruction</strong> <strong>manual</strong><br />
Mode d'emploi
Table of contents<br />
About this introduction ....................................... 5<br />
Symbols and key words used in these instructions ....................... 5<br />
Proper use .................................................................................... 7<br />
Safety instructions .............................................. 8<br />
Information about 3D ................................................................ 12<br />
System requirements ................................................................. 15<br />
Before use ...................................................... 16<br />
Checking the package contents ................................................. 16<br />
Overview of the device ...................................... 17<br />
Sides .......................................................................................... 20<br />
Charging the batteries ....................................... 21<br />
Charging battery prior to first use .............................................. 21<br />
Charging battery in charge cradle .............................................. 22<br />
Charging battery in camcorder .................................................. 23<br />
Start-up ........................................................ 24<br />
Inserting the memory card ......................................................... 24<br />
Operation ....................................................... 26<br />
Switching on camcorder ............................................................ 26<br />
Switching off camcorder ............................................................ 26<br />
1
Selecting operating mode .......................................................... 26<br />
Recording videos .............................................. 27<br />
2<br />
Setting the exposure correction .................................................. 27<br />
Starting recording/zoom function/ terminating recording .......... 27<br />
Display in video mode ................................................................ 29<br />
Taking pictures ................................................. 30<br />
Setting the exposure correction .................................................. 30<br />
Taking picture/zooming ............................................................. 30<br />
Display in photo mode ............................................................... 32<br />
Viewing recorded videos and photos ..................... 33<br />
Exiting playback mode ............................................................... 33<br />
Video playback ........................................................................... 34<br />
Viewing photos .......................................................................... 34<br />
Deleting videos and photos ................................. 35<br />
Deleting one file ......................................................................... 35<br />
Terminating deletion .................................................................. 35<br />
Setup menu ..................................................... 37<br />
Exiting menu .............................................................................. 37<br />
Language ................................................................................... 37<br />
Setting date and time ................................................................. 38<br />
Formatting memory card/internal memory ................................ 38
Default settings .......................................................................... 39<br />
Energy saving option ................................................................. 39<br />
Frequency .................................................................................. 40<br />
TV standard ................................................................................ 40<br />
Tones ......................................................................................... 41<br />
Settings in video mode ...................................... 42<br />
White balance ............................................................................ 42<br />
Resolution .................................................................................. 42<br />
Colour ....................................................................................... 43<br />
Settings in photo mode ..................................... 44<br />
White balance ............................................................................ 44<br />
Resolution .................................................................................. 44<br />
Colour ....................................................................................... 45<br />
Date stamp ................................................................................ 45<br />
Serial photo function ................................................................. 46<br />
Connecting camcorder to TV set ................................................ 47<br />
Connection via HDMI ................................................................. 48<br />
Connecting camcorder to computer ...................... 49<br />
Installing the software ...................................... 50<br />
DCF memory standard ............................................................... 51<br />
Card drive .................................................................................. 51<br />
3
Memory folder structure ............................................................. 52<br />
Disposal .......................................................... 54<br />
Maintenance and care ....................................... 55<br />
Technical data ................................................. 56<br />
ArcSoft Total Media HDCam 2.0 .......................... 58<br />
4
About this introduction<br />
Read the safety instructions carefully before use. Note the<br />
warnings on the device and in the operating instructions.<br />
Always keep the operating instructions close to hand. If<br />
you sell the unit or give it away, make sure you also hand<br />
over these instructions and the guarantee card.<br />
Symbols and key words used in these instructions<br />
DANGER!<br />
Warning: immediate mortal danger!<br />
CAUTION!<br />
Warning: possible mortal danger<br />
and/or serious irreversible injuries<br />
WARNING!<br />
Please note the following guidelines to<br />
avoid injuries and property damage!<br />
CAUTION!<br />
Please note the following guidelines to<br />
avoid property damage!<br />
5
6<br />
NOTE!<br />
Additional information on using the device<br />
NOTE!<br />
Observe the notes in the operating<br />
instructions!<br />
CAUTION!<br />
Warning: danger of electric shock!<br />
� Bulleted item / information on operating<br />
steps and results<br />
� Tasks to be performed
Proper use<br />
This camcorder is designed for the recording of pictures and video<br />
clips. Recorded pictures and videos can be transferred to a PC.<br />
Alternatively, they can be viewed on a TV via the USB-AV or HDMI<br />
interface. The camcorder is intended solely for private use and not for<br />
commercial purposes. Improper use shall void any warranty and<br />
liability on the part of the manufacturer.<br />
7
Safety instructions<br />
General<br />
� This unit is not intended for use by people (including children)<br />
with reduced physical, sensory or mental abilities, unless they are<br />
supervised by a person responsible for their safety or they have<br />
been instructed on its use. Children should be supervised to<br />
ensure they do not play with this unit.<br />
� Always adhere to the user instructions of the devices that you<br />
connect to the camcorder.<br />
DANGER!<br />
Keep the plastic packaging out of the reach of<br />
children as it can cause suffocation!<br />
Preventing electric shock<br />
� Never open the camcorder casing or the charger cradle, except to<br />
insert the battery.<br />
� Connect the charger cradle to a professionally installed AC 230 V ~<br />
50 Hz mains socket.<br />
� To remove the power cord quickly and easily from the mains in an<br />
emergency, the socket must be easily accessible and close to the<br />
appliance.<br />
� Do not kink or crush the power cord.<br />
8
� Use only the charger supplied.<br />
� Take measures to prevent moisture or liquid from penetrating the<br />
camcorder or the charger cradle.<br />
� Never touch the charger cradle with wet hands.<br />
� Never use the camcorder if the power cord is defective.<br />
� To avoid any danger, replace the charger cradle and its power cord<br />
by a charger unit of the same type if either component is<br />
damaged. In such a case, please contact our service centre.<br />
� In the event of a fault or malfunction, immediately switch off the<br />
camcorder.<br />
� Protect the camcorder and charger cradle from rain and splash<br />
water.<br />
� Do not place vessels containing liquids, such as vases, on or near<br />
the appliance or the charger cradle and protect all parts of the<br />
device from rain and splash water. The vessel might tip over, and<br />
the liquid might impair the electrical safety of the product.<br />
Risk of explosion<br />
� Never expose the batteries to excessive heat (sunlight, open fire,<br />
etc.).<br />
� Do not throw batteries into a fire.<br />
� Never short-circuit the (rechargeable) batteries.<br />
� Do not dismantle (rechargeable) batteries.<br />
9
CAUTION!<br />
There is a risk of explosion, if rechargeable batteries are<br />
replaced incorrectly. Replace batteries only with the<br />
same or equivalent type.<br />
Preventing fire hazards<br />
� Always uncoil the entire length of the power cord.<br />
� Ensure there is adequate ventilation and never cover the charger<br />
cradle.<br />
� Do not place naked flames – such as lit candles – on or near the<br />
unit.<br />
Risk of poisoning<br />
� Keep the battery out of reach of children.<br />
Risk of chemical burns<br />
� Always remove spent batteries from the device, as there is an<br />
increased risk of leakage. Avoid contact with skin, eyes and<br />
mucous membranes. If any of these areas come into contact with<br />
battery acid, rinse them immediately with plenty of clean water<br />
and contact a doctor without delay.<br />
Preventing damage to the camcorder<br />
� If the battery is leaking, immediately remove it from the<br />
camcorder. Before inserting a new battery, clean the contacts.<br />
� Use only the lithium-ion battery supplied.<br />
10
� Before inserting the battery, check that the contacts in the<br />
camcorder and on the batteries are clean. If necessary, clean the<br />
battery connections with a clean, dry cloth or an eraser.<br />
� Do not touch the lens or lens mounting.<br />
Preventing damage to the battery<br />
� Never insert the battery the wrong way round. Always ensure<br />
correct polarity at the +/- terminals.<br />
� Never allow the battery to come into contact with liquids.<br />
� Direct intense heat can damage the battery. Therefore do not<br />
expose the camcorder to any sources of direct heat.<br />
� If the camcorder is not to be used for long periods, remove the<br />
battery.<br />
Preventing breakage<br />
� Do not drop the camcorder.<br />
� When carrying the camcorder, always place the strap around your<br />
wrist.<br />
Preventing data loss<br />
� Never interrupt the power supply while data are being processed.<br />
Preventing damage to SD cards<br />
� Never remove the SD card from the camcorder during the data<br />
saving process.<br />
11
Protection from condensation<br />
� Do not expose the camcorder to rapid changes in temperature.<br />
� Place the camcorder in a protective case or plastic bag before<br />
exposing it to any sudden changes in temperature.<br />
� If the camcorder is cold, wait until it has reached room<br />
temperature before connecting it to the power cord. The device<br />
can safely be connected for charging as soon as the unit has<br />
reached room temperature.<br />
� Do not use or store the camcorder in direct sunlight or at high<br />
ambient temperatures.<br />
Battery charge capacity<br />
At low temperatures the capacity of the battery might drop<br />
significantly as chemical reactions are slowed down. When recording<br />
in cold weather, keep a second battery pack in reserve in a warm place<br />
(e.g. trouser pocket).<br />
Information about 3D<br />
� Warning regarding photosensitive epilepsy and other health risks.<br />
– Some viewers may experience an epileptic seizure or stroke<br />
when they are exposed to flashing images or flashing lights, as<br />
does occur in some television films or video games. Please<br />
consult your doctor before using the 3D function if you or your<br />
relatives have a past history of epilepsy or palpitations.<br />
12
– Do not watch any 3D films if you feel disorientated, listless,<br />
tired and ill, or if you have consumed alcohol. Do not watch 3D<br />
films for hours on end.<br />
– Even people without a personal or family history of epilepsy or<br />
palpitations can have an undiagnosed “propensity for<br />
photosensitive epilepsy” without being aware of it.<br />
– If you have any of the following symptoms, then immediately<br />
stop watching 3D images and consult a medical specialist:<br />
(1) visual disorders, (2) daze, (3) dizziness, (4) involuntary<br />
movements of the eyes or muscles, (5) confusion, (6)<br />
nausea, (7) clouded awareness, (8) convulsions, (9)<br />
seizures and/or (10) disorientation.<br />
Parents should observe their children and ask whether any of<br />
the above symptoms have occurred. Such symptoms are more<br />
likely to occur in children and teenagers than in adults.<br />
� Some 3D images can frighten the viewers. Pregnant women,<br />
seniors and people with epilepsy or a serious illness should refrain<br />
from using the 3D function on this device.<br />
� We advise you not to watch 3D images when you are in a poor<br />
physical condition, exhausted or have consumed alcohol.<br />
� By immersing yourself in the images, negative effects such as travel<br />
sickness, long-term perception disorders, disorientation and eye<br />
strain may occur.<br />
� Therefore, take regular breaks as this will reduce the danger of<br />
such effects from occurring. This is also recommended for other<br />
devices, such as keyboards and computer monitors, where you<br />
13
tend to focus or concentrate on them. Stop using the device if your<br />
eyes start showing signs of tiredness or dryness, or if one or more<br />
of the symptoms described above occur.<br />
� The ideal viewing distance is about 30 – 40 cm between the LCD<br />
screen and your eyes. We recommend that the viewer sits in such a<br />
way that his eyes are at the same height as the screen. In some<br />
people this can reduce the 3D effect.<br />
14
System requirements<br />
If you wish to connect the camcorder to a PC, the computer must<br />
meet the following requirements:<br />
Pentium P III or higher (recommended: P4), free USB 2.0 interface and<br />
1 GB of free hard disk space with Operating system Windows® XP SP3,<br />
Windows Vista® SP1 or Windows®7<br />
15
Before use<br />
Checking the package contents<br />
Please check your purchase to ensure that all items are included. If<br />
parts are missing, please contact us within 7 days of purchase. The<br />
following items are supplied with your product:<br />
� Full HD camcorder<br />
� 1 lithium-ion batteries<br />
� Charge cradle with power cord<br />
� HDMI cable<br />
� USB/AV cable<br />
� Case<br />
� Carrying strap<br />
� Software CD<br />
� Operating instructions and warranty documents<br />
16
Overview of the device<br />
Front side<br />
17
1. Display<br />
2. Arrow buttons and record button<br />
3. MODE button<br />
4. Playback button<br />
5. Speaker<br />
6. 3D button<br />
7. MENU/DEL button<br />
8. Operating LED<br />
18
Rear side<br />
1. Camera lens<br />
2. Battery compartment cover<br />
3. Tripod socket<br />
4. Fixture for carrying strap<br />
5. Microphone<br />
19
Sides<br />
1. USB port and HDMI port<br />
2. SD card slot<br />
20
Charging the batteries<br />
Charging battery prior to first use<br />
Before using the camcorder for the first time, you must charge the<br />
battery.<br />
This can be done by placing the battery in the supplied charge cradle<br />
or directly in the camcorder, provided that the device is connected by<br />
the USB cable to a computer.<br />
The battery charge level is indicated by a symbol on the display:<br />
Battery fully<br />
recharged<br />
Battery half empty Battery empty, recharge!<br />
Removing and inserting battery<br />
� Remove the cover of the battery<br />
compartment by sliding it towards the<br />
tripod socket.<br />
21
� Remove the empty battery (if<br />
any) and insert the charged<br />
battery as shown.<br />
Charging battery in<br />
charge cradle<br />
� Place the battery you wish to<br />
charge in the charge cradle.<br />
The battery contacts must<br />
touch the contacts on the<br />
charger.<br />
� Push the battery against the<br />
spring contacts. Ensure that the<br />
battery is positioned properly<br />
below the guide edge in the tray.<br />
� Using the power cord, connect<br />
the charge cradle to a AC 230 V ~<br />
50 Hz mains socket.<br />
� The orange LED indicator lights<br />
up.<br />
� The charging time is approx. 2 hours.<br />
As soon as the battery is fully charged, the green LED indicator<br />
lights up.<br />
22
� Disconnect the charge cradle from the mains supply.<br />
CAUTION!<br />
The charger is designed to prevent overcharging.<br />
Nonetheless, unplug the charger from the mains to<br />
avoid unnecessary power consumption.<br />
Charging battery in camcorder<br />
� Ensure that the rechargeable battery is inserted in the camcorder.<br />
Connect the mini USB plug of the USB/AV cable to the camcorder<br />
and connect the other end of the cable to a free USB port of your<br />
computer.<br />
NOTE:<br />
The camcorder must be switched off for charging.<br />
� The charging process starts<br />
immediately. During charging, the<br />
red charger LED on the side of the<br />
device lights up.<br />
� The charging time is approx. 2 ½<br />
hours. When the battery is fully<br />
charged, the charger LED is<br />
switched off.<br />
23
Start-up<br />
Inserting the memory card<br />
� To save files to a SD memory card,<br />
insert it in the card slot and push it<br />
in until it engages. The metal<br />
contacts must face towards the<br />
bottom of the device.<br />
� To remove the memory card from<br />
the card slot, press the card gently<br />
in so that it disengages.<br />
NOTE:<br />
When the card is inserted<br />
photo and video files that are taken with the camcorder<br />
are stored on the card and can be viewed in playback<br />
mode. The display shows .<br />
If no memory card is inserted in the camcorder, the photo<br />
and video files are stored in the internal 128 MB memory<br />
and can also be viewed in playback mode. The display<br />
shows MEM.<br />
24
CAUTION!<br />
Do not use force when trying to insert the memory<br />
card! The card can only be inserted in one direction.<br />
Incorrectly inserted memory cards can damage the<br />
camcorder or the card.<br />
25
Operation<br />
Switching on camcorder<br />
� Turn the display clockwise.<br />
The display is switched on and<br />
the green operating LED lights<br />
up.<br />
Switching off camcorder<br />
� Turn the display<br />
counterclockwise. The display<br />
light is off and the camcorder is<br />
switched off.<br />
Selecting operating mode<br />
� Press the button to switch the recording mode of the<br />
camcorder from 3D mode to 2D mode.<br />
� Repeatedly press the MODE button in both modes to select the<br />
video or photo mode, or to call up the setup menu.<br />
� In video mode, the<br />
the display.<br />
symbol is displayed in the left top corner of<br />
� In photo mode, the<br />
the display.<br />
symbol is displayed in the left top corner of<br />
26
Recording videos<br />
� Switch on the camcorder and press the MODE button to select<br />
the video mode and press the button to choose between<br />
3D or 2D modes.<br />
Setting the exposure correction<br />
Before starting to record, press the arrow buttons � and � to select<br />
the desired exposure value. The exposure value is available in nine<br />
stages from -2.0 to +2.0 in 0.5 increments.<br />
The chosen setting appears as a symbol in the middle of the<br />
lower screen edge; the symbol disappears when the value is set to 0.<br />
Starting recording/zoom function/<br />
terminating recording<br />
Starting recording<br />
� To start recording, press the record button.<br />
The record symbol � REC is displayed in the top left corner of the<br />
display. In addition, the recording time is displayed.<br />
Terminating recording<br />
� To terminate the recording, press the record button again.<br />
The record symbol � REC on the display is off.<br />
27
Zooming during recording<br />
� Press the arrow button � to zoom out (wide angle).<br />
� Press the arrow button � to zoom in (tele lens angle).<br />
The digital zoom rate is displayed by means of a bar.<br />
28<br />
NOTE:<br />
The zoom function cannot be used when recording in 3D.
Display in video mode<br />
1. Video mode<br />
2. Display for the white balance setting<br />
3. Zoom level<br />
4. Elapsed recording time<br />
5. Number of videos already recorded<br />
6. Remaining memory in %<br />
7. Memory to which data is saved<br />
8. Display for the exposure correction setting<br />
9. Display for the colour mode used<br />
10. Display for the chosen resolution<br />
11. Battery charge level<br />
29
Taking pictures<br />
� Switch on the camcorder and select photo mode with the<br />
MODE button; press the button to select either the 3D or 2D<br />
mode.<br />
Setting the exposure correction<br />
Before starting to record, press the arrow buttons � and � to select<br />
the desired exposure value. The exposure value is available in nine<br />
stages from -2.0 to +2.0 in 0.5 increments.<br />
The chosen setting appears as a symbol in the middle of the<br />
lower screen edge; the symbol disappears when the value is set to 0.<br />
Taking picture/zooming<br />
Take one picture<br />
� Press the record button half down to activate automatic exposure<br />
measurement.<br />
� To take the picture, press the record button.<br />
30
Zooming<br />
� Repeatedly press the arrow button � to zoom out (wide angle).<br />
� Repeatedly press the arrow button � to zoom in (tele lens angle).<br />
The digital zoom rate is displayed by means of a bar.<br />
NOTE:<br />
The zoom function cannot be used when recording in 3D.<br />
31
Display in photo mode<br />
1. Photo mode<br />
2. Display for the white balance setting<br />
3. Zoom level<br />
4. Number of photos taken<br />
5. Remaining memory in %<br />
6. Memory to which data is saved<br />
7. Display for the exposure value<br />
8. Display for the colour mode used<br />
9. Picture resolution<br />
10. Battery charge level<br />
32
Viewing recorded videos and photos<br />
NOTE!<br />
Video recordings and photos can only be played back in<br />
3D via the camera’s screen or on a television with 3D<br />
capability.<br />
If you play back a 3D recording on a conventional<br />
television, the recordings of the left and right lenses will<br />
be displayed separately.<br />
� To view video recordings, select video mode. To view photos,<br />
select photo mode.<br />
� Press the playback button to view the stored video or photo<br />
files.<br />
� Browse through the recorded files by pressing the arrow buttons<br />
� and� select the file you wish to view.<br />
Exiting playback mode<br />
� Press the MODE button to exit the playback mode and to select<br />
another operating mode.<br />
33
Video playback<br />
Starting/terminating playback and adjusting volume<br />
� To start a video playback, call up the video/photo file list and press<br />
the record button.<br />
� To terminate the playback, press the record button again.<br />
� During playback, you can adjust the volume by pressing the arrow<br />
buttons � and �. The volume is indicated by a bar in the middle<br />
of the display.<br />
Fast forward/rewind, slow motion<br />
� During playback, repeatedly press the arrow buttons � and � to<br />
change to fast forward/rewind. Fast forward/rewind is available at<br />
speed rates of 2x, 4x and 8x.<br />
Viewing photos<br />
Open thumbnail view<br />
� When viewing photos, use the arrow button � to switch from<br />
photo view to thumbnail view.<br />
� Using the arrow buttons � ��� you can now select a<br />
thumbnail preview.<br />
� You can switch back to photo view by pressing the record button.<br />
34
Deleting videos and photos<br />
� Switch to video or photo playback and then select a file to delete.<br />
� Press the DEL button.<br />
The delete function bar is displayed.<br />
Deleting one file<br />
� Using the arrow buttons � and �, select the symbol to delete<br />
the currently displayed file. Press the record button. The selected<br />
file is deleted.<br />
� Using the arrow buttons � and �, select the � symbol and<br />
press the record button to abort the delete process.<br />
Terminating deletion<br />
� Using the arrow buttons � and �, select the � symbol and<br />
press the record button or the MODE button to terminate the<br />
delete function.<br />
35
36<br />
CAUTION! DATA LOSS!<br />
When deleted, the data is irretrievably lost.<br />
We therefore strongly recommend that you take a<br />
backup of your data before using the delete function.
Setup menu<br />
� Switch on the camcorder and select the setup menu by pressing<br />
the MODE button.<br />
� Select a menu option using the arrow buttons � and �.<br />
� Change the setting or value using the arrow buttons � and �.<br />
Exiting menu<br />
To exit the setup menu, press the MODE button again.<br />
Language<br />
Here, you can set the language for the setup menu.<br />
The following languages are available: German, English, French,<br />
Italian, Dutch, Portuguese and Turkish.<br />
37
Setting date and time<br />
� Select the menu item Date/Time with the arrow buttons � and<br />
� and confirm the selection with the record button.<br />
Using the arrow buttons � and �, select a field, then press the<br />
arrow buttons � and � to change the value.<br />
The date and time are displayed as follows:<br />
year / month / day – hours / minutes<br />
� To save the new settings, press the record button.<br />
Formatting memory card/internal memory<br />
Select this option to format the internal memory or the memory card<br />
(if inserted).<br />
� Select the menu item Format with the arrow buttons � and<br />
��and confirm the selection with the record button.<br />
� At the prompt, use the arrow buttons � and � to check the box<br />
� and confirm with the record button. The formatting process of<br />
the memory is started.<br />
� Select the � symbol using the arrow buttons � and � and<br />
confirm with the record button to abort the formatting process.<br />
38
CAUTION! DATA LOSS!<br />
When formatting the internal memory or the memory<br />
card, all stored data is irretrievably lost.<br />
During formatting, do not switch off the camcorder<br />
and do not remove the memory card! The internal<br />
memory or the memory card could otherwise be<br />
damaged so that the camcorder cannot be switched on<br />
again!<br />
We strongly recommend that you take a backup of<br />
your data before formatting the memory.<br />
Default settings<br />
Select this entry if you want to reset the camcorder to the default<br />
settings.<br />
� Select the menu item Reset with the arrow buttons � and � and<br />
confirm the selection with the record button.<br />
� At the prompt, use the arrow buttons � and � to check the box<br />
� and confirm with the record button to reset to the default<br />
settings.<br />
� Select the � symbol using the arrow buttons � and � and<br />
confirm with the record button to abort the reset process.<br />
Energy saving option<br />
Here you can specify the time until the camcorder switches of<br />
automatically to save battery energy.<br />
39
� Select the menu item Save energy with the arrow buttons � and<br />
� and confirm the selection with the record button.<br />
� Select the desired option 1 Min. or 5 Min. using the arrow buttons<br />
� and � and confirm the selection with the record button.<br />
� Select the � symbol using the arrow buttons � and � and<br />
confirm with the record button to switch off the save energy<br />
option.<br />
Frequency<br />
Select here the frequency for video playback on a television set (50 or<br />
60 Hz).<br />
TV standard<br />
Select here the TV standard for video playback on a television set<br />
(NTSC or PAL).<br />
40
Tones<br />
� Select the menu item Standard settings with the arrow buttons<br />
� and � and confirm the selection with the record button.<br />
� At the prompt, use the arrow buttons � and � to check the box<br />
� and confirm with the record button to reset to the default<br />
settings.<br />
� Select the � symbol using the arrow buttons � and � and<br />
confirm with the record button to abort the reset process.<br />
PLEASE NOTE!<br />
You will always hear the shutter even when the sounds<br />
have been deactivated.<br />
41
Settings in video mode<br />
The settings in video mode are identical for 3D and 2D recordings; any<br />
deviations will be indicated in the relevant menu item.<br />
White balance<br />
Set the camcorder here to the white balance of the light at the location<br />
for filming.<br />
� Select Auto to activate the Automatic White Balance.<br />
� Select to set the camcorder to daylight recording.<br />
� Select to set the camcorder to reduced daylight recording.<br />
� Select to set the camcorder to fluorescent light recording.<br />
� Select to set the camcorder to light bulb light recording.<br />
Resolution<br />
Set the desired resolution here for video recordings.<br />
The following settings are available:<br />
42
Einstellung Auflösung in Pixeln 2D 3D<br />
WVGA 848 x 480 px X X<br />
VGA 640 x 480 px - X<br />
720p 1280 x 720 px X -<br />
Colour<br />
Set one of the 3 effects for the recording here.<br />
� Select Colour to produce colour recordings.<br />
� Select Sepia to produce recordings with an “antique“ effect.<br />
� Select Black/White to produce recordings in black & white.<br />
43
Settings in photo mode<br />
The settings in photo mode are identical for 3D and 2D recordings;<br />
any deviations will be indicated in the relevant menu item.<br />
White balance<br />
Set the camcorder here to the white balance of the light at the location<br />
for filming.<br />
� Select Auto to activate the Automatic White Balance.<br />
� Select to set the camcorder to daylight recording.<br />
� Select to set the camcorder to reduced daylight recording.<br />
� Select to set the camcorder to fluorescent light recording.<br />
� Select to set the camcorder to light bulb light recording.<br />
Resolution<br />
This menu item is only available in 2D mode.<br />
Set the desired resolution here for taking photos.<br />
44
The following settings are available:<br />
Einstellung Auflösung in Pixeln<br />
5M 2592 x 1944<br />
8M 3200 x 2400<br />
Colour<br />
Set one of the 3 effects for the recording here.<br />
� Select Colour to produce colour recordings.<br />
� Select Sepia to produce recordings with an “antique“ effect.<br />
� Select Black/White to produce recordings in black & white.<br />
Date stamp<br />
This menu item is only available in 2D mode.<br />
Set here whether the date should be shown on the photo or not.<br />
� Select the menu item Date stamp with the arrow buttons � and<br />
� and confirm the selection with the record button.<br />
45
� At the prompt, use the arrow buttons � and � to check the box<br />
� and confirm with the record button to activate this function.<br />
� Select the � symbol using the arrow buttons � and � and<br />
confirm with the record button to deactivate this function.<br />
Serial photo function<br />
This menu item is only available in 2D mode.<br />
The serial photo function allows you to take multiple photos in series<br />
by keeping the record button pressed down.<br />
� Select the menu item Serial photo function with the arrow<br />
buttons � and � and confirm the selection with the record<br />
button.<br />
� At the prompt, use the arrow buttons � and � to check the box<br />
� and confirm with the record button to activate this function.<br />
� Select the � symbol using the arrow buttons � and � and<br />
confirm with the record button to deactivate this function.<br />
46
Connecting camcorder to TV set<br />
To view photos and videos on a<br />
television set, proceed as<br />
follows:<br />
� Connect the USB/AV cable<br />
to the USB port of the<br />
camcorder.<br />
� Connect the white and<br />
yellow plugs of the USB/AV<br />
cable to the corresponding<br />
sockets on the television set.<br />
� Switch on the television set.<br />
� The camcorder’s LCD screen<br />
switches off.<br />
� The photos will be displayed on the TV set.<br />
NOTE:<br />
As long as the camcorder is connected to a television set, the<br />
LCD screen is switched off.<br />
47
Connection via HDMI<br />
To view recorded videos in<br />
HD, connect the camcorder<br />
with the HDMI cable to the<br />
digital port of your television<br />
set.<br />
48
Connecting camcorder to computer<br />
You can copy your pictures<br />
and videos to a computer.<br />
� Connect the mini USB<br />
plug of the USB/AV cable<br />
to the camcorder and<br />
connect the other end of<br />
the cable to a free USB<br />
port on your computer.<br />
� Switch on the camcorder<br />
so that the system can<br />
automatically detect the<br />
type of connected storage<br />
device.<br />
Supported operating<br />
systems:<br />
� Windows XP; Windows Vista; Windows 7<br />
49
Installing the software<br />
The enclosed CD contains the driver files and the ArcSoft Total Media<br />
software, which allows you to edit your pictures and video files.<br />
� Insert the CD in the CD drive of your computer.<br />
� Normally, the CD is automatically recognised and its contents are<br />
displayed on the screen. If this is not the case, select the CD drive<br />
in Windows Explorer > My Computer and double-click the drive<br />
name to start the CD.<br />
� The start page shows an overview of the contents of the CD.<br />
� To install the software, double-click the Total Media<br />
HDCam.exe icon.<br />
� To install the software, follow the on-screen instructions.<br />
� For more detailed information regarding the operation of the<br />
software, refer to the enclosed quick guide for ArcSoft Total Media.<br />
50
DCF memory standard<br />
The files on your camcorder are<br />
managed (saved, named, etc.) as<br />
specified by the DCF standard (DCF =<br />
Design Rule for Camera File System). You<br />
can also use your camcorder to view files<br />
stored on memory cards from other DCF<br />
cameras.<br />
Card drive<br />
If your PC is equipped with a card drive or is connected to a card<br />
reader and you have saved your pictures and video clips on the<br />
memory card, you can of course use just the card to copy the files to<br />
your PC.<br />
51
Memory folder structure<br />
The camcorder saves the recorded files in folders on the internal<br />
memory or on the memory card. The following folders are<br />
automatically created upon saving:<br />
� DCIM: This is the main directory on the memory card; all photos<br />
and video recordings in this directory are saved in the relevant<br />
subdirectories.<br />
� 100MA3D: All 3D photos are saved in this directory.<br />
� 200MA2D: All 2D photos are saved in this directory.<br />
� 300VID3D:-All 3D video recordings are saved in this directory.<br />
� 400VID3D: All 2D video recordings are saved in this directory.<br />
The files are automatically named "PH3D", “PH2D”, “MP3D” or<br />
“MP2D”, followed by a four-digit number.<br />
A maximum of 9999 photos or videos can be saved to each folder.<br />
Afterwards, a new directory will be set up for the next photo or<br />
recording e.g. if the directory 200MA2D contains 9999 photos, then a<br />
new directory 201MA2D will be set up. A maximum of 999 folders can<br />
be created.<br />
If another recording is made, an error message will appear (“Directory<br />
cannot be created”). In this case, insert a new memory card. A new file<br />
structure is set up, starting with file "0001" in folder "100DCIM".<br />
52
Do not attempt to change the folder and file structure on the<br />
camcorder (by renaming, etc.). You might destroy the files by doing<br />
so.<br />
53
Disposal<br />
Packaging<br />
54<br />
Your camcorder is packaged to protect it during transport.<br />
All packaging is made from raw materials that can be reused<br />
or recycled through normal household waste recycling.<br />
Device<br />
At the end of its service life, do not dispose of the camcorder<br />
through normal household waste. Dispose of it in an<br />
environmentally friendly manner by bringing it to a local<br />
WEEE collection point. Contact your local authority to find<br />
out where your nearest collection point is located.<br />
Batteries<br />
Do not dispose of spent batteries through normal<br />
household waste. The batteries must be brought to a<br />
collection point for batteries for safe disposal.
Maintenance and care<br />
Clean the housing, lens and display as follows:<br />
Clean the camera housing using a soft, dry cloth.<br />
Do not use thinners or detergents that contain oil, as these could<br />
damage your camcorder.<br />
Before cleaning the lens and the display, use a lens brush to remove<br />
any dust. Then wipe the lens and display with a soft cloth. Do not<br />
apply any pressure to the display and do not use hard objects to clean<br />
it.<br />
Do not use strong cleaning agents for the housing and lens (if there is<br />
dirt that cannot be removed, contact your dealer).<br />
55
Technical data<br />
Camcorder<br />
Sensor: 5.0 mega pixels CMOS<br />
Aperture/<br />
Focal distance: F = 2.8 / f= 4.76 mm<br />
LCD monitor: 8.89 cm / 3.5 " LCD screen (16:9)<br />
File formats: JPEG, AVI<br />
Battery: NP40 rechargeable Li-ion battery<br />
3.7 V; 720 mAh<br />
type: KLIC7001<br />
Memory: Internal: 128 MB internal memory<br />
(usable memory may vary)<br />
External: SD/SDHC card (max. 8 GB)<br />
Port: Mini USB 2.0<br />
Dimensions: 113 x 59 x 19 mm (H x W x D)<br />
Weight: 115 g, incl. battery<br />
Charger cradle<br />
Model number: TC03G-2U025-0421D<br />
Manufacturer: Technics-GP<br />
Input voltage: 100-240 V ~ 50/60 Hz max. 0.11 A<br />
Output voltage: 4.2 V 0.6 A<br />
56
This mark on the camcorder certifies that the camcorder<br />
complies with EU guidelines (European Union) on radio<br />
interference. CE stands for Conformité Européenne<br />
(European conformity).<br />
57
ArcSoft Total Media HDCam 2.0<br />
Quick start instructions<br />
58
Introduction<br />
Total Media HDCam by ArcSoft is desktop software that combines<br />
media management and playback functions.<br />
Media management<br />
You can import media files for editing, uploading and creating photo<br />
books and albums from the device.<br />
Playback function<br />
With Total Media HDCam by ArcSoft you can view photos and<br />
playback video clips.<br />
System requirements<br />
Operating system: Windows XP SP2, Vista and Windows 7<br />
CPU: Intel / AMD Dual-Core or higher<br />
Memory: 1 GB or more<br />
Graphics card: DirectX 9 or DirectX 10 (recommended)<br />
Port: Standard USB 1.1 connection or higher<br />
Hard drive: A minimum of 2 GB free fixed disk storage<br />
59
Installation<br />
How to install the Total Media HDCam:<br />
� Connect your device to your desktop or notebook PC.<br />
� Insert the installation CD in the DVD/CD drive.<br />
� The CD starts automatically.<br />
� Follow the instructions to complete the installation.<br />
If the CD does not execute automatically follow the steps below to<br />
install the software:<br />
� Double-click on Workstation.<br />
� Move the cursor to the DVD/CD drive.<br />
� Right-click and then click Open.<br />
� Double-click Total Media HDCam.exe.<br />
� A wizard appears and guides you through the installation.<br />
� Follow the instructions to complete the installation.<br />
60
How to uninstall<br />
How to install the Total Media HDCam:<br />
� Click on Start > Programs > ArcSoft Total Media HDCam ><br />
Uninstall.<br />
� A wizard appears and guides you through the uninstallation.<br />
� Follow the instructions to complete the uninstallation.<br />
Language<br />
How to change the language of the user interface after installation:<br />
� On the main screen click on Preferences.<br />
� Select a language and click on OK.<br />
Registration and activation<br />
How to register and update the software:<br />
� On the main screen to create a connection with the information<br />
centre click on .<br />
� Select Upgrade, Patches or Registration.<br />
61
Media Browser<br />
# Area Function<br />
1 View mode area Offers three modes to display the media files.<br />
2 Preview area To select and display file miniatures and<br />
detailed information<br />
3 Function bar Lists the main function buttons.<br />
62<br />
3<br />
1<br />
2
View media files<br />
Follow the instructions below to view the media files on your device:<br />
� Connect the device to the computer.<br />
� The device code is shown above the view mode area.<br />
� To display all the media files on the device click on the device<br />
code.<br />
Device<br />
code<br />
Media<br />
files<br />
on the<br />
device<br />
� To playback a video clip double-click the relevant clip or<br />
� To pause/stop/continue playback of a video clip click<br />
on<br />
63
� To playback the previous or next clip click<br />
� To delete a file click on the icon of the relevant file.<br />
� To cut a video clip click on the icon.<br />
� To assess a file click on the icon of the relevant file.<br />
� To view the properties of a file click on the<br />
file.<br />
icon of the relevant<br />
� Double-click the relevant image to open the preview of an image<br />
in a new window.<br />
� To open the preview of the previous or next image click on the<br />
left/right button.<br />
64
Display modes<br />
There is a choice of three display modes to<br />
display the media files: Library view, calendar<br />
view and search view.<br />
Note: To view the media files on your device in<br />
the library or calendar view, you must first<br />
import the files.<br />
Library view<br />
The library view lists the "Own Creation" folder<br />
and other folders that are created when<br />
importing the files.<br />
� How to switch to library view<br />
� To extend the library window click on<br />
Libraries.<br />
� Select the desired folder.<br />
� To switch to the library view click on<br />
View or edit the properties of a folder by selecting the folder and<br />
clicking .<br />
To delete a folder click on the icon of the relevant folder.<br />
65
Calendar view<br />
The calendar view uses the creation date of the files to arrange the<br />
media files.<br />
� How to switch to calendar view<br />
� To extend the calendar window click on Libraries.<br />
� Select the desired folder.<br />
� To switch to the calendar view click on<br />
Three modes are available in the calendar view: Annual, Monthly and<br />
Daily mode.<br />
How to switch between the three different modes:<br />
� To open the monthly mode click on the image of the desired year.<br />
� To open the previous or next year - if available - click on or<br />
� To open the daily mode click on the image of the desired month.<br />
� To open the previous or next month - if available - click on<br />
66<br />
or
� To return to the previous mode click on<br />
Browser view<br />
Browser view enables you to search the media files on your computer<br />
with the aid of a tree structure.<br />
How to switch to browser view:<br />
� To extend the computer window click on Computer.<br />
� To view the media files select the desired folder on your computer.<br />
� To update the list of media files click on<br />
67
Preview area<br />
The preview area has various options for selecting and displaying<br />
miniature file images and more detailed information for selection.<br />
Refer to the following table for a description of the relevant options:<br />
Option Name Function<br />
68<br />
Evaluation<br />
filter<br />
Shows the media files as per the selected<br />
evaluation.<br />
New filter Shows the new media files.<br />
Type filter Shows the media files as per the selected type.<br />
Quick<br />
search<br />
Miniature<br />
image slide<br />
control<br />
Shows the media files as per the letter entered.<br />
Modifies the size of the miniature images with<br />
the aid of the slide control.
Miniature<br />
images<br />
Details<br />
Shows the files as miniature images<br />
Shows the miniature images of the files<br />
together with detailed information.<br />
69
Function bar<br />
The function bar lists the main function buttons. By clicking the<br />
buttons you access the relevant functions. A description of the<br />
relevant buttons is found in the following table:<br />
Button Name Function<br />
Imports media files from a<br />
Import camera, camcorder or memory<br />
device on the computer.<br />
70<br />
File link<br />
Produce<br />
AVCHD<br />
Upload to<br />
YouTube<br />
Upload files to<br />
Facebook<br />
Photo album<br />
Album page<br />
Produces films with your video<br />
files.<br />
Burns your video data onto an<br />
AVCHD disk.<br />
Uploads the files to your YouTube<br />
account.<br />
Uploads the files to your Facebook<br />
account.<br />
Produces photo albums with your<br />
images.<br />
Produces album pages with your<br />
images.
Import media files<br />
How to import media files onto your computer:<br />
� Select the desired folder.<br />
� Select the desired files.<br />
� Click on Import. The "Import" window is displayed.<br />
� Select Import new scenes, Import selected scenes or Import all<br />
scenes.<br />
� Select a folder name or enter one.<br />
� To import the files click on OK.<br />
71
Cut video clips<br />
How to cut video clips:<br />
Click file link. The work area is displayed.<br />
� Move the desired video clips to the work area using drag-anddrop.<br />
� Double-click to open the preview and edit the clips.<br />
� To cut the clips click on Continue.<br />
� Select the device and the path under which the cut clip is to be<br />
saved.<br />
Burning AVCHD disks<br />
How to burn AVCHD disks<br />
� Click on Create AVCHD. The work area is displayed.<br />
� Move the desired video clips to the work area using drag-anddrop.<br />
� Double-click the relevant image to open the preview of an image<br />
in a new window.<br />
� Click on Next.<br />
� Select the drive with which you want to burn the AVCHD disk or<br />
the path to save the files on your computer.<br />
72
Edit video clips<br />
How to edit a video clip:<br />
� Double-click on a video clip in the work area. The “Edit” window is<br />
displayed.<br />
� To select the start of your cut clip click on<br />
� To select the end of your cut clip click on<br />
� To save the cut clip click on<br />
A description of other tools in the "Edit" window is found in the<br />
following table:<br />
Button Name Function<br />
Playback /<br />
Pause<br />
Click to playback or pause the clip.<br />
Stop Click to end playback of the clip.<br />
Previous Click to open the previous clip.<br />
Next Click to open the next clip.<br />
Time field<br />
Click on the number; use the arrow<br />
keys to view a particular section of the<br />
video clip.<br />
73
74<br />
Volume level Slide to adjust the volume.<br />
Full screen Click to open the full screen mode.
Upload files to YouTube<br />
How to upload the files to YouTube:<br />
Click on Upload to YouTube. The work area is displayed.<br />
� Move the desired file to the work area using drag-and-drop.<br />
� Click on Next. The log in window for YouTube is displayed.<br />
� Enter your YouTube user name and password.<br />
� To login to YouTube click on “Login”.<br />
� Follow the instructions to upload the file to YouTube.<br />
Upload files to Facebook<br />
To upload to Facebook:<br />
� Click on Upload to Facebook. The work area is displayed.<br />
� Move the desired file to the work area using drag-and-drop.<br />
� Click on Next. The login window for Facebook is displayed.<br />
� Enter your Facebook email address and password.<br />
� To login to Facebook click on “Login”.<br />
� Follow the instructions to upload the file to Facebook.<br />
75
Create photo albums<br />
How to create photo albums:<br />
� Click on Photo album. The work area is displayed.<br />
� Drag the desired images into the work area.<br />
� To start the print creations application by ArcSoft click on<br />
Continue.<br />
� Select the categories for the photo albums to view the photo<br />
albums.<br />
� Select a photo album.<br />
� To open the “Photo album design" screen click on Continue.<br />
� Observe the descriptions of the photo album design using the<br />
following diagram:<br />
76
1 Restart<br />
2 Add images<br />
3 Remove all<br />
4 Block/ release design<br />
5 Save design<br />
6 New project<br />
7 Undo / redo<br />
8 Modify photo album template<br />
9 Click icon to display the image page<br />
10 Fill empty pages with images automatically<br />
11 Click text or image to edit it<br />
12 Photo album preview<br />
13 Share photo album by email, image or SWF file<br />
14 Search page<br />
15 Edit page / page layout<br />
16 Print / print options<br />
78
Create album page<br />
How to create album pages:<br />
� Click on Album page.<br />
The work area is displayed.<br />
� Drag the desired image into the work area.<br />
� To start the print creations application by ArcSoft click on<br />
Continue.<br />
� Select the categories for the photo albums to view the photo<br />
albums.<br />
� Select an album page.<br />
� To open the “Photo album design" screen click on Continue.<br />
� Observe the descriptions of the photo album design using the<br />
following diagram:<br />
79
1 Restart<br />
2 Add images<br />
3 Remove all<br />
4 Block/release design<br />
5 Save design<br />
6 Undo / redo<br />
7 Modify album page template<br />
8 Click icon to display the image page<br />
9 Album page preview<br />
10 Share album page by email or image file<br />
11 Print / print options<br />
81
02/11<br />
DE<br />
MTC - <strong>Medion</strong> Technologie Center<br />
Freiherr-vom-Stein-Straße 131<br />
45473 Mülheim / Ruhr<br />
Hotline: 01805 - 633 633<br />
Fax: 01805 - 665 566<br />
(0,14 Euro/Minute aus dem dt. Festnetz,<br />
Mobilfunk max. 0,42 Euro/Min)<br />
Servicebereich der Homepage:<br />
www.medion.de/service<br />
<strong>Medion</strong> Electronics Ltd.<br />
www.medion.de<br />
120 Faraday Park, Faraday Road, Dorcan<br />
Swindon SN3 5JF, Wiltshire<br />
United Kingdom<br />
Hotline: 0871 37 61 020<br />
(calls are charged at 7p per min from a standard landline,<br />
calls from mobiles could be higher)<br />
Fax: 01793 71 57 16<br />
FR<br />
<strong>Medion</strong> France<br />
75 Rue de la Foucaudière<br />
72100 LE MANS<br />
France<br />
Service Hotline: 02 43 16 60 30 (appel non surtaxé)<br />
Service PREMIUM hors garantie: 08 92 35 05 40<br />
(0.34 EUR/min)<br />
E-Mail: Pour nous contacter, merci de vous rendre sur<br />
notre site internet à la rubrique « Service et Support »<br />
www.medion.fr<br />
UK<br />
www.medion.co.uk