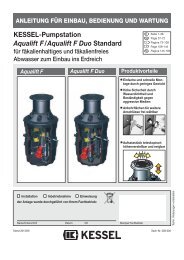
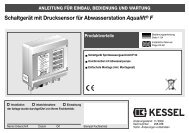
KESSEL-Pumpstation Aqualift€F/Aqualift€F Duo For all wastewaters ...
KESSEL-Pumpstation Aqualift€F/Aqualift€F Duo For all wastewaters ...
KESSEL-Pumpstation Aqualift€F/Aqualift€F Duo For all wastewaters ...

Create successful ePaper yourself
Turn your PDF publications into a flip-book with our unique Google optimized e-Paper software.
5. Electrical connections<br />
Connection<br />
Power connection<br />
Motor / pump cables<br />
Twin Pump Systems – Follow <strong>all</strong> safety regulations!<br />
Instructions<br />
• Power cables L1, L2, L3, N and PE should be connected to their appropriate jacks (located<br />
on the second level from the bottom). Please see the coded inst<strong>all</strong>ation help located near<br />
the connection area<br />
• It is mandatory that cables N and PE are connected and connected properly<br />
• The power supply cable to the control unit must be equipped with a main On / Off switch<br />
• Each phase of the main power cable must be equipped with a fuse with a max rating of 25 Amps.<br />
• Improper electrical inst<strong>all</strong>ation / connection of the control unit and / or pumps can<br />
damage or destroy the control system.<br />
• The motor / pump cables 2 x U/V/W should be connected to the ABB-Schütze B6-30-10<br />
jacks T1 / T2 / T3 which are below the motor protection switches (pump 1 left / pump 2<br />
right). The direction of rotation of the motors is to be noted.<br />
• The PE cable is to be connected to the lower level of grey jacks according to the coded<br />
inst<strong>all</strong>ation help located near the connection area.<br />
• Sufficient slack should be left in the motor cables so that removal of the pump(s) for<br />
repair or maintenance is possible.<br />
Motor temperature sensors • Entry TF1: Cable 5 from the pump 1 should be connected on the right in entry TF1.<br />
Cable 4 should be connected to the left in entry TF1<br />
• Entry TF2: Cable 5 from the pump 2 should be connected on the right in entry TF2.<br />
Cable 4 should be connected to the left in entry TF2<br />
• Entry E7: Cable 6 from pump 1 should be connected on the left in entry E7. (remove<br />
the bridge if necessary).<br />
• Entry E8: Cable 6 from pump 2 should be connected on the left in entry E8. (remove<br />
the bridge if necessary).<br />
Float switch connections<br />
“Off”, “On”, “On2”<br />
and “Alarm”<br />
Warning and Alarm outputs<br />
• The cable ends of the float switches are to be connected to their corresponding<br />
• marked jacks.<br />
• The connection jacks of the float switches should have no other cables entering them<br />
• The connection jacks are marked with switching symbols<br />
• The ʻStörungʼ (malfunction) and ʻAlarmʼ (warning / alarm) control unit signals are controlled<br />
by a relay without a protective safety switch. Inductive loads must be extern<strong>all</strong>y<br />
eliminated. The stand by (powerless) position of the relays is printed on the board.<br />
• The relay contacts have no connection to any power supply or operating voltage of the<br />
system and are safely separated up to an operating voltage of 300 V according to Table<br />
D.10 of the EN 61010 Norm (Overload category 2 u. Contamination level 2).<br />
• The relays are designed to switch 250 V / 2 A. Appropriate external measures should be<br />
taken to limit the current to this level.<br />
• It is not <strong>all</strong>owable to switch phases with the relays. The phase may deviate from L1.<br />
Outputs L1 / N<br />
• The L1 and N outputs (2 each) are designed for an external (extra) warning for the “Malfunc-<br />
(230V / 50 Hz) •tion” and „Alarm” functions. These outputs may not be used for any other purposes.<br />
• Maximum current is 2 amps<br />
Rechargeable battery<br />
• A NiCd-9V-Block rechargeable battery (Type IEC 6F22) may be inst<strong>all</strong>ed inside the control<br />
unit (it is not included with the control unit). The purpose of this battery is to power the alarm<br />
and notification devices on the control unit during power outages / failures. Do not use a standard<br />
battery! Only use rechargeable batteries that conform to the above specifications.<br />
• Only remove or replace the rechargeable battery in the control unit when the power to the<br />
entire control unit has been turned off / disconnected. Make sure battery polarity is correct<br />
• In the case that a „dead„ or power-less rechargeable battery is placed in the control unit,<br />
the unit will require approximately 36 hours to completely re-charge the battery. After 36<br />
hours the battery and the control unit will be fully operational.<br />
18