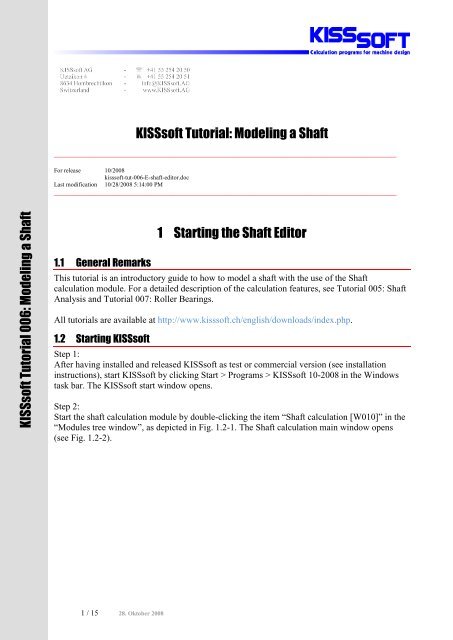
KISSsoft Tutorial: Modeling a Shaft 1 Starting the Shaft Editor K ...
KISSsoft Tutorial: Modeling a Shaft 1 Starting the Shaft Editor K ...
KISSsoft Tutorial: Modeling a Shaft 1 Starting the Shaft Editor K ...

Create successful ePaper yourself
Turn your PDF publications into a flip-book with our unique Google optimized e-Paper software.
<strong>KISSsoft</strong> <strong>Tutorial</strong>: <strong>Modeling</strong> a <strong>Shaft</strong><br />
__________________________________________________________________________________________<br />
For release 10/2008<br />
kisssoft-tut-006-E-shaft-editor.doc<br />
Last modification 10/28/2008 5:14:00 PM<br />
__________________________________________________________________________________________<br />
<strong>KISSsoft</strong> <strong>Tutorial</strong> 006: <strong>Modeling</strong> a <strong>Shaft</strong><br />
1.1 General Remarks<br />
1 <strong>Starting</strong> <strong>the</strong> <strong>Shaft</strong> <strong>Editor</strong><br />
This tutorial is an introductory guide to how to model a shaft with <strong>the</strong> use of <strong>the</strong> <strong>Shaft</strong><br />
calculation module. For a detailed description of <strong>the</strong> calculation features, see <strong>Tutorial</strong> 005: <strong>Shaft</strong><br />
Analysis and <strong>Tutorial</strong> 007: Roller Bearings.<br />
All tutorials are available at http://www.kisssoft.ch/english/downloads/index.php.<br />
1.2 <strong>Starting</strong> <strong>KISSsoft</strong><br />
Step 1:<br />
After having installed and released <strong>KISSsoft</strong> as test or commercial version (see installation<br />
instructions), start <strong>KISSsoft</strong> by clicking Start > Programs > <strong>KISSsoft</strong> 10-2008 in <strong>the</strong> Windows<br />
task bar. The <strong>KISSsoft</strong> start window opens.<br />
Step 2:<br />
Start <strong>the</strong> shaft calculation module by double-clicking <strong>the</strong> item “<strong>Shaft</strong> calculation [W010]” in <strong>the</strong><br />
“Modules tree window”, as depicted in Fig. 1.2-1. The <strong>Shaft</strong> calculation main window opens<br />
(see Fig. 1.2-2).<br />
1 / 15 28. Oktober 2008
Fig. 1.2-1: <strong>KISSsoft</strong> start window with “Modules tree window”.<br />
Fig. 1.2-2: <strong>Shaft</strong> calculation main window.<br />
2 / 15
1.3 Example Problem<br />
The shaft with <strong>the</strong> properties as depicted in Fig. 1.3-1 is to be modelled (blue faces: loads,<br />
yellow faces: bearings).<br />
Fig. 1.3-1: Example shaft.<br />
<strong>Shaft</strong> elements:<br />
1 Notch effect due to interference fit 2 Keyway<br />
3 Line load 4 Keyway<br />
5 Radius 6 Coupling (source of power)<br />
7 Radius 8 Radial bore<br />
9 Radius 10 Cylindrical gear (drain of power)<br />
11 Longitudinal bore<br />
3 / 15
2.1 Coordinate System<br />
2 <strong>Modeling</strong> <strong>the</strong> <strong>Shaft</strong> Geometry<br />
Fig. 2.1-1: <strong>Shaft</strong> coordinate system (right-hand rule applies).<br />
y=0:<br />
Left end of shaft.<br />
Positive x-axis: Points out of <strong>the</strong> screen<br />
Positive y-axis: From left to right, in direction of shaft axis<br />
Positive z-axis: From bottom to top<br />
Pos. of application: Angle between positive x-axis and towards positive z-axis. Counterclockwise<br />
positive.<br />
2.2 Editing Views<br />
The following editing functions are available in <strong>the</strong> <strong>Shaft</strong> editor:<br />
Function<br />
“+”/”-“/”Home”<br />
Left mouse button<br />
Right mouse button<br />
Delete<br />
Explanation<br />
Zoom in, zoom out, centre graphic<br />
Select element<br />
Open context menu: zoom in, zoom out, centre graphic<br />
Delete selected element<br />
2.3 Entering <strong>Shaft</strong> Sections<br />
<strong>Modeling</strong> a shaft in <strong>KISSsoft</strong> requires information on <strong>the</strong> main geometry, <strong>the</strong> notches, loads and<br />
supports/bearings. As elements of <strong>the</strong> shaft, first <strong>the</strong> so-called main elements (e.g. cylinders),<br />
followed by <strong>the</strong> sub elements (e.g. notches), loads (e.g. forces and momentums) and<br />
supports/bearings have to be defined. Fig. 2.3-1 shows an overview of <strong>the</strong> “Elements-tree”<br />
structure and Table 2.3-1 comprises information on elements in group level of <strong>the</strong> Elements-tree.<br />
The Connecting elements entry allows two shafts to be interconnected. See <strong>Tutorial</strong> m: <strong>Modeling</strong><br />
multiple shafts for a detailed description of how to model systems of shafts.<br />
4 / 15
Fig. 2.3-1: “Elements-tree” and element hierarchy.<br />
Table 2.3-1: Group level elements in <strong>the</strong> “Elements-tree”.<br />
Element<br />
Outer/<br />
Inner<br />
contour<br />
Forces<br />
Bearing<br />
Cross<br />
sections<br />
Information<br />
on<br />
shaft section<br />
Required input<br />
diameter, length of shaft section, surface, type and<br />
geometry of notches as sub elements<br />
external loads centric or ex-centric force/momentum vectors,<br />
machine elements (like gears) for load introduction,<br />
additional masses<br />
supports,<br />
roller bearings<br />
critical cross<br />
section<br />
Selection of roller bearings, information on bearing<br />
stiffness, degrees of freedom<br />
effect of notch, position, geometry, surface<br />
roughness<br />
Determination of<br />
A, I xx , I zz , I p , W xx ,<br />
W zz, W p , k<br />
F y , Q x , Q z , M bx ,<br />
M bz , T<br />
reaction forces,<br />
boundary<br />
conditions<br />
notch factor, strain<br />
2.3.1 External Contour<br />
The shaft is modelled as a series of cones/cylinders. Right-click <strong>the</strong> Outer contour item in <strong>the</strong><br />
“Elements-tree” window and choose <strong>the</strong> “Cylinder” element from <strong>the</strong> list. Define <strong>the</strong> length<br />
(l=80mm) and diameter (d=40mm) of <strong>the</strong> first cylindrical section in <strong>the</strong> “Element editor<br />
window”. Also, define surface roughness to be Rz=8.0. Repeat <strong>the</strong>se steps for all cylindrical<br />
sections knowing that every new cylindrical element is appended to <strong>the</strong> right (positive y-<br />
direction) of <strong>the</strong> preceding one.<br />
5 / 15
Fig. 2.3-2: Definition of first cylindrical element.<br />
Fig. 2.3-3: Parameterizing <strong>the</strong> cylindrical element.<br />
Repeat <strong>the</strong>se steps for <strong>the</strong> three remaining sections, using <strong>the</strong> dimensions shown in <strong>the</strong> table<br />
below:<br />
Section No. Length [mm] Diameter [mm] Surface quality [-]<br />
2 40 55 N7<br />
3 80 50 N7<br />
4 35 35 N7<br />
The model should now look like as shown below. Right-click to open <strong>the</strong> context menu: Choose<br />
“Fit window” to resize <strong>the</strong> drawing according to window frame.<br />
6 / 15
Fig. 2.3-4: <strong>Shaft</strong> model after adding <strong>the</strong> external contours.<br />
2.3.2 Internal Contour<br />
A bore with diameter d i =5mm from y=100mm to <strong>the</strong> right end of <strong>the</strong> shaft is to be included in<br />
<strong>the</strong> model. Since geometry elements are added from <strong>the</strong> left to <strong>the</strong> right first a bore from y=0mm<br />
to y=100mm with diameter equal zero has to be introduced. To do so select <strong>the</strong> Inner contour<br />
item in <strong>the</strong> “Elements-tree” window and define a new bore hole. Continue with length and bore<br />
diameter via <strong>the</strong> “Elements-tree” window as depicted in Fig. 2.3-6.<br />
Fig. 2.3-5: Definition of first bore hole.<br />
Fig. 2.3-6: <strong>Shaft</strong> with bore hole.<br />
7 / 15
2.4 Defining Notches<br />
Introduce a notch to a shaft section by right-clicking <strong>the</strong> respective main element (e.g. Cylinder<br />
1, see Fig. 2.4-1) in <strong>the</strong> “Elements-tree” and choose <strong>the</strong> desired notch effect from <strong>the</strong> context<br />
menu. Parameterize <strong>the</strong> notch in <strong>the</strong> “Elements-editor”.<br />
2.4.1 Entering Radii<br />
Radii are present on <strong>the</strong> right end of <strong>the</strong> first shaft section and on <strong>the</strong> left end of <strong>the</strong> third and<br />
fourth section. In order to define <strong>the</strong> radius on <strong>the</strong> right side of <strong>the</strong> first shaft section right-click<br />
<strong>the</strong> first element in <strong>the</strong> list of “Outer Contour” elements and choose “Radius right” from <strong>the</strong> list.<br />
Use <strong>the</strong> “Elements-tree” window to enter <strong>the</strong> radius of <strong>the</strong> newly introduced element (see Fig.<br />
2.4-1):<br />
Fig. 2.4-1: Steps for adding a radius.<br />
This procedure is now repeated for <strong>the</strong> two remaining radii. For <strong>the</strong> second radius, <strong>the</strong> third shaft<br />
section is to be selected and a radius on <strong>the</strong> left with r=1mm is to be added. For <strong>the</strong> third radius,<br />
<strong>the</strong> fourth section is to be selected and a radius on <strong>the</strong> left with r=4mm is added. The model<br />
should now look as follows:<br />
Fig. 2.4-2: <strong>Shaft</strong> model after adding <strong>the</strong> radii.<br />
8 / 15
2.4.2 Entering <strong>the</strong> Longitudinal Groove/Keyway<br />
In order to define a longitudinal groove on <strong>the</strong> right side of <strong>the</strong> first shaft section right-click <strong>the</strong><br />
first element in <strong>the</strong> list of “Outer Contour” elements and choose “Key” from <strong>the</strong> list. Use <strong>the</strong><br />
“Elements-editor” window to enter <strong>the</strong> parameters of <strong>the</strong> newly introduced element: length of <strong>the</strong><br />
groove and <strong>the</strong> position of its left end with respect to <strong>the</strong> element’s left end (groove length:<br />
22mm, reference measure: 2mm):<br />
Fig. 2.4-3: Steps for adding a key.<br />
This is now repeated for <strong>the</strong> second longitudinal groove/keyway (for <strong>the</strong> cylindrical gear): select<br />
<strong>the</strong> third shaft section and introduce a longitudinal groove with reference measure 10mm and<br />
length 60mm. Groove width and depth are chosen according to DIN 6885.1 (Standard). The<br />
model should now look as follows:<br />
Fig. 2.4-4: <strong>Shaft</strong> model after adding longitudinal grooves/keyways.<br />
9 / 15
2.4.3 Introducing <strong>the</strong> Interference Fit<br />
The coupling on <strong>the</strong> left end of <strong>the</strong> shaft uses not only a key but also an interference fit to<br />
introduce <strong>the</strong> torque. This interference fit will result in a notch effect as well. Add <strong>the</strong><br />
interference fit element by right-clicking on <strong>the</strong> first “Outer contour” element and select<br />
“Interference fit” from <strong>the</strong> list. Now, define <strong>the</strong> position of <strong>the</strong> left end of <strong>the</strong> interference fit<br />
(pos=0mm), <strong>the</strong> length (l=40mm) and choose <strong>the</strong> type of interference from <strong>the</strong> drop-down list in<br />
<strong>the</strong> “Elements-editor” window.<br />
Fig. 2.4-5: “Elements-editor” for <strong>the</strong> interference fit.<br />
2.4.4 Adding <strong>the</strong> Radial Bore<br />
In <strong>the</strong> middle of <strong>the</strong> second shaft section a radial bore has to be applied (e.g. for lubrication<br />
purposes). Model this element by right-clicking <strong>the</strong> second element in <strong>the</strong> “Outer contour” tree<br />
and choose “Cross hole” from <strong>the</strong> list. The “Elements-editor” enables you to set <strong>the</strong> parameters<br />
to Diameter d=5mm and “Reference measure” pos=20mm.<br />
The model should now look as follows:<br />
Fig. 2.4-6: Element editor for <strong>the</strong> radial bore (cross hole).<br />
10 / 15
Fig. 2.4-7: <strong>Shaft</strong> model after adding <strong>the</strong> interference fit and radial bore.<br />
2.4.5 Introducing Loads<br />
In this step <strong>the</strong> external forces acting on <strong>the</strong> shaft are modelled.<br />
Basically, any load is applied by right-clicking <strong>the</strong> “Forces” element in <strong>the</strong> “Elements-tree<br />
window”. A “Centrical load/Eccentric” load is determined by its position and three components,<br />
one per Cartesian axis. This force vector can ei<strong>the</strong>r act through <strong>the</strong> centre line of <strong>the</strong> shaft or with<br />
an offset. Note that in <strong>the</strong> “<strong>Shaft</strong>s editor” a load vector is represented by an arrow always<br />
pointing in negative z-direction.<br />
Besides <strong>the</strong> definition of forces as a general force/moment vector, <strong>KISSsoft</strong> provides <strong>the</strong><br />
possibility to define external loads using machine elements. The resulting forces acting on <strong>the</strong><br />
shaft are <strong>the</strong>n automatically calculated based on <strong>the</strong> geometry of <strong>the</strong> machine element, its<br />
function and power rating (see Fig. 2.4-9).<br />
The shaft is driven by a coupling on its left end. The shaft drives an external application with <strong>the</strong><br />
helical gear according to a power of 75kW. In <strong>the</strong> middle of <strong>the</strong> shaft a line-load is added. The<br />
speed of <strong>the</strong> shaft is defined in <strong>the</strong> tab “Basic data” of <strong>the</strong> shaft analysis module, not in <strong>the</strong> tab<br />
“<strong>Shaft</strong> editor”. Add a load by right-clicking on <strong>the</strong> “Forces” item in <strong>the</strong> “Elements-tree window”.<br />
The following load elements are to be introduced to <strong>the</strong> overall shaft model:<br />
1. Coupling/Motor<br />
1.1. Power P = 75kW (driven)<br />
1.2. Length of load application l = 40mm<br />
1.3. Center point for load application y = 20mm (with respect to shaft’s origin)<br />
2. Centrical load<br />
2.1. Shearing force in x-direction F x = 2kN<br />
2.2. Shearing force in z-direction F z = 200N<br />
2.3. Length of load application l = 30mm<br />
2.4. Center point for load application y = 100mm (with respect to shaft’s origin)<br />
3. Cylindrical gear<br />
3.1. Power P = 75kW (driving)<br />
3.2. Reference diameter d = 120mm<br />
11 / 15
3.3. Helix angle (left-hand) â = 15°<br />
3.4. Pressure angle á = 20°<br />
3.5. Position of cylindrical gear y = 160mm (with respect to shaft’s origin)<br />
3.6. Facewidth b = 70mm<br />
3.7. Position of contact á pos = 180°<br />
Fig. 2.4-8: Adding a force element (centrical load).<br />
Fig. 2.4-9: Load parameters: Coupling (left) and Cylindrical gear (right).<br />
The direction of <strong>the</strong> force due to <strong>the</strong> power transmitted by <strong>the</strong> helical gear is defined by <strong>the</strong> fields<br />
“Position of contact” and “Pressure angle”. The “Position of contact” is defined as depicted in<br />
Fig. 2.4-10.<br />
Fig. 2.4-10: Position of contact á pos .<br />
12 / 15
Note that angle á pos is counted positive counter-clockwise with respect to <strong>the</strong> y-axis.<br />
If <strong>the</strong> overall torque is unbalanced a message comes up telling that <strong>the</strong> sum of torques is not zero.<br />
Since a shaft’s stationary operating point requires <strong>the</strong> accelerating loads to be null you have to<br />
check <strong>the</strong> applied torques. Most probably one or more errors in <strong>the</strong> definition of <strong>the</strong> Direction<br />
parameters occurred. A definition of <strong>the</strong> Direction parameter is given in Table 2.4-1.<br />
Table 2.4-1: Definition of Direction.<br />
The shaft is … driving. driven.<br />
Power flows … out of into … <strong>the</strong> shaft.<br />
Torque turns in … opposite same … direction of<br />
shaft’s rotation.<br />
After adding <strong>the</strong> force elements, <strong>the</strong> model should look as follows:<br />
Fig. 2.4-11: <strong>Shaft</strong> model after adding <strong>the</strong> load elements.<br />
2.4.6 Adding <strong>the</strong> Bearings<br />
The two bearings are added by selecting <strong>the</strong> item “Bearing” in <strong>the</strong> “Elements-tree window”. You<br />
can choose between “Bearing (in general)” and “Roller bearing”. General bearings allow for <strong>the</strong><br />
definition of degrees of freedom where roller bearings incorporate constraints based on <strong>the</strong>ir<br />
mechanical properties (e.g. additional axial forces). The y-position (centre of <strong>the</strong> bearing), <strong>the</strong><br />
type, size (internal diameter) and name of <strong>the</strong> bearing have to be defined in <strong>the</strong> “Elementseditor”<br />
window. Fur<strong>the</strong>rmore, it has to be defined whe<strong>the</strong>r <strong>the</strong> bearing will take axial forces and<br />
from which side.<br />
Choosing <strong>the</strong> option “Roller bearing stiffness calculated from inner geometry” from <strong>the</strong><br />
dropdown-list Roller bearing in tab “Basic data” introduces translational/rotational stiffness to<br />
<strong>the</strong> respective bearing based on parameters of its inner geometry (diameter of rollers, radii of<br />
raceways, …). If no such data is given <strong>the</strong> parameters will be approximated based on <strong>the</strong><br />
bearing’s type and size. See also section 2.6.1.<br />
Line supports have to be modelled using a number of separate supports. See <strong>Tutorial</strong> 007: Roller<br />
bearings on bearing analysis.<br />
13 / 15
The following load elements are to be introduced to <strong>the</strong> overall shaft model:<br />
1. Bearing (SKF *6208)<br />
1.1. Position y = 65mm (with respect to shaft’s origin)<br />
1.2. Type of bearing: Fixed bearing adjusted on <strong>the</strong> left side<br />
1.3. Type: Deep groove ball bearing (single row)<br />
1.4. Inside diameter d = 40mm<br />
2. Bearing (SKF *6207)<br />
2.1. Position y = 216mm (with respect to shaft’s origin)<br />
2.2. Type of bearing: Fixed bearing adjusted on <strong>the</strong> right side<br />
2.3. Type: Deep groove ball bearing (single row)<br />
2.4. Inside diameter d = 35mm<br />
Fig. 2.4-12: Adding a roller bearing (left bearing).<br />
After adding <strong>the</strong> bearings, <strong>the</strong> model should look like as follows:<br />
2.5 Cross Sections<br />
Fig. 2.4-13: <strong>Shaft</strong> model upon adding <strong>the</strong> bearing elements.<br />
<strong>KISSsoft</strong> provides two definitions of sections for strength calculations: <strong>the</strong> “Limited cross<br />
section” and <strong>the</strong> “Free cross section”. While for a “Limited cross section” <strong>the</strong> calculation module<br />
returns <strong>the</strong> actual notch factors for <strong>the</strong> given y-coordinate it is up to <strong>the</strong> user’s demands to alter<br />
<strong>the</strong>se parameters arbitrarily for <strong>the</strong> “Free cross section”. For a detailed description of strength<br />
calculation see <strong>Tutorial</strong> 005: <strong>Shaft</strong> Analysis.<br />
14 / 15
2.6 Notes<br />
2.6.1 Bearing calculation<br />
Choose your desired bearing calculation via <strong>the</strong> drop-down list “Roller bearing” in <strong>the</strong> “Basic<br />
data” input window (see Fig. 2.6-1).<br />
Fig. 2.6-1: Basic data: Roller bearing dropdown-list.<br />
There are three different bearing calculations available:<br />
1. Classical calculation with or w/o consideration of pressure angle<br />
These two options comprise <strong>the</strong> features well-known from <strong>KISSsoft</strong> Rel. 04/06: Bearings<br />
are considered constraints for displacement and rotation with optional offset, adjustment,<br />
stiffness and clearance.<br />
2. Calculation of <strong>the</strong> stiffness based on inner geometry<br />
This method evaluates service life like in <strong>the</strong> classical roller calculation but with respect<br />
to roller geometry, number of rollers, radii of raceways, etc. The bearing’s stiffness and<br />
offset are computed based on nonlinear material laws.<br />
3. Calculation according to DIN/ISO 281 Annex 4<br />
The guideline DIN ISO 281-4:2003 Dynamic load ratings and rating life covers modified<br />
service life calculations with respect to <strong>the</strong> bearing’s inner geometry. Also, stiffness and<br />
offset are computed based on nonlinear material laws.<br />
2.6.2 <strong>Shaft</strong> systems<br />
The calculation module „<strong>Shaft</strong> systems“ allowed modeling and calculation from different shafts<br />
in one calculation model. These kind of modeling is useful e.g. for calculation <strong>the</strong> shaft in<br />
planetary gear.<br />
15 / 15