

Wire Harness Installation Instructions - Painless Performance
Wire Harness Installation Instructions - Painless Performance
Wire Harness Installation Instructions - Painless Performance

Create successful ePaper yourself
Turn your PDF publications into a flip-book with our unique Google optimized e-Paper software.
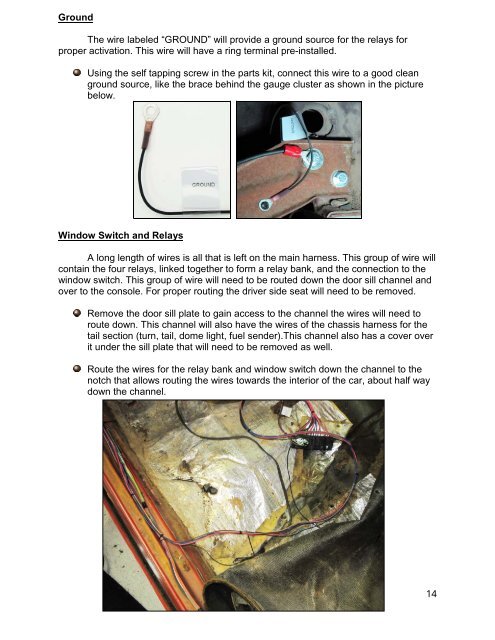
Ground<br />
The wire labeled “GROUND” will provide a ground source for the relays for<br />
proper activation. This wire will have a ring terminal pre-installed.<br />
Using the self tapping screw in the parts kit, connect this wire to a good clean<br />
ground source, like the brace behind the gauge cluster as shown in the picture<br />
below.<br />
Window Switch and Relays<br />
A long length of wires is all that is left on the main harness. This group of wire will<br />
contain the four relays, linked together to form a relay bank, and the connection to the<br />
window switch. This group of wire will need to be routed down the door sill channel and<br />
over to the console. For proper routing the driver side seat will need to be removed.<br />
Remove the door sill plate to gain access to the channel the wires will need to<br />
route down. This channel will also have the wires of the chassis harness for the<br />
tail section (turn, tail, dome light, fuel sender).This channel also has a cover over<br />
it under the sill plate that will need to be removed as well.<br />
Route the wires for the relay bank and window switch down the channel to the<br />
notch that allows routing the wires towards the interior of the car, about half way<br />
down the channel.<br />
14


