

Wire Harness Installation Instructions - Painless Performance
Wire Harness Installation Instructions - Painless Performance
Wire Harness Installation Instructions - Painless Performance

Create successful ePaper yourself
Turn your PDF publications into a flip-book with our unique Google optimized e-Paper software.
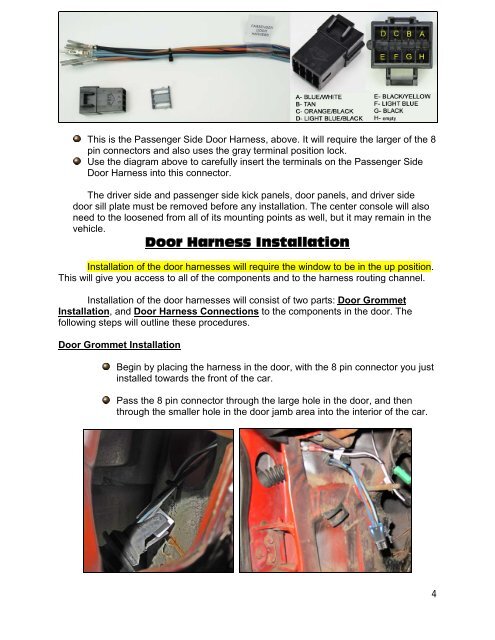
This is the Passenger Side Door <strong>Harness</strong>, above. It will require the larger of the 8<br />
pin connectors and also uses the gray terminal position lock.<br />
Use the diagram above to carefully insert the terminals on the Passenger Side<br />
Door <strong>Harness</strong> into this connector.<br />
The driver side and passenger side kick panels, door panels, and driver side<br />
door sill plate must be removed before any installation. The center console will also<br />
need to the loosened from all of its mounting points as well, but it may remain in the<br />
vehicle.<br />
Door <strong>Harness</strong> <strong>Installation</strong><br />
<strong>Installation</strong> of the door harnesses will require the window to be in the up position.<br />
This will give you access to all of the components and to the harness routing channel.<br />
<strong>Installation</strong> of the door harnesses will consist of two parts: Door Grommet<br />
<strong>Installation</strong>, and Door <strong>Harness</strong> Connections to the components in the door. The<br />
following steps will outline these procedures.<br />
Door Grommet <strong>Installation</strong><br />
Begin by placing the harness in the door, with the 8 pin connector you just<br />
installed towards the front of the car.<br />
Pass the 8 pin connector through the large hole in the door, and then<br />
through the smaller hole in the door jamb area into the interior of the car.<br />
4


