
You also want an ePaper? Increase the reach of your titles
YUMPU automatically turns print PDFs into web optimized ePapers that Google loves.
fx<br />
rfx<br />
am/fm<br />
Cassette Player<br />
<strong>RFX</strong>-<strong>8030</strong><br />
operation & installation
Dear Customer,<br />
Congratulations on your purchase of the world's finest brand of car audio source units.<br />
At Rockford Fosgate we are committed to musical reproduction at its best, and we are<br />
pleased you chose our product. Through years of engineering expertise, hand craftsmanship<br />
and critical testing procedures, we have created a wide range of products that<br />
reproduce music with all the clarity and richness you deserve.<br />
For maximum performance we recommend you have your new Rockford Fosgate<br />
product installed by an Authorized Rockford Fosgate Dealer, as we provide specialized<br />
training through Rockford Technical Training Institute (RTTI). Please read your<br />
warranty and retain your receipt and original carton for possible future use.<br />
To add the finishing touch to your new Rockford Fosgate image order your Rockford<br />
accessories, which include everything from T-shirts and jackets to hats and sunglasses.<br />
To get a free brochure on Rockford Fosgate products and Rockford accessories, in the<br />
U.S. call 602-967-3565 or FAX 602-967-8132. For all other countries, call +001-602-<br />
967-3565 or FAX +001-602-967-8132.<br />
PRACTICE SAFE SOUND<br />
CONTINUOUS EXPOSURE TO SOUND PRESSURE LEVELS OVER<br />
100dB MAY CAUSE PERMANENT HEARING LOSS. HIGH<br />
POWERED AUTOSOUND SYSTEMS MAY PRODUCE SOUND<br />
PRESSURE LEVELS WELL OVER 130dB. USE COMMON SENSE<br />
AND PRACTICE SAFE SOUND.<br />
If, after reading your <strong>manual</strong>, you still have questions regarding this product,<br />
we recommend that you see your Rockford Fosgate dealer. If you need further<br />
assistance, you can call us direct at 1-800-795-2385. Be sure to have your serial<br />
number, model number and date of purchase available when you call.<br />
The serial number can be found on the outside of the box. Please record it in<br />
the space provided below as your permanent record. This will serve as<br />
verification of your factory warranty and may become useful in recovering your<br />
source unit if it is ever stolen.<br />
Serial Number: ________________________________<br />
Model Number: ________________________________
T ABLE OF CONTENTS<br />
Introduction ............................................................................................. 1<br />
Accessory Pack ........................................................................................ 1<br />
Precautions .............................................................................................. 2<br />
Features Matrix ........................................................................................ 4<br />
Technical Design Features ....................................................................... 5<br />
<strong>RFX</strong>-<strong>8030</strong> Design Features ....................................................................... 9<br />
IR Remote Design Features..................................................................... 12<br />
Installation Considerations ..................................................................... 13<br />
Source Unit Mounting Locations ............................................................ 14<br />
Wiring the System .................................................................................. 15<br />
Source Unit Installation .......................................................................... 19<br />
Basic Operation ..................................................................................... 22<br />
Tuner Operation .................................................................................... 30<br />
Cassette Operation ................................................................................. 36<br />
CD Changer Operation .......................................................................... 44<br />
External Audio Operation....................................................................... 50<br />
IR Remote Operation ............................................................................. 51<br />
Rockford Fosgate Accessories................................................................. 58<br />
Troubleshooting ..................................................................................... 60<br />
Specifications ......................................................................................... 67<br />
Warranty Information ............................................................................. 69<br />
International Information........................................................................ 70<br />
G ETTING STARTED<br />
Welcome to Rockford Fosgate! This <strong>manual</strong> is designed to provide<br />
information for the owner, salesperson and installer. For those of you<br />
who want quick information on how to install this product, please turn<br />
to the Installation Section of this <strong>manual</strong> or refer to the icons listed<br />
below. Other information can be located by using the Table of Contents.<br />
We, at Rockford Fosgate, have worked very hard to make sure all the<br />
information in this <strong>manual</strong> is current. But, as we are constantly finding<br />
new ways to improve our product, this information is subject to change<br />
without notice.<br />
I<br />
N<br />
S<br />
T<br />
A<br />
L<br />
L<br />
A<br />
T<br />
I<br />
O<br />
N<br />
® ®<br />
TROUBLE-S<br />
H<br />
O<br />
O<br />
T<br />
I<br />
N<br />
G<br />
Sections marked<br />
INSTALLATION<br />
include “slam dunk”<br />
wiring connections<br />
Sections marked<br />
TROUBLESHOOTING<br />
include recommendations for curing<br />
installation problems
INTRODUCTION<br />
Rockford Fosgate optimized usable features in the <strong>RFX</strong> source units for<br />
use in high performance car audio systems. The “world's best tuner,” a<br />
high performance Cassette Player, and controls pioneered by Rockford<br />
Fosgate offer unmatched performance in the aftermarket world.<br />
We strongly recommend you have your authorized Rockford Fosgate<br />
Dealer install your new Rockford Fosgate source unit. If you choose to<br />
install your source unit yourself, please be sure to read the entire <strong>manual</strong><br />
before beginning.<br />
ACCESSORY PACK<br />
<strong>RFX</strong>-<strong>8030</strong><br />
Installation & Operation Manual<br />
(1) Mounting Sleeve<br />
(1) Backstrap<br />
(1) Left Chassis Release Key<br />
(1) Right Chassis Release Key<br />
(5) Mounting Screws<br />
(m5 x 0.88mm x 4mm)<br />
(1) Faceplate Case<br />
(1) Power Harness (22-pin)<br />
(1) 5-Channel RCA Harness (10-pin)<br />
– 1 –
VOL<br />
VOL<br />
AUD<br />
PWR<br />
PWR<br />
AUD<br />
PWR<br />
VOL<br />
® ®<br />
AUD<br />
PWR<br />
® ®<br />
<strong>RFX</strong>-<strong>8030</strong><br />
® ®<br />
<strong>RFX</strong>-<strong>8030</strong><br />
CLOCK<br />
DSPL<br />
D.SCN SCAN<br />
1<br />
<strong>RFX</strong>-<strong>8030</strong><br />
1<br />
2<br />
2<br />
AUTO<br />
P.SCN<br />
RPT<br />
ILLUM<br />
LOUD<br />
RDM DIM<br />
3 4 5<br />
CLOCK<br />
DSPL<br />
D.SCN SCAN<br />
1 2<br />
RPT<br />
CLOCK<br />
DSPL<br />
D.SCN SCAN<br />
1<br />
2<br />
RDM<br />
4<br />
AUTO<br />
P.SCN<br />
RPT<br />
COMPACT<br />
MON<br />
DIGITAL AUDIO<br />
PAUSE<br />
6<br />
AUTO ILLUM<br />
P.SCN LOUD<br />
RPT RDM DIM<br />
3 4 5<br />
COMPACT<br />
DIGITAL AUDIO<br />
6<br />
ILLUM<br />
LOUD<br />
RDM DIM<br />
3 4 5<br />
COMPACT<br />
DIGITAL AUDIO<br />
COMPACT<br />
SKIP<br />
SEL<br />
MON<br />
PAUSE<br />
6<br />
MON<br />
DIGITAL AUDIO<br />
PAUSE<br />
6<br />
TUNE<br />
SKIP<br />
SEL<br />
SKIP<br />
SEL<br />
TUNE<br />
TUNE<br />
PRECAUTIONS<br />
SOURCE UNIT & OPTIONAL<br />
CD CHANGER<br />
+70°C<br />
–10°C<br />
Operating Temperature<br />
Be sure the temperature inside the vehicle is<br />
between –10° C and +70° C (+14° F and +158°F).<br />
DO NOT play a cassette if the temperature is<br />
higher or lower than the operating range.<br />
Moisture Condensation<br />
The tape playback may waver due to condensation.<br />
If this occurs, remove the tape from the<br />
source unit and wait for approximately an hour<br />
for the moisture to evaporate.<br />
Environment Exposure<br />
DO NOT expose the Source Unit or optional CD<br />
Changer to any of the following: direct sun and<br />
heat, high humidity, excessive dust, excessive<br />
vibration and rain or water.<br />
AUD CLOCK AUTO I LUM<br />
SEL<br />
D.SCN SCAN DIM PAUSE<br />
<strong>RFX</strong>-<strong>8030</strong><br />
DSPL P.SCN LOUD<br />
VOL TUNE<br />
® ®<br />
3 5<br />
MON SKIP<br />
✯<br />
✯<br />
✯<br />
Handling the Detachable Faceplate<br />
DO NOT drop or cause shock to the faceplate as<br />
serious damage may occur. Protect the faceplate<br />
by storing it in the supplied carrying case.<br />
Avoid Mechanical Malfunction<br />
DO NOT grab a cassette while it is being automatically<br />
loaded into the source unit. Doing this<br />
may cause serious damage to the source unit.<br />
– 2 –
®<br />
1-6<br />
®<br />
CASSETTES<br />
Cleaning Cassette<br />
Cleaning<br />
Fluid<br />
Cassette Player Care<br />
DO NOT lubricate the player mechanism. AVOID<br />
TOUCHING the tape head with hard or magnetic<br />
objects. AVOID USING thin and long C-120 cassettes.<br />
Use C-30 to C-90 minute cassettes. DO<br />
NOT use cassettes that are deformed, dirty or<br />
contaminated. VERIFY the cassette is in good<br />
condition. Over time, cassettes may wear and<br />
degrade in sound quality.<br />
Cassette Player Maintenance<br />
CLEAN the tape player after every 35 hours of use<br />
with a non-abrasive, “wet-type” cleaning cassette.<br />
A dirty tape head may result in reduced sound<br />
quality, “eating” the cassette, or damaging the<br />
mechanism. CLEAN the tape head if a reduction in<br />
sound quality is observed.<br />
Cassette Care<br />
DO NOT expose cassettes to direct sun and heat,<br />
high humidity, or rain and water. STORE cassettes<br />
in their plastic cases to avoid dirt and other contaminants.<br />
IR REMOTE (OPTIONAL)<br />
+<br />
–<br />
Environment Exposure<br />
DO NOT expose the IR Remote to any of the<br />
following: direct sun and heat, high humidity and<br />
rain or water.<br />
✯<br />
✯<br />
+<br />
–<br />
1-6<br />
✯<br />
Handling the IR Remote<br />
DO NOT drop or cause shock to the IR Remote as<br />
serious damage may occur.<br />
– 3 –
®<br />
FEATURE<br />
<strong>RFX</strong>-<strong>8030</strong><br />
General<br />
Detachable Faceplate<br />
X<br />
Any Button Wake-Up<br />
X<br />
SMART-On<br />
X<br />
Green/Amber Illumination<br />
X<br />
Illumination Dimmer<br />
X<br />
Clock<br />
X<br />
Display Recall<br />
X<br />
Default Display<br />
X<br />
Tuner<br />
AM/FM Stereo (6AM/18FM Presets X<br />
Preset Scan<br />
X<br />
Auto Store<br />
X<br />
AM/FM Tune/Seek<br />
X<br />
Mute*<br />
X<br />
World Wide Tuner<br />
X<br />
Power Antenna<br />
X<br />
Cassette Player<br />
Auto Reverse<br />
X<br />
Dolby-B NR<br />
X<br />
Auto Metal EQ<br />
X<br />
Music Search<br />
X<br />
Radio Monitor<br />
X<br />
Pause<br />
X<br />
Repeat<br />
X<br />
Music Search<br />
X<br />
Clean Indicator<br />
X<br />
Tape Counter<br />
X<br />
CD Changer Controller<br />
Next/Previous Track<br />
X<br />
Fast Forward/Reverse<br />
X<br />
Repeat<br />
X<br />
Random Track<br />
X<br />
Pause<br />
X<br />
Track Scan<br />
X<br />
Disc Scan<br />
X<br />
Audio<br />
Source Tone Memory<br />
X<br />
Switchable Loudness<br />
X<br />
Cell Phone Mute<br />
X<br />
Internal Amp<br />
X<br />
Preamp Output<br />
5-Ch RCA<br />
Adjustable Sub Level<br />
X<br />
Preamp Output Voltage<br />
2.4 Vrms<br />
External Audio Input 1<br />
IR Remote Compatible<br />
X<br />
Tuner Mode<br />
X<br />
Cassette Player Mode<br />
X<br />
CD Changer Mode<br />
X<br />
Volume Up/Dn<br />
X<br />
Track Seek Up/Dn<br />
X<br />
Tuner Preset Select<br />
X<br />
Any Button Wake-Up<br />
X<br />
Pulse<br />
X<br />
* Accessible through IR Remote<br />
– 4 –
TECHNICAL DESIGN FEATURES<br />
TUNER<br />
◆ Patented Tuner<br />
The Source Units utilize a refined high performance tuner for providing<br />
unmatched tuning range. The tuner uses a patented Digital<br />
Automatic Alignment (a mini pre-programmed computer) to precisely<br />
target and “tune in” FM radio stations. The aftermarket standard<br />
is done by mechanical alignment which relies on not-so-precise<br />
tunable inductors to “get within the ballpark” of a radio station. The<br />
tuner is also refined with Dual FM Conversion and Dual AM Up-<br />
Convert schemes to create a tuner that is capable of receiving radio<br />
signals better.<br />
THE RESULT: Absolutely the “world's best tuner”<br />
◆ MIR Circuit<br />
The MIR (Multipath Interference Rejection) Circuit improves audio<br />
performance under difficult reception conditions. The tuner slowly<br />
tapers from stereo to monaural when excessive static is produced due<br />
to poor radio reception in fringe areas. This feature is virtually<br />
undetectable by the listener due to its smooth transition from monaural<br />
back to stereo. The MIR circuit improves audio quality by reducing<br />
multipath effects in both weak and strong signal conditions.<br />
THE RESULT: Improves audio performance when radio reception is poor<br />
PREAMP/AMPLIFIER<br />
◆ High Output Voltage/<br />
Low Source Impedance<br />
A high preamp output voltage allows a cleaner signal to be driven to<br />
the amplifier. A low source impedance (50Ω) enables the preamp to<br />
drive multiple amplifiers without signal loss. It is not enough to have<br />
only a high voltage output; to take full advantage of the extra voltage,<br />
a low source impedance is essential. These two features are an<br />
important combination for a preamp that truly delivers a Punch!<br />
THE RESULT: Resists noise and enables multiple amplifiers to be<br />
driven without signal loss<br />
– 5 –
CASSETTE PLAYER<br />
◆ Full Logic Cassette Mechanism<br />
The Full Logic Cassette Mechanism provides smooth and reliable<br />
operation for cassette play-back. The mechanism uses logic circuits,<br />
rather than mechanical methods, to control loading, ejecting, fast<br />
forward and fast reverse. Logic circuits provide the cassette mechanism<br />
with long term reliability and increased features.<br />
THE RESULT: Provides smooth and reliable cassette operation<br />
◆ Pinch Roller Release<br />
The Pinch Roller Release helps maintain the quality of cassette tapes.<br />
The tape head and pinch roller are retracted when a loaded cassette<br />
is not currently playing or the ignition is turned off. By relieving<br />
tension on the tape, “flat spots” and other forms of degradation are<br />
minimized to maintain tape quality.<br />
THE RESULT: Maintains sound quality of cassettes by reducing tape<br />
wear<br />
◆ Auto Tape Tightening<br />
Auto Tape Tightening helps reduce play-back failure caused by<br />
cassettes exposed to vibration or shock. The cassette is checked for<br />
loosely wound tape by automatically tightening it before play-back.<br />
The tape tightening feature helps prevent the cassette mechansim<br />
from “eating” the tape.<br />
THE RESULT: Reduces “eaten” tapes<br />
◆ Auto Metal EQ<br />
No, this doesn't instantly optimize your source unit to play heavy<br />
metal music. The Auto Metal EQ senses metal and CrO2 tapes to<br />
automatically engage an equalization circuit. This allows the source<br />
unit to take advantage of the improved frequency response gained by<br />
using metal-biased cassettes.<br />
THE RESULT: Engages EQ circuity for metal-biased tapes<br />
– 6 –
CONTROLS/SECURITY<br />
◆ Detachable Faceplate<br />
No need to haul around a five pound source unit wherever you go.<br />
A Detachable Faceplate is a lot easier to remove and carry around<br />
with you. Just press the faceplate release button, drop the faceplate<br />
in its carrying case, and put it in your shirt pocket. Now, you're ready<br />
to roll. The Detachable Faceplate is a great deterrent to theft and helps<br />
to ensure your source unit is safe …just make sure to remove it.<br />
THE RESULT: Deters source unit theft<br />
◆ SMART On (Outputs A & B)<br />
The SMART On (Sequentially Managed Accessory Remote Turn-On)<br />
outputs supply sequential on/off auto power for external components.<br />
After the radio is powered on, output “A” will immediately<br />
supply turn-on voltage to its output. A half second later, output “B”<br />
supplies turn-on voltage to its output. After the radio is powered<br />
down, output “B” will immediately turn off, then a half second later,<br />
output “A” will turn off. The SMART On circuitry eliminates turn on/<br />
off transients for components with various power on/off cycles.<br />
THE RESULT: Protects speakers and electronics from damaging<br />
transients<br />
◆ Any Button Wake Up<br />
The Any Button Wake Up feature allows the receiver to power-up by<br />
pressing any button on the faceplate or IR remote. If the receiver is<br />
<strong>manual</strong>ly powered down while ignition power is on, the receiver will<br />
“wake up” when any button on the faceplate is depressed. This allows<br />
the user to easily turn on the source unit while simultaneously<br />
demonstrating his/her street racing skills.<br />
THE RESULT: Power-up the receiver without fumbling for the PWR<br />
button<br />
– 7 –
◆ Source Tone Memory<br />
The Source Tone Memory function memorizes the bass and treble<br />
setting between AM, FM, Cassette, CD Changer and External Audio<br />
modes. This enables the user to customize or compensate for the<br />
difference in sound between multiple source modes.<br />
THE RESULT: Separate Bass and Treble memory for different modes<br />
◆ Cell Phone Mute<br />
The Cell Phone Mute feature automatically mutes the audio system<br />
when the in-car cellular phone rings. A sensor wire on the source unit<br />
detects a signal from the cell phone ringer and triggers audio mute<br />
function. No more missed calls from the office or “significant other”<br />
when cranking up your audio system to escape the pressures of life.<br />
THE RESULT: Never miss a phone call while listening to your system<br />
◆ IR Remote Compatible<br />
(Remote available separately)<br />
The source unit can be controlled through the use of an IR Remote<br />
Control. The infrared receiver eye, located inside the anti-theft<br />
faceplate, accepts infrared encoded data from the remote control.<br />
This feature allows various functions of the Tuner, Cassette Player and<br />
CD Changer to be conveniently operated which will not only impress<br />
your friends but also your favorite car audio judge.<br />
THE RESULT: Ability to operate functions via remote control<br />
◆<br />
Pulse<br />
The Pulse provides a momentary +12V to “Output C” of the<br />
®<br />
source unit. The Pulse is accessible through the “Diamond R”<br />
®<br />
button on the IR Remote Control. This function enables the user to<br />
switch on or off additional components connected to the system.<br />
THE RESULT: Ability to trigger amp racks, neon lights, etc. via remote<br />
control<br />
– 8 –
® ®<br />
COMPACT<br />
DIGITAL AUDIO<br />
<strong>RFX</strong>-<strong>8030</strong> DESIGN FEATURES<br />
24 13<br />
18<br />
19<br />
12<br />
26<br />
27<br />
28<br />
MON<br />
SKIP<br />
VOL<br />
AUD<br />
PWR<br />
D.SCN<br />
CLOCK<br />
DSPL<br />
SCAN<br />
AUTO<br />
P.SCN<br />
RPT<br />
RDM<br />
ILLUM<br />
LOUD<br />
DIM<br />
PAUSE<br />
SEL<br />
TUNE<br />
<strong>RFX</strong>-<strong>8030</strong><br />
1<br />
2<br />
3 4 5<br />
6<br />
5 3 1<br />
25 14 20 21 22 9 23 15 6 2<br />
4<br />
7 16 10<br />
8<br />
1. LC Display – The positive image LCD (Liquid Crystal Display)<br />
contains visual indicators for the operation of Tuner, Tape Player,<br />
External Audio, CD Changer and IR Remote.<br />
2. Release Button – Pressing the Release button will detach the<br />
faceplate from the main housing for theft prevention.<br />
3. PWR Button – The PWR (power) turns power on and off for the<br />
source unit.<br />
4. AUD Button – The AUD (audio adjustment) button cycles through<br />
Bass, Treble, Fade, Balance, Sub, and Volume controls.<br />
5. VOL +/– Rocker – The VOL +/– (volume up/down) rocker adjusts<br />
the audio level of the Bass, Treble, Fade, Balance, Sub and Volume<br />
controls.<br />
6. TUNE ^v Rocker – The TUNE ^v (tune up/down) rocker selects<br />
radio stations when in tuner mode and selects Tape/CD tracks when<br />
in Cassette/CD changer mode.<br />
7. CLOCK Button – The CLOCK button controls the functions of the 12<br />
hour time-of-day clock.<br />
8. DSPL Button – The DSPL (display) button allows the LCD to toggle<br />
between functions of the Clock, Tuner, Tape Player or CD Changer.<br />
9. DIM Button – Pressing the DIM (dimmer) button (in conjunction<br />
with another function explained in Operations section) will adjust<br />
the intensity of the backlighting display.<br />
10. ILLUM Button – The ILLUM (illumination) button allows the display<br />
to toggle between amber and green.<br />
– 9 –<br />
17<br />
11
11. LOUD Button – The LOUD (loudness) button enables the bass<br />
response to be boosted at low listening levels.<br />
12. IR Eye – The IR (infrared receiver) Eye accepts infrared encoded<br />
data from the IR Remote Control. (IR Remote Control is available<br />
separately.)<br />
13. Sine Wave Button – The SINE WAVE (tuner) button switches the<br />
source unit to Tuner (AM/FM) Mode.<br />
14. 1-2-3-4-5-6 Buttons – The 1-2-3-4-5-6 (channel preset) buttons<br />
select radio frequencies stored in presets #1 through #6 of the tuner.<br />
15. SEL Button – The SEL (select) button toggles between Tuner Mode<br />
and External Audio.<br />
16. AUTO Button – The AUTO (auto store) button allows a new group<br />
of tuner stations to be temporarily programmed in memory for<br />
traveling purposes.<br />
17. P.SCN Button – The P.SCN (preset scan) button will scan and play<br />
each preset tuner frequency for approximately 5 seconds each.<br />
18. Cassette Button – The CASSETTE button switches the receiver to<br />
tape mode if a cassette has been previously loaded into the housing.<br />
19. Eject Button – Pressing the EJECT button will eject the cassette and<br />
re-initialize Tuner Mode.<br />
20. SCAN Button – Pressing the SCAN button will cycle and play each<br />
track of the current playing CD in the CD Changer for 10 seconds.<br />
21. RPT Button – Pressing the RPT (repeat play) button when in<br />
Cassette/CD Changer mode will replay the current track.<br />
22. RDM Button – Pressing the RDM (random play) button will<br />
randomly select and play tracks from all discs in the CD Changer.<br />
23. Pause Button – Pressing the Pause button will pause the current<br />
playing tape/CD track and reduce the volume to minimum.<br />
24. CDX Button – The CDX (stack of discs) button selects operation of<br />
an optional CD Changer.<br />
25. D.SCN Button – Pressing the D.SCN button (disc scan) will play the<br />
first track of each CD in the CD Changer for 10 seconds, after which<br />
the first CD will begin playing.<br />
– 10 –
26. MON Button – Pressing the MON button (radio monitor) will<br />
temporarily enable Tuner Mode during cassette fast forward/fast<br />
reverse.<br />
27. SKIP Button – Pressing the SKIP button will enable the tape player<br />
to skip to the next selection if no music is detected within 15<br />
seconds.<br />
28. – Pressing the Button will reduce background<br />
noise from tapes encoded with Dolby Noise Reduction.<br />
Dolby® Noise Reduction is manufactured under a license from<br />
Dolby Laboratories Licensing corporation. Dolby and the double-D<br />
symbol are trademarks of Dolby Laboratories Licensing Corporation.<br />
10 8 6 4 2<br />
9 7 5 3 1<br />
22 21 20 19 18 17 16 15 14 13 12<br />
11 10 9 8 7 6 5 4 3 2 1<br />
29 30 31<br />
32<br />
29. 10-Pin Connector – The 10-Pin Connector (pre-amp harness) is<br />
used for low level RCA pigtail connections.<br />
30. Antenna Connector – The Antenna Connector is a pigtail socket<br />
used for connection of a standard male JASCO coaxial connector<br />
for RF (radio frequency) input.<br />
31. 13-Pin Din Connector – The 13-Pin Din Connector (CDX cable)<br />
provides an easy connection for an optional CD Changer.<br />
32. 22-Pin Connector – The 22-Pin Connector (power/speaker harness)<br />
is used for battery, power, speaker and accessory wire<br />
connections.<br />
– 11 –
®<br />
IR REMOTE DESIGN FEATURES<br />
1<br />
6<br />
4<br />
7<br />
+<br />
2<br />
VOL TUNE 3<br />
–<br />
1-6<br />
9<br />
10<br />
5 8<br />
1. IR Remote Control – The IR Remote Control transmits infrared<br />
encoded data to the receiver eye. The IR Remote has a range of 15<br />
feet and is capable of transmitting through tinted auto glass.<br />
2. Volume +/– Rocker – The VOLUME +/– (volume up/down) rocker<br />
adjusts the audio level.<br />
3. Tune ^v Rocker – The TUNE ^v (tune up/down) rocker selects radio<br />
frequency bands when in tuner mode and selects tape tracks when<br />
in Cassette Player mode.<br />
4. Sine Wave Button – The SINE WAVE (tuner) button switches the<br />
source unit to Tuner (AM/FM) Mode.<br />
5. 1-6 Button – The 1-6 (channel preset) button selects radio frequencies<br />
stored in presets #1 through #6 of the tuner.<br />
6. CDX Button – The CDX (stack of discs) button selects the operation<br />
of an optional Rockford Fosgate CD Changer.<br />
7. Cassette/CD Player Button – The Cassette button switches the<br />
source unit to Cassette Player mode if a cassette has been previously<br />
loaded into the housing.<br />
8. II Button – Pressing the II (pause) button will pause the current<br />
playing track in Cassette mode or mute the radio when in tuner mode.<br />
9. “Diamond R” Button – Pressing the “DIAMOND R” button provides<br />
a momentary +12V to “Output C” of the source unit.<br />
10. Battery Housing – The Battery Housing holds batteries for the<br />
remote control power source.<br />
– 12 –
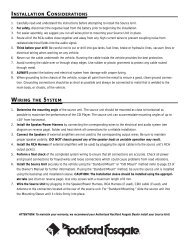
I NSTALLATION CONSIDERATIONS<br />
The following is a list of tools you will need for installing your Source<br />
Unit:<br />
Volt/Ohm Meter<br />
#2 Phillips screwdriver<br />
Wire strippers<br />
Battery post wrench<br />
Wire crimpers<br />
Soldering iron<br />
Wire cutters<br />
Solder<br />
1/8" diameter heatshrink tubing Heat gun<br />
This section focuses on some of the vehicle considerations for<br />
installing your new Source Unit. Pre-planning your system layout and<br />
best wiring routes will save installation time. When deciding on the<br />
layout of your new system, be sure that each component will be easily<br />
accessible for making adjustments.<br />
Before beginning any installation, be sure to follow these simple rules:<br />
1. Be sure to carefully read and understand the instructions before<br />
attempting to install the Source Unit.<br />
2. For safety, disconnect the negative lead from the battery prior to<br />
beginning the installation.<br />
3. For easier assembly, we suggest you run all wires prior to<br />
mounting your Source Unit in place.<br />
4. Route all of the RCA cables close together and away from any<br />
high current wires.<br />
5. Use high quality connectors for a reliable installation and to<br />
minimize signal or power loss.<br />
6. Think before you drill! Be careful not to cut or drill into gas tanks,<br />
fuel lines, brake or hydraulic lines, vacuum lines or electrical<br />
wiring when working on any vehicle.<br />
7. Never run wires underneath the vehicle. Running the wires<br />
inside the vehicle provides the best protection.<br />
8. Avoid running wires over or through sharp edges. Use rubber or<br />
plastic grommets to protect any wires routed through metal,<br />
especially the firewall.<br />
9. ALWAYS protect the battery and electrical system from damage<br />
with proper fusing. Install the appropriate fuseholder and fuse on<br />
the +12V power wire within 18” (45.7 cm) of the battery terminal.<br />
10. When grounding to the chassis of the vehicle, scrape all paint<br />
from the metal to ensure a good, clean ground connection.<br />
Grounding connections should be as short as possible and always<br />
be connected to metal that is welded to the main body, or chassis,<br />
of the vehicle.<br />
– 13 –
SOURCE UNIT MOUNTING LOCATIONS<br />
The source unit can be installed in a wide range of operating<br />
locations. However, care should be taken to ensure optimum performance.<br />
Engine Compartment<br />
Mounting the source unit in the engine compartment will void your<br />
warranty. The only thing that should be mounted in the engine<br />
compartment is that big metal thing that makes the vehicle go fast.<br />
Instrument Panel<br />
Mounting the source unit in the instrument panel provides optimum<br />
access. The source unit should be securely mounted using the<br />
“Standard Mount” or “ISO Mount” method to ensure optimum Player<br />
performance.<br />
Center Console<br />
Mounting the source unit in the center console provides optimum<br />
access. Be sure the installation does not interfere with the operation<br />
of the gear shift or parking brake.<br />
Glove Box<br />
Mounting the source unit in the glove box is adequate, but does not<br />
provide easy access. Glove box mounting should only be done if<br />
“Instrument Panel” or ”Center Console” mounting is not acceptable<br />
(i.e., maintaining integrity of older vehicles with metal dashboards).<br />
Under Dash<br />
Mounting the source unit under the dash is adequate, but does not<br />
provide easy access. Under dash mounting should only be done if<br />
“Instrument Panel,” ”Center Console” or ”Glove Box” mounting is<br />
not acceptable. Mount the source unit off to the side of the driver's<br />
area to reduce interference with the parking brake, gear shift or<br />
operating pedals.<br />
– 14 –
W IRING THE SYSTEM<br />
NOTICE: If you do not feel comfortable with wiring your new<br />
source unit, please see your local Authorized Rockford Fosgate<br />
Dealer for assistance.<br />
• For safety, disconnect the negative lead from the battery prior to<br />
beginning the installation.<br />
1. Install the 22-Pin/Power Harness by connecting the corresponding<br />
wires to the electrical and audio system. Solder and heat<br />
shrink all connections for a reliable installation. For each connection,<br />
cut a 1" piece of heat shrink tubing and slide over one of the<br />
wires. Strip each wire 3/8" then twist together and solder. Slide<br />
the tubing over the connection and shrink the tubing with a hot<br />
air gun until no bare wire is exposed.<br />
The BLACK Wire (Chassis Ground) supplies –power ground for<br />
the source unit. Prepare the chassis ground by scraping any paint<br />
from the metal surface and thoroughly clean the area of all dirt<br />
and grease. Strip the end of the wire and attach a ring connector.<br />
Fasten the wire to the chassis using a non-anodized screw and<br />
star washer.<br />
The RED Wire (Ignition) allows the source unit to turn on only<br />
when the ignition key is in the “accessory” or “run” position.<br />
Connect the RED wire to a switched 12 volt positive source. The<br />
switched signal is usually taken from the ACC (accessory) position<br />
of the ignition. If the vehicle does not have an ACC position,<br />
connect the wire to the switched ON position of the ignition. The<br />
current consumption through this wire is negligible.<br />
The YELLOW Wire (Battery) is the main power wire and retains<br />
memory for user-programmed functions. Connect the Yellow<br />
wire to a constant 12 volt positive source. The source should<br />
always have +12V, even when the ignition is off and the car is not<br />
running.<br />
The LT. BLUE Wire (Turn-On “A”) is the primary accessory turnon<br />
wire which provides immediate turn-on and .5 sec delayed<br />
turn-off. Connect the Lt. Blue wire to the “Remote Turn-On”<br />
leads of any external equalizers or crossovers which cause on/<br />
off transients (pops or thumps) in the system. The maximum<br />
current available from this lead is 2 Amps.<br />
– 15 –
The BLUE/WHITE (Turn-On “B”) is the secondary accessory<br />
turn-on wire which provides a .5 sec delayed turn-on and<br />
immediate turn-off. Connect the Blue/White wire to the “Remote<br />
Turn-On” leads of the amplifiers. The maximum current<br />
available from this lead is 300mA.<br />
The BLUE/RED Wire (Turn-On “C”) is the pulsed 500ms<br />
output accessible through the “Diamond R” button on the IR<br />
Remote. Connect the Blue/Red wire to a latching relay or<br />
circuit which will be used to turn on and off accessories such<br />
as neon lights, amp racks, etc. The maximum current available<br />
from this lead is 300mA.<br />
The BROWN Wire (Audio Mute) mutes the audio for cellular<br />
phone use. Most cellular phones provide an output which is<br />
used to beep-beep the vehicle's horn or mute the audio system.<br />
Connect the Brown wire to the cellular phone's “–” output. If<br />
the cellular phone is a “+” trigger output, use a relay to “chassis<br />
ground” the Brown wire.<br />
The GREEN/WHITE Wire (External Audio Control) triggers<br />
the selection of the External Audio Input . Connect the Green/<br />
White wire to a relay or switch that will provide a constant<br />
“chassis ground” when selected. The External Audio Input will<br />
continue to override all other functions (Tuner, Cassette, CD<br />
Changer) for the duration that the Green/White wire is connected<br />
to “chassis ground.”<br />
NOTE: Since the External Audio Input and the CD Changer use<br />
the same 13-pin DIN connector, only one component can be<br />
supported at a time.<br />
The ORANGE Wire (Dimmer) is used for the source unit's<br />
illumination dimmer. Connect the Orange wire to the “parking<br />
light” or a switched 12 volt positive source. The current<br />
consumption through this wire is negligible. Refer to the “Basic<br />
Operation” section of this <strong>manual</strong> for further information.<br />
– 16 –
The ORANGE/WHITE Wire (External Dimmer) allows the<br />
source unit to control the illumination level of compatible<br />
Rockford Fosgate components. Connect the Orange/White<br />
wire to the dimmer input (typically orange wire) of the additional<br />
Rockford Fosgate component.<br />
CAUTION! The Orange/White wire uses Pulse Width Modulation<br />
(not rheostat design) to control the level of illumination<br />
for RF components only.<br />
The BLUE Wire (Power Antenna) is used to control only fully<br />
automatic antennas. Since the antenna is specially controlled<br />
throughout the different operating conditions of the source unit,<br />
it is recommended to use the Blue wire from the source unit<br />
instead of the factory power antenna control wire. If this is<br />
desired, disconnect the “+” control lead from the power antenna<br />
and heatshrink it to prevent it from shorting out. Then<br />
connect the Blue wire to the “+” control lead of the power<br />
antenna.<br />
2. Connect the Speaker Wires (if external amplifiers are not used)<br />
to the corresponding speaker leads by soldering and heat<br />
shrinking all connections for a reliable installation. If only one<br />
pair of speakers is utilized in the system, use only the FRONT<br />
speaker leads and heat shrink the unused REAR leads to prevent<br />
from shorting out. Be sure to maintain speaker polarity. DO<br />
NOT chassis ground any speaker leads as unstable operation<br />
may result.<br />
3. Take a break! You deserve a nice cold one after wiring that 22-<br />
pin harness.<br />
4. Install the Preamp Harness (if external amplifiers will be used)<br />
by plugging the RCA cable(s) into the corresponding output<br />
jacks from the source unit. Be sure to route the signal level<br />
cables away from any high current wires to prevent coupling<br />
noise from radiated electrical fields into the audio signal.<br />
The GREEN marked RCAs connect to the Front speaker's<br />
amplifier.<br />
The GRAY marked RCAs connect to the Rear speaker's amplifier.<br />
The RED marked RCAs connect to the Subwoofer amplifier.<br />
– 17 –
5. Connect the Antenna by plugging the antenna cable into the<br />
connector located at the rear of the source unit. Be sure the<br />
antenna is securely grounded to the vehicle for proper radio<br />
reception.<br />
6. Connect the 13-pin DIN<br />
Optional CD Changer. Connect the CD Changer's CDX cable to<br />
the 13-pin DIN located at the rear of the source unit. Be sure to<br />
route the CD cable away from any high current wires to prevent<br />
coupling noise from radiated electrical fields into the audio<br />
signal.<br />
External Audio Input. Connect the component used for the<br />
external audio source to the corresponding terminals of the 13-<br />
pin DIN located at the rear of the source unit (refer to the<br />
Installation Reference Sheet for the pin-out of the 13-pin DIN). Be<br />
sure to route the signal cables away from any high current wires<br />
to prevent coupling noise from radiated electrical fields into the<br />
audio signal.<br />
– 18 –
® ®<br />
SOURCE UNIT INSTALLATION<br />
I<br />
N<br />
S<br />
T<br />
A<br />
L<br />
L<br />
A<br />
T<br />
I<br />
O<br />
N<br />
Source Unit Mounting Angle<br />
20°<br />
• Mount the Installation Sleeve as close to horizontal as possible for<br />
optimum performance<br />
• Mounting Angles up to ±20° from horizontal can be accommodated<br />
Mounting the Installation Sleeve<br />
20°<br />
Instrument Panel Thickness<br />
Tabs to Bend<br />
A B C D E F G<br />
1.2mm to 2.5mm x x x<br />
2.4mm to 3.5mm x x x<br />
3.6mm to 4.5mm x x<br />
4.6mm to 5.5mm x x x<br />
5.6mm to 7.0mm x x<br />
7.0mm to 12mm x x x<br />
12.0mm to 15mm x x<br />
Left<br />
Side View<br />
Top View<br />
Right<br />
Side View<br />
G C C B F A D E E D A F B C G C<br />
• Mount the Installation Sleeve into a secure instrument panel<br />
• Bend Tabs on the installation sleeve which correspond to the chart above<br />
• Bend Appropriate Tabs on all sides of the mounting sleeve (Top, Bottom,<br />
Left & Right)<br />
– 19 –
® ®<br />
Installing the Source Unit – Standard Mount<br />
I<br />
N<br />
S<br />
T<br />
A<br />
L<br />
L<br />
A<br />
T<br />
I<br />
O<br />
N<br />
Backstrap<br />
Trim Piece<br />
Installation Sleeve<br />
4mm Max<br />
Antenna<br />
Antenna Input<br />
CAUTION: Installation sleeve should be installed using the appropriate tabs<br />
(refer to page 17)<br />
• Install Source Unit by sliding unit into installation sleeve until it clicks into<br />
place<br />
• Mount Backstrap securely behind the instrument panel to prevent source<br />
unit vibration<br />
• Backstrap Screw should be 4mm max (use supplied screw)<br />
• Connect Antenna to antenna jack on rear of source unit<br />
• Antenna Ground should read less than 0.05Ω between antenna and<br />
chassis ground<br />
Installing the Source Unit – ISO Mount<br />
Factory Bracket<br />
Trim Piece<br />
Antenna<br />
Antenna Input<br />
4mm Max<br />
• Remove Trim Piece and Installation Sleeve from source unit<br />
• Factory Bracket should align with two mounting holes on each side of<br />
source unit<br />
• ISO Screws should be 4mm max (use supplied screw)<br />
• Connect Antenna to antenna jack on rear of source unit<br />
• Antenna Ground should read less than 0.05Ω between antenna and<br />
chassis ground<br />
• Install Source Unit into instrument panel<br />
• Replace Trim Piece on source unit if needed<br />
– 20 –
® ®<br />
COMPACT<br />
DIGITAL AUDIO<br />
® ®<br />
Un-installing the Source Unit – Standard Mount<br />
I<br />
N<br />
S<br />
T<br />
A<br />
L<br />
L<br />
A<br />
T<br />
I<br />
O<br />
N<br />
MON SKIP<br />
AUD SEL<br />
PWR<br />
® ®<br />
<strong>RFX</strong>-<strong>8030</strong><br />
DSPL P.SCN LOUD<br />
VOL TUNE<br />
1<br />
CLOCK AUTO<br />
SCAN RPT RDM<br />
PAUSE<br />
2<br />
ILLUM<br />
D.SCN DIM<br />
3 4 5<br />
6<br />
• Remove Faceplate and trim piece from source unit to access chassis<br />
release holes<br />
• Disconnect Backstrap from rear of radio (if used)<br />
• Insert Release Keys into left and right sides of source unit to disengage locks<br />
• Remove Source Unit from installation sleeve with release keys<br />
Reset Button<br />
RESET<br />
• Press Reset Button if source unit gets jammed during operation<br />
– 21 –
® ®<br />
COMPACT<br />
DIGITAL AUDIO<br />
BASIC OPERATION<br />
MON<br />
SKIP<br />
VOL<br />
AUD<br />
PWR<br />
CLOCK<br />
DSPL<br />
D.SCN SCAN<br />
AUTO<br />
P.SCN<br />
RPT<br />
RDM<br />
ILLUM<br />
LOUD<br />
DIM<br />
PAUSE<br />
SEL<br />
TUNE<br />
<strong>RFX</strong>-<strong>8030</strong><br />
1<br />
2<br />
3 4 5<br />
6<br />
DETACHABLE FACEPLATE<br />
Removing the Faceplate<br />
1.Press the Release button to release the faceplate from<br />
the main housing.<br />
2.Grasp the right side of the faceplate and pull it out.<br />
Installing the Faceplate<br />
1.Insert the left side of the faceplate into the main<br />
housing.<br />
2.Push the right side of the faceplate until it locks firmly<br />
into place.<br />
Considerations<br />
Make sure there is no dirt or dust on the connector<br />
terminals and no foreign objects between the front<br />
panel and the main housing.<br />
NOTE: To prevent damage to the faceplate, protect it<br />
by storing it in the supplied carrying case.<br />
– 22 –
® ®<br />
COMPACT<br />
DIGITAL AUDIO<br />
MON<br />
SKIP<br />
VOL<br />
AUD<br />
PWR<br />
CLOCK<br />
DSPL<br />
D.SCN SCAN<br />
AUTO<br />
P.SCN<br />
RPT<br />
RDM<br />
ILLUM<br />
LOUD<br />
DIM<br />
PAUSE<br />
SEL<br />
TUNE<br />
<strong>RFX</strong>-<strong>8030</strong><br />
1<br />
2<br />
3 4 5<br />
6<br />
POWER SWITCH<br />
On<br />
PWR<br />
<br />
Off<br />
Power On/Off<br />
Press the PWR button to turn the source unit on and off.<br />
This switch has operating priority over all other switches.<br />
“WAKE-UP” Feature<br />
Pressing any button except for the DSPL and EJECT<br />
buttons will also turn the source unit on. (Tape must be<br />
inserted for CASSETTE button to “Wake-up.”)<br />
Display<br />
The display will turn on whenever ignition voltage is<br />
applied, without regard to the radio power switch. If<br />
the ignition power is on, and radio is off, only the clock<br />
will be displayed.<br />
Considerations<br />
Removing the faceplate will turn the unit off.<br />
Inital Power-Up Defaults<br />
Preset Scan<br />
Off<br />
Auto Store<br />
Off<br />
Cassette Mode Default Elapsed Time<br />
Radio Monitor<br />
On<br />
Blank Skip<br />
Off<br />
CD Random Mode<br />
Off<br />
CD Repeat Mode<br />
Off<br />
CD Disc Scan<br />
Off<br />
CD Scan<br />
Off<br />
Loudness<br />
On<br />
Backlighting Color<br />
Green<br />
Backlighting Dim Level 4 (max)<br />
Volume Level 10<br />
Default Display<br />
Clock<br />
CD Mode Default Display Track #& Elapsed Time<br />
Frequency Range<br />
Americas<br />
– 23 –
® ®<br />
COMPACT<br />
DIGITAL AUDIO<br />
MON<br />
SKIP<br />
VOL<br />
AUD<br />
PWR<br />
CLOCK<br />
DSPL<br />
D.SCN SCAN<br />
AUTO<br />
P.SCN<br />
RPT<br />
ILLUM<br />
LOUD<br />
RDM DIM<br />
PAUSE<br />
SEL<br />
TUNE<br />
<strong>RFX</strong>-<strong>8030</strong><br />
1<br />
2<br />
3 4 5<br />
6<br />
BASS>TREBLE>FADE>BALANCE>SUB>VOLUME<br />
BASS<br />
TREB<br />
*FADE<br />
BAL<br />
*SUB<br />
VOL<br />
AUD<br />
=><br />
+<br />
VOL<br />
Audio Adjustment<br />
1.Press the AUD button to cycle the radio through<br />
BASS>TREB>FADE>BAL>SUB>VOL. Volume is always<br />
the default audio adjustment.<br />
2.Press the VOL (+) rocker to increase the selection.<br />
3.Press the VOL (–) rocker to decrease the selection.<br />
Display<br />
The display will indicate the selected function and the<br />
corresponding level.<br />
Function Display Range Default<br />
Volume: Vol 0 to 38 10<br />
Bass: Bass –8 to +8 0<br />
Treble: Treb –8 to +8 0<br />
Fade: Fade B15 to F15 0<br />
Balance: Bal L15 to R15 0<br />
Subwoofer: Sub 0 to 32 32<br />
After five seconds of Bass, Treble, Balance, Fader, or<br />
Subwoofer, the display will revert to its default (Tuner/<br />
Cassette or Clock).<br />
Considerations<br />
Separate Bass and Treble settings are retained for AM,<br />
FM, Cassette Player, CD Changer and External Audio<br />
Modes.<br />
After five seconds of Bass, Treble,Fader, Balance or<br />
Subwoofer, the +/– rocker will revert to volume adjustment.<br />
Any tuner function will cancel the selected<br />
audio adjustment mode and default the +/– rocker to<br />
volume adjustment.<br />
– 24 –
® ®<br />
COMPACT<br />
DIGITAL AUDIO<br />
MON<br />
SKIP<br />
VOL<br />
AUD<br />
PWR<br />
CLOCK<br />
DSPL<br />
D.SCN SCAN<br />
AUTO<br />
P.SCN<br />
RPT<br />
ILLUM<br />
LOUD<br />
RDM DIM<br />
PAUSE<br />
SEL<br />
TUNE<br />
<strong>RFX</strong>-<strong>8030</strong><br />
1<br />
2<br />
3 4 5<br />
6<br />
CLOCK OPERATION<br />
CLOCK<br />
DSPL<br />
=> =><br />
=><br />
SET 12:<br />
TUNE<br />
CLOCK<br />
DSPL<br />
CLOCK<br />
DSPL<br />
=><br />
SET :14<br />
=><br />
TUNE<br />
Set the Clock Hours<br />
1. Press and hold the CLOCK (DSPL) button for two<br />
seconds. The display will indicate “SET” and the<br />
hour digit(s) will flash.<br />
2. Press the up arrow (^) to increase hours.<br />
3. Press the down arrow (v) to decrease hours.<br />
Set the Clock Minutes<br />
1.Push the Clock (DSPL) button a second time. The<br />
minute digits will begin to flash.<br />
2.Press the up arrow (^) to increase minutes.<br />
3.Press the down arrow (v) to decrease minutes.<br />
The seconds will automatically reset to zero.<br />
Display<br />
On initial power-up, the clock will indicate 1:00. The<br />
clock is displayed when the radio is off and ignition<br />
voltage is on.<br />
Considerations<br />
Momentarily pushing the Clock (DSPL) button while in<br />
Clock mode will toggle between hours and minutes.<br />
After five seconds, the Clock function will time out and<br />
revert to its default display. Pushing any button except<br />
the Clock and PRESET 5 will cancel this mode before the<br />
five second time out. In addition, PRESET 6 will not<br />
cancel time set mode if the radio is turned off.<br />
The clock may be set with the ignition on and radio<br />
power on or off.<br />
– 25 –
® ®<br />
COMPACT<br />
DIGITAL AUDIO<br />
MON<br />
SKIP<br />
VOL<br />
AUD<br />
PWR<br />
CLOCK<br />
DSPL<br />
D.SCN SCAN<br />
AUTO<br />
P.SCN<br />
RPT<br />
RDM<br />
ILLUM<br />
LOUD<br />
DIM<br />
PAUSE<br />
SEL<br />
TUNE<br />
<strong>RFX</strong>-<strong>8030</strong><br />
1<br />
2<br />
3 4 5<br />
6<br />
DISPLAY RECALL<br />
=><br />
CLOCK<br />
DSPL<br />
=><br />
100.3 12:14<br />
Tuner Mode Display Recall<br />
Press the DSPL (display) button to toggle the<br />
display between Tuner frequency and Clock.<br />
Cassette/CDX Mode Display Recall<br />
Press the DSPL (display) button to toggle the<br />
display between Cassette/CDX and Clock.<br />
or<br />
=> =><br />
CLOCK<br />
DSPL<br />
T2 1:34 <br />
12:14<br />
External Audio Mode Display Recall<br />
In External Audio Mode, press the DSPL (display)<br />
button to toggle the display between EX<br />
AUD and Clock.<br />
Ignition Off Display Recall<br />
With ignition off, press the DSPL (display) button<br />
to display the Clock for five seconds.<br />
Considerations<br />
After five seconds, the display will revert to its<br />
default.<br />
EX AUD<br />
=> =><br />
CLOCK<br />
DSPL<br />
EX AUD <br />
12:14<br />
– 26 –
® ®<br />
COMPACT<br />
DIGITAL AUDIO<br />
MON<br />
SKIP<br />
VOL<br />
AUD<br />
PWR<br />
CLOCK<br />
DSPL<br />
D.SCN SCAN<br />
AUTO<br />
P.SCN<br />
RPT<br />
RDM<br />
ILLUM<br />
LOUD<br />
DIM<br />
PAUSE<br />
SEL<br />
TUNE<br />
<strong>RFX</strong>-<strong>8030</strong><br />
1<br />
2<br />
3 4 5<br />
6<br />
DEFAULT DISPLAY<br />
T2 1:34<br />
=><br />
CLOCK<br />
DSPL<br />
=><br />
SET :14<br />
=> => => =><br />
100.3 <br />
or<br />
CLOCK<br />
DSPL<br />
SET :14<br />
<br />
CLOCK<br />
DSPL<br />
=><br />
=><br />
=><br />
EX AUD<br />
SET :14<br />
12:14<br />
12:14<br />
EX AUD 12:14<br />
Operation<br />
The display can be set to default to the operating<br />
mode (Tuner, Cassette, CD Changer, External<br />
Audio) or Clock.<br />
Set Tuner Mode Default Display<br />
1. Press the SINE WAVE (Tuner) button to select<br />
Tuner mode.<br />
2. Press and hold the DSPL (display) button for<br />
two seconds to enter Clock mode.<br />
3. Press PRESET 6 to select Tuner Frequency or<br />
Clock.<br />
Set Cassette or CDChanger Mode Default Display<br />
1. Press the Cassette/CD Changer button to<br />
select Cassette/CD Changer mode.<br />
2. Press and hold the DSPL (display) button for<br />
two seconds to enter Clock mode.<br />
3. Press PRESET 6 to select Elapsed Time or<br />
Clock.<br />
Set External Audio Default Display<br />
1. Select the External Audio Input mode.<br />
2. Press and hold the DSPL (display) button for<br />
two seconds to enter Clock mode.<br />
3. Press PRESET 6 to select EX AUD or Clock.<br />
Considerations<br />
After five seconds, the new default display will<br />
appear.<br />
Initial Power Up Defaults<br />
Operating Mode Default Display<br />
Ignition Off<br />
Clock<br />
Tuner Mode Clock<br />
Cassette Mode Elapsed Time<br />
CD Changer Mode Disc #, Track # &<br />
Elapsed Time<br />
Ex. Audio Mode Clock<br />
– 27 –
® ®<br />
® ®<br />
COMPACT<br />
DIGITAL AUDIO<br />
COMPACT<br />
DIGITAL AUDIO<br />
MON<br />
SKIP<br />
VOL<br />
AUD<br />
PWR<br />
CLOCK<br />
DSPL<br />
D.SCN SCAN<br />
AUTO<br />
P.SCN<br />
RPT<br />
ILLUM<br />
LOUD<br />
RDM DIM<br />
PAUSE<br />
SEL<br />
TUNE<br />
<strong>RFX</strong>-<strong>8030</strong><br />
1<br />
2<br />
3<br />
4<br />
5<br />
6<br />
ILLUMINATION DIMMER<br />
Off<br />
Low<br />
Med<br />
Hi<br />
Max<br />
CLOCK<br />
DSPL<br />
=><br />
DIM<br />
5<br />
Operation<br />
The backlight illumination is turned on by applying<br />
+12 volts to the Dimmer input (orange wire) at the rear<br />
of the source unit.<br />
Dimmer Program<br />
1. Press and hold the DSPL button for two seconds.<br />
2. Press the DIM (PRESET 5) button to adjust the<br />
intensity from 0 (off) to 4 (max).<br />
Considerations<br />
Once 4 is reached, the intensity setting will start over<br />
at 0.<br />
Initial Power Up Defaults<br />
On initial power-up, the backlight Dim Level will<br />
default to 4 (max.).<br />
MON<br />
SKIP<br />
VOL<br />
AUD<br />
PWR<br />
CLOCK<br />
DSPL<br />
D.SCN SCAN<br />
AUTO<br />
P.SCN<br />
RPT<br />
ILLUM<br />
LOUD<br />
RDM DIM<br />
PAUSE<br />
SEL<br />
TUNE<br />
<strong>RFX</strong>-<strong>8030</strong><br />
1<br />
2<br />
3<br />
4<br />
5<br />
6<br />
ILLUMINATION COLOR<br />
ILLUM<br />
LOUD<br />
=><br />
GREEN<br />
ILLUM<br />
LOUD<br />
=><br />
AMBER<br />
Change Color<br />
1. Press and hold the ILLUM (LOUD) button for two<br />
seconds to toggle between Green and Amber backlight<br />
color.<br />
2. Press and hold the ILLUM (LOUD) button again for<br />
two seconds to change to the previous color.<br />
Initial Power-Up Defaults<br />
On initial power-up, the display and buttons will be<br />
backlit Green.<br />
– 28 –
® ®<br />
COMPACT<br />
DIGITAL AUDIO<br />
MON<br />
SKIP<br />
VOL<br />
AUD<br />
PWR<br />
CLOCK<br />
DSPL<br />
D.SCN SCAN<br />
AUTO<br />
P.SCN<br />
RPT<br />
ILLUM<br />
LOUD<br />
RDM DIM<br />
PAUSE<br />
SEL<br />
TUNE<br />
<strong>RFX</strong>-<strong>8030</strong><br />
1<br />
2<br />
3<br />
4<br />
5<br />
6<br />
LOUDNESS CONTROL<br />
ILLUM<br />
LOUD<br />
=><br />
LD<br />
Loudness On/Off<br />
Press the LOUD button to enable the loudness feature.<br />
Press the LOUD button a second time to disable the<br />
loudness feature.<br />
Display<br />
When the loudness feature is enabled, “LD” will be<br />
indicated on the display.<br />
Initial Power-Up Defaults<br />
On initial power-up, the Loudness function will default<br />
to On.<br />
– 29 –
® ®<br />
COMPACT<br />
DIGITAL AUDIO<br />
TUNER OPERATION<br />
MON<br />
SKIP<br />
VOL<br />
AUD<br />
PWR<br />
CLOCK<br />
DSPL<br />
D.SCN SCAN<br />
AUTO<br />
P.SCN<br />
RPT<br />
ILLUM<br />
LOUD<br />
RDM DIM<br />
PAUSE<br />
SEL<br />
TUNE<br />
<strong>RFX</strong>-<strong>8030</strong><br />
1<br />
2<br />
3<br />
4<br />
5<br />
6<br />
WORLD WIDE TUNER<br />
CLOCK<br />
DSPL<br />
=><br />
SET 12:14<br />
=> =><br />
SEL<br />
AMERICAS<br />
EUR/AUST<br />
SAUDI<br />
Operation<br />
The frequency band on the tuner can be programmed<br />
to conform with different country codes (except Japan).<br />
Set Programmable Frequency Band<br />
1. Press and hold the DSPL (display) button for two<br />
seconds to enter Clock mode<br />
2. Press the SINE WAVE (tuner) button<br />
3. Press the SEL (select) button to cycle through each<br />
country<br />
AMERICAS AM=530 – 1710 kHz @ 10kHz spacing<br />
FM=87.75–107.9 MHz @ 200kHz spacing<br />
EUR/AUST AM= 522–1620kHz @ 9kHz spacing<br />
FM=87.5–108.0MHz @ 100kHz spacing<br />
SAUDI<br />
AM=531-1602kHz @ 9kHz spacing<br />
FM=87.5-108.0MHz @ 100kHz spacing<br />
Considerations<br />
The frequency can be programmed with the radio<br />
power on or off.<br />
Initial Power-Up Defaults<br />
Frequency Band ...............................Americas<br />
– 30 –
® ®<br />
COMPACT<br />
DIGITAL AUDIO<br />
MON<br />
SKIP<br />
VOL<br />
AUD<br />
PWR<br />
CLOCK<br />
DSPL<br />
D.SCN SCAN<br />
AUTO<br />
P.SCN<br />
RPT<br />
ILLUM<br />
LOUD<br />
RDM DIM<br />
PAUSE<br />
SEL<br />
TUNE<br />
<strong>RFX</strong>-<strong>8030</strong><br />
1<br />
2<br />
3<br />
4<br />
5<br />
6<br />
TUNER MODE<br />
FM 1<br />
FM 2<br />
FM 3<br />
AM<br />
=><br />
FM 1<br />
TUNE 100.3<br />
Tuner Select<br />
1. Press the SINE WAVE (tuner) button to select the<br />
radio tuner and go to the last active band.<br />
2. Consecutive pressing of the SINE WAVE (tuner)<br />
button cycles the radio through FM1, FM2, FM3<br />
and AM.<br />
Display<br />
The display will indicate “TUNE,” station frequency,<br />
and band indicator for five seconds. After five seconds,<br />
the display will switch to its default (Tuner or Clock).<br />
Initial Power-Up Defaults – Americas<br />
Preset Preset Preset Preset Preset Preset<br />
1 2 3 4 5 6<br />
FM1 (MHz) 87.75 88.1 98.1 96.3 107.9 103.7<br />
FM2 (MHz) 87.75 88.1 98.1 96.3 107.9 103.7<br />
FM3 (MHz) 87.75 88.1 98.1 96.3 107.9 103.7<br />
AM (kHz) 530 600 1000 1400 1710 1070<br />
– 31 –
® ®<br />
COMPACT<br />
DIGITAL AUDIO<br />
MON<br />
SKIP<br />
VOL<br />
AUD<br />
PWR<br />
CLOCK<br />
DSPL<br />
D.SCN SCAN<br />
AUTO<br />
P.SCN<br />
RPT<br />
ILLUM<br />
LOUD<br />
RDM DIM<br />
PAUSE<br />
SEL<br />
TUNE<br />
<strong>RFX</strong>-<strong>8030</strong><br />
1<br />
2<br />
3<br />
4<br />
5 6<br />
TUNER PRESETS<br />
TUNE<br />
=><br />
FM 1<br />
TUNE 100.3<br />
=><br />
1 2 3 4 5 6<br />
Operation<br />
There are 24 total presets available for storing tuner<br />
frequencies: AM = 6 presets<br />
FM1 = 6 presets<br />
FM2 = 6 presets<br />
FM3 = 6 presets<br />
Station Storing<br />
Tune to the station to be stored using the <strong>manual</strong><br />
Tune or Seek methods. Press and hold the desired<br />
PRESET button for at least two seconds to store the<br />
selected station.<br />
Preset Recall<br />
Pressing one of the 1-2-3-4-5-6 (channel preset)<br />
buttons will recall and tune the radio to the frequency<br />
stored in that preset.<br />
Display<br />
The display will indicate “TUNE,” station frequency,<br />
band indicator and channel preset for five seconds.<br />
After five seconds, the display will switch to its<br />
default (Tuner or Clock).<br />
Considerations<br />
The Channel and Preset indicators (if displayed) will<br />
disappear during the two second interval, after<br />
which they will return after the station is stored.<br />
The audio will mute during the two second interval.<br />
Pressing any PRESET button and releasing it within<br />
less than 2 seconds will tune the radio to the<br />
channel previously stored in that preset.<br />
The PRESET buttons assume different functions<br />
when a cassette is played.<br />
– 32 –
® ®<br />
COMPACT<br />
DIGITAL AUDIO<br />
R<br />
VOL<br />
AUD<br />
PWR<br />
CLOCK<br />
DSPL<br />
D.SCN SCAN<br />
AUTO<br />
P.SCN<br />
RPT<br />
ILLUM<br />
LOUD<br />
RDM DIM<br />
PAUSE<br />
SEL<br />
TUNE<br />
<strong>RFX</strong>-8103<br />
1<br />
2<br />
3 4 5<br />
6<br />
RADIO TUNE MODES – SEEK>TUNE<br />
TUNE<br />
Operation<br />
Seek mode automatically selects the next radio station.<br />
Tune mode allows <strong>manual</strong> selection of a radio station.<br />
SEEK<br />
TUNE<br />
(press and hold)<br />
TUNE<br />
Seek Mode Select<br />
Momentarily press the TUNE (^/v) rocker to automatically<br />
select the next radio station.<br />
Tune Mode Select<br />
1. Press and hold the TUNE rocker (^/v) for 2 seconds to<br />
enter Manual Tune Mode.<br />
2. Press the TUNE (^/v) rocker to <strong>manual</strong>ly select radio<br />
stations.<br />
Display<br />
The display will indicate the radio tune mode, station<br />
frequency, band indicator, channel preset (if applicable),<br />
and stereo indicator (if stereo broadcast detected)<br />
for five seconds. After five seconds, the display will<br />
return to its default (Tuner or Clock).<br />
Considerations<br />
The Seek mode is always the default.<br />
The radio will default back to Seek mode if the TUNE<br />
(^/v) rocker is not pressed within 2 seconds of entering<br />
Tune Mode.<br />
– 33 –
® ®<br />
COMPACT<br />
DIGITAL AUDIO<br />
MON<br />
SKIP<br />
VOL<br />
AUD<br />
PWR<br />
CLOCK<br />
DSPL<br />
D.SCN SCAN<br />
AUTO<br />
P.SCN<br />
RPT<br />
ILLUM<br />
LOUD<br />
RDM DIM<br />
PAUSE<br />
SEL<br />
TUNE<br />
<strong>RFX</strong>-<strong>8030</strong><br />
1<br />
2<br />
3<br />
4<br />
5 6<br />
AUTO STORE<br />
AUTO<br />
P.SCN<br />
=> =><br />
FM 1<br />
TUNE 100.3<br />
FM1 (6)<br />
FM2 (6)<br />
FM3 (6)<br />
AM (6)<br />
Operation<br />
The radio will search, and temporarily store, the strongest<br />
stations in the selected band (6 for AM & 18 for FM).<br />
Auto Store Select<br />
Press and hold the P.SCN button for two seconds to<br />
switch to Auto Store mode.<br />
Auto Store Cancel<br />
Press and hold the P.SCN button for two seconds to<br />
cancel Auto Store mode. When canceled, the original<br />
presets will be restored, discarding the presets found<br />
during Auto Store.<br />
Considerations<br />
Auto Store presets will be deleted only after the battery<br />
has been disconnected.<br />
Initial Power-Up Defaults<br />
On initial power-up, Auto Store will default to Off.<br />
– 34 –
® ®<br />
COMPACT<br />
DIGITAL AUDIO<br />
MON<br />
SKIP<br />
VOL<br />
AUD<br />
PWR<br />
CLOCK<br />
DSPL<br />
D.SCN SCAN<br />
AUTO<br />
P.SCN<br />
RPT<br />
ILLUM<br />
LOUD<br />
RDM DIM<br />
PAUSE<br />
SEL<br />
TUNE<br />
<strong>RFX</strong>-<strong>8030</strong><br />
1<br />
2<br />
3<br />
4<br />
5 6<br />
PRESET SCAN<br />
FM1 (6)<br />
FM2 (6)<br />
FM3 (6)<br />
AUTO<br />
P.SCN<br />
=><br />
=><br />
AUTO<br />
P.SCN<br />
(stop)<br />
AM (6)<br />
Operation<br />
When Preset Scan is selected, the radio will<br />
sequentially sample each preset tuner frequency<br />
for five seconds each. (Up to 18 FM or 6 AM<br />
presets)<br />
Preset Scan Select<br />
Press the P.SCN button to enable Preset Scan<br />
mode.<br />
If a preset station is active when P.SCN is<br />
depressed, then the preset stations will be<br />
sampled sequentially beginning at the next<br />
higher numbered preset.<br />
Preset Scan Cancel<br />
Press the P.SCN button a second time to cancel<br />
the Preset Scan mode. It is also canceled by all<br />
buttons except LOUD, EJECT and audio volume<br />
functions.<br />
Display<br />
During Preset Scan tuning, the display will<br />
indicate “PSCN,” frequency, band indicator<br />
and channel preset.<br />
Considerations<br />
Preset Scanning will continue until the function<br />
is canceled. The tuner will wrap around from<br />
the last preset of FM3 to the first preset of FM1.<br />
Initial Power-Up Defaults<br />
On initial power-up, Preset Scan will default<br />
to Off.<br />
– 35 –
® ®<br />
COMPACT<br />
DIGITAL AUDIO<br />
CASSETTE PLAYER OPERATION<br />
MON<br />
SKIP<br />
VOL<br />
AUD<br />
PWR<br />
CLOCK<br />
DSPL<br />
D.SCN SCAN<br />
AUTO<br />
P.SCN<br />
RPT<br />
ILLUM<br />
LOUD<br />
RDM DIM<br />
PAUSE<br />
SEL<br />
TUNE<br />
<strong>RFX</strong>-<strong>8030</strong><br />
1<br />
2<br />
3<br />
4<br />
5 6<br />
CASSETTE PLAYER MODE<br />
=><br />
TP ▲ 007<br />
Cassette Player Select<br />
Press the CASSETTE button to select tape mode if a<br />
cassette has been previously loaded.<br />
Display<br />
The display will indicate “TP,” tape direction, elapsed<br />
time, and cassette icon. After five seconds, the display<br />
will switch to its default (Cassette or Cock). The display<br />
will indicate “NO TAPE” if the cassette button is pushed<br />
with no cassette loaded.<br />
The cassette icon will always be displayed if a cassette<br />
is loaded in the player<br />
Considerations<br />
Pressing the cassette button will take priority over any<br />
mode.<br />
Initial Power-Up Defaults<br />
Cassette Repeat Mode<br />
Cassette Default Display<br />
Off<br />
Direction Arrow &<br />
Elapsed Time<br />
– 36 –
® ®<br />
® ®<br />
COMPACT<br />
DIGITAL AUDIO<br />
COMPACT<br />
DIGITAL AUDIO<br />
MON<br />
SKIP<br />
VOL<br />
AUD<br />
PWR<br />
CLOCK<br />
DSPL<br />
D.SCN SCAN<br />
AUTO<br />
P.SCN<br />
RPT<br />
ILLUM<br />
LOUD<br />
RDM DIM<br />
PAUSE<br />
SEL<br />
TUNE<br />
<strong>RFX</strong>-<strong>8030</strong><br />
1<br />
2<br />
3<br />
4<br />
5 6<br />
INSERT CASSETTE AND PLAY<br />
Operation<br />
Inserting a Cassette will cancel the current mode, switch<br />
to Cassette mode, and begin playing.<br />
“WAKE-UP” Feature<br />
Inserting a cassette (with ignition on) will power the<br />
source unit up and begin playing the cassette.<br />
Display<br />
The display will indicate “TP,” direction arrow, elapsed<br />
time, and cassette icon. After five seconds, the display<br />
will switch to its default (Cassette or Clock).<br />
MON<br />
SKIP<br />
VOL<br />
AUD<br />
PWR<br />
CLOCK<br />
DSPL<br />
D.SCN SCAN<br />
AUTO<br />
P.SCN<br />
RPT<br />
ILLUM<br />
LOUD<br />
RDM DIM<br />
PAUSE<br />
SEL<br />
TUNE<br />
<strong>RFX</strong>-<strong>8030</strong><br />
1<br />
2<br />
3<br />
4<br />
5 6<br />
REVERSE PLAY<br />
▲<br />
▲<br />
Operation<br />
Reverse Play allows the player to switch to the opposite<br />
side of the cassette and resume playing.<br />
Reverse Play Select<br />
While a cassette is playing, press the CASSETTE (^/v)<br />
button to switch to the opposite side.<br />
Display<br />
The display will indicate “TP,” direction arrow, elapsed<br />
time, and cassette icon. After five seconds, the display<br />
will switch to its default (Cassette or Clock).<br />
– 37 –
® ®<br />
® ®<br />
COMPACT<br />
DIGITAL AUDIO<br />
COMPACT<br />
DIGITAL AUDIO<br />
MON<br />
SKIP<br />
VOL<br />
AUD<br />
PWR<br />
CLOCK<br />
DSPL<br />
D.SCN SCAN<br />
AUTO<br />
P.SCN<br />
RPT<br />
ILLUM<br />
LOUD<br />
RDM DIM<br />
PAUSE<br />
SEL<br />
TUNE<br />
<strong>RFX</strong>-<strong>8030</strong><br />
1<br />
2<br />
3<br />
4<br />
5 6<br />
CASSETTE EJECT<br />
=><br />
Cassette Eject<br />
Press the EJECT button to release the cassette and<br />
reinitialize Previous Play or Eject Default (see below)<br />
Display<br />
The cassette icon will be turned off when the cassette is<br />
ejected.<br />
Considerations<br />
A cassette may be ejected during any mode (AM, FM or<br />
CD Changer).<br />
MON<br />
SKIP<br />
VOL<br />
AUD<br />
PWR<br />
CLOCK<br />
DSPL<br />
D.SCN SCAN<br />
AUTO<br />
P.SCN<br />
RPT<br />
ILLUM<br />
LOUD<br />
RDM DIM<br />
PAUSE<br />
SEL<br />
TUNE<br />
<strong>RFX</strong>-<strong>8030</strong><br />
1<br />
2<br />
3<br />
4<br />
5 6<br />
EJECT DEFAULT<br />
PREVIOUS<br />
PLAY<br />
=><br />
100.3<br />
EJECT MUTE<br />
=><br />
NO TAPE<br />
Eject Default Operation<br />
Previous Play enables Tuner mode after a cassette is<br />
ejected.<br />
Eject Mute mutes the audio after a cassette is ejected.<br />
Eject Default Program<br />
1. Press the DSPL button to enter clock mode.<br />
2. Press the CASSETTE button to cycle between “P PLAY”<br />
or “EJ MUTE.”<br />
Display<br />
Previous Play<br />
The display will indicate normal Tuner functions.<br />
Eject Mute<br />
The display will indicate “NO TAPE.”<br />
– 38 –
® ®<br />
® ®<br />
COMPACT<br />
DIGITAL AUDIO<br />
COMPACT<br />
DIGITAL AUDIO<br />
MON<br />
SKIP<br />
VOL<br />
AUD<br />
PWR<br />
CLOCK<br />
DSPL<br />
D.SCN SCAN<br />
AUTO<br />
P.SCN<br />
RPT<br />
ILLUM<br />
LOUD<br />
RDM DIM<br />
PAUSE<br />
SEL<br />
TUNE<br />
<strong>RFX</strong>-<strong>8030</strong><br />
1<br />
2<br />
3<br />
4<br />
5 6<br />
TUNE<br />
=><br />
▲<br />
NEXT 1<br />
MUSIC SEARCH<br />
Operation<br />
Music Search mode will seek and play the next/previous<br />
music selection.<br />
Music Search Select<br />
1. Press the up arrow (^) rocker to select the next track.<br />
Press the down arrow (v) rocker to select the previous<br />
track.<br />
2. Consecutive pressing of the up/down (^/v) rocker will<br />
increase or decrease the track number corresponding<br />
to the number of depressions.<br />
Display<br />
The display will indicate “NEXT” or “PREV”, and the<br />
number of music searches selected.<br />
Considerations<br />
When the cassette reaches the beginning or end of the<br />
tape, the cassette will automatically resume play mode.<br />
MON<br />
SKIP<br />
VOL<br />
AUD<br />
PWR<br />
CLOCK<br />
DSPL<br />
D.SCN SCAN<br />
AUTO<br />
P.SCN<br />
RPT<br />
ILLUM<br />
LOUD<br />
RDM DIM<br />
PAUSE<br />
SEL<br />
TUNE<br />
<strong>RFX</strong>-<strong>8030</strong><br />
1<br />
2<br />
3<br />
4<br />
5 6<br />
SKIP<br />
BLANK SKIP<br />
Operation<br />
Blank Skip fast forwards the tape to the next available<br />
selection if no music is detected within 15 seconds.<br />
off<br />
on<br />
Blank Skip Select/Cancel<br />
While playing a cassette, press and hold the SKIP button<br />
to turn-on/off skip mode.<br />
Display<br />
The display will indicate “SKIP-ON” when skip mode is<br />
enabled or “SKIP-OFF” when skip mode is disabled.<br />
After five seconds, the display will switch to its default<br />
(Cassette or Clock)<br />
– 39 –
® ®<br />
® ®<br />
COMPACT<br />
DIGITAL AUDIO<br />
COMPACT<br />
DIGITAL AUDIO<br />
MON<br />
SKIP<br />
VOL<br />
AUD<br />
PWR<br />
CLOCK<br />
DSPL<br />
D.SCN SCAN<br />
AUTO<br />
P.SCN<br />
RPT<br />
ILLUM<br />
LOUD<br />
RDM DIM<br />
PAUSE<br />
SEL<br />
TUNE<br />
<strong>RFX</strong>-<strong>8030</strong><br />
1<br />
2<br />
3<br />
4<br />
5 6<br />
FAST FORWARD/FAST REWIND<br />
TUNE<br />
=><br />
▲<br />
FWD 007<br />
Fast Forward/Fast Rewind<br />
1. Press and hold the up/down arrow (^/v) rocker to fast<br />
forward/fast rewind the tape.<br />
2. Momentarily press the up/down arrow (^/v) rocker to<br />
stop fast forward/fast rewind mode and resume playing.<br />
Display<br />
Radio Monitor-Off<br />
The display will indicate FWD or REV, direction arrow,<br />
and elapsed time.<br />
Radio Monitor-On<br />
The display will indicate normal Tuner functions.<br />
Considerations<br />
When the cassette reaches the beginning or end of the<br />
tape, the cassette will automatically resume play mode.<br />
MON<br />
SKIP<br />
VOL<br />
AUD<br />
PWR<br />
CLOCK<br />
DSPL<br />
D.SCN SCAN<br />
AUTO<br />
P.SCN<br />
RPT<br />
ILLUM<br />
LOUD<br />
RDM DIM<br />
PAUSE<br />
SEL<br />
TUNE<br />
<strong>RFX</strong>-<strong>8030</strong><br />
1<br />
2<br />
3<br />
4<br />
5 6<br />
CASSETTE PAUSE<br />
TP ▲007<br />
6<br />
=><br />
=> PAUS<br />
Operation<br />
Cassette Pause mutes the audio and retracts the pinch<br />
roller and tape head.<br />
Cassette Pause<br />
1.Press the PAUSE button to stop the current playing<br />
track and mute the audio.<br />
2.Press the PAUSE button a second time to resume<br />
playing the track.<br />
– 40 –
® ®<br />
® ®<br />
COMPACT<br />
DIGITAL AUDIO<br />
COMPACT<br />
DIGITAL AUDIO<br />
MON<br />
SKIP<br />
VOL<br />
AUD<br />
PWR<br />
CLOCK<br />
DSPL<br />
D.SCN SCAN<br />
AUTO<br />
P.SCN<br />
RPT<br />
ILLUM<br />
LOUD<br />
RDM DIM<br />
PAUSE<br />
SEL<br />
TUNE<br />
<strong>RFX</strong>-<strong>8030</strong><br />
1<br />
2<br />
3<br />
4<br />
5 6<br />
RADIO MONITOR<br />
off<br />
on<br />
MON<br />
Operation<br />
Radio Monitor temporarily enables Tuner mode while<br />
fast forwarding or fast rewinding cassette.<br />
Radio Monitor Select/Cancel<br />
While fast forwarding/fast rewinding a cassette:<br />
1.Press the MON (monitor) button to select Radio Monitor<br />
mode.<br />
2.Press the MON (monitor) button to disable Radio<br />
Monitor mode.<br />
Display<br />
The display will indicate “MONI-ON” when monitor<br />
mode is enabled or “MONI-OFF” when monitor mode is<br />
disabled.<br />
MON<br />
SKIP<br />
VOL<br />
AUD<br />
PWR<br />
CLOCK<br />
DSPL<br />
D.SCN SCAN<br />
AUTO<br />
P.SCN<br />
RPT<br />
ILLUM<br />
LOUD<br />
RDM DIM<br />
PAUSE<br />
SEL<br />
TUNE<br />
<strong>RFX</strong>-<strong>8030</strong><br />
1<br />
2<br />
3<br />
4<br />
5 6<br />
DOLBY-B NR<br />
Operation<br />
Dolby-B NR will reduce background noise from tapes<br />
encoded with Dolby Noise Reduction.*<br />
off<br />
on<br />
Select/Cancel<br />
1. Press the button to select Dolby-B NR<br />
2. Press the button again to cancel Dolby-B NR<br />
Display<br />
The display will indicate theicon, “TP," direction<br />
arrow, and the cassette icon.<br />
* Dolby® Noise Reduction is manufactured under a license from Dolby<br />
Laboratories Licensing Corporation. Dolby and the double-D symbol<br />
are trademarks of Dolby Laboratories Licensing Corporation.<br />
– 41 –
® ®<br />
COMPACT<br />
DIGITAL AUDIO<br />
MON<br />
SKIP<br />
VOL<br />
AUD<br />
PWR<br />
CLOCK<br />
DSPL<br />
D.SCN SCAN<br />
AUTO<br />
P.SCN<br />
RPT<br />
ILLUM<br />
LOUD<br />
RDM DIM<br />
PAUSE<br />
SEL<br />
TUNE<br />
<strong>RFX</strong>-<strong>8030</strong><br />
1<br />
2<br />
3<br />
4<br />
5 6<br />
RPT<br />
3<br />
=><br />
RPT<br />
TP ▲ 007<br />
➥<br />
➥<br />
➥<br />
➥<br />
Track<br />
REPEAT PLAY<br />
Operation<br />
Repeat Play mode will rewind the cassette and replay<br />
the current track.<br />
Repeat Play Select/Cancel<br />
1. Press the RPT (repeat) button to select Repeat Play<br />
mode.<br />
2. Press the RPT (repeat) button a second time to cancel<br />
Repeat Play mode.<br />
Display<br />
The display will indicate “RPT,” “TP,” direction arrow,<br />
and the cassette icon.<br />
Considerations<br />
Repeat Play mode will repeat only one track at a time.<br />
Repeat Play mode will continue until the function is<br />
canceled or another function is selected.<br />
– 42 –
® ®<br />
COMPACT<br />
DIGITAL AUDIO<br />
MON<br />
SKIP<br />
VOL<br />
AUD<br />
PWR<br />
CLOCK<br />
DSPL<br />
D.SCN SCAN<br />
AUTO<br />
P.SCN<br />
RPT<br />
ILLUM<br />
LOUD<br />
RDM DIM<br />
PAUSE<br />
SEL<br />
TUNE<br />
<strong>RFX</strong>-<strong>8030</strong><br />
1<br />
2<br />
3<br />
4<br />
5 6<br />
CLEAN INDICATOR<br />
TP CLEAN<br />
Operation<br />
The Clean Indicator automatically alerts the user to clean<br />
the tape head after 35 hours of cassette use (refer to<br />
PRECAUTIONS section for further information).<br />
Clean Indicator Reset<br />
1. Press and hold the EJECT button for five seconds until<br />
CLN RST is displayed.<br />
Display<br />
The display will indicate “TP CLEAN" and a flashing<br />
cassette icon. After five seconds, the display will switch<br />
to its default (Cassette or Clock).<br />
Considerations<br />
The 35 hour time counter will only reset when the EJECT<br />
button is released after “CLN RST” is displayed.<br />
– 43 –
® ®<br />
COMPACT<br />
DIGITAL AUDIO<br />
CD CHANGER OPERATION<br />
MON<br />
SKIP<br />
VOL<br />
AUD<br />
PWR<br />
CLOCK<br />
DSPL<br />
D.SCN SCAN<br />
AUTO<br />
P.SCN<br />
RPT<br />
ILLUM<br />
LOUD<br />
RDM DIM<br />
PAUSE<br />
SEL<br />
TUNE<br />
<strong>RFX</strong>-<strong>8030</strong><br />
1<br />
2<br />
3<br />
4<br />
5 6<br />
=><br />
Disc 3<br />
T 2 1:34<br />
CD CHANGER MODE<br />
CD Changer Select<br />
Press the CDX (stack of discs) button to select CD<br />
Changer mode. If the magazine is loaded in the CD<br />
changer with at least one disc installed, the CD Changer<br />
will play the first track of that CD.<br />
CD Changer Cancel<br />
The CD Changer mode can be canceled by pressing the<br />
SINE WAVE (tuner) or the CASSETTE (tape) buttons.<br />
Display<br />
The display will indicate Disc #, Track #, Elapsed Time<br />
and the CD Changer Icon for five seconds. If there aren't<br />
any CDs or magazines loaded in the CD Changer, the<br />
display will indicate “NO CDX”. After five seconds, the<br />
display will switch to its default (CD or Clock).<br />
The CDX Icon will always be displayed if a disc is<br />
loaded in the CD Changer.<br />
Considerations<br />
Pressing the CDX (stack of discs) button will take<br />
priority over any mode.<br />
Initial Power-Up Defaults<br />
CD Random Mode Off<br />
CD Repeat Mode<br />
Off<br />
CD Scan<br />
Off<br />
CD Mode Default Display Track #<br />
& Elapsed Time<br />
– 44 –
® ®<br />
® ®<br />
COMPACT<br />
DIGITAL AUDIO<br />
COMPACT<br />
DIGITAL AUDIO<br />
MON<br />
SKIP<br />
VOL<br />
AUD<br />
PWR<br />
CLOCK<br />
DSPL<br />
D.SCN SCAN<br />
AUTO<br />
P.SCN<br />
RPT<br />
ILLUM<br />
LOUD<br />
RDM DIM<br />
PAUSE<br />
SEL<br />
TUNE<br />
<strong>RFX</strong>-<strong>8030</strong><br />
1<br />
2<br />
3<br />
4<br />
5 6<br />
Disc 1<br />
Disc 2<br />
Disc 3<br />
etc.<br />
DISC SELECTION<br />
Disc Select<br />
1. Press and hold the CDX (stack of discs) button to<br />
cycle through the discs in the magazine.<br />
2. Release the CDX button to stop Disc Selection Mode<br />
and resume playing.<br />
Display<br />
The Display will indicate Disc#, Track#, Elapsed Time<br />
(00) and the CDX Icon until the function is canceled. The<br />
display will also indicate the CDX Icon when the magazine<br />
is loaded in the CD changer with at least one disc.<br />
Considerations<br />
The audio will be muted until the disc selection is made.<br />
MON<br />
SKIP<br />
VOL<br />
AUD<br />
PWR<br />
CLOCK<br />
DSPL<br />
D.SCN SCAN<br />
AUTO<br />
P.SCN<br />
RPT<br />
ILLUM<br />
LOUD<br />
RDM DIM<br />
PAUSE<br />
SEL<br />
TUNE<br />
<strong>RFX</strong>-<strong>8030</strong><br />
1<br />
2<br />
3<br />
4<br />
5 6<br />
Disc 3<br />
T 2<br />
T 1<br />
T 2<br />
T 3<br />
etc.<br />
SCAN<br />
2<br />
=><br />
SCAN<br />
=><br />
CDX TRACK SCAN<br />
Operation<br />
The CD Changer will cycle and play each track on the<br />
currently playing CD for ten seconds.<br />
Disc Scan Select<br />
1. Press the SCAN button to select Scan mode.<br />
2. Press the SCAN button a second time to disable<br />
Scan mode.<br />
Display<br />
The display will indicate “SCAN,” Disc #,Track #,<br />
Elapsed Time and the CD Icon.<br />
Considerations<br />
Scan mode will select the next track, then begin its<br />
cycle mode. Scan mode will continue cycling until the<br />
function is canceled or another function is selected.<br />
– 45 –
® ®<br />
COMPACT<br />
DIGITAL AUDIO<br />
MON<br />
SKIP<br />
VOL<br />
AUD<br />
PWR<br />
CLOCK<br />
DSPL<br />
D.SCN SCAN<br />
AUTO<br />
P.SCN<br />
RPT<br />
ILLUM<br />
LOUD<br />
RDM DIM<br />
PAUSE<br />
SEL<br />
TUNE<br />
<strong>RFX</strong>-<strong>8030</strong><br />
1<br />
2<br />
3<br />
4<br />
5 6<br />
MAGAZINE DISC SCAN<br />
D.SCN<br />
1<br />
=><br />
Disc 3<br />
T 2 DSCAN<br />
Disc1<br />
Disc2<br />
Disc3<br />
etc.<br />
=><br />
Operation<br />
The CD Changer will cycle and play the first track of<br />
each disc for ten seconds.<br />
Disc Scan Select<br />
1. Press the D.SCAN button to select Disc Scan mode.<br />
2. Press the D.SCAN button a second time to disable<br />
Disc Scan mode.<br />
Display<br />
The display will indicate “D.SCN,” Disc #, Track #,<br />
Elapsed Time and the CD Changer Icon.<br />
Considerations<br />
Disc Scan mode will continue cycling until the function<br />
is canceled or another function is selected.<br />
– 46 –
® ®<br />
® ®<br />
COMPACT<br />
DIGITAL AUDIO<br />
COMPACT<br />
DIGITAL AUDIO<br />
MON<br />
SKIP<br />
VOL<br />
AUD<br />
PWR<br />
CLOCK<br />
DSPL<br />
D.SCN SCAN<br />
AUTO<br />
P.SCN<br />
RPT<br />
ILLUM<br />
LOUD<br />
RDM DIM<br />
PAUSE<br />
SEL<br />
TUNE<br />
<strong>RFX</strong>-<strong>8030</strong><br />
1<br />
2<br />
3<br />
4<br />
5 6<br />
NEXT TRACK / PREVIOUS TRACK<br />
TUNE<br />
=><br />
T 2 1:34<br />
CD Track Select<br />
1. Press and release the up arrow (^) rocker to select the<br />
next track. Press and release the down arrow (v)<br />
rocker to select the previous track.<br />
2. Consecutive pressing of the up/down (^/v) rocker<br />
will increase or decrease the track number corresponding<br />
to the number of depressions.<br />
Display<br />
The display will indicate Track #, Elapsed Time and the<br />
CD Icon for five seconds. After five seconds, the display<br />
will switch to its default (CD or Clock).<br />
MON<br />
SKIP<br />
VOL<br />
AUD<br />
PWR<br />
CLOCK<br />
DSPL<br />
D.SCN SCAN<br />
AUTO<br />
P.SCN<br />
RPT<br />
ILLUM<br />
LOUD<br />
RDM DIM<br />
PAUSE<br />
SEL<br />
TUNE<br />
<strong>RFX</strong>-<strong>8030</strong><br />
1<br />
2<br />
3<br />
4<br />
5 6<br />
FAST FORWARD / FAST REWIND<br />
TUNE<br />
=><br />
T 2 1:34<br />
Fast Forward/Fast Rewind<br />
1. Press and hold the up arrow (^) rocker to fast forward<br />
the track. Press and hold the down arrow (v) rocker<br />
to fast rewind the track.<br />
2. Release the up/down arrow rocker to stop the fast<br />
forward/rewind function and resume play mode.<br />
Display<br />
The display will indicate the accelerated Elapsed Time<br />
for as long as the up/down arrow (^/v) rocker is depressed.<br />
– 47 –
® ®<br />
COMPACT<br />
DIGITAL AUDIO<br />
MON<br />
SKIP<br />
VOL<br />
AUD<br />
PWR<br />
CLOCK<br />
DSPL<br />
D.SCN SCAN<br />
AUTO<br />
P.SCN<br />
RPT<br />
ILLUM<br />
LOUD<br />
RDM DIM<br />
PAUSE<br />
SEL<br />
TUNE<br />
<strong>RFX</strong>-<strong>8030</strong><br />
1<br />
2<br />
3<br />
4<br />
5 6<br />
RPT<br />
3<br />
=><br />
Disc 3 RPT<br />
T 2 1:34<br />
➥<br />
=>➥<br />
➥<br />
➥<br />
Track<br />
RPT<br />
3<br />
CDX REPEAT PLAY<br />
Operation<br />
The CD Changer will repeat the current playing track or<br />
the entire disc.<br />
Repeat Track Select<br />
1. Press the RPT (repeat) button to select Repeat Track<br />
mode.<br />
2. Press the RPT (repeat) button two times to disable<br />
Repeat Track mode.<br />
Repeat Disc Select<br />
1. Press the RPT (repeat) button two times to select<br />
Repeat Disc mode.<br />
2. Press the RPT (repeat) button a third time to disable<br />
Repeat Disc mode.<br />
=> => =>➥<br />
RPT<br />
3<br />
Disc 3 RPT<br />
T 2 1:34<br />
Display<br />
The display will indicate “RPT,” Disc #, Track #, and the<br />
CD Changer Icon. The CD Changer Icon will flash when<br />
in Repeat Disc mode.<br />
Considerations<br />
Repeat Track/Repeat Disc mode will repeat only the<br />
current playing track or disc. Repeat Track/Repeat Disc<br />
mode will continue until the function is canceled or<br />
another function is selected.<br />
➥<br />
➥<br />
➥<br />
Disc<br />
– 48 –
® ®<br />
® ®<br />
COMPACT<br />
DIGITAL AUDIO<br />
COMPACT<br />
DIGITAL AUDIO<br />
MON<br />
SKIP<br />
VOL<br />
AUD<br />
PWR<br />
CLOCK<br />
DSPL<br />
D.SCN SCAN<br />
AUTO<br />
P.SCN<br />
RPT<br />
ILLUM<br />
LOUD<br />
RDM DIM<br />
PAUSE<br />
SEL<br />
TUNE<br />
<strong>RFX</strong>-<strong>8030</strong><br />
1<br />
2<br />
3<br />
4<br />
5 6<br />
CDX RANDOM PLAY<br />
RDM<br />
4<br />
=> =><br />
Disc 3 RDM<br />
T 2 1:34<br />
Disc1 T2<br />
Disc3 T10<br />
Disc5 T7<br />
etc.<br />
Operation<br />
Random Play will randomly select and play tracks from<br />
all discs in the CD Changer.<br />
Random Play Select<br />
1. Press the RDM (random) button to select Random<br />
Play mode.<br />
2. Press the RDM (random) button a second time to<br />
disable Random Play mode.<br />
Display<br />
The display will indicate “RDM,” Disc #, Track #,<br />
Elapsed Time and the CD Icon.<br />
Considerations<br />
The Random Play mode will begin its cycle after<br />
completing the current playing track. Random Play<br />
mode will continue until the function is canceled.<br />
VOL<br />
AUD<br />
PWR<br />
CLOCK<br />
DSPL<br />
D.SCN SCAN<br />
AUTO<br />
P.SC<br />
RPT N<br />
ILLUM<br />
LOUD<br />
RDM DIM<br />
PAUSE<br />
SEL<br />
TUNE<br />
<strong>RFX</strong>-8103<br />
1<br />
2 3<br />
4<br />
5<br />
6<br />
PAUSE<br />
6<br />
=><br />
T 2 1:34 T 2 PAUS<br />
CD PAUSE<br />
Pause CD<br />
1. Press the PAUSE button to stop the current<br />
playing track and reduce the volume to<br />
minimum.<br />
2. Press the PAUSE button a second time to<br />
resume playing the track at the position<br />
prior to stopping.<br />
Display<br />
The display will indicate “PAUS” and Track #.<br />
– 49 –
® ®<br />
COMPACT<br />
DIGITAL AUDIO<br />
EXTERNAL AUDIO OPERATION<br />
MON<br />
SKIP<br />
VOL<br />
AUD<br />
PWR<br />
CLOCK<br />
DSPL<br />
D.SCN SCAN<br />
AUTO<br />
P.SCN<br />
RPT<br />
ILLUM<br />
LOUD<br />
RDM DIM<br />
PAUSE<br />
SEL<br />
TUNE<br />
<strong>RFX</strong>-<strong>8030</strong><br />
1<br />
2<br />
3<br />
4<br />
5 6<br />
Audio<br />
External Audio Source<br />
EXTERNAL AUDIO INPUT<br />
SEL<br />
=><br />
Cassette/Tuner<br />
Mode<br />
Green/White<br />
<br />
EX AUDIO<br />
Mode<br />
Switch<br />
Operation<br />
The External Audio Input is a 2-channel input that<br />
allows the source unit to play an additional audio<br />
source (VCR, video game, etc.)<br />
External Audio Select<br />
1. Press the SEL (select) button to switch to EX AU-<br />
DIO.<br />
2. Press the SEL button a second time to revert back<br />
to Cassette/Tuner mode.<br />
=><br />
…OR…<br />
Cassette/Tuner<br />
Mode<br />
<br />
EX AUDIO<br />
Mode<br />
1. Chassis ground the Green/White wire (use relay or<br />
switch) to select EX AUDIO Mode.<br />
2. Disconnect the wire from chassis ground to revert<br />
back to Cassette/Tuner mode.<br />
Display<br />
The display will indicate “EX AUDIO” for five seconds<br />
then switch to its default (External Audio or Clock).<br />
Considerations<br />
The SEL (select) button has priority control over the<br />
Green/White trigger wire.<br />
NOTE: Since the External Audio Input and CD Changer<br />
share the same 13-pin DIN, the source unit can only<br />
support one device at a time.<br />
– 50 –
®<br />
®<br />
IR REMOTE OPERATION<br />
+<br />
–<br />
1-6<br />
ANY BUTTON “WAKE UP”<br />
+<br />
–<br />
=><br />
VOL 23<br />
Operation<br />
The “Wake Up” feature allows the IR Remote to turn<br />
on the source unit without the use of the PWR button.<br />
Any Button “Wake Up”<br />
Press any button except the “Diamond R” button to<br />
turn on the source unit.<br />
Considerations<br />
This function is only active when the ignition power<br />
is on.<br />
+<br />
–<br />
1-6<br />
VOLUME<br />
ADJUSTMENT<br />
+<br />
–<br />
=><br />
VOL 23<br />
Operation<br />
Press the VOLUME (+) rocker to increase the audio<br />
level. Press the VOLUME (–) rocker to decrease the<br />
audio level.<br />
Display<br />
The display will indicate the number (0-38) corresponding<br />
to the audio level selected.<br />
Considerations<br />
Five seconds after the last volume adjustment, the<br />
display will switch to the default display.<br />
– 51 –
+<br />
–<br />
1-6<br />
®=><br />
><br />
><br />
><br />
TUNER MODE<br />
><br />
SEEK 100.3<br />
CDX MODE<br />
><br />
T 2 1.34<br />
CASSETTE MODE<br />
><br />
NEXT ▲ 007<br />
TUNE RADIO/<br />
SEEK TRACK ADJUSTMENT<br />
Tune Radio<br />
When in Tuner mode, pressing the TUNE (^/v) rocker<br />
will enable the radio to Seek up/down to the next radio<br />
station.<br />
Considerations<br />
If the end of the frequency band is reached, the seek will<br />
wrap around to the opposite end of the band and<br />
continue to seek.<br />
Seek Track<br />
When in Cassette/CDX, pressing the TUNE (^/v) rocker<br />
will advance the Cassette Player/CD Changer to the<br />
next/previous track.<br />
CDX Considerations<br />
If the highest track is reached, the unit will wrap around<br />
to track #1 and begin playing. If the lowest track is<br />
reached, the unit will wrap around to the highest track#<br />
and begin playing.<br />
Cassette Consideration<br />
If the highest or lowest track is reached, the player will<br />
reverse the cassette and begin playing.<br />
– 52 –
®<br />
®<br />
+<br />
–<br />
1-6<br />
TUNER MODE<br />
FM 1<br />
FM 2<br />
FM 3<br />
AM<br />
Tuner Select<br />
1. Press the SINE WAVE (tuner) button to select the<br />
radio tuner and go to the last active band.<br />
2. Consecutive pressing of the SINE WAVE (tuner)<br />
button cycles the radio through FM1, FM2, FM3,<br />
and AM.<br />
=><br />
FM 1<br />
TUNE 100.3<br />
Display<br />
The display will indicate “TUNE”, station frequency<br />
and band indicator. After five seconds, the display will<br />
switch to its default (Tuner frequency or Clock) dependent<br />
on its program default.<br />
+<br />
–<br />
1-6<br />
TUNER PRESETS<br />
1<br />
2<br />
3<br />
4<br />
5<br />
6<br />
1-6<br />
=><br />
FM 1 CH1<br />
TUNE 100.3<br />
Selecting Presets<br />
1. Press the 1-6 (channel preset) button to tune the<br />
radio to the frequency stored in preset #1.<br />
2. Consecutive pressing of the 1-6 (channel preset)<br />
button (within five seconds of the previous depression)<br />
will cycle through each tuner preset.<br />
Display<br />
Along with the preset which has been selected, the<br />
display will indicate “TUNE,” station frequency and<br />
band indicator. After five seconds, the display will<br />
revert to its default (Tuner or Clock).<br />
Considerations<br />
If the highest preset (#6) has been reached, the unit<br />
will wrap around to Preset #1.<br />
– 53 –
®<br />
+<br />
–<br />
1-6<br />
CD CHANGER MODE<br />
Disc 1<br />
Disc 2<br />
Disc 3<br />
etc.<br />
CD Changer Select<br />
1. Momentarily press the CDX (stack of discs)<br />
button to select the operation of the optional CD<br />
Changer.<br />
2. Press and hold the CDX button to cycle through<br />
the discs in the magazine.<br />
3. Release the CDX button to stop disc selection<br />
mode and resume playing.<br />
Display<br />
Along with the CD Changer icon, the display will<br />
indicate Disc#, Track#, and Elapsed Time for approximately<br />
five seconds. After five seconds, the<br />
display will return to its default (CD or Clock).<br />
Considerations<br />
Pressing this button without a CD inserted in the CD<br />
Changer will indicate “NO CDX.” After five seconds,<br />
the display will return to its default (CD or<br />
Clock).<br />
The selection of the CDX (stack of discs) button will<br />
stop the in-dash Cassette Player and activate the CD<br />
Changer.<br />
– 54 –
®<br />
+<br />
–<br />
1-6=><br />
TP ▲ 007<br />
CASSETTE PLAYER MODE<br />
CD Player Select<br />
1. Press the Cassette button to select Cassette mode.<br />
If a cassette has been previously loaded, it will begin<br />
playing where it previously left off.<br />
Display<br />
Along with the Cassette icon, the display will indicate<br />
Track # and Elapsed Time. After five seconds the display<br />
will return to its default (Cassette or Clock).<br />
Considerations<br />
Pressing this button without a tape inserted will indicate<br />
“NO TAPE.” After five seconds, the display will return<br />
to its default (Cassette or Clock).<br />
Pressing the Cassette button will take priority over any<br />
mode currently playing.<br />
– 55 –
®<br />
®<br />
®<br />
+<br />
–<br />
1-6<br />
PAUSE / MUTE<br />
T 2<br />
T 2<br />
CASS/CDX<br />
Mode<br />
=><br />
=><br />
PAUS<br />
Tuner/External<br />
Audio Mode<br />
PAUS<br />
Pause Select (Cassette/CDX)<br />
1. When in Cassette/CDX Mode, press the II (pause)<br />
button to pause the current playing track.<br />
2. Press the II button a second time to resume playing.<br />
Mute Select (Tuner/External Audio)<br />
1. When in Tuner/External Audio Mode, press the II<br />
(pause) button to mute the radio.<br />
2. Press the II button a second time to resume playing<br />
the radio station.<br />
Display<br />
Along with the appropriate Cassette, CDX, Tuner, or<br />
External Audio indicators, “PAUS” will be indicated on<br />
the display.<br />
+<br />
–<br />
®<br />
PULSE<br />
1-6<br />
®<br />
=><br />
Output C<br />
(+12V for 500ms)<br />
Pulse Output Select<br />
Press the DIAMOND R button to switch “Output C” of<br />
the source unit from 0 volts to +12 volts for a period of<br />
500ms. The current available from this output is 300mA<br />
maximum.<br />
Display<br />
There will not be any display changes corresponding<br />
to this function.<br />
Considerations<br />
This function is only active when the ignition power is on.<br />
Please refer to your local Authorized Rockford Fosgate Dealer<br />
for possible applications on the Pulse.<br />
– 56 –
®<br />
® ®<br />
1-6<br />
COMPACT<br />
DIGITAL AUDIO<br />
®<br />
+<br />
–<br />
1-6<br />
IR REMOTE RANGE<br />
MON<br />
SKIP<br />
VOL<br />
AUD<br />
PWR<br />
CLOCK<br />
DSPL<br />
D.SCN SCAN<br />
AUTO<br />
P.SCN<br />
RPT<br />
ILLUM<br />
LOUD<br />
RDM DIM<br />
PAUSE<br />
SEL<br />
TUNE<br />
<strong>RFX</strong>-<strong>8030</strong><br />
1<br />
2<br />
3<br />
4<br />
5 6<br />
45° 45°<br />
For optimum range, keep the IR Remote<br />
within 45° of the source unit's faceplate.<br />
+<br />
–<br />
BATTERY STORAGE<br />
COMPARTMENT<br />
+<br />
CR2032<br />
+<br />
CR2032<br />
Replace Batteries<br />
Remove the two #1 Phillips screws and carefully remove<br />
the back cover.<br />
Replace the batteries with two “CR2032” (or equivalent)<br />
“watch type” lithium batteries.<br />
Replace Cover<br />
Replace the back cover and the two #1 Phillips screws.<br />
(DO NOT OVERTIGHTEN.)<br />
Considerations<br />
Use only lithium batteries and observe proper polarity.<br />
– 57 –
ROCKFORD FOSGATE ACCESSORIES<br />
◆ Replacement Faceplate Case (HW-1222-A)<br />
If you're always “on the go”, there have been plenty of times you have<br />
dropped, kicked or sat on your detachable faceplate case. After all,<br />
the function of the case is to protect your investment. So, if you find<br />
your old faceplate case needs to be retired, replacements are available<br />
for continued protection.<br />
◆ 6-Disc CD Changer (<strong>RFX</strong>-8601)<br />
The <strong>RFX</strong>-8601 is a 6-disc CD changer compatible with <strong>RFX</strong> source<br />
units. The CD changer features dual 1 bit D/A converters with 8x<br />
oversampling for precise playback and a multi-damping system to<br />
reduce CD skipping in even the bumpiest conditions. The five way<br />
adjustable suspension accommodates horizontal and vertical mounting<br />
as well as any angle between 0° and 90°. All data and power<br />
transmissions are carried through a single 18 foot CDX cable. The CD<br />
Changer's compact size facilitates stealth mounting in small center<br />
consoles or glove boxes.<br />
® ®<br />
R F X - 8 6 0 1<br />
6<br />
disc<br />
changer<br />
ATTENTION: We recommend your Authorized Rockford Fosgate<br />
Dealer install your new accessory.<br />
– 58 –
®<br />
®<br />
◆ Additional 6-Disc Magazine (<strong>RFX</strong>-1610)<br />
Eliminate the frustration of constantly<br />
switching out the discs in your CD<br />
Changer with additional 6-Disc Magazines.<br />
Maximize your listening time<br />
by ejecting the old tunes and popping<br />
in new ones. Use several magazines to<br />
sort your music by artist, music type or<br />
even his and hers.<br />
DIGITAL AUDIO<br />
COMPACT<br />
• INSERT IN THIS DIRECTION •<br />
◆ IR Remote (<strong>RFX</strong>-1030)<br />
The <strong>RFX</strong>-1030 is an Infrared Remote Control<br />
which operates many functions of the source<br />
unit. The remote features a Tuner button used<br />
for selecting one of four tuner modes, a CD<br />
Changer button for cycling between discs and<br />
a CD/Cassette mode button. A Volume rocker<br />
adjusts the source unit's audio level and a<br />
Tune rocker selects radio stations in Tuner<br />
mode and tracks in CD/Cassette mode. The<br />
remote also features a Tuner Preset button for<br />
recalling presets stored in memory and a Pause/<br />
Mute button. For special applications, a Pulse button triggers a<br />
momentary positive pulse from the source unit to activate accessories<br />
like a trunk release, amp rack or neon lights. The IR Remote is<br />
available for Rockford Fosgate source units that are IR Remote<br />
compatible.<br />
ATTENTION: We recommend your Authorized Rockford Fosgate<br />
Dealer install the pulsed output function of the source unit.<br />
+<br />
–<br />
1-6<br />
– 59 –
SOURCE UNIT TROUBLESHOOTING<br />
TROUBLE-S<br />
H<br />
O<br />
O<br />
T<br />
I<br />
N<br />
G<br />
Symptom Diagnosis Remedy<br />
Source Unit does<br />
not turn on<br />
No backlight<br />
illumination<br />
No audio output<br />
(display indicates<br />
“VOL 0”)<br />
Speakers pop when<br />
turning Source Unit<br />
On/Off<br />
Voltage applied to Red<br />
and Yellow wires is not<br />
between 10.5 and 16<br />
volts or there is no voltage<br />
present<br />
Source unit is not properly<br />
grounded<br />
Voltage applied to Orange<br />
wire is not between<br />
10.5 and 16 volts or there<br />
is no voltage present<br />
Source Unit is not properly<br />
grounded<br />
Brown wire is grounded<br />
Cellular phone or other<br />
component is falsely triggering<br />
Brown wire<br />
Turn On “A” and “B” are<br />
not configured properly<br />
Check battery, fuses and connections<br />
and repair or replace<br />
as necessary. If voltage is above<br />
+16 volts, have the electrical<br />
system inspected by an authorized<br />
car service center<br />
Check wiring and repair as<br />
necessary<br />
Check battery, fuses and connections<br />
and repair or replace<br />
as necessary. If voltage is above<br />
+16 volts, have the electrical<br />
system inspected by an authorized<br />
car service center<br />
Check wiring and repair as<br />
necessary<br />
Check wiring and repair as<br />
necessary<br />
Disconnect Brown wire and<br />
check operation. Repair wiring<br />
as necessary<br />
Check wiring and repair as<br />
necessary. Refer to “Wiring the<br />
System” section of this <strong>manual</strong><br />
for further information<br />
Bad component in the<br />
signal chain<br />
Check connections and bypass<br />
additional components (crossovers<br />
and equalizers) between<br />
the source unit and the amplifier.<br />
Connect one component<br />
at a time to determine the culprit.<br />
Connect this component<br />
to the Blue/White wire and<br />
check for pops. If pops persist,<br />
repair or replace component<br />
as necessary<br />
– 60 –
Symptom Diagnosis Remedy<br />
TROUBLE-S<br />
H<br />
O<br />
O<br />
T<br />
I<br />
N<br />
G<br />
Turn On “C”<br />
does not work<br />
Tuner cannot<br />
“tune-in” any<br />
radio stations<br />
Pulsed Output accessible<br />
only through “Diamond<br />
R” button on IR Remote<br />
Blue/Red wire disconnected<br />
IR Remote is not operating<br />
properly<br />
External relay system not<br />
operating properly or<br />
draws more than 300mA<br />
Antenna is disconnected<br />
Invest in the optional IR Remote<br />
Check connections and repair<br />
wiring as necessary<br />
Refer to the IR Remote<br />
“Troubleshooting” section for<br />
more information<br />
Disconnect Blue/Red wire<br />
from the system and connect<br />
to voltmeter. Press the “Diamond<br />
R” button to verify a<br />
pulsed output of +12 volts for<br />
500ms. Repair external wiring<br />
as necessary<br />
Check connections and repair<br />
as necessary<br />
Tuner has poor<br />
reception<br />
Cassette will not<br />
load into Source<br />
Unit (also see<br />
error codes)<br />
Antenna is disconnected<br />
or not properly grounded<br />
to vehicle<br />
Antenna cable is intermittent<br />
or damaged<br />
Antenna is wrong type<br />
for AM/FM frequencies<br />
Voltage applied to Red<br />
and Yellow wires is not<br />
between 10.5 and 16<br />
volts or there is no voltage<br />
present<br />
Check connections and installation<br />
of antenna and repair or<br />
replace as necessary<br />
Disconnect antenna and test<br />
with known working antenna.<br />
If tuner works, check installation<br />
and repair antenna wiring<br />
as necessary<br />
Consult your local Authorized<br />
Rockford Fosgate Dealer for<br />
proper antenna selection<br />
Check battery, fuses and connections<br />
and repair or replace<br />
as necessary. If voltage is above<br />
+16 volts, have the electrical<br />
system inspected by an authorized<br />
car service center<br />
– 61 –
Symptom Diagnosis Remedy<br />
TROUBLE-S<br />
H<br />
O<br />
O<br />
T<br />
I<br />
N<br />
G<br />
Cassette will not<br />
eject<br />
(Also see error<br />
codes)<br />
Distorted Sound<br />
Quality<br />
Error Code E10<br />
Error Code E11<br />
Error Code E12<br />
Error Code E13<br />
Error Code E14<br />
Voltage applied to Yellow<br />
wire is not between<br />
10.5 and 16 volts or there<br />
is no voltage present<br />
Source Unit is too hot or<br />
too cold<br />
Condensation has developed<br />
on the tape head<br />
Dirty tape head<br />
Tight cassette tape<br />
Cut cassette tape<br />
Dirty tape player<br />
Communication error<br />
Warped cassette tape<br />
Check battery, fuses and connections<br />
and repair or replace<br />
as necessary. If voltage is above<br />
+16 volts, have the electrical<br />
system inspected by an authorized<br />
car service center<br />
Wait until source unit is within<br />
proper operating temperature<br />
(between –10°C and +70°C)<br />
Eject cassette from source unit<br />
and wait for approximately an<br />
hour for moisture to evaporate<br />
Eject cassette from source unit<br />
and clean tape head with “wettype”<br />
cleaning cassette (refer<br />
to PRECAUTIONS section for<br />
information)<br />
Eject cassette from source unit<br />
and repair or replace cassette<br />
Eject cassette from source unit<br />
and play only cassettes in good<br />
condition<br />
Eject cassette from source unit<br />
and clean tape head with “wettype”<br />
cleaning cassette (refer<br />
to PRECAUTIONS section for<br />
information)<br />
Remove faceplate and press<br />
“Reset” button on source unit.<br />
If failure code continues, see<br />
your local Authorized Rockford<br />
Fosgate Dealer<br />
Eject cassette from source unit<br />
and play only cassettes in good<br />
condition<br />
– 62 –
Symptom Diagnosis Remedy<br />
TROUBLE-S<br />
H<br />
O<br />
O<br />
T<br />
I<br />
N<br />
G<br />
Engine Noise<br />
Radiated Noises<br />
Source unit is not<br />
grounded properly<br />
Noise is radiating into<br />
RCA signal cable<br />
Bad component in the<br />
signal chain<br />
Noise is radiating into<br />
the speaker cables<br />
Multiple grounds in the<br />
audio system<br />
No RF suppression of<br />
blower motors<br />
No RF suppression of<br />
switches<br />
Check connections and repair<br />
wiring as necessary<br />
Check connections and run<br />
the RCA cables on a different<br />
route away from sources of<br />
high current<br />
Check connections and bypass<br />
additional components (crossovers<br />
and equalizers) between<br />
the source unit and the amplifier.<br />
Connect one component<br />
at a time to determine the culprit.<br />
Repair or replace components<br />
as necessary<br />
Disconnect existing speakers<br />
and connect a test speaker to<br />
the output terminals of the<br />
Source unit. If noise is gone,<br />
reroute the speaker cables<br />
away from sources of high<br />
current<br />
Check ground connections and<br />
connect amplifiers, signal processors,<br />
and other components<br />
to a central location or try a<br />
different grounding point on<br />
the chassis<br />
Connect filter cap (Radio Shack<br />
#272-1085) in-line on B+ as close<br />
to blower motor as possible<br />
Connect a .1µf - .01µf nonpolarized<br />
capacitor across<br />
switch contacts<br />
– 63 –
CD CHANGER TROUBLESHOOTING<br />
TROUBLE-S<br />
H<br />
O<br />
O<br />
T<br />
I<br />
N<br />
G<br />
Symptom Diagnosis Remedy<br />
Error Code E30<br />
(Optics Focus<br />
Error)<br />
Error Code E31<br />
Disc loaded upside<br />
down into magazine<br />
CD Changer is too hot<br />
or too cold<br />
Condensation has developed<br />
on the playback<br />
mechanism<br />
Excessive dirt or dust<br />
on disc<br />
Excessive fingerprints<br />
on disc<br />
Stickers or labels<br />
on disc<br />
Excessive scratches<br />
on disc<br />
Disc is warped,<br />
cracked or severely<br />
damaged<br />
Loss of optical tracking<br />
control<br />
Reload disc into magazine “label<br />
side up”<br />
Wait until CD Changer is<br />
within proper operating temperature.<br />
(between –10°C and<br />
+60°C)<br />
Remove the disc from the<br />
source unit and wait for approximately<br />
an hour for the<br />
moisture to evaporate<br />
Clean disc to remove dirt or<br />
dust as necessary<br />
Clean disc to remove fingerprints<br />
as necessary<br />
Remove stickers or labels from<br />
the disc's playing side and any<br />
excess adhesive as necessary<br />
Clean as necessary to remove<br />
aggravating dust and fingerprints<br />
and try to replay disc. If<br />
disc still does not play, you<br />
now have a miniature Frisbee<br />
Eject damaged disc from CD<br />
Changer and play only nondamaged<br />
discs<br />
Press “Reset” button on CD<br />
Changer. If failure code continues,<br />
see your local Authorized<br />
Rockford Fosgate Dealer<br />
– 64 –
Symptom Diagnosis Remedy<br />
TROUBLE-S<br />
H<br />
O<br />
O<br />
T<br />
I<br />
N<br />
G<br />
Error Code E32<br />
(Load/Unload<br />
motor problem)<br />
Foreign object(s) are preventing<br />
the disc from loading<br />
or unloading<br />
Check CD Changer by cleaning<br />
disc load/unload area<br />
Error Code E33<br />
(Communication<br />
problem)<br />
Error Code E35<br />
CD Changer does<br />
not operate<br />
Disc is jammed in<br />
CD Changer<br />
No “CDX”<br />
Potential internal motor<br />
problem<br />
Disc cannot be identified<br />
by CD Changer.<br />
Communication error<br />
between Source Unit<br />
and CD Changer<br />
Disc load/unload problem<br />
Disc magazine empty<br />
CDX cable is intermittent<br />
or severely damaged<br />
CDX cable is disconnected<br />
from Source unit<br />
or CD Changer<br />
Communication problem<br />
Disc load/unload problem<br />
Communication problem<br />
See your local Authorized<br />
Rockford Fosgate Dealer<br />
Replace damaged disc(s) in<br />
magazine<br />
Press “Reset” button on CD<br />
Changer<br />
Press “Reset ” button on CD<br />
Changer. If CD Changer does<br />
not operate, see your Local<br />
Authorized Rockford Fosgate<br />
Dealer.<br />
Load at least one disc into the<br />
magazine<br />
Check connections and repair<br />
or replace CDX cable as necessary<br />
Check connections at the<br />
Source unit and CD Changer<br />
and repair wiring as necessary<br />
Press “Reset” button on CD<br />
Changer<br />
Press “Reset” button on CD<br />
Changer. If CD Changer still<br />
does not operate, see your<br />
Local Authorized Rockford<br />
Fosgate Dealer<br />
Unplug 13-pin DIN for a few<br />
minutes and reconnect to CD<br />
Changer<br />
– 65 –
IR REMOTE TROUBLESHOOTING<br />
TROUBLE-S<br />
H<br />
O<br />
O<br />
T<br />
I<br />
N<br />
G<br />
Symptom Diagnosis Remedy<br />
IR Remote has<br />
poor range<br />
IR Remote does<br />
not work<br />
(LED does not<br />
illuminate)<br />
Batteries are weak<br />
Excessive dirt or dust<br />
on IR Remote transmitter<br />
lens<br />
Excessive dirt or dust<br />
on Source unit receiver<br />
lens<br />
IR remote is outside of<br />
optimum transmitting<br />
range<br />
High sunlight conditions<br />
Batteries are dead<br />
Batteries are installed<br />
incorrectly<br />
Check battery condition and<br />
replace as necessary with two<br />
CR2032 (+3 volt) batteries<br />
Clean transmitter lens with<br />
Plexiglas solution and a nonabrasive<br />
cloth as necessary<br />
Clean receiver lens (compact<br />
disc logo) with Plexiglas solution<br />
and a non-abrasive cloth<br />
as necessary<br />
Operate IR Remote within approximately<br />
15 feet and ±45°<br />
from horizontal of the Source<br />
unit's faceplate<br />
Operate IR Remote closer to<br />
source unit<br />
Check battery condition and<br />
replace as necessary with two<br />
CR2032 (+3 volt) batteries<br />
Check battery installation and<br />
repair as necessary (polarity is<br />
indicated on pc board)<br />
– 66 –
SPECIFICATIONS<br />
General<br />
Operating Voltage<br />
Standby Current<br />
Operating Temperature<br />
+10.5V – +16.0V DC<br />
6.5mA max.<br />
Dynamic Power Rating (IHF-202 13 watts x 4<br />
Standard) per channel into a 4Ω load<br />
RMS continuous power per channel, 7.5 watts x 4<br />
all channels driven into a 4Ω load from<br />
20-20,000Hz, with less than 0.1%<br />
Total Harmonic Distortion (THD)<br />
Load Impedance<br />
Preamp Output Voltage<br />
Preamp Output Impedance<br />
Sub-Preamp Output<br />
Equalization<br />
IR Receiver Eye Range<br />
–30°C to +70°C (Receiver)<br />
–10°C to +65°C (Cassette Player)<br />
4Ω min. - 10Ω max.<br />
2.4 VRMS @ 0.05% THD<br />
50Ω<br />
80Hz Low-Pass @ 12dB/octave<br />
Bass: ±8dB @ 60Hz<br />
Treble: ±10dB @ 10kHz<br />
±45° off axis<br />
Chassis Dimensions 7"W x 6 3 ⁄8"D x 2"H<br />
(178mm x 162mm x 50.4mm)<br />
Nosepiece Dimensions 7 1 ⁄16"W x 7 ⁄8"D x 2"H<br />
(trim ring removed)<br />
(179.7mm x 22.2mm x 50.4mm)<br />
(trim ring installed)<br />
7 13 ⁄32"W x 7 ⁄8"D x 2 9 ⁄32"H<br />
(188.1mm x 22.2mm x 57.9mm)<br />
Weight<br />
3.34 (1551g)<br />
Specifications subject to change without notice.<br />
– 67 –
FM Tuner<br />
Tuning Range Americas 87.7-107.9mHz (200kHz spacing)<br />
Eur/Aus 87.5-108mHz (100kHz spacing)<br />
Saudi 87.5-108mHz (100kHz spacing)<br />
Frequency Response<br />
30Hz - 15kHz<br />
Usable Sensitivity 20dB @ 1µV<br />
Alternate Channel Selectivity 90dB<br />
Adjacent Channel Selectivity 50dB<br />
50dB Quieting Sensitivity 18dBf<br />
Signal-to-Noise Ratio<br />
72dB<br />
Distortion
LIMITED W ARRANTY INFORMATION<br />
Rockford Corporation offers a limited warranty on Rockford Fosgate products on the<br />
following terms:<br />
• Length of Warranty<br />
3 years on electronics 90 days on electronic B-stock (receipt required)<br />
2 years on source units 30 days on speaker B-stock (receipt required)<br />
1 year on speakers<br />
• What is Covered<br />
This warranty applies only to Rockford Fosgate products sold to consumers by<br />
Authorized Rockford Fosgate Dealers in the United States of America or its<br />
possessions. Product purchased by consumers from an Authorized Rockford<br />
Fosgate Dealer in another country are covered only by that country’s Distributor<br />
and not by Rockford Corporation.<br />
• Who is Covered<br />
This warranty covers only the original purchaser of Rockford product purchased<br />
from an Authorized Rockford Fosgate Dealer in the United States. In order to<br />
receive service, the purchaser must provide Rockford with a copy of the receipt<br />
stating the customer name, dealer name, product purchased and date of purchase.<br />
• Products found to be defective during the warranty period will be repaired or<br />
replaced (with a product deemed to be equivalent) at Rockford's discretion.<br />
• What is Not Covered<br />
1. Damage caused by accident, abuse, improper operations, water, theft<br />
2. Any cost or expense related to the removal or reinstallation of product<br />
3. Service performed by anyone other than Rockford or an Authorized Rockford<br />
Fosgate Service Center<br />
4. Any product which has had the serial number defaced, altered, or removed<br />
5. Subsequent damage to other components<br />
6. Any product purchased outside the U.S.<br />
7. Any product not purchased from an Authorized Rockford Fosgate Dealer<br />
• Limit on Implied Warranties<br />
Any implied warranties including warranties of fitness for use and merchantability<br />
are limited in duration to the period of the express warranty set forth above. Some<br />
states do not allow limitations on the length of an implied warranty, so this<br />
limitation may not apply. No person is authorized to assume for Rockford Fosgate<br />
any other liability in connection with the sale of the product.<br />
• How to Obtain Service<br />
Please call 1-800-669-9899 for Rockford Customer Service. You must obtain an<br />
RA# (Return Authorization number) to return any product to Rockford Fosgate. You<br />
are responsible for shipment of product to Rockford.<br />
Ship to: Electronics<br />
Rockford Corporation<br />
Warranty Repair Department<br />
2055 E. 5th Street<br />
Tempe, AZ 85281<br />
RA#:_________________<br />
Ship to: Speakers<br />
Rockford Acoustic Design<br />
(Receiving-speakers)<br />
609 Myrtle N.W.<br />
Grand Rapids, MI 49504<br />
RA#:_________________<br />
– 69 –
INTERNATIONAL<br />
I NFORMATION<br />
– 70 –
FUNCIONAMIENTO BÁSICO<br />
Graves, Agudos, Fader, Balance, Sub, Volumen<br />
1.Pulse AUD para seleccionar la función BASS>TREB>FADE>BAL><br />
SUB>VOL<br />
2.Pulse VOL (±) para el ajuste de la selección<br />
Reloj<br />
1.Mantenga pulsado durante 2 segundos la tecla CLOCK para que parpadeen<br />
los dígitos de la hora<br />
2.Pulse el botón TUNE (^/v) para el ajustar la hora<br />
3.Pulse el botón CLOCK para que parpadeen los dígitos de los minutos<br />
4.Pulse el botón TUNE (^/v) para ajustar los minutos<br />
Funciones del Display<br />
1.Pulse el botón DSPL para cambiar entre Tuner, Cassette, CDX, o EX AUD<br />
y Reloj<br />
Pantalla inicial<br />
1.Pulse el botón de la onda senoidal para seleccionar el modo Radio<br />
2.Mantenga pulsado el botón DSPL durante dos segundos<br />
3.Pulse el botón PRESET 6 para seleccionar Radio y tiempo transcurrido, EX<br />
AUD o Reloj<br />
Dimmer de Iluminación<br />
1.Mantenga pulsado el botón DSPL durante dos segundos<br />
2.Pulse el botón DIM para variar cíclicamente la intensidad de 0 (off) a 4<br />
(máx)<br />
Color de Iluminación<br />
1.Mantenga pulsado el botón ILLUM durante dos segundos para seleccionar<br />
entre Verde o Ambar<br />
– 71 –
FUNCIONAMIENTO DE LA RADIO<br />
Sintonizador Standard Mundial<br />
La banda de frecuencias del sintonizador puede ser programda para ser<br />
compatible con los diferentes códigos de los países (excepto Japón)<br />
1.Mantenga pulsado el botón DSPL durante dos segundos<br />
2.Pulse el botón con la onda senoidal (Radio)<br />
3.Pulse SEL para cambiar secuencialmente entre AMERICAS, EUROPA/<br />
AUSTRALIA y ARABIA SAUDI<br />
ESPAÑOL<br />
Modo de Sintonización – AM>FM1>FM2>FM3<br />
1.Pulse el botón de la onda senoidal (radio) para seleccionar el modo de<br />
Sintonizador<br />
2.Pulse sucesivamente el mismo botón para seleccionar secuencialmente<br />
FM1, FM2, FM3 o AM<br />
Presintonias de Radio<br />
1.Sintonice la emisora a grabar<br />
2.Mantenga pulsado durante dos segundos el botón DSPL<br />
3.Mantenga pulsado el botón PRESET (#1, #2, #3, #4, #5, o #6) durante dos<br />
segundos<br />
Modos de Sintonización de Radio – SEEK>TUNE<br />
Modo SEEK (Búsqueda)<br />
1.Pulse TUNE (^/v) para buscar la siguiente emisora<br />
Modo Sintonización<br />
1.Mantenga pulsado TUNE (^/v) para entrar en el modo de sintonización<br />
2.Pulse TUNE (^/v) para seleccionar <strong>manual</strong>mente las emisoras de radio<br />
Presintonización Automática<br />
La radio buscará, y grabará temporalmente, las emisoras con señal más<br />
potente de la banda en la que esté (6 en AM y 18 en FM)<br />
1.Mantenga pulsado el botón P.SCN durante dos segundos para activar/<br />
desactivar el modo de Auto-Store<br />
Escaneo de Presintonias<br />
Cuando esté seleccionado el Preset Scan, la radio mostreará secuencialmente<br />
cada emisora pregrabada durante cinco segundos cada una (18 en FM y 6 en AM)<br />
1.Pulse P.SCN para activar/desactivar el modo de Preset Scan<br />
– 72 –
FUNCIONAMIENTO DEL CASSETTE<br />
Funcionamiento del Eject<br />
Después de la reproducción, si el cassette es extraido, el modo radio se activa<br />
automáticamente<br />
El Eject Mute silencia el audio después de extraer la cinta de cassette<br />
1.Pulse el botón DSPL durante dos segundos<br />
2. Pulse CASSETTE ( ^/v) para seleccionar “P PLAY” o “EJ MUTE”<br />
Bobinado y Rebobinad Rápidos<br />
1.Pulse TUNE (^/v) durante dos segundos<br />
Espacio en Blanco a saltar<br />
Si existe un espacio en blanco de 15 segundos o se detecta una cinta en<br />
blanco, el reproductor bobinará rápidamente la cinta hasta la siguiente<br />
selección<br />
1.Mantenga pulsado el botón SKIP para seleccionar la conexión/desconexión<br />
del modo de Blank Skip<br />
Monitor de Radio<br />
El modo de Radio se conectará temporalmente cuando la cassette se esté<br />
bobinando o rebobinándo<br />
1. Mantenga pulsado el TUNE para bobinar/rebobinar la cassette<br />
2. Mantenga pulsado el botón MON para encender/apagar el modo de<br />
Monitor de Radio<br />
FUNCIONAMIENTO DEL CDX (CARGADOR DE CD'S)<br />
Selección del Disco<br />
1.Mantenga pulsado el botón CDX para saltar cíclicamente de un disco a otro<br />
Escaneo de Pistas<br />
El cargador de CD's reproducirá cada pista del CD actual durante diez<br />
segundos cada una.<br />
1. Pulse el botón SCAN para encender/apagar el modo Scan<br />
Escaneo del Cargador de CD's<br />
El Cargador de CD's reproducirá cíclicamente la primera pista de cada disco<br />
durante 10 segundos<br />
1.Pulse D.SCAN para activar/desactivar la función de Escaneo de Discos<br />
Repetición de la Pista<br />
1.Pulse RPT para seleccionar el modo de Repetición de pista<br />
2.Pulse RPT dos veces para cancelar el modo de Repetición de pista<br />
– 73 –
Repetición del Disco<br />
1.Pulse RPT dos veces para seleccionar el modo de Repetición de disco<br />
2.Pulse RPT una vez más para cancelar el modo de Repetición de disco<br />
Reproducción Aleatoria<br />
Se seleccionarán pistas al azar de todos los discos<br />
1.Pulse RDM para activar/desactivar el modo de Reproducción<br />
FUNCIONAMIENTO DE LA ENTRADA EXTERNA DE AUDIO<br />
La Entrada Externa de Audio en el es de 2 canales y permite que la unidad<br />
reproduzca una fuente de sonido adicional (VCD, Video Juegos, etc.)<br />
1.Pulse SEL para seleccionar el modo EX AUDIO (CDX DIN)<br />
2.Pulse SEL una segunda vez para volver al modo de Cassette/Tuner<br />
––O bien––<br />
1.Ponga a masa del chasis el cable Verde/Blanco para seleccionar la<br />
entrada EX AUDIO<br />
2.Desconecte el cable Verde/Blanco de la masa del chasis para volver al<br />
modo Cassette/Tuner<br />
FUNCIONAMIENTO DEL CONTROL REMOTO POR<br />
INFRARROJOS<br />
Modo Sintonizador – AM>FM1>FM2>FM3<br />
1.Mantengo pulsado el botón de la onda senoidal (radio) para seleccionar<br />
FM1, FM2, FM3, o AM<br />
Presintonias de Radio – (1-6)<br />
1.Pulse los botones 1-6 para seleccionar la primera emisora<br />
2.Mantenga pulsado el botón 1-6 para cambiar entre las presintonias #1,<br />
#2, #3, #4, #5, or #6<br />
Modo Cargador de CD's<br />
1.Mantengo pulsado el botón CDX (Cargado de discos) para seleccionar<br />
Disco 1, Disco 2, Disco 3, etc. del cargador<br />
Pulso “R”<br />
1.Pulse el botón para conmutar la “SALIDA C” de la unidad principal<br />
®<br />
de 0 voltios a +12 voltios durante 500ms. La corriente que se suminstra<br />
es de 300mA.<br />
– 74 –
UTILISATION<br />
Bass, Aigu (Treble), Fader, Balance, Sub, Volume<br />
1.Enfoncez AUD pour selectionner BASS>TREB>FADE*>BAL>SUB*>VOL<br />
2.Enfoncez VOL (±) pour ajuster votre selection<br />
Clock<br />
1.Enfoncez CLOCK durant au moins deux secondes afin de faire clignoter<br />
l'heure<br />
2.Enfoncez TUNE (^/v) pour ajuster l'heure<br />
3.Enfoncez à nouveau CLOCK pour faire clignoter les minutes<br />
4.Utilisez TUNE (^/v) pour ajuster les minutes<br />
Display Recall<br />
1.Enfoncez DSPL pour changer le display entre Tuner, CD, CDX, or EX<br />
AUD* et Clock<br />
Default Display<br />
1.Enfoncez le bouton SINE WAVE pour selectionner Tuner<br />
2.Enfoncez et tenez DSPL enfoncé durant deux secondes<br />
3.Enfoncez PRESET 6 pour selectionner Tuner, Track# & Elapsed Time, EX<br />
AUD* ou Clock<br />
Illumination Dimmer*<br />
1.Enfoncez et tenez DSPL enfoncé durant deux secondes<br />
2.Enfoncez DIM pour changer l'intensité de l'éclairage de 0 (off) à 4 (max)<br />
Illumination Color*<br />
1.Enfoncez et tenez ILLUM enfoncé durant deux secondes pour selectionner<br />
vert ou orange<br />
* Fonction disponible que sur certains modèles<br />
– 75 –
UTILISATION DU TUNER<br />
World Wide Tuner<br />
La bande de fréquence peut être programmé pour convenir au codes des<br />
différents pays (excepté le Japon).<br />
1.Enfoncez et tenez DSPL enfoncé durant deux secondes<br />
2.Enfoncez SIN WAVE (Tuner)<br />
3.Enfoncez SEL pour parcourir AMERICAS, EUR/AUST et SAUDI<br />
Mode Tuner – AM>FM1>FM2>FM3<br />
1.Enfoncez SINE WAVE (tuner) pour entrer en mode Tuner<br />
2.Enfoncez SINE WAVE (tuner) pour sélectionner FM1, FM2, FM3, ou OM<br />
Préselections du Tuner<br />
1.Choisissez la station à mémoriser<br />
2.Enfoncez et tenez DSPL enfoncé durant deux secondes<br />
3.Enfoncez et tenez PRESET (#1, #2, #3, #4, #5, or #6) enfoncé durant deux<br />
secondes<br />
FRANÇAIS<br />
8115/8120 Modes Radio – SEEK>TUNE>SCAN<br />
1.Enfoncez SEL pour selectionner le Mode Seek, Tune ou Scan<br />
2.Enfoncez TUNE (^/v) pour selectionner la station radio<br />
8130/8140 Modes Radio – SEEK>TUNE<br />
Mode SEEK<br />
1.Enfoncez TUNE (^/v) pour selectionner la prochaine station radio<br />
Mode TUNE<br />
1. Enfoncez et tenez TUNE (^/v) pour entrer en Mode “Tune”<br />
2. Enfoncez TUNE (^/v) pour selectionner les stations radio manuellement<br />
Auto Store<br />
La radio va chercer et mémoriser les postes les plus puissants (6 OM et 18 FM)<br />
1.Enfoncez et tenez P.SCN enfoncé durant deux secondes pour activer/<br />
désactiver le mode Auto Store<br />
Preset Scan<br />
Quand Preset Scan est selectionné, la radio vous donnera successivement un<br />
échantillon de chaque station préselectionnée durant cinq secondes chacune<br />
(jusqu'à 18 FM ou 6 OM préselections)<br />
1.Enfoncez P.SCN pour activer ou désactiver le mode Preset Scan<br />
– 76 –
UTILISATION DU CASSETTE<br />
Réglages Eject<br />
Previous Play active le tuner lorsque la cassette est éjectée<br />
Eject Mute coupe le signal audio lorsque la cassette est éjectée<br />
1. Enfoncer la touche DSPL pendant deux secondes<br />
2. Enfoncer la touche CASSETTE (^/v) to select “P PLAY” o “EJ MUTE”<br />
Avance rapide / Rebobinage<br />
1.Enfoncer al touche TUNE (^/ v) pendant deux secondes<br />
Recherche des blancs<br />
Lorsque un blanc de 15 secondes est détecté sur la bande, le lecteur recherce<br />
le morceau suivant en avance rapide<br />
1.Garder enfoncé la touche SKIP pour aciver/désactiver la recherche des<br />
blancs (Blank Skip)<br />
Moniteur radio<br />
La radio est activée lorsque la cassette est en avance rapide ou rebobinage<br />
1.Garder enfoncé la touche TUNE pour activer le bobinage rapide de la<br />
cassette<br />
2.Garder enfoncé la touche MON pour activer/désactiver la fonction<br />
Moniteur Radio<br />
UTILISATION DU CHANGEUR CDX<br />
Disc Selection<br />
1.Enfoncez CDX (changeur CD) et tenez le enfoncé afin de circuler à travers<br />
de chaque CD<br />
Recherce des pistes (Tack Scan)<br />
Le changeur CD va sélectionner chaque morceau du disque pendant dix<br />
secondes<br />
1. Enfoncer la touche SCAN pour activer/désactiver le mode scan<br />
Magazine Disc Scan<br />
Le changeur CD se mettra en marche et passera la premier morceau de chaque<br />
disc pendant dix secondes<br />
1.Enfoncez D.SCAN pour activer ou désactiver le mode Disc Scan<br />
Repeat Track<br />
1.Enfoncez RPT pour selectionner le mode Repeat Track<br />
2.Enfoncez RPT deux fois afin de désactiver le mode Repeat Track<br />
– 77 –
Repeat Disc<br />
1.Enfoncez RPT deux fois le mode Repeat Disc<br />
2.Enfoncez RPT un troiséme fois pour désactiver le mode Repeat Disc<br />
Random Play<br />
Random Play passera arbitrairement différents morceaux des différents CD se<br />
trouvant das le changeur<br />
1.Enfoncez RDM pour activer ou désactiver le mode Random Play<br />
UTILISATION DE L'ENTRÉE AUDIO EXTERNE DU <strong>8030</strong><br />
L'entrée audio externe <strong>8030</strong> est une entrée à deux canaux qui permet à la<br />
source de faire jouer des sources audio additionnelles (vidéo, jeux vidéo,… )<br />
1.Enfoncez SEL pour selectionner le mode EX AUDIO (CDX DIN)<br />
2.Enfoncez SEL une seconde fois pour retourner au mode CD/Tuner<br />
––Ou ––<br />
1.Branchez le fil Vert/Blanc à la masse pour sélectionner EX AUD 2<br />
2.Débranchez le fil Vert/Blanc de la masse pour retourner en mode CD/<br />
Tuner<br />
UTILISATION DE LA TÉLÉCOMMANDE<br />
Tuner Mode – AM>FM1>FM2>FM3<br />
1.Enfoncez SINE WAVE (tuner) et tenez le enfoncé pour sélectionner FM1,<br />
FM2, FM3, ou OM<br />
Tuner Presets – (1-6)<br />
1.Enfoncez 1-6 (canaux préselectionnés) pour selectionner la première<br />
préselection<br />
2.Enfoncez 1-6 et tenez le enfoncé pour selectionner les préselections #1,<br />
#2, #3, #4, #5, or #6<br />
CDX Mode<br />
1.Enfoncez CDX (changeur CD) et tenez le enfoncé pour selectionner<br />
Disc 1, Disc 2, Disc 3, etc. dans le changeur<br />
“R” Pulse<br />
1.Enfoncez pour changer la sortie “C” de la source de 0 volts à +12<br />
®<br />
volts pour 500ms. Le courant disponible est 300mA.<br />
– 78 –
ALLGEMEINE BEDIENUNG<br />
Bass, Treble, Fader, Balance, Sub, Volume<br />
1.Drücken Sie AUD, um BASS>TREB>FADE>BAL>SUB>VOL zu wählen<br />
2.Drücken Sie VOL (±), um die Einstellung zu verändern<br />
Uhr<br />
1.Drücken und halten Sie CLOCK für zwei Sekunden, um die Digital-<br />
Anzeige zum Blinken zu bringen<br />
2.Drücken Sie TUNE (^/v), um die Stunden einzustellen<br />
3.Drücken Sie wieder CLOCK, um auf die Minuten umzuschalten<br />
4.Drücken Sie TUNE (^/v), um die Minuten einzustellen<br />
Display aufrufen<br />
1.Drücken Sie DSPL, um das Display zwischen Tuner, Cassetten, CDX, oder<br />
EX AUD und Uhr umzuschalten<br />
Display Einstellungen<br />
1.Drücken Sie die SINE WAVE Taste, um die Tuner-Einstellung auszuwählen<br />
2.Drücken und halten Sie DSPL für zwei Sekunden<br />
3.Drücken Sie PRESET 6, um zwischen Tuner, verstrichene Spielzeit, EX<br />
AUD oder Uhr umzuschalten<br />
Display Helligkeit<br />
1.Drücken un halten Sie DSPL für zwei Sekunden<br />
2.Drücken Sie DIM, um die Intensität umzuschalten; 0 (off), 4 (max)<br />
Display Farbe<br />
1.Drücken und halten Sid ILLUM für zwei Sekunden, um zwischen Green<br />
oder Amber auszuwählen<br />
– 79 –
BEDIENUNG DES TUNERS<br />
Weltweiter Tuner<br />
Das Frequenzband des Tuners kann programmiert werden, um in den<br />
verschiedenen Ländern einwandfrei zu funktionieren (ausgenommen Japan).<br />
1.Drücken und halten Sie DSPL für zwei Sekunden<br />
2.Drücken Sie SINE WAVE (Tuner)<br />
3.Drücken Sie SEL, um zwischen AMERICAS, EUR/AUST und SAUDI<br />
umzuschalten<br />
Tuner Einstellung – AM>FM1>FM2>FM3<br />
1.Drücken Sie SINE WAVE (tuner), um die Tuner-Einstellung aufzurufen<br />
2.Drücken Sie SINE WAVE (tuner), um zwischen FM1, FM2, FM3 oder AM<br />
auszuwählen<br />
Sender-Festeinstellung<br />
1.Suchen Sie die Station, die gespeichert werden soll<br />
2.Drücken und halten Sie PRESET (#1, #2, #3, #4, #5, #6) für zwei Sekunden<br />
Radio Suchfunktionen – SEEK>TUNE<br />
SEEK Einstellung<br />
1.Drücken Sie TUNE (^/v), um zur nächsten Radio-Station zu springen<br />
TUNE Einstellung<br />
1.Drücken und halten Sie TUNE (^/v), um den Suchmodus einzustellen<br />
2.Drücken Sie TUNE (^/v), um die Radiostationen manuell auswählen zu<br />
können<br />
Automatisches Speichern<br />
Das Radio wird die stärksten Sender, nacheinander und automatisch in dem<br />
ausgesuchten Band abspeichern (18 FM und 6 AM)<br />
1.Drücken und halten Sie P.SCN für ei Sekunden, um den automatischen<br />
Modus ein-oder auszuschalten<br />
DEUTSCH<br />
Anspielfunktion<br />
Wenn die Anspielfunktion ausgewählt wurde, wird jeder gespeicherte Sender<br />
für 5 Sekunden angespielt und dann springt das Radio zum Nächsten<br />
voreingestellten Sender (18 FM oder 6 AM)<br />
1.Drücken Sie P.SCN, um die Anspielfunktion ein-oder auszuschalten<br />
– 80 –
CASSETTE OPERATION<br />
Cassettenauswurf-Voreinstellungen<br />
Previous play ermöglicht dem Gerät, beim Auswurf der Cassette<br />
Eject Mute senkt die Lautstärke, nachdem die Cassette ausgeworfen wurde<br />
1. Drücken Sie DSPL für zwei Sekunden<br />
2. Drücken Sie CASSETTE (^/v) um “P PLAY” oder “EJ MUTE” ¨wählen<br />
Schnelles Vor-Zurückspulen<br />
1. Drücken Sie TUNE (^/ v) für zwei Sekunden<br />
Leerstellen überspringen<br />
Sind 15 Sekunden des Bandes nicht bespielt, spult das Gerät automatisch<br />
vork, bis zur nächsten Aufnahme<br />
1. Drücken und halten Sie SKIP, um die Funktion ein- oder<br />
Radio Monitor<br />
Das Radio schaltet sich automatisch ein, wenn die Cassette Vor- oder<br />
Zurückgespult wird<br />
1. Drücken und halten Sie TUNE um die Cassette Vor- oder Zurückzuspulen<br />
2. Drücken und halten Sie MON um die Funktion ein- oder auszuschalten<br />
BEDIENUNG DES CD-WECHSLERS<br />
CD Auswählen<br />
1.Drücken und halten Sie CDX, um die CD's zu wechseln<br />
Anspielen der Titel<br />
Der CD Wechsler spielt jeden titel auf der CD für 10 Sekunden an<br />
1. Drücken Sie SCAN um die Funktion ein- oder auszuschalten<br />
Anspielen des Magazins<br />
Der CD-Wechsler wind von jeder CD die ersten 10 Sekunden, des ersten<br />
Titels, anspielen<br />
1.Drücken Sie D.SCAN, um den Anspielmodus ein-oder auszuschalten<br />
Wiederholfunktion Titel<br />
1.Drücken Sie RPT, um den Wiederholmodus einzuschalten<br />
2.Drücken Sie RPT zweimal, um den Wiederholmodus auszuschalten<br />
Wiederholfunktion CD<br />
1.Drücken Sie RPT zweimal, um den Wiederholmodus einzuschalten<br />
2.Drücken Sie RPT ein drittes Mal, um den Wiederholmodus auszuschalten<br />
Zufallswidergabe<br />
Die Zufallswiedergabe wird die, auf den CD's enthaltenen Titel, in einer<br />
zufälligen Reihenfolge wiedergeben<br />
1.Drücken Sie RDM, um die Zufallswiedergabe ein-oder auszuschalten<br />
– 81 –
BEDIENUNG DES EXTERNEN AUDIO EINGANGS<br />
Der im 8130 enthaltene, externe zweikanal Audio Eingang, erlaubt es, das<br />
Radio mit einer beliebigen anderen Quelle zu verbinden (Videorekorder,<br />
Videospiel usw.)<br />
1.Drücken Sie SEL, um den EX AUDIO mode anzuwählen (CD-Wechsler<br />
DIN)<br />
2.Drücken Sie ein zweites Mal, um wieder auf den Cassetten/tuner<br />
umzuschalten<br />
––ODER––<br />
1.Grün/weiβes Kabel auf Karosserie Masse erden, um auf EX AUDIO mode<br />
zu schalten<br />
2.Grün/weiβes Kabel von der Masse entfernen, um auf Cassetten/Tuner<br />
mode umzuschalten<br />
IR REMOTE OPERATION<br />
Tuner Einstellung – AM>FM1>FM2>FM3<br />
1.Drücken und halten Sie SINE WAVE (tuner), um zwischen FM1, FM2, FM3<br />
oder AM auszuwählen<br />
Tuner Presets – (1-6)<br />
1.Drücken Sie 1-6 (Speicherplätze), um den Speicherplatz #1 zu wählen<br />
2.Drücken und halten Sie 1-6, um einen Speicherplatz #1, #2, #3, #4, #5,<br />
oder #6 zu wählen<br />
CDX-Wechsler<br />
1.Drücken und halten Sie CDX, um CD1, CD2, CD3 usw. zu wählen<br />
“R” Pulse<br />
1.Drücken Sie , um den “Ausgang C”, des Radios von 0V auf +12V für<br />
®<br />
500ms umzuschalten. Der vorhandene Strom ist 300mA.<br />
– 82 –
FUNZIONI COMUNI<br />
Bassi, Alti, Fader, Bilanciamento, Sub, Volume<br />
1.Premere AUD per selezionare BASS>TREB>FADE>BAL>SUB>VOL<br />
2.Premere VOL (±) per regolare la vostra selezione<br />
Orologio<br />
1.Premere premuto CLOCK per 2 secondi, le cifre delle ore lampeggiano<br />
2.Premere TUNE (^/v) per regolare le ore<br />
3.Premere CLOCK per far lampeggiare le cifre dei minuti<br />
4.Premere TUNE (^/v) per regolare i minuti<br />
Visualizzazione del display<br />
1.Premere DSPL piú volte per visualizzare TUNER, Cassette, CDX, EX<br />
AUD, CLOCK<br />
Impostazione del Display<br />
1.Premere il tasto Onda Sinusoidale per selezionare il tuner<br />
2.Tenere premuto il tasto DSPL per 2 secondi<br />
3.Premere piú volte il tasto Memoria 6 per selezionare Tuner, tempo<br />
trascorso o EX AUD e l'orologio<br />
Dimmer dell'illuminazione<br />
1.Tenere premuto DSPL per 2 secondi<br />
2.Premere piú volte DIM per variare l'intensitá tra 0 (spento) e 4 (max)<br />
Colore dell'illuminazione<br />
1.Tenere premuto ILLUM per 2 secondi per passare da verde ad ambra<br />
– 83 –
SINTONIZZATORE<br />
Sintonizzatore a copertura mondiale<br />
Le bande di frequenza del sintonizzatore possono essere programmate per<br />
adeguarsi ai diversi sistemi dei paesi (Giappone escluso).<br />
1.Tenere premuto DSPL per 2 secondi<br />
2.Premere il tasto Onda Sinusoidale (Tuner)<br />
3.Premere piú volte SEL per selezionare tra AMERICAS, EUR/AUST e<br />
SAUDI<br />
Nota: per l'Italia selezionare EUR/AUST<br />
Funzione sintonizzatore AM>FM1>FM2>FM3<br />
1.Premere Il tasto Onda Sinusoidale per selezionare il sintonizzatore<br />
2.Premere piú volte il tasto Onda Sinusoidale per selezionare FM1, FM2,<br />
FM3, AM<br />
Memorie del sintonizzatore<br />
1.Sintonizzare la stazione da memorizzare<br />
2.Tenere premuto il tasto della memoria desiderata (#1, #2, #3, #4, #5, #6)<br />
per 2 secondi<br />
Modalitá di ricerca – SEEK>TUNE<br />
Funzione SEEK (ricerca automatica)<br />
1.Premere il tasto TUNE (^/v) per sintonizzare la stazione successiva<br />
Funzione TUNE (ricerca <strong>manual</strong>e)<br />
1.Tenere premuto il tasto TUNE (^/v)<br />
2.Premere TUNE (^/v) per selezionare <strong>manual</strong>mente la stazione<br />
Auto Store<br />
Il sintonizzatore ricercherá e memorizzerá temporaneamente le stazioni piú<br />
forti nelle bande selezionate (6 AM e 18 FM)<br />
1.Tenere premuto il tasto P.SCN per 2 secondi per attivare/disattivare la<br />
funzione AUTO STORE<br />
Scan delle memorie<br />
Quando questa funzione é attivata la radio sintonizzerá in modo sequenziale<br />
le stazioni memorizzate per 5 secondi ciascuna (fino a 18 in FM o 6 in AM)<br />
1.Premere P.SCN per attivare/disattivare la funzione<br />
ITALIANO<br />
– 84 –
UNITÁ A CASSETTE<br />
Espulsione<br />
Alla pressione del tasto Eject si puó ottenere l'ascolto della radio o il Mute<br />
1.Premere DSPL hper 2 secondi<br />
2. Premere (UP) per selezionare P = play o EJ per mute<br />
Avvolgimento/riavvolgiemento rapido<br />
1.Premere il tasto ricera UP/DOWN per 2 secondi<br />
Spazio vuoto<br />
Se vengono individuati spazi non incisi di oltre 15 secondi, il lettore si<br />
posizionerá alla prima traccia disponibile<br />
1.Tenere premuto il tasto skip per attivare disattivare la funzione<br />
Radio Monitor<br />
Il sintonizzatore si attiva mentre la cassetta viene riavvolta<br />
1. Mantenere premuto il tasto TUNE per attivare la funzione avvolgimento/<br />
riavvolgimeno<br />
2. Premer MON per attivare/disattivare la funzione<br />
CDX (CAMBIA DISCHI ESTERNO OPZIONALE)<br />
Selezione dei dischi<br />
1.Tenere premuto il tasto CDX (pila di dischi) per selezionare il disco<br />
Preascolto dei brani<br />
Il CD changer suonerá i primi dieci secondi di ciascun brano del disco<br />
1. Premere SCAN per attivare/disattivare la funzione<br />
Preascolto dei dischi<br />
Il CD changer suonerá i primi 10 secondi della prima traccia di ciascun disco<br />
1.Premere D.SCAN per attiavare/disattivare la funzione<br />
Ripetizione traccia<br />
1. Premere il tasto RPT per selezionare la ripetizione della traccia<br />
2. Premere RPT per disattivare la ripetizione della traccia<br />
Ripetizione disco<br />
1.Premere RPT 2 volte per selezionare la ripetizione del disco<br />
2.Premere RPT per disattivare la ripetizione del disco<br />
Riproduzione casuale<br />
Il CD suonerá in ordine casuale le tracce dei dischi contenuti nel changer<br />
1.Premere il tasto RDM per attivare/disattivare la funzione<br />
– 85 –
FUNZIONAMENTO CON INGRESSO AUDIO ESTERNO<br />
L'ingresso audio esterno é un ingresso 2 canali che permette di ascoltare una<br />
sorgente esterna (VCR, Video Game, ecc.)<br />
1.Premere SEL per selezionare EX AUDIO (Connettore DIN)<br />
2.Premere SEL per tornare al funzionamento normale<br />
––OPPURE––<br />
1.Portare a massa il cavo Verde/Bianco per selezionare EX AUDIO<br />
2.Disconnettere Verde/Bianco dalla massa per tornare al funzionamento<br />
normale<br />
FUNZIONAMENTO CON TELECOMANDO AD INFRAROSSI<br />
Funzione sintonizzatore – AM>FM1>FM2>FM3<br />
1.Premere il tasto Onda Sinusoidale per selezionare il sintonizzatore<br />
2. Premere piú volte il tasto Onda Sinusoidale per selezionare FM1, FM2,<br />
FM3, or AM<br />
Memorie del sintonizzatore – (1-6)<br />
1.Premere il tasto 1-6 (preselezione dei canali) per selezionare la memoria #1<br />
2.Tenere premuto il tasto 1-6 per selezionare le memorie #1, #2, #3, #4, #5, #6<br />
CDX (cambia dischi opzionale)<br />
1.Tenere premuto il tasto CDX (pila di dischi) per selezionare il Disco 1,<br />
Disco 2, Disco 3, ecc.)<br />
Impulso “R”<br />
1.Premere il tasto per dare un impulso di 500 ms a +12 volt all'uiscita<br />
®<br />
“C” dell'autoradio. La massima corrente disponibile é 300 mA<br />
DICHIARAZIONE DI CONFORMITÁ<br />
La sottoscritta Rockford Europe GmbH, con sede in BREMEN-<br />
GERMANIA in qualitá di mandatario della Rockford Corporation<br />
di Tempe, AZ - USA, dichiara che gli apparecchi<br />
radioriceventi modelli <strong>RFX</strong>-<strong>8030</strong> rispondono alle norme<br />
contenute nel Decreto 20 agosto 1995, n. 548.<br />
– 86 –
MADE IN MEXICO<br />
Designed and Engineered in the USA<br />
by Delco Electronics and Rockford Fosgate<br />
This product was assembled by Delco Electronics at Deltronicos de Matamoros,<br />
Mexico. Due to the global nature of their manufacturing facilities and the electronics<br />
parts industry in general, some parts may be manufactured in other countries.<br />
3/97<br />
MAN-1542-A<br />
Rockford Fosgate<br />
Rockford Corporation<br />
546 South Rockford Drive<br />
Tempe, Arizona 85281 U.S.A.<br />
In U.S.A., (602) 967-3565<br />
In Europe, Fax (49) 4207-801250<br />
In Japan, Fax (81) 559-79-1265