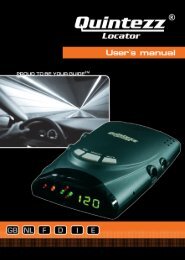
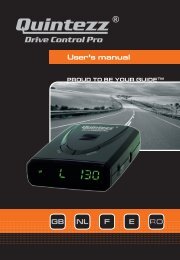
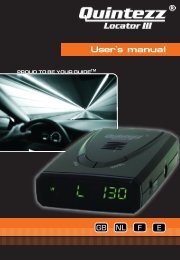
Drive Control Pro manual GB - Quintezz
Drive Control Pro manual GB - Quintezz
Drive Control Pro manual GB - Quintezz

You also want an ePaper? Increase the reach of your titles
YUMPU automatically turns print PDFs into web optimized ePapers that Google loves.
English<br />
OVERVIEW BEFORE GETTING STARTED<br />
This overview gives you a structure of the steps that need to be followed before you can get started.<br />
All points listed below will be described in detail in the following chapters.<br />
1. Install the DRIVE CONTROL PRO into your car. (See page 4 ‘Installation in the car’ to find out how<br />
to install the DRIVE CONTROL PRO into your car.)<br />
2. Connect the GPS device (A) to your computer with the USB cable and download the latest<br />
database with fixed camera locations via www.quintezz.com into your DRIVE CONTROL PRO.<br />
(See page 16 ‘Download database locations’ to find out how to download the latest database into<br />
your device.)<br />
3. Step into your car with the updated GPS device (A), mount the GPS device on the dashboard with<br />
the Velcro tape and connect it to the radar / laser detector (B-C) and start your car.<br />
4. The GPS device will now start searching for the GPS satellites. As soon as the satellites were<br />
found, the DRIVE CONTROL PRO will start working.<br />
5. You can now set the menu according to your own preferences. You can e.g. choose the language,<br />
set in a maximum speed, … and you can of course choose to switch the radar detector ON or OFF.<br />
(See page 8 ‘Settings of the <strong>Drive</strong> <strong>Control</strong> <strong>Pro</strong>’ to find out how to set the menu.)<br />
INSTALLATION IN THE CAR<br />
3.1 MOUNTING THE DRIVE CONTROL PRO<br />
3.1.1 MOUNTING THE GPS DEVICE (A)<br />
See illustration II<br />
Illustration II<br />
General guidelines:<br />
• The unit may be positioned within 25° of horizontal without significantly reducing performance.<br />
• Mount the unit on top of the dashboard so that the control panel is plainly visible for the driver.<br />
• Do not leave it in direct sunlight for long periods of time.<br />
Mounting guidelines:<br />
Use the Hook and Loop Fastener Velcro tape to mount the GPS device on the dashboard. Make sure<br />
the dashboard is clean and dry before using the tape. The device should be mounted upwards, in<br />
direction of the sky, to catch the satellites.<br />
• Remove backing from the “LOOP (fuzzy)” Velcro piece, fix this to the bottom of your unit and press<br />
firmly.<br />
• Clean the dashboard with common rubbing alcohol to remove dirt and grease.<br />
• Peel the backing from the “hook” velcro side and press the unit into the desired position on the<br />
dashboard.