

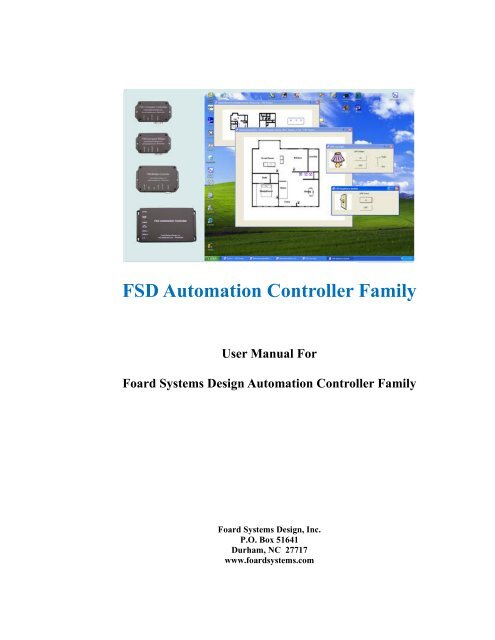
FSD Automation Controller System User Manual - Foard Systems ...
FSD Automation Controller System User Manual - Foard Systems ...
FSD Automation Controller System User Manual - Foard Systems ...

You also want an ePaper? Increase the reach of your titles
YUMPU automatically turns print PDFs into web optimized ePapers that Google loves.
<strong>FSD</strong> <strong>Automation</strong> <strong>Controller</strong> Family<br />
<strong>User</strong> <strong>Manual</strong> For<br />
<strong>Foard</strong> <strong>System</strong>s Design <strong>Automation</strong> <strong>Controller</strong> Family<br />
<strong>Foard</strong> <strong>System</strong>s Design, Inc.<br />
P.O. Box 51641<br />
Durham, NC 27717<br />
www.foardsystems.com
This <strong>Manual</strong> is divided into the following sections. Select a choice<br />
for more options.<br />
<strong>FSD</strong> <strong>Controller</strong> Installation Guides<br />
<strong>FSD</strong> Configuration Guides<br />
<strong>FSD</strong> <strong>Controller</strong> Reference <strong>Manual</strong>s<br />
Example Scenarios<br />
<strong>FSD</strong> <strong>Controller</strong> Spec Sheets
<strong>FSD</strong> <strong>Controller</strong> Installation Guides<br />
Select the <strong>FSD</strong> <strong>Controller</strong> type below to display its installation manual.<br />
<strong>FSD</strong> <strong>Controller</strong> Installation<br />
<strong>FSD</strong> X10 Compact <strong>Controller</strong> – guide to install controller that controls X10 family devices<br />
<strong>FSD</strong> UPB Compact <strong>Controller</strong> – guide to install controller that controls UPB family devices<br />
<strong>FSD</strong> X10-UPB Compact Bridge – guide to install bridge that allows control of X10 and UPB family devices on the<br />
same system<br />
<strong>FSD</strong> X10-UPB-FGI Bridge <strong>Controller</strong> – guide to install bridge that allows control of X10, UPB, and FGI family<br />
devices on the same system<br />
<strong>FSD</strong> X10-UPB-FGI Bridge <strong>Controller</strong> Plus – guide to install bridge controller that allows control of X10, UPB, and<br />
FGI family devices on the same system, with time-of-day timer features<br />
<strong>FSD</strong> <strong>System</strong> -Installation of Device Families<br />
<strong>FSD</strong> <strong>System</strong> Installation Notes for X10 Devices – notes and background on X10 products.<br />
<strong>FSD</strong> <strong>System</strong> Installation Notes for UPB Devices – notes and background on UPB products.<br />
<strong>FSD</strong> <strong>System</strong> Installation Notes for FGI Devices – notes and background on FGI products.
<strong>FSD</strong> X10 Compact <strong>Controller</strong> Installation Guide<br />
Overview: The <strong>FSD</strong> Compact <strong>Controller</strong> can be configured to control systems using either X10 or UPB technology.<br />
(The configuration may be changed by software as explained in another document).<br />
For the <strong>FSD</strong> X10 Compact <strong>Controller</strong>:<br />
1. Unpack the shipping box. It should contain:<br />
a. <strong>FSD</strong> X10 Compact <strong>Controller</strong><br />
b. Installation disk<br />
c. USB cable<br />
d. RJ11 cable<br />
e. Power transformer, 9 VAC<br />
DO NOT plug any cables into the <strong>FSD</strong> Compact <strong>Controller</strong> at this time.<br />
2. Install programs<br />
a. Insert the Installation CD into the CD or DVD drive of your computer.<br />
b. The installer starts automatically. If not, open Windows Explorer and select the CD or DVD<br />
drive. Double-click on the install_fsd_controller application to start installing files.<br />
c. Click the ―Install Software‖ button to begin installation.<br />
d. Read the License Agreement, and click the ―I agree‖ button to continue. Use the ―Back‖ and<br />
―Next‖ buttons to navigate within the installer.<br />
e. In the Select Installation Options screen, select the controller type.<br />
f. For the initial<br />
installation, select the<br />
(controller attached to<br />
computer) installation<br />
type, and set the type of<br />
connection port to<br />
either USB Port or RS-<br />
232 Serial Port.<br />
g. Alternatively, if setting<br />
up an additional<br />
computer, select the<br />
(controller accessed via<br />
Internet or LAN)<br />
installation type, and<br />
read the remote access<br />
configuration<br />
instructions.<br />
h. Enter the installation<br />
root directory<br />
destination in the edit<br />
box or choose the<br />
directory with the<br />
―Browse‖ button.<br />
i. Verify selected options before proceeding to install.<br />
3. Connect the <strong>Controller</strong>:<br />
After the software installation succeeds, connect the controller cables as shown in the picture at the end of this<br />
section.<br />
a. Plug the power transformer into an electrical receptacle and insert into the controller box at the<br />
port marked ―AC PWR‖.<br />
b. To use the USB Port , connect the USB cable to the USB port on your computer and the other end<br />
to the port marked ―USB‖ on the <strong>FSD</strong> Compact <strong>Controller</strong> box. Windows XP should find and<br />
recognize the new device.<br />
c. To use the RS-232 Serial Port, connect a standard ―Null Modem‖ (twisted) serial cable from the<br />
computer to the controller‘s serial port.<br />
d. Connect the provided RJ-11 cable from the <strong>FSD</strong> X10 Compact <strong>Controller</strong> port marked ―X10<br />
OUT‖ to a TW-523, PSC-05, PL-513, or similar X10 interface module. USE THE CABLE
SUPPLIED WITH THE KIT. Do NOT use regular telephone cable.<br />
4. Naming <strong>System</strong> Devices<br />
a. From the bin folder in the installation directory you‘ve specified, double-click on ―Autostart‖.<br />
b. For Windows XP users, a dialog box may appear querying whether the firewall should continue<br />
blocking the application. Unblock the Router application. Close all open <strong>FSD</strong> software<br />
applications and restart the Autostart application.<br />
c. The ―FGI Devices‖ dialog appears (initial configuration only).<br />
i. Double click on the entry whose Type Name is ―<strong>FSD</strong> <strong>Controller</strong>‖.<br />
ii. Enter a Device Name and Device Location.<br />
iii. Click ―OK‖.<br />
iv. Click ―OK‖ in the FGI Devices dialog.
d. From the ―Timers, Etc.‖ dialog insert and name an X10 Interface (TW523) device.<br />
\<br />
e. From the ―X10 Devices‖ dialog insert, name, and set the address for one or more X10 devices.<br />
f. From the ―Timers, Etc.‖ dialog insert and name any timer virtual devices desired.<br />
g. Additional X10 Devices can be added by:<br />
i. From the Automator View menu select ―<strong>FSD</strong> Namer‖ and choose ―X10 Devices‖ to enter<br />
X10 devices.<br />
ii. Click ―Insert‖ button.<br />
iii. Select a X10 Device Type from the droplist.<br />
iv. Enter a X10 Device Name and Location.<br />
v. Choose the X10 controller on your system from the droplist.<br />
vi. Enter a House Code and Unit Code from their respective droplists.<br />
vii. Click ―OK‖<br />
viii. Repeat steps 4g(ii) through 4g(vii) for each X10 device to enter.<br />
ix. Click ―OK‖ in X10 Device List.<br />
x. Dialog appears to either load configuration, now or later. Load Configuration after all<br />
X10 devices on the system are entered. When finished inserting devices, under the File<br />
menu choose ―Load Configuration‖.<br />
h. Similarly, additional Timers and Variables can be added from Automator :: View <strong>FSD</strong><br />
Namer.
5. Help<br />
Additional tutorials and documents that describe device setup, configuration, and device use are available under<br />
the Help menu in <strong>FSD</strong> Automator, and from the HELP menu for each <strong>FSD</strong> application to access its user<br />
manual.<br />
6. Operation<br />
For normal operation, start the software by running Autostart from the ―bin‖ folder in the directory you<br />
specified during installation. Autostart setting options are found in Automator Options menu, by selecting ―Set<br />
Autostart Options‖.<br />
7. Troubleshooting<br />
Please refer to the “<strong>FSD</strong> <strong>Controller</strong> Troubleshooting Guide”, located in the Help menu in <strong>FSD</strong> Automator<br />
―View Configuration Guides‖.
<strong>FSD</strong> UPB Compact <strong>Controller</strong> Installation Guide<br />
Overview: The <strong>FSD</strong> Compact <strong>Controller</strong> can be configured to control systems using either X10 or UPB technology.<br />
(The configuration may be changed by software as explained in another document).<br />
For the <strong>FSD</strong> UPB Compact <strong>Controller</strong>:<br />
1. Unpack the shipping box. It should contain:<br />
a. <strong>FSD</strong> Compact <strong>Controller</strong><br />
b. Installation disk<br />
c. USB cable<br />
d. Power transformer, 9 VAC<br />
DO NOT plug any cables into the <strong>FSD</strong> Compact <strong>Controller</strong> at this time.<br />
2. Install programs<br />
a. Insert the Installation CD into the CD or DVD drive of your computer.<br />
b. The installer starts automatically. If not, open Windows Explorer and select the CD or DVD<br />
drive. Double-click on the install_fsd_controller application to start installing files.<br />
c. Click the ―Install Software‖ button to begin installation.<br />
d. Read the License Agreement, and click the ―I agree‖ button to continue. Use the ―Back‖ and<br />
―Next‖ buttons to navigate within the installer.<br />
e. For the initial installation, select the (controller attached to computer) installation type, and set the<br />
type of connection port to USB<br />
Port.<br />
f. Alternatively, if setting up an<br />
additional computer, select the<br />
(controller accessed via<br />
Internet or LAN) installation<br />
type, and read the remote<br />
access configuration<br />
instructions.<br />
h. Enter the installation root<br />
directory destination in the edit<br />
box or choose using the<br />
―Browse‖ button<br />
i. Verify selected options before<br />
proceeding to install.<br />
3. Connect the <strong>Controller</strong>:<br />
After the software installation succeeds,<br />
connect the controller cables as shown in the<br />
picture at the end of this section.<br />
a. Plug the power transformer into<br />
an electrical receptacle and insert into the controller box at the port marked ―AC PWR‖.<br />
b. Connect the USB cable to the USB port on your computer and the other end to the port marked<br />
―USB‖ on the <strong>FSD</strong> Compact <strong>Controller</strong> box. Windows XP should find and recognize the new<br />
device.<br />
c. Connect the UPB Interface serial cable to the <strong>FSD</strong> UPB Compact <strong>Controller</strong> serial port.
4. Naming <strong>System</strong> Devices<br />
a. From the bin folder in the installation directory you‘ve specified, double-click on ―Autostart‖.<br />
b. For Windows XP users, a dialog box appears querying whether the firewall should continue<br />
blocking the application. Unblock the Router application. Close all open <strong>FSD</strong> software<br />
applications and restart the Autostart application.<br />
c. The ―FGI Devices‖ dialog appears (initial configuration only).<br />
i. Double click on the entry whose Type Name is ―<strong>FSD</strong> <strong>Controller</strong>‖.<br />
ii. Enter a Device Name and Device Location.<br />
iii. Click ―OK‖.<br />
iv. Click ―OK‖ in the FGI Devices dialog.<br />
d. From the ―RS-232/485 Devices‖ dialog insert and name a UPB Interface (PIM) device. Set your<br />
Network and Network Password values that you used in the PCS Upstart UPB configuration<br />
utility to configure your UPB devices.
e. From the ―UPB Devices‖ dialog insert, name, and set the address for one or more UPB devices.<br />
f. From the ―Timers, Etc.‖ dialog insert and name any timer virtual devices desired.<br />
g. Additional UPB Devices can be added later by:<br />
i. From the View menu select ―<strong>FSD</strong> Namer‖ and choose ―UPB Devices‖ to enter UPB<br />
devices.<br />
ii. Click ―Insert‖ button.<br />
iii. Select a UPB Device Type from the droplist.<br />
iv. Enter a UPB Device Name and Location.<br />
v. Choose the UPB controller on your system from the droplist.<br />
vi. Enter a Network ID and Unit ID from their respective droplists. (If the ID values are<br />
unknown, from the View menu choose ―UPB Installer Tools‖ and ―UPB Upstart‖. If<br />
path to Upstart.exe is not configured, in Automator, under the Options menu, choose Set<br />
Automator Options. At the bottom of the dialog enter the path to Upstart.exe, if known.<br />
(Consult your UPB manuals for instructions for UPB Upstart.)<br />
vii. Click ―OK‖.<br />
viii. Repeat steps 4g(ii) through 4g(vii) for each UPB device to enter.<br />
ix. Click ―OK‖ in UPB Device List.<br />
x. Dialog appears to either load configuration, now or later. Load Configuration after all<br />
UPB devices on system are entered. When finished inserting devices, under the File<br />
menu choose ―Load Configuration‖.<br />
h. Similarly, additional Timers and Variables can be added from Automator :: View <strong>FSD</strong><br />
Namer.<br />
5. Help<br />
Additional tutorials and documents that describe device setup, configuration, and device use are available under<br />
the Help menu in <strong>FSD</strong> Automator, and from the HELP menu for each <strong>FSD</strong> application to access its user<br />
manual.<br />
6. Operation<br />
For normal operation, start the software by running Autostart from the ―bin‖ folder in the directory you<br />
specified during installation. Autostart setting options are found in Automator Options menu, by selecting ―Set<br />
Autostart Options‖.<br />
7. Troubleshooting<br />
Please refer to the “<strong>FSD</strong> <strong>Controller</strong> Troubleshooting Guide”, located in the Help menu in <strong>FSD</strong> Automator ―View<br />
Configuration Guides‖.
<strong>FSD</strong> X10 – UPB Compact Bridge Installation Guide<br />
For the <strong>FSD</strong> X10-UPB Compact Bridge<br />
1. Unpack the shipping box. It should contain:<br />
a. <strong>FSD</strong> Compact Bridge<br />
b. Installation disk<br />
c. RJ-11 cable<br />
d. Power transformer, 9 VAC<br />
DO NOT plug any cables into the <strong>FSD</strong> Compact Bridge at this time.<br />
2. Install programs<br />
a. Insert the Installation CD into the CD or DVD drive of your computer.<br />
b. The installer starts automatically. If not, open Windows Explorer and select the CD or DVD<br />
drive. Double-click on the install_fsd_controller application to start installing files.<br />
c. Click the ―Install Software‖ button to begin installation.<br />
d. Read the License Agreement, and click the ―I agree‖ button to continue. Use the ―Back‖ and<br />
―Next‖ buttons to navigate within the installer.<br />
e. For the initial installation, select the (controller attached to computer) installation type, and set the<br />
type of connection port to RS-232<br />
Serial Port.<br />
f. Alternatively, if setting up an<br />
additional computer, select the<br />
(controller accessed via Internet or<br />
LAN) installation type, and read the<br />
remote access configuration<br />
instructions.<br />
g. Enter the installation root directory<br />
destination in the edit box or choose a<br />
directory with the ―Browse‖ button.<br />
h. Verify selected options before<br />
proceeding to install.<br />
3. Connect the <strong>FSD</strong> Bridge <strong>Controller</strong>:<br />
After the software installation succeeds, connect the controller cables as shown in the picture at the end of this<br />
installation guide.<br />
a. Plug the power transformer into an electrical receptacle and insert into the controller box at the<br />
port marked ―AC PWR‖.<br />
b. Connect either a standard Null Modem (twisted) cable to your computer and the other end to the<br />
port marked ―Serial‖ on the <strong>FSD</strong> X10-UPB Compact Bridge. CAUTION: If your computer does<br />
not have a serial port, some third party USB to serial conversion cables do not properly configure<br />
to the proper pins.<br />
c. After device configuration (see section 4, naming the system), disconnect the null modem cable<br />
from the computer and the <strong>FSD</strong> X10-UPB Compact Bridge, and connect a serial cable (straight<br />
cable, UPB Interface) from the <strong>FSD</strong> X10-UPB Compact Bridge serial port to the UPB Power Line<br />
Interface Module. Note that the same serial cable cannot be used for both connections without<br />
also using a null modem adapter.<br />
d. Connect the provided RJ-11 cable from the <strong>FSD</strong> X10-UPB Compact Bridge port marked ―X10<br />
OUT‖ to a TW-523, PSC-05, PL-513, or similar X10 interface module. USE THE CABLE<br />
SUPPLIED WITH THE KIT. Do NOT use regular telephone cable.<br />
e. Optionally, connect an RJ-11 cable from the <strong>FSD</strong> X10-UPB Compact Bridge port marked ―X10 IN‖<br />
to the X10 powerline interface output port of a legacy X10 controller. Use the RJ11 cable which<br />
would otherwise connect the legacy controller to a TW-523, PSC-05, PL-513, or similar X10<br />
interface module.
4. Naming <strong>System</strong> Devices<br />
a. From the bin folder in the installation directory you‘ve specified, double-click on ―Autostart‖.<br />
b. For Windows XP users, a dialog box may appear querying whether the firewall should continue<br />
blocking the application. Unblock the Router application. Close all open <strong>FSD</strong> software<br />
applications and restart the Autostart application.<br />
c. The ―FGI Devices‖ dialog appears (initial configuration only).<br />
i. Double click on the entry whose Type Name is ―<strong>FSD</strong> <strong>Controller</strong>‖.<br />
ii. Enter a Device Name and Device Location.<br />
iii. Click ―OK‖.<br />
iv. Click ―OK‖ in the FGI Devices dialog.<br />
NOTE: If you plan to simply bridge UPB and X10 commands for simple on/off and dimming with<br />
lighting, you might want to use <strong>FSD</strong> Super Bridge or Super Fine Bridge. See Configure X10-<br />
UPB Bridge. If so, you can skip parts ―e‖ and ―g‖ below and follow instructions in the above<br />
link.<br />
d. From the ―Timers, Etc.‖ dialog, click ―Insert‖ and name an X10 Interface (TW523) device.<br />
e. From the ―X10 Devices‖ dialog , click ―Insert‖ , name, and set the address for one or more X10<br />
devices.
f. From the ―RS-232/485 Devices‖ dialog, click ―Insert‖ and name a UPB Interface (PIM) device. Set<br />
your Network and Network Password values that you used in the PCS Upstart UPB configuration<br />
utility to configure your UPB devices.<br />
g. From the ―UPB Devices‖ dialog, click ―Insert‖ , name, and set the address for one or more UPB<br />
devices.<br />
h. From the ―Timers, Etc.‖ dialog, click ―Insert‖ and name any Super Bridge and/or Button Control<br />
virtual devices desired.<br />
i. Additional UPB Devices can be added later by:<br />
i. From the View menu select ―<strong>FSD</strong> Namer‖ and choose ―UPB Devices‖ to enter UPB de<br />
vices.<br />
ii. Click ―Insert‖ button.<br />
iii. Select a UPB Device Type from the droplist.<br />
iv. Enter a UPB Device Name and Location.
v. Choose the UPB controller on your system from the droplist.<br />
vi. Enter a Network ID and Unit ID from their respective droplists. (If the ID values are<br />
unknown, from the View menu choose ―UPB Installer Tools‖ and ―UPB Upstart‖. If the<br />
path to Upstart.exe is not configured, in Automator, under the Options menu, choose Set<br />
Automator Options. At the bottom of the dialog enter the path to Upstart.exe, if known.<br />
(Consult your UPB manuals for instructions for UPB Upstart.))<br />
vii. Click ―OK‖.<br />
viii. Repeat steps 4i(ii) through 4i(vii) for each UPB device to enter.<br />
ix. Click ―OK‖ in UPB Device List.<br />
x. Dialog appears to either load configuration, now or later. Load Configuration after all<br />
UPB devices on system are entered. When finished inserting devices, under the File<br />
menu choose ―Load Configuration‖.<br />
j. Similarly, additional X10 devices can be added later from Automator:: View <strong>FSD</strong> Namer.<br />
k. Similarly, additional Timers and Variables can be added from Automator :: View<br />
Namer.<br />
5. Help<br />
Additional tutorials and documents that describe device setup, configuration, and device use are available under<br />
the Help menu in <strong>FSD</strong> Automator, and from the HELP menu for each <strong>FSD</strong> application to access its user<br />
manual.<br />
6. Operation<br />
For normal operation, start the software by running Autostart from the ―bin‖ folder in the directory you<br />
specified during installation. Autostart setting options are found in Automator Options menu, by selecting ―Set<br />
Autostart Options‖.<br />
7. Troubleshooting<br />
Please refer to the “<strong>FSD</strong> <strong>Controller</strong> Troubleshooting Guide”, located in the Help menu in <strong>FSD</strong> Automator<br />
―View Configuration Guides‖.<br />
<strong>FSD</strong> X10 – UPB - FGI Bridge <strong>Controller</strong> Installation Guide<br />
For the <strong>FSD</strong> X10-UPB-FGI Bridge <strong>Controller</strong>:<br />
1. Unpack the shipping box. It should contain:<br />
a. <strong>FSD</strong> Bridge <strong>Controller</strong>
. Installation disk<br />
c. USB cable<br />
d. RJ-11 Cable<br />
e. Power transformer, 14 VAC<br />
DO NOT plug any cables into the <strong>FSD</strong> Bridge <strong>Controller</strong> at this time.<br />
2. Install programs<br />
a. Insert the Installation CD into the CD or DVD drive of your computer.<br />
b. The installer starts automatically. If not, open Windows Explorer and select the CD or DVD<br />
drive. Double-click on the install_fsd_controller application to start installing files.<br />
c. Click the ―Install Software‖ button to begin installation.<br />
d. Read the License Agreement, and click the ―I agree‖ button to continue. Use the ―Back‖ and<br />
―Next->‖ buttons to navigate within the installer.<br />
e. For the initial installation, select the (controller attached to computer) installation type, and set the<br />
type of connection port to USB Port.<br />
f. Alternatively, if setting up an additional computer, select the (controller accessed via Internet or<br />
LAN) installation type, and read the remote access configuration instructions.<br />
g. Enter the installation root directory destination in the edit box or choose using the ―Browse‖<br />
button<br />
h. Verify selected options before proceeding to install.<br />
3. Connect the <strong>FSD</strong> <strong>Controller</strong><br />
After the software installation succeeds, connect the controller cables as shown in the picture at the end of this<br />
section.<br />
a. Plug the power transformer into an electrical receptacle and insert into the controller box at the<br />
port marked ―AC PWR‖.<br />
b. Connect the USB cable to the USB port on your computer and the other end to the port marked<br />
―USB‖ on the <strong>FSD</strong> Compact <strong>Controller</strong> box. Windows XP should find and recognize the new<br />
device.<br />
c. Connect the UPB Interface serial cable to the <strong>FSD</strong> UPB Compact <strong>Controller</strong> serial port.<br />
d. Connect the provided RJ-11 cable from the <strong>FSD</strong> X10UPB-FGI Bridge <strong>Controller</strong> port marked<br />
―X10 OUT‖ to a TW-523, PSC-05, PL-513, or similar X10 interface module.<br />
e. Optionally, connect an RJ-11 cable from the <strong>FSD</strong> X10-UPB-FGI Bridge <strong>Controller</strong> port marked<br />
―X10 IN‖ to the X10 powerline interface output port of a legacy X10 controller. Use the RJ11<br />
cable which would otherwise connect the legacy controller to a TW-523, PSC-05, PL-513, or<br />
similar X10 interface module.<br />
f. Connect any FGI hardwired device to the Bridge <strong>Controller</strong>‘s FGI port. This port is designated as a<br />
daisy-chain out (DO) port. FGI devices may be daisy-chained to connect to the controller.<br />
Additionally, multiple FGI devices may be connected in a branched tree configuration, with each<br />
FGI device‘s daisy-chain in (DI) port connected to the controller‘s FGI DO port or to either the<br />
DO1 or DO2 port on another FGI device. Tree branching can also be accomplished by connecting<br />
to one of the nine DO ports on the FGI Hub device.
4. Naming <strong>System</strong> Devices<br />
a. From the bin folder in the installation directory you‘ve specified, double-click on ―Autostart‖.<br />
b. For Windows XP users, a dialog box may appear querying whether the firewall should continue<br />
blocking the application. Unblock the Router application. Close all open <strong>FSD</strong> software<br />
applications and restart the Autostart application.<br />
c. The ―FGI Devices‖ dialog appears (initial configuration only).<br />
i. Double click on the entry whose Type Name is ―<strong>FSD</strong> <strong>Controller</strong>‖.<br />
ii. Enter a Device Name and Device Location.<br />
iii. Click ―OK‖.<br />
iv. Similarly, enter device names and locations for all hardwired FGI devices detected by the<br />
controller. The controller automatically finds and identifies the device type of all<br />
connected FGI devices. Double-click on the FGI devices displayed, enter a Device Name<br />
and Device Location, and click ―OK‖.<br />
v. When completed, click ―OK‖ in the FGI Devices dialog.<br />
NOTE: If you plan to simply bridge UPB and X10 commands for simple on/off and dimming with<br />
lighting, you might want to use <strong>FSD</strong> Super Bridge or Super Fine Bridge. See Configure X10-<br />
UPB-FGI Bridge. If so, you can skip parts ―e‖ and ―g‖ below and follow instructions in the above<br />
link.<br />
d. From the ―Timers, Etc.‖ dialog insert and name an X10 Interface (TW523) device.<br />
e. From the ―X10 Devices‖ dialog insert, name, and set the address for one or more X10 devices.<br />
f. From the ―RS-232/485 Devices‖ dialog insert and name a UPB Interface (PIM) device. Set your<br />
Network and Network Password values that you used in the PCS Upstart UPB configuration<br />
utility to configure your UPB devices.<br />
g. From the ―UPB Devices‖ dialog insert, name, and set the address for one or more UPB devices.<br />
h. From the ―Timers, Etc.‖ dialog insert and name any Super Bridge and/or Button Control virtual<br />
devices desired.<br />
i. Additional UPB Devices can be added later by::<br />
i. From the View menu select ―<strong>FSD</strong> Namer‖ and choose ―UPB Devices‖ to enter UPB
devices.<br />
ii. Click ―Insert‖ button.<br />
iii. Select a UPB Device Type from the droplist.<br />
iv. Enter a UPB Device Name and Location.<br />
v. Choose the UPB controller on your system from the droplist.<br />
vi. Enter a Network ID and Unit ID from their respective droplists. (If the ID values are<br />
unknown, from the View menu choose ―UPB Installer Tools‖ and ―UPB Upstart‖. If<br />
path to Upstart.exe is not configured, in Automator, under the Options menu, choose Set<br />
Automator Options. At the bottom of the dialog enter the path to Upstart.exe, if known.<br />
(Consult your UPB manuals for instructions for UPB Upstart.)<br />
vii. Click ―OK‖.<br />
viii. Repeat steps 4i(ii) through 4i(vii) for each UPB device to enter.<br />
ix. Click ―OK‖ in UPB Device List.<br />
x. Dialog appears to either load configuration, now or later. Load Configuration after all<br />
UPB devices on system are entered. When finished inserting devices, under the File<br />
menu choose ―Load Configuration‖.<br />
j. Similarly, additional X10 devices can be added later from Automator:: View -> Namer.<br />
k. Similarly, additional Timers, Etc. family devices (Super Bridge and Button Control) and Variables<br />
can be added from Automator :: View Namer<br />
5. Help<br />
Additional tutorials and documents that describe device setup, configuration, and device use are available under<br />
the Help menu in <strong>FSD</strong> Automator, and from the HELP menu for each <strong>FSD</strong> application to access its user<br />
manual.<br />
6. Operation<br />
For normal operation, start the software by running Autostart from the ―bin‖ folder in the directory you<br />
specified during installation. Autostart setting options are found in Automator Options menu, by selecting ―Set<br />
Autostart Options‖.<br />
7. Troubleshooting<br />
Please refer to the “<strong>FSD</strong> <strong>Controller</strong> Troubleshooting Guide”, located in the Help menu in <strong>FSD</strong> Automator<br />
―View Configuration Guides‖.<br />
8. FGI Devices<br />
For information about FGI Devices, including FGI device types supported by the <strong>FSD</strong> X10-UPB-FGI Bridge<br />
<strong>Controller</strong>, see the ―<strong>FSD</strong> <strong>System</strong> Installation Notes for FGI Devices”, located in the Help menu in <strong>FSD</strong><br />
Automator ―View Configuration Guides‖ .
<strong>FSD</strong> X10 – UPB - FGI Bridge <strong>Controller</strong> Plus Installation Guide<br />
For the <strong>FSD</strong> X10-UPB-FGI Bridge <strong>Controller</strong> Plus:<br />
1. Unpack the shipping box. It should contain:<br />
a. <strong>FSD</strong> X10/UPB/FGI Bridge <strong>Controller</strong> Plus<br />
b. Installation disk<br />
c. USB cable<br />
d. RJ-11 Cable<br />
e. Power transformer, 14 VAC<br />
DO NOT plug any cables into the <strong>FSD</strong> Bridge <strong>Controller</strong> at this time.<br />
2. Install programs<br />
a. Insert the Installation CD into the CD or DVD drive of your computer.<br />
b. The installer starts automatically. If not, open Windows Explorer and select the CD or DVD<br />
drive. Double-click on the install_fsd_controller application to start installing files.<br />
c. Click the ―Install Software‖ button to begin installation.<br />
d. Read the License Agreement, and click the ―I agree‖ button to continue. Use the ―Back‖ and<br />
―Next->‖ buttons to navigate within the installer.<br />
e. For the initial installation, select the<br />
(controller attached to computer)<br />
installation type, and set the type of<br />
connection port to USB Port.<br />
f. Alternatively, if setting up an additional<br />
computer, select the (controller<br />
accessed via Internet or LAN)<br />
installation type, and read the remote<br />
access configuration instructions.<br />
g. Enter the installation root directory<br />
destination in the edit box or choose a<br />
directory with the ―Browse‖ button.<br />
h. Verify selected options before proceeding<br />
to install. Click ―Next‖.<br />
i. The next dialog box asks if you wish to<br />
install a driver to that allows<br />
communication between the computer‘s<br />
USB port to the <strong>Controller</strong>. Click<br />
―Install‖.<br />
j. After successful installation, a dialog appears with buttons to<br />
―View Installation Guide for Next Steps‖. Asks whether or not to install Adobe Reader and<br />
opens to this document.<br />
―Start <strong>FSD</strong> Automator Now‖. Choose only if the following section is completed.<br />
―Exit‖. Exits installation application.<br />
3. Connect the <strong>FSD</strong> Bridge <strong>Controller</strong><br />
After the software installation succeeds, connect the controller cables as shown in the picture at the end of this<br />
section.<br />
a. Plug the power transformer into an electrical receptacle and insert into the controller box at the<br />
port marked ―AC PWR‖.<br />
b. Connect the USB cable to the USB port on your computer and the other end to the port marked<br />
―USB‖ on the <strong>FSD</strong> X10-UPB-FGI Bridge <strong>Controller</strong> box. Windows XP should find and<br />
recognize the new device.<br />
c. Connect the UPB Interface serial cable to the <strong>FSD</strong> X10-UPB-FGI Bridge <strong>Controller</strong> Plus serial<br />
port and the UPB Power Line Interface.<br />
d. Connect the provided RJ-11 cable from the <strong>FSD</strong> X10-UPB-FGI Bridge <strong>Controller</strong> port marked<br />
―X10 OUT‖ to a TW-523, PSC-05, PL-513, or similar X10 interface module. USE THE CABLE<br />
SUPPLIED WITH THE KIT. Do NOT use regular telephone cable.<br />
e. Optionally, connect an RJ-11 cable from the <strong>FSD</strong> X10-UPB-FGI Bridge <strong>Controller</strong> port marked
―X10 IN‖ to the X10 powerline interface output port of a legacy X10 controller. Use the RJ11<br />
cable which would otherwise connect the legacy controller to a TW-523, PSC-05, PL-513, or<br />
similar X10 interface module.<br />
f. Connect any FGI hardwired device to the Bridge <strong>Controller</strong>‘s FGI port. This port is designated as a<br />
daisy-chain out (DO) port. FGI devices may be daisy-chained to connect to the controller.<br />
Additionally, multiple FGI devices may be connected in a branched tree configuration, with each<br />
FGI device‘s daisy-chain in (DI) port connected to the controller‘s FGI DO port or to either the<br />
DO1 or DO2 port on another FGI device. Tree branching can also be accomplished by connecting<br />
to one of the nine DO ports on the FGI Hub device.
4. Naming <strong>System</strong> Devices<br />
a. From the bin folder in the installation directory you‘ve specified, double-click on ―Autostart‖.<br />
b. For Windows XP users, a dialog box may appear querying whether the firewall should continue<br />
blocking the application. Unblock the Router application. Close all open <strong>FSD</strong> software<br />
applications and restart the Autostart application.<br />
c. Use the Set Location and Time dialog to your geographic location, necessary for proper calculation<br />
of dawn and dusk times.<br />
NOTE: If you plan to simply bridge UPB and X10 commands for simple on/off and dimming with<br />
lighting, you might want to use <strong>FSD</strong> Super Bridge or Super Fine Bridge. See Configure X10-<br />
UPB-FGI Bridge Plus. If so, you can skip parts ―f‖ and ―h‖ below and follow instructions in the<br />
above link.<br />
d. The ―FGI Devices‖ dialog appears (initial configuration only).<br />
i. Double click on the entry whose Type Name is ―<strong>FSD</strong> <strong>Controller</strong>‖.<br />
ii. Enter a Device Name and Device Location.<br />
iii. Click ―OK‖.<br />
iv. Similarly, enter device names and locations for all hardwired FGI devices detected by the<br />
controller. The controller automatically finds and identifies the device type of all<br />
connected FGI devices. Double-click on the FGI devices displayed, enter a Device Name<br />
and Device Location, and click ―OK‖.<br />
v. When completed, click ―OK‖ in the FGI Devices dialog.
e. From the ―Timers, Etc.‖ dialog, choose ―Insert‖ and name an X10 Interface (TW523) device.<br />
f. From the ―X10 Devices‖ dialog choose ―Insert‖, name, and set the address for one or more X10<br />
devices.<br />
g. From the ―RS-232/485 Devices‖ dialog choose ―Insert‖ and name a UPB Interface (PIM) device.<br />
Set your Network and Network Password values that you used in the PCS Upstart UPB<br />
configuration utility to configure your UPB devices.
h. From the ―UPB Devices‖ dialog choose ―Insert‖, name, and set the address for one or more UPB<br />
devices.<br />
i. From the ―Timers, Etc.‖ dialog choose ―Insert‖ and name any Super Bridge and/or Button Control<br />
virtual devices desired.<br />
j. Additional UPB Devices can be added later by::<br />
i. From the View menu select ―<strong>FSD</strong> Namer‖ and choose ―UPB Devices‖ to enter UPB<br />
devices.<br />
ii. Click ―Insert‖ button.<br />
iii. Select a UPB Device Type from the droplist.<br />
iv. Enter a UPB Device Name and Location.<br />
v. Choose the UPB controller on your system from the droplist.<br />
vi. Enter a Network ID and Unit ID from their respective droplists. (If the ID values are<br />
unknown, from the View menu choose ―UPB Installer Tools‖ and ―UPB Upstart‖. If<br />
path to Upstart.exe is not configured, in Automator, under the Options menu, choose Set<br />
Automator Options. At the bottom of the dialog enter the path to Upstart.exe, if known.<br />
(Consult your UPB manuals for instructions for UPB Upstart.)<br />
vii. Click ―OK‖.<br />
viii. Repeat steps 4i(ii) through 4i(vii) for each UPB device to enter.<br />
ix. Click ―OK‖ in UPB Device List.<br />
x. Dialog appears to either load configuration, now or later. Load Configuration after all<br />
UPB devices on system are entered. When finished inserting devices, under the File<br />
menu choose ―Load Configuration‖.<br />
k. Similarly, additional X10 devices can be added later from Automator:: View -> <strong>FSD</strong> Namer.<br />
l. Similarly, additional Timers, Etc. family devices (Time of Day Event, Super Bridge, and Button<br />
Control) and Variables can be added from Automator :: View <strong>FSD</strong> Namer.<br />
5. Help<br />
Additional tutorials and documents that describe device setup, configuration, and device use are available under<br />
the Help menu in <strong>FSD</strong> Automator, and from the HELP menu for each <strong>FSD</strong> application to access its user<br />
manual.<br />
6. Operation<br />
For normal operation, start the software by running Autostart from the ―bin‖ folder in the directory you<br />
specified during installation. Autostart setting options are found in Automator Options menu, by selecting ―Set<br />
Autostart Options‖.<br />
7. Troubleshooting<br />
Please refer to the “<strong>FSD</strong> <strong>Controller</strong> Troubleshooting Guide”, located in the Help menu in <strong>FSD</strong> Automator<br />
―View Configuration Guides‖.<br />
8. FGI Devices
For information about FGI Devices, including FGI device types supported by the <strong>FSD</strong> X10-UPB-FGI Bridge<br />
<strong>Controller</strong>, see the ―<strong>FSD</strong> <strong>System</strong> Installation Notes for FGI Devices”, located in the Help menu in <strong>FSD</strong><br />
Automator ―View Configuration Guides‖ .
<strong>FSD</strong> <strong>System</strong> Installation Notes for X10 Devices<br />
X10 is a power line control technology, which has been in use for over 25 years. X10 devices<br />
are readily available, easy to use when they work, and many are inexpensive. Ensuring X10<br />
signal integrity in an installation is important to satisfactory performance, as is discussed below.<br />
Most X10 devices are ―One-Way‖ devices, either transmitters or receivers. Therefore, a<br />
controller or other device cannot know if a device, such as a wall-mounted light dimmer switch,<br />
is manually turned ON or OFF. Some X10 devices are capable of ―Two-Way‖ communications.<br />
These devices are more expensive, so often not selected. Inexpensive X10 devices generally<br />
support only a minimal command set, while some X10 devices also support features such as<br />
scene control via X10 Extended Commands. Note that the interpretation of X10 Extended<br />
Commands is inconsistent across manufacturers, so when used, the variant of X10 Extended<br />
Commands must also be specified.<br />
<strong>FSD</strong> <strong>Controller</strong>s connect to X10 devices through an X10 power line interface module, such as a<br />
TW523, PSC05, or PL513. Some <strong>FSD</strong> <strong>Controller</strong>s may also connect via a CM11A device.<br />
<strong>FSD</strong> Bridge devices can also emulate a TW523, PSC05, or PL513 device connected to a legacy<br />
controller, enabling the legacy controller to communicate with UPB and FGI hardwired devices,<br />
as though they were X10 devices.<br />
To configure the <strong>FSD</strong> <strong>Controller</strong> for use with a TW523, PSC05, or PL513 interface, from the<br />
<strong>FSD</strong> Automator main menu, select View <strong>FSD</strong> Namer Timers, Etc., then from <strong>FSD</strong> Namer,<br />
insert an X10 Interface (TW523) device. This device is also used to configure the controller for<br />
X10 interface emulation. Interface options are specified in the device configuration dialog for<br />
the X10 Interface device. The TW523 and PSC05 are the recommended X10 interfaces for<br />
general controller use. The PL513 interface is transmit only, hence if used external X10 signals<br />
cannot reach the <strong>FSD</strong> <strong>Controller</strong>.<br />
If supported by the <strong>FSD</strong> <strong>Controller</strong> model, the user can configure the <strong>FSD</strong> <strong>Controller</strong> to use an<br />
CM11A interface. From the <strong>FSD</strong> Automator main menu, select View <strong>FSD</strong> Namer <br />
RS232/485 Devices, then in <strong>FSD</strong> Namer, insert an X10 Interface (CM11A) device. Note that the<br />
CM11A may be the best option for some X10 logging purposes, since it can receive X10<br />
Extended Commands, while the TW523 cannot. However, the CM11A is not recommended for<br />
general control purposes, as it can introduce undesired delays between the X10 signals and the<br />
<strong>FSD</strong> <strong>Controller</strong>.<br />
Most X10 devices are easily configured by setting house code and unit code values on<br />
thumbwheel switches. Some devices are configured by pushing a button, or simply applying<br />
power, followed by using another source to send an X10 command with the address you wish to<br />
set the device to.<br />
For individual control, each X10 device should be defined for the <strong>FSD</strong> <strong>Controller</strong> using <strong>FSD</strong><br />
Namer X10 Devices. Alternatively, groups of up to sixteen X10 device addresses can be<br />
linked through a Super Bridge device (defined in <strong>FSD</strong> Namer Timers, Etc.), as might be done<br />
to configure an <strong>FSD</strong> Bridge controller.<br />
Linking X10 Devices with Operations:<br />
Since most X10 devices do not report their states, the <strong>FSD</strong> <strong>Controller</strong> and other X10 devices may<br />
not always know for certain the state of an X10 device. Therefore, if one needs to turn ON an
X10 device, an X10 ON command should be sent regardless of the state the controller thinks the<br />
X10 device is in. Similarly, a received X10 OFF command for a device should be processed to<br />
cause configured OFF transition actions, even if the controller‘s last knowledge if the device<br />
state indicates that the device is already OFF.<br />
This is accomplished by linking control operations with the Momentary ON and Momentary<br />
OFF elements for a switch, lamp, or appliance device, instead of the device‘s On/Off State<br />
element, which indicates the last known state of the device. To interconnect two devices‘<br />
Momentary On elements, along with their Momentary Off elements, add a<br />
SET_MOMENTARY_PAIR operation to the Momentary ON elements for the devices; the<br />
Momentary OFF elements are implicitly linked together. The SET_MOMENTARY_PAIR<br />
operation is often the easiest option to interconnect a switch with a lamp or appliance module.<br />
The SET_TO_VALUE operation may link operations to individual Momentary ON or OFF<br />
elements for maximum flexibility and asymmetrical operations; for example, a switch might be<br />
configured to turn ON lights in the downstairs hallway, and to turn OFF all downstairs light.<br />
X10 Installer Tools:<br />
The <strong>FSD</strong> <strong>Controller</strong> software includes utilities to aid in installation. Tools are included to<br />
monitor and log X10 packets sent and received, to display X10 addresses in use, and to send<br />
arbitrary X10 commands and extended commands to test an installation. Tools are accessed<br />
from the <strong>FSD</strong> Automator main menu, by selecting View X10 Installer Tools (X10 Logger,<br />
X10 Mapper, or X10 Tester).<br />
Signal Integrity Issues:<br />
For many single family residences, X10 signals may need assistance communicating between<br />
devices attached on opposite legs of the 230 volt split-phase line. For smaller houses, installing a<br />
relatively low cost X10 signal coupler across the 230 volt line may suffice. For larger homes, or<br />
to eliminate guesswork and improve the X10 signal levels throughout any size home, install an<br />
X10 repeater across the two phases.<br />
For locations with three phase power, found in many commercial settings, a three-phase X10<br />
repeater must be installed to communicate across the phases.<br />
X10 signals may be absorbed by surge protectors, reducing signal levels and preventing reliable<br />
communication. Some brands of surge protectors are friendlier to X10 signals than others. X10<br />
signal analyzers are available to help determine whether the signal level is sufficient at<br />
troublesome locations.<br />
X10 communication may also be hampered by interference from other noisy power line devices,<br />
such as a fan or light dimmer. X10 line filtering devices are available to help isolate offending<br />
devices from the power line.<br />
X10 signals could reach a neighboring house, if connected to the same line transformer. If so, an<br />
X10 blocking coupler can be installed at the power feed point to one or both houses to eliminate<br />
house-to-house interference. Alternatively, neighbors might simply agree to use distinct sets of<br />
house codes for their X10 devices.<br />
Device Specific Notes:<br />
The X10 small transceiver (RTM75) is an RF receiver that can control X10 devices on up to 16
addresses on one house code. The module also has a switched outlet controlled from unit code 1<br />
on the RF transmitter. Note that the module has no X10 receive capability, so the switched<br />
outlet cannot be controlled via X10 power line commands from other X10 devices or an X10<br />
controller.<br />
The large X10 transceiver (RR501) is similar to the small transceiver, but has an X10 signal<br />
receiver. Thus, the switched outlet can be controlled via X10 power line signals from an X10<br />
controller or other X10 device.<br />
Manufacturer’s web site:<br />
www.x10.com/support<br />
X10.com
<strong>FSD</strong> <strong>System</strong> Installation Notes for UPB Devices<br />
Universal Powerline Bus (UPB) is a power line control technology developed by Powerline<br />
Control <strong>System</strong>s, Inc. (PCS). UPB provides highly reliable communications, and all UPB<br />
devices are capable of ―Two-Way‖ communications. UPB devices support direct control, and<br />
scene-like control via UPB ―Link‖ commands.<br />
<strong>FSD</strong> <strong>Controller</strong>s interface to UPB devices through an RS-232 serial port version of a UPB<br />
Powerline Interface Module. Both PIM devices from PCS and from Simply Automated, Inc. are<br />
supported. To configure the <strong>FSD</strong> <strong>Controller</strong> to use either PIM, from the <strong>FSD</strong> Automator main<br />
menu, select View <strong>FSD</strong> Namer RS232/485, then from <strong>FSD</strong> Namer, insert a UPB Interface<br />
device. Set the Network ID and password to match UPB devices configured using the PCS<br />
UPStart utility.<br />
UPB devices are initially configured with the PCS UPStart utility, available as a free download<br />
from the PCS web site (listed below). Using UPStart, add each device to the network with an<br />
assigned Unit ID. Devices with self-contained switches, such as wall-mounted light dimmer<br />
switches, should be configured to transmit local switch changes to the controller, in addition to<br />
performing their self-contained function.<br />
See the PCS documentation for details on using the UPStart utility, and for general information<br />
about UPB devices and technology.<br />
The PCS UPStart utility uses a UPB PIM device to communicate with the installed UPB devices.<br />
A single PIM may be shared between the PCS UPStart utility and most <strong>FSD</strong> <strong>Controller</strong> models,<br />
without disconnecting and reconnecting cables to alternate between the two software<br />
applications. To configure <strong>FSD</strong> Automator for PCS Upstart access, select Options Configure<br />
Automator and enter the PCS UPStart directory path in the configuration dialog. To access PCS<br />
UPStart, select View UPB Installer Tools PCS UPStart; this shuts down <strong>FSD</strong> Automator<br />
and leaves the <strong>FSD</strong> <strong>Controller</strong> in a serial pass-through mode, bridging the UPB PIM to the PCS<br />
UPStart utility through the same USB or RS-232 port used by <strong>FSD</strong> Automator.<br />
For individual control, each UPB device should be defined for the <strong>FSD</strong> <strong>Controller</strong> using <strong>FSD</strong><br />
Namer UPB Devices. Alternatively, groups of up to 16 UPB device addresses can be linked<br />
through a Super Bridge device (defined in <strong>FSD</strong> Namer Timers, Etc.), as done to configure an<br />
<strong>FSD</strong> Bridge controller.<br />
UPB Installer Tools:<br />
The <strong>FSD</strong> <strong>Controller</strong> software includes utilities to aid installation. Tools are included to monitor<br />
and log UPB packets sent and received, to display UPB addresses in use, and to send arbitrary<br />
UPB direct commands and link commands to test an installation. These are accessed from the<br />
<strong>FSD</strong> Automator main menu, by selecting View UPB Installer Tools (UPB Logger, UPB<br />
Mapper, or UPB Tester).<br />
Note that similar capabilities are also available within the PCS UPStart utility. If the PCS<br />
UPStart utility shares the same PIM with the <strong>FSD</strong> <strong>Controller</strong>, the PCS logging, monitoring, and<br />
testing capabilities are available while PCS UPStart is running, and the <strong>FSD</strong> UPB Installer Tools<br />
are available during <strong>FSD</strong> <strong>Controller</strong> run-time operation.<br />
Signal Integrity Issues:
For most single family residences, UPB works reliably with no special installation concerns.<br />
However, installing a fairly low cost UPB signal coupler across the opposite legs of the 230 volt<br />
line is recommended to ensure signal quality across phases.<br />
For locations with three phase power, as found in many commercial settings, a three-phase UPB<br />
repeater must be installed to communicate across the phases.<br />
Manufacturer’s web site:<br />
www.pulseworx.com<br />
Powerline Control <strong>System</strong>s, Inc.
<strong>FSD</strong> <strong>System</strong> Installation Notes for FGI Devices<br />
FGI Network Devices:<br />
FGI networking technology provides an easy-to-use means to<br />
interconnect a heterogeneous mix of hard-wired remote<br />
sensor and control devices. The FGI interface logic has plugand-play<br />
style self-identification and built-in network<br />
management capabilities. FGI network devices are connected<br />
to an <strong>FSD</strong> <strong>Controller</strong> with RS485 port through an arbitrarily<br />
wired branched daisy chain tree, typically with a two-device<br />
fan-out after each device. Device power is provided via the<br />
network wiring, except for devices that need large amounts of<br />
power. Devices may be distributed throughout a building,<br />
placed conveniently close to the measured or controlled<br />
device locations. FGI network devices have selfidentification<br />
and addressing features for plug-and-play-like system configuration, and automatically know<br />
where they connected in the wiring tree, simplifying initial installation, configuration, and future system<br />
expansion.<br />
FGI devices supported by the <strong>FSD</strong> X10-UPB-FGI Bridge <strong>Controller</strong> include:<br />
FGI Temperature and Humidity Sensors<br />
Temperature sensor devices are available with or without humidity sensing. Each<br />
sensor device also includes one additional input, which may be a switch level<br />
detector, a switch transition detector, or an analog input for interfacing industry<br />
standard 4 to 20 milliamp sensors.<br />
FGI Temperature and Humidity Sensors:<br />
FG-014300 FGI Temperature Sensor, Switch Input<br />
FG-024300<br />
FG-004300<br />
TBD<br />
FGI Temperature Sensor, Transition Input<br />
FGI Temperature Sensor, 4-20 ma Analog Input<br />
FGI Temperature Sensor, Over/Under Temperature Alarm<br />
FG-014000-10<br />
FG-024000-10<br />
FG-004000-10<br />
FGI Temperature & Humidity Sensor, Switch Input, +/- 3%RH<br />
FGI Temperature & Humidity Sensor, Transition Input, +/- 3%RH<br />
FGI Temperature & Humidity Sensor, 4-20 ma Analog Input, +/- 3%RH<br />
FG-014000-11<br />
FG-024000-11<br />
FG-004000-11<br />
FGI Temperature & Humidity Sensor, Switch Input, +/- 2%RH<br />
FGI Temperature & Humidity Sensor, Transition Input, +/- 2%RH<br />
FGI Temperature & Humidity Sensor, 4-20 ma Analog Input, +/- 2%RH<br />
FGI Quad Input / Quad Output Devices<br />
The Quad I/O devices have four switch inputs, each with level and transition detection, and four<br />
non-isolated output drivers configured to drive LEDs, external relays or solenoids, or digital<br />
signal inputs on another device.
FGI Quad Input / Quad Output Devices<br />
FG-032020-06-330 FGI Quad Input / Quad LED Drive Output, 330 Ohms<br />
FG-032020-00<br />
FG-032020-01<br />
FG-032020-<br />
FGI Quad Input / Quad Relay and Solenoid Driver Output<br />
FGI Quad Input / Quad Dual Latching Relay Driver Output<br />
FGI Quad Input / Quad Digital Output<br />
FGI Octal Input / Quad Relay Output Devices<br />
Relay Output devices have eight switch inputs plus four sets of<br />
DPDT relay outputs. Options include latching versus non-latching<br />
relays, and RJ-45 or screw terminal FGI network connectors.<br />
FGI Octal Input / Quad Relay Output Devices<br />
FG-032061<br />
FG-032060<br />
FGI Octal Input / Quad Relay Output, Latching<br />
FGI Octal Input / Quad Relay Output, Non-Latching<br />
FGI Sixteen Security Sensor Input Devices<br />
Sixteen Security Sensor devices each have inputs for use with 1<br />
K-ohm loaded switches to detect wiring shorts and opens. All<br />
inputs detect current level and open/short status. Optional<br />
include transition detection support on zero, four, eight, or<br />
sixteen inputs. Available with RJ-45 or screw terminal FGI<br />
network connectors.<br />
FGI Sixteen Security Sensor Input Devices<br />
FG-05600C<br />
FG-056009<br />
FG-056008<br />
FG-05600D<br />
FGI Sixteen Security Input Sensor, Level Detection Inputs<br />
FGI Sixteen Security Input Sensor, 4 Transition Inputs<br />
FGI Sixteen Security Input Sensor, 8 Transition Inputs<br />
FGI Sixteen Security Input Sensor, 16 Transition Inputs<br />
FGI Nine Port Wiring Hub Device<br />
A nine-way FGI network wiring hub can be used to divide the FGI network into<br />
nine branches. Hubs may be daisy chained to provide higher fan-out.<br />
Additional device power can be injected at the hubs to drive large numbers of<br />
FGI devices if needed.<br />
FGI Nine Port Wiring Hub Devices
FG-072001-00<br />
FG-072001-80<br />
FGI Nine Port Standard Hub<br />
FGI Nine Port AC Power Hub<br />
FGI Wiring Method Adapters<br />
Adapters are available to convert the FGI<br />
network wiring style between RJ-45 Cat-5<br />
type cabling and 4-wire (two twisted pair)<br />
screw terminal wiring. Output side<br />
converters provide dual RJ-45 connectors for<br />
a two-way fan-out to downstream devices.<br />
FGI Wiring Method Adapters<br />
FS-1100001 FGI Adapter, RJ-45 to FGI DI Terminals<br />
FS-1100002<br />
FS-1100003<br />
FGI Adapter, Single FGI DO Terminals to RJ-45<br />
FGI Adapter, Dual FGI DO Terminals to Dual RJ-45 (bare)<br />
FGI Device Wiring Specifications<br />
A) Cable Type:<br />
FGI devices are networked with a 4-wire signal bus and are wired in a branched daisy chain<br />
arrangement. Many devices are designed to be interconnected using standard CAT-5 cabling with RJ-<br />
45 connectors, for convenience and commonality with other wiring. Other devices are designed to<br />
connect with a 4-wire cable using screw terminals, and some are available with a choice of either<br />
interconnection option. Both options use the same signaling on the wires, and can be used together by<br />
connecting them with a simple wiring adapter.<br />
WARNING: The signals on the FGI CAT-5 cables are NOT compatible with computer networks, and<br />
should never be connected to a computer network port, a computer data networking hub, or any other<br />
device not specifically identified as an FGI compatible controller or device.<br />
Many FGI devices use standard CAT-5 cabling to interconnect sensors and control devices throughout<br />
the building. FGI devices use standard RJ-45 crimp-on connectors at the cable ends, 8-pin equivalents<br />
of standard telephone-style RJ-11 connectors, with the cables wired straight-through as is commonly<br />
used for network cables. Note that when attaching connectors to the cables on-site the order of<br />
attaching the wires to the connectors is important, as described below (most standard pre-assembled<br />
network cables are connected in the proper order, and can be used with FGI devices).<br />
With the CAT-5 cable option, FGI devices use four of the wires for the distributed sensor and control<br />
networking. In some FGI device configurations the other two wire pairs are used as additional<br />
communication or signaling channels or to supply additional power to high power devices, so should<br />
not be used for unrelated purposes.<br />
For the 4 wire cables to interconnect with screw-terminal equipped FGI devices, most unshielded dual<br />
twisted pair cables are acceptable options. The FGI interface design is extremely noise-immune and<br />
uses moderate data speeds.<br />
B) RJ-45 Connector Wiring<br />
As per standard RJ-45 Cat 5 connector wiring, T568B wiring:
Pin #<br />
Color<br />
1 White/Orange<br />
2 Orange<br />
3 White/Green<br />
4 Blue<br />
5 White/Blue<br />
6 Green<br />
7 White/Brown<br />
8 Brown<br />
C) Wiring Topology<br />
The FGI data bus uses a branched daisy-chain low voltage wiring topology. Each device connects to<br />
its nearest neighbor in whatever order is convenient. Two-way branching is supported by most FGI<br />
devices. The resulting topology is typically a tree structure, with an arbitrary number of devices daisychained<br />
along any branch (up to the maximum depth limit). At the root of the tree is an <strong>FSD</strong><br />
<strong>Controller</strong> with an FGI interface. In larger system installations, often a nine-way branching FGI hub<br />
device may also be located near the controller, or in a centralized location and connected to the<br />
controller near the root of the FGI device tree.<br />
Since each FGI sensor or control device needs only to connect to its nearest neighbor, typical<br />
connecting wires are relatively short and easy to run. Thus, bulky and complex home-run wiring<br />
bundles are avoided.<br />
The order and structure of the FGI device interconnections are fairly unimportant and are automatically<br />
determined by the <strong>FSD</strong> <strong>Controller</strong>. Thus, quantities, types, and placement of FGI devices can be<br />
selected without extensive concern over the wiring structure. Additional FGI sensors and control<br />
devices can be easily added to the system at any time after the initial installation.<br />
Note that many FGI devices, such as FGI temperature sensor devices, have ―extra‖ switch input<br />
connections available. Therefore, additional switches may be added to a <strong>FSD</strong> / FGI system with little<br />
extra cost beyond the cost of installing the switch itself (i.e. without paying for an additional FGI<br />
device). For example, (1) a window or door-mounted magnetic reed switch, motion detector sensor, or<br />
an under-carpet pressure sensor pad can be connected to a nearby FGI temperature sensor, thus<br />
providing an extra security and/or occupancy sensor, or (2) an extra standard wall switch can be<br />
connected to the low voltage switch input to add an inexpensive remote switch for a multi-way control<br />
of a light. Taking maximum advantage of these extra ―free‖ inputs increases the rewards of owning an<br />
<strong>FSD</strong> / FGI home automation system with very little additional cost.<br />
D) Depth of Modules on a "Tree":<br />
As a rule of thumb, the FGI device wiring tree should be configured so each device does not exceed<br />
the recommended depth limit of 16 devices from the root of the tree. This is a conservative estimate;<br />
longer branches may work fine. There are two issues involved:<br />
First, the requirement to power most of the FGI devices via the device network cable. The power<br />
needed greatly depends on the device types installed. Certain device types, such as a relay module, use<br />
substantially more power than others (some devices have the option to be locally powered).<br />
Depending on particular device types and the configuration, a depth of 32 devices (maximum<br />
supported by software design) electrically performs without problems.<br />
Second, configure the system in a way to reduce the impact of any failure. While FGI devices are<br />
unlikely to fail, a device failure or wiring problem might cause other modules on a branch to be<br />
unreachable. In a "bushy" topology with short branches, few modules are affected. In contrast , a<br />
slender tree with long branches design might affect more devices.
E) Voltage Level Options<br />
FGI devices designed for residential and light commercial applications use 5 volt power and data<br />
signal levels. Supply current on the Cat 5 cables is kept below 500 milliamps, and current on the data<br />
wires is kept below 25 milliamps. Supply current through screw-terminal cables may be greater, if<br />
required.<br />
Certain special purpose FGI devices require more power . The extra power may be supplied using the<br />
additional wire pairs in the Cat 5 cable. The maximum secondary voltage used by any FGI device<br />
supplied via the Cat 5 cable is 24 VAC.<br />
FGI devices designed for industrial and harsh environment applications use 24 volt power and signal<br />
levels for greater power available to devices and for increased interference immunity. Most FGI<br />
devices designed for 24 volt operation have the option to operate at 12 volt. An industrial version of<br />
the <strong>FSD</strong> <strong>Controller</strong> supports both 24 volt and 12 volt industrial FGI devices.
<strong>FSD</strong> Configuration Guides<br />
Select the <strong>FSD</strong> Configuration guide below to display its manual.<br />
<strong>FSD</strong> Guide to Understanding Devices and Elements – an <strong>FSD</strong> configured system can be comprised<br />
of a variety of devices. For the <strong>FSD</strong> <strong>Controller</strong> to operate the system, the user creates interactions<br />
between the devices by associating device elements together by way of operations. This guide is an<br />
introduction to understanding devices, their elements and operations.<br />
<strong>FSD</strong> Operation Configuration Guide – Operations are used to associate Device Elements with one<br />
another. This guide explains the different operations possible and how to associate them with device<br />
elements.<br />
<strong>FSD</strong> Timers, Etc. Configuration Guide – This guide describes the different timers and virtual devices<br />
in this device family. The guide describes each timer‘s purpose and how to use them.<br />
<strong>FSD</strong> Macro Developers Guide – The user can customize the <strong>FSD</strong> <strong>Controller</strong> by writing macros to<br />
program customized behaviors. The guide describes the two types of macros that can be written and<br />
the different functions available.<br />
<strong>FSD</strong> Designer Configuration Guide – Describes using <strong>FSD</strong> Designer to create floor layouts<br />
resembling the user‘s building. The layouts can be used to place devices and run the system using the<br />
graphical interface. See the tutorial for <strong>FSD</strong> Designer for further details.<br />
<strong>FSD</strong> Logger Configuration Guide – This guide outlines the logging capabilities of the <strong>FSD</strong> controller<br />
family. The logger is used to record how the system is operating in order for the user to troubleshoot<br />
behavior abnormalities and verify that the system operates as configured.<br />
<strong>FSD</strong> Additional Configuration Topics – Contains miscellaneous tips and topics to consider to<br />
configure an <strong>FSD</strong> <strong>Controller</strong>.<br />
<strong>FSD</strong> Remote Access Configuration Guide – Discusses how to configure host and remote access<br />
computers in order to communicate from a remote site to a computer connected to the <strong>FSD</strong><br />
<strong>Controller</strong>.<br />
<strong>FSD</strong> Third Party Application Interface Guide – Describes steps for a third party application to<br />
communicate with the <strong>FSD</strong> <strong>Controller</strong>.<br />
<strong>FSD</strong> Multiple <strong>Controller</strong> Configuration Guide – Describes steps to configure multiple <strong>FSD</strong><br />
controllers on the same computer.<br />
<strong>FSD</strong> <strong>Controller</strong> Troubleshooting Guide – Listed are answers and solutions to frequently asked<br />
questions. Information is listed to report problems and to contact technical support.
<strong>FSD</strong> Guide to Understanding Devices and Elements<br />
<strong>FSD</strong> <strong>Controller</strong>s are configured by assembling a set of devices and creating interactions between devices. The<br />
interactions are created by using operations to connect elements of one device to another. This guide explains the<br />
concepts of devices, their elements, operations, and how they are used to configure an <strong>FSD</strong> <strong>Controller</strong> automation<br />
system.<br />
Note: <strong>FSD</strong> <strong>Controller</strong> models differ in capabilities. Device types supported are controller model dependent..<br />
Device Families:<br />
Devices are grouped as families, generally by the type of communications protocol used by the controller to<br />
communicate with the device. FGI devices exchange state data and commands via the FGI hardwired protocol, X10<br />
devices communicate via the X10 powerline carrier protocol, UPB devices communicate via the UPB powerline<br />
carrier protocol, Z-Wave devices communicate wirelessly via the Z-Wave RF standard, and so forth.<br />
Please note that the controller communicates with several device families through a special protocol interface<br />
device. The interface to/from the controller differs from the family‘s innate communications protocol. For example,<br />
the UPB powerline interface module, the INSTEON interface module, and the X10 CM11A interface communicate<br />
with the controller via RS-232. These interface controller devices are found within the RS-485/RS-232 device<br />
family, rather than within the UPB, INSTEON, or X10 family as one might assume. Similarly, the X10 TW523 and<br />
X10 PL513 modules communicate through specialized controller hardware, so are found within the Timers, Etc.<br />
device family. Z-Wave interface devices are found in either the Timers, Etc. device family or the FGI device<br />
family, depending on the specific <strong>FSD</strong> controller used. <strong>FSD</strong> <strong>Controller</strong>s are members of the FGI device family,<br />
because some <strong>FSD</strong> <strong>Controller</strong> types are designed to interconnect and communicate hierarchically via the FGI<br />
interface.<br />
Three special device families are supported by <strong>FSD</strong> controllers: the Macro device family, the Timer, Etc. device<br />
family, and the Variable device family. These device families comprise software based devices, which<br />
communicate within the controller internally, without external protocol. The Timers, Etc. device family also<br />
includes devices that are software drivers for specialized controller hardware features, such as the Real Time Clock,<br />
the interface to the X10 TW-523 module, and the direct relay output signals available on certain <strong>FSD</strong> <strong>Controller</strong>s.<br />
Macro device types, and how they differ from Direct Macros, are discussed separately in the <strong>FSD</strong> Macro<br />
Developer‘s Guide.<br />
Variables hold temporary or constant values used for controlling, configuring, or debugging other devices and their<br />
interactions with other system devices. Boolean variables (sometimes called ―Flags‖) hold TRUE-FALSE values.<br />
Other types of variables can be used to hold more complex values, such as a temperature or humidity threshold<br />
value.<br />
Timer, Etc. devices include: (1) time oriented devices, such as timeout delay devices, time-of-day triggered devices,<br />
and fade-rate control devices; (2) controller-hardware driver devices, as discussed above; and (3) devices that<br />
interconnect and adopt the behaviors of other families through device configuration options, but are not directly<br />
associated with any other family. The last group includes the Button Control and Super Bridge devices. The Button<br />
Controls (1) can be configured to send and/or receive device communications directly via selected protocols such as<br />
X10 or UPB and (2) can invoke Direct Macros triggered either by user interaction or by state changes in other<br />
devices. Super Bridge devices can bridge ranges of addresses across protocol families to seamlessly implement<br />
multi-protocol installations, such as a house with a combination of X10 and UPB devices. For more details on<br />
Timer, Etc. devices see the <strong>FSD</strong> Timers, Etc. Configuration Guide.<br />
Device Types versus Devices:<br />
A ―Device Type‖ specifies the characteristics of a type and possibly model of device, such as an X10 Lamp module.<br />
All individual devices having the same part number behave identically.<br />
A ―Device‖ is an individual unit of a particular Device Type. For example, ―Mary‘s Lamp‖ may be an instance of<br />
an X10 Lamp module and ―Living Room Lamp‖ may be another X10 Lamp Module of the same Device Type<br />
within the same house. Each has the same control properties, but may be set to different control states.<br />
Elements:
Individual state values associated with devices are referred to as ―Elements‖. A device may have a single or<br />
multiple element state(s). An example of a single element device is a typical Appliance Module with an On/Off<br />
state that can be set and possibly read, with no other control information. A two-element device example is a typical<br />
Lamp Module, which has an On/Off state and a Dim Level state. Another two-element device example is an X10<br />
motion detector device. It uses one X10 address to signal when motion is detected or a time-out interval passes<br />
since the last time motion was detected, and uses another X10 address to signal whether the general light level is<br />
above or below a threshold (intended to be used as a crude Dusk/Dawn indication). A temperature plus humidity<br />
sensor is another example of a multiple element device.<br />
Device elements may be used to send state information to a device (e.g. to control a simple Appliance Module), to<br />
receive state information from a device (e.g. to read a temperature / humidity sensor device), or to send and receive<br />
states bidirectionally (e.g. to set and verify the On/Off control state of a ―Two-Way‖ X10 Appliance Module).<br />
These are referred to as ―To‖ elements, ―From‖ elements, and ―To/From‖ elements.<br />
Device elements, that are available for use, are predefined based on the type of device (or in the case of Macro<br />
Device Types, predefined by the user or system installer). Individual elements (1) may be enabled and named for<br />
each individual device, and (2) can be set to initial states upon controller restart.<br />
Element states can typically be viewed, and possibly set, from the device‘s associated Device Dialog display.<br />
Through the use of <strong>FSD</strong> Logger, the states and state changes of selected individual device elements may be logged<br />
to a data file for use by another program or for historical analysis. For details on state logging options see the <strong>FSD</strong><br />
Logger Configuration Guide.<br />
Operations:<br />
States of device elements are interconnected with operations to associate devices with one another. For example, an<br />
X10 switch ―From‖ element may be connected to a UPB Appliance Module‘s ―To‖ element, using a ―Set To Value‖<br />
operation, to enable the X10 switch to control the UPB Appliance Module. Available operations and their use are<br />
discussed further in the <strong>FSD</strong> Operation Configuration Guide.<br />
Adding, Modifying, Listing, and Viewing Devices:<br />
Devices are added and modified with the <strong>FSD</strong> Namer utility, accessed by selecting View <strong>FSD</strong> Namer <br />
(device family) from the <strong>FSD</strong> Automator main menu. If <strong>FSD</strong> Viewer is active, but <strong>FSD</strong> Automator is not visible,<br />
select View-> <strong>FSD</strong> Automator from the <strong>FSD</strong> Viewer system menu (accessed by clicking on the icon on the left end<br />
of <strong>FSD</strong> Viewer‘s title bar).<br />
When <strong>FSD</strong> Namer is activated, it displays a list of currently defined devices for the specified device family.<br />
Depending upon the device family, devices can be added or deleted from the configuration, assigned device names<br />
and addresses, and individual element options can be set for the device.<br />
Device and Device Type information can be viewed and/or printed by using <strong>FSD</strong> Lister, activated by selecting View<br />
<strong>FSD</strong> Lister -> (device family) from <strong>FSD</strong> Automator‘s main menu. When <strong>FSD</strong> Lister is initially activated from<br />
<strong>FSD</strong> Automator‘s View menu, it shows detailed device information for the selected device family. Selecting the<br />
―T‖ or ―D‖ button on the tool bar changes how the active device family‘s device type information is displayed,<br />
organized by either the device type number or the device type description.
<strong>FSD</strong> Operation Configuration Guide<br />
Operations associate Device Elements with each other using selected association properties. Operations define<br />
simple behaviors, such as a switch assigned to turn a light on and off. More complex operations and groups of<br />
operations establish increased interdependent behaviors. One could define logical combination of multiple inputs to<br />
trigger an output device response. For example, turning on an air conditioner if either the temperature or the<br />
humidity exceeds their set-point value, but only if doors to the outside are closed.<br />
Assigning Operations:<br />
To add or edit operations affecting a device‘s elements, select Configure Operations from the device‘s Device<br />
Dialog system menu. To display the device‘s Device Dialog, click on a linked device icon on a floor or device<br />
layout within Viewer, or from <strong>FSD</strong> Automator‘s main menu by selecting Display (then select<br />
device name).<br />
Alternatively, from <strong>FSD</strong> Automator‘s main menu start <strong>FSD</strong> Operator directly by selecting Operations (then select device name).<br />
Either method starts <strong>FSD</strong> Operator, displayed with tabs for each enabled element on the device. If an element is<br />
enabled for ―To/From‖ bidirectional usage, a separate tab is shown for each direction.<br />
Note that tabs are shown for enabled elements and for the its enabled direction(s). If an expected tab is not shown<br />
for an element known to be available to the corresponding device type, or not shown for an expected ―To/From‖<br />
direction, close <strong>FSD</strong> Operator and start <strong>FSD</strong> Namer from the <strong>FSD</strong> Automator View menu. Choose the device from<br />
the device family list. Ensure that the elements are properly enabled.<br />
For the currently selected tab, <strong>FSD</strong> Operator displays a list of operation assignments that affect or are affected by the<br />
element and data direction shown on the tab label. Note that operation take their input data from ―From‖ elements,<br />
and apply their output data to ―To‖ elements. Also note that an operation assignment may be added, viewed, edited,<br />
and/or deleted from any ―From‖ element or ―To element associated with the operation; for example, one can view a<br />
switch element to see all the lights it controls, and one can view a light element to see all the switches that control<br />
the light.<br />
To add a new operation assignment, click the ―Add‖ button, then choose the desired operation to add from the<br />
selection box. To view or change the settings for an existing operation, double-click on the operation list entry.<br />
Operations available depend on the selected element‘s data type, and on the model of <strong>FSD</strong> <strong>Controller</strong> in use.<br />
Possible operations available to choose from include:<br />
SET_TO_VALUE<br />
SET_MOMENTARY_PAIR<br />
TOGGLE_VALUE
INCREMENT_VALUE<br />
DECREMENT_VALUE<br />
ADD_OR_SUBTRACT_VALUE<br />
COMPARE_VALUE<br />
LOGICAL_NOT<br />
LOGICAL_AND<br />
LOGICAL_OR<br />
LOGICAL_NAND<br />
LOGICAL_NOR<br />
LOGICAL_XOR<br />
GATED_SET_TO_VALUE<br />
GATED_SET_TO_CONSTANT<br />
CONVERT_VALUE<br />
SCALE_VALUE<br />
PID_CONTROL<br />
Please note that some operations cannot be universally coupled to all elements. Use toggle, value, and logical<br />
operations with elements of BOOLEAN data type. Use increment, decrement, add, subtract, and scale value with<br />
numeric type elements. In contrast the set to value operation is an example of an operation that can be used with<br />
numerous element data types. A type cast operator is available to convert data types, when needed.<br />
Examples:<br />
As an example, to control an UPB device with an X10 tabletop ―mini-controller‖, connect the ―Momentary On‖ and<br />
―Momentary Off‖ elements to the UPB device‘s ―On/Off Setting‖ element using SET_TO_VALUE operations. The<br />
―On‖ operation is set to apply its output when TRUE, and the ―Off‖ operation configured with its output inverted<br />
and applied when FALSE.<br />
A simpler, improved implementation is connecting the ―mini-controller‖ switch ―Momentary On‖ to the UPB<br />
Devices ―Momentary On‖ with a SET_MOMENTARY_PAIR operation. This operation implicitly connects the<br />
―Momentary Off‖ elements of the two devices. Thus, the control connects with a single operation. Furthermore,<br />
controlling the UPB device through its momentary elements sends a UPB command each time the X-10 switch is<br />
pressed. In the previous example the UPB command is only sent when the UPB device‘s ―On/Off Setting‖ element<br />
changes value.<br />
The SET_MOMENTARY_PAIR operation can also connect a non-momentary BOOLEAN state ―From‖ element<br />
with a pair of momentary ―To‖ elements, when momentary ―From‖ elements are not available. In this<br />
configuration, the ―Momentary On‖ ―To‖ element is pulsed whenever the ―From‖ element state transitions to TRUE<br />
(HIGH), and the ―Momentary Off‖ ―To‖ element is pulsed whenever the ―From‖ element transitions to FALSE<br />
(LOW).<br />
As a rule-of-thumb, if available, use a momentary-pair to momentary-pair link to interconnect devices. As a second<br />
choice, connect a non-momentary ―From‖ element to a momentary ―To‖ element pair. If there are no momentary<br />
―To‖ elements, connect the non-momentary state values. With a simple configuration, the connection options may<br />
appear to give the same results. However, as a system grows with multiple ―From‖ devices controlling the ―To‖<br />
device, if one uses the momentary connection approach instead, performance and reliability are improved.<br />
This example of operations uses TOGGLE_VALUE. In this case mechanical rocker switches are wired to digital<br />
inputs on a single multi-input, low-voltage, hardwired interface device to control a few lights via X10 modules. If a<br />
single rocker switch controls a single light, a SET_TO_VALUE operation can link the element wired to the switch<br />
with the X10 device controlling the lamp; in this case the UP position can always turn the light ON, and the DOWN<br />
position can always turn the light OFF. If several switches control the same light, use the TOGGLE_VALUE<br />
operation to control the X10 device. Now the light can be controlled by flipping any of the switches to its opposite<br />
position, regardless of the positions of the other switches assigned to the light.<br />
In another example, a system has (1) two or three rotary encoders connected to low voltage hard-wired rotary<br />
encoder input devices and (2) push-button shaft switches connected to the extra digital inputs on the rotary encoder<br />
devices. Use ADD_OR_SUBTRACT_VALUE operations to link all encoder value change elements to the dimmer<br />
level element on an X10 or UPB lamp module. The push button input elements could be connected to the On/Off<br />
State lamp module element with a TOGGLE_VALUE operation. With this set-up one can toggle the light on or off<br />
by pushing the knob on any of the encoders and can control the level of illumination by turning any of the encoders.<br />
(Continuous encoders with no end stops should be used for this configuration). Additionally, the ―speed‖ of the
dimmer knobs can be adjusted by using the SCALE_VALUE operations.<br />
Occasionally, one may want to connect two elements of different data types. For example, the Fade Timer device<br />
outputs a USHORT fade value, so it may be used in many applications beyond the presumed light dimmer fade<br />
application. A lamp device‘s dimmer element is a UCHAR value, specifying a percent level from 0 to 100.<br />
Therefore, to use the Fade Timer output level element to control the lamp device dimmer setting, the USHORT<br />
―From‖ value must be linked to the UCHAR ―To‖ level. To convert data type connect the elements with a<br />
CONVERT_VALUE operation.<br />
Configuring Operations:<br />
When adding or editing operations, a configuration dialog box for the selected operation type appears. Fields<br />
provide for selecting the ―To‖ and/or ―From‖ device elements to be used by the operation, and additional control<br />
parameters as appropriate for the operation and element types.<br />
For operations which associate a single ―From‖ element to a ―To‖ element, the configuration dialog allows selecting<br />
the complement ―To‖ or ―From‖ element. For example, with a switch device to add an operation to control a light,<br />
select the tab for the switch ―From‖ element, then press the ―Add‖ button to add a new operation. After selecting a<br />
SET_TO_VALUE operation type, in the operation dialog select a ―To‖ element on the light. Similarly, if one<br />
configures operations for the light, the operation dialog allows entry of a ―From‖ element from the switch.<br />
For operation types that associate two ―From‖ elements with a single ―To‖ element, such as the binary logical<br />
operation types, the operation configuration dialog displays two device element selection groups. If the operation is<br />
added or edited for a ―To‖ element, the left side element selection group is for the operation‘s ―From‖ element, and<br />
if the operation is added or edited for a ―From‖ element, the left side element selection group is for the operation‘s<br />
―To‖ element, similar to the behavior of the single ―From‖ element operation type dialogs. In either case, the right<br />
side element selection group provides for the selection of the other ―From‖ element used by the operation.<br />
Some operations have additional parameters such as a constant which can be set from the operation configuration<br />
dialog.<br />
Configure each operation to be active under various circumstances: in all operation modes, in selected operation<br />
modes, in certain combinations of operation modes, or to disable in all operation modes. For example, one might<br />
configure three operations for a motion detector element to turn on a light to full intensity in ―Awake‖ mode, to turn<br />
on a light to a 30 percent dim level in ―Asleep‖ mode, and to activate the security system in ―Away‖ mode. For<br />
more details on defining, setting, and using operation modes, see the discussion of operation modes in the <strong>FSD</strong><br />
Timers, Etc. Configuration Guide.<br />
For BOOLEAN element types, the operation can be configured to invert the ―From‖ element(s) (e.g. true value<br />
viewed as false, or its converse) before the basic operation is calculated, and/or to invert the ―To‖ results of the<br />
operation.<br />
There are additional output options to control when the operation calculation result is applied to the associated ―To‖
element. ―Apply Always‖ always applies the result, while ―Apply Never‖ never applies the result. If ―Apply On<br />
Input Change‖ is selected, the operation result is applied to the ―To‖ element. For instance whenever any ―From‖<br />
element associated with the operation has a value change the ―To‖ element is conditionally set to the operation<br />
result. Similarly, if the ―Apply On Output Change‖ option is selected, the associated ―To‖ element is conditionally<br />
set to the operation result whenever the operation result differs from the previously calculated result.<br />
For BOOLEAN operation results, an additional condition determining whether the ―To‖ element is set to the<br />
operation result is whether it matches the ―Apply on Output TRUE‖ or ―Apply on Output FALSE‖ selections. For<br />
example, configure an <strong>FSD</strong> <strong>Controller</strong> with an Timer type operating mode device and the switch element is<br />
connected to the Sleep operating mode. If the condition ―Apply on Output TRUE‖ is met, this allows a ―Sleep‖<br />
operation mode element state to be configured to turn all lights OFF at bedtime, without affecting the states of the<br />
lights when in the ―Awake‖ mode.<br />
Using Variables with Operations:<br />
<strong>User</strong>-defined Variable devices (BOOLEAN element type variables are sometimes called flags) can simplify<br />
operation assignments, by consolidating multiple ―From‖ elements to be applied to multiple ―To‖ elements. For<br />
example, a house has each upstairs bedroom equipped with a switch that when signaling ―OFF‖ turns OFF all<br />
downstairs lights, and switching ―ON‖ turns ON lights in the downstairs foyer, hall, and kitchen for a midnight<br />
snack run. Assigning individual operations directly between each switch to each affected light is possible, but<br />
cumbersome. In a simpler approach each switch is assigned a BOOLEAN variable for ON and another for OFF.<br />
Then assign these two BOOLEAN variables to operations that control the three lights.<br />
Use the MOMENTARY_PAIR Variable device type as the preferred base type for intermediate devices, thus<br />
consolidating elements for devices having momentary element On/Off pairs. If desired, a single non-paired<br />
BOOLEAN element can also be configured as a momentary element (configured from <strong>FSD</strong> Namer).<br />
Use Variable devices to link multiple operations between other device elements. For example, to turn on a light if<br />
either state A or state B is TRUE, while state C is also TRUE, a logical OR operation can be used to combine A and<br />
B, followed by a logical AND operation to combine the result of the first operation with C. However, operations<br />
connect elements to elements, not elements to operations, so an element is needed to hold the result of the A and B<br />
operation. A variable with a ―To/From‖ BOOLEAN element can be defined and used to hold the intermediate<br />
result. Note that the result of this intermediate operation can be viewed and changed from the user interface by<br />
displaying the variable‘s device dialog.
<strong>FSD</strong> Timers, Etc. Configuration Guide<br />
Guide to Configuring <strong>FSD</strong> Timers and other Virtual Devices<br />
<strong>FSD</strong> Timers, Etc. Overview<br />
The Timers, Etc. device family is a collection of devices implemented as firmware, and in some cases specialized<br />
hardware in the <strong>FSD</strong> <strong>Controller</strong>. The Timers, Etc. family provides a variety of electronic timers for time based<br />
control of connected devices: There are two timer categories: Elapsed Time Timers, and Time-of-Day Timers.<br />
Also in the Timers, Etc. family are other virtual devices used to control devices.<br />
Elapsed Time Timers include: Retriggerable Timer, Alarm Timer, Fade Timer.<br />
Time-of-Day Timers include: Real Time Clock, Time of Day Event, Holiday Schedule, Alarm Clock.<br />
Other Timers, Etc. devices include: Operating Mode, 8-Button Control, 16-Button Control, Super Bridge, X10<br />
Interface (TW523), and Z-Wave Interface.<br />
The timer devices available are <strong>FSD</strong> <strong>Controller</strong> model dependent. Most controller models are equipped with all<br />
Elapsed Time Timers. The Time-of-Day timers are available on all controller models, except the Bridge controllers,<br />
which do not support Real-Time Clock hardware. Installation of the other timers depends on the function of a<br />
particular controller model. For example, (1) Super Bridge devices are available on controller models supporting<br />
two or more HA protocols; (2) the X10 Interface device is only installed on controller models supporting X10, and<br />
(3) the Z-Wave Interface device is only installed on controller models that include internal Z-Wave support.<br />
Timers are implemented by <strong>FSD</strong> controller firmware, so timers operate independently from and do not depend on<br />
software attached to the host computer. Similar to other devices, Timer, Etc. devices have ―To‖, ―From‖, and<br />
―To/From‖ elements, which can interconnect with other devices to control and/or be controlled by external events.<br />
Timers, Etc. devices have user interface device dialogs, so the user can interact with timer operation, when the host<br />
computer is connected.<br />
Elapsed Time Timers<br />
Retriggerable Timer<br />
This timer type allows the user to program a triggerable event. This event starts a specified time after the trigger, is<br />
active for a specified time, and inactive for a specified time. A input to this timer can be connected to trigger an<br />
action programmed by this timer.<br />
Configurable options on the Retriggerable Timer includes Blink mode, retriggerability, and setting time<br />
accumulation from repeated trigger events.<br />
To view the operation of this timer, the timer device dialog shows the state of the Timer output, the time remaining<br />
for the specific state (delay, on, or<br />
refractory period), and the states of the<br />
Trigger Input, Trigger Enable (both can<br />
be set by clicking its button) and the<br />
Pause Time elements. With the Trigger<br />
Enable in the TRUE state, the user can<br />
click on the Trigger Input when<br />
displayed FALSE to trigger an event.<br />
Alarm Timer<br />
This device uses an alarm to notify when an alarm<br />
event occurs. The user can configure an initial<br />
delay before activation and stagger alarm responses<br />
by specifying when the first, second and third alarm<br />
alert outputs occur.<br />
The user can also configure the alarm device to send<br />
a notification message to the host computer, when
an alarm is triggered. See the section on ―Using Alarm Notifications‖ below for additional details on using<br />
Notification Messages.<br />
On the alarm timer, the user can configure: the delay of the trigger, the duration of the alarm, the delay time between<br />
the first and second alarm alert, and the delay between the second and third alarm.<br />
The Alarm Timer device dialog display shows the current alarm state if the appropriate box is checked. Buttons are<br />
available to trigger the alarm, enable the alarm, or deactivate the alarm. Deactivating the alarm can be password<br />
protected.<br />
Fade Timer<br />
A Fade Timer controls a device so it can be turned on or off in a gradual fashion. If desired a holding level can be<br />
programmed before the end fade level is reached.<br />
Typical use is to implement slow bright / dim fade behavior for a light dimmer switch or module, if the device does<br />
not support internal fade time control. The Fade Timer can also implement a gradual change in any other analog<br />
control value, for example slowly raising the temperature of a building heated by a heat pump to a target<br />
temperature to avoid using the emergency heat function (uses more electricity).<br />
When triggered the fade timer device<br />
controls the change in power level for the<br />
device from a start percentage level (0—<br />
100%), to a hold level, to an end fade level.<br />
Each of these levels has a specific time<br />
period assigned.<br />
The Fade Timer dialog displays the state of<br />
the fade timer, the different settings, buttons<br />
to enable the trigger, set the trigger state, and<br />
turn the pause time on or off.<br />
Time-of-Day Timers<br />
Real Time Clock<br />
The Real Time Clock timer device is an<br />
interface to the controller‘s real time clock.<br />
It allows other devices on the system to<br />
control or be controller by time states using<br />
operation connections with the device‘s<br />
―To‖ and ―From‖ elements.<br />
The Real Time Clock timer device dialog<br />
displays the current time setting for the <strong>FSD</strong><br />
<strong>Controller</strong>. Clicking on the ―Set‖ button<br />
displays a dialog box to set the date and time for the controller. (Note that an alternative method for automatically<br />
keeping the controller‘s time set correctly is to enable <strong>FSD</strong> Router as the time master. From the <strong>FSD</strong> Automator<br />
main menu, select Option -> Configure Router Options (also see <strong>FSD</strong> Router manual), and set the checkbox for<br />
―Time Synch Source‖, which periodically synchronizes the <strong>FSD</strong> <strong>Controller</strong> Date/Time setting with the computer‘s<br />
date/clock values.)<br />
The dialog also displays the element states for the different dawn/dusk states (discussed in a following section) and<br />
the ―To‖ element (Input) states for Time Set, Hour, and Minute. These cannot be changed directly from the device<br />
dialog interface, since the dawn/dusk states are derived from the current time settings. In addition, the ―Set‖ button<br />
provides a more convenient method of setting the time from a GUI interface than the button-oriented time setting<br />
elements.<br />
Time of Day Event
The Time of Day Event timer generates time-of-day based ―From‖ element states, which can be connected via<br />
operations to devices to trigger actions at predefined times. For example, program the event timer to turn the porch<br />
light ON from dusk until 11:00 PM every night.<br />
One can configure the Time of Day Event timer for events to occur at specified start and stop times, or to occur<br />
randomly for a specified range of minutes and turned off for a specified range of minutes during a specified time<br />
period set.<br />
The event can be configured to occur on<br />
specified days of the week, optionally<br />
only on specified days of the year<br />
designated as a ―Holiday‖, ―Special Day<br />
1‖, ―Special Day 2‖, or ―Special Day 3‖.<br />
(See following section on ―Holiday<br />
Schedule‖.)<br />
By using Operating Modes, the user can<br />
make the event timer active depending<br />
on specified Operating Mode conditions.<br />
For example, randomized control of the living room light would probably only be enabled for an ―Away‖ mode, and<br />
inactive in ―At Home‖ mode. For further discussion of Operating Mode options, see the section ―Using Operating<br />
Modes‖ below.<br />
The Time of Day Event timer device dialog shows the user whether the current event state is True or False (on or<br />
off), whether the event is enabled today, and whether the event is enabled in the current operating mode. Event<br />
times can be configured through the ―Configure Event Timer‖ in the Event Timer‘s device dialog‘s system menu.<br />
Alarm Clock<br />
The Alarm Clock timer mimics a traditional alarm clock, but with additional features. One can configure an Alarm<br />
Clock timer device to activate an<br />
alarm for a specific clock time or time<br />
relative to specific sunrise or sunset<br />
event, for specified days of the week,<br />
or be conditionally dependent on<br />
whether the day has been designated<br />
as a ―Holiday‖, ―Special Day 1‖,<br />
―Special Day 2‖, or ―Special Day 3‖.<br />
The alarm clock device can control<br />
three separately timed actions,<br />
connected by operations to the alarm<br />
clock device‘s ―From‖ elements, with<br />
the second and third alarm times<br />
relative to the first and second alarm<br />
clock output.<br />
―Hitting‖ the snooze button (―To‖ element) inactivates the alarm state for a specified period, then reactivates the<br />
alarm, as would the ―Snooze‖ button on a traditional alarm clock. The ―Deactivate‖ element turns off the alarm<br />
clock at least for the day (optionally the alarm clock can be set to reactivate during the day).<br />
The Alarm Clock device dialog display shows the current alarm clock trigger state and alarm output states. Buttons<br />
are available to trigger the alarm,<br />
enable the alarm, start a snooze<br />
period, or deactivate the alarm.<br />
Holiday Schedule<br />
The Holiday Schedule timer<br />
device controls date designations,<br />
and controls other devices based<br />
on date designations. The device<br />
uses values connected by
operations linked to its device elements. The Holiday Schedule device dialog box allows the user to designate<br />
scheduled dates. More than one Holiday Schedule devices can be configured into a system (for example separate<br />
calendars for Holidays and each category of Special Days).<br />
Some timer device family members can be configured to be active or disabled on dates designated as a Holiday,<br />
Special Day 1, Special Day 2, or Special Day 3. For these devices, the connection to the date designations is<br />
internal and automatic, and no explicit element operations are needed. Other devices can be controlled by date by<br />
linking them to the Holiday Schedule device elements, and if desired, a device can set a holiday or special state; for<br />
example, an X10 switch can activate Holiday mode operation for the day, without editing the calendar schedule.<br />
To set a date to be a holiday or special event, click the ―Insert‖ button on a Holiday Schedule device dialog. An Edit<br />
Holiday dialog box appears. Set the start and stop date for the time period, ensure that the Enable Date checkbox is<br />
selected, enter a name for the event, and select the check boxes if this event is annual and designated Holiday,<br />
Special Day 1, Special Day 2, and/or Special Day 3. Other options are whether one wants to cancel all scheduled<br />
events for the specified time period, or to disable all alarm clocks on those days. Click ―OK‖ and the entered event<br />
is displayed in the list box. Double clicking on a listed event allows editing. To delete, select an event in the list<br />
box and click the ―Delete‖.<br />
To quickly assign today‘s date as a special event click the ―Today is Special‖ button. Note: after today‘s date is<br />
assigned as a special date and enabled, the button changes to ―Today is NOT Special‖. Clicking this button displays<br />
the event assigned with the ―Today is Special‖ button.<br />
To assign tomorrow‘s date as a special event click the ―Tomorrow is Special‖ button.<br />
Non-Time Based Timers, Etc. Devices<br />
8 Button Control<br />
16 Button Control<br />
When 8-Button or 16– Button Control devices are installed, it is possible for<br />
other devices on the <strong>FSD</strong> <strong>Controller</strong> to send arbitrary X10, UPB, or other<br />
protocol commands. One simply sets a device element state via a normal<br />
operation, such as SET_TO_VALUE. For example, a Button Control device<br />
could be configured to send X10 extended commands to set ―Scenes‖ when<br />
receiving inputs from a hardwired switch or a low cost X10 switch console.<br />
The ―Buttons‖ on the button control devices can be configured to invoke<br />
direct macros after receiving ―To‖ element values.<br />
Buttons can be individually configured to operate as momentary, push-ON<br />
push-OFF , or as button pairs when one button sets an ON state, and the other<br />
sets an OFF state. ON and OFF responses can also be independently<br />
configured.<br />
Both button control device types are identical, except for the<br />
maximum number of buttons controlled.<br />
The Button Control device dialog can be configured as an 8<br />
button user interface on a connected computer. 16 button<br />
control user interfaces also include a selector to switch between<br />
button ranges. Buttons may be labeled as desired, and disabled<br />
if not in use. This allows direct user<br />
operation of the 8 or 16 buttons functions;<br />
for example, it could be configured as a<br />
―Scene‖ controller from the desktop, or as a<br />
console for triggering user defined macros.<br />
Super Bridge<br />
A Super Bridge device can bridge<br />
commands from one device family to a<br />
different device family. Groups of device
addresses can be bridged with minimal configuration effort. Thus, a variety of devices, each using different<br />
communication protocols, can communicate with one another. The <strong>FSD</strong> <strong>Controller</strong> translates the commands from<br />
one device family to another device family. Conceptually, view a Super Bridge device as a group of four X10,<br />
UPB, and/or hardwired four address switch devices glued together with a 16-Button Control device. 16 operations<br />
bridge their ―From‖ and ―To‖ elements. Additionally, the Super Bridge can also bridge fade levels for dimmers.<br />
For example , an existing X10 based system can be upgraded by installing UPB devices. The X10 and UPB devices<br />
can control each other through Super Bridge devices.<br />
Use operations to connect the input and output sides of the bridge with their complement ―To‖ and ―From‖ elements<br />
on devices. To view the interactions, use <strong>FSD</strong> Logger to log a report to the PC host.<br />
The Super Bridge device dialogs display switches that can control and indicate the state of each switc h. In addition<br />
there are slider controls to control bridged devices with dimmer capabilities.<br />
To configure a Super Bridge device, select ―Configure Device‖ from its device dialog, or from <strong>FSD</strong> Automator, use<br />
the Configure —> Timers, Etc. menu and choose an instance of Super Bridge (previously created using View —><br />
<strong>FSD</strong> Namer —> Timers, Etc.). The Configure Super Bridge dialog displays a list box displaying address groups<br />
within Bridge Group Configuration. Double-clicking on an address group line in the list box displays the Edit<br />
Bridge Group dialog box to edit bridge behavior for a block of four sequential input and output addresses.<br />
For each section use the drop lists to choose the device family, X10 variation if applicable, and device family<br />
controller (on <strong>FSD</strong> <strong>Controller</strong> models supporting more than one). Depending on the device family, enter other<br />
appropriate information required for the device family in the displayed drop lists and radio button selections. In the<br />
Input Settings section, choose the device family and address information for the devices that send signals to the <strong>FSD</strong><br />
<strong>Controller</strong>. For X10 devices that use extended<br />
command, also enter the protocol variation to use<br />
based on the X10 device models. For devices to<br />
receive the bridged signals from the <strong>FSD</strong> <strong>Controller</strong>,<br />
enter configuration data in the Output Settings<br />
section. For each section the first address entered is<br />
the base address. The next three devices use the next<br />
three addresses in sequence.<br />
For subsequent address groups in the Bridge Group<br />
Configuration, double click on the address group<br />
entry in the list box. If the same device families<br />
from the previous line are used for input and output<br />
to the controller with consecutive addresses used,<br />
select the Inherit Settings checkbox. If the output<br />
device group has dimmer capabilities, check the<br />
―Enable Dimmer Operation‖ checkbox to enable<br />
bridging dimmer values through the Super Bridge.<br />
Operating Mode<br />
The Operating Mode device type enables devices<br />
to interact with the <strong>FSD</strong> <strong>Controller</strong>‘s Operating<br />
Mode state. Thus, a device can change the current<br />
Operating Mode state by connecting a device<br />
element with an operation by way of an Operating<br />
Mode device. For example, one can configure a<br />
bedside X10 switch to place a house into an<br />
―Asleep‖ (operating) mode. Direct control of<br />
device states can be accomplished by changing<br />
operating modes using the operation connections<br />
on the devices elements.<br />
An Operating Mode device dialog displays the currently enabled operating modes assigned to the different operation<br />
mode groups. The current operating mode is changed using the Operating Mode device dialog.
All operations, and some Timers, Etc. devices can be enabled depending on the current operating mode state. This<br />
is one approach to configure complex conditional system behaviors. See the section ―Using Operating Modes‖<br />
below for a further discussion of operating modes and operating mode groups.<br />
X10 Interface (TW523)<br />
The X10 Interface (TW523) device type implements an X10<br />
protocol controller device. This device communicates with X10<br />
family devices via an X10 power line interface module (TW523,<br />
PSC05, or PL513) connected to the <strong>FSD</strong> <strong>Controller</strong>‘s X10 OUT<br />
port. In Compact Bridges and Bridge <strong>Controller</strong>s supporting X10,<br />
the X10 Interface (TW523) device also supports communications<br />
with a legacy X10 controller by emulating a TW523 or PL513 device on the X10 IN port.<br />
The X10 Interface (TW523) device type is in the Timers, Etc. family because it connects to specialized TW523<br />
interfacing circuitry in the <strong>FSD</strong> <strong>Controller</strong> and does not communicate with the power line interface module of the<br />
primary interface protocol families. In contrast, the X10 Interface (CM11A) device type, if supported by the <strong>FSD</strong><br />
<strong>Controller</strong> model, is a member of the RS232/485 device family, since it communicates with the <strong>FSD</strong> <strong>Controller</strong> via<br />
an RS-232 port. Only one TW523 X10 Interface device is supported per <strong>FSD</strong> <strong>Controller</strong>.<br />
The type of power line interface module used should be set with the device dialog‘s Configure Device option dialog,<br />
and /or the type of interface module emulation to be supported on the X10 IN port, if applicable. The X10 OUT<br />
power line interface module selection and X10 IN emulation port selection need not match. Additional<br />
configuration options include enabling automatically repeating X10 commands if controller-implemented<br />
redundancy is desired.<br />
Note that the two-way power line interface models TW523, PSC05, and compatible variations from other<br />
manufacturers are all equivalent from the perspective of the X10 Interface protocol controller device. The TW523<br />
modules can receive X10 commands from other X10 devices, but cannot receive X10 Extended commands;<br />
nonetheless a TW523 or similar interface is generally recommended for use with an <strong>FSD</strong> <strong>Controller</strong> or Bridge. The<br />
PL513 is a lower cost, transmit only device, which cannot receive X10 commands from other devices. The CM11A<br />
interface can receive X10 Extended commands, but has performance limitations that make it unsuitable for many<br />
controller applications beyond X10 protocol packet logging.<br />
Timers, Etc. Device Family Related Topics<br />
Using Dawn/Dusk Relative Times<br />
<strong>FSD</strong> <strong>Controller</strong>s, with real time clock capability, can control devices based on time relative to dusk or dawn.<br />
Dusk and dawn times depend on geographic location, so before using dusk/dawn relative times define the controller<br />
location. Set location from the <strong>FSD</strong> Automator main menu Options —> Set Location and Time. Use the Set<br />
Location and Time Display dialog to input location and time information for dawn and dusk calculations. In the<br />
USA, set the location by either selecting a nearby city on the drop lists or selecting a zip code. Alternatively, enter<br />
the location‘s latitude and longitude. Verify or set the time zone, and choose whether or not to enable Daylight<br />
Savings Time.<br />
Several dawn and dusk time definitions are available as timer trigger reference times:<br />
Dawn Definitions<br />
Sun Rise – when the sun is halfway above the horizon.<br />
Civil Dawn – when there is sufficient sunlight to be able to read print.<br />
Nautical Dawn – when the sky is too bright to use the major stars to navigate.<br />
Astronomical Dawn – when the sky no longer is the darkest.<br />
Dusk Definitions<br />
Sun Set – when the sun is halfway below the horizon.<br />
Civil Dusk – when there is insufficient sunlight to be able to read print.<br />
Nautical Dusk – when one can use the major stars for celestial navigation.
Astronomical Dusk – when the sky becomes its darkest.<br />
The Real Time Clock device provides ―From‖ elements indicating the current dusk/dawn states, which can be<br />
connected via operations to ―To‖ elements in other devices. Also, on the Real Time Clock device dialog,<br />
checkboxes labeled Sun Rise, Civil Dawn, Nautical Dawn, and Astronomical Dawn indicate the current dusk dawn<br />
state:<br />
as a check is displayed in the checkbox, the particular dawn definition has been reached.<br />
as a check is removed from the checkbox, the complementary dusk definition has been reached.<br />
Time-of-Day Event Timer devices can start or end events based on times relative to the dawn or dusk times.<br />
Relative time offsets are relative to midnight (12:00 AM). There is no offset of the time event at midnight. To set a<br />
trigger time for a few minutes before the selected Dawn /Dusk time, set the time to 11:?? PM. Similarly, to set a<br />
trigger time for a few minutes after the selected Dawn / Dusk time, set the time to 12:?? AM.<br />
For example, in the time of day event‘s Configure<br />
Event dialog on the right, the reference start time<br />
of Civil Dawn and the reference stop time of Sun<br />
Set are modified with relative time offsets. The<br />
―Relative‖ buttons to the right of the Start and<br />
Stop times are set enabling relative time<br />
offsetting. The start time is set to trigger 15<br />
minutes after Civil Dawn, with the relative time<br />
set as 12:15 AM. The stop time is set to 15 minute before Sun Set, with the relative time set as 11:45 PM.<br />
Using Operating Modes<br />
Use Operating Modes to configure the <strong>FSD</strong> <strong>Controller</strong> based automation system. Depending on the Operating<br />
Modes set, the controller receives different input and it changes the controlled device‘s behavior. For example, the<br />
user can configure a motion sensor in the house to trigger different responses depending on whether the automation<br />
system expects the house to be occupied. In ―Away‖ and ―On Vacation‖ operating modes, the house is unoccupied.<br />
When motion is sensed, it triggers the alarm and notifies the security service. In ―At Home—awake‖ mode, the<br />
system might be configured to turn a light on when motion is detected after dusk. Additionally, if the system is also<br />
in ―At home—asleep‖ mode, when motion is detected,<br />
the lights are turned on using fade timing, slowly<br />
bringing the lights to a low intensity level.<br />
Using Operating Mode Groups provides another level of<br />
configuration control. An Operating Mode Group<br />
combines a selected number of operating modes. Thus,<br />
an Operating Mode Group provides a convenient way to<br />
configure the <strong>FSD</strong> <strong>Controller</strong>. In this way various<br />
devices can automatically adapt to changes in<br />
circumstances prescribed in the Operating Mode group.<br />
For example, one might want the system to act differently<br />
depending on whether school is in session.<br />
Operating Modes and Operating Mode Groups are<br />
defined and enabled using <strong>FSD</strong> Namer. From the <strong>FSD</strong><br />
Automator main menu, select View —> <strong>FSD</strong> Namer —><br />
Operating Mode to display a dialog for editing Operating<br />
Mode Groups and Operating Modes. Double-clicking on<br />
an Operating Mode or Operating Mode Group entry<br />
allows the user to assign a name and set enabling. For<br />
Operating Modes, group membership can be assigned.<br />
For Operating Mode Groups, the user assigns a style.<br />
The ―Radio Button‖ style acts like old-fashioned radio<br />
buttons where selecting any mode in the group desel ects<br />
all others in the same group (mutually exclusive); the ―Independent‖ style allows the modes in the group to be set or<br />
cleared independently; ―All TRUE‖ assigns all modes in the group as true; and ―All FALSE‖ assigns all modes in
the group as false.<br />
Operating Mode default setting and controller reboot<br />
condition are set in the Configure Device dialog for the<br />
<strong>FSD</strong> <strong>Controller</strong>.<br />
The current operating mode(s) can be set from another<br />
device such as a switch input device. An Operating Mode<br />
device must be defined within <strong>FSD</strong> Namer, in the<br />
Timers, Etc. family. A ―From‖ element from the source<br />
device can then be linked to the desired Operating Mode ―To‖ element via a configured operation.<br />
To view or set the current operating mode from the operator<br />
interface, view the device dialog for a defined Operating<br />
Mode device. Alternatively, from <strong>FSD</strong> Automator, under the<br />
Options menu choose ―Set Operating Modes‖. This displays<br />
the operating modes that are enabled and to which group<br />
each belongs. Note that the dialogs for these two methods<br />
look similar, but behave differently. Double-clicking on an<br />
operating mode on the list activates the operating mode.<br />
Under the enabled column the operating mode will be<br />
marked with an ―R‖, ―I‖, ―T‖, or ―F‖, which indicates the<br />
operating mode group‘s style (Radio button, Independent, all<br />
TRUE, or all FALSE, respectively). When using the device<br />
dialog, the mode(s) are set immediately, and the box dialog remains open to view changes from other sources such<br />
as a linked switch. When using ―Set Operating Modes‖ the display is static and changes take effect only after the<br />
dialog is closed.<br />
All operation types linking device elements, such as SET_TO_VALUE, can be conditionally enabled based on the<br />
current operating mode(s) set. Certain timer device types, including the Alarm, Alarm Clock, and Time-of-Day<br />
Event types, can also be conditionally enabled, dependent on current operating mode(s). Examples include:<br />
configuring (1) an Alarm device to be enabled only in the ―Away‖ and ―On Vacation‖ modes or (2) an Alarm Clock<br />
to be enabled only in the ―At home—asleep‖ mode and with school in session.<br />
To configure the Operating Mode options for an operation, edit the operation properties by selecting ―Configure<br />
Operations‖ from either the ―From‖ or the ―To‖ device, select the corresponding element tab, and select the<br />
operation from the displayed list. To configure the Operating Mode options for a Timers, Etc. device, select<br />
―Configure Device‖ from its device dialog‘s system menu. In either configuration dialog, there will be a group of<br />
controls such as the partial dialog box shown nearby, with the particular listed options derived from the enabled<br />
operating modes and operating mode groups previously defined within <strong>FSD</strong> Namer.<br />
Select the ―All Modes‖ radio button to enable the<br />
operation or timer in all operating modes. Select<br />
―Any Mode‖ to enable any number of operating<br />
modes checked as enabled. Select ―Multi-Mode‖<br />
when a combination of operating modes, modes<br />
selected from different operating mode groups,<br />
defines the controller‘s actions. For example in the<br />
dialog above, one can choose ―At home—asleep‖<br />
from group 1 and ―School‘s in Session‖ from<br />
group 2 to determine the timing of lights that go on<br />
and starting of the coffee maker in the morning<br />
consistent with school in session. Select ―None<br />
(Disabled)‖ to disable the operation or timer<br />
device at all times.<br />
If ―Any Mode‖ or ―Multi-Mode‖ is selected, click<br />
on operating modes listed to the right to select<br />
operating modes for which the operation or timer<br />
device is enabled. An ‗X‘ in the ―En‖ column<br />
indicates the operating mode is selected. The<br />
―Grp‖ column shows the operating mode group
number for the listed operation.<br />
Using Alarm Notifications<br />
Notifications initiate an action on the host computer or a connected remote computer, in response to an event or<br />
condition detected by the <strong>FSD</strong> controller. For example, a<br />
message could be displayed on the computer screen if a<br />
security sensor is activated or if a monitored control system<br />
parameter exceeds a limit value.<br />
To use alarm notifications, set the following when configuring<br />
an alarm timer: enable the notification trigger checkbox, enter<br />
a notification code, and enter notification text. The alarm is<br />
triggerable.<br />
Notifications from Alarm Devices are supported by <strong>FSD</strong><br />
Automator and the Alarm device dialog. If the associated<br />
Alarm device dialog is active, the notification packet is sent to<br />
the dialog. If the dialog is inactive, the dialog is started<br />
automatically from Automator to process the notification.<br />
(Note: Automator must be active for the packet to be handled<br />
in this fashion).<br />
The Alarm device dialog handles the notification in<br />
accordance to the options selected in the ―Configure Notify‖<br />
dialog (accessed from the Alarm Timer device dialog‘s system<br />
menu). A message window may be displayed for viewing,<br />
and/or a user-specified notification handler application can be started to take further action.<br />
Alternatively, alarm Device notifications can alternatively be processed by a user-developed or third party provided<br />
custom notification service. This <strong>FSD</strong> Router client application is developed by following the guidelines provided<br />
in the <strong>FSD</strong> Third Party Application Interface documentation.<br />
This notification handling functions similarly to the macro notification provided by Macro Devices, which is based<br />
on user-defined Macro Device Types.<br />
Generic Timers, Etc. Device Set-Up Procedure<br />
1. To generate an instance of an <strong>FSD</strong> Timers, Etc. device, in <strong>FSD</strong> Automator from the main menu select View ->Fsd<br />
Namer->Timers, Etc.<br />
2. A ―Timer List‖ dialog box appears. Click the ―Insert‖ button. The ―Edit Timer‖ dialog box is displayed. Select a<br />
timer type from the Timer Type drop list. Click ―OK‖.<br />
3. From the Display menu in <strong>FSD</strong> Automator, choose the ―Timers, etc.‖ selection. In the dialog box displayed,<br />
choose the Device Type and the Device Name of the timer just created from their respective drop lists. The<br />
current state of the timer is displayed. Each timer type may have a slightly different display list and pattern.<br />
4. Display the system menu of the displayed device dialog by clicking on the icon on the left end of the title bar, or<br />
by right-clicking anywhere on the title bar, shows a menu allowing the user to:<br />
Configure Display -- user can change icon displayed on this dialog box.<br />
Configure Event Times -- user programs the timer from this dialog box.<br />
Configure Device -- user programs Input and Output Settings for device.
Configure Operations -- user connects to the<br />
device controlled by this timer.<br />
5. Select Configure Operations to show an Operation<br />
dialog. One can define operations linking the<br />
elements of the device to elements of other devices,<br />
as discussed in the ―<strong>FSD</strong> Operation Configuration<br />
Guide‖.<br />
Choose the element type from the tabbed indices,<br />
Click on the ―Add‖ button, select the type of<br />
operation from the drop list in the Operation<br />
dialog box,<br />
In the Device Element Operation dialog, choose<br />
the Device Family, Device Type, Device<br />
Name, and Device Element for the device to<br />
link to the timer device element. NOTE: The<br />
appearance of the Device Element Operation<br />
box, and options available within the box,<br />
depends on the operation selected. ALSO<br />
NOTE: the other device(s) to be linked must<br />
already be defined through <strong>FSD</strong> Namer.<br />
Set other variables as desired.<br />
Click ―OK‖.<br />
6. Either click the ―Load‖ button on the tabbed element<br />
Operation dialog box or select ―Load<br />
Configuration‖ on the File menu in <strong>FSD</strong><br />
Automator to load the configuration to the<br />
controller.<br />
Refer to the manual on a specific Timers, Etc. device type for detailed configuration and operating instructions.
<strong>FSD</strong> Macro Developer’s Guide<br />
Direct Macros vs Macro Device Types<br />
The <strong>FSD</strong> <strong>Controller</strong> family and the <strong>FSD</strong> Creator macro design utility provide two approaches to implement high<br />
capability custom macros. Direct Macros are single-instance macros that link directly to device elements. It<br />
provides a relatively simple approach to generate customized control sequences. Macro Device Types are custom<br />
designed virtual device types. Use <strong>FSD</strong> Namer to add multiple macro devices as instances of the macro device type.<br />
Macro Devices, based on Macro Device Types can be displayed as Device Dialogs. Element values can be<br />
monitored and modified from the screen display, and the macro device elements can be interconnected with other<br />
device elements by way of operations. Use Configure Operations similarly to nonvirtual devices. Macro Device<br />
Types provide an elegant means to implement multiple instances of a custom behavior, and are well suited to export<br />
into a shareable macro library and import into other controllers.<br />
Creating Direct Macros and Macro Device Types<br />
To create a new macro, select View <strong>FSD</strong> Creator from the <strong>FSD</strong> Automator main menu. In <strong>FSD</strong> Creator, select<br />
whether to work with Direct Macros or<br />
Macro Device Types, then press the<br />
Insert button (Fig. 1). In the macro<br />
editing dialog (Fig. 2), enter a name for<br />
the macro. The macro can be left<br />
disabled until finished and ready to test.<br />
If Autostart is checked, the Direct<br />
Macro or all <strong>FSD</strong> Namer defined macro<br />
devices, based on the Macro Device<br />
Type, start automatically on controller<br />
restart. Otherwise, the macro runs when<br />
explicitly invoked or in response to a<br />
Start Trigger event.<br />
Proceed to fill the body of the macro<br />
with macro items by selecting Insert<br />
from the macro editing dialog. If no<br />
item is selected, new items are inserted at the end of the list. If an item is selected, new items are inserted prior to<br />
the selected item. Deselect items by clicking in the area at the end of the displayed list. Reorder item sequence by<br />
selecting an item and moving it up or down in the list with the buttons provided below. Double click an item to edit<br />
it.<br />
Macro Items<br />
When inserting or editing macro items, a dialog<br />
box is displayed to select a function to be<br />
performed by the macro item, to enable or disable<br />
the individual item, and to enter a comment. The<br />
comment is displayed in the macro listing to<br />
enhance maintainability of the macro. Depending<br />
on the type of macro function, different fields are<br />
displayed. Figure 3 shows an example of a macro<br />
edit box, in this case for X10 function.<br />
Macro functions available depends on the <strong>FSD</strong><br />
<strong>Controller</strong> model and may include:<br />
COMMENT<br />
LABEL<br />
ELEMENT<br />
REGISTER
PAUSE<br />
SUSPEND<br />
MOVE<br />
COMPLEMENT<br />
AND<br />
OR<br />
NAND<br />
NOR<br />
XOR<br />
ADD<br />
SUBTRACT<br />
MULTIPLY<br />
DIVIDE<br />
COMPARE<br />
JUMP<br />
FADE<br />
EXECUTE<br />
NOTIFY<br />
DEBUG<br />
WARNING<br />
ERROR<br />
X10_COMMAND<br />
ZWAVE_COMMAND<br />
UPB_COMMAND<br />
RS485_COMMAND<br />
INSTEON_COMMAND<br />
This rich set of macro functions allows easy implementation of both simple and relatively complex macros. Macros<br />
can be functionally similar to small programs and written with variables, conditional jumps, subroutines, and<br />
message communication with the host computer.<br />
Comments and Label Commands<br />
COMMENT<br />
LABEL<br />
Use comments to add documentation to the left column of the macro listing. All items allow adding comments to<br />
the right column of the listing.<br />
Labels mark positions in the macro so that jumps and triggers know where to transfer execution control. Labels are<br />
not case sensitive.<br />
Two special labels, ―START‖ and ―FINISH‖, are target addresses for the Start Trigger and Finish Trigger elements<br />
(discussed below). If not defined within the macro item list, ―START‖ defaults to the first macro item, and<br />
―FINISH‖ defaults to the end of the macro after the last listed macro item.<br />
Element Commands<br />
ELEMENT<br />
ELEMENT macro items are local element reference names that associate to device element specifications.<br />
Elements are implemented differently within Direct Macros and Macro Device Types; this distinction is the primary<br />
difference between the two macro definition categories.<br />
Within a Direct Macro definition, the ELEMENT item is associated with a previously defined device element on<br />
another device; for example, it may be set to the ―On/Off State‖ element of an X10 Lamp Module device.<br />
Within a Macro Device Type definition, the ELEMENT command is an element for any Macro Device created by<br />
<strong>FSD</strong> Namer and has its base type defined as a Macro Device Type (except for Map type element definitions). This<br />
defined element can link the Macro Device with other devices using operations, such as SET_TO_VALUE.
Elements designated as Start Trigger, Finish Trigger, and Resume Trigger have pre-defined behaviors. The Start<br />
Trigger begins execution at the ―START‖ label position, or at the beginning of the macro if the start position is not<br />
labeled. The Finish Trigger jumps the execution to the ―FINISH‖ label position, or to end the macro execution if the<br />
finish position is not labeled. The Resume Trigger resumes macro execution if previously suspended by a PAUSE<br />
or SUSPEND command.<br />
For Direct Macros, the Trigger elements are BOOLEAN edge triggered inputs. The macro is triggered by<br />
transitions to TRUE, or FALSE if the input is set as inverted.<br />
For Macro Device Types, the Trigger elements are momentary BOOLEAN ―To‖ data elements for macro devices<br />
based on the type definition. These Trigger elements can be linked to other devices through operations, and viewed<br />
and set at run time from the Macro Device Dialogs, available in the user interface.<br />
Map elements are named substitutes for device element specifications. If there are several references to the same<br />
device element, using a map element can simplify macro construction, increase readability of the macro definition,<br />
and aids redirecting the macro to a different device.<br />
I/O elements (for Macro Device Types only) are the ―To‖, ―From‖, and ―To/From‖ data elements for macro devices,<br />
based on the type definition. Macro device I/O elements are linked to other devices through operations, and viewed<br />
and set at run time from the Macro Device Dialogs, available in the user interface.<br />
Register Commands<br />
REGISTER<br />
Registers are named variables that may be used to store macro data values temporarily and may be used to<br />
communicate values between macros and between invocations of a macro. All registers are implemented as static<br />
variables.<br />
Local Registers are named values that can be used (1) within a direct macro or (2) within a single macro device<br />
derived from a macro device type. If different macros use a local register of the same name or if different macro<br />
device instances are created from the same macro device type, then different memory for the local registers are used.<br />
Global registers are named values that are shared among all direct macros and macro devices. They can refer to a<br />
global register by using the same name. A common memory location stores the data associated with the global<br />
register name, so all macros see the same value.<br />
Execution Suspension Commands<br />
PAUSE<br />
SUSPEND<br />
The PAUSE command suspends execution of the macro until a specified length of time elapses or a Resume Trigger<br />
event occurs. The paused macro execution then resumes.<br />
The SUSPEND command stops execution of the macro until a Resume Trigger event occurs and the macro<br />
execution proceeds.<br />
Data Manipulation Commands<br />
MOVE<br />
COMPLEMENT<br />
AND<br />
OR<br />
NAND<br />
NOR<br />
XOR<br />
ADD<br />
SUBTRACT<br />
MULTIPLY<br />
DIVIDE<br />
COMPARE
Data manipulation commands perform logical and mathematic operations on pairs of values. The single input<br />
commands take a value from the first specified location and move the value or its complement into the other<br />
specified location. The two input commands combine the values from both locations, placing the result (except for a<br />
COMPARE result) into the second location.<br />
Value locations are typically named elements, registers, or directly specified device element locations. The data<br />
manipulation commands expect at least one of the values held in a Local or Global Register. Only one location can<br />
be a named element or a device element specification.<br />
The MOVE command moves a value from a register to/from a named element, another register, or a specified<br />
device element location. The COMPLEMENT command is similar to MOVE, but inverts the TRUE / FALSE<br />
condition of a BOOLEAN value, or performs a one‘s complement of a numeric value.<br />
The AND, OR, NAND, NOR, and XOR commands perform their named logical operation upon BOOLEAN values,<br />
and replaces one of the values with the result. More complex logical relationships can be constructed by combining<br />
these commands and storing intermediate results in Registers.<br />
The ADD, SUBTRACT, MULTIPLY, and DIVIDE commands perform their mathematical operations upon<br />
numeric values, replacing one of the values with the result.<br />
The COMPARE command tests the two value locations against each other and sets internal result flags to indicate<br />
their equality and relative size relationships. Result flags can be tested by a JUMP command (see below) to<br />
determine if a conditional JUMP is executed.<br />
Fade Command<br />
FADE<br />
The FADE command typically implements a lighting fade to a specified bright or dim level over a specified period<br />
of time. Any dimmable device, such as a basic low-cost X10 lamp module, can be gradually faded with the FADE<br />
command. Some devices implement automatic fades within the dimmer control device, and hence do not need<br />
controller timed fades.<br />
Control Flow Modification Commands<br />
JUMP<br />
EXECUTE<br />
The JUMP command changes the order of macro item execution. When encountered, if conditions are met, macro<br />
execution continues with the macro item following the matching LABEL command.<br />
Conditional jumps occur only if the condition matches the results of the another condition determining command.<br />
Typically, this is a COMPARE command. An example of a conditional jump is testing for a divide-by-zero error<br />
condition after a DIVIDE command.<br />
An unconditional JUMP might be used to execute a macro loop continuously until a Finish Trigger event occurs.<br />
The EXECUTE command starts or stops the execution of a child direct macro started or spawned from an initially<br />
running macro (parent). The parent macro may be either a direct macro or a macro device. Options allow the initial<br />
parent macro to suspend execution until the named child macro has completed (akin to a subroutine or function call),<br />
or to continue executing concurrently with the child macro (akin to spawning a new process). If desired, the<br />
EXECUTE command supports initial parallel execution with later synchronization between the two macros. Parent<br />
macros can pass parameters to and can share data with their child macros through the use of Global Registers.<br />
Notification Command Group<br />
NOTIFY<br />
DEBUG<br />
WARNING<br />
ERROR
The notification command group sends information to applications on the host computer to communicate conditions<br />
within the macro.<br />
The DEBUG command sends text messages showing execution points, register values, and element values. Text<br />
messages can be viewed on the <strong>FSD</strong> Router or <strong>FSD</strong> Automator view window. DEBUG commands are typically<br />
used to verify intended functioning during macro design.<br />
The WARNING and ERROR commands send text messages to <strong>FSD</strong> Automator, which cause Warning or Error<br />
message windows to appear and warn of an exceptional condition. One example is sending a WARNING if a macro<br />
monitoring an air pressure sensor device detects a drop in air flow. The warning would suggest servicing the<br />
HVAC, in particular examining the air filter.<br />
The NOTIFY command sends a message to the host computer, causing display of a notification message box or<br />
execution of a custom notification handler program on the host. See the Using Notifications section below for<br />
additional discussion.<br />
Sending External Protocol Commands<br />
X10_COMMAND<br />
ZWAVE_COMMAND<br />
UPB_COMMAND<br />
RS485_COMMAND<br />
INSTEON_COMMAND<br />
The protocol commands send device family-specific native commands to its devices. Note: The device family must<br />
be supported by the model of <strong>FSD</strong> <strong>Controller</strong> in use and an appropriate protocol interface controller device must be<br />
configured on the system.<br />
When a protocol command is selected, a dialog box is displayed with options appropriate for the selected protocol.<br />
For example:<br />
X10<br />
Different manufacturers of X10 devices specify their own syntax for extended commands and are thus<br />
incompatible standards.<br />
the <strong>FSD</strong> <strong>Controller</strong> supports the appropriate extended commands and sends them so that ―scene‖ and<br />
―Group‖ commands may be used.<br />
UPB<br />
both direct and link commands are supported<br />
Concurrent Macro Execution<br />
Macros can execute concurrently with each other, while the <strong>FSD</strong> controller continues its functions.<br />
Single instances of different Direct Macros can run concurrently. Multiple, simultaneous execution of the same<br />
Direct Macro is not supported. Attempts to execute or start trigger a running Direct Macro are ignored.<br />
Single instances of Macro Devices can run concurrently, even if based upon the same Macro Device Type.<br />
Multiple, simultaneous execution of the same Macro Device is not supported.<br />
Exporting and Importing Macros<br />
Direct Macros may be exported and imported with care. After importing a Direct Macro, reconnect any device<br />
elements specified in the macro. Reset any explicit device addressing, such as by an X10 or UPB direct command,<br />
to the correct addresses for the new configuration.<br />
Macro Device Types are better suited for exporting and importing macro designs, if written for portability. If all<br />
element linkages are implemented as ELEMENT macro items, rather than directly referencing elements on other<br />
devices, then they can be connected to elements on the imported system with Operations, without changing the<br />
macro device type implementation. Similarly, for portability, implement commands to devices such as X10 or UPB<br />
devices as controlling elements linked to those devices, rather than using direct protocol commands.<br />
Using Notifications
Notifications initiate actions on the host computer or a connected remote computer, in response to an event or<br />
condition detected by the <strong>FSD</strong> controller. For example, a message could be displayed on the computer screen if the<br />
doorbell is rung or if the clothes dryer has finished.<br />
NOTIFY macro functions may be inserted in Direct Macro and Macro Device Type definitions. When encountered<br />
at run time the <strong>FSD</strong> <strong>Controller</strong> sends an ST_NOTIFY_PKT packet containing the specified notification code and<br />
selected additional data or text string.<br />
Macro Device Notifications:<br />
Notifications from Macro Devices are supported by <strong>FSD</strong> Automator and the Macro device dialog. If the<br />
associated Macro device dialog is active, the notification packet is sent to the dialog. If the dialog is not active,<br />
the dialog is started automatically from Automator to process the notification. (Note: Automator must be active<br />
for the packet to be handled in this fashion).<br />
The Macro device dialog handles the notification in accordance to the options selected in the ―Configure Notify‖<br />
dialog (accessed from the device dialog‘s system menu). A message window may be displayed for viewing,<br />
and/or a user-specified notification handler application can be started to take further action<br />
Macro Device notifications can alternatively be processed by a user-developed or third party provided custom<br />
notification service. This application is a <strong>FSD</strong> Router client , developed following the guidelines provided in the<br />
<strong>FSD</strong> Third Party Application Interface documentation.<br />
This notification handling functions similarly to the alarm notification capability provided by the Alarm Timer<br />
device type.<br />
Direct Macro Notifications:<br />
Notifications from Direct Macros are not supported by <strong>FSD</strong> Automator; however, notification packets are sent<br />
from the <strong>FSD</strong> <strong>Controller</strong> to <strong>FSD</strong> Router. The notifications can be processed by a user-developed or third party<br />
provided custom notification service. This application is a <strong>FSD</strong> Router client application, developed following<br />
the guidelines provided in the <strong>FSD</strong> Third Party Application Interface documentation.
<strong>FSD</strong> Designer Configuration Guide<br />
Use <strong>FSD</strong> Designer to plan floor layouts, to add ―smart‖ devices, and ,if desired, to create and add furniture and<br />
appliances to your layout. The different floors can be combines to create a building layout.<br />
If the devices are added to the system and configured (using <strong>FSD</strong> Automator), double clicking on the device icon<br />
you‘ve added to the floor plan. In the Device Item Properties dialog box, select the device family, device type and<br />
name of the device to connect the configured device to the icon. In <strong>FSD</strong> Viewer, double-clicking on the icon<br />
displays the device‘s dialog box.<br />
For more detailed instructions see the tutorial for <strong>FSD</strong> Designer by choosing View Tutorials under the Help Menu in<br />
<strong>FSD</strong> Automator. In the tutorial click on <strong>FSD</strong> Graphical Interface Designer.
<strong>FSD</strong> Logger Configuration Guide<br />
The <strong>FSD</strong> <strong>Controller</strong> software provides two approaches to log or record events occurring on the system. First, <strong>FSD</strong><br />
Logger records device element states. Second, the logger utilities, under the Installer Tools menu, record protocol<br />
packets. More about protocol packet logging is discussed at the end of this document. These tools can be used<br />
independently.<br />
Device Element State Logging:<br />
Device element state logging records the state(s) of device elements periodically and/or when the state changes. The<br />
<strong>FSD</strong> Logger provides extensive logging configuration options to customize data logging.<br />
An example of element state logging is a system monitoring and recording temperature and humidity over time at<br />
various locations throughout a building (e.g. museum). The user can set an <strong>FSD</strong> <strong>Controller</strong> options to send a<br />
notification when conditions exceed a specified range.<br />
To start the logger, in <strong>FSD</strong> Automator, select View <strong>FSD</strong> Logger.<br />
From the <strong>FSD</strong> Logger main menu, define or modify the logging behavior by selecting Log Define Log File<br />
Properties. Alternatively, click on the ‗D‘ button on the Logger toolbar.<br />
The log file name list box displays currently defined log file base names. <strong>FSD</strong> Logger can generate multiple log<br />
files, each logging different data. These files can be used for different purposes.<br />
To define a new log file definition, press the ―Add Log File Definition‖ button. To edit an existing log file, double<br />
click its list entry.<br />
From the log file definition dialog, enter a base name<br />
for the log file. Each file generated is automatically<br />
combined with a creation date and append number.<br />
Select the checkboxes whether to ―Enable Log File‖<br />
and/or ―Enable Log File at Startup‖.<br />
Select a storage location for the file. If desired, select<br />
another location for a redundantly generated backup<br />
file (possibly a different disk or storage on a<br />
networked computer). The default location is<br />
\data.<br />
Select the Log Duration to specify how long to log<br />
before starting a new file. The date for a monthly file<br />
is designated as the first day of the current month. The<br />
date for the weekly file is set as the Sunday of the<br />
current week. Also select the maximum file size.<br />
When the maximum is reached, a new log file starts.<br />
Log files have Write with Read access. These files can<br />
be (1) used to communicate device element state data<br />
to custom user applications as they are generated, (2) viewed by an<br />
application such as Excel, or (3) backed up at any time.<br />
Select the format for the log files. Log files can be written (1) in a<br />
documented binary data format, which minimizes file size and<br />
increases processing efficiency, or (2) in a comma delimited format,<br />
which enables easy import of data into off-the-shelf applications.<br />
Use filters to specify what data to log. Add a filter by pressing the<br />
―Add Filter Definition‖ button, modify an existing filter by doubleclicking<br />
its entry in the filter list.<br />
In the Edit Filter Options dialog, specify which device families, device<br />
types, and/or devices to log. If a single device type or specific device
is selected, also select which elements to log.<br />
Under Set Log Interval, specify whether to log element state values under the following conditions: (1) every report<br />
that occurs, (2) at set intervals (periodically, seconds or minutes), and/or (3) only when changes occur.<br />
Note the interdependence between the device‘s element state reporting configuration and the specified logging<br />
control configuration. The device‘s reporting configuration specifies how frequent device element state data packets<br />
are sent from the controller to <strong>FSD</strong> Logger (and other listening applications). The logger filter specifies which<br />
element state data packets to log. Thus, filtering can reduce the number of reports logged, but not increase it.<br />
Device configuration dictates the maximum logging, even if the filter specifies a greater frequency.<br />
Also note that (1) one can individually enable or disable log files and filters, and (2) both a log file and at least one<br />
filter must be enabled before data can be logged.<br />
For the logger to record the element state data to log file(s), <strong>FSD</strong> Logger must be running and data logging<br />
activated. For casual and diagnostic logging, manually starting <strong>FSD</strong> Logger may be adequate and preferred. Start<br />
logging manually by selecting Log Enable All Logs or pressing the ‗A‘ button on <strong>FSD</strong> Logger‘s toolbar.<br />
Alternatively, <strong>FSD</strong> Logger can be started whenever the user starts the computer. Place <strong>FSD</strong> Autostart in the<br />
Windows startup application list, and select ―Automatically Start <strong>FSD</strong> Logger‖ in the Autostart Options dialog<br />
(accessed from <strong>FSD</strong> Automator‘s main menu Options Set Autostart Options). When set, <strong>FSD</strong> Logger starts as a<br />
service at boot-up. If you do not want logging displayed on screen, set <strong>FSD</strong> Logger to run invisibly. Using<br />
Automatic start-up and invisible running of <strong>FSD</strong> Logger is ideal when the logging PC doesn‘t require a user login.<br />
To enable element state logging, whether or not a user is logged on, set <strong>FSD</strong> Logger to operate as a Windows<br />
service. To configure, select ―Start Logger as a Service‖ on the Autostart Options dialog in <strong>FSD</strong> Automator. Note<br />
that when <strong>FSD</strong> Logger is started as a service, <strong>FSD</strong> Router is also started as a service. <strong>FSD</strong> Router routes the state<br />
data packets from the <strong>FSD</strong> <strong>Controller</strong> to the <strong>FSD</strong> Logger application. When deselecting <strong>FSD</strong> Logger to start as a<br />
service, also deselect <strong>FSD</strong> Router to start as a service, if preferred.<br />
When manually starting <strong>FSD</strong> Logger (<strong>FSD</strong> Logger not running as service), if <strong>FSD</strong> Automator is not running, <strong>FSD</strong><br />
Logger starts <strong>FSD</strong> Automator invisibly to validate current device configuration. If <strong>FSD</strong> Automator detects a<br />
configuration change, it becomes visible and requests attention.<br />
Device element state data can be logged onto FLASH memory on ―larger‖ <strong>FSD</strong> <strong>Controller</strong>s. Thus, data logging<br />
continues without interruption if (1) the controller‘s host computer is disconnected or turned off, or (2) when the<br />
<strong>FSD</strong> Logger program or its logging function is stopped. If FLASH logging is enabled, device element data logs to a<br />
circular queue within the controller‘s FLASH memory. When <strong>FSD</strong> Logger is started, or when a stopped log file is<br />
started, <strong>FSD</strong> Logger retrieves the historical FLASH log data beginning from the last time <strong>FSD</strong> Logger was active<br />
until the present. <strong>FSD</strong> Logger proceeds to log the current device element data reports. Data are retained in the<br />
circular queue until overlapped, in the event data logged is checked from a second computer.<br />
Installer Tools Protocol Packet Logging:<br />
From the <strong>FSD</strong> Automator main menu, select the Tools X10 Installer Tools <strong>FSD</strong> X10 Logger to start a utility<br />
that logs X10 protocol packet. This utility decodes X10 packets, from both the <strong>FSD</strong> <strong>Controller</strong> and the power line<br />
(via a TW523 or PSC05 interface), and displayed them onscreen. If selected, packets are recorded to a packet log<br />
file. If the <strong>FSD</strong> <strong>Controller</strong> is an X10 Bridge model, X10 packets can be logged by attaching a legacy controller to<br />
the ―X10 IN‖ input. <strong>FSD</strong> X10 Logger supports run time packet logging simultaneous with other <strong>FSD</strong> <strong>Controller</strong><br />
functions.<br />
If the <strong>FSD</strong> <strong>Controller</strong> is an advanced model, X10 packets can also be logged from an CM11A interface. However,<br />
the CM11A interface introduces considerable time delays, which may be acceptable for a logging application, but<br />
undesirable for device control. Note that unlike the CM11A, the TW523 / PSC05 interfaces do not receive X10<br />
extended commands.<br />
Similar to the X10 logging utility, there is an UPB logging utility. From the <strong>FSD</strong> Automator main menu, select<br />
Tools UPB Installer Tools <strong>FSD</strong> UPB Logger to start a utility that logs UPB protocol packets. This utility<br />
decodes UPB packets from the <strong>FSD</strong> <strong>Controller</strong> and the UPB power line interface module and logs them onscreen<br />
and, if enabled, to a packet log file. <strong>FSD</strong> UPB Logger supports run time packet logging simultaneous with other<br />
<strong>FSD</strong> <strong>Controller</strong> functions.
Note that the PCS Upstart utility also logs UPB packets. From <strong>FSD</strong> Automator choose Tools UPB Installer Tools<br />
PCS Upstart. In this situation, (1) the <strong>FSD</strong> <strong>Controller</strong> shifts to an RS-232 packet pass-through mode, (2) <strong>FSD</strong><br />
Automator and all associated <strong>FSD</strong> applications shut down , and (3) the PCS Upstart utility starts. This allows the<br />
PCS Upstart utility to use the same UPB powerline interface module as the <strong>FSD</strong> <strong>Controller</strong>, without disconnecting<br />
and reconnecting cables. However, it does not allow simultaneous use of the PCS Upstart utility and <strong>FSD</strong><br />
<strong>Controller</strong> run-time functions. To log run-time data using the UPB Upstart utility, connect a second UPB powerline<br />
interface module to the PC for dedicated use by PCS Upstart.<br />
For additional information, see the <strong>FSD</strong> Logger reference manual. Access the manual from the Help menu in <strong>FSD</strong><br />
Automator; choose View Reference <strong>Manual</strong>s then <strong>FSD</strong> Logger from the displayed list.
<strong>FSD</strong> Additional Configuration Topics<br />
Checking for Updates:<br />
Before updating, please remember to back up your <strong>FSD</strong> <strong>Controller</strong> installation files. !!!<br />
To check for software and documentation updates, select Options _ Check For Updates from the<br />
Automator main menu, or from the Viewer system menu.<br />
Select the level of update desired, and press OK. The update will proceed automatically. If given a notice<br />
that <strong>FSD</strong> Upclient cannot update an open utility, close that utility and continue.<br />
Check For Updates will automatically update the <strong>FSD</strong> <strong>Controller</strong> firmware if needed, and possibly the<br />
firmware in supported attached devices, in addition to updating the PC based software and documentation<br />
files.<br />
Update level options:<br />
Update Current Version – to maintain a satisfactorily stable installation with no significant changes, select<br />
this option. ―If it ain‘t broke, don‘t fix it.‖<br />
Update to Latest Version – obtain the latest released version to benefit from feature improvements and<br />
support for new devices. Select a Stable Days option appropriate for your own trade off between wanting<br />
to update versus wanting to let others find any problems in the release. Before configuring a new<br />
installation, updating to the latest released version is recommended.<br />
Beta Version – test release of features targeted for the next official release, so early adopters can fiddle with<br />
the code and participate in finding any bugs and undocumented features. Beta releases will attempt to<br />
automatically update user data from earlier versions, but the user should be certain to back up his previous<br />
installation prior to updating. Not recommended for use in third party installations or by the faint of heart.<br />
Alpha Version – test release for preliminary evaluation of new version features. Alpha releases may not<br />
always attempt to automatically update data from earlier versions, so previous configuration data may be<br />
lost. Not recommended for use in real installations.<br />
Controlling Devices with SEND_DE<br />
The SEND_DE utility can be used to control a device or trigger a macro from a desktop icon, without<br />
having to start the whole <strong>FSD</strong> Automator or <strong>FSD</strong> Viewer environment. It may also be used within a batch<br />
file for aggregating several commands.<br />
SEND_DE is appropriate for use on remote computers, in addition to the controller host computer. If the<br />
system is configured for directory lookup of the controller‘s TCP/IP address, SEND_DE can take<br />
advantage of this service.<br />
SEND_DE provides a simple control interface method for using <strong>FSD</strong> <strong>Controller</strong> capabilities from within a<br />
custom third party application. Simply spawning SEND_DE with appropriate parameters will set device<br />
element values in the controller.<br />
SEND_DE is started with parameters as follows:<br />
SEND_DE SET \<br />
The device name ID is passed in as a capitalized HEX value, matching the name_id for the device to be<br />
controlled. Other values are passed as decimal values.<br />
One way to find the device name ID value, and appropriate element number and element type, is to view<br />
the device information with View _ Lister _ from the <strong>FSD</strong> Automator main menu.<br />
To create a desktop icon to use SEND_DE, point at the desktop, right click, select New _ Shortcut, then<br />
select Browse and find \BIN\send_de.exe.<br />
After the icon is on the desktop, right click and select Properties, then at the end of the line with the<br />
send_de.exe path, enter ―/k= SET ‖.<br />
Additional <strong>FSD</strong> <strong>Controller</strong> Installation:<br />
More than one <strong>FSD</strong> <strong>Controller</strong> or Bridge can be operated and/or configured from a computer. This might<br />
be done for one person to maintain controllers at more than one location from a laptop computer or a<br />
remote location, or to operate more than one specialized controller from the same host computer at one<br />
location.<br />
Each <strong>FSD</strong> <strong>Controller</strong> installation has its own copy of the <strong>FSD</strong> executable files, so different controllers<br />
using different versions of the <strong>FSD</strong> software may be used from the same computer. This allows using the<br />
latest greatest version for configuring a new installation, while maintaining existing stable installations<br />
without updating them. Therefore, if one wants to update all installations, each must be updated<br />
independently.<br />
Installing Additional <strong>Controller</strong> from an Install Disk:<br />
To install an additional controller from an <strong>FSD</strong> <strong>Controller</strong> Installation disk, run the install program again
specifying a different installation root directory than used for an existing <strong>FSD</strong> <strong>Controller</strong> installation.<br />
When prompted, have the installation program check for the latest updates via the Internet.<br />
Installing Additional <strong>Controller</strong> from the Existing Installation:<br />
If the host computer already has one or more <strong>FSD</strong> <strong>Controller</strong> or Bridge product(s) installed, start by<br />
copying the previous <strong>FSD</strong> software installation in its entirety to a folder with a different root name (for<br />
example, assume the new application root to be ).<br />
Delete all xxx.CFG files from \BIN.<br />
Delete all files in \DATA.<br />
Multi-site Remote Operation Configuration:<br />
From the <strong>FSD</strong> Automator main menu, select Options _ Set Automator Options, and enter the <strong>Controller</strong><br />
Name ID from the additional remote <strong>FSD</strong> <strong>Controller</strong>. Configure the connection address directory lookup<br />
or IP address as appropriate.<br />
The Router Port value must match the Router Port assignment on the controller host computer.<br />
The Server Port value on the remote computer can be the default or any other value, if only one of the<br />
installed configurations will be connected at a time. For simultaneous remote access, the Server Port value<br />
will need to be different for each remote installation instance.<br />
Simultaneous Host Operation Configuration:<br />
For each <strong>FSD</strong> <strong>Controller</strong> installation, from the <strong>FSD</strong> Automator main menu, select Options _ Set Router<br />
Options, and select the Comm Port to use with the associated controller. Deselect the Comm Port<br />
autosearch option.<br />
From the <strong>FSD</strong> Automator main menu, select Options _ Set Automator Options, and select the local<br />
machine option if needed.<br />
For simultaneous operation, the Router Port and Server Port values must be different for each <strong>FSD</strong><br />
<strong>Controller</strong> installation instance. To enable remote access to multiple controllers, the Router Port and<br />
associated Synchronization Port need to be unblocked for each controller (see the “<strong>FSD</strong> Remote Access<br />
Configuration Guide”).<br />
Automatically starting <strong>FSD</strong> Router and / or <strong>FSD</strong> Logger as services is not currently supported for more<br />
than one hosted <strong>FSD</strong> <strong>Controller</strong>. Please check with <strong>FSD</strong> for assistance if this is required.<br />
Procedure to Convert <strong>Controller</strong> Type:<br />
The current model <strong>FSD</strong> X10 Compact <strong>Controller</strong> and <strong>FSD</strong> UPB Compact <strong>Controller</strong> use the same<br />
controller hardware, so may be converted from one to the other by the user via a software configuration<br />
procedure. To maintain installations to evaluate both types of controllers, an additional installation with a<br />
different root folder should be made for the second <strong>FSD</strong> Compact <strong>Controller</strong> configuration.<br />
To convert an <strong>FSD</strong> X10 Compact <strong>Controller</strong> to an <strong>FSD</strong> UPB Compact <strong>Controller</strong>, or vice versa, first start<br />
Router from \BIN\ROUTER.EXE, then start \BIN\LOADER.EXE. From <strong>FSD</strong><br />
Loader‘s menu, select Options _ Set <strong>Controller</strong> Configuration. Using the drop-down selection within the<br />
dialog, select either <strong>FSD</strong> X10 Compact <strong>Controller</strong> or <strong>FSD</strong> UPB Compact <strong>Controller</strong>.<br />
Follow the Additional <strong>Controller</strong> Installation instructions above to create a new folder tree for the different<br />
controller type. Alternatively, delete the \BIN\*.CFG files and all the files in the<br />
\DATA folder.<br />
WARNING: Selecting a controller type which does not match the hardware capabilities will lead to<br />
unsatifying results!<br />
Start Automator. Automator will reload the controller firmware automatically to match the new controller<br />
type selection.
<strong>FSD</strong> Remote Access Configuration Guide<br />
<strong>FSD</strong> controller software, and third party custom software, can access <strong>FSD</strong> controllers<br />
via a LAN, Wireless LAN, or the Internet using the TCP/IP protocol. The programming<br />
model used for remote access is based on having the <strong>FSD</strong> software running on a host<br />
computer connected directly to the <strong>FSD</strong> controller, and also installed on each additional<br />
computer accessing the system remotely. Components of the host based <strong>FSD</strong> software<br />
route packets between the remote computers and the <strong>FSD</strong> controller, and also<br />
synchronize configuration data among the computers. This approach provides close to<br />
full functionality for high performance remote monitoring, control, and configuration of<br />
the system. By contrast, a browser based approach might typically provide a more<br />
limited, lower performance solution, with the advantage of not requiring <strong>FSD</strong> software to<br />
be installed on the remote computers. The host computer must be a Windows XP (any<br />
variation) or Windows 2000 machine connected to the LAN or Internet, but does not<br />
need to be a LAN server or to run Internet server software. For Internet access, a high<br />
speed always-on connection is desirable so the controller may be dependably accessed<br />
while away, but the software can work with standard dial-up service. A static IP address<br />
is nice but not required; the <strong>FSD</strong> software includes a feature for automatically finding<br />
connection addresses via an Internet based directory service. Configuring remote<br />
access involves a number of steps at the host computer and the remote client<br />
computer.<br />
Warning: Optimally configuring a system for remote access may require Host<br />
Computer Configuration:<br />
1) If running in floor plan Viewer mode, select “View <strong>FSD</strong> Automator” from Viewer’s<br />
system menu (accessed by clicking the icon on the left end of Viewer’s title bar).<br />
2) From the Automator menu, select Options _ Configure Router Options<br />
3) Router will become visible, with an active dialog box for selecting serial port options.<br />
Click on the CANCEL button to close the dialog box.<br />
4) From the Router menu, select Options _ Select Access Options<br />
5) Select desired access privilege levels for LAN and Intenet access, enable appropriate<br />
password requirements, and set passwords. Passwords set at the Router level are used<br />
by<br />
all enabled access levels for LAN and Internet access.<br />
6) Close Router, then restart Automator (using Autostart); make Automator visible as in<br />
step 1 above if needed.<br />
7) If the host computer has an always-on connection to the Internet: From the<br />
Automator menu, select Options _ Select Autostart Options, and enable “Start Router<br />
as<br />
a Service”. With this selection, Router will be automatically started whenever the<br />
computer reboots, so the controller can be accessed remotely without having to first log<br />
on to the host computer and manually start Automator.<br />
8) Note that when configured for remote access, some invisible components of the <strong>FSD</strong><br />
Automator software system will continue to run after Automator is closed with a normal<br />
exit, so that the system may still be accessed remotely. To shut down all components of<br />
the system, from the Automator menu select File _ Shutdown Server.<br />
9) Note that if Router has been started as a service as in step 7 above, it cannot be<br />
accessed from the Automator menu as in step 2 above. To change remote access<br />
options, shutdown the server as in step 8 above, then restart Automator (using<br />
Autostart). Then with Automator visible, proceed with Options _ Configure Router<br />
Options.
10) If directory lookup services will be used for finding TCP/IP addresses, to prepare for<br />
configuring the remote computers the <strong>FSD</strong> controller “name_id” must be found. One<br />
way to find this is from the Automator menu select Options _ Configure Automator<br />
Options and observer the <strong>Controller</strong> Name ID field. Alternatively, select View _ Lister _<br />
FGI Devices, find the controller in the device listing, and copy down the “name_id” from<br />
the displayed information.<br />
11) Note that for remote access, any firewall services on the host computer and<br />
possibly on one’s Internet router will need to have Router and Syserver access<br />
unblocked. By default, <strong>FSD</strong> Router is set to use TCP/IP port 7100, and <strong>FSD</strong> Syserver is<br />
set to use TCP/IP port 7110; these port numbers can be changed from the Router menu<br />
Options _ Configure Router Options.<br />
12) Note that if a Host computer is to be configured to allow access to more than one<br />
connected <strong>FSD</strong> controller, additional measures must be taken. Do a Check for Updates<br />
from Automator Options or the Viewer system menu, and then view this guide from the<br />
installation root\manuals directory for additional instructions, or contact <strong>FSD</strong> for further<br />
instructions.<br />
Remote Access Computer Configuration:<br />
1) Start the <strong>FSD</strong> software with Autostart; if needed make Automator visible as above.<br />
The software can be expected to fail to find a Router connection.<br />
2) From Automator, select Options _ Configure Automator Options.<br />
3) For using directory services, enter the <strong>FSD</strong> controller “name_id”, and select “find<br />
address automatically”. Both the host computer and the remote client computer must<br />
have Internet access for directory services to work.<br />
4) Alternatively, static LAN and/or Internet addresses may be manually entered, and the<br />
appropriate access type enabled.<br />
5) Close the dialog and restart the application.<br />
6) If the remote client computer has a firewall installed that blocks outgoing accesses,<br />
configure the firewall to allow communications as in step 11 of the Host computer setup<br />
instructions.<br />
7) Note that if a remote client computer is to be configured to access more than one<br />
<strong>FSD</strong><br />
controller, the software should be installed with a separate installation root directory for<br />
each controller accessed.
<strong>FSD</strong> Third Party Application Interface<br />
The <strong>FSD</strong> /FGI automation controller and software system are designed to facilitate third<br />
party and custom application integration. <strong>FSD</strong> provides these applications with a means<br />
to receive sensor data from and send device control data to the automation controller and<br />
its controller devices via standard TCP/IP packets, so the custom applications can easily<br />
interface with the real world from the local host computer, across a network, and/or via<br />
the Internet.<br />
When interfacing with the <strong>FSD</strong> / FGI system, the custom application first establishes a<br />
connection with the <strong>FSD</strong> Router, and then proceeds with a packet conversation with the<br />
<strong>FSD</strong> / FGI <strong>Automation</strong> <strong>Controller</strong>.<br />
Custom Application to <strong>FSD</strong> Router Conversation:<br />
On Custom Application Start-Up:<br />
1) Establish a TCP/IP socket connection with <strong>FSD</strong> Router, port ID as set on the <strong>FSD</strong><br />
Router options dialog (the default port used is 7100).<br />
2) <strong>FSD</strong> Router will then control the packet conversation until the connection permissions<br />
are established, including a password exchange if <strong>FSD</strong> Router is configured to require a<br />
password for system access.<br />
In the packet protocol, participating applications use packet source and destination<br />
connection IDs to control packet routing to the appropriate recipients. Custom<br />
applications should base their application connection IDs on the value:<br />
#define CUSTOM_APPLICATION_BASE_ID 0x22F00000<br />
Commercial third party applications may use other base IDs assigned by <strong>FSD</strong>.<br />
Additionally, applications may send and receive broadcast packets addressed to all<br />
interested recipients, where the destination connection ID is set to 0xFFFFFFFF.<br />
Packet definitions, along with other useful structure definitions are provided in the files<br />
PUBLIC_PACKET.LC and PUBLIC_NAME.LC. These files should be included in the<br />
custom application‘s STDAFX.H or otherwise included where used by the application.<br />
PUBLIC_NAME.LC has structure definitions which can be used by the custom<br />
application to interpret device and device type name files, to associate device name IDs<br />
with user-defined alphanumeric device names.<br />
Note that additional private packet types are used by the system for setup and<br />
configuration purposes. Custom and third party applications should ignore all such<br />
unrecognized packets.<br />
3) After establishing a socket connection with <strong>FSD</strong> Router, the custom application<br />
should receive an ST_CONNECTION_INFO packet from <strong>FSD</strong> Router.<br />
From the <strong>FSD</strong> Router ST_CONNECTION_INFO packet, the custom application should<br />
save the router‘s connection ID for use whenever packets are addressed to the router.<br />
The custom application should also use the connection index value from the packet to<br />
construct its own connection ID value.<br />
The max_packet_size value sent from the Router should be used to limit the maximum<br />
packet size sent from the custom application.<br />
The request_reply field in the received ST_CONNECTION_INFO packet indicates<br />
whether the originating application expects the sending application to reciprocate by<br />
sending an ST_CONNECTION_INFO packet back to the originator. The<br />
ST_CONNECTION_INFO packet from <strong>FSD</strong> Router will always have request_reply set<br />
TRUE, and the ST_CONNECTION_INFO response packet send from the custom<br />
application to <strong>FSD</strong> Router should set request_reply to FALSE.<br />
The following code snippet is provided to show how to interpret the<br />
ST_CONNECTION_INFO packet received from <strong>FSD</strong> Router:<br />
// process ST_CONNECTION_INFO packet from ROUTER app<br />
switch (((<strong>FSD</strong>_PKT_HEADER *) m_packet_received)->packet_type)
{<br />
case FP_STATUS_REPORT:<br />
switch (((FP_STATUS_PKT *) m_packet_received)->status_type)<br />
{<br />
case ST_CONNECTION_INFO:<br />
// save the connection ID for <strong>FSD</strong> Router<br />
m_fsd_router_connection_id =<br />
((<strong>FSD</strong>_PKT_HEADER *) m_packet_received)->source_id;<br />
// construct the connection ID for the Custom Application<br />
m_custom_application_connection_index =<br />
((ST_CONNECTION_INFO_PKT *) m_packet_received)-<br />
>connection_index;<br />
m_custom_application_connection_id =<br />
(CUSTOM_APPLICATION_BASE_ID +<br />
m_custom_application_connection_index);<br />
4) The custom application should send an ST_CONNECTION_INFO response packet to<br />
<strong>FSD</strong> Router. Again, a code snippet:<br />
// send custom application’s connection info to <strong>FSD</strong> Router<br />
send_connection_info_packet (fsd_router_connection_id, FALSE);<br />
VOID send_connection_info_packet (ULONG destination_id, UCHAR<br />
reply_state)<br />
{<br />
ST_CONNECTION_INFO_PKT *connection_packet_p;<br />
<strong>FSD</strong>_PKT_HEADER *packet_header_p;<br />
connection_packet_p = (ST_CONNECTION_INFO_PKT *) packet_buffer;<br />
packet_header_p = (<strong>FSD</strong>_PKT_HEADER *) packet_buffer;<br />
// set the packet header info<br />
packet_header_p->synch = FP_SYNCH;<br />
packet_header_p->destination_id = destination_id;<br />
packet_header_p->source_id = m_custom_application_connection_id;<br />
packet_header_p->packet_type = FP_STATUS_REPORT;<br />
packet_header_p->packet_size = (USHORT) sizeof<br />
(ST_CONNECTION_INFO_PKT);<br />
packet_header_p->sequence_number = // rolling number, 1 - 255, back to 1<br />
// set the status type value in the packet<br />
connection_packet_p->status_type = ST_CONNECTION_INFO;<br />
connection_packet_p->request_reply = reply_state;<br />
strcpy (connection_packet_p->sw_application_name,<br />
"custom_application");<br />
connection_packet_p->sw_version = 0x0001;<br />
connection_packet_p->hw_type = 0x0000; // Windows PC<br />
connection_packet_p->hw_configuration = 0x0000;<br />
connection_packet_p->hw_version = 0x0000;<br />
connection_packet_p->packet_data_version = PACKET_DATA_VERSION;<br />
connection_packet_p->max_packet_size = MAX_BYTES_IN_PACKET;<br />
connection_packet_p->connection_index =<br />
m_custom_application_connection_index;<br />
connection_packet_p->data_size =<br />
(sizeof (ST_CONNECTION_INFO_PKT) - (sizeof (FP_STATUS_PKT) - 1));<br />
// add crc_16<br />
set_packet_crc_16 (packet_buffer, packet_header_p->packet_size);<br />
// send the packet
send_fsd_packet (packet_buffer);<br />
} // end send_connection_info_packet<br />
VOID C_CRC::flash_crc_16_accumulate (USHORT *crc_16_value_p, UCHAR<br />
in_byte)<br />
{<br />
#define CRC_CCITT 0x1021<br />
USHORT data;<br />
USHORT index;<br />
USHORT crc_16_value;<br />
/** figure next CRC interim value */<br />
data = (USHORT) (((USHORT) in_byte) 0; index--)<br />
{<br />
if ((data ^ crc_16_value) & 0x8000)<br />
{<br />
crc_16_value = (USHORT) ((crc_16_value
case STD_PW_REQUEST:<br />
6) If the custom application received a password request packet from <strong>FSD</strong> Router, the<br />
custom application must send a valid response packet.<br />
// send a response packet as defined in PUBLIC_PACKET.LC<br />
send_password_info_packet ();<br />
7) The custom application will receive a Password acknowledgement packet from <strong>FSD</strong><br />
Router. If all is well, the status data value will be STD_PW_OK, and the custom<br />
application can proceed with establishing a conversation with the <strong>FSD</strong> / FGI <strong>Controller</strong><br />
as shown in step 8. Otherwise, additional attempts at password authentication must be<br />
made.<br />
case FP_STATUS_REPORT:<br />
switch (((FP_STATUS_PKT *) m_packet_received)->status_type)<br />
{<br />
case ST_AUTHENTICATE:<br />
switch (((ST_AUTHENTICATE_PKT *) m_packet_received)-<br />
>authenticate_type)<br />
{<br />
case STD_PW_OK:<br />
// password is OK, proceed with CONTROLLER conversation<br />
-- OR --<br />
case STD_PW_LOCKOUT:<br />
// bad password, connection dropped by server<br />
case STD_PW_GLOBAL_LOCKOUT:<br />
// bad password received by <strong>FSD</strong> Router<br />
// from another app, retry password later<br />
Custom Application to <strong>FSD</strong> / FGI <strong>Controller</strong> Conversation:<br />
8) The custom application has now successfully established and authenticated a<br />
connection with <strong>FSD</strong> Router. The custom application can now proceed with establishing<br />
a packet conversation with the <strong>FSD</strong> / FGI <strong>Controller</strong>.<br />
The custom application will send the controller a ST_CONNECTION_INFO packet,<br />
using the following controller ID value, with the request_reply field set TRUE so that the<br />
controller will reciprocate.<br />
#define FGI_CONTROLLER_BASE_ID 0x20000000<br />
send_connection_info_packet (FGI_CONTROLLER_BASE_ID, TRUE);<br />
9) The custom application will receive an ST_CONNECTION_INFO packet from the<br />
<strong>FSD</strong> / FGI <strong>Controller</strong>. As above, the custom application should extract the<br />
max_packet_size value from the controller‘s ST_CONNECTION_INFO packet and use<br />
it to limit the size of packets sent to the controller.<br />
case FP_STATUS_REPORT:<br />
switch (((FP_TEST_TYPE_RESPONSE_PKT *)m_packet_received)-<br />
>status_type)<br />
{<br />
case ST_CONNECTION_INFO:<br />
10) The custom application will receive DEVICE_ELEMENT data packets from the<br />
<strong>FSD</strong> / FGI <strong>Controller</strong>, containing element state data from the devices on the system.<br />
case FP_DATA:<br />
switch (((FP_DATA_PKT *) m_packet_received)->data_type)<br />
{<br />
case DT_NAMED_DEVICE_ELEMENT_DATA:<br />
case DT_DEVICE_ELEMENT_DATA:<br />
11) The custom application may send DEVICE_ELEMENT data packets to the <strong>FSD</strong> /<br />
FGI <strong>Controller</strong>, containing element state data to control the output states of the devices.
Other Custom Application to/from <strong>Controller</strong> Conversation:<br />
12) If the custom application is up and running with a valid <strong>FSD</strong> Router connection prior<br />
to the <strong>FSD</strong> / FGI <strong>Controller</strong> power-up, or after the <strong>FSD</strong> / FGI <strong>Controller</strong> has been reset,<br />
the custom application will receive an STD_SLAVE_RESTARTED report telling the<br />
custom application that the controller has been restarted.<br />
Whenever an STD_SLAVE_RESTARTED packet is received, the custom application<br />
should reestablish a controller connection by sending a new ST_CONNECTION_INFO<br />
packet to the <strong>FSD</strong> / FGI <strong>Controller</strong> as in STEP 8 above.<br />
// Received From <strong>Controller</strong> after power-up or reset:<br />
case FP_STATUS_REPORT:<br />
status_type: ST_SLAVE_STATUS<br />
status_data_type: STD_SLAVE_RESTARTED<br />
13) The custom application may send an ST_REPORT_ELEMENT_STATES_PKT to<br />
request an immediate report of a device's status data. If the device family, device index,<br />
and element index are all set to 0xFF and 0xFFFF, all enabled element states of all<br />
devices present will be reported.<br />
14) The custom application may send an ST_OPERATION_MODE_PKT to set the<br />
operating mode of the <strong>FSD</strong> / FGI <strong>Controller</strong>.<br />
15) If configured, the custom application will receive an<br />
ST_NOTIFY_ALARM_TRIGGER_PKT<br />
when a configured alarm event has occurred.<br />
16) A note on packet sequence number usage:<br />
For packets issued spontaneously by an application, such as<br />
DEVICE_ELEMENT_DATA packets and STATUS_QUERY packets, the application<br />
should maintain and use an outgoing packet sequence number. For each packet sent, the<br />
sequence number should be incremented in sequence from 1 through 255, returning to 1<br />
as the next value following 255.<br />
STATUS_REPONSE packets must have the sequence number set to the sequence<br />
number of the STATUS_QUERY packet to which the response is being sent.<br />
Applications compare the response sequence number to the request sequence number to<br />
verify the received answer is matched to the appropriate question, maintaining<br />
appropriate synchronization between the application and the controller.<br />
17) Miscellaneous notes:<br />
All multi-byte numbers are stored in LITTLE ENDIAN (Intel style) form, with the least<br />
significant bytes in the numbers coming first, i.e. at lower addresses, than the most<br />
significant bytes.<br />
All packet and structure definitions are in PACKED form, with no pad bytes inserted<br />
within the structure (sometimes done automatically by a compiler for data alignment<br />
convenience). For the Microsoft VC++ compiler, use the ―Zp1‖ compile option. This is<br />
also referred to as ―1-byte-alignment‖ mode.<br />
Time values follow the Microsoft definition of time (__time64_t values), representing<br />
seconds past a particular reference time.<br />
Text string values in packets are in ASCII (single byte per char) and should include a<br />
0x00 termination character (C-style strings). The associated data_size value in<br />
FP_TEXT_PKT packets includes the 0x00 termination character.<br />
Note that many structures are defined as having a variable size array within the structure.<br />
In these cases, arrays are declared with an array size of 1, and are preceded by a<br />
number_of_entries variable specifying the actual number of array records present. The<br />
actual number of entries may be any value from 0 to a maximum dependent on the data<br />
represented. The actual size of the structure, and hence the position of the CRC_16 value<br />
at the end of the structure, will thus be dependent on the number of entries present. All<br />
packets have a standard header with a valid packet_size value indicating the actual size of
the packet structure including any variable length data.<br />
Also note that for structures defined with more than one variable size array, or with<br />
nested variable size array, the position of array entries must always be explicitly<br />
calculated relative to the position of the first array entry, and the array entries cannot be<br />
accessed simply by indexing the array. As a particular example, the<br />
FP_NAMED_DEVICE_ELEMENT_DATA_PKT must be linearly ―walked through‖,<br />
calculating the device and element data positions for each device in the packet.<br />
A variety of CRC calculation methods are in common use, with sample implementation<br />
code freely available from many sources. Not all of these methods produce the same<br />
resulting values. To ensure consistent results, use the sample CRC_16 calculation code<br />
provided or code that produces equivalent results.
Multiple <strong>Controller</strong> Configuration Guide<br />
Multiple <strong>FSD</strong> <strong>Controller</strong>s can be connected to and controlled by the same computer. However,<br />
this requires careful configuration to prevent interference with one another. Successful<br />
configuration includes the following steps:<br />
1) Install the <strong>FSD</strong> software for each controller in separate folders. For example:<br />
2) With only one controller connected, start Router from the controller‘s associated bin<br />
folder, for example \fsd\j1708_tester\bin\router.exe<br />
From the Menu bar choose Options Set Serial Port Options, select<br />
the appropriate COMM port option, and disable Auto-Search. Click<br />
OK and restart Router. Router should successfully connect to the<br />
controller.<br />
NOTE: the COMM port selected must be within the range of COM1<br />
through COM9. If Router fails to find a controller, check the<br />
assigned comm. port value using Windows Device Manager<br />
(accessed in the Control Panel-><strong>System</strong>->Hardware->Device<br />
Manager). Click on the Ports category<br />
to see which COM is associated with<br />
the CP210x USB to UART Bridge<br />
<strong>Controller</strong>. If a COM port is out of<br />
range, double click on this port listing<br />
in Device Manager to open the<br />
properties dialog, select Port Settings,<br />
then click on Advanced to change the<br />
assigned port. Port values may be<br />
listed as used – it is OK to reuse these<br />
port settings as long as the assigned<br />
devices are not connected to the<br />
computer simultaneously.<br />
3) From the menu bar select Options <br />
Set Router Options, and enter unique<br />
TCP/IP port values for the two port<br />
options. (only one controller can use
the default port values of 7100 and 7110)<br />
4) If the controller uses Automator, start Automator, from the menu bar select OptionsSet<br />
Automator Options, then enter a unique Server TCP/IP port value (only one controller<br />
can use the default Server TCP/IP port value of 7200).<br />
5) Close Router. For each additional controller repeat steps 2 through 4. Each time use the<br />
unique bin folder for the installed controller. Also set unique COM port and TCP/IP port<br />
values for each controller.<br />
6) All controllers can now be connected to the computer, with its associated <strong>FSD</strong> automation<br />
software running simultaneously.
<strong>FSD</strong> <strong>Controller</strong> Troubleshooting Guide<br />
Problem: <strong>Controller</strong> cannot open communications port.<br />
If using an USB port, determine the Comm Port assigned to the <strong>FSD</strong> <strong>Controller</strong><br />
1. Under the Start Menu, depending on the version and presentation of Windows, choose ―Control Panel‖ or<br />
―Settings → Control Panel‖.<br />
2. Choose ―<strong>System</strong>‖ either:<br />
a. Directly in classic view, or<br />
b. Choose ―Performance and Maintenance‖ category followed by selecting ―<strong>System</strong>‖.<br />
3. Click on the ―Hardware‖ tab and choose the ―Device Manager‖ Button.<br />
4. Devices on the computer appear on a tree list.<br />
a. Double click on the ―Ports‖ line to display comm. port assignments.<br />
b. Note the comm. port number for the Silicon Labs CP210x USB to UART Bridge device. If the Comm port<br />
number is greater than 9 (nine), double click on the CP210x device, select ―Port Settings‖, click on ―Advanced‖, and<br />
select a lower port number. If there is no listing for CP210x USB to Serial, install the driver. In the directory where<br />
you installed the <strong>FSD</strong> soft-ware, in the \drivers\usb\WIN directory run Preinstall.exe.<br />
c. Close ―Device Manager‖ and ―<strong>System</strong> Properties‖ windows.<br />
5. Click ―OK‖.<br />
6. Select the Automator application screen.<br />
7. From the ―Options‖ menu select ―Set Router Options‖.<br />
8. From the ―Comm. Port‖ droplist select the comm. port number determined above.<br />
9. Click ―OK‖.<br />
10. Click ―OK‖ to the box stating to restart the router application to reset.<br />
Problem : Buttons and lines in dialog boxes do not line up<br />
This problem occurs when using Windows Vista Operating <strong>System</strong>. To remedy the problem:<br />
1. Right-click the mouse on the desktop and choose ―Personalize‖.<br />
2. Click the ―Adjust font size ― shield in the left side of dialog.<br />
3. Choose ―Default‖ for the display font size (96 DPI).
<strong>FSD</strong> <strong>Controller</strong> Reference <strong>Manual</strong>s<br />
Select the <strong>FSD</strong> application below to display its reference manual.<br />
<strong>FSD</strong> <strong>Controller</strong> Operation<br />
<strong>FSD</strong> Autostart - opens critical applications used to configure the system.<br />
<strong>FSD</strong> Automator - an integrating tool to configure the devices on the system.<br />
<strong>FSD</strong> Viewer - displays the layouts produced in <strong>FSD</strong> Designer.<br />
<strong>FSD</strong> Logger - records conversation between controller and devices in a text file.<br />
<strong>FSD</strong> Upclient – used to update <strong>FSD</strong> <strong>Controller</strong> software via the internet.<br />
<strong>FSD</strong> Router - a server application to route communications among serial ports and TCP/IP addresses.<br />
<strong>FSD</strong> Device Dialogs – links to a page listing manuals for device dialogs.<br />
<strong>FSD</strong> Operation Designing Tools<br />
<strong>FSD</strong> Lister - displays a list of devices in the entire system<br />
<strong>FSD</strong> Creator - create Direct Macros and Macro Device Types to produce customized programming<br />
on the system.<br />
<strong>FSD</strong> Namer - assign name, location, and other identification to configure the system.<br />
<strong>FSD</strong> Designer - a multifunctional tool used to construct floor layouts of the building for placement of<br />
devices and furniture.<br />
<strong>FSD</strong> Operator - configures the various operations of the devices on the system.<br />
<strong>FSD</strong> Builder - builds the image of the data set for loading into the controller.<br />
<strong>FSD</strong> Loader - loads a <strong>FSD</strong> formatted file to the <strong>FSD</strong> <strong>Controller</strong> or other <strong>FSD</strong> devices attached to the<br />
system.<br />
<strong>FSD</strong> X10 Installation Tools<br />
<strong>FSD</strong> X10 Logger - records conversation between controller and X10 devices into a text file.<br />
<strong>FSD</strong> X10 Mapper - displays defined and detected X10 devices on the system.
<strong>FSD</strong> X10 Tester – this utility sends various commands to a specified X10 device.<br />
<strong>FSD</strong> UPB Installation Tools<br />
<strong>FSD</strong> UPB Logger - records conversation between controller and UPB devices into a text file.<br />
<strong>FSD</strong> UPB Mapper - displays defined and detected UPB devices on the system.<br />
<strong>FSD</strong> UPB Tester – this utility sends various commands to a specified UPB device.
<strong>FSD</strong> Autostart<br />
Overview <strong>FSD</strong> Automator<br />
<strong>FSD</strong> Autostart opens applications needed to configure the system. It launches <strong>FSD</strong> Router, <strong>FSD</strong> Synchronization<br />
Server, <strong>FSD</strong> Logger, <strong>FSD</strong> Automator, and <strong>FSD</strong> Viewer.<br />
<strong>FSD</strong> Autostart<br />
<strong>FSD</strong> Autostart opens critical applications used to configure the system. It launches <strong>FSD</strong> Router, <strong>FSD</strong> Automator,<br />
<strong>FSD</strong> Synchronization Server, and <strong>FSD</strong> Viewer. Depending on the options set in <strong>FSD</strong> Automator, <strong>FSD</strong> Autostart<br />
will automatically start <strong>FSD</strong> Automator, either in the background or displayed on screen, and also will<br />
automatically start <strong>FSD</strong> Viewer.<br />
Other options set in <strong>FSD</strong> Automator, allows <strong>FSD</strong> Autostart to start automatically <strong>FSD</strong> Logger, either in the<br />
background or with screen displayed.<br />
Another option is to Start Router as a Service, which will automatically start <strong>FSD</strong> Router when the computer is<br />
turned on.<br />
If desired, the user can set another option to open automatically an application of choice. Check the checkbox to<br />
enable starting a custom application automatically. In the edit boxes enter the application name, the application<br />
parameters, and the application ID name.
<strong>FSD</strong> Automator<br />
Overview <strong>FSD</strong> Automator<br />
<strong>FSD</strong> Automator is an executive program that accesses various programs used to configure devices on the system<br />
and to run the <strong>FSD</strong> <strong>Controller</strong>. Within Automator the user (1) opens <strong>FSD</strong> Namer to define a device to add into the<br />
system, (2) configures the various devices on the system, and (3) sets the operations for the devices. To view how<br />
the system is configured, use <strong>FSD</strong> Lister to display the devices and their settings on the system. Automator can<br />
also display the current state of a selected device. Use <strong>FSD</strong> Designer to draw customized floor layouts of the<br />
house in order to construct a graphical interface, which can be used in <strong>FSD</strong> Viewer to configure and control<br />
devices.<br />
<strong>FSD</strong> Automator Menu Layout<br />
Under the File menu, the user can Open, Save, Load, and Print configuration files.<br />
Shutdown Server—stops the controller operating as a server.<br />
Exit—closes the <strong>FSD</strong> Automator application<br />
Under the View menu, the user sets the system by using:<br />
<strong>FSD</strong> Lister to display system-wide device placement and configuration.<br />
<strong>FSD</strong> Namer to assign devices to the system.<br />
<strong>FSD</strong> Creator to assign names to devices.<br />
<strong>FSD</strong> Designer to place devices in user-created floor layouts.<br />
<strong>FSD</strong> Viewer to configure and control devices using a graphical interface.<br />
<strong>FSD</strong> Logger to log data of system operation.<br />
Selecting Toolbar displays the <strong>FSD</strong> Automator toolbar.<br />
Selecting Status Bar displays the Windows status bar.<br />
Under the Display menu, the user can display devices entered in <strong>FSD</strong> Namer. Select the device family, then<br />
choose the desired device in the resultant dialog box. The dialog displayed shows its operational state and allows<br />
the user to control the device from the dialog box.<br />
Under the Configure menu, the user can choose a specific device to configure its reporting output and any specific<br />
functions (e.g. timers).<br />
Under the Operation menu, the user can choose a specific device to display its element types mode and choose<br />
operations to connect elements between devices.<br />
Under the Tools menu, the user chooses particular options to assist installation of X10, UPB, and Insteon device<br />
product lines:<br />
Mapper – to map devices on system<br />
Logger – to configure data logging<br />
Tester – to test function of devices on the system<br />
Test Remote Access—to test communications to remote controller<br />
Under the Options menu, the user chooses particular options for:<br />
<strong>FSD</strong> Automator<br />
<strong>FSD</strong> Autostart<br />
<strong>FSD</strong> Router<br />
Set location and time zone
Set Operation Modes<br />
Report All States - the controller reports all current input<br />
and output states for all devices<br />
Set Access Levels - password protected access settings to<br />
either monitor, control, or configure the system.<br />
Check for software updates via the internet.<br />
Under the Help menu, the user can choose to view Tutorials, Installation<br />
Guides, Configuration Guides, Reference <strong>Manual</strong>s, Example Scenarios (to<br />
configure system), and Product Specifications.<br />
<strong>FSD</strong> Automator<br />
The File menu displays the following commands:<br />
Open<br />
Save<br />
Save As<br />
Load Configuration<br />
Print Preview<br />
Print<br />
Pop-up menu options open an existing system configuration or top level layout data set.<br />
Saves the current system data set using the same data set name.<br />
Saves the current system data set to a specified data set name.<br />
Loads changes in configuration to the controller.<br />
Displays the data set on the screen as it would appear printed.<br />
Prints a system data set.<br />
Shutdown Server Closes controller as a server.<br />
Shutdown Client Closes connection to remote client.<br />
Exit <strong>FSD</strong> Automator Closes <strong>FSD</strong> Automator program.<br />
The View menu displays the following commands:<br />
<strong>FSD</strong> Lister<br />
Invokes <strong>FSD</strong> Lister to view device listings, device wiring tree<br />
configuration, and device type information.<br />
Current <strong>FSD</strong> Configuration - Invokes the <strong>FSD</strong> Lister utility to view the current system<br />
device configuration and supported device type information.<br />
Saved <strong>FSD</strong> Configuration - Invokes the <strong>FSD</strong> Lister utility to view the saved system<br />
device configuration in the currently open data set, saved device wiring<br />
tree configuration, and supported device type information.<br />
X10 Devices – Invokes the <strong>FSD</strong> Viewer Utility to display the X10 devices on the<br />
system.<br />
Z-Wave Devices – Invokes the <strong>FSD</strong> Viewer Utility to display the Z-wave devices on<br />
the system.<br />
UPB Devices – Invokes the <strong>FSD</strong> Viewer Utility to display the UPB devices on the<br />
system.<br />
RS435/232 Devices – Invokes the <strong>FSD</strong> Viewer Utility to display the RS435/232 devices on the system.<br />
Insteon Devices – Invokes the <strong>FSD</strong> Viewer Utility to display the Insteon devices on the system.<br />
ALC Devices – Invokes the <strong>FSD</strong> Viewer Utility to display the ALC devices on the system.<br />
ZigBee Devices – Invokes the <strong>FSD</strong> Viewer Utility to display the ZigBee devices on the system.<br />
LON Devices – Invokes the <strong>FSD</strong> Viewer Utility to display the LON devices on the system.
Macro Devices - Invokes the <strong>FSD</strong> Viewer Utility to display the macro devices on the system.<br />
Timers - Invokes the <strong>FSD</strong> Viewer Utility to display the timers on the system.<br />
Variables - Invokes the <strong>FSD</strong> Viewer Utility to display the variable data on the system.<br />
Operations - Invokes the <strong>FSD</strong> Viewer Utility to display operations on the system.<br />
Operational Mode - Invokes the <strong>FSD</strong> Viewer Utility to display the operational modes on the system.<br />
<strong>FSD</strong> Namer Invokes <strong>FSD</strong> Namer to assign user defined names to individual devices for X10 Devices, Z-<br />
Wave Devices, UPB Devices, RS435/232 Devices, Insteon Devices, ALC Devices, ZigBee<br />
Devices, LON Devices, Macro Devices, Timers, Operations, and Operational Modes.<br />
<strong>FSD</strong> Creator Invokes <strong>FSD</strong> Creator to assign user defined names to individual devices.<br />
<strong>FSD</strong> Designer Opens <strong>FSD</strong> Designer program for customized creation of device icons, furniture, appliance,<br />
and floor plans.<br />
<strong>FSD</strong> Automator Enables / Disables <strong>FSD</strong> Automator visibility state upon <strong>FSD</strong> Automator startup, so the <strong>FSD</strong><br />
Automator screen can be hidden from the user when the <strong>FSD</strong> Viewer graphical user<br />
interface is displayed.<br />
<strong>FSD</strong> Viewer Enables / Disables <strong>FSD</strong> Viewer to start automatically when <strong>FSD</strong> Automator starts, to view<br />
a graphical user interface to configure and control devices placed in the system..<br />
<strong>FSD</strong> Logger Invokes <strong>FSD</strong> Logger to edit logging options and enable data logging.<br />
Toolbar Shows or hides the toolbar.<br />
Status Bar Shows or hides the status bar.<br />
The Display menu displays the following commands to choose selection dialogs for:<br />
FGI Devices<br />
ALC Devices<br />
X10 Devices<br />
ZigBee Devices<br />
Z-Wave Devices<br />
LON Devices<br />
UPB Devices<br />
Macro Devices<br />
RS435/232 Devices Timers<br />
Insteon Devices<br />
Variables<br />
Select the device type and the device name to<br />
display the state of the device.<br />
Click ―OK‖ to display the device and control<br />
functions.<br />
The Configure menu displays the following commands:<br />
Displays a dialog box (see Select dialog above) to select the type and name of the device type to configure one<br />
of the following devices:<br />
FGI Devices<br />
X10 Devices<br />
Z-Wave Devices<br />
UPB Devices<br />
RS435/232 Devices<br />
Insteon Devices<br />
ALC Devices<br />
ZigBee Devices<br />
LON Devices<br />
Macro Devices<br />
Timers<br />
Variables<br />
Choose the type from the droplist and the device
name from the droplist. Click ―OK‖ to approve<br />
selection of the device. A dialog box specific to the<br />
selected device appears (see dialog box shown on<br />
the right). Enter data and choose settings to<br />
configure the device. Click ―OK‖ to accept values.<br />
The Operations menu displays the following commands:<br />
Displays a dialog box to select for operation the type and name of the device type for:<br />
FGI Devices<br />
X10 Devices<br />
Z-Wave Devices<br />
UPB Devices<br />
RS435/232 Devices<br />
Insteon Devices<br />
ALC Devices<br />
ZigBee Devices<br />
LON Devices<br />
Macro Devices<br />
Timers<br />
Variables<br />
Choose the type from the droplist and the device name from the droplist. Click ―OK‖ to approve selection of the<br />
device. A dialog box specific to the selected device appears displaying the elements associated with the device.<br />
To edit the element‘s operation attributes, double-click on the element. To add another element, click on the<br />
―Add‖ button. In the ―Operation‖ dialog that appears, choose the operation from the droplist. Click ―OK‖. The<br />
―Device Element Operation‖ dialog appears. Enter operational data for the device. Click ―OK‖
The Tools menu displays the following:<br />
X10 Installer Tools:<br />
X10 Mapper<br />
X10 Tester<br />
X10 Logger<br />
UPB Installer Tools:<br />
UPB Upstart<br />
UPB Mapper<br />
UPB Tester<br />
UPB Logger<br />
Insteon Installer Tools:<br />
Insteon Mapper<br />
Insteon Tester<br />
Insteon Logger<br />
invokes the X10 Mapper utility to map which X10 addresses are used in the system.<br />
invokes the X10 Tester utility to send commands to test X10 device function.<br />
invokes the X10 Logger utility to edit logging options and enable data logging.<br />
invokes PCS Upstart utility to configure UPB devices. UPB Upstart closes all<br />
controller applications and uses only the serial port communications. Set the Upstart<br />
path in the Automator Options menu.<br />
invokes the UPB Mapper utility to map which UPB addresses are used in the system.<br />
invokes the UPB Tester utility to send commands to test UPB device function.<br />
invokes the UPB Logger utility to edit logging options and enable data logging.<br />
invokes the Insteon Mapper utility to map which Insteon addresses are used in the<br />
system.<br />
invokes the Insteon Tester utility to send commands to test X10 device function.<br />
invokes the Insteon Logger utility to edit logging options and enable data logging.<br />
Test Remote Access—used to test the functioning of the various components needed for remote access to the <strong>FSD</strong><br />
<strong>Controller</strong>. The first screen of results displays Remote Access HOST Settings, the next displays Remote Access<br />
HOST Addresses, and the third displays results of testing remote access components, including <strong>FSD</strong> Primary<br />
Server, <strong>FSD</strong> Target Server, <strong>FSD</strong> Update Server, <strong>FSD</strong><br />
Redirection Server and the connect tests by <strong>FSD</strong> Upserver<br />
results (<strong>FSD</strong> Router and <strong>FSD</strong> Syserver).<br />
The Options menu displays the following commands:<br />
Set Automator Options<br />
Selects <strong>FSD</strong> Automator options<br />
<strong>Controller</strong> Name ID Displays the unique controller id<br />
assigned to the <strong>FSD</strong> <strong>Controller</strong>.<br />
TCP/IP address -- choose the appropriate radio button that<br />
corresponds to your situation:<br />
Local Machine only<br />
Use Address From Directory to identify computer<br />
hosting the <strong>FSD</strong> Router application.<br />
Use LAN IP Address—enter the IP address of computer<br />
hosting the <strong>FSD</strong> Router application.<br />
Use Internet IP Address—enter the address of the<br />
computer hosting the <strong>FSD</strong> Router application. If<br />
using <strong>FSD</strong> Loader on the same computer as <strong>FSD</strong><br />
Router, set the TCP/IP address to its default local host<br />
value, 127.0.0.1.<br />
Router IP Port - the port used to connect to and communicate with <strong>FSD</strong> Router and its connected serial port
devices. Note that (1) the specified port must match the port specified in the <strong>FSD</strong> Router application and (2)<br />
for access via a firewall protected link the specified port must have access permission.<br />
Server IP Port - the port used to connect with other applications called by <strong>FSD</strong> Automator (e.g. calling <strong>FSD</strong><br />
Lister).<br />
Enforce Configuration – when more than one computer is connected to a controller, it is imperative to designate<br />
only one computer as the master and to select the Enforce Configuration checkbox. WARNING: if more<br />
than one computer selects this checkbox, at start-up the ID configuration number is checked and changed if<br />
it differs.<br />
<strong>FSD</strong> Automator Watch Level selects the quantity of debug information presented on the <strong>FSD</strong> Automator view<br />
window. Watch Level 0 disables most output, with increasing levels showing more detailed debugging<br />
information.<br />
Enable Debug File – all view window tests, plus other information, are logged in DEBUG.TXT in the<br />
computer‘s TEMP directory, which is set in the computer‘s environment variables.<br />
Enable Debug Crash – writes the debug output to the file after each entry. This ensures completed writes to file<br />
while debugging, in the event there is an application crash.<br />
Create New Debug File – starts a new file when <strong>FSD</strong> Automator starts (otherwise debug information is<br />
appended to the previous file).
Set Autostart Options – This dialog sets options for<br />
Autostart functions. Select checkboxes to choose<br />
options to automatically start <strong>FSD</strong> Automator,<br />
whether the application appears on the desktop,<br />
and also whether to start <strong>FSD</strong> Viewer.<br />
Another option selects whether <strong>FSD</strong> Logger is<br />
started and if its window is displayed on the<br />
desktop.<br />
Selecting Start Router as a Service automatically<br />
starts <strong>FSD</strong> Router when the computer is<br />
turned on. This also applies to <strong>FSD</strong> Logger.<br />
The user has the option to automatically start a<br />
custom application. Enter the specifics in the<br />
edit boxes provided. The custom application<br />
can also be started as a service.<br />
Set Router Options:<br />
Set Serial Port Options<br />
Set the Comm Port to the port assigned to connect the controller with the<br />
<strong>FSD</strong> Router. Selecting the Auto Search checkbox allows <strong>FSD</strong> Router to<br />
determine the assigned Comm Port.<br />
<strong>Manual</strong>ly, one can select a Comm port COM1 – COM16, Parity enforcement,<br />
Number of Stop Bits, and number of Stop Bits to use. Also select the baud<br />
rate for the port.<br />
Select Full Duplex for normal RS-232, RS-422, or RS-423 operation.<br />
Deselect Full Duplex for Half-Duplex operation, if <strong>FSD</strong> Router is used with<br />
an RS-485 or J1708 type port adapter, which connects the transmit and<br />
receive lines. For use with RS-485 adapters, which use the RTS signal to<br />
enable transmit, select the RTS TX Enable option.<br />
For RS-232 use with hardware handshaking lines, select the Use DTR/DSR<br />
or Use CTS/RTS option.<br />
Set Router Options<br />
Use this command to select TCP/IP socket options and debug options.<br />
Show TCP/IP Address -- Click the button to display the computer‘s ip<br />
configuration information and TCP/IP address.<br />
Router Port – use this port to connect to and communicate with other<br />
<strong>FSD</strong> applications (e.g. <strong>FSD</strong> Loader). Note that the specified port must<br />
match the port selected in other <strong>FSD</strong> applications. For access via a<br />
firewall protected link, the specified port must be given access<br />
permission. Note that since <strong>FSD</strong> Router is a TCP/IP server application,<br />
specifying the TCP/IP address in the <strong>FSD</strong> Router application setup is not<br />
required. For connecting to <strong>FSD</strong> Router from an application running on<br />
the same machine, the local access TCP/IP address 127.0.0.1 can be<br />
used. For accessing <strong>FSD</strong> Router from another machine on the network<br />
or via the Internet, use the host machine‘s TCP/IP address.<br />
<strong>FSD</strong> Packet ID -- This value times 0x100 is added to 0x02000000 to construct the base ID value used in packets
sent from <strong>FSD</strong> Router. The connection index reported from <strong>FSD</strong> Router is added to this value to create the<br />
SOURCE_ID value for the packets.<br />
Remote Synch Port -- is the port assigned to communicate with <strong>FSD</strong> software running on a computer at a<br />
remote location.<br />
Time Synch Source -- when selected, will send the time on the computer clock to the <strong>FSD</strong> controller.<br />
Watch Level -- selects the quantity of debug information presented on the <strong>FSD</strong> Loader view window. Watch<br />
Level 0 shows the minimum amount of output, Watch Level 1 shows packet types being sent in each direction<br />
to and from the serial port, Watch Level 2 also shows the first several bytes of each packet sent, and Watch<br />
Level 3 shows more detailed debugging information.<br />
Enable Debug File -- All view window test and other information are logged in DEBUG.TXT, found in the<br />
computer‘s TEMP directory. These directories are set in the computer‘s environment variables.<br />
Enable Debug Crash -- flushes the debug output to the file after each write. This action ensures completed<br />
writes while debugging application crash conditions.<br />
Create New Debug File -- Starts a new file upon <strong>FSD</strong> Loader startup (otherwise debug information is appended<br />
to the previous file).<br />
Allow CSUM Packets -- allows reception of packets appended with a 16 bit checksum instead of a 16 bit CRC<br />
value from devices connected to the serial port. Packets arriving via a TCP/IP connection, and all transmitted<br />
packets will still use CRC validation.<br />
Check Validity – Applies internal packet CRC checking to packets in transit. Otherwise packets will be trusted.<br />
Packets arriving through the serial port are always checked.<br />
Check Packet Size – enforces internally specified parameters on packet sizes based on packet type. This<br />
enables <strong>FSD</strong> Router to discard invalid packets. May be disabled by the installer during application<br />
development to relax constraints. Packet type validity and maximum packet size will be enforced in either case.<br />
Auto Response – automatically returns an acknowledge status packet to the sender of any packet containing the<br />
BROADCAST_DESTINATION_ID (0xFFFFFFFF).<br />
Access Options<br />
Choose the access type to set password security<br />
for Router, Host, LAN, or Internet access.<br />
Security Level – select NONE to disable<br />
password protection or ENABLED to require<br />
password protected access from applications<br />
connecting to <strong>FSD</strong> Router via TCP/IP<br />
connections. The four password secure<br />
activities are: Monitoring, Control,<br />
Configuration, and for some instances Installer.<br />
Password – 32 character maximum, case<br />
sensitive. Specify the password which must be<br />
sent from a connection application to gain<br />
access to a <strong>FSD</strong> Router connection.<br />
For the password secure activities, selecting the<br />
checkbox on the far right enables remote access to the function.<br />
Lockout Time in Minutes is the length of waiting time imposed after<br />
the selected number of bad password
Set Location and Time - used to enter location and time information for dawn and dusk calculations. Select a<br />
preprogrammed location nearest to your location on the droplists, choose your zipcode on the droplist, or enter<br />
your location‘s latitude and longitude. Verify the time zone, change time zone (if desired) and check whether or<br />
not to enable Daylight Savings Time. Click ―OK‖ to enter values.<br />
Set Operating Modes - Displays dialog box to display<br />
Operating Modes assigned to the different Operating<br />
Mode groups.<br />
Report All States<br />
Requests the controller to report all current input and<br />
output states for all devices.<br />
Check for Updates - Displays dialog box to select the type of update<br />
desired.<br />
The Help menu displays the following commands, which provide assistance with this application:<br />
View Tutorials—Displays a list of instructional tutorials to view.<br />
View Installation Guides—Displays a page listing <strong>FSD</strong> <strong>System</strong> and<br />
<strong>FSD</strong> <strong>Controller</strong> installation guides and Specification Sheets for <strong>FSD</strong><br />
<strong>Controller</strong> and Devices. Click on the link to display the pdf file.<br />
View Configuration Guides—Displays a page listing <strong>FSD</strong> <strong>Controller</strong><br />
configuration guides. Click on the link to display the pdf file.<br />
View Reference <strong>Manual</strong>s—Displays a page listing manuals providing<br />
help to use <strong>FSD</strong> <strong>Controller</strong> software. Click on the link to display the<br />
pdf file.<br />
View Example Scenarios—Displays a page listing examples<br />
providing help to configure specific types of <strong>FSD</strong> <strong>Controller</strong><br />
operations. Click on the link to display the pdf file.
View Product Specifications—Displays a page listing manuals providing product specifications for <strong>FSD</strong> and<br />
FGI automation products. Click on the link to display the pdf file.<br />
Help Topics—Offers an index to Help topics for <strong>FSD</strong> Automator.<br />
About <strong>FSD</strong> Automator—Displays the version number of this application.<br />
Toolbar<br />
Folder icon Open an existing document. <strong>FSD</strong> Automator displays the Open dialog box, where you can locate<br />
and open the desired file.<br />
Disk icon Save the active document or template with its current name. Use this command to save the active<br />
system data set to its current name and directory. When you save a data set for the first time, <strong>FSD</strong> Automator<br />
displays the Save As dialog box so you can name your data set. If you want to change the name and directory of<br />
an existing data set before you save it, choose the Save As command.<br />
Printer icon Print the active document. Invokes dialog to select print listings of device on the system, device<br />
wiring tree configuration, and supported <strong>FSD</strong> device types.<br />
―D‖ button Select and activate a device display-monitoring and configuration window.<br />
―R‖ button Request the controller to report current states for all devices on the system. The Monitor Report All<br />
States command sends a command to the controller requesting a report of current values for all input and output<br />
states for devices on the system.<br />
The Monitor Device command is active only when the <strong>FSD</strong> <strong>Controller</strong> reporting state has been initialized.<br />
―A‖ button Select <strong>FSD</strong> Automator options. Use this command to select TCP/IP socket options and debug<br />
options.<br />
TCP/IP address -- choose the appropriate radio button that corresponds to your situation:<br />
Local Machine only<br />
Use Address From Directory to identify computer hosting the <strong>FSD</strong> Router application.<br />
Use LAN IP Address—enter the IP address of computer hosting the <strong>FSD</strong> Router application.<br />
Use Internet IP Address—enter the address of the computer hosting the <strong>FSD</strong> Router application. If using<br />
<strong>FSD</strong> Loader on the same computer as <strong>FSD</strong> Router, set the TCP/IP address to its default local host value,<br />
127.0.0.1.<br />
Router IP Port – port used to connect and communicate with <strong>FSD</strong> Router and its connected serial port<br />
devices. Note that the specified port must match the port specified in the <strong>FSD</strong> Router application. For<br />
access via a firewall protected link, the specified port must have access permission.<br />
<strong>FSD</strong> Automator Watch Level—select the quantity of debug information presented on the <strong>FSD</strong> Automator view<br />
window. Watch Level 0 disables most output, with increasing levels displaying more detailed debugging<br />
information.<br />
<strong>FSD</strong> <strong>Controller</strong> Watch Level—select the quantity of debug information to be sent from a connected <strong>FSD</strong><br />
<strong>Controller</strong>. The <strong>FSD</strong> <strong>Controller</strong> debug information will be presented on the <strong>FSD</strong> Automator view window.<br />
Watch Level 0 disables most output, with increasing levels displaying more detailed debugging information.<br />
Enable Debug File – select to log all view window tests, plus other information to DEBUG.TXT in the<br />
computer‘s F_TEMP or TEMP directory, which is set in the computer‘s environment variables.<br />
Enable Debug Crash – writes the debug output to the file after each entry, to ensure completed writes in the<br />
event the application crashes.<br />
Create New Debug File – Starts a new file when <strong>FSD</strong> Automator starts (otherwise debug information is<br />
appended to the previous file).
―O‖ button Select a device to activate a display-to configure device elements with operations.
<strong>FSD</strong> Viewer<br />
<strong>FSD</strong> Viewer Overview<br />
In <strong>FSD</strong> Designer floor layouts and buildings can be designed and devices positioned in the constructed layout. Use<br />
<strong>FSD</strong> Viewer to display the layouts.<br />
The user can configure <strong>FSD</strong> Autostart so that <strong>FSD</strong> Viewer is started by <strong>FSD</strong> Autostart and opens the last floor<br />
layout displayed. If opening <strong>FSD</strong> Viewer directly, choose the .fvg file containing the desired floor layout.<br />
<strong>FSD</strong> Viewer Menu<br />
Right-click on the title bar to display the following menu items:<br />
Restore – when the window is minimized, the Restore command is active and when clicked will restore the<br />
minimized window onto the screen.<br />
Move – will allow the device dialog to be moved on screen.<br />
Minimize – will remove the window from the desktop, and minimized to the windows taskbar.<br />
Close – exits the application.<br />
Open Building – displays the Open dialog to choose a .fvg file to open.<br />
Edit Layout View – Opens the layout portion of the designer application to edit the opened layout (see <strong>FSD</strong><br />
Designer).<br />
Load Confirmation – calls <strong>FSD</strong> Builder to build the image to load the changed configuration into the controller.<br />
View Tutorials and Guides - opens a htm document that displays links to View Tutorials, View Installation Guides,<br />
View Configuration Guides, and View Reference <strong>Manual</strong>s.<br />
View <strong>FSD</strong> Designer – opens the application <strong>FSD</strong> Automator.<br />
View <strong>FSD</strong> Automator – brings <strong>FSD</strong> Automator into view.
Check For Updates - starts <strong>FSD</strong> Upclient to check for <strong>FSD</strong> <strong>Controller</strong> software updates<br />
About <strong>FSD</strong> - Viewer displays information about the application‘s version.<br />
Help Topics - displays the Help Index for <strong>FSD</strong> Viewer.<br />
<strong>FSD</strong> Viewer<br />
Double-click on one of the layouts displayed in the <strong>FSD</strong> Viewer window to enlarge the layout.
Double-click on a room to enlarge further. If in the above figure, Zoom to Expand is chosen, the enlarged room<br />
display replaces the floor layout window. Right-click on the title bar and choose Cancel Zoom in the menu to return<br />
to the floor layout. In contrast, if Zoom to Expand is NOT selected, double-clicking on the room will enlarge it and<br />
the window displaying the floor layout is also displayed on the screen.<br />
Both enlarged layouts have similar menu (right-click title bar to display). Choosing Edit Layout View displays the<br />
layout in <strong>FSD</strong> Designer to edit room or placement of devices, appliances, and furniture (see manual for <strong>FSD</strong><br />
Designer).
<strong>FSD</strong> Logger<br />
<strong>FSD</strong> Logger Overview<br />
<strong>FSD</strong> Logger records conversation in text file between controller and devices. The user can set the level of detail<br />
recorded as desired. One can choose among different debug file options.<br />
<strong>FSD</strong> Logger<br />
File Menu<br />
The File menu offers the following commands:<br />
Open Opens an existing system data set.<br />
Import Data Imports the application‘s Registry data from a file.<br />
Export Data Exports the application‘s Registry data to a file.<br />
Print Prints a system data set.<br />
Print Preview Displays the data set on the screen as it would appear printed.<br />
Print Setup Selects a printer and printer connection.<br />
Exit Exits <strong>FSD</strong> Logger.<br />
View Menu<br />
The View menu offers the following commands:<br />
Toolbar<br />
Shows or hides the toolbar.<br />
Toolbar components:<br />
Folder icon Open an existing data set. <strong>FSD</strong> Lister displays the Open dialog box, in which you can locate and<br />
open the desired file.<br />
Printer icon Print the active document.<br />
―D‖ button The Define Log File Properties command is used to define all log file instances for the <strong>FSD</strong><br />
Logger application. Within each log file instance definition, multiple device filters may be defined.<br />
―S‖ button The Enable Startup Logs command enables or disables all log files selected to be active at <strong>FSD</strong><br />
Logger application start-up.<br />
―A‖ button The Enable All Logs command enables or disables all defined log files.<br />
―E‖ button<br />
Status Bar<br />
The Extract Binary Log Files command extracts a binary log file to a text file.<br />
Shows or hides the status bar.<br />
Log Menu<br />
The Log menu offers the following commands:<br />
Define Log File Properties<br />
Displays dialog to select log file.<br />
<strong>FSD</strong> Logger<br />
Displays Logger windows for all devices.
<strong>FSD</strong> Logger Overview<br />
<strong>FSD</strong> Logger records conversation in text file between controller and devices. The user can set the level of detail<br />
recorded as desired. One can choose among different debug file options.<br />
<strong>FSD</strong> Logger<br />
File Menu<br />
The File menu offers the following commands:<br />
Open Opens an existing system data set.<br />
Import Data Imports the application‘s Registry data from a file.<br />
Export Data Exports the application‘s Registry data to a file.<br />
Print Prints a system data set.<br />
Print Preview Displays the data set on the screen as it would appear printed.<br />
Print Setup Selects a printer and printer connection.<br />
Exit Exits <strong>FSD</strong> Logger.<br />
View Menu<br />
The View menu offers the following commands:<br />
Toolbar<br />
Shows or hides the toolbar.<br />
Toolbar components:<br />
Folder icon Open an existing data set. <strong>FSD</strong> Lister displays the Open dialog box, in which you can locate and<br />
open the desired file.<br />
Printer icon Print the active document.<br />
―D‖ button The Define Log File Properties command is used to define all log file instances for the <strong>FSD</strong><br />
Logger application. Within each log file instance definition, multiple device filters may be defined.<br />
―S‖ button The Enable Startup Logs command enables or disables all log files selected to be active at <strong>FSD</strong><br />
Logger application start-up.<br />
―A‖ button The Enable All Logs command enables or disables all defined log files.<br />
―E‖ button<br />
Status Bar<br />
The Extract Binary Log Files command extracts a binary log file to a text file.<br />
Shows or hides the status bar.<br />
Log Menu<br />
The Log menu offers the following commands:<br />
Define Log File Properties Displays Logger<br />
windows for all devices.<br />
Displays dialog to select log file.<br />
Add log file definitions button displays Log File Definition dialog. <strong>User</strong> can specify the files name, a brief<br />
description and set operational parameters for logging, including checkboxes to enable log file, enable log file at<br />
startup, and create backup file. One can specify the log duration: daily, weekly, monthly and set the maximum
log file size: 256, 512, 1024, 2048, or 4096K. The format for the log file can be set as binary or as comma<br />
delimited. The user can set filter options.<br />
Clicking Add filter definition displays the Edit Filter Options dialog. The filter name can be assigned, a checkbox<br />
toggles enabling of the filter. The devices to log can be set. Either select all devices or select specific devices by<br />
using the droplist for device types and droplist for device name. In the Select Elements to Log section, check the<br />
elements to be logged. One can set to log all reports, to set an interval for logging (1, 5, 10, 15, 20, 25, 30, 60,<br />
300 sec.), or to log changes only.<br />
Enable Startup Logs Enables / Disables Log files selected to be enabled at <strong>FSD</strong> Logger application start-up.<br />
Enable All Logs<br />
Enables / Disables all defined Log files.<br />
Extract Binary Log File<br />
Extracts a binary log file to a text file.<br />
Options Menu<br />
Set Logger Options<br />
options<br />
Selects Logger communications and watch<br />
TCP/IP address -- choose the appropriate radio button that corresponds<br />
to your situation:<br />
Local Machine only<br />
Use Address From Directory to identify computer hosting the <strong>FSD</strong><br />
Router application.<br />
Use LAN IP Address—enter the IP address of computer hosting<br />
the <strong>FSD</strong> Router application.<br />
Use Internet IP Address—enter the address of the machine hosting<br />
the <strong>FSD</strong> Router application. If using <strong>FSD</strong> Loader on the same<br />
machine as <strong>FSD</strong> Router, set the TCP/IP address to its default local<br />
host value, 127.0.0.1.<br />
Router IP Port is the port to be used to connect to and communicate<br />
with <strong>FSD</strong> Router and its connected serial port devices. Note that the specified port must match that<br />
selected within the <strong>FSD</strong> Router application, and for access via a firewall protected link the specified port<br />
must be given access permission.<br />
<strong>FSD</strong> Logger Watch Level selects the quantity of debug information presented on the <strong>FSD</strong> Logger view window.
Watch Level 0 disables most output, with increasing levels used to show more detailed debugging<br />
information.<br />
Enable Debug File – All view window test, plus other information will be logged in DEBUG.TXT in the<br />
computer‘s TEMP directory, as set in the computer‘s environment variables.<br />
Enable Debug Crash – flushes the debug output to the file after each write, to ensure completed writes while<br />
debugging application crash conditions.<br />
Create New Debug File – Starts a new file upon <strong>FSD</strong> Logger startup (else debug information is appended to the<br />
previous file).<br />
Help Menu<br />
The Help menu offers the following commands, which provide you assistance with this application:<br />
Help Topics Offers you an index to topics on which you can get help.<br />
About <strong>FSD</strong> Logger Displays the version number of this application.<br />
For more detailed instructions on using <strong>FSD</strong> Logger, in <strong>FSD</strong> Automator, from the Help menu choose ―View<br />
Configuration Guide‖. In the displayed list select ―<strong>FSD</strong> Logger Configuration Guide‖.<br />
Add log file definitions button displays Log File Definition dialog. <strong>User</strong> can specify the files name, a brief<br />
description and set operational parameters for logging, including checkboxes to enable log file, enable log file at<br />
startup, and create backup file. One can specify the log duration: daily, weekly, monthly and set the maximum<br />
log file size: 256, 512, 1024, 2048, or 4096K. The format for the log file can be set as binary or as comma<br />
delimited. The user can set filter options.<br />
Clicking Add filter definition displays the Edit Filter Options dialog. The filter name can be assigned, a checkbox<br />
toggles enabling of the filter. The devices to log can be set. Either select all devices or select specific devices by<br />
using the droplist for device types and droplist for device name. In the Select Elements to Log section, check the<br />
elements to be logged. One can set to log all reports, to set an interval for logging (1, 5, 10, 15, 20, 25, 30, 60,<br />
300 sec.), or to log changes only.<br />
Enable Startup Logs Enables / Disables Log files selected to be enabled at <strong>FSD</strong> Logger application start-up.<br />
Enable All Logs<br />
Enables / Disables all defined Log files.<br />
Extract Binary Log File<br />
Extracts a binary log file to a text file.<br />
Options Menu<br />
Set Logger Options<br />
Selects Logger communications and watch options<br />
TCP/IP address -- choose the appropriate radio button that corresponds to your situation:<br />
Local Machine only<br />
Use Address From Directory to identify computer hosting the <strong>FSD</strong> Router application.<br />
Use LAN IP Address—enter the IP address of computer hosting the <strong>FSD</strong> Router application.<br />
Use Internet IP Address—enter the address of the machine hosting the <strong>FSD</strong> Router application. If using <strong>FSD</strong><br />
Loader on the same machine as <strong>FSD</strong> Router, set the TCP/IP address to its default local host value,<br />
127.0.0.1.<br />
Router IP Port is the port to be used to connect to and communicate with <strong>FSD</strong> Router and its connected serial<br />
port devices. Note that the specified port must match that selected within the <strong>FSD</strong> Router application, and<br />
for access via a firewall protected link the specified port must be given access permission.<br />
<strong>FSD</strong> Logger Watch Level selects the quantity of debug information presented on the <strong>FSD</strong> Logger view window.<br />
Watch Level 0 disables most output, with increasing levels used to show more detailed debugging<br />
information.
Enable Debug File – All view window test, plus other information will be logged in DEBUG.TXT in the<br />
computer‘s TEMP directory, as set in the computer‘s environment variables.<br />
Enable Debug Crash – flushes the debug output to the file after each write, to ensure completed writes while<br />
debugging application crash conditions.<br />
Create New Debug File – Starts a new file upon <strong>FSD</strong> Logger startup (else debug information is appended to the<br />
previous file).<br />
Help Menu<br />
The Help menu offers the following commands, which provide you assistance with this application:<br />
Help Topics Offers you an index to topics on which you can get help.<br />
About <strong>FSD</strong> Logger Displays the version number of this application.<br />
For more detailed instructions on using <strong>FSD</strong> Logger, in <strong>FSD</strong> Automator, from the Help menu choose ―View<br />
Configuration Guide‖. In the displayed list select ―<strong>FSD</strong> Logger Configuration Guide‖.
<strong>FSD</strong> Upclient<br />
<strong>FSD</strong> Upclient Overview<br />
With <strong>FSD</strong> Upclient the user can update <strong>FSD</strong> <strong>Controller</strong> software via the<br />
internet. Upon opening, the application displays a select update dialog.<br />
Select the update type that corresponds to your situation.<br />
<strong>FSD</strong> Upclient Menu Layout<br />
File Menu<br />
Use either the Exit command or the Close command on the application Control menu to end the <strong>FSD</strong> Update<br />
Client session. <strong>FSD</strong> Update Client prompts you to save documents with unsaved changes.<br />
View Menu<br />
The toolbar is displayed across the top of the application window, below the menu bar. The toolbar provides<br />
quick mouse access to many tools used in <strong>FSD</strong> Update Client,<br />
To hide or display the Toolbar, choose Toolbar from the View menu (ALT, V, T).<br />
Click To<br />
―L‖ button<br />
―O‖ button<br />
―A‖ button<br />
―D‖ button<br />
Loads a <strong>FSD</strong> formatted file to the controller or attached <strong>FSD</strong> device.<br />
Offloads log data from a device, clearing the device data log.<br />
Attaches a J1708 device and switches to <strong>FSD</strong> packet mode.<br />
Detaches a previously attached device and switches to native mode.<br />
The status bar is displayed at the bottom of the <strong>FSD</strong> Update Client window. To display or hide the status bar, use<br />
the Status Bar command in the View menu.<br />
The left area of the status bar describes how menu items act, as the arrow keys navigate through the menus. This<br />
area also shows messages that describe the actions of toolbar buttons they are depressed, before releasing them. If<br />
you decide not to execute the command, release the mouse button when not pointing to the toolbar button.<br />
The right areas of the status bar indicate which of the following keys are latched down:<br />
Indicator Description<br />
CAP The Caps Lock key is latched down.<br />
NUM The Num Lock key is latched down.<br />
SCRL The Scroll Lock key is latched down.
Options Menu<br />
Set Upclient Options<br />
Update Server Port – use this port to connect to and<br />
communicate with <strong>FSD</strong> Router and its connected serial port<br />
devices. Note that the specified port must match the port<br />
selected in the <strong>FSD</strong> Router application. For access via a<br />
firewall protected link, the specified port must be given access<br />
permission.<br />
Primary Server Address -- The address of the machine hosting<br />
the <strong>FSD</strong> Router application. If using <strong>FSD</strong> Update Client on<br />
the same machine as <strong>FSD</strong> Router, set the TCP/IP address to its<br />
default local host value, 127.0.0.1.<br />
<strong>FSD</strong> Update Client Watch Level -- selects the quantity of<br />
debug information presented on the <strong>FSD</strong> Update Client view<br />
window. Watch Level 0 displays the least amount of<br />
information, with increasing levels showing more detailed debugging information.<br />
Debug Options<br />
Enable Debug File -- All view window test and other information are logged in DEBUG.TXT, found in the<br />
computer‘s TEMP directory. These directories are set in the computer‘s environment variables.<br />
Enable Debug Crash -- flushes the debug output to the file after each write. This action ensures completed writes<br />
while debugging application crash conditions.<br />
Create New Debug File -- Starts a new file upon <strong>FSD</strong> Loader startup (otherwise debug information is appended to<br />
the previous file).<br />
Help Menu<br />
The Help menu offers the following commands, which provides assistance with this application:<br />
Help Topics Use this command to display the opening screen of Help. From the opening screen, you can jump<br />
to step-by-step instructions for using Update Client and various types of reference information.<br />
After Help opens, click the Contents button to return to the opening screen.<br />
About <strong>FSD</strong> Upclient<br />
Displays copyright notice and the version number of this application.
<strong>FSD</strong> Router<br />
Overview <strong>FSD</strong> Router<br />
<strong>FSD</strong> Router is a server application to route communications among serial ports and TCP/IP addresses.<br />
<strong>FSD</strong> Router Menu Layout<br />
File Menu<br />
Use either the Exit command or the Close command on the application Control menu to end the <strong>FSD</strong> Router<br />
session. <strong>FSD</strong> Router prompts you to save documents with unsaved changes.<br />
View Menu<br />
The toolbar is displayed across the top of the application window, below the menu bar. The toolbar provides<br />
quick mouse access to many tools used in <strong>FSD</strong> Router,<br />
To hide or display the Toolbar, choose Toolbar from the View menu (ALT, V, T).<br />
Click To<br />
―C‖ button<br />
―S‖ button<br />
―P‖ button<br />
Displays dialog to set port settings.<br />
Displays dialog to set router options.<br />
Displays dialog to set password options.<br />
―Red Octagon‖ button<br />
Stops sending all packets.<br />
Options Menu<br />
The Options menu provides choices to set options for serial ports, router, and access.<br />
Set Serial Port Options<br />
Set the Comm Port to the port assigned to connect the controller with the<br />
<strong>FSD</strong> Router. Selecting the Auto Search checkbox allows <strong>FSD</strong> Router to<br />
determine the assigned Comm Port.<br />
<strong>Manual</strong>ly, one can select a Comm port COM1 – COM16, Parity enforcement,<br />
Number of Stop Bits, and number of Stop Bits to use. Also select the baud<br />
rate for the port.<br />
Select Full Duplex for normal RS-232, RS-422, or RS-423 operation.<br />
Deselect Full Duplex for Half-Duplex operation, if <strong>FSD</strong> Router is used with<br />
an RS-485 or J1708 type port adapter, which connects the transmit<br />
and receive lines. For use with RS-485 adapters, which use the RTS<br />
signal to enable transmit, select the RTS TX Enable option.<br />
For RS-232 use with hardware handshaking lines, select the Use<br />
DTR/DSR or Use CTS/RTS option.<br />
Set Router Options<br />
Use this command to select TCP/IP socket options and debug<br />
options.<br />
Show TCP/IP Address -- Click the button to display the computer‘s
ip configuration information and TCP/IP address.<br />
Router Port – use this port to connect to and communicate with other <strong>FSD</strong> applications (e.g. <strong>FSD</strong> Loader). Note<br />
that the specified port must match the port selected in other <strong>FSD</strong> applications. For access via a firewall<br />
protected link, the specified port must be given access permission. Note that since <strong>FSD</strong> Router is a TCP/IP<br />
server application, specifying the TCP/IP address in the <strong>FSD</strong> Router application setup is not required. For<br />
connecting to <strong>FSD</strong> Router from an application running on the same machine, the local access TCP/IP address<br />
127.0.0.1 can be used. For accessing <strong>FSD</strong> Router from another machine on the network or via the Internet, use<br />
the host machine‘s TCP/IP address.<br />
<strong>FSD</strong> Packet ID -- This value times 0x100 is added to 0x02000000 to construct the base ID value used in packets<br />
sent from <strong>FSD</strong> Router. The connection index reported from <strong>FSD</strong> Router is added to this value to create the<br />
SOURCE_ID value for the packets.<br />
Remote Synch Port -- is the port assigned to communicate with <strong>FSD</strong> software running on a computer at a<br />
remote location.<br />
Time Synch Source -- when selected, will send the time on the computer clock to the <strong>FSD</strong> controller.<br />
Watch Level -- selects the quantity of debug information presented on the <strong>FSD</strong> Loader view window. Watch<br />
Watch Level 0 shows the minimum amount of output, Watch Level 1 shows packet types being sent in each<br />
direction to and from the serial port, Watch Level 2 also shows the first several bytes of each packet sent, and<br />
Watch Level 3 shows more detailed debugging information.<br />
Enable Debug File -- All view window test and other information are logged in DEBUG.TXT, found in the<br />
computer‘s TEMP directory. These directories are set in the computer‘s environment variables.<br />
Enable Debug Crash -- flushes the debug output to the file after each write. This action ensures completed<br />
writes while debugging application crash conditions.<br />
Create New Debug File -- Starts a new file upon <strong>FSD</strong> Loader startup (otherwise debug information is appended<br />
to the previous file).<br />
Allow CSUM Packets -- allows reception of packets appended with a 16 bit checksum instead of a 16 bit CRC<br />
value from devices connected to the serial port. Packets arriving via a TCP/IP connection, and all transmitted<br />
packets will still use CRC validation.<br />
Check Validity – Applies internal packet CRC checking to packets in transit. Otherwise packets will be trusted.<br />
Packets arriving through the serial port are always checked.<br />
Check Packet Size – enforces internally specified parameters on packet sizes based on packet type. This<br />
enables <strong>FSD</strong> Router to discard invalid packets. May be disabled by the installer during application<br />
development to relax constraints. Packet type validity and maximum packet size will be enforced in either case.<br />
Auto Response – automatically returns an acknowledge status packet to the sender of any packet containing the<br />
BROADCAST_DESTINATION_ID<br />
(0xFFFFFFFF).<br />
Access Options<br />
Choose the access type to set password<br />
security for Router, Host, LAN, or Internet<br />
access.<br />
Security Level – select NONE to disable<br />
password protection or ENABLED to require<br />
password protected access from applications<br />
connecting to <strong>FSD</strong> Router via TCP/IP<br />
connections. The four password secure<br />
activities are: Monitoring, Control,
Configuration, and for some instances Installer.<br />
Password – 32 character maximum, case sensitive. Specify the password which must be sent from a connection<br />
application to gain access to a <strong>FSD</strong> Router connection.<br />
For the password secure activities, selecting the checkbox on the far right enables remote access to the function.<br />
Lockout Time in Minutes is the length of waiting time imposed after the selected number of bad password<br />
attempts, before <strong>FSD</strong> Router will accept password protected logon attempts from any connecting application.<br />
This feature discourages use of automatic password generators and other trial-and-error password entry efforts.<br />
Attempts is the number of incorrect passwords that connecting applications can make before the Lockout Time<br />
is imposed. Note that this is the total logon attempts from all applications, not just from a single application.<br />
<strong>Controller</strong> Name ID -- displays the unique identifier for the controller on the system.<br />
Depending on the access type selected, check boxes are active to indicate that TCP/IP address is STATIC or to<br />
Disable Directory Service.<br />
Stop All Packets -- to cease transmission of packets.<br />
Status Bar<br />
The status bar is displayed at the bottom of the <strong>FSD</strong> Router window. To display or hide the status bar, use the<br />
Status Bar command in the View menu.<br />
The left area of the status bar describes how menu items act, as the arrow keys navigate through the menus. This<br />
area also shows messages that describe the actions of toolbar buttons they are depressed, before releasing them. If<br />
you decide not to execute the command, release the mouse button when not pointing to the toolbar button.<br />
The right areas of the status bar indicate which of the following keys are latched down:<br />
Indicator Description<br />
CAP The Caps Lock key is latched down.<br />
NUM The Num Lock key is latched down.<br />
SCRL The Scroll Lock key is latched down.<br />
Help Menu<br />
The Help menu offers the following commands, which provides assistance with this application:<br />
Help Topics Use this command to display the opening screen of Help. From the opening screen, you can jump<br />
to step-by-step instructions for using Router and various types of reference information.<br />
After Help opens, click the Contents button to return to the opening screen.<br />
About <strong>FSD</strong> Router<br />
Displays copyright notice and the version number of this application.
Select the Device Type to display their operating manual.<br />
Timer Device Family<br />
<strong>FSD</strong> Alarm<br />
<strong>FSD</strong> Alarm Clock<br />
<strong>FSD</strong> Time of Day Event<br />
<strong>FSD</strong> Fade Timer<br />
<strong>FSD</strong> Holiday Schedule<br />
<strong>FSD</strong> Operating Mode<br />
<strong>FSD</strong> 8 Button Control<br />
<strong>FSD</strong> 16 Button Control<br />
<strong>FSD</strong> Delay Timer<br />
<strong>FSD</strong> Retriggerable Timer<br />
X10 Interface (TW523)<br />
<strong>FSD</strong> Super Bridge 8<br />
<strong>FSD</strong> Super Bridge 16<br />
X10 Device Family<br />
X10 <strong>Controller</strong><br />
X10 Switch<br />
UPB Device Family<br />
UPB <strong>Controller</strong><br />
UPB Switch<br />
UPB Input/Output Module<br />
RS485/232 Devices<br />
UPB Interface (PIM)
Alarm<br />
Device Types in family<br />
Device Family<br />
Timer<br />
Alarm Timer<br />
Device Type Description<br />
Alarm Timer<br />
Use this timer‘s dialog to set the properties to<br />
send an alarm notification with the<br />
specifications to send a second or third alarm<br />
notification, if desired.<br />
Device Dialog Box<br />
The device dialog displays the various alarm<br />
states. A checked checkbox reports whether the<br />
alarm is triggered, or if the first, second, or third<br />
notification has occurred (Alarm, Second,<br />
Third). Buttons are available to trigger the alarm, to enable the alarm, or to deactivate the alarm.<br />
Right-clicking on the title bar displays a menu list, including commands to configure<br />
the Alarm Timer.<br />
Configure Display - Use this<br />
command to choose the picture used<br />
on the device dialog. In the<br />
―Configure Display‖ dialog that<br />
appears, click ―Browse‖ to select the<br />
picture to be shown on the device<br />
dialog. Click the ―Open‖ button to<br />
implement the selection. In the<br />
―Configure Display‖ dialog apply the settings to either<br />
t<br />
h<br />
e<br />
specific device, the device type, or the<br />
devices in the group. Click ―OK‖.<br />
Configure Alarm Timer - In the upper<br />
section, select how the alarm will<br />
behave. One can set either in seconds or<br />
minutes the delay to trigger the alarm,<br />
how long the alarm lasts, and the delay<br />
to send the subsequent alarm notification<br />
(second or third alarms). Use the<br />
following sections to configure and<br />
enable the input and operating modes;<br />
how the alarm is armed, notification<br />
options; enter text to send during<br />
notification , and to set a pass code to<br />
disarm or cancel the alarm. Click the<br />
―Define Pass Code‖ to enter a pass code.<br />
Reenter the pass code for verification.<br />
Click ―OK‖ to store pass code. Clicking
the ―Reporting Options‖ button displays the Configure Device dialog (see below). Click ―OK‖ to<br />
finalize selections.<br />
Configure Device - Use the following<br />
sections to configure the reporting for<br />
either the Input or Output Settings. If<br />
reporting when changes occur is desired,<br />
choose ―Report Changes‖. Check the box<br />
for ―Report Periodically‖ and select the<br />
interval for periodic reporting from the<br />
droplist. These settings can be applied to<br />
either the specific device, the device type,<br />
or the devices in the group. Click ―OK‖<br />
to finalize selections.<br />
Configure Operations - Select this command<br />
to display a dialog to configure the device elements for the operation desired for the device.<br />
Double click on the device name to display the ―Device Element Operation‖ dialog or click the<br />
―Add‖ button to add an operation. A detailed discussion on configuring device element operations<br />
is found in ―<strong>FSD</strong> Operation Configuration Guide‖.<br />
Other commands control the placement and size of the dialog box and a command to close the dialog.<br />
Selections on the menu lead to presentation of Help Topics, information about the Alarm Timer<br />
device, and software version information for the Alarm Timer.
Alarm Clock<br />
Device Types in family<br />
Device Family<br />
Timer<br />
Alarm Clock<br />
Device Type Description<br />
Alarm Clock<br />
Use this device dialog to use the controller as an alarm clock. Set the time to trigger the alarm, the<br />
duration of the alarm, and whether or not there are two different controlled events triggered. These<br />
two events are based on the alarm time. The user can also set the duration of the snooze period.<br />
Device Dialog Box<br />
The device dialog displays the<br />
various alarm states.. Reported is<br />
whether the alarm is triggered, if<br />
the first, second, or third<br />
controlled event has occurred<br />
(Alarm, Second, Third) and<br />
buttons to trigger the alarm or<br />
enable the alarm. There is a<br />
button to implement a Snooze<br />
reset of alarm and another button<br />
to deactivate the alarm.<br />
Right-clicking on the title bar displays a menu list, including<br />
commands to configure the Alarm Timer.<br />
Configure Display - Use this command to choose the<br />
picture used on the device dialog. In the<br />
―Configure Display‖ dialog that appears, click<br />
―Browse‖ to select the picture to be shown on the<br />
device dialog. Click the ―Open‖ button to<br />
implement the selection. In the ―Configure<br />
Display‖ dialog apply the settings to either the<br />
specific device, the device type, or the devices in<br />
the group. Click ―OK‖.
Configure Alarm Clock - In<br />
the upper section, the user<br />
can configure the device to<br />
activate an alarm for a<br />
specific clock time value<br />
or time relative to specific<br />
sunrise or sunset event<br />
choose from droplist.<br />
Relative time offsets are<br />
relative to midnight (12:00<br />
AM). For example, to set<br />
a trigger time for a few<br />
minutes before the<br />
selected Dawn /Dusk time,<br />
check the ―Relative‖<br />
checkbox and set the time<br />
to 11:xx PM. Similarly, to<br />
set a trigger time for a few<br />
minutes after the selected<br />
Dawn / Dusk time, set the<br />
time to 12:xx AM. In the<br />
section on ―Enable on<br />
Days:: choose the<br />
specified days of the week<br />
the alarm is enabled. One<br />
can further stipulate<br />
whether the alarm occurs<br />
on a holiday or special<br />
days set by the user<br />
(―Holiday‖, ―Special Day<br />
1‖, ―Special Day 2‖, or ―Special Day 3‖). The alarm clock device can be programmed to control<br />
up to three separate, but sequentially timed actions, connected by operations to the alarm clock<br />
device‘s ―From‖ elements, with the second and third output times specified relative to the first and<br />
second alarm clock output. One can set either in seconds or minutes the delay to trigger the alarm,<br />
how long the alarm lasts, and the delay to trigger the next controlled events (second or third<br />
―alarms‖). Use the following sections to enable the operating modes and how the alarm is armed.<br />
Clicking the ―Reporting Options‖ button displays the Configure Device dialog (see below). Click<br />
―OK‖ to finalize selections.<br />
Configure Device - Use the following sections<br />
to configure the reporting for either the Input or<br />
Output Settings. If reporting when changes occur<br />
is desired, choose ―Report Changes‖. Check the<br />
box for ―Report Periodically‖ and select the<br />
interval for periodic reporting from the droplist.<br />
These settings can be applied to either the<br />
specific device, the device type, or the devices in<br />
the group. Click ―OK‖ to finalize selections.
Configure Operations - Select this command to display a dialog to configure the device elements for<br />
the operation desired for the device. Double click on the device name to display the ―Device<br />
Element Operation‖ dialog or click the ―Add‖ button to add an operation. A detailed discussion<br />
on configuring device element operations is found in ―<strong>FSD</strong> Operation Configuration Guide‖.<br />
Other commands control the placement and size of the dialog box and a command to close the dialog.<br />
Selections on the menu lead to presentation of Help Topics, information about the Alarm Clock device,<br />
and software version information for the Alarm Clock.
Event Timer<br />
Device Types in family<br />
Device Family<br />
Timer<br />
Event<br />
Device Type Description<br />
Time of Day Event<br />
Use this device timer to instruct the controller to turn on and off a particular light or appliance on the<br />
system. The dialog displays whether the event is currently on and reports whether or not the event is<br />
enabled for the current day.<br />
Device Dialog Box<br />
The dialog displays whether the event<br />
is currently on of off (TRUE or<br />
FALSE) and reports whether or not the<br />
event is enabled for the current day and<br />
also if the device is enabled in the<br />
current operating mode.<br />
Right-clicking on the title bar displays a menu list, including<br />
commands to configure the Alarm Timer.<br />
Configure Display - Use this command to choose the picture used<br />
on the device dialog. In the ―Configure Display‖ dialog that<br />
appears, click ―Browse‖ to select the picture to be shown on the<br />
device dialog. Click the ―Open‖ button to implement the<br />
selection. In the ―Configure Display‖ dialog<br />
apply the settings to either the specific device,<br />
the device type, or the devices in the group.<br />
Click ―OK‖.<br />
Configure Alarm Clock - In the upper section, the<br />
user can configure the device to start and to stop<br />
an event for a specific clock time value or time<br />
relative to specific sunrise or sunset event<br />
choose from droplist. Relative time offsets are<br />
relative to midnight (12:00 AM). For example,<br />
to set a trigger time for a few minutes before the<br />
selected Dawn /Dusk time, check the ―Relative‖ checkbox and set the time to 11:?? PM.<br />
Similarly, to set a trigger time for a few minutes after the selected Dawn / Dusk time, set the time<br />
to 12:?? AM. The next section one can program the event timer to turn on and off at random times<br />
during the time period specified in the start/stop section. The user can (1) set the probability that<br />
the event is on at the start time, (2) delay the start or stop time up to a maximal specified time, (3)<br />
set the range of time for the event to be on, and (4) set the range of time the event is off. In the<br />
section on ―Enable on Days:: choose the specified days of the week the event is enabled. One can<br />
further stipulate whether the event occurs on a holiday or special days set by the user (―Holiday‖,<br />
―Special Day 1‖, ―Special Day 2‖, or ―Special Day 3‖). Set the date range for the event to occur,<br />
or check ―Always‖. Use the following sections to enable the operating modes. Clicking the
―Reporting Options‖ button displays the Configure Device dialog (see below). Click ―OK‖ to<br />
finalize selections.<br />
Configure Device -<br />
Use the following<br />
sections to<br />
configure the<br />
reporting for either<br />
the Input or Output<br />
Settings. If<br />
reporting when<br />
changes occur is<br />
desired, choose<br />
―Report Changes‖.<br />
Check the box for<br />
―Report<br />
Periodically‖ and<br />
select the interval<br />
for periodic<br />
reporting from the<br />
droplist. These<br />
settings can be<br />
applied to either<br />
the specific device,<br />
the device type, or<br />
the devices in the<br />
group. Click<br />
―OK‖ to finalize<br />
selections.<br />
Configure Operations - Select this command<br />
to display a dialog to configure the device<br />
elements for the operation desired for the device.<br />
Double click on the device name to display the<br />
―Device Element Operation‖ dialog or click the<br />
―Add‖ button to add an operation. A detailed<br />
discussion on configuring device element<br />
operations is found in ―<strong>FSD</strong> Operation<br />
Configuration Guide‖.<br />
Other commands control the placement and size<br />
of the dialog box and a command to close the<br />
dialog. Selections on the menu lead to<br />
presentation of Help Topics, information about<br />
the Event Timer device, and software version<br />
information for the Event Timer.
Fade Timer<br />
Device Types in family<br />
Device Family<br />
Timer<br />
Fade Timer<br />
Device Type Description<br />
Fade Timer<br />
Use the fade timer to set a device to increase or decrease the output of a device gradually. For<br />
instance, a light can be faded to a set level. If wanted, the level is held for a set time, before changing<br />
to another set level.<br />
Device Dialog Box<br />
A Fade Timer allows the<br />
device to be turned on or off<br />
in a gradual fashion. If<br />
desired a holding level can be<br />
programmed before the end<br />
fade level is reached.<br />
Typically one implements a<br />
slow bright / dim fade<br />
behavior for a light dimmer<br />
switch or module, which does not support internal fade time control. The Fade Timer can also execute<br />
a gradual change in any other analog control value, such as slowly increasing the target temperature of<br />
a building heated by a heat pump to avoid triggering its emergency heat function.<br />
When triggered the fade timer device controls the change in power level for the device from a start<br />
percentage level (0—100%), to a hold level, to an end fade level. Each of these levels has a specific<br />
time period assigned.<br />
The Fade Timer display shows the state of the fade timer, the<br />
different settings, buttons to enable the trigger, set the trigger state,<br />
and turn the pause time on or off.<br />
Right-clicking on the title bar displays a menu list, including<br />
commands to configure the Fade Timer.<br />
Configure Display - Use this command to choose the picture used<br />
on the device dialog. In the ―Configure Display‖ dialog that<br />
appears, click ―Browse‖ to select the picture to be shown on the<br />
device dialog. Click the ―Open‖ button to<br />
implement the selection. In the ―Configure<br />
Display‖ dialog apply the settings to either the<br />
specific device, the device type, or the devices in<br />
the group. Click ―OK‖.
Configure Device - Check the<br />
checkboxes to configure the fade<br />
timer. Choose Edge (i.e. event)<br />
Triggered Input when a change in the<br />
state of input occurs. In the various<br />
edit boxes set values (0 - 100) for the<br />
fade and hold levels and time values<br />
in minutes or seconds for the fades<br />
and accumulated time limit. Use the<br />
following sections to configure the<br />
reporting for either the Input or<br />
Output Settings. If reporting when<br />
changes occur is desired, choose<br />
―Report Changes‖. Check the box<br />
for ―Report Periodically‖ and select<br />
the interval for periodic reporting<br />
from the droplist. These settings can<br />
be applied to either the specific<br />
device, the device type, or the<br />
devices in the group. Click ―OK‖ to<br />
finalize selections.<br />
Configure Operations - Select this command to display a dialog to configure the device elements for<br />
the operation desired for the device. Double click on the device name to display the ―Device<br />
Element Operation‖ dialog or click the ―Add‖ button to add an operation. A detailed discussion<br />
on configuring device element operations is found in ―<strong>FSD</strong> Operation Configuration Guide‖.<br />
Other commands control the placement and size of the dialog box and a command to close the<br />
dialog. Selections on the menu lead to presentation of Help Topics, information about the Fade<br />
Timer device, and software version information for the Fade Timer.
Holiday Schedule<br />
Device Types in family<br />
Device Family<br />
Timer<br />
Holiday<br />
Schedule<br />
Device Type Description<br />
Holiday Schedule Timer<br />
Use the Holiday Schedule tool to set timer events that differ from the daily timer events scheduled.<br />
Holiday and three other special schedules can be configured. Dialog displays the holiday status for the<br />
current day.<br />
Device Dialog Box<br />
The Holiday Schedule timer<br />
device allows the user to<br />
control devices based on date<br />
designations. Using the<br />
Holiday Schedule device<br />
dialog box the user can<br />
schedule special dates. One<br />
can configure multiple<br />
Holiday Schedule devices<br />
onto the system, for example<br />
a separate Holiday Schedule<br />
for Holidays and a schedules<br />
for each category of Special<br />
Days.<br />
To assign a date to be a holiday or special event,<br />
click the ―Insert‖ button on a Holiday Schedule<br />
device dialog. An Edit Holiday dialog box appears.<br />
Set the start and stop date for the time period, ensure<br />
that the Enable Date checkbox is selected, enter a<br />
name for the event, and select the check boxes to<br />
designate this event as annual and as Holiday,<br />
Special Day 1, Special Day 2, and/or Special Day 3.<br />
Other configurable conditions are cancellation of all<br />
scheduled events for the specified time period, or disabling all alarm clocks on those days. Click<br />
―OK‖ and the entered event is displayed in the list box. Double clicking on a listed event allows<br />
editing of event. To delete the event, select the event and click the ―Delete‖ button.<br />
To assign the current date as a special event click the ―Today is Special‖<br />
button. Note: if current date is already assigned and enabled as a special<br />
date, the button states ―Today is NOT Special‖. Clicking this button<br />
displays the event assigned with the ―Today is Special‖ button.<br />
Similarly, to assign tomorrow‘s date as a special event, click the<br />
―Tomorrow is Special‖ button<br />
Right-clicking on the title bar displays a menu list, including commands<br />
to configure the Holiday Schedule.
Configure Display - Use this command to choose the<br />
picture used on the device dialog. In the<br />
―Configure Display‖ dialog that appears, click<br />
―Browse‖ to select the picture to be shown on the<br />
device dialog. Click the ―Open‖ button to<br />
implement the selection. In the ―Configure<br />
Display‖ dialog apply the settings to either the<br />
specific device, the device type, or the devices in<br />
the group. Click ―OK‖.<br />
Configure Device - Use the<br />
following sections to configure<br />
reporting of the output settings<br />
by reporting changes and/or<br />
reporting periodically. Choose<br />
the Output Interval in seconds<br />
from the droplist.<br />
Configure Operations -<br />
Select this command to<br />
display a dialog to<br />
configure the device<br />
elements for the<br />
operation desired for<br />
the device. Double<br />
click on the device<br />
name to display the<br />
―Device Element<br />
Operation‖ dialog or<br />
click the ―Add‖ button<br />
to add an operation. A<br />
detailed discussion on<br />
configuring device<br />
element operations is<br />
found in ―<strong>FSD</strong><br />
Operation Configuration Guide‖.<br />
Other commands control the placement and size of the dialog box and a command to close the dialog.<br />
Selections on the menu lead to presentation of Help Topics, information about the Holiday Schedule<br />
Timer device, and software version information for the Holiday Schedule Timer.
Operation<br />
Device Types in family<br />
Device Family<br />
Timer<br />
Operating Mode<br />
Device Type Description<br />
Operating Mode<br />
Use this device to activate or deactivate operating modes configured in the <strong>FSD</strong> <strong>Controller</strong>.<br />
Device Dialog Box<br />
The Operating Mode dialog listbox displays the<br />
operating mode that are enabled on the system<br />
(defined in <strong>FSD</strong> Namer). Shown are the different<br />
group numbers and the operating modes<br />
associated with the group. Double-clicking on<br />
one of the lines activates or deactivates the<br />
operating mode.<br />
Right-clicking on the title bar displays a menu list, including commands to<br />
configure the Operating Mode device.<br />
<br />
<br />
Configure Display - Use this command to choose the picture used<br />
on the device dialog. In the ―Configure Display‖ dialog that<br />
appears, click ―Browse‖ to select the picture to be shown on the<br />
device dialog. Click the ―Open‖ button to implement the<br />
selection. In the ―Configure Display‖ dialog apply the settings<br />
to either the specific device, the device type, or the devices in<br />
the group. Click ―OK‖.
Configure Device - This dialog displays<br />
a list of modes (A - H). For each of<br />
these modes select a group and<br />
opearating mode from the droplist.<br />
The following section configures<br />
reporting for Output Settings. If<br />
reporting when changes occur is<br />
desired, choose ―Report Changes‖.<br />
Check the box for ―Report<br />
Periodically‖ and select the interval<br />
for periodic reporting from the<br />
droplist. apply the settings to either<br />
the specific device, the device type, or<br />
the devices in the group. Click ―OK‖<br />
to finalize selections.<br />
Configure Operations - Select this<br />
command to display a dialog to<br />
configure the device elements for the<br />
operation desired for the device.<br />
Double click on the device name to<br />
display the ―Device Element<br />
Operation‖ dialog or<br />
click the ―Add‖<br />
button to add an<br />
operation. A<br />
detailed discussion<br />
on configuring<br />
device element<br />
operations is found<br />
in ―<strong>FSD</strong> Operation<br />
Configuration<br />
Guide‖.<br />
Other commands control the placement and size of the dialog box and a command to close the<br />
dialog. Selections on the menu lead to presentation of Help Topics, information about the<br />
Operating Mode device, and software version information for the Operating Mode device.
Button <strong>Controller</strong><br />
Device Types in family<br />
Device Family<br />
Timer<br />
8 Button<br />
Control<br />
16 Button<br />
Control<br />
Device Type Description<br />
8 Button Control<br />
Use this nontime based timer to assign eight buttons to take input from other devices and or the buttons<br />
be programmed to run ―Scenes‖ for lighting, to run macros, or do simple switching to control X10 and<br />
FGI devices on the system.<br />
16 Button Control<br />
Same as the 8 Button Control, but with 16 buttons.<br />
Device Dialog Box<br />
8-Button Control and 16-Button Control device types can transcribe<br />
input from other devices and in return send out programmed X10, UPB,<br />
or other protocol commands to mediate control of target devices. For<br />
example, a Button Control device could be configured to send X10<br />
extended commands to set ―Scenes‖ in response to inputs from a<br />
hardwired switch or a low cost X10 switch console. ―Buttons‖ on<br />
button control devices can also be configured to invoke direct macros in<br />
response to devices setting ―To‖ element values.<br />
Each button can be configured as a momentary, push-ON push-OFF<br />
operation, or as button pairs where one button sets an ON state and the<br />
other sets an OFF state. ON and OFF responses may also be<br />
independently configured.<br />
The two button control device types are identical, except for the maximum<br />
number of buttons controlled.<br />
Right-clicking on the title bar displays a menu list, including commands to<br />
configure the Retriggerable Timer.<br />
Configure Display - Use this command to choose the picture used on the device dialog. In<br />
the ―Configure Display‖ dialog that appears, click ―Browse‖ to select the picture to be<br />
shown on the device dialog. Click the ―Open‖ button to implement the selection. The listbox displays the 8 or 16<br />
buttons and whether the button is enabled, configured as a pair of buttons, or configured as a push on/off button, and<br />
the label name of the button. Double-clicking on the number in the listbox displays the edit button info box. In this<br />
box configure the button as part of an on/off pair or as puh on/off. Assign a label for the button and also a label used<br />
in the off state.
Configure Device - This dialog displays a listbox of<br />
the buttons in the control showing the type of button,<br />
label, type and name associated with its type. Doubleclicking<br />
on a button‘s entry opens the Edit <br />
Button Info dialog. The specific display depends on<br />
the button type. Shown are button info dialogs for X10<br />
and Scene. Choose the appropriate button type from<br />
the ―Button Type‖ droplist. For the X10 button type,<br />
the user sets the X10 <strong>Controller</strong> and the type of X10<br />
variant. Set the house and unit code, the ON and OFF<br />
command from the droplist. If an extended command<br />
is chosen, then contimue to select the extended<br />
command type and extended command function from<br />
the droplist. For Scene or Macro button type, select the<br />
scene or macro to associate with the button. The<br />
following section configures reporting for Output<br />
Settings. If reporting when changes occur is desired,<br />
choose ―Report Changes‖. Check the box for ―Report<br />
Periodically‖ and select the interval for periodic<br />
reporting from the droplist. Click ―OK‖ to finalize selections.<br />
Configure Operations - Select this command to display a dialog<br />
to configure the device elements for the operation desired for the<br />
device. Double click on the device name to display the ―Device<br />
Element Operation‖ dialog or click the<br />
―Add‖ button to add an operation. A<br />
detailed discussion on configuring device<br />
element operations is found in ―<strong>FSD</strong><br />
Operation Configuration Guide‖.<br />
Other commands control the<br />
placement and size of the dialog<br />
box and a command to close the<br />
dialog. Selections on the menu<br />
lead to presentation of Help<br />
Topics, information about the<br />
Button Control device, and<br />
software version information for<br />
the Button Control device.
Delay Timer<br />
Device Types in family<br />
Device Family<br />
Timer<br />
Delay Timer<br />
(Boolean)<br />
Delay Timer<br />
(Byte)<br />
Device Type Description<br />
Delay Timer<br />
Use this device to impose a delay in<br />
output following an input.<br />
Device Dialog Box<br />
There are two types of delay timers, byte and<br />
boolean. Shown in the figure on the right is<br />
the byte type. Input and output states are<br />
displayed as values from 0 to 255. For the Boolean type, values displayed are either<br />
True or False.<br />
Right-clicking on the title bar displays a menu list, including commands to configure<br />
the Delay Timer device.<br />
Configure Display - Use this command to choose the picture used on<br />
the device dialog. In the ―Configure Display‖ dialog that appears, click<br />
―Browse‖ to select the picture to be shown on the device dialog. Click<br />
the ―Open‖ button to implement the selection. In the ―Configure<br />
Display‖ dialog apply the settings to either the specific device, the<br />
device type, or the devices in the group. Click ―OK‖.<br />
Configure Device - This dialog<br />
displays a list of Outputs. Each<br />
output has a droplist to select a step.<br />
For the steps programmed, a delay<br />
time can be set in Milliseconds or<br />
Seconds. The following section<br />
configures reporting for Input and<br />
Output Settings. If reporting when<br />
changes occur is desired, choose<br />
―Report Changes‖. Check the box<br />
for ―Report Periodically‖ and select<br />
the interval for periodic reporting<br />
from the droplist. apply the settings<br />
to either the specific device, the<br />
device type, or the devices in the<br />
group. Click ―OK‖ to finalize<br />
selections.
Configure Operations - Select this command to display a dialog to configure the device elements for<br />
the operation desired for the device. Double click on the device name to display the ―Device<br />
Element Operation‖ dialog or click the ―Add‖ button to add an operation. A detailed discussion<br />
on configuring device element operations is found in ―<strong>FSD</strong> Operation Configuration Guide‖.<br />
Other commands control the placement and size of the dialog box and a command to close the<br />
dialog. Selections on the menu lead to presentation of Help Topics, information about the Delay<br />
Timer device, and software version information for the Delay Timer device.
Retriggerable Timer<br />
Device Types in family<br />
Device Family<br />
Timer<br />
Retriggerable<br />
Timer<br />
Device Type Description<br />
Retriggerable Timer<br />
Use the retriggerable timer to set a device to repeatedly trigger an event. The user can specify a period<br />
of delay after the trigger, the time the device is active, and the time the device is inactive.<br />
Device Dialog Box<br />
A Retriggerable Timer allows a<br />
device to be repeatedly triggered.<br />
If desired a delay period after<br />
trigger can be programmed. The<br />
length of time the device is active<br />
is specified, along with the period<br />
of inactivity between active<br />
periods.<br />
When the Trigger Enabled is<br />
toggled to TRUE, a trigger input starts the timer for the specified interval.<br />
The remaining time in the period (for delay, on, or refractory period) is<br />
displayed. If the Pause Time is toggled to TRUE, then the timed interval<br />
control of the device is disabled<br />
Right-clicking on the title bar displays a menu list, including commands to<br />
configure the Fade Timer.<br />
Configure Display - Use this command to choose the picture<br />
used on the device dialog. In the ―Configure Display‖ dialog<br />
that appears, click ―Browse‖ to select the picture to be shown on<br />
the device dialog. Click the ―Open‖ button to implement the<br />
selection. In the ―Configure Display‖ dialog apply the settings<br />
to either the specific device, the device type, or the devices in<br />
the group. Click ―OK‖.
Configure Device - Check the checkboxes to<br />
configure the retriggerable timer. Choose<br />
Edge (i.e. event) Triggered Input to trigger<br />
an event when a change in the state of input<br />
occurs. Choose Blink While Triggered, for<br />
the output to pulsate on/off (not an option<br />
when Retriggerable While Active is<br />
selected). Selecting Retriggerable While<br />
Active allows the user to repeatedly<br />
retrigger the event during the active period.<br />
The retrigger restarts the active interval<br />
period. However, if Accumulate Time is<br />
selected, this allows each retrigger to add<br />
the specified time to the end of the current<br />
period. To impose a limit to the amount of<br />
active time allowed, enter a limit, in<br />
seconds or minutes. Choose Force Inactive<br />
on Trigger End to end the active period<br />
when the trigger ends, but the interval<br />
hasn‘t ended.<br />
In the various edit boxes set values for the<br />
amount of time for delay after trigger,<br />
output active time, and refractory period in<br />
minutes or seconds. There are also<br />
checkboxes available to customize how<br />
input signals are evaluated.<br />
Use the following sections to configure the<br />
reporting for either the Input or Output<br />
Settings. If reporting when changes occur is desired, choose ―Report Changes‖. Check the box<br />
for ―Report Periodically‖ and select the interval for periodic reporting from the droplist. These<br />
settings can be applied to either the specific device, the device type, or the devices in the group.<br />
Click ―OK‖ to finalize selections.<br />
Configure Operations - Select this command to display a dialog to configure the device elements for<br />
the operation desired for the device. Double click on the device name to display the ―Device<br />
Element Operation‖ dialog or click the ―Add‖ button to add an operation. A detailed discussion<br />
on configuring device element operations is found in ―<strong>FSD</strong> Operation Configuration Guide‖.<br />
Other commands control the placement and size of the dialog box and a command to close the<br />
dialog. Selections on the menu lead to presentation of Help Topics, information about the Fade<br />
Timer device, and software version information for the Fade Timer.
X10 <strong>Controller</strong><br />
Device Types in family<br />
Device Family<br />
RS485/232<br />
Timer<br />
X10 Interface (CM11A)<br />
X10 Interface (TW523)<br />
Device Type Description<br />
X10 Interface (TW523)<br />
The TW523 is also a two-way communication X10 device interface that allows<br />
connection between the <strong>FSD</strong> <strong>Controller</strong> and the X10 network. The connection<br />
between the two units uses an RJ11 cable.<br />
The X10 Interface model PL513 is similar to TW523, but since it is a one-way<br />
communication device, we recommend the TW523.<br />
X10 Interface (CM11A)<br />
The CM11A is an X10 device interface that allows connection between the <strong>FSD</strong><br />
<strong>Controller</strong> and the X10 network (powerline interface). The connection between the<br />
two units uses an RS232 serial port.<br />
Device Dialog Box<br />
The device dialog shows information about the X10 controller. Right-clicking on<br />
the title bar displays a menu list, including commands to configure the X10<br />
<strong>Controller</strong> functions.<br />
Configure Display - Use this command to choose the picture used<br />
on the device dialog. In the ―Configure Display‖ dialog that<br />
appears, click ―Browse‖ to select the picture to be shown on the<br />
device dialog. Click the ―Open‖ button to implement the<br />
selection. In the ―Configure Display‖ dialog apply the settings<br />
to either the specific device, the device type, or the devices in<br />
the group. Click ―OK‖.
Configure Device - Use this command to set the<br />
type of interface used for input and output signals<br />
(None, PL513 (power line interface), or TW523<br />
(2-way communication power line interface).<br />
The user can also set number of times to send<br />
transmit packets, to set the number of echo<br />
received packets, to apply the settings to either<br />
the specific device, the device type, or the devices<br />
in the group, and to set the Watch Level Control<br />
(determines the amount of information reported<br />
to the user in the debug text file). Click ―OK‖ to<br />
finalize selections.<br />
Configure Operations - this command does not currently apply to this dialog.<br />
Other commands control the placement and size of the dialog box and a command to close the dialog.<br />
Selections on the menu lead to presentation of Help Topics, or version information about the device<br />
and about the X10 <strong>Controller</strong>.
Super Bridge<br />
Device Types in family<br />
Device Family<br />
Timer Super Bridge 8 Super Bridge 16<br />
Device Type Description<br />
Super Bridge<br />
Use this device to implement a bridge between different device families. In this manner one device<br />
type can control another device type (for example, a UPB switch controlling an X10 device).<br />
Device Dialog Box<br />
There are two sizes of Super Bridges: either<br />
8 or 16 buttons. The Super Bridge acts to<br />
bridge commands from one device family to<br />
a different device family. Even though<br />
different devices have their own<br />
communications protocols, with the Super<br />
Bridge configured the <strong>FSD</strong> Bridge <strong>Controller</strong><br />
translates the commands from one device<br />
family to another device family.<br />
The Super Bridge device dialogs display<br />
switches that control and indicate the state of<br />
each switch. Slider controls are shown for<br />
controlling bridged devices with dimmer<br />
capabilities.<br />
Right-clicking on the title bar displays a<br />
menu list, including commands to configure<br />
the Super Bridge.<br />
Configure Display - Use this command to choose the<br />
picture used on the device dialog. In the ―Configure<br />
Display‖ dialog that appears, click ―Browse‖ to<br />
select the picture to be shown on the device dialog.<br />
Click the ―Open‖ button to implement the selection.<br />
In the ―Configure Display‖ dialog apply the settings<br />
to either the specific device, the device type, or the<br />
devices in the group. Click ―OK‖.
Configure Device - The Configure Super<br />
Bridge dialog displays a list box displaying<br />
address groups within Bridge <strong>Controller</strong><br />
Configuration. Double-clicking on an<br />
address group line in the list box will display<br />
the Edit Super Bridge dialog box to edit<br />
bridge behavior for a block of four sequential<br />
input and output addresses (see next section,<br />
Edit Bridge Group). The following section<br />
configures reporting for Input and Output<br />
Settings. If reporting when changes occur is<br />
desired, choose ―Report Changes‖. Check<br />
the box for ―Report Periodically‖ and select<br />
the interval for periodic reporting from the<br />
droplist. Apply the settings to either the<br />
specific device, the device type, or the<br />
devices in the group. Double-click on any of<br />
the lines in the Bridge Group Configuration<br />
list box to configure the bridging (see next<br />
section) Click ―OK‖ to finalize selections.<br />
Edit Bridge Group - In the Input Settings<br />
section. enter the device family and address<br />
information for the devices that send signals<br />
to the <strong>FSD</strong> <strong>Controller</strong>. In this example X10<br />
devices will control UPB devices. For X10<br />
devices using extended command, also enter<br />
the protocol variation to use based on the X10<br />
device models. Also select the radio button to<br />
indicate whether the address is a unit or group<br />
ID. For devices to receive the bridged signals<br />
from the <strong>FSD</strong> <strong>Controller</strong>, enter configuration<br />
data in the Output Settings section. For each<br />
section the first address entered is used as a<br />
base address with the next three devices<br />
assigned the next three addresses in the<br />
sequence. For each section use the drop lists to<br />
choose the device family, X10 variation if<br />
applicable, and device family controller (on<br />
<strong>FSD</strong> <strong>Controller</strong> models supporting more than<br />
one). Depending on the device family, enter<br />
other appropriate information required for the<br />
device family in the displayed drop lists and<br />
radio button selections. In this example, the<br />
X10 device with address I-8 will control the UPB device at address 001::005 (and I-9 controls<br />
001::006 etc.).<br />
For subsequent address groups in the Bridge Group Configuration, double click on the address<br />
group entry in the initial list box. If the same device families are used for input and output to the<br />
controller as the previous line and with consecutive addresses, select the Inherit Settings<br />
checkbox. If the output device group has dimmer capabilities, check the ―Enable Dimmer<br />
Operation‖ checkbox to enable bridging dimmer values through the Super Bridge.<br />
Configure Operations - Select this command to display a dialog to configure the device elements for<br />
the operation desired for the device. Double click on the device name to display the ―Device<br />
Element Operation‖ dialog or click the ―Add‖ button to add an operation. A detailed discussion<br />
on configuring device element operations is found in ―<strong>FSD</strong> Operation Configuration Guide‖.<br />
Other commands control the placement and size of the dialog box and a command to close the<br />
dialog. Selections on the menu lead to presentation of Help Topics, information about the Super<br />
Bridge device, and software version information for the Super Bridge device.
X10 Switch<br />
Device Types in family<br />
Device Family<br />
X10 X10 Switch X10 Appliance<br />
Module<br />
X10 Lamp<br />
Module<br />
X10 Two-Way<br />
Appliance<br />
Module<br />
X10 Two-Way<br />
Lamp Module<br />
X10<br />
X10 Remote<br />
Chime<br />
X10 Siren<br />
LEV DHC<br />
Dimmer<br />
COMPOSE<br />
Dimmer<br />
PCS Dimmer<br />
X10<br />
SmartLinc<br />
Dimmer<br />
Device Type Description<br />
X10 Switch<br />
Any switch that receives X10 commands to turn on or off the equipment to which the switch is<br />
connected.<br />
X10 Appliance Module<br />
Module that plugs into electrical receptacle and receives X10 commands to turn on and off an<br />
appliance that is plugged into this module.<br />
X10 Lamp Module<br />
Module that plugs into electrical receptacle and receives X10 commands to turn on and off an<br />
lamp (non-fluorescent and limited to 300 watts) that is plugged into this module.<br />
X10 Two-Way Appliance Module<br />
Module that plugs into electrical receptacle and receives X10 commands to turn on and off an<br />
appliance that is plugged into this module. This module sends a communication when it performs<br />
its local operation.<br />
X10 Two-Way Lamp Module<br />
Module that plugs into electrical receptacle and receives X10 commands to turn on and off an<br />
lamp (non-fluorescent and limited to 300 watts) that is plugged into this module. This module<br />
sends a communication when it performs its local operation.<br />
X10 Remote Chime<br />
Receives specific input from X10 motion sensor to cause chime to sound.<br />
X10 Siren<br />
Receives specific input from sensors to trigger siren to sound.<br />
The following device types receive X10 input to turn on and off lights, and also commands to set light<br />
intensity. The dimmer value is retained and illuminates to that level when turned on manually.<br />
LEV DHC Dimmer<br />
COMPOSE Dimmer<br />
PCS Dimmer<br />
SmartLinc Dimmer<br />
Device Dialog Box<br />
The device dialog shows controls to operate the<br />
X10 switch. In the example of the lamp<br />
module, there are buttons to turn the lamp on or<br />
off. If equipped with dimmer capability, there<br />
is a sliding bar to brighten or dim the light.<br />
Right-clicking on the title bar displays a menu list, including commands to<br />
configure the X10 Switch.
Configure Display - Use this command to choose the picture<br />
used on the device dialog. In the ―Configure Display‖<br />
dialog that appears, click ―Browse‖ to select the picture to<br />
be shown on the device dialog. Click the ―Open‖ button to<br />
implement the selection. In the ―Configure Display‖ dialog<br />
apply the settings to either the specific device, the device<br />
type, or the devices in the group. Click ―OK‖.<br />
Configure Device - Use this command to configure<br />
the reporting for either the Input or Output Settings. If<br />
reporting when changes occur is desired, choose<br />
―Report Changes‖. Check the box for ―Report<br />
Periodically‖ and select the interval for periodic<br />
reporting from the droplist. These settings can be<br />
applied to either the specific device, the device type, or<br />
the devices in the group. Click ―OK‖ to finalize<br />
selections.<br />
Configure Operations - Select this command to<br />
display a dialog to configure the device elements<br />
for the operation desired for the device. Double<br />
click on the device name to display the ―Device<br />
Element Operation‖ dialog or click the ―Add‖ button to add an operation. A detailed discussion<br />
on device element operation configuration can be found in ―<strong>FSD</strong> Operation Configuration Guide‖.<br />
Other commands control the placement and size of the dialog box<br />
and a command to close the dialog. Selections on the menu lead to<br />
presentation of Help Topics, information about the X10 device (see<br />
figure), and software version information for the X10 Switch.
UPB <strong>Controller</strong><br />
Device Types in family<br />
Device Family<br />
RS485/232<br />
UPB Interface (PIM)<br />
Device Type Description<br />
UPB Interface (PIM)<br />
The PIM is an UPB device interface that allows connection between the<br />
<strong>FSD</strong> <strong>Controller</strong> and the UPB network (powerline interface). The<br />
connection between the two units uses an RS232 serial port.<br />
Device Dialog Box<br />
The device dialog shows information about the UPB controller. Right-clicking<br />
on the title bar displays a menu list, including commands to configure the UPB<br />
<strong>Controller</strong> functions.<br />
Configure Display - Use this<br />
command to choose the<br />
picture used on the device<br />
dialog. In the ―Configure<br />
Display‖ dialog that appears,<br />
click ―Browse‖ to select the<br />
picture to be shown on the<br />
device dialog. Click the<br />
―Open‖ button to implement<br />
the selection. In the ―Configure Display‖ dialog apply the settings to either the specific device, the<br />
device type, or the devices in the group. Click ―OK‖.<br />
Configure Device - The user can set<br />
number of times to send transmit packets, to<br />
set the number of echo received packets, to<br />
apply the settings to either the specific<br />
device, the device type, or the devices in the<br />
group, and to set the Watch Level Control<br />
(determines the amount of information<br />
reported to the user in the debug text file).<br />
Click ―OK‖ to finalize selections.<br />
Configure Operations - this command does not<br />
currently apply to this dialog.<br />
Other commands control the placement and<br />
size of the dialog box and a command to<br />
close the dialog. Selections on the menu lead to presentation of Help Topics, or version information about<br />
the device and about the UPB <strong>Controller</strong>.
UPB Switch<br />
Device Types in family<br />
Device Family<br />
UPB UPB Switch UPB Appliance<br />
Module<br />
UPB Dimmer<br />
Device Type Description<br />
UPB Switch<br />
Any switch that receives UPB commands to turn on or off the equipment to which the switch is<br />
connected.<br />
UPB Appliance Module<br />
Module that plugs into electrical receptacle and receives UPB commands to turn on and off an<br />
appliance that is plugged into this module.<br />
UPB Dimmer<br />
Module that plugs into electrical receptacle and receives UPB commands to turn on and off and<br />
dim a lamp.<br />
Device Dialog Box<br />
The device dialog shows controls to<br />
operate the UPB switch. In the example<br />
of the dimmer module, there are buttons to<br />
turn the lamp on or off. If equipped with<br />
dimmer capability, there is a sliding bar to<br />
brighten or dim the light.<br />
Right-clicking on the title bar displays a menu list, including commands to<br />
configure the UPB Switch.<br />
Configure Display - Use this command to choose the picture used on<br />
the device dialog. In the ―Configure Display‖ dialog that appears,<br />
click ―Browse‖ to select the picture to be shown on the device<br />
dialog. Click the ―Open‖ button to implement the selection. In the<br />
―Configure Display‖ dialog apply the settings to either the specific<br />
device, the device type, or the devices in the group. Click ―OK‖.
Configure Device - Use this command to configure the reporting for either the Input or Output<br />
Settings. If reporting when changes occur is desired, choose ―Report Changes‖. Check the box<br />
for ―Report Periodically‖ and select the interval for periodic reporting from the droplist. These<br />
settings can be applied to either the specific device, the device type, or the devices in the group.<br />
Click ―OK‖ to finalize selections.<br />
<br />
Configure Operations - Select this command to display a dialog to configure the device elements for<br />
the operation desired for the device. Double click on the device name to display the ―Device<br />
Element Operation‖ dialog or click the ―Add‖ button to add an operation. A detailed discussion<br />
on device element operation configuration can be found in ―<strong>FSD</strong> Operation Configuration Guide‖.<br />
Other commands control the placement and size of the dialog box and a command to close the dialog.<br />
Selections on the menu lead to presentation of Help Topics, information about the UPB device (see<br />
figure), and software version information for the UPB Switch type device.
UPB Input/Output<br />
Device Types in family<br />
Device Family<br />
UPB<br />
UPB Input Output Module<br />
Device Type Description<br />
UPB Input/Output Module<br />
The Input/Output Module is an UPB device that identifies and transmits the status of low voltage<br />
input. The device output can control the operation of low voltage actuators.<br />
Device Dialog Box<br />
The device dialog shows information about<br />
the UPB Input/Output. Dis played as<br />
activateable buttons are the states for the<br />
Outputs that control devices and reported<br />
are the UPB Inputs.<br />
Right-clicking on the title bar displays a menu list, including commands<br />
to configure the UPB Input/Output functions.<br />
Configure Display - Use this command to choose the<br />
picture used on the device dialog. In the ―Configure<br />
Display‖ dialog that appears, click ―Browse‖ to select the<br />
picture to be shown on the device dialog. Click the<br />
―Open‖ button to implement the selection. In the<br />
―Configure Display‖ dialog apply the settings to either the<br />
specific device, the device type, or the devices in the<br />
group. Click ―OK‖.<br />
Configure Device - Use this<br />
command to configure the<br />
reporting for either the Input or<br />
Output for reporting changes or<br />
periodic reporting. Enter the<br />
measurement interval and<br />
choose the reporting interval<br />
from the droplist. These<br />
settings can be applied to either<br />
the specific device, the device<br />
type, or the devices in the<br />
group. Click ―OK‖ to finalize<br />
selections.
Configure Operations - Select this command to display a dialog to configure the device elements for<br />
the operation desired for the device. Double click on the device name to display the ―Device<br />
Element Operation‖ dialog or click the ―Add‖ button to add an operation. A detailed discussion<br />
on device element operation configuration can be found in ―<strong>FSD</strong> Operation Configuration<br />
Guide‖..<br />
Other commands control the placement and size of the dialog box and a command to close the dialog.<br />
Selections on the menu lead to presentation of Help Topics, or version information about the device<br />
and about the UPB Input/Output module.
<strong>FSD</strong> Lister<br />
<strong>FSD</strong> Lister Overview<br />
<strong>FSD</strong> Lister displays a list of devices in the entire system. The lists can be displayed in different formats. <strong>FSD</strong><br />
devices can be displayed in a horizontal or vertical tree listing. <strong>FSD</strong> devices can also be listed by type or<br />
alphabetically. <strong>FSD</strong> Lister can display the following device groupings: <strong>FSD</strong>, X10, Z-Wave, UPB, RS435/232.<br />
Macro, Timer, and Variable. In addition, a summary list can be generated.<br />
The generated lists can also be printed.<br />
<strong>FSD</strong> Lister Menu<br />
The File menu offers the following commands:<br />
Open<br />
Print<br />
Print Preview<br />
Print Setup<br />
Exit<br />
Opens an existing document.<br />
Prints a document.<br />
Displays the document on the screen as it would appear printed.<br />
Selects a printer and printer connection.<br />
Exits <strong>FSD</strong> Lister.<br />
The View menu offers the following commands:<br />
FGI Device List<br />
Displays the FGI device list in the view<br />
window.<br />
FGI Horizontal Tree<br />
Displays the FGI device tree horizontally<br />
in the view window.<br />
FGI Vertical Tree<br />
Displays the FGI device tree vertically in<br />
the view window.<br />
X10 Device List<br />
Displays list of X10 devices on system<br />
Z-Wave Device List<br />
Displays list of Z-Wave devices on<br />
system<br />
UPB Device List<br />
Displays list of UPB devices on system<br />
RS435/232 Device List Displays list of RS435/232 devices on<br />
system<br />
Macro Device List<br />
Displays list of Macro devices on system<br />
Timer List<br />
Displays list of Timer devices on system<br />
Variable List<br />
Displays list of Variable devices on<br />
system<br />
Summary<br />
Displays the device summary in the view<br />
window.<br />
Supported Types<br />
Displays popup menu to choose between<br />
display sort options.<br />
List Options<br />
Display the Options dialog box to set options for Lister:<br />
Checkboxes for:<br />
List View<br />
List by Type/Description<br />
Device Tree Display<br />
Header Labels Displayed<br />
Toolbar Shows or hides the toolbar.<br />
Folder icon Open an existing data set. <strong>FSD</strong> Lister displays the Open dialog box, in which you can locate and<br />
open the desired file.<br />
Printer icon<br />
―F‖ button<br />
Print the active document.<br />
Display the device list in the view window.
―H‖ button<br />
―V‖ button<br />
―S‖ button<br />
―T‖ button<br />
―D‖ button<br />
Display the device tree horizontally in the view window.<br />
Display the device tree vertically in the view window.<br />
Display the device summary in the view window.<br />
Display the supported device types sorted by Device Type.<br />
Display the supported device types sorted by Device Type Description.<br />
―O‖ button Display the Options dialog box to set options for Lister:<br />
Checkboxes for:<br />
List View<br />
List by Type/Description<br />
Device Tree Display<br />
Header Labels Displayed<br />
Status Bar<br />
Shows or hides the status bar.<br />
The Types menu allows the user to select a device families or virtual<br />
devices and have them listed either by Type or by Description.<br />
The Help menu offers the following commands, which provides assistance with this application:<br />
Help Topics<br />
About <strong>FSD</strong> Lister<br />
Offers you an index to topics on which you can obtain help.<br />
Displays the version number of this application.
<strong>FSD</strong> Creator<br />
<strong>FSD</strong> Creator Overview<br />
Use this tool to create Direct Macros and Macro Device Types. Direct Macros are single-instance macros that link<br />
directly to device elements. It is a relatively simple approach to generate customized control sequences. Macro<br />
Device Types are custom designed virtual device types.<br />
For a detailed reference on developing macros with <strong>FSD</strong> Creator, choose View Configuration Guides from the Help<br />
menu in <strong>FSD</strong> Automator. Choose <strong>FSD</strong> Macro Developers Guide from the displayed list.<br />
<strong>FSD</strong> Creator<br />
To create a new macro, choose <strong>FSD</strong> Creator from<br />
the <strong>FSD</strong> Automator‘s View menu. Use the radio<br />
buttons to select whether to work with Direct<br />
Macros or Macro Device Types.<br />
To add a macro, click the Insert button and the<br />
Edit Macro is displayed (see below). Select a<br />
macro and click the Delete button to delete the<br />
macro. To import or export the macro, click its<br />
respective button. After importing a macro,<br />
connect any device elements specified in the<br />
macro. See <strong>FSD</strong> Macro Developers Guide for<br />
further details (Choose View Configuration<br />
Guides from the Help menu in <strong>FSD</strong><br />
Automator. Choose <strong>FSD</strong> Macro Developers<br />
Guide from the displayed list.) When macros<br />
are completed, click the Load button to Load<br />
Configuration.<br />
Edit Macro<br />
After inserting a macro in the Creator (see<br />
above), in the Edit Macro dialog, enter a name<br />
for the macro. The macro can be disabled until<br />
finished and tested. If the Autostart checkbox<br />
is checked, the Direct Macro or all <strong>FSD</strong> Namer<br />
defined macro devices, based on the Macro<br />
Device Type, start automatically on controller<br />
restart. Otherwise, the macro runs when<br />
explicitly invoked or triggered by a Start<br />
Trigger event.<br />
Program the macro by selecting Insert from the<br />
macro editing dialog and choosing a macro<br />
component to use (see below). If no line is selected in the listbox, new items are inserted at the end of the list. If a<br />
line is selected, new items are inserted above the selected item. Deselect items by clicking in the area at the end of<br />
the displayed list. Reorder item sequence by clicking a line and moving it up or down in the list with the indicated<br />
buttons below. Double click a line to edit it.<br />
Edit Macro Item
In the Edit dialog box, choose the macro function from the droplist (see <strong>FSD</strong> Macro Developer‘s Guide for<br />
definitions of functions). Depending on the function selected, a function-specific edit macro item dialog appears.<br />
The Edit X10 Item is shown as an example. Select the checkbox to enable the macro function. Enter a comment to<br />
state that the function does in the macro and select the appropriate properties for the macro.
<strong>FSD</strong> Namer<br />
Overview <strong>FSD</strong> Namer<br />
Allows the user to assign a name, location, and other identification to a selected device type. The device can now<br />
be configured in the system. <strong>FSD</strong> Namer can be accessed from the View menu in <strong>FSD</strong> Automator and selecting<br />
the specific device category or <strong>FSD</strong> Namer can be run as a stand-alone application.<br />
<strong>FSD</strong> Namer Menu Layout<br />
When accessing <strong>FSD</strong> Namer by using the View menu in <strong>FSD</strong> Automator,<br />
choose the device category wanted (list may vary depending on controller<br />
type). A list of the devices of that category on the system is displayed.<br />
If <strong>FSD</strong> Namer is used as a stand-alone program:<br />
The File menu displays the following commands:<br />
Open<br />
Save<br />
Print<br />
Print Preview<br />
Print Setup<br />
Exit<br />
Opens an existing document.<br />
Saves an opened document using the same file name.<br />
Prints a document.<br />
Displays the document on the screen as it would appear printed.<br />
Selects a printer and printer connection.<br />
Exits <strong>FSD</strong> Namer.<br />
The View menu displays the following selections to choose the device<br />
category to edit:<br />
The Help menu provides:<br />
Help Topics—an index to Help topics for <strong>FSD</strong> Namer.<br />
<strong>FSD</strong> Namer Menu Layout<br />
The File menu displays the following commands (only for <strong>FSD</strong> Namer started as stand-alone program):<br />
Open<br />
Save<br />
Print<br />
Opens an existing document.<br />
Saves an opened document using the same file name.<br />
Prints a document.
Print Preview Displays the document on the screen as it would appear printed.<br />
Print Setup Selects a printer and printer connection.<br />
Exit Exits <strong>FSD</strong> Namer.<br />
The View menu displays the following device categories to select:<br />
FGI Device Shows list for adding FGI devices or modifying names and locations.<br />
The FGI Device List command opens a device listing window, which allows assigning a name and location to a<br />
device.<br />
To reflect changes in the hardware system configuration, in particular the addition and removal of devices,<br />
additional functions are provided. Single-clicking on a device information row selects the device name to<br />
manipulate its position on list.<br />
Below the device listings, four buttons are now active – Insert, Delete, Move Up, and Move Down.<br />
FGI devices are ―plug-and-play‖, thus when plugging an FGI device to the controller, the system recognizes<br />
the device type. Selecting the device in the list and clicking the Insert button displays a dialog to enter a<br />
name and location for the device. This corresponds to a hardware device insertion with other device types.<br />
Note: always run the <strong>FSD</strong> Automator program with the new system configuration and save the device<br />
configuration from within <strong>FSD</strong> Automator before using <strong>FSD</strong> Namer to modify name and location<br />
information. <strong>FSD</strong> Automator inserts the device information row in all fields except the name and location<br />
fields. Thus, the Insert button performs the corresponding insertion on the name and location entries only,<br />
without affecting the remaining device information entries.<br />
Similarly, the Delete button removes name and location information from the selected device information<br />
row, adjusting the remaining entries appropriately, to correspond to a device deletion from the hardware<br />
system. Again note that <strong>FSD</strong> Automator should be run first and the new configuration saved, prior to<br />
invoking <strong>FSD</strong> Namer, and that Delete only affects the name and location entries in the device information<br />
listing..<br />
Move Up and Move Down provide more flexibility for rearranging the device name and location<br />
assignments. The selected entry moves up or down one position, swapping places with the name and location<br />
information from the targeted row.<br />
Modified name and location information are automatically saved when the device list box is closed.<br />
Double-clicking on a device information row brings up a dialog that allows entry and editing of the device<br />
name and location information, and also display of Device Type, Device Subtype, Device ID, Device Path,<br />
and a table of element information. There is an ―Enable All‖ button to enable all elements and a ―Disable<br />
All‖ button to disable all elements. Click ―OK‖ to retain changes, otherwise click ―Cancel‖.
Double-clicking on an element in the table displays an edit element name dialog box. In this box the user can<br />
edit the element name, enable or disable the element. In this edit box click ―OK‖ to retain changes, otherwise<br />
click ―Cancel‖.
X10 Devices<br />
Shows X10 device list for modifying<br />
names and locations. The X10<br />
Device List command opens a<br />
device listing window, where the<br />
user can insert a device type of the<br />
X10 family. Selecting the Name or<br />
Address radio button displays the list<br />
alphabetically by Name or by<br />
Address.<br />
The Insert button displays an Edit<br />
X10 Device dialog to choose an<br />
X10 Device Type, to enter a<br />
device name, to associate the<br />
device with a controller interface,<br />
to assign a house and unit code,<br />
and to choose unit code or group<br />
id.<br />
Similarly, the Delete button removes<br />
the device instance from the system.<br />
Double-clicking on the device<br />
information row displays the Edit<br />
X10 Device dialog that allows entry<br />
and editing of the device name and<br />
location information and selection of<br />
a device family controller interface.<br />
Use the House Code and Unit Code<br />
droplist boxes to reassign an address<br />
for the device.<br />
The number of elements for the<br />
device is shown and the elements are<br />
displayed in the table. Listed are the<br />
element number, whether the<br />
element is enabled, the element‘s<br />
address, element name, and the<br />
device type element name. There is<br />
an ―Enable All‖ button to enable all<br />
elements and a ―Disable All‖ button<br />
to disable all elements. Click ―OK‖<br />
to retain changes, otherwise click<br />
―Cancel‖.<br />
Double-clicking on an element in the table displays an edit element name<br />
dialog box. In this box the user can edit the element name, enable or<br />
disable the element, and, if applicable, change the attributes of the element<br />
and assign an address if the device has more than one address. In this edit<br />
box click ―OK‖ to retain changes, otherwise click ―Cancel‖.<br />
NOTE: The Device List, Edit Device List, and Edit Element Name dialog boxes<br />
as described for X10 devices are similar for many of the remaining devices.<br />
Z-Wave Devices<br />
Shows Z-Wave device list where the user can insert a device type of the Z-<br />
Wave family.<br />
The Z-Wave Device List command opens a device listing window to insert or modify a Z-Wave device on the
system. Selecting the Name or Address radio button displays the list alphabetically by Name or by Address.<br />
The Insert button displays an Edit Z-Wave Device dialog to choose an Z-Wave Device Type, to enter a<br />
device name, to associate the device with a controller interface, and to assign a house id and unit id.<br />
Similarly, the Delete button removes the device instance from the system.<br />
Double-clicking on the device information row displays the Edit Z-Wave Device dialog that allows entry and<br />
editing of the device name and location information and selection of a device family controller interface.<br />
Use the Unit ID droplist box to assign an address for the device.<br />
The number of elements for the device is shown and the elements are displayed in the table. Listed is the<br />
element number, whether the element is enabled, the element‘s address, element name, and the device type<br />
element name. There is an ―Enable All‖ button to enable all elements and a ―Disable All‖ button to disable<br />
all elements. Click ―OK‖ to retain changes, otherwise click ―Cancel‖.<br />
Double-clicking on an element in the table displays an edit element name dialog box. In this box the user can<br />
edit the element name, enable or disable the element, and, if applicable, change the attributes of the element<br />
and assign an address if the device has more than one address. In this edit box click ―OK‖ to retain changes,<br />
otherwise click ―Cancel‖.<br />
UPB Devices<br />
Shows UPB device list where the user can insert a device type of the UPB family.<br />
The UPB Device List command opens a device listing window to insert or modify a UPB device on the<br />
system. . Selecting the Name or Address radio button displays the list alphabetically by Name or displayed<br />
by Address.<br />
The Insert button displays an Edit Z-Wave Device dialog to choose an Z-Wave Device Type, to enter a<br />
device name, to associate the device with a controller interface, and to assign a network id and unit id.<br />
Similarly, the Delete button removes the device instance from the system.<br />
Double-clicking on the device information row displays the Edit UPB Device dialog that allows entry and<br />
editing of the device name and location information and selection of a device family controller interface.<br />
Use the Network ID and Unit ID droplist boxes to assign an address for the device.<br />
The number of elements for the device is shown and the elements are displayed in the table. Listed is the<br />
element number, whether the element is enabled, the element‘s address, element name, and the device type<br />
element name. There is an ―Enable All‖ button to enable all elements and a ―Disable All‖ button to disable<br />
all elements. Click ―OK‖ to retain changes, otherwise click ―Cancel‖.<br />
Double-clicking on an element in the table displays an edit element name dialog box. In this box the user can<br />
edit the element name, enable or disable the element, and, if applicable, change the attributes of the element<br />
and assign an address if the device has more than one address. In this edit box click ―OK‖ to retain changes,<br />
otherwise click ―Cancel‖.<br />
RS-485/232 Devices<br />
Shows RS-485/232 device list where the user can insert a device type of the RS-485/232 family.<br />
The RS-485/232 Device List command opens a device listing window to insert or modify a RS-485/232<br />
device on the system.<br />
The Insert button displays an Edit RS-485/232 Device dialog to choose an RS-485/232 Device Type, to enter<br />
a device name and a location.<br />
Similarly, the Delete button removes the device instance from the system.<br />
Double-clicking on the device information row displays the Edit RS-485/232 Device dialog that allows entry<br />
and editing of the device name and location information and , if applicable, any address information.<br />
The number of elements for the device is shown and the elements are displayed in the table. Listed is the
element number, whether the element is enabled, element name, and the device type element name. There is<br />
an ―Enable All‖ button to enable all elements and a ―Disable All‖ button to disable all elements. Click ―OK‖<br />
to retain changes, otherwise click ―Cancel‖.<br />
Double-clicking on an element in the table displays an edit element name dialog box. In this box the user can<br />
edit the element name, enable or disable the element, and, if applicable, change the attributes of the element.<br />
In this edit box click ―OK‖ to retain changes, otherwise click ―Cancel‖.<br />
Macro Devices<br />
Shows Macro device list where the user can insert a macro device.<br />
The Macro Device List command opens a device listing window to insert or modify a Macro device on the<br />
system. (Macro devices are created using <strong>FSD</strong> Creator, see <strong>FSD</strong> Creator manual.)<br />
The Insert button displays an Edit Macro Device dialog to choose an Macro Device Type, to enter a device<br />
name and a location.<br />
Similarly, the Delete button removes the device instance from the system.<br />
Double-clicking on the device information row displays the Edit Macro Device dialog that allows entry and<br />
editing of the device name.<br />
The number of elements for the device is shown and the elements are displayed in the table. Listed is the<br />
element number, whether the element is enabled, element name, and the device type element name. There is<br />
an ―Enable All‖ button to enable all elements and a ―Disable All‖ button to disable all elements. Click ―OK‖<br />
to retain changes, otherwise click ―Cancel‖.<br />
Double-clicking on an element in the table displays an edit element name dialog box. In this box the user can<br />
edit the element name, enable or disable the element, and, if applicable, change the attributes of the element.<br />
In this edit box click ―OK‖ to retain changes, otherwise click ―Cancel‖.<br />
Timers, etc. Devices<br />
Shows Timer etc. device list where the user can insert a device type of the Timer etc. family.<br />
The Timer etc. Device List command opens a device listing window to insert or modify a Timer etc. device<br />
on the system.<br />
The Insert button displays an Edit Timer etc. Device dialog to choose an Timer etc. Device Type, to enter a<br />
device name and a location.<br />
Similarly, the Delete button removes the device instance from the system.<br />
Double-clicking on the device information row displays the Edit Timer etc. Device dialog that allows entry<br />
and editing of the device name and location information<br />
The number of elements for the device is shown and the elements are displayed in the table. Listed is the<br />
element number, whether the element is enabled, element name, and the device type element name. There is<br />
an ―Enable All‖ button to enable all elements and a ―Disable All‖ button to disable all elements. Click ―OK‖<br />
to retain changes, otherwise click ―Cancel‖.<br />
Double-clicking on an element in the table displays an edit element name dialog box. In this box the user can<br />
edit the element name, enable or disable the element, and, if applicable, change the attributes of the element.<br />
In this edit box click ―OK‖ to retain changes, otherwise click ―Cancel‖.<br />
Variables<br />
Shows Variables list where the user can insert a variable.<br />
The Variables List command opens a device listing window to insert or modify a variable on the system.<br />
The Insert button displays an Edit Variable dialog to choose a variable, to enter a name for the instance of the<br />
variable. Clicking on the Edit Value button allows assigning a value or setting conditions to the variable.<br />
Similarly, the Delete button removes the variable instance from the system.
Double-clicking on the variable information row displays the Edit Variable dialog that allows entry and<br />
editing of the device name and location information<br />
Operating Mode<br />
Shows Operating Mode list for mode name, enabled and mode number.<br />
The Operating Modes List command opens a dialog with two device listing windows. One window lists<br />
Operating Mode Groups, displaying enabled status, group number, style, and operating mode group name.<br />
The other window lists Operating Modes, displaying the enabled status, group number, and operation.<br />
Double-clicking on an operating mode group displays a dialog that allows the user to enter or edit the<br />
operating mode group name and to enable or disable the operating mode group. The user can also assign the<br />
operating mode group style by selecting either Radio Button, Independent, ALL TRUE, or ALL FALSE.<br />
Click ―OK‖ to retain changes, otherwise click ―Cancel‖.<br />
Double-clicking on an operating mode displays a dialog that allows entry and editing of the operating mode<br />
name and to enable or disable the operating mode. The user can also assign the operating mode to an<br />
operating mode group by clicking on the Operating Mode Group droplist and choosing a group. Click ―OK‖<br />
to retain changes, otherwise click ―Cancel‖.<br />
Click ―OK‖ to retain changes, otherwise click ―Cancel‖. Either action will exit Operating Mode List dialog.<br />
<strong>FSD</strong> Lister Invokes <strong>FSD</strong> Lister to show devices on system.<br />
The <strong>FSD</strong> Lister command invokes the <strong>FSD</strong> Lister utility, which displays FGI devices on the system as a list, a<br />
device wiring tree, or a summary of devices on the system. <strong>FSD</strong> Lister also can be used to view a list of<br />
supported device types that can be used with an FGI system, including X10, Z-Wave, UPB, RS485/232,<br />
Macro, Timer, and Variable. See <strong>FSD</strong> Lister manual.<br />
Toolbar Shows or hides the toolbar.<br />
Folder icon Open an existing data set. <strong>FSD</strong> Namer displays the Open dialog box, in which you can locate and<br />
open the desired file.<br />
Disk Icon Saves the current document.<br />
Printer icon Prints the active document.<br />
―F‖ button Displays the device list in the view window.<br />
―?‖ icon<br />
Displays the About <strong>FSD</strong> Namer dialog box.<br />
―Arrow - ?‖ icon Activates Context-sensitive help. Click on the ―Arrow - ?‖ icon , select the menu, button,<br />
or other object to display the help information connected with the object.<br />
Status Bar Shows or hides the status bar.<br />
The Help menu displays the following commands, which provides assistance with this application:<br />
Help Topics Offers you an index to topics on which you can obtain help.<br />
Use this command to display the opening screen of Help. From the opening screen, you can jump to step-bystep<br />
instructions for using <strong>FSD</strong> Namer and various types of reference information.<br />
After Help opens, click the Contents button to return to the opening screen.<br />
About Displays the version number of this application.<br />
Use this command to display the copyright notice and version number of your copy of <strong>FSD</strong> Namer
<strong>FSD</strong> Designer<br />
<strong>FSD</strong> Designer Overview<br />
<strong>FSD</strong> Designer is a multifunctional tool used to construct floor layouts of the building for placement of<br />
devices and furniture. The user can create furniture, appliance, and device icons for use in the floor layout.<br />
The user can also build icon and menu layouts.<br />
<strong>FSD</strong> Designer Menu<br />
The application opens with the <strong>FSD</strong> Designer screen. Choose between creating a new drawing or opening an<br />
existing one. Choose among the following drawing types: (1) Composite: Building Information, Floor<br />
Layout, Device Layout; and (2) Fundamental: Floor Plan Drawing, Furniture Drawing‘ Appliance Drawing,<br />
and Device Icon.<br />
When creating a new drawing, a screen with a drawing grid appears. A palette of tool buttons that displays<br />
tools appropriate for the drawing type selected.<br />
When opening an existing file, in the Open dialog that is displayed, select the file desired. Click ―OK‖ and<br />
the screen with a drawing grid appears with the existing file displayed.<br />
The File menu offers the following commands:<br />
New<br />
Open<br />
Save<br />
Save As<br />
Print<br />
Print Preview<br />
Print Setup<br />
File Properties<br />
Exit<br />
Creates a new document. Select the type of new file you want to create in the File New<br />
dialog box.<br />
Pop-up menu options open an existing system configuration or top level layout data<br />
set.<br />
Saves the current system data set using the same data set name.<br />
Saves the current system data set to a specified data set name.<br />
Prints a system data set.<br />
Displays the data set on the screen as it would appear printed.<br />
Selects a printer and printer connection.<br />
Opens dialog box that displays information on the file, its designer and file name and<br />
last change information.<br />
Exits <strong>FSD</strong> Designer.<br />
The Edit menu offers the following commands:<br />
Undo<br />
Undoes the last change to the file.<br />
Cut<br />
Cuts the selected item to the clipboard.<br />
Copy<br />
Copies the selected item to the clipboard.<br />
Paste<br />
Pastes the item in the clipboard to the selected location.<br />
Select All Selects all objects in the drawing.<br />
The View menu offers the following commands:<br />
Tools<br />
Floor<br />
Room<br />
Small Icon<br />
Large Icon<br />
Toolbar<br />
For a new drawing, shows the drawing tools palette with tools appropriate<br />
to the type drawing. For existing drawings, an Options palette is shown<br />
with appropriate options listed.<br />
Check to display normal floor view.<br />
Use this command to display a dialog box to assign room number and<br />
names and to assign a space in the floor layout that corresponds to the<br />
room number. Click the ―Add‖ button to display a dialog box that assigns<br />
room number and name. Enter values for number and name. Click ―OK‖.<br />
The newly entered name and room number is displayed in the table. To<br />
designate the room that corresponds to the selected room in the list,<br />
choose the ―Hot Spot Assignment‖ radio button.<br />
Use this command to display the small icon version of devices in the normal view.<br />
Use this command to display the large icon version of devices in the normal view.<br />
Use this command to display and hide the toolbar, which includes buttons for some of
the most common commands in Designer, such as File Open. A checkmark appears<br />
next to the menu item when the Toolbar is displayed. To hide or display the toolbar,<br />
click Toolbar from the View menu.<br />
New icon<br />
Folder icon<br />
Disk icon<br />
Scissors icon<br />
Double sheet icon<br />
Clipboard icon<br />
Printer icon<br />
Question icon<br />
Question/Arrow icon<br />
Creates a new document.<br />
Open an existing document. <strong>FSD</strong> Designer displays the Open dialog box, in<br />
which you can locate and open the desired file.<br />
Saves the active document or template with its current name. Use this command<br />
to save the active system data set to its current name and directory. When saving<br />
a data set for the first time, <strong>FSD</strong> Designer displays the Save As dialog box so you<br />
can name your data set. To change the name and directory of an existing data set<br />
before saving it, choose the Save As command.<br />
Cuts the selected item to the clipboard.<br />
Copies the selected item to the clipboard.<br />
Pastes the item in the clipboard to the selected<br />
Print the active document.<br />
Displays the copyright notice and version number of Designer.<br />
Displays the context-sensitive help.<br />
Status Bar<br />
The status bar is displayed at the bottom of the <strong>FSD</strong> Designer window. To display or hide the status bar,<br />
use the Status Bar command in the View menu.<br />
The left area of the status bar describes actions of menu items as you use the arrow keys to navigate<br />
through menus. This area similarly shows messages that describe the actions of toolbar buttons as you<br />
depress them, before releasing them. If after viewing the description of the toolbar button command you<br />
wish not to execute the command, then release the mouse button while the pointer is off the toolbar<br />
button.<br />
The right areas of the status bar indicate which of the following keys are latched down:<br />
Indicator<br />
CAP<br />
NUM<br />
SCRL<br />
Description<br />
The Caps Lock key is latched down.<br />
The Num Lock key is latched down.<br />
The Scroll Lock key is latched down.<br />
The Tool menu offers the following commands, which are also<br />
displayed on a Tools palette.:<br />
Pointer<br />
Wall<br />
Select the pointer tool to reposition objects in<br />
the drawing by holding down the left mouse<br />
button while selecting, then positions or<br />
resizes the object. Release the mouse button<br />
when edit is completed.<br />
Select the Wall tool to draw lines<br />
representing building walls by holding down<br />
the left mouse button while drawing. Release<br />
the mouse button when the wall is
completed. Walls can be drawn only in the vertical and horizontal orientation.<br />
Window<br />
Door<br />
Line<br />
Rectangle<br />
Select the Window tool to draw lines representing windows by holding down the left<br />
mouse button while drawing. Release the mouse button when the window is<br />
completed.<br />
Select the Door tool to draw lines representing doors by holding down the left mouse<br />
button while drawing. Release the mouse button when the door is completed. Draws<br />
an outlined thin rectangle the width of a wall and filled with a shade of the wall color<br />
to represent a door.<br />
Draws lines by holding down the left mouse button while drawing. Release the<br />
mouse button when the line is completed.<br />
Select the Rectangle tool to draw rectangles by holding down the left mouse button<br />
while drawing. Release the mouse button when the rectangle is completed.<br />
Rounded Rectangle Select the Rounded Rectangle tool to draw rectangles with rounded corners by<br />
holding down the left mouse button while drawing. Release the mouse button when<br />
the rectangle is completed.<br />
Circle<br />
Draw circles by holding down the left mouse button while drawing. Release the<br />
mouse button when the circle is completed.<br />
Ellipse<br />
Draw ellipses by holding down the left mouse button while drawing. Release the<br />
mouse button when the ellipse is completed.<br />
Text<br />
Select the Text tool to enter text in the drawing. Holding down the left mouse button<br />
while outlining the area for the text. Release the mouse button when the area is<br />
completed. Type the text in the outlined box.<br />
Hot Spot<br />
Use this command to select the Hot Spot tool to draw rectangles representing hot<br />
spots by holding down the left mouse button while drawing. Release the mouse<br />
button when the door is completed. To activate this selection, select ―Hot Spot<br />
Assignment‖ in the Room Assignment dialog box. Left-click and hold the mouse<br />
button at one corner of the area selected, and drag mouse to include the area desired.<br />
Ensure to include the walls of the designated area. Release button when area is<br />
selected. The selected area is pastel red and the walls of the area red.<br />
The Options menu offers the following commands, are also present in<br />
Options palette:<br />
These commands are present in building layout.<br />
Add Floor Layout When i n the composite drawing building<br />
layout utility, use this command to add a<br />
floor layout. A dialog box appears to open<br />
the floor layout to be included in the<br />
building.<br />
Add Device Layout When in the composite drawing device<br />
layout utility, use this command to add a<br />
device. A dialog box appears to open the<br />
device to be included in the device layout.<br />
These commands are present in floor layout.<br />
Select Floor Plan When in a composite drawing floor layout<br />
utility, use this command to add a floor plan.<br />
A dialog box appears to open the floor plan<br />
to be inclu ded in the floor layout.<br />
Add Furniture<br />
When in a floor layout, use this command to<br />
add furniture. A dialog box appears to open<br />
the furniture piece to be included in the floor<br />
layout.
Add Appliance<br />
Add Device<br />
Room Assignment<br />
When in a floor layout, use this command to add appliances. A dialog box appears<br />
to open the device to be included in the floor layout.<br />
When in a floor layout, use this command to add devices. A dialog box appears to<br />
open the device to be included in the floor layout.<br />
Use this command to display a dialog box to assign room number and names and to<br />
assign a space in the floor layout that corresponds to the room number. Click the<br />
―Add‖ button to display a dialog box that assigns room number and name. Enter<br />
values for number and name. Click ―OK‖. The newly entered name and room<br />
number is displayed in the table. To designate the room that corresponds to the<br />
selected room in the list, choose the ―Hot Spot Assignment‖ radio button. .<br />
The Help menu offers the following commands, which provide you assistance with this application:<br />
Help Topics<br />
Use this command to display the opening screen of Help. From the opening screen,<br />
you can jump to step-by-step instructions for using Designer and various types of<br />
reference information.<br />
After Help opens, click the Contents button to return to the opening screen.<br />
About <strong>FSD</strong> Designer Displays copyright notice and the version number of this application.<br />
For detailed instructions on using <strong>FSD</strong> Designer to create a floor plan and layout, view the tutorial. From the<br />
Help menu in <strong>FSD</strong> Automator, choose View Tutorials to initiate a slide show tutorial.<br />
<strong>FSD</strong> Operator<br />
<strong>FSD</strong> Operator Overview<br />
The <strong>FSD</strong> Operator configures the various operations of the devices on the system. Dialog boxes are displayed for<br />
the user to assign the device‘s element operation, to set operations, to enable or disable the elements, and to set<br />
operational parameters for the elements. Other dialog boxes are available for the operator to compare operations, to<br />
set logical operations, to set feedback control operations, and to scale operations, when these operations are<br />
appropriate.<br />
<strong>FSD</strong> Operator Menu Layout<br />
The <strong>FSD</strong> Operator configures the various operations of the devices on the system. Dialog boxes are displayed for<br />
the user to assign the device‘s element operation, to set operations, to enable or disable the elements, and to set<br />
operational parameters for the elements. Other dialog boxes are available for the operator to compare operations, to<br />
set logical operations, to set feedback control operations, and to scale operations, when these operations are<br />
appropriate.<br />
<strong>FSD</strong> Operator<br />
Selecting a device family from the operations menu displays a dialog box to select<br />
a device name from a droplist. If one selects a particular device type from the<br />
Device Type droplist, a refined list of devices is displayed.<br />
Clicking ―OK‖ displays an indexed property page dialog box for the device. For<br />
each index page the Element Type information for the device is listed, including<br />
Device Name, Element Name, Plus status, and Operation.
Button Actions:<br />
Load – Loads the updated configuration to the controller.<br />
OK – Saves the configuration and closes dialog.<br />
Add – Displays Operation dialog to add a new operation.<br />
Delete – Deletes the selected operation.<br />
Cancel – Closes the dialog without saving changes.<br />
Double-clicking on a listing in the table will display the<br />
Device Element Operation dialog.
Device Element Operation<br />
Dialog box displays the Device Mode. The user can<br />
select an operation from the droplist by clicking on the<br />
list. Select a radio button to designate whether the<br />
operation is for all operating modes, any mode selected,<br />
multi-modes, or none. Couple the operation to a device<br />
by assigning the device family, device type, device<br />
name, and device element from droplist (middle portion<br />
of dialog box).<br />
In the table listing box for operating modes, selecting<br />
and double-clicking on the operation will toggle<br />
enabling and disabling of the operation.<br />
In Input Options the user can invert the input value by<br />
checking the box. Thus, a TRUE input will be read as<br />
a FALSE value, and conversely. The same can be<br />
selected for Output Options. Additionally, the user can<br />
specify that the output occurs if TRUE or if the output<br />
value is FALSE. Using the radio buttons, choose<br />
whether these Output Options never apply, applies on<br />
input change, applies on output change, or always<br />
applies.<br />
Choose ―OK‖ to accept changes or ―Cancel‖ to close<br />
dialog without saving changes.<br />
Compare Operation<br />
This dialog is identical the Device Element Operation dialog with the addition of an edit box to enter a value to<br />
compare and removal of the Invert Input checkbox. Choose ―OK‖ to accept changes or ―Cancel‖ to close dialog<br />
without saving changes.<br />
Logical Operation<br />
This dialog is identical the Device Element Operation dialog with the addition of a second set of droplists for device<br />
family, device type, device name, and device element. There is an additional checkbox to specify ―Invert Input2‖.<br />
Choose ―OK‖ to accept changes or ―Cancel‖ to close dialog without saving changes.<br />
Feedback Control Operation<br />
When the operation is feedback_control, this operation edit box appears. This dialog is identical the Logical<br />
Operation dialog with the addition of edit boxes to enter a Feedback Scale value and a Feedback Offset value; and<br />
the deletion of the ―Invert Input‖ checkbox. Choose ―OK‖ to accept values or ―Cancel‖ to close dialog without<br />
saving changes.<br />
Scale Operation<br />
When the operation is scale_value, this operation edit box appears. This<br />
dialog is identical the Device Element Operation dialog with the addition<br />
of edit boxes to enter values for Scale, Offset, Upper Bound and Lower<br />
Bound. Choose ―OK‖ to accept values or ―Cancel‖ to close dialog
without saving changes.<br />
Operation dialog<br />
When the ―Add‖ button is clicked, the Operation Dialog appears. This dialog allows the user to click in the droplist<br />
to assign an operation for the Device Mode listed.<br />
Choose ―OK‖ to accept changes or ―Cancel‖ to close dialog without saving changes.<br />
Variable Operation<br />
Displays a dialog to choose a variable type for the operation<br />
Choose ―OK‖ to accept changes and display a tabbed index property display for the device operations; or ―Cancel‖<br />
to close dialog without saving changes.
<strong>FSD</strong> Builder<br />
<strong>FSD</strong> Builder Overview<br />
<strong>FSD</strong> Builder builds the image of the data set for loading into the controller.<br />
<strong>FSD</strong> Builder Menu<br />
<strong>FSD</strong> Builder builds the image of the data set for loading into the controller.<br />
The File menu commands are:<br />
Open – calls the Open dialog to select the image file (.fmp) to build.<br />
Build Image Now – builds the image for use by the controller<br />
Recent file – opens most recent image file<br />
Exit – closes the application.<br />
The View menu commands are:<br />
Toolbar<br />
Folder icon Open an existing document. <strong>FSD</strong> Builder displays the Open dialog box, in which you can locate<br />
and open the desired file.<br />
―B‖ button – clicking this button builds the image for use by the controller.<br />
Status Bar<br />
The status bar is displayed at the bottom of the <strong>FSD</strong> Builder window. To display or hide the status bar, use the<br />
Status Bar command in the View menu.<br />
The left area of the status bar describes actions of menu items as you use the arrow keys to navigate through<br />
menus. This area similarly shows messages that describe the actions of toolbar buttons as you depress them,<br />
before releasing them. If after viewing the description of the toolbar button command you wish not to execute<br />
the command, then release the mouse button while the pointer is off the toolbar button.<br />
The right areas of the status bar indicate which of the following keys are latched down:<br />
Indicator<br />
CAP<br />
NUM<br />
SCRL<br />
Description<br />
The Caps Lock key is latched down.<br />
The Num Lock key is latched down.<br />
The Scroll Lock key is latched down.<br />
The Help menu offers the following commands, which provide assistance with this application:<br />
Help Topics Use this command to display the opening screen of Help. From the opening screen, you can jump<br />
to step-by-step instructions for using Builder and various types of reference information.<br />
After Help opens, click the Contents button to return to the opening screen.<br />
About <strong>FSD</strong> Builder<br />
Displays copyright notice and the version number of this application.
<strong>FSD</strong> Loader<br />
<strong>FSD</strong> Loader Overview<br />
<strong>FSD</strong> Loader loads a <strong>FSD</strong> formatted file to the <strong>FSD</strong> <strong>Controller</strong> or other <strong>FSD</strong> devices attached to the system.<br />
<strong>FSD</strong> Loader Menu Layout<br />
File Menu<br />
Use either the Exit command or the Close command on the application Control menu to end the <strong>FSD</strong> Loader<br />
session. <strong>FSD</strong> Loader prompts you to save documents with unsaved changes.<br />
View Menu<br />
The toolbar is displayed across the top of the application window, below the menu bar. The toolbar provides<br />
quick mouse access to many tools used in <strong>FSD</strong> Loader.<br />
To hide or display the Toolbar, choose Toolbar from the View menu (ALT, V, T).<br />
Click<br />
―L‖ button<br />
To<br />
Loads a <strong>FSD</strong> formatted file to the controller or attached <strong>FSD</strong> device.<br />
―O‖ button Offloads log data from a device, clearing the device data log.<br />
―A‖ button Attaches a J1708 device and switches to <strong>FSD</strong> packet mode.<br />
―D‖ button Detaches a previously attached device and switches to native mode.<br />
The status bar is displayed at the bottom of the <strong>FSD</strong> Loader window. To display or hide the status bar, use the<br />
Status Bar command in the View menu.<br />
The left area of the status bar describes how menu items act, as one uses the arrow keys to navigate through<br />
menus. This area also shows messages that describe the actions of toolbar buttons they are depressed, before<br />
releasing them. If you decide not to execute the command, release the mouse button when not pointing to the<br />
toolbar button.<br />
The right areas of the status bar indicate which of the following keys are latched down:<br />
Indicator<br />
CAP<br />
NUM<br />
SCRL<br />
Description<br />
The Caps Lock key is latched down.<br />
The Num Lock key is latched down.<br />
The Scroll Lock key is latched down.<br />
Load menu<br />
Load <strong>FSD</strong> File -- loads an <strong>FSD</strong> formatted file to the controller or attached <strong>FSD</strong> device.<br />
Offload Device Data -- offloads device data from the controller or attached <strong>FSD</strong><br />
device to the computer.<br />
Attach Device -- sends a J1708 command to attach a J1708 device using the <strong>FSD</strong><br />
packet communication mode.<br />
Detach Device -- detaches a previously attached<br />
device and sends the device a command to revert<br />
to its native communications mode.<br />
Load to Boot – The Load Boot command loads a<br />
binary controller boot file to the controller.<br />
Load to App – The Load Application command<br />
loads a binary controller application file to the<br />
controller.<br />
Options Menu<br />
Set Loader Options
Use this dialog box to select TCP/IP<br />
socket options and debug options.<br />
<strong>Controller</strong> Name ID: displays the unique<br />
ID assigned to the controller.<br />
TCP/IP address -- choose the appropriate radio button that corresponds to your situation:<br />
Local Machine only<br />
Use Address From Directory to identify computer hosting the <strong>FSD</strong> Router application.<br />
Use LAN IP Address—enter the IP address of computer hosting the <strong>FSD</strong> Router application.<br />
Use Internet IP Address—enter the address of the machine hosting the <strong>FSD</strong> Router application. If using <strong>FSD</strong><br />
Loader on the same machine as <strong>FSD</strong> Router, set the TCP/IP address to its default local host value, 127.0.0.1.<br />
Router IP Port – use this port to connect to and communicate with <strong>FSD</strong> Router and its connected serial port<br />
devices. Note that the specified port must match the port selected in the <strong>FSD</strong> Router application. For access<br />
via a firewall protected link, the specified port must be given access permission.<br />
<strong>FSD</strong> Loader Watch Level -- selects the quantity of debug information presented on the <strong>FSD</strong> Loader view window.<br />
Watch Level 0 displays the least amount of information, with increasing levels showing more detailed debugging<br />
information.<br />
<strong>FSD</strong> <strong>Controller</strong> Watch Level -- selects the quantity of debug information to be sent from a connected <strong>FSD</strong><br />
<strong>Controller</strong>. The <strong>FSD</strong> <strong>Controller</strong> debug information is presented on the <strong>FSD</strong> Loader view window. Watch Level 0<br />
disables most output, with increasing levels used to show more detailed debugging information.<br />
Debug Options—select the options desired:<br />
Enable Debug File -- All view window test and other information are logged in DEBUG.TXT, found in the<br />
computer‘s TEMP directory. These directories are set in the computer‘s environment variables.<br />
Enable Debug Crash -- Flushes the debug output to the file after each write. This action ensures completed writes<br />
while debugging application crash conditions.<br />
Create New Debug File -- Starts a new file upon <strong>FSD</strong> Loader startup (otherwise debug information is appended to<br />
the previous file).<br />
Set Product Configuration Info<br />
This dialog box displays information about the <strong>FSD</strong> <strong>Controller</strong> attached to the system. From the droplist ensure
that the correct HW (hardware) Product Name. In the same column hardware information about the particular<br />
device is displayed. In the adjacent column is displayed the SW (software) application associated with the<br />
hardware product. Included in the information displayed is the supported controller and information on the device<br />
family types that can be controlled by the hardware.<br />
Help Menu<br />
The Help menu offers the following commands, which provide you assistance with this application:<br />
Help Topics Use this command to display the opening screen of Help. From the opening screen, you can jump<br />
to step-by-step instructions for using Loader and various types of reference information.<br />
Once you open help, you can click the Contents button whenever you want to return to the opening screen.<br />
About <strong>FSD</strong> Loader<br />
Displays copyright notice and the version number of this application.<br />
<strong>FSD</strong> X10 Logger<br />
<strong>FSD</strong> X10 Logger Overview<br />
<strong>FSD</strong> X10 Logger records conversation between controller and X10 devices into a text file. Under the Options menu<br />
the user can set the path for the log file and also whether to create a new file or append to existing file.
This tool is useful for debugging problems during the configuration of the system. The commands sent between<br />
<strong>FSD</strong> <strong>Controller</strong> and X10 devices are displayed in the <strong>FSD</strong> X10 Logger window. The date and time are displayed<br />
along with the direction ( from the controller), along with the unit and house code.<br />
<strong>FSD</strong> X10 Logger Menu<br />
The File menu offers the following commands:<br />
Exit<br />
Exits <strong>FSD</strong> X10 Logger.<br />
The View menu offers the following commands:<br />
Clear Display Clears the X10 activity history log display.<br />
Toolbar Shows or hides the toolbar.<br />
―C‖ button Clears the logger display<br />
―L‖ button Toggles the enable file logger function<br />
―O‖ button The Set X10 Logger Options command invokes a dialog box, which allows setting the path name<br />
and file creation or appending options used when logging X10 command activity.<br />
Status Bar<br />
Shows or hides the status bar.<br />
The Log menu offers the following command:<br />
Log File Enable/Disable<br />
Enables / Disables logging of the received X10 commands.<br />
The Options menu offers the following commands:<br />
Set X10 Logger Options<br />
Selects X10 Logger options to set path for the logger file and to select creation<br />
of a new file or appending to existing file.<br />
The Help menu offers the following commands, which provides assistance with this application:<br />
Help Topics Offers you an index to topics on which you can obtain help.<br />
About <strong>FSD</strong> X10 Logger Displays the version number of this application.
<strong>FSD</strong> X10 Mapper<br />
<strong>FSD</strong> X10 Mapper Overview<br />
X10 Mapper is a utility that displays defined and detected X10 devices on the system. X10 devices defined in the<br />
<strong>FSD</strong> <strong>Controller</strong> are depicted as fuschia colored boxes. Detected devices (e.g. when a signal is sent with an unit and<br />
house code) are depicted as lavender colored boxes.<br />
<strong>FSD</strong> X10 Mapper<br />
X10 devices defined in the <strong>FSD</strong> <strong>Controller</strong> are depicted as fuschia colored boxes. Detected X10 devices are<br />
depicted by the lavender colored boxes. The Show button displays all defined and detected devices (Fig A). The<br />
Hide button changes the display to only show those devices that are detected (Fig B). Devices that are both defined<br />
and detected are indicated with half fuschia and half lavender colored boxes. The Clear button clears the display of<br />
detected devices. By choosing the ―Group‖ radio button, defined and detected groups are displayed instead of<br />
individual units (Units radio button). Clearing of detected devices or groups and Hiding of defined devices or<br />
groups can also be implemented by right-clicking on the title bar and choosing the desired action from the menu.<br />
Use the Start button to initiate a search on the system to detect X10 devices that are capable of answering to a query<br />
(2-way communication, this process may take several minutes).
<strong>FSD</strong> X10 Tester<br />
<strong>FSD</strong> X10 Tester Overview<br />
The <strong>FSD</strong> X10 Tester utility sends various commands to a specified X10 device. These commands enabled the user<br />
to test a device with a group of commands to determine if the device responds to commands properly.<br />
<strong>FSD</strong> X10 Tester<br />
The <strong>FSD</strong> X10 Tester utility sends various commands to a specified X10 device. Set the house and unit codes for the<br />
target device. Listed are a variety of commands. Click the Send button adjacent to the command to send. A sent<br />
command is noted in the box adjacent to the command. Buttons are present to send ON/OFF commands<br />
continuously and also to clear received commands.
<strong>FSD</strong> UPB Logger<br />
<strong>FSD</strong> UPB Logger Overview<br />
<strong>FSD</strong> UPB Logger records conversation between controller and UPB devices into a text file. Under the Options<br />
menu the user can set the path for the log file and also whether to create a new file or append to existing file.<br />
This tool is useful for debugging problems during the configuration of the system. The commands sent between<br />
<strong>FSD</strong> <strong>Controller</strong> and UPB devices are displayed in the <strong>FSD</strong> UPB Logger window. The date and time are displayed<br />
along with the direction ( from the controller), along with the network and unit id.<br />
<strong>FSD</strong> UPB Logger Menu<br />
The File menu offers the following commands:<br />
Exit<br />
Exits <strong>FSD</strong> UPB Logger.<br />
The View menu offers the following commands:<br />
Clear Display Clears the UPB activity history log display.<br />
Toolbar Shows or hides the toolbar.<br />
―C‖ button Clears the logger display<br />
―L‖ button Toggles the enable file logger function<br />
―O‖ button The Set UPB Logger Options command invokes a dialog box, which allows setting the path name<br />
and file creation or appending options used when logging UPB command activity.<br />
Status Bar<br />
Shows or hides the status bar.<br />
The Log menu offers the following command:<br />
Log File Enable/Disable<br />
Enables / Disables logging of the received UPB commands.<br />
The Options menu offers the following commands:<br />
Set UPB Logger Options<br />
Selects UPB Logger options to set path for the logger file and to select creation<br />
of a new file or appending to existing file.
The Help menu offers the following commands, which provides assistance with this application:<br />
Help Topics Offers you an index to topics on which you can obtain help.<br />
About <strong>FSD</strong> UPB Logger Displays the version number of this application.
<strong>FSD</strong> UPB Mapper<br />
<strong>FSD</strong> UPB Mapper Overview<br />
UPB Mapper is a utility that displays defined and detected UPB devices on the system. UPB devices defined in the<br />
<strong>FSD</strong> <strong>Controller</strong> are depicted as fuschia colored boxes. Detected devices (e.g. when a signal is sent with an unit and<br />
house code) are depicted as lavender colored boxes.<br />
<strong>FSD</strong> UPB Mapper<br />
UPB devices defined in the <strong>FSD</strong> <strong>Controller</strong> are depicted as fuschia colored boxes. Detected UPB devices are<br />
depicted by the lavender colored boxes. The display grid shows the unit number. Each row has 15 boxes. To<br />
determine the unit number add the number of the column to the number of the row (e.g column 15 and row 240<br />
results in unit number 255). The Show button displays all defined and detected devices. The Hide button changes<br />
the display to only show those devices that are detected (shown). Devices that are both defined and detected are<br />
indicated with half fuschia and half lavender colored boxes. The Clear button clears the display of detected devices.<br />
By choosing the ―Network‖ or ―Link‖ radio button, defined and detected networks or links are displayed instead of<br />
individual units (Units radio button). Clearing of detected devices, links, or networks and Hiding of defined devices,<br />
links, or networks can also be implemented by right-clicking on the title bar and choosing the desired action from<br />
the menu. Use the Start button to initiate a search on the system to detect UPB devices that are capable of answering<br />
to a query (2-way communication, this process may take several minutes).
<strong>FSD</strong> UPB Tester<br />
<strong>FSD</strong> UPB Tester Overview<br />
The <strong>FSD</strong> UPB Tester utility sends various commands to a specified UPB device. These commands enabled the user<br />
to test a device with a group of commands to determine if the device responds to commands properly.<br />
<strong>FSD</strong> UPB Tester<br />
The <strong>FSD</strong> UPB Tester utility sends various commands to a specified UPB device. Set the network, destination, and<br />
source ids from the droplists for the target device. Choose whether the test is direct or to a link and the repeat<br />
transmission rate. Check the appropriate box for requesting an acknowledgement pulse, acknowledgement message,<br />
or ID pulse. Select the transmit count and sequence number from the droplists. Listed are a variety of commands.<br />
Click the Send button adjacent to the command to send. A sent command is noted in the box adjacent to the<br />
command. Buttons are present to send ON/OFF commands continuously and also to clear received commands.
<strong>FSD</strong> <strong>Controller</strong> Example Scenarios<br />
Select the scenario example below to display a quick guide to accomplish the procedure using an<br />
<strong>FSD</strong> <strong>Controller</strong>.<br />
Configure Switch-Lamp Connection – Step-by-step instructions to configure a switch to control a<br />
lamp module.<br />
Configure Event Timer – Step-by-step instructions to configure a Time of Day Event to control a<br />
lamp module.<br />
Configure X10-UPB Bridge – Step-by-step instructions to configure an <strong>FSD</strong> X10-UPB Bridge<br />
<strong>Controller</strong> to link X10 Devices with UPB Devices.<br />
Configure X10-UPB-FGI Bridge – Step-by-step instructions to configure an <strong>FSD</strong> X10-UPB-FGI<br />
Bridge <strong>Controller</strong> to link X10 Devices, UPB, and FGI Devices.<br />
Configure X10-UPB-FGI Bridge Plus – Step-by-step instructions to configure an <strong>FSD</strong> X10-UPB-<br />
FGI Bridge <strong>Controller</strong> Plus to link X10 Devices, UPB, and FGI Devices, and also to configure for<br />
time of day events.<br />
Configure Alarm Clock – Step-by-step instructions to configure an Alarm Clock device that control<br />
up to three devices. The first device is triggered similar to a time of day event (alarm), and the next<br />
two are triggered based on a programmed delay of the preceding device‘s start time.<br />
Configure Fade Timer – Step-by-step instructions to configure a Fade Timer to control a lamp<br />
module. When programmed a fade timer dims or brightens a lamp to a hold level, held for a specified<br />
time before proceeding to the next programmed level.<br />
Configure Retriggerable Timer – Step-by-step instructions to configure a Retriggerable Timer. This<br />
timer can be programmed, to respond to a trigger by delaying onset, turned on for a specified time,<br />
and rendered inactive for a stated time. If desired, subsequent triggers during the active period can<br />
result in a lengthened active period.<br />
Configure Delay Timer – Step-by-step instructions to configure a Delay Timer to control a lamp<br />
module. This timer allows the user to trigger up to eight output events, each a specified step level<br />
delay time apart.<br />
Configure Button Control – Step-by-step instructions to configure a Button Control non-time based<br />
Timer device to control a lamp module.<br />
Configure Multi-Switch Device – Step-by-step instructions to configure a device with multiple<br />
switches<br />
Configure Sensor Device to Control Another Device – Step-by-step instructions to configure a<br />
Sensor Device (e.g. temperature/humidity sensor) to control another device.<br />
Configure Bridging of UPB Link Commands to X10 – Step-by-step instructions to configure an <strong>FSD</strong><br />
Bridge <strong>Controller</strong> to use UPB Link Commands to control X10 Devices.<br />
<strong>FSD</strong> Multiple <strong>Controller</strong> Configuration Guide – Describes steps to configure multiple <strong>FSD</strong><br />
controllers on the same computer.
Multiple <strong>FSD</strong> Bridges to Send Common UPB Signals on Independent Power Lines Configuration<br />
Guide – Describes steps to configure multiple <strong>FSD</strong> Bridge controllers to transmit common UPB<br />
signals onto different power line sources within the same building.<br />
Configure <strong>FSD</strong> Logger -- Describes steps to configure program to create log file of <strong>FSD</strong> device state<br />
activities.<br />
Configure Operating Modes – Describes steps to configure multiple operating modes.
Simple Example to Configure a Switch to Lamp Module<br />
The example illustrates how to configure an X10 <strong>System</strong> to enable a switch to control a lamp<br />
module. The same procedure applies to other device families.<br />
Initial system set-up - add <strong>FSD</strong> <strong>Controller</strong>, power line interface, lamp module, and switch to the<br />
system.<br />
1. Open the <strong>FSD</strong> Autostart application, which starts <strong>FSD</strong> Router and <strong>FSD</strong> Automator.<br />
2. In <strong>FSD</strong> Automator‘s View menu, choose <strong>FSD</strong> Namer to assign an <strong>FSD</strong> <strong>Controller</strong> (FGI<br />
Device) and an X10 Power Line Interface (X10 Device) to the system (e.g. TW523 (a<br />
Timer Etc. family device).<br />
3. From the <strong>FSD</strong> Automator application, select <strong>FSD</strong> Namer-> X10 Devices from the View<br />
menu.<br />
4. In the X10 Device List window, click the Insert button. From the droplist choose X10<br />
Lamp Module. Enter a Device Name, set the house and unit code (e.g. B and 2). Click<br />
―OK‖.<br />
5. In the X10 Device List window, click ―OK‖. If queried by a dialog box, choose to load<br />
configuration later.<br />
6. Click the Insert button. In the next dialog box, from the droplist choose X10 Switch.<br />
Enter a Device Name, set the house and unit code (e.g. A and 1). Click ―OK‖.<br />
7. In the X10 Device List window, click the Insert button again. From the droplist choose<br />
X10 Lamp Module. Enter a Device Name, set the house and unit code (e.g. B and 2).<br />
Click ―OK‖.<br />
8. In the X10 Device List window, click ―OK‖. If queried by a dialog box, choose to load<br />
configuration later.<br />
Link Devices by Setting Operations - configure devices and link device elements using<br />
operations<br />
1. From <strong>FSD</strong> Automator, choose X10 Devices from the Operations menu. Choose the X10<br />
switch you‘ve entered.<br />
2. A tabbed index dialog appears. On the tabs are the different element types on the switch.
Click on ―From Momentary On‖. This ―From‖ element sends a momentary on signal<br />
and connects to a ―To‖ element on another device (e.g. lamp module). Click ―Add‖, to<br />
add an operation that connects the From and To elements. From the droplist select<br />
SET_MONENTARY_PAIR.<br />
3. In the resulting dialog, select the device family to connect with the ―To‖ element, the<br />
device type, and device name. Choose X10, X10 lamp module, and the name you‘ve<br />
entered, respectively. The Device element is Momentary On. Click ―OK‖.<br />
4. In the tabbed index dialog, click ―Load‖ to Load Configuration.<br />
5. When loading finishes, choose X10 Devices from the Operations menu. Choose the lamp<br />
module you‘ve entered. Click the ―To Momentary On‖ element. Listed is the operation<br />
that links to the switch you‘ve entered. You have configured the system to have a<br />
switch of one address control the lamp module with a different address.<br />
6. From the Display menu, choose X10 Devices and the x10 switch you entered. If there is a<br />
lamp device on the system with the address B-2, clicking on the ―ON‖ and ―OFF‖ button<br />
controls the lamp device.<br />
Configuring other device family systems is similar to the X10 system described above. For<br />
example, with an UPB system, substitute X10 component with its UPB counterpart (i.e.<br />
powerline interface, network and unit code).
Simple Example to Configure a Timer Event<br />
The following example shows how a Time of Day Event Timer can control a lamp module. X10<br />
devices are used in the example, but apply similarly to other device families.<br />
Initial system set-up - add <strong>FSD</strong> <strong>Controller</strong>, power line interface, and lamp module to the<br />
system.<br />
1. Open the <strong>FSD</strong> Autostart application, which starts <strong>FSD</strong> Router and <strong>FSD</strong> Automator.<br />
2. In <strong>FSD</strong> Automator‘s View menu, choose <strong>FSD</strong> Namer to assign an <strong>FSD</strong> <strong>Controller</strong> (FGI<br />
Device) and an X10 Power Line Interface (X10 Device) to the system (e.g. TW523 (a<br />
Timer Etc. family device).<br />
3. From the <strong>FSD</strong> Automator application, select <strong>FSD</strong> Namer-> X10 Devices from the View<br />
menu.<br />
4. In the X10 Device List window, click the Insert<br />
button. From the droplist choose X10<br />
Appliance Module. Enter a Device Name,<br />
set the house and unit code (e.g. H and 8).<br />
Click ―OK‖.<br />
5. In the X10 Device List window, click ―OK‖. If<br />
queried by a dialog box, choose to load<br />
configuration later.<br />
Configure Timer and Set Operations - configure<br />
timer device and link device elements<br />
1. In <strong>FSD</strong> Automator‘s View menu, choose <strong>FSD</strong><br />
Namer to assign a Timer, Etc. device. In the<br />
Timer List dialog, click the Insert button. In<br />
the Edit Timer dialog, choose Time of Day<br />
Event from the Timer Type droplist. Enter a<br />
name for the timer. Click ―OK‖.<br />
2. From <strong>FSD</strong> Automator, choose Timers, Etc.<br />
from the Display menu. Select the Time of<br />
Day Event device type and the device name<br />
you‘ve entered. Click ―OK‖. In the Time of<br />
Day Event dialog (the device dialog) with<br />
the device name in the title bar, right-click<br />
on the title bar and select Configure Event<br />
Times from the menu list.<br />
3. In the Configure dialog, set the<br />
Start and Stop times desired. In the lower<br />
third of the dialog box, select the days the<br />
timer is enabled and the date range. Click<br />
―OK‖.<br />
4. Either right-click the title bar in the device<br />
dialog and select Configure Operations from<br />
the menu or from <strong>FSD</strong> Automator, choose<br />
Timers, Etc. from the Operations menu.<br />
Choose the timer you‘ve entered.<br />
5. A tabbed index dialog appears. On the tabs are the different element types on the Time of
Day Event device. Click on ―From Event State‖. This ―From‖ element sends a signal<br />
and connects to a ―To‖ element on another device (e.g. lamp module). Click ―Add‖, to<br />
add an operation that connects the From and To elements. From the droplist select<br />
SET_MONENTARY_PAIR.<br />
6. In the resulting dialog, select the device family to connect with the ―To‖ element, the<br />
device type, and device name. Choose X10, X10 appliance module, and the name<br />
you‘ve entered, respectively. The Device element is Momentary On. Click ―OK‖.<br />
7. In the tabbed index dialog,<br />
click ―Load‖ to load the<br />
configuration.<br />
8. When loading finishes, choose<br />
X10 Devices from the<br />
Operations menu. Choose<br />
the appliance module<br />
you‘ve entered. Click the<br />
―To Momentary On‖<br />
element. Listed is the<br />
operation that links to the<br />
timer you‘ve entered. You<br />
have configured the system<br />
for an event timer to control<br />
an appliance module.<br />
9. From the device dialog of the<br />
time of day event, click on<br />
the Event State button<br />
(button should change from<br />
False to True. If there is a<br />
appliance device on the<br />
system with the address H-<br />
8, changing the event state<br />
should turn on and off the<br />
appliance module.<br />
The preceding example uses X10 family devices. However, devices from a different device<br />
family can be substituted (e.g. UPB devices). Link elements using operations as described<br />
above.<br />
Simple Example to Configure an <strong>FSD</strong> X10-UPB Compact Bridge <strong>Controller</strong><br />
The <strong>FSD</strong> X10-UPB Compact Bridge <strong>Controller</strong> allows the user to construct a system mixed with<br />
X10 and UPB devices to work with one another. To accomplish this, configure the controller so<br />
it knows which X10 addresses are coupled to corresponding UPB unit ids. The following<br />
example describes how to use the <strong>FSD</strong> X10-UPB Compact Bridge <strong>Controller</strong>. The first and<br />
second examples demonstrate how to use <strong>FSD</strong> virtual devices, Super Bridge and Super Fine<br />
Bridge, to link UPB devices with X10 devices. The third example illustrates connecting an UPB<br />
switch to an X10 lamp module using a one-on-one connection.
Initial system set-up for configuration<br />
If you have already added the controller, X10 and UPB powerline interfaces, X10 devices and<br />
UPB devices to the system configuration, skip this section. If you have not installed the <strong>FSD</strong><br />
Bridge <strong>Controller</strong> Software, you can install from the CD provided with the <strong>FSD</strong> Bridge<br />
<strong>Controller</strong>. Instructions are found under the Help menu ->View Installation Guides, and choose<br />
<strong>FSD</strong> X10-UPB Bridge <strong>Controller</strong> from the list. Add <strong>FSD</strong> <strong>Controller</strong> and power line interfaces<br />
using <strong>FSD</strong> Namer.<br />
1. Connect the power supply to the controller and a NULL MODEM cable (also called<br />
twisted cable, do not use a straight serial cable) from the serial port of your computer to<br />
the serial port on the controller.<br />
2. Open the <strong>FSD</strong> Autostart application, which starts <strong>FSD</strong> Router and <strong>FSD</strong> Automator.<br />
3. In <strong>FSD</strong> Automator‘s View menu, choose <strong>FSD</strong> Namer to assign an <strong>FSD</strong> <strong>Controller</strong> (FGI<br />
Device), an UPB Power Line interface (e.g. PIM, an RS485/232 device), and an X10<br />
Power Line Interface to the system (e.g. TW523, a Timer Etc. device).<br />
If you already have a list of addresses to couple X10 to their respective UPB unit ids, you do not<br />
need to enter each X10 and UPB device into the system‘s configuration. To finish configuration,<br />
couple the X10 with UPB devices using either Super Bridges or Super Fine Bridges (skip to<br />
subsequent sections).<br />
If you wish to bridge devices using a one-on-one connection, use the following example to enter<br />
devices into the system.<br />
1. From the <strong>FSD</strong><br />
Automator<br />
application, select<br />
<strong>FSD</strong> Namer-> X10<br />
Devices from the<br />
View menu.<br />
2. Select <strong>FSD</strong> Namer-><br />
UPB Devices<br />
from the View<br />
menu. Click the<br />
Insert button. In<br />
the next dialog<br />
box, from the<br />
droplist choose<br />
UPB Switch.<br />
Enter a Device<br />
Name, set the<br />
network and unit<br />
code assigned to<br />
the device. Click<br />
―OK‖. Click<br />
―OK‖. If queried<br />
by a dialog box,<br />
choose to load configuration later.<br />
3. Select <strong>FSD</strong> Namer-> X10 Devices from the View menu. In the X10 Device List window,<br />
click the Insert button again. From the droplist choose X10 Lamp Module. Enter a<br />
Device Name, set the house and unit code (e.g. B and 2). Click ―OK‖.<br />
4. In the X10 Device List window, click ―OK‖. If queried by a dialog box, choose to load
configuration later.<br />
<strong>FSD</strong> Super Bridge<br />
The <strong>FSD</strong> Super Bridge is a virtual device in the Timers, Etc. device family. As mentioned in the<br />
last section, it is possible to link one-by-one an X10 address with an UPB address. However,<br />
linking device elements with operations for multiple devices can be a tedious task assigning a<br />
number of switches to corresponding modules. To simplify this task, use an <strong>FSD</strong> Super Bridge if<br />
you have a minimum of four sequentially numbered X10 addresses linked to four sequentially<br />
numbered UPB units. [If you don‘t have sequentially numbered devices, use the <strong>FSD</strong> Super Fine<br />
Bridge (see next section).] Super Bridges come in 8 or 16 links sizes. Thus, for example if you<br />
planned C1 through C4 X10 addresses to signal UPB unit ids 006 through 009, do the following:<br />
1. Select <strong>FSD</strong> Namer-> Timers, Etc. from the View menu. In the Timers, Etc. List window,<br />
click the Insert button. From the droplist choose Super Bridge 8. Enter a Device Name<br />
and click ―OK‖. If asked, load configuration later.<br />
2. Select Timers, Etc. from the Configure menu, and choose the Super Bridge 8 you just<br />
entered. In the Configure dialog box, double-click on the first entry line (1-4).<br />
3. In the Edit Bridge Group dialog choose X10 for the Input Settings. Enter ―C‖ for the<br />
house code and ―1‖ for the unit code. Choose UPB for the Output Settings and enter the<br />
network id and unit id 006. Click ―OK‖. Click ―OK‖. Choose Load Configuration<br />
under the File menu.<br />
4. Thus activating X10<br />
addresses C1 through<br />
C4, controls UPB<br />
devices with unit ids 006<br />
through 009 respectively.<br />
Assigning the other four<br />
addresses is easy. In Step 2<br />
choose the entry line 5-8 and<br />
select the ―Inherit Settings‖<br />
check box if the UPB devices<br />
are the next numbers in<br />
sequence. Otherwise assign the<br />
beginning sequence unit id you<br />
wish to use for X10 addresses<br />
(e.g. H5 through H8) to control<br />
the UPB devices (e.g. 145<br />
through 148).<br />
If your planned addresses are not<br />
sequentially numbered, use a<br />
Super Fine Bridge (next section)<br />
Configuring <strong>FSD</strong> Super Fine Bridge<br />
The <strong>FSD</strong> Super Fine Bridge is a virtual device akin to the Super Bridge. The Super Bridge is a<br />
convenient tool used to configure sequential numbered X10 devices with sequentially numbered
UPB devices (minimum of four devices must be sequential). However, if your devices are not<br />
sequentially numbered, use the <strong>FSD</strong> Super Fine Bridge.<br />
1. As with other devices, insert an instance of a<br />
<strong>FSD</strong> Super Fine Bridge (a Timers, Etc. type<br />
device) using <strong>FSD</strong> Namer. Select <strong>FSD</strong><br />
Namer-> Timers, Etc. from the View menu.<br />
In the Timers, Etc. List window, click the<br />
Insert button. From the droplist choose<br />
Super Fine Bridge 16. Enter a Device<br />
Name and click ―OK‖. If asked, load<br />
configuration now.<br />
2. From the Configure menu choose the<br />
Timers, Etc. super fine bridge that you<br />
inserted. Note: Settings are grouped in sets<br />
of four UPB or X10 devices. The device<br />
family settings for switches 1, 5, 9, and 13<br />
apply to the subsequent three switches. In<br />
the figure below, the dialog box in the<br />
background shows that the first set of<br />
switches bridges input from the UPB device<br />
family and outputs to the X10 device<br />
family. As seen in the listbox neither the<br />
UPB nor the X10 devices are in sequential<br />
order. The second set of four are X10 input with UPB output.<br />
3. The dialog box in the foreground edits the settings for switch 9. Checking the ―Inherit<br />
Settings‖ box sets the input and output settings to the previous switches device settings.<br />
If ―Inherit Settings‖ is not selected, the device family droplist boxes become active for<br />
selection. Check the ―Enable Bridge Operation‖ box to enable bridging of this switch<br />
and the ―Enable Dimmer Operation‖ box if the device bridged has dimming capability.<br />
4. Enter the X10 address and UPB address that you wish to bridge.<br />
5. Add the input and output device addresses and in the upper right corner, indicate the<br />
bridging direction: input to output (normal), output to input, or bidirectional.<br />
Link X10 and UPB Device with Operations<br />
For more complicated operations other than switching on and off with dimming than can be<br />
accomplished with Super Bridges or<br />
Super Fine Bridges, use operations to<br />
link devices. Each device type has<br />
specific types of elements associated<br />
with them. Elements are the<br />
interfaces between devices.<br />
Operations are used to connect the<br />
elements with one another. Each<br />
element has specific operations<br />
associated with them. The following<br />
example shows the steps to link a<br />
UPB switch to an X10 lamp module.<br />
1. From <strong>FSD</strong> Automator, choose<br />
UPB Devices from the
Operations menu. Choose the UPB switch you‘ve entered in the one-on-one<br />
connection section on page 1.<br />
2. A tabbed index dialog appears. On the tabs are the different element types associated with<br />
the switch. Click on ―From Momentary On‖. This ―From‖ element sends a momentary<br />
on signal and connects to a ―To‖ element on another device (e.g. lamp module). Click<br />
―Add‖, to choose an appropriate operation that<br />
connects the From and To elements. From the<br />
droplist select SET_MONENTARY_PAIR.<br />
3. In the resulting dialog, from the droplists (a) select<br />
the device family to connect with the ―To‖<br />
element, (b) the device type, and (c) device name.<br />
Choose X10, X10 Lamp Module, and the name<br />
you‘ve entered, respectively. The Device element<br />
is Momentary On. Click ―OK‖.<br />
4. In the tabbed index dialog, click ―Load‖ to Load<br />
Configuration.<br />
5. When loading finishes, choose X10 Devices from the<br />
Operations menu. Choose the lamp module<br />
you‘ve entered. Click the ―To Momentary On‖<br />
element. Listed is the operation that links to the<br />
UPB switch you‘ve entered.<br />
You have configured the system to enable an UPB<br />
switch to control the X10 Lamp Module.<br />
Connecting <strong>FSD</strong> X10-UPB Bridge to your system<br />
1. After configuring the controller, disconnect the power supply and the NULL MODEM<br />
cable from the controller.<br />
2. Connect the serial cable connected to the UPB Power Line interface to the serial port of<br />
the <strong>FSD</strong> X10-UPB Bridge <strong>Controller</strong>.<br />
3. Connect the RJ11 data cable (not telephone cable) from the X10 Power Line interface to<br />
the X10 Out port of the controller.<br />
4. Connect the power supply. The <strong>FSD</strong> X10-UPB Bridge <strong>Controller</strong> is set to bridge UPB and<br />
X10 protocols in a mixed X10/UPB installation.
Simple Example to Configure an <strong>FSD</strong> X10-UPB-FGI Bridge <strong>Controller</strong><br />
The <strong>FSD</strong> X10-UPB-FGI Bridge <strong>Controller</strong> allows the user to construct a system mixed with<br />
X10, UPB, and FGI devices to work with one another. To accomplish this, configure the<br />
controller so it knows which X10 addresses are coupled to corresponding UPB unit ids. The<br />
following example describes how to use the <strong>FSD</strong> X10-UPB-FGI Bridge <strong>Controller</strong>. The first<br />
and second examples demonstrate how to use <strong>FSD</strong> virtual devices, Super Bridge and Super Fine<br />
Bridge, to link UPB devices with X10 devices. The third example illustrates connecting an UPB<br />
switch to an X10 lamp module using a one-on-one connection. In a similar fashion one can<br />
bridge an FGI device with either X10 or UPB device.<br />
Initial system set-up for configuration<br />
If you have already added the controller, X10 and UPB powerline interfaces, X10 devices and<br />
UPB devices to the system configuration, skip this section. If you have not installed the <strong>FSD</strong><br />
Bridge <strong>Controller</strong> Software, you can install from the CD provided with the <strong>FSD</strong> Bridge<br />
<strong>Controller</strong>. Instructions are found under the Help menu ->View Installation Guides, and choose<br />
<strong>FSD</strong> X10-UPB Bridge <strong>Controller</strong> from the list. Add <strong>FSD</strong> <strong>Controller</strong> and power line interfaces<br />
using <strong>FSD</strong> Namer.<br />
1. Connect the power supply to the controller and either an USB cable from the computer or<br />
a NULL MODEM cable (also called twisted cable, do not use a straight serial cable)<br />
from the serial port of your computer to the serial port on the controller.<br />
2. Open the <strong>FSD</strong> Autostart application, which starts <strong>FSD</strong> Router and <strong>FSD</strong> Automator.<br />
3. In <strong>FSD</strong> Automator‘s View menu, choose <strong>FSD</strong> Namer to assign an <strong>FSD</strong> <strong>Controller</strong> (FGI<br />
Device), an UPB Power Line interface (e.g. PIM, an RS485/232 device), and an X10<br />
Power Line Interface to the system (e.g. TW523, a Timer Etc. device).<br />
If you already have a list of addresses to couple X10 to their respective UPB unit ids, you do not<br />
need to enter each X10 and UPB device into the system‘s configuration. To finish configuration,<br />
couple the X10 with UPB devices using either Super Bridges or Super Fine Bridges (skip to<br />
subsequent sections).
If you wish to bridge devices using a one-on-one connection, use the following example to enter<br />
devices into the system.<br />
1. From the <strong>FSD</strong><br />
Automator<br />
application, select<br />
<strong>FSD</strong> Namer-><br />
X10 Devices from<br />
the View menu.<br />
2. Select <strong>FSD</strong> Namer-><br />
UPB Devices<br />
from the View<br />
menu. Click the<br />
Insert button. In<br />
the next dialog<br />
box, from the<br />
droplist choose<br />
UPB Switch.<br />
Enter a Device<br />
Name, set the<br />
network and unit<br />
code assigned to<br />
the device. Click<br />
―OK‖. Click<br />
―OK‖. If queried<br />
by a dialog box,<br />
choose to load configuration later.<br />
3. Select <strong>FSD</strong> Namer-> X10 Devices from the View menu. In the X10 Device List window,<br />
click the Insert button again. From the droplist choose X10 Lamp Module. Enter a<br />
Device Name, set the house and unit code (e.g. B and 2). Click ―OK‖.<br />
4. In the X10 Device List window, click ―OK‖. If queried by a dialog box, choose to load<br />
configuration later.<br />
<strong>FSD</strong> Super Bridge<br />
The <strong>FSD</strong> Super Bridge is a virtual device in the Timers, Etc. device family. As mentioned in the<br />
last section, it is possible to link one-by-one an X10 address with an UPB address. However,<br />
linking device elements with operations for multiple devices can be a tedious task assigning a<br />
number of switches to corresponding modules. To simplify this task, use an <strong>FSD</strong> Super Bridge if<br />
you have a minimum of four sequentially numbered X10 addresses linked to four sequentially<br />
numbered UPB units. [If you don‘t have sequentially numbered devices, use the <strong>FSD</strong> Super Fine<br />
Bridge (see next section).] Super Bridges come in 8 or 16 links sizes. Thus, for example if you<br />
planned C1 through C4 X10 addresses to signal UPB unit ids 006 through 009, do the following:<br />
1. Select <strong>FSD</strong> Namer-> Timers, Etc. from the View menu. In the Timers, Etc. List window,<br />
click the Insert button. From the droplist choose Super Bridge 8. Enter a Device Name<br />
and click ―OK‖. If asked, load configuration later.
2. Select Timers, Etc.<br />
from the Configure<br />
menu, and choose the<br />
Super Bridge 8 you<br />
just entered. In the<br />
Configure dialog box,<br />
double-click on the<br />
first entry line (1-4).<br />
3. In the Edit Bridge<br />
Group dialog choose<br />
X10 for the Input<br />
Settings. Enter ―C‖<br />
for the house code<br />
and ―1‖ for the unit<br />
code. Choose UPB<br />
for the Output<br />
Settings and enter the<br />
network id and unit id<br />
006. Click ―OK‖.<br />
Click ―OK‖. Choose<br />
Load Configuration<br />
under the File menu.<br />
4. Thus activating X10<br />
addresses C1 through C4, controls UPB devices with unit ids 006 through 009<br />
respectively.<br />
Assigning the other four addresses is easy. In Step 2 choose the entry line 5-8 and select the<br />
―Inherit Settings‖ check box if the UPB devices are the next numbers in sequence. Otherwise<br />
assign the beginning sequence unit id you wish to use for X10 addresses (e.g. H5 through H8) to<br />
control the UPB devices (e.g. 145 through 148). Check ―Enable Dimmer Operation‖ if the<br />
devices have dimmer capabilities.<br />
If your planned addresses are not sequentially numbered, use a Super Fine Bridge (next section)<br />
Configuring <strong>FSD</strong> Super Fine Bridge<br />
The <strong>FSD</strong> Super Fine Bridge is a virtual device akin to the Super Bridge. The Super Bridge is a<br />
convenient tool used to configure sequential numbered X10 devices with sequentially numbered<br />
UPB devices (minimum of four devices must be sequential). However, if your devices are not<br />
sequentially numbered, use the <strong>FSD</strong> Super Fine Bridge.<br />
1. As with other devices, insert an instance of a <strong>FSD</strong> Super Fine Bridge (a Timers, Etc. type<br />
device) using <strong>FSD</strong> Namer. Select <strong>FSD</strong> Namer-> Timers, Etc. from the View menu. In<br />
the Timers, Etc. List window, click the Insert button. From the droplist choose Super<br />
Fine Bridge 16. Enter a Device Name and click ―OK‖. If asked, load configuration now.
2. From the Configure menu choose the<br />
Timers, Etc. super fine bridge that<br />
you inserted. Note: Settings are<br />
grouped in sets of four UPB or X10<br />
devices. The device family settings<br />
for switches 1, 5, 9, and 13 apply to<br />
the subsequent three switches. In the<br />
figure below, the dialog box in the<br />
background shows that the first set of<br />
switches bridges input from the UPB<br />
device family and outputs to the X10<br />
device family. As seen in the listbox<br />
neither the UPB nor the X10 devices<br />
are in sequential order. The second<br />
set of four are X10 input with UPB<br />
output.<br />
3. The dialog box in the foreground edits<br />
the settings for switch 9. Checking<br />
the ―Inherit Settings‖ box sets the<br />
input and output settings to the<br />
previous switches device settings. If<br />
―Inherit Settings‖ is not selected, the device family droplist boxes become active for<br />
selection. Check the ―Enable Bridge Operation‖ box to enable bridging of this switch<br />
and the ―Enable Dimmer Operation‖ box if the device bridged has dimming capability.<br />
4. Enter the X10 address and UPB address that you wish to bridge.<br />
5. Add the input and output device addresses and in the upper right corner, indicate the<br />
bridging direction: input to output (normal), output to input, or bidirectional.<br />
Link X10 and UPB Device with Operations<br />
For more complicated operations other than switching on and off with dimming than can be<br />
accomplished with Super Bridges or Super Fine Bridges, use operations to link devices. Each<br />
device type has specific types of elements associated with them. Elements are the interfaces<br />
between devices. Operations are used to connect the elements with one another. Each element<br />
has specific operations associated with them. The following example shows the steps to link a<br />
UPB switch to an X10 lamp module.<br />
1. From <strong>FSD</strong> Automator, choose UPB Devices from the Operations menu. Choose the UPB<br />
switch you‘ve entered in the one-on-one connection section on page 1.<br />
2. A tabbed index dialog appears. On the tabs are the different element types associated with<br />
the switch. Click on ―From Momentary On‖. This ―From‖ element sends a momentary<br />
on signal and connects to a ―To‖ element on another device (e.g. lamp module). Click<br />
―Add‖, to choose an appropriate operation that connects the From and To elements.<br />
From the droplist select SET_MONENTARY_PAIR.<br />
3. In the resulting dialog, from the droplists (a) select the device family to connect with the<br />
―To‖ element, (b) the device type, and (c) device name. Choose X10, X10 Lamp<br />
Module, and the name you‘ve entered, respectively. The Device element is Momentary<br />
On. Click ―OK‖.
4. In the tabbed index dialog, click<br />
―Load‖ to Load<br />
Configuration.<br />
5. When loading finishes, choose<br />
X10 Devices from the<br />
Operations menu. Choose the<br />
lamp module you‘ve entered.<br />
Click the ―To Momentary On‖<br />
element. Listed is the<br />
operation that links to the<br />
UPB switch you‘ve entered.<br />
You have configured the system to<br />
enable an UPB switch to control the<br />
X10 Lamp Module.<br />
In a fashion use operations to<br />
connect an element on a FGI device with either a X10<br />
or UPB device to bridge these devices.<br />
Connecting <strong>FSD</strong> X10-UPB Bridge to your system<br />
The <strong>FSD</strong> X10-UPB-FGI Bridge <strong>Controller</strong> is ready for<br />
use, UNLESS the serial port on the <strong>FSD</strong> X10-UPB-FGI<br />
Bridge <strong>Controller</strong> is used for configuring the controller. If<br />
it is, do the following:<br />
1. After configuring the controller, disconnect the<br />
power supply and the NULL MODEM cable<br />
from the controller.<br />
2. Connect the power supply.<br />
3. Connect the serial cable from the UPB Power Line interface to the serial port of the <strong>FSD</strong><br />
X10-UPB Bridge <strong>Controller</strong>.
Simple Example to Configure an <strong>FSD</strong> X10-UPB-FGI Bridge Plus <strong>Controller</strong><br />
The <strong>FSD</strong> X10-UPB-FGI Bridge Plus <strong>Controller</strong> allows the user to construct a system mixed with<br />
X10, UPB, and FGI devices to work with one another. To accomplish this, configure the<br />
controller so it knows which X10 addresses are coupled to corresponding UPB unit ids. The<br />
following example describes how to use the <strong>FSD</strong> X10-UPB-FGI Bridge Plus <strong>Controller</strong>. The<br />
first and second examples demonstrate how to use <strong>FSD</strong> virtual devices, Super Bridge and Super<br />
Fine Bridge, to link UPB devices with X10 devices. The third example illustrates connecting an<br />
UPB switch to an X10 lamp module using a one-on-one connection. In a similar fashion one can<br />
bridge an FGI device with either X10 or UPB device.<br />
Initial system set-up for configuration<br />
If you have already added the controller, X10 and UPB powerline interfaces, X10 devices and<br />
UPB devices to the system configuration, skip this section. If you have not installed the <strong>FSD</strong><br />
Bridge <strong>Controller</strong> Software, you can install from the CD provided with the <strong>FSD</strong> Bridge<br />
<strong>Controller</strong>. Instructions are found under the Help menu ->View Installation Guides, and choose<br />
<strong>FSD</strong> X10-UPB Bridge Plus <strong>Controller</strong> from the list. Add <strong>FSD</strong> <strong>Controller</strong> and power line<br />
interfaces using <strong>FSD</strong> Namer.<br />
1. Connect the power supply to the controller and either an USB cable from the computer or<br />
a NULL MODEM cable (also called twisted cable, do not use a straight serial cable)<br />
from the serial port of your computer to the serial port on the controller.<br />
2. Open the <strong>FSD</strong> Autostart application, which starts <strong>FSD</strong> Router and <strong>FSD</strong> Automator.<br />
3. In <strong>FSD</strong> Automator‘s View menu, choose <strong>FSD</strong> Namer to assign an <strong>FSD</strong> <strong>Controller</strong> (FGI<br />
Device), an UPB Power Line interface (e.g. PIM, an RS485/232 device), and an X10<br />
Power Line Interface to the system (e.g. TW523, a Timer Etc. device).<br />
If you already have a list of addresses to couple X10 to their respective UPB unit ids, you do not<br />
need to enter each X10 and UPB device into the system‘s configuration. To finish configuration,<br />
couple the X10 with UPB<br />
devices using either Super<br />
Bridges or Super Fine<br />
Bridges (skip to these<br />
subsequent sections).<br />
If you wish to bridge devices<br />
using a one-on-one<br />
connection, use the following<br />
example to enter devices into<br />
the system.<br />
1. From the <strong>FSD</strong><br />
Automator<br />
application, select<br />
<strong>FSD</strong> Namer-> X10<br />
Devices from the<br />
View menu.<br />
2. Select <strong>FSD</strong> Namer-><br />
UPB Devices from<br />
the View menu.<br />
Click the Insert<br />
button. In the next<br />
dialog box, from the
droplist choose UPB Switch. Enter a Device Name, set the network and unit code<br />
assigned to the device. Click ―OK‖. Click ―OK‖. If queried by a dialog box, choose to<br />
load configuration later.<br />
3. Select <strong>FSD</strong> Namer-> X10 Devices from the View menu. In the X10 Device List window,<br />
click the Insert button again. From the droplist choose X10 Lamp Module. Enter a<br />
Device Name, set the house and unit code (e.g. B and 2). Click ―OK‖.<br />
4. In the X10 Device List window, click ―OK‖. If queried by a dialog box, choose to load<br />
configuration later.<br />
<strong>FSD</strong> Super Bridge<br />
The <strong>FSD</strong> Super Bridge is a virtual device in the Timers, Etc. device family. As mentioned in the<br />
last section, it is possible to link one-by-one an X10 address with an UPB address. However,<br />
linking device elements with operations for multiple devices can be a tedious task assigning a<br />
number of switches to corresponding modules. To simplify this task, use an <strong>FSD</strong> Super Bridge if<br />
you have a minimum of four sequentially numbered X10 addresses linked to four sequentially<br />
numbered UPB units. [If you don‘t have sequentially numbered devices, use the <strong>FSD</strong> Super Fine<br />
Bridge (see next section).] Super Bridges come in 8 or 16 links sizes. Thus, for example if you<br />
planned C1 through C4 X10 addresses to signal UPB unit ids 006 through 009, do the following:<br />
1. Select <strong>FSD</strong> Namer-> Timers, Etc. from the View menu. In the Timers, Etc. List window,<br />
click the Insert button. From the droplist choose Super Bridge 8. Enter a Device Name<br />
and click ―OK‖. If<br />
asked, load<br />
configuration later.<br />
2. Select Timers, Etc.<br />
from the Configure<br />
menu, and choose<br />
the Super Bridge 8<br />
you just entered. In<br />
the Configure<br />
dialog box, doubleclick<br />
on the first<br />
entry line (1-4).<br />
3. In the Edit Bridge<br />
Group dialog<br />
choose X10 for the<br />
Input Settings.<br />
Enter ―C‖ for the<br />
house code and ―1‖<br />
for the unit code.<br />
Choose UPB for the<br />
Output Settings and<br />
enter the network id<br />
and unit id 006.<br />
Click ―OK‖. Click<br />
―OK‖. Choose Load Configuration under the File menu.<br />
4. Thus activating X10 addresses C1 through C4, controls UPB devices with unit ids 006<br />
through 009 respectively.<br />
Assigning the other four addresses is easy. In Step 2 choose the entry line 5-8 and select the
―Inherit Settings‖ check box if the UPB devices are the next numbers in sequence. Otherwise<br />
assign the beginning sequence unit id you wish to use for X10 addresses (e.g. H5 through H8) to<br />
control the UPB devices (e.g. 145 through 148). Check ―Enable Dimmer Operation‖ if the<br />
devices have dimmer capabilities.<br />
If your planned addresses are not sequentially numbered, use a Super Fine Bridge (next section)<br />
Configuring <strong>FSD</strong> Super Fine Bridge<br />
The <strong>FSD</strong> Super Fine Bridge is a virtual device akin to the Super Bridge. The Super Bridge is a<br />
convenient tool used to configure sequential numbered X10 devices with sequentially numbered<br />
UPB devices (minimum of four devices must be sequential). However, if your devices are not<br />
sequentially numbered, use the <strong>FSD</strong> Super Fine Bridge.<br />
1. As with other devices, insert an instance of a <strong>FSD</strong> Super Fine Bridge (a Timers, Etc. type<br />
device) using <strong>FSD</strong> Namer. Select <strong>FSD</strong> Namer-> Timers, Etc. from the View menu. In<br />
the Timers, Etc. List window, click the Insert button. From the droplist choose Super<br />
Fine Bridge 16. Enter a Device Name<br />
and click ―OK‖. If asked, load<br />
configuration now.<br />
2. From the Configure menu choose the<br />
Timers, Etc. super fine bridge that you<br />
inserted. Note: Settings are grouped in<br />
sets of four UPB or X10 devices. The<br />
device family settings for switches 1, 5,<br />
9, and 13 apply to the subsequent three<br />
switches. In the figure below, the<br />
dialog box in the background shows<br />
that the first set of switches bridges<br />
input from the UPB device family and<br />
outputs to the X10 device family. As<br />
seen in the listbox neither the UPB nor<br />
the X10 devices are in sequential order.<br />
The second set of four are X10 input<br />
with UPB output.<br />
3. The dialog box in the foreground edits<br />
the settings for switch 9. Checking the<br />
―Inherit Settings‖ box sets the input and<br />
output settings to the previous switches<br />
device settings. If ―Inherit Settings‖ is<br />
not selected, the device family droplist boxes become active for selection. Check the<br />
―Enable Bridge Operation‖ box to enable bridging of this switch and the ―Enable<br />
Dimmer Operation‖ box if the device bridged has dimming capability.<br />
4. Enter the X10 address and UPB address that you wish to bridge.<br />
5. Add the input and output device addresses and in the upper right corner, indicate the<br />
bridging direction: input to output (normal), output to input, or bidirectional.<br />
Link X10 and UPB Device with Operations
For more complicated operations other than switching on and off with dimming than can be<br />
accomplished with Super Bridges or Super Fine Bridges, use operations to link devices. Each<br />
device type has specific types of elements associated with them. Elements are the interfaces<br />
between devices. Operations are used to connect the elements with one another. Each element<br />
has specific operations associated with<br />
them. The following example shows<br />
the steps to link a UPB switch to an<br />
X10 lamp module.<br />
1. From <strong>FSD</strong> Automator, choose<br />
UPB Devices from the<br />
Operations menu. Choose<br />
the UPB switch you‘ve<br />
entered in the one-on-one<br />
connection section on page 1.<br />
2. A tabbed index dialog appears.<br />
On the tabs are the different<br />
element types associated with<br />
the switch. Click on ―From<br />
Momentary On‖. This<br />
―From‖ element sends a<br />
momentary on signal and<br />
connects to a ―To‖ element<br />
on another device (e.g. lamp<br />
module). Click ―Add‖, to<br />
choose an appropriate operation that<br />
connects the From and To elements.<br />
From the droplist select<br />
SET_MONENTARY_PAIR.<br />
3. In the resulting dialog, from the droplists (a)<br />
select the device family to connect with<br />
the ―To‖ element, (b) the device type,<br />
and (c) device name. Choose X10, X10<br />
Lamp Module, and the name you‘ve<br />
entered, respectively. The Device<br />
element is Momentary On. Click ―OK‖.<br />
4. In the tabbed index dialog, click ―Load‖ to<br />
Load Configuration.<br />
5. When loading finishes, choose X10 Devices<br />
from the Operations menu. Choose the<br />
lamp module you‘ve entered. Click the<br />
―To Momentary On‖ element. Listed is<br />
the operation that links to the UPB switch<br />
you‘ve entered.<br />
You have configured the system to enable an UPB switch to control the X10 Lamp Module.<br />
In a fashion use operations to connect an element on a FGI device with either a X10 or UPB<br />
device to bridge these devices.<br />
Configuring <strong>FSD</strong> X10-UPB-FGI Bridge Plus <strong>Controller</strong> with Timed Events
Instructions to use the timed event capabilities of the Bridge Plus <strong>Controller</strong>, read the following<br />
example scenarios from the Help menu:<br />
Configuring Event Timer<br />
Configuring Alarm Clock<br />
Connecting <strong>FSD</strong> X10-UPB Bridge Plus to your system<br />
The <strong>FSD</strong> X10-UPB-FGI Bridge Plus <strong>Controller</strong> is ready for use, UNLESS the serial port on the<br />
<strong>FSD</strong> X10-UPB-FGI Bridge Plus <strong>Controller</strong> is used for configuring the controller. If it is, do the<br />
following:<br />
1. After configuring the controller, disconnect the power supply and the NULL MODEM<br />
cable from the controller.<br />
2. Connect the power supply.<br />
3. Connect the serial cable from the UPB Power Line interface to the serial port of the <strong>FSD</strong><br />
X10-UPB Bridge Plus <strong>Controller</strong>.
Simple Example to Configure an Alarm Clock Timer<br />
The following example shows how to configure an Alarm Clock Timer. This timer can trigger<br />
the same device or up to three separate devices, in a sequential manner. In the Alarm Clock<br />
Timer one can set the ―alarm‖ time for the first device to start. The start time for the second<br />
device is based on the start time of the first device; the third device based on the start time of the<br />
second device. For instance, the Alarm Clock Timer might be configured to wake you-up<br />
(alarm), trigger a second device to start the coffee maker, then trigger a third device to turn on<br />
lights needed in the morning; or simply set off three timed alarms for the same device. X10<br />
devices are used in the example, but apply similarly to other device families.<br />
Initial system set-up - add <strong>FSD</strong> <strong>Controller</strong>, power line interface, and lamp module to the<br />
system.<br />
1. Open the <strong>FSD</strong> Autostart application, which starts <strong>FSD</strong> Router and <strong>FSD</strong> Automator.<br />
2. In <strong>FSD</strong> Automator‘s View menu, choose <strong>FSD</strong> Namer to assign an <strong>FSD</strong> <strong>Controller</strong> (FGI<br />
Device) and an X10 Power Line Interface (X10 Device) to the system (e.g. TW523 (a<br />
Timer Etc. family device).<br />
3. From the <strong>FSD</strong> Automator application, select <strong>FSD</strong> Namer-> X10 Devices from the View<br />
menu.<br />
4. In the X10 Device List window, click the Insert button. From the droplist choose X10<br />
Lamp Module. Enter a Device Name, set the house and unit code (e.g. B and 2). Click<br />
―OK‖.<br />
5. In the X10 Device List window, click ―OK‖. If queried by a dialog box, choose to load<br />
configuration later.<br />
Configure Timer and Set Operations - configure<br />
timer device and link device elements<br />
1. In <strong>FSD</strong> Automator‘s View menu, choose <strong>FSD</strong><br />
Namer to assign a Timer, Etc. device. In<br />
the Timer List dialog, click the Insert<br />
button. In the Edit Timer dialog, choose<br />
Alarm Clock from the Timer Type list.<br />
Enter a name for the timer. Click ―OK‖.<br />
2. From <strong>FSD</strong> Automator, choose Timers, Etc.<br />
from the Configure menu. Select the Alarm<br />
Clock device type and the device name<br />
you‘ve entered. Click ―OK‖.<br />
3. In the Configure dialog, set<br />
the Alarm Time desired. The following can<br />
be set for seconds or minutes: (1) Alarm<br />
Duration (length of time the device is on),<br />
(2) Second Alarm Delay (length of time<br />
between the start of the first device to when<br />
to start the second device), (3) Third Alarm<br />
Delay (length of time between the start of<br />
the second device to when to start the third<br />
device), and (4) the amount of time the<br />
alarm is in Snooze mode.
4. In the middle third of the dialog box, select the days the timer is enabled. Also Assign<br />
whether or not to use alarm on a holiday or special day schedule (see Holiday Schedule<br />
reference manual). Click ―OK‖.<br />
5. Either right-click the title bar in the device dialog and select Configure Operations from<br />
the menu or from <strong>FSD</strong> Automator, choose Timers, Etc. from the Operations menu.<br />
Choose the alarm clock you‘ve entered.<br />
6. A tabbed index dialog appears. On the tabs are the different element types on the Alarm<br />
Clock device. Click on ―From Alarm State‖. This ―From‖ element sends a signal and<br />
connects to a ―To‖ element on another device (e.g. lamp module). Click ―Add‖, to add<br />
an operation that connects the From and To elements. From the droplist select<br />
SET_MONENTARY_PAIR.<br />
7. In the resulting<br />
dialog, select the<br />
device family to<br />
connect with the<br />
―To‖ element, the<br />
device type, and<br />
device name.<br />
Choose X10,<br />
X10 lamp<br />
module, and the<br />
name you‘ve<br />
entered,<br />
respectively. The<br />
Device element<br />
is Momentary<br />
On. Click ―OK‖.<br />
8. Repeat step 7 to<br />
configure a second and third device, if desired. Shown in the figure is ―From Second<br />
Alarm State‖ set to trigger an appliance module.<br />
9. In the tabbed index dialog, click ―Load‖ to load the configuration.<br />
10. When loading finishes, choose X10 Devices from the Operations menu. Choose the lamp<br />
module you‘ve entered. Click the ―To Momentary On‖ element. Listed is the operation<br />
that links to the alarm clock you‘ve entered. You have configured the system for an<br />
alarm clock device to control a lamp module.<br />
11. In the Configure alarm clock dialog there is a pair of radio buttons: ―Automatic Arming<br />
on Mode Activation‖ and ―<strong>Manual</strong> Arming Required‖. Selecting the former arms the<br />
alarm every day it is enabled. Selecting the latter radio button, the alarm must be<br />
manually armed or enabled. From the device dialog of the alarm clock, click on the<br />
Alarm Enable button (button should change from False to True). This enables the<br />
alarm‘s functions. Alarm enabled can be configured to a switch to enable or disable the<br />
alarm. Link the ―To Trigger Element‖ element type on the alarm clock timer to the<br />
―On/Off State‖ element on the switch with a SET_TO_VALUE operation. The same<br />
can be done for configuring the deactivate button and snooze button to a switch.<br />
The preceding example uses X10 family devices. However, devices from a different device<br />
family can be substituted (e.g. UPB devices). Link elements using operations as described<br />
above.
Simple Example to Configure a Fade Timer<br />
Use a Fade Timer to control the length of time an event is on, to dim or brighten a light on a<br />
specific schedule and, if desired, to program an inactive period before the event can be<br />
retriggered.<br />
The example illustrates how to configure a switch to activate a Fade Timer that controls a lamp<br />
module on an X10 system. X10 devices are used in the example, but apply similarly to other<br />
device families.<br />
Initial system set-up - add <strong>FSD</strong> <strong>Controller</strong>, power line interface, lamp module, and switch to the<br />
system.<br />
1. Open the <strong>FSD</strong> Autostart application, which starts <strong>FSD</strong> Router and <strong>FSD</strong> Automator.<br />
2. In <strong>FSD</strong> Automator‘s View menu, choose <strong>FSD</strong> Namer to assign an <strong>FSD</strong> <strong>Controller</strong> (FGI<br />
Device) and an X10 Power Line Interface (X10 Device) to the system (e.g. TW523 (a<br />
Timer Etc. family device)).<br />
3. From the <strong>FSD</strong> Automator application, select <strong>FSD</strong> Namer-> X10 Devices from the View<br />
menu.<br />
4. In the X10 Device List window, click the Insert button. From the droplist choose X10<br />
Lamp Module. Enter a Device Name, set the house and unit code (e.g. B and 2). Click<br />
―OK‖.<br />
5. In the X10 Device List window, click ―OK‖. If queried by a dialog box, choose to load<br />
configuration later.<br />
6. Click the Insert button. In the next dialog box, from the droplist choose X10 Switch.<br />
Enter a Device Name, set the house and unit code (e.g. A and 1). Click ―OK‖.<br />
7. In the X10 Device List window, click the Insert button again. From the droplist choose<br />
X10 Lamp Module. Enter a Device Name, set the house and unit code (e.g. B and 2).<br />
Click ―OK‖.<br />
8. In the X10 Device List window, click ―OK‖. If queried by a dialog box, choose to load<br />
configuration later.<br />
Creating and Configuring a Fade Timer - set<br />
parameters of the fade timer, a virtual device<br />
1. From the <strong>FSD</strong> Automator application, select<br />
<strong>FSD</strong> Namer-> Timers, Etc. from the View<br />
menu. From the Timers list, click<br />
―Insert‖. In the Edit Timers dialog,<br />
choose Fade Timer from the droplist and<br />
enter a name. Click ―OK‖ and Click<br />
―OK‖ in the next dialog box displayed. If<br />
needed you can choose Load<br />
Configuration later.<br />
2. Under the Configure menu in <strong>FSD</strong><br />
Automator, choose Timers, Etc. In the<br />
Select box choose the fade timer you<br />
entered.<br />
3. In the Configure dialog select 1) the ―Edge<br />
Triggered Input‖ (triggered when there is<br />
a change in event state), 2) ―Retriggerable<br />
While Active‖ (allows the timer to be
eset to extend the active period), 3) Accumulate time, and 4) Always Enabled.<br />
4. Set the Start Fade Level to 80 and time 5 seconds; set the Hold Level to 50 and time to 15<br />
seconds , and End Fade Level to 0 and Time for 10 seconds. In this configuration the<br />
fade timer begins at 80 and takes 5 seconds to reach the Hold Level and is held for 15<br />
seconds; then takes 10 seconds to reach the End Fade Level of zero.<br />
Link Devices by Setting Operations - configure devices and link device elements using<br />
operations<br />
1. From <strong>FSD</strong> Automator, choose Timers, Etc from the Operations menu. Choose the fade<br />
timer you‘ve entered.<br />
2. A tabbed index dialog appears. On the tabs are the different element types on the switch.<br />
Click on ―From Event State‖. This ―From‖ element sends a momentary on signal and<br />
connects to a ―To‖ element on another device (e.g. lamp module). Click ―Add‖, to add<br />
an operation that connects the From and To elements. From the droplist select<br />
SET_MOMENTARY_PAIR.<br />
3. In the resulting dialog, select the device family to connect with the ―To‖ element, the<br />
device type, and device name. Choose X10, X10 lamp module, and the device name<br />
you‘ve entered, respectively. The Device element is Momentary On. Click ―OK‖.<br />
4. In the tabbed index page, choose ―To Trigger State‖. Click the Add button and choose<br />
SET_TO_VALUE. Choose the Device Family, Device Type, Device Name, and Device<br />
Element (Momentary On) for the X10 switch selected. Click ―OK‖.<br />
5. In the tabbed index page, choose ―From Output Level‖. Click the Add button and choose<br />
CONVERT_VALUE. (CONVERT_VALUE is used because the two connecting<br />
elements on each device are different data types, but can be typecast for compatibility.)<br />
Choose the Device Family, Device Type, Device Name, and Device Element (Dimmer<br />
Setting) for the X10 switch selected. Click ―OK‖.<br />
6<br />
.<br />
I<br />
n<br />
the tabbed index dialog, click ―Load‖ to Load Configuration.<br />
Toggling the X10 switch sends a trigger to the fade timer. The fade timer turns on and fades the<br />
light as specified.
One can configure the fade timer to receive an input to enable the fade timer. Unselect the<br />
―Always Enabled‖ checkbox in the configure device dialog. Follow the above steps in ―Link<br />
Devices by Setting Operations‖ with the following changes: step 2, choose ―To Trigger<br />
Enabled‖ and add from the droplist SET_TO_VALUE. In step 3 choose the switch input with<br />
the device element selected as ―On/Off State‖.<br />
Some other options to select during configuration: With the ―Retriggerable While Active‖<br />
option selected, when the timer is active, pushing the on button of the switch causes the active<br />
period to reset to the beginning of the active period. If the ―Accumulate Time‖ is selected, the<br />
amount of time defined in the active period setting is added to the remaining active period. The<br />
amount of time accumulated can be limited by specifying a time.<br />
Configuring other device family systems is similar to the X10 system described above. For<br />
example, with an UPB system, substitute X10 component with its UPB counterpart (i.e.<br />
powerline interface, network and unit code).
Simple Example to Configure a Retriggerable Timer<br />
Use a Retriggerable Timer to control the length of time an event is on and, if desired, an inactive<br />
period before the event can be retriggered.<br />
The example illustrates how to configure a switch to activate a Retriggerable Timer that controls<br />
a lamp module on an X10 system. X10 devices are used in the example, but the example applies<br />
similarly to other device families.<br />
Initial system set-up - add <strong>FSD</strong> <strong>Controller</strong>, power line interface, lamp module, and switch to the<br />
system.<br />
1. Open the <strong>FSD</strong> Autostart application, which starts <strong>FSD</strong> Router and <strong>FSD</strong> Automator.<br />
2. In <strong>FSD</strong> Automator‘s View menu, choose <strong>FSD</strong> Namer to assign an <strong>FSD</strong> <strong>Controller</strong> (FGI<br />
Device) and an X10 Power Line Interface (X10 Device) to the system (e.g. TW523 (a<br />
Timer Etc. family device).<br />
3. From the <strong>FSD</strong> Automator application, select <strong>FSD</strong> Namer-> X10 Devices from the View<br />
menu.<br />
4. In the X10 Device List window, click the Insert button. From the droplist choose X10<br />
Lamp Module. Enter a Device Name, set the house and unit code (e.g. B and 2). Click<br />
―OK‖.<br />
5. In the X10 Device List window, click ―OK‖. If queried by a dialog box, choose to load<br />
configuration later.<br />
6. Click the Insert button. In the next dialog box, from the droplist choose X10 Switch.<br />
Enter a Device Name, set the house and unit code (e.g. A and 1). Click ―OK‖.<br />
7. In the X10 Device List window, click the Insert<br />
button again. From the droplist choose X10<br />
Lamp Module. Enter a Device Name, set the<br />
house and unit code (e.g. B and 2). Click<br />
―OK‖.<br />
8. In the X10 Device List window, click ―OK‖. If<br />
queried by a dialog box, choose to load<br />
configuration later.<br />
Creating and Configuring a Retriggerable Timer -<br />
set parameters of the retriggerable timer, a virtual device<br />
1. From the <strong>FSD</strong> Automator application, select <strong>FSD</strong><br />
Namer-> Timers, Etc. from the View menu.<br />
From the Timers list, click ―Insert‖. In the Edit<br />
Timers dialog, choose Retriggerable Timer<br />
from the droplist and enter a name. Click<br />
―OK‖. and Click ―OK‖ in the dialog that is<br />
displayed. If needed, you can choose Load<br />
Configuration later.<br />
2. Under the Configure menu in <strong>FSD</strong> Automator,<br />
choose Timers, Etc. In the Select box choose<br />
the retriggerable timer you entered.<br />
3. In the Configure dialog select 1) the ―Edge<br />
Triggered Input‖ (triggered when there is a<br />
change in event state), 2) ―Retriggerable While Active‖ (allows the timer to be reset to<br />
extend the active period), 3) Accumulate time, and 4) Always Enabled.
4. Set the Delay Time After Trigger to 5 seconds, the Output Active Time to 1 Minute, and<br />
Minimum Inactive Time to 20 seconds. In this configuration the timer waits 5 seconds<br />
after the trigger impulse to turn on the light for 1 minute, and prohibits triggering<br />
another event for 20 seconds.<br />
Link Devices by Setting Operations -<br />
configure devices and link device elements<br />
using operations<br />
1. From <strong>FSD</strong> Automator, choose<br />
Timers, Etc from the Operations<br />
menu. Choose the retriggerable<br />
timer you‘ve entered.<br />
2. A tabbed index dialog appears. On<br />
the tabs are the different element<br />
types on the switch. Click on<br />
―From Event State‖. This ―From‖<br />
element sends a momentary on signal and connects<br />
to a ―To‖ element on another device (e.g. lamp<br />
module). Click ―Add‖, to add an operation that<br />
connects the From and To elements. From the<br />
droplist select SET_MOMENTARY_PAIR.<br />
3. In the resulting dialog, select the device family to<br />
connect with the ―To‖ element, the device type, and<br />
device name. Choose X10, X10 lamp module, and<br />
the device name you‘ve entered, respectively. The<br />
Device element is Momentary On. Click ―OK‖.<br />
4. In the tabbed index page, choose ―To Trigger State‖.<br />
Click the Add button and choose SET_TO_VALUE.<br />
Choose the Device Family, Device Type, Device<br />
Name, and set the Device Element to ―On/Off State‖<br />
for the X10 switch selected. Click ―OK‖.<br />
5. In the tabbed index dialog, click ―Load‖ to Load<br />
Configuration.<br />
Toggling the X10 switch sends a trigger to the retriggerable<br />
timer. The retriggerable timer delays, then turns on the lamp<br />
module as specified. If ―Always Enabled‖ is not selected in<br />
the Configure dialog, the user can configure another switch<br />
to toggle the enable switch (―To Trigger Enable‖ element,<br />
similar to step 4 above).<br />
Some other options to select during configuration: With the ―Retriggerable While Active‖<br />
option selected, when the timer is active, pushing the on button of the switch causes the active<br />
period to reset to the beginning of the active period. If the ―Accumulate Time‖ is selected, the<br />
amount of time defined in the active period setting is added to the remaining active period. The<br />
amount of time accumulated can be limited by specifying a time.<br />
Configuring other device family systems is similar to the X10 system described above. For<br />
example, with an UPB system, substitute X10 component with its UPB counterpart (i.e.<br />
powerline interface, network and unit code).
Simple Example to Configure a Delay Timer<br />
The Delay Timer is an <strong>FSD</strong> virtual device in the Timers, Etc. device family. The user can<br />
program the delay timer to postpone the triggering of an event. If using the Boolean delay timer,<br />
the user can specify a number of thresholds to be achieved before a trigger is sent. The<br />
following example shows how to configure a Delay Timer. This Timers, Etc. device comes as<br />
either Boolean or a Byte version.<br />
Initial system set-up - add <strong>FSD</strong> <strong>Controller</strong>, power line interface, and lamp module to the<br />
system.<br />
1. Open the <strong>FSD</strong> Autostart application, which starts <strong>FSD</strong> Router and <strong>FSD</strong> Automator.<br />
2. In <strong>FSD</strong> Automator‘s View menu, choose <strong>FSD</strong> Namer to assign an <strong>FSD</strong> <strong>Controller</strong> (FGI<br />
Device) and an X10 Power Line Interface (X10 Device) to the system (e.g. TW523, a<br />
Timer Etc. family device).<br />
3. From the <strong>FSD</strong> Automator application, select <strong>FSD</strong> Namer-> X10 Devices from the View<br />
menu.<br />
4. In the X10 Device List window, click the Insert button. From the droplist choose X10<br />
Lamp Module. Enter a Device Name, set the house and unit code (e.g. B and 2). Click<br />
―OK‖.<br />
5. In the X10 Device List window, click ―OK‖. If queried by a dialog box, choose to load<br />
configuration later.<br />
Configure Delay Timer and Set Operations - configure button control device and link device<br />
elements<br />
The following example applies to a Boolean type Delay Timer.<br />
1. In <strong>FSD</strong> Automator‘s View menu, choose<br />
<strong>FSD</strong> Namer to assign a Timer, Etc.<br />
device. In the Timer List dialog, click<br />
the Insert button. In the Edit Timer<br />
dialog, choose Delay Timer (Boolean)<br />
from the Timer Type droplist. Enter a<br />
name for the timer. Click ―OK‖.<br />
2. From <strong>FSD</strong> Automator, choose Timers, Etc.<br />
from the Display menu. Select the<br />
Delay Timer (Boolean) device type and<br />
the device name you‘ve entered. Click<br />
―OK‖. In the Configure Device dialog,<br />
enter the Delay Time Per Step in<br />
Milliseconds or Seconds. For example,<br />
if the delay time (Boolean model) per<br />
step is one second, each output can be<br />
delayed between 0 to 63 seconds (max.<br />
of 63 steps) from the triggering signal.<br />
For the byte model there are only 8<br />
stages. If you want the output signal to<br />
send a false instead of true, click the<br />
―Invert‖ checkbox( not active for byte
model). To change the input signal from true to<br />
false, select ―Invert Input‖.<br />
3. Use the Combo Output Settings section to use<br />
selected triggered outputs to signal triggering of<br />
another output. In the Combo Output Settings<br />
section (not active for byte model), the user can<br />
select outputs (1 through 8) to be monitored. In<br />
the ―Threshold TRUE‖ edit box, enter the<br />
number of signals that must be true for a True<br />
signal to the sent. For example, if five of eight<br />
outputs are selected and threshold is three, then<br />
three of the five outputs selected must turn true<br />
before an ―On‖ signal is sent from the ―From<br />
Combo Output‖ element. Similarly, if threshold<br />
FALSE is set at two, when two of the outputs are<br />
false, an ―Off‖ output signal is sent. Click<br />
―OK‖. Click ―OK‖ in the Configure Device<br />
dialog.<br />
4. To configure the device elements, either right-click<br />
the title bar in the device dialog and select<br />
Configure Operations from the menu or from<br />
<strong>FSD</strong> Automator, choose Timers, Etc. from the<br />
Operations menu. Choose the delay timer<br />
you‘ve entered.<br />
5. A tabbed index dialog appears. On the tabs are the<br />
different element types on the Delay Timer<br />
device. Click on ―From Output ‖ to configure the output step. This ―From‖<br />
element sends a signal and connects to a ―To‖ element on another device (e.g. lamp<br />
module). Click ―Add‖, to add an operation that connects the From and To elements.<br />
From the droplist select SET_MONENTARY_PAIR.<br />
6. In the resulting dialog, select the device family to connect with the ―To‖ element, the<br />
device type, and device name. Choose X10, X10 lamp module, and the name you‘ve<br />
entered, respectively. The Device element is Momentary On. Click ―OK‖.<br />
7. If a Combo Output Setting is configured, select the ―From Combo Output‖ element.<br />
8. In the tabbed index dialog, click ―Load‖ to load the configuration.<br />
9. When loading finishes, choose X10 Devices from the Operations menu. Choose the lamp<br />
module you‘ve entered. Click the ―To Momentary On‖ element. Listed is the operation<br />
that links to the device timer you‘ve entered. You have configured the system for an<br />
delay timer device to control a lamp module.<br />
The preceding example uses X10 family devices. However, devices from a different device<br />
family can be substituted (e.g. UPB devices). Link elements using operations as described<br />
above.<br />
Simple Example to Configure a Button Control (non-time-based Timer device)<br />
<strong>FSD</strong> Button Control devices are virtual devices that resemble, on first glance, multiple address<br />
control pad devices. This Timers, Etc. device comes with either 8 or 16 buttons. Each button<br />
can be configured to control either customized scenes or macros, or FGI, X10, and UPB devices<br />
(depending on the model of controller).<br />
The following example shows how to configure a Button Control for an X10 system.
Initial system set-up - add <strong>FSD</strong> <strong>Controller</strong>, power line interface, and lamp module to the<br />
system.<br />
1. Open the <strong>FSD</strong> Autostart application, which starts <strong>FSD</strong> Router and <strong>FSD</strong> Automator.<br />
2. In <strong>FSD</strong> Automator‘s View menu, choose <strong>FSD</strong> Namer to assign an <strong>FSD</strong> <strong>Controller</strong> (FGI<br />
Device) and an X10 Power Line Interface (X10 Device) to the system (e.g. TW523 (a<br />
Timer Etc. family device).<br />
3. From the <strong>FSD</strong> Automator application, select <strong>FSD</strong> Namer-> X10 Devices from the View<br />
menu.<br />
4. In the X10 Device List window, click the Insert button. From the droplist choose X10<br />
Lamp Module. Enter a Device Name, set the house and unit code (e.g. P and 1). Click<br />
―OK‖.<br />
5. In the X10 Device List window, click ―OK‖. If queried by a dialog box, choose to load<br />
configuration later.<br />
Configure Button Controls and Set Operations - configure button<br />
control device and link device elements<br />
1. In <strong>FSD</strong> Automator‘s View menu, choose <strong>FSD</strong> Namer to assign<br />
a Timer, Etc. device. In the Timer List dialog, click the Insert<br />
button. In the Edit Timer dialog, choose 8 Button Control<br />
from the Timer Type droplist. Enter a name for the timer.<br />
Click ―OK‖. Load the configuration.<br />
2. In the Configure Display that appears, click on the number that<br />
corresponds to the button number you wish to configure.<br />
Click ―Enabled‖ to enable the button and choose either<br />
―On/Off Pair‖ to configure a pair of buttons, each controlling<br />
either the on or off state, or ―Push On/Push Off‖, in which the<br />
same button controls the on and off state. Enter a label for<br />
the button, if desired. If you want a different label displayed<br />
during the ―Off‖ state, check the ―Use OFF State label‖ and<br />
enter the label in the activated edit<br />
box. In the ―On‖ state, the label<br />
entered in the upper box is<br />
displayed. Click ―OK‖. Click<br />
―OK‖ in the Configure Display<br />
dialog.<br />
3. A button control dialog (the device<br />
dialog) with Configure in the title bar appears. (If<br />
not, from the Configure menu,<br />
choose Timers, Etc. and the 8 button<br />
control you‘ve defined.) Doubleclick<br />
a button that you‘ve labeled.<br />
In the Edit Button Info dialog that<br />
appears, choose the button type<br />
(FGI, X10, UPB, Macro, or Scene;<br />
what is listed depends on controller<br />
type). Select X10.<br />
4. In the Edit X10 Button Info dialog that<br />
appears, in the Primary grouping
ox enter the house and unit code of the device you want this button to control. Enter P-<br />
1. For the ON Command, choose ―ON‖ from the droplist. If the button is Push On/Push<br />
Off, in the Secondary grouping enter 1 as the unit and choose ―Off‖ from the OFF<br />
Command droplist. Click ―OK‖. The button you‘ve programmed now controls the<br />
lamp module device.<br />
The preceding example uses X10 family devices. However, devices from a different device<br />
family can be substituted (e.g. UPB devices).
Simple Example to Configure a Multi Switch Device<br />
The following example shows how to configure a Multi Switch. While there are many different<br />
types of devices in the multi switch category, this example deals with the multi button type multi<br />
switch. The following example is for an X10 system.<br />
Initial system set-up - add <strong>FSD</strong> <strong>Controller</strong>, power line interface, and lamp module to the<br />
system.<br />
1. Open the <strong>FSD</strong> Autostart application, which starts <strong>FSD</strong> Router and <strong>FSD</strong> Automator.<br />
2. In <strong>FSD</strong> Automator‘s View menu, choose <strong>FSD</strong> Namer to assign an <strong>FSD</strong> <strong>Controller</strong> (FGI<br />
Device) and an X10 Power Line Interface (X10 Device) to the system (e.g. TW523 (a<br />
Timer Etc. family device).<br />
3. From the <strong>FSD</strong> Automator application, select <strong>FSD</strong> Namer-> X10 Devices from the View<br />
menu.<br />
4. In the X10 Device List window, click the Insert button. From the droplist choose X10<br />
Lamp Module. Enter a Device Name, set the house and unit code (e.g. B and 2). Click<br />
―OK‖.<br />
5. In the X10 Device List window, click ―OK‖. If queried by a dialog box, choose to load<br />
configuration later.<br />
Configure Multi Switch and Set Operations - configure multi switch device and link device<br />
elements<br />
1. In <strong>FSD</strong> Automator‘s View menu,<br />
choose <strong>FSD</strong> Namer to assign an<br />
X10 device. In the X10 List<br />
dialog, click the Insert button. In<br />
the Edit X10 Device dialog,<br />
choose X10 8 Address Switch<br />
from the X10 Device Type<br />
droplist. Enter a name for the<br />
address switch. Select a starting<br />
House Code and Unit Code for<br />
the addresses. Click ―OK‖.<br />
Load the configuration.<br />
2. From the Configure menu choose<br />
X10 Device and choose the<br />
address switch you entered. In<br />
the configure dialog, check all<br />
switches you wish controlled by<br />
the All Lights ON and All Units Off button on the device. NOTE: Purchased X10 multi<br />
address switch pads are programmed automatically turn on all lamp modules for the<br />
programmed house code, but not appliance modules. With the <strong>FSD</strong> multi switch you<br />
can choose to include appliance modules or exclude lamp modes from activation with<br />
the ALL Lights On button and deactivation with the All Units OFF button. Click ―OK‖.<br />
3. From the Operation menu choose X10 Device and select the multi address switch you<br />
entered. A tabbed index dialog appears. On the tabs are the different element types on<br />
the Multi Switch device. For the switch desired click on its ―From Momentary On‖ tab.<br />
This ―From‖ element sends a signal and connects to a ―To‖ element on another device
(e.g. lamp module). Click ―Add‖, to add an operation that connects the From and To<br />
elements. From the droplist select SET_MONENTARY_PAIR.<br />
4. In the resulting dialog, select the device family to connect with the ―To‖ element, the<br />
device type, and device name. Choose X10, X10 lamp module, and the name you‘ve<br />
entered, respectively. The Device element is Momentary On. Click ―OK‖.<br />
5. In the tabbed index dialog, click ―Load‖ to load the configuration.<br />
6. When loading finishes, choose X10<br />
Devices from the Operations menu.<br />
Choose the lamp module you‘ve<br />
entered. Click the ―To Momentary<br />
On‖ element. Listed is the operation<br />
that links to the multi switch you‘ve<br />
entered. You have configured the<br />
system for an multi switch to control<br />
a lamp module.<br />
The preceding example uses X10 family<br />
devices. However, devices from a different<br />
device family can be substituted (e.g. UPB<br />
devices). Link elements using operations as described above.<br />
Simple Example to Configure a Sensor Device to Control another Device<br />
The following example describes how to use an <strong>FSD</strong> <strong>Controller</strong> equipped with a FGI port (RS-<br />
485) to take input from a FGI Sensor and control another device. Specifically, we will configure<br />
the system to take readings from a FGI Temperature/Humidity Sensor to trigger an UPB<br />
Appliance Module.
Initial system set-up for configuration<br />
In this example we use the <strong>FSD</strong> Bridge <strong>Controller</strong> equipped with an FGI port. If you have not<br />
installed the <strong>FSD</strong> Bridge <strong>Controller</strong> Software, you can install from the CD provided with the<br />
<strong>FSD</strong> Bridge <strong>Controller</strong>. Instructions are found under the Help menu->View Installation Guides,<br />
and choose <strong>FSD</strong> X10-UPB-FGI Bridge <strong>Controller</strong> from the list. Add <strong>FSD</strong> <strong>Controller</strong>, power line<br />
interfaces, and appliance module to the system.<br />
1. Connect the power supply to the controller and an USB cable from computer to controller<br />
(or a NULL MODEM cable (also called twisted cable, do not use a straight serial cable)<br />
from the serial port of your computer to the serial port on the controller).<br />
2. Plug the FGI RS-485 cable with FGI Temperature/Humidity Sensor attached into the FGI<br />
port.<br />
3. Open the <strong>FSD</strong> Autostart application, which starts <strong>FSD</strong> Router and <strong>FSD</strong> Automator.<br />
4. In <strong>FSD</strong> Automator‘s View menu, choose <strong>FSD</strong> Namer to assign an <strong>FSD</strong> <strong>Controller</strong> (FGI<br />
Device), name the temperature/humidity sensor, and an UPB Power Line interface (e.g.<br />
PIM, an RS485/232 device).<br />
5. Select <strong>FSD</strong> Namer-> UPB Devices from the View menu. Click the Insert button. In the<br />
next dialog box, from the droplist choose UPB Appliance Module. Enter a Device<br />
Name, set the network and unit code assigned to the device. Click ―OK‖. Click ―OK‖.<br />
If queried by a dialog box, choose to load configuration later.<br />
Configuring the Sensor Device and<br />
Slave Device<br />
1. Under Operations menu bring up<br />
the operations dialog for the<br />
temp/humidity FGI device.<br />
Select the From temperature<br />
element tab (from meaning that<br />
the signal is sent ―from‖ this<br />
element type). Click Add.<br />
2. In the Operation dialog box notice<br />
that the From type is<br />
SHORT_HUNDRETHS (more<br />
on this later). Select the
COMPARE_VALUE operation. Click ―OK‖.<br />
3. Displayed is the Compare Operation dialog.<br />
Select the device that you are sending the<br />
signal ―To‖. In this case the UPB appliance<br />
module with device element ―On/Off<br />
Setting‖.<br />
4. In the compare value box enter the temperature<br />
threshold value * 100 (type is<br />
SHORT_HUNDRETHS, thus if threshold is<br />
77, enter 7700).<br />
5. Click ―OK‖, and click ―Load‖ to load<br />
configuration. When temperature reaches<br />
77 F, the appliance (fan) should turn on,<br />
below 77 F, it turns off.<br />
Enable Hysteresis and Compare Range Options<br />
Enable Hysteresis<br />
If your value hovers around the threshold, your<br />
device might be cycling on and off. To remedy<br />
this use Enable Hysteresis. Set the Compare High<br />
Value as the threshold and the Compare Low<br />
Value as the shut off point. Thus, in our example<br />
the fan will turn on at 77 F and shuts off at 74 F.<br />
Compare Range<br />
Use this feature to switch on the device between<br />
the low and high values. Thus the fan works over<br />
a specified range, turns on at the Low value and shuts<br />
off at High value.<br />
Example to Configure Bridging of UPB Link<br />
Commands to X10 Devices<br />
The following example describes how to use an <strong>FSD</strong> Bridge <strong>Controller</strong> to receive UPB link<br />
commands from an UPB controller generating UPB link commands and bridge them to X10<br />
devices.<br />
Initial system set-up for configuration<br />
Please refer to the example scenario or manual that corresponds to your bridge controller model<br />
for initial configuration of your controller. When the UPB <strong>Controller</strong> generates UPB link<br />
commands to control a device, these commands go to ―virtual‖ devices. For the <strong>FSD</strong> Bridge to<br />
bridge the UPB commands to control X10 devices, the <strong>FSD</strong> Bridge needs to know the addresses<br />
of these ―virtual‖ devices. The <strong>FSD</strong> Bridge can recognize the UPB address and associate it with<br />
the proper X10 address.<br />
1. Select <strong>FSD</strong> Namer-> UPB Devices from the View menu. In the UPB Device List window,<br />
click the Insert button again. From the droplist choose UPB Switch. Enter a Device<br />
Name, choose the Link ID radio button, set the Network and Link ID (e.g. 001 and<br />
011L). Click ―OK‖. Continue adding UPB devices as needed. For this example add<br />
eight switches.
2. In the UPB Device List window, click ―OK‖. If queried by a dialog box, choose to load<br />
configuration later.<br />
3. Select <strong>FSD</strong> Namer-> X10 Devices from the View menu. In the X10 Device List window,<br />
click the Insert button again. From the droplist choose X10 Appliance Module. Enter a<br />
Device Name, set the house and unit code (e.g. M and 1). Click ―OK‖. Continue<br />
adding X10 devices as needed. For this example add eight appliance modules.<br />
4. In the X10 Device List window, click ―OK‖. If queried, choose to load configuration later.
Link UPB and X10 Device with Operations<br />
Each device type has specific types of elements associated with them. Elements are the<br />
interfaces between devices. Operations are used to connect the elements with one another. Each<br />
element has specific operations<br />
associated with them.<br />
1. From <strong>FSD</strong> Automator, choose<br />
UPB Devices from the<br />
Operations menu. Choose<br />
the UPB switch you‘ve<br />
entered.<br />
2. A tabbed index dialog appears.<br />
On the tabs are the different<br />
element types on the switch.<br />
Click on ―From Momentary<br />
On‖. This ―From‖ element<br />
sends a momentary on signal<br />
and connects to a ―To‖<br />
element on another device<br />
(e.g. lamp module). Click<br />
―Add‖, to choose an<br />
appropriate operation that<br />
connects the From and To<br />
elements. From the droplist select<br />
SET_MONENTARY_PAIR.<br />
3. In the resulting dialog, from the droplists (a) select<br />
the device family to connect with the ―To‖<br />
element, (b) the device type, and (c) device<br />
name. Choose X10, X10 Lamp Module, and the<br />
name you‘ve entered, respectively. The Device<br />
element is Momentary On. Click ―OK‖.<br />
4. In the tabbed index dialog, click ―Load‖ to Load<br />
Configuration.<br />
5. When loading finishes, choose X10 Devices from<br />
the Operations menu. Choose the lamp module<br />
you‘ve entered. Click the ―To Momentary On‖<br />
element. Listed is the operation that links to the<br />
UPB switch you‘ve entered.<br />
You have configured the system to enable an UPB<br />
switch control a X10 Lamp Module. Configure the<br />
remaining switches and modules using the same<br />
procedures or use an <strong>FSD</strong> Super Bridge (see below).<br />
<strong>FSD</strong> Super Bridge<br />
The <strong>FSD</strong> Super Bridge is a virtual device in the Timers, Etc. device family. In the previous<br />
example, linking device elements with operations for multiple devices can be a tedious task
assigning a number of switches to corresponding modules. To simplify this task, use an <strong>FSD</strong><br />
Super Bridge.<br />
In the following example the sequential UPB link Switches (011L through 018L) are assigned to<br />
X10 modules with sequential<br />
unit codes (M-1 through M-8).<br />
1. Select <strong>FSD</strong> Namer-><br />
Timers, Etc. from the<br />
View menu. In the<br />
Timers, Etc. List<br />
window, click the Insert<br />
button. From the droplist<br />
choose Super Bridge 8.<br />
Enter a Device Name and<br />
click ―OK‖. If asked,<br />
load configuration later.<br />
2. Select Timers, Etc. from<br />
the Configure menu, and<br />
choose the Super Bridge<br />
8 you just entered. In the<br />
Configure dialog box,<br />
double-click on the first<br />
entry line (Switches 1-4).<br />
3. In the Edit Bridge Group<br />
dialog choose UPB for<br />
the Input Settings.<br />
Choose Link ID. Enter<br />
―01‖ for the Network ID<br />
and ―011‖ for the Link ID. Choose X10 for the Output Settings and enter the ―M‖ for the<br />
House Code and ―1‖ for the Unit code entered in step 2. Click ―OK‖. Click ―OK‖ in the<br />
Configure dialog. Choose Load Configuration under the File menu.<br />
4. Assigning the another four addresses is easy. Repeat Step 2, but choose the entry line 5-8<br />
and select the ―Inherit Settings‖ checkbox.<br />
5. UPB Switches 011 through 018 are now associated with X10 devices M-1 through M-8,<br />
respectively (i.e. UPB switch 011 operates X10 device at M-1).<br />
Configuring the UPB <strong>Controller</strong> with Links (scenes)<br />
1. Define the UPB Link names in UPSTART. Open the UPSTART application and under the<br />
Network menu option choose ―Link Names‖. Click the ―New‖ button, add a new link,<br />
and assign the Link ID of 011. Repeat for the number of UPB Switches defined in <strong>FSD</strong><br />
Namer.<br />
2. Configure your UPB <strong>Controller</strong> (e.g. Home Control Assistant) to send commands to the<br />
UPSTART defined UPB Link names (defined as "Scenes‖ in Home Control Assistant).
Simple Example to Configure Two <strong>FSD</strong> Bridge <strong>Controller</strong>s to Transmit UPB Commands<br />
Across a Building with Multiple Powerline Supplies<br />
In a large building, different sections might be supplied with separate power lines. In this case<br />
UPB commands from a single controller cannot be signaled throughout the entire building.<br />
Employing two <strong>FSD</strong> Bridge <strong>Controller</strong>s allows the user to connect one section of a building to<br />
another section of a building supplied with an independent power line, in order to send UPB<br />
signals to all areas.<br />
Initial set-up of Equipment<br />
1. Install shielded 4-wire cable from one section of the building to the section of the<br />
building with a different power source. Attach RJ-11 connectors to both ends so that the<br />
cable is straight wired.<br />
2. At one <strong>FSD</strong> Bridge <strong>Controller</strong> end plug the RJ-11 connector into the X10 in port; at the<br />
other <strong>FSD</strong> Bridge <strong>Controller</strong> plug the RJ-11 connector into the X10 out port.<br />
Perform the following steps for each <strong>FSD</strong> Bridge <strong>Controller</strong>:<br />
Initial system configuration set-up<br />
If you have already added the controller and UPB powerline interfaces to the system<br />
configuration, skip this section. If you have not installed the <strong>FSD</strong> Bridge <strong>Controller</strong> Software,<br />
you can install from the CD provided with the <strong>FSD</strong> Bridge <strong>Controller</strong>. Instructions are found<br />
under the Help menu ->View Installation Guides, and choose the appropriate <strong>FSD</strong> Bridge<br />
<strong>Controller</strong> (e.g. <strong>FSD</strong> X10-UPB Bridge Plus <strong>Controller</strong>) from the list. Add <strong>FSD</strong> <strong>Controller</strong> and<br />
power line interfaces (both UPB and X10[, even if no X10 interface is installed) using <strong>FSD</strong><br />
Namer.<br />
1. Connect the power supply to the controller and either an USB cable from the computer or<br />
a NULL MODEM cable (also called twisted cable, do not use a straight serial cable) from<br />
the serial port of your computer to the serial port on the controller.<br />
2. Open the <strong>FSD</strong> Autostart application, which starts <strong>FSD</strong> Router and <strong>FSD</strong> Automator.<br />
3. In <strong>FSD</strong> Automator‘s View menu, choose <strong>FSD</strong> Namer to assign an <strong>FSD</strong> <strong>Controller</strong> (FGI<br />
Device) , X10 interface (TW523, an Timer etc. device), and an UPB Power Line interface<br />
(e.g. PIM, an RS485/232 device).<br />
Theory of operation: <strong>FSD</strong> Bridge <strong>Controller</strong>s were designed to bridge different home control<br />
product technologies so they could operate with one another using a single controller. In this<br />
example we use a bridge that allows both UPB and X10 protocols to be operated by the same<br />
controller. This ability is adapted for use in this situation. UPB commands from the UPM PIM<br />
with be converted to X10 signals by one <strong>FSD</strong> Bridge, X10 commands transmitted through the<br />
X10 ports to the other <strong>FSD</strong> Bridge, the other bridge will convert the X10 commands to UPB<br />
commands and sent to the UPB PIM attached to the other power line source. These command<br />
conversion are done by setting up Super Bridges or Super Fine Bridges, in which you configure<br />
what UPB address corresponds to what X10 address (details follow).<br />
<strong>FSD</strong> Super Bridge<br />
The <strong>FSD</strong> Super Bridge is a virtual device in the Timers, Etc. device family. It is possible to link<br />
one-by-one an X10 address with an UPB address. However, linking device elements with
operations for multiple devices can be a tedious task assigning a number of switches to<br />
corresponding modules. To simplify this task, use an <strong>FSD</strong> Super Bridge if you have a minimum<br />
of four sequentially numbered X10 addresses linked to four sequentially numbered UPB units.<br />
Super Bridges come in 8 or 16 links sizes. Thus, for example if you planned C1 through C4 X10<br />
addresses to signal UPB unit ids 006 through 009, do the following:<br />
1. Select <strong>FSD</strong> Namer-><br />
Timers, Etc. from the<br />
View menu. In the<br />
Timers, Etc. List<br />
window, click the<br />
Insert button. From the<br />
droplist choose Super<br />
Bridge 8 (or if needed<br />
Super Bridge 16).<br />
Enter a Device Name<br />
and click ―OK‖. If<br />
asked, load<br />
configuration later.<br />
2. Select Timers, Etc. from<br />
the Configure menu,<br />
and choose the Super<br />
Bridge 8 you just<br />
entered. In the<br />
Configure dialog box,<br />
double-click on the<br />
first entry line (1-4).<br />
3. In the Edit Bridge Group<br />
dialog choose X10 for the Input Settings. Enter ―C‖ for the house code and ―1‖ for the<br />
unit code. Choose UPB for the Output Settings and enter the network id and unit id 006.<br />
Click ―OK‖. Click ―OK‖. Choose Load Configuration under the File menu.<br />
4. Thus activating X10 addresses C1 through C4, controls UPB devices with unit ids 006<br />
through 009 respectively.<br />
5. Check the Bridge to be bidirectional.<br />
Assigning the other four addresses is easy. In Step 2 choose the entry line 5-8 and select the<br />
―Inherit Settings‖ check box if the UPB devices are the next numbers in sequence. Otherwise<br />
assign the beginning sequence unit id you wish to use for X10 addresses (e.g. H5 through H8) to<br />
control the UPB devices (e.g. 145 through 148). Check ―Enable Dimmer Operation‖ if the<br />
devices have dimmer capabilities. (For Super Bridge 16, just use the same procedures to extent<br />
the number of addresses from 8 to 16.)<br />
If your planned addresses are not sequentially numbered, use a Super Fine Bridge (next section)<br />
Configuring <strong>FSD</strong> Super Fine Bridge<br />
The <strong>FSD</strong> Super Fine Bridge is a virtual device akin to the Super Bridge. The Super Bridge is a<br />
convenient tool used to configure sequential numbered X10 devices with sequentially numbered<br />
UPB devices (minimum of four devices must be sequential). However, if your devices are not<br />
sequentially numbered, use the <strong>FSD</strong> Super Fine Bridge.
1. As with other devices, insert an instance of<br />
a <strong>FSD</strong> Super Fine Bridge (a Timers, Etc.<br />
type device) using <strong>FSD</strong> Namer. Select<br />
<strong>FSD</strong> Namer-> Timers, Etc. from the<br />
View menu. In the Timers, Etc. List<br />
window, click the Insert button. From<br />
the droplist choose Super Fine Bridge 16.<br />
Enter a Device Name and click ―OK‖. If<br />
asked, load configuration now.<br />
2. From the Configure menu choose the<br />
Timers, Etc. super fine bridge that you<br />
inserted. Note: Settings are grouped in<br />
sets of four UPB or X10 devices. The<br />
device family settings for switches 1, 5,<br />
9, and 13 apply to the subsequent three<br />
switches. In the figure below, the dialog<br />
box in the background shows that the<br />
first set of switches bridges input from<br />
the UPB device family and outputs to the<br />
X10 device family. As seen in the<br />
listbox neither the UPB nor the X10<br />
devices are in sequential order. The second set of four are X10 input with UPB output.<br />
3. The dialog box in the foreground edits the settings for switch 9. Checking the ―Inherit<br />
Settings‖ box sets the input and output settings to the previous switches device settings.<br />
If ―Inherit Settings‖ is not selected, the device family droplist boxes become active for<br />
selection. Check the ―Enable Bridge Operation‖ box to enable bridging of this switch<br />
and the ―Enable Dimmer Operation‖ box if the device bridged has dimming capability.<br />
4. Enter the X10 address and UPB address that you wish to bridge.<br />
5. Add the input and output device addresses and in the upper right corner, indicate the<br />
bridging direction: input to output (normal), output to input, or bidirectional.<br />
Configuring <strong>FSD</strong> X10-UPB-FGI Bridge Plus <strong>Controller</strong> with Timed Events<br />
Instructions to use the timed event capabilities of the Bridge Plus <strong>Controller</strong>, read the following<br />
example scenarios from the Help menu:<br />
Configuring Event Timer<br />
Configuring Alarm Clock<br />
Connecting <strong>FSD</strong> X10-UPB Bridge Plus to your system<br />
The <strong>FSD</strong> X10-UPB-FGI Bridge Plus <strong>Controller</strong> is ready for use, UNLESS the serial port on the<br />
<strong>FSD</strong> X10-UPB-FGI Bridge Plus <strong>Controller</strong> is used for configuring the controller. If it is, do the<br />
following:<br />
1. After configuring the controller, disconnect the power supply and the NULL MODEM<br />
cable from the controller.<br />
2. Connect the power supply.<br />
3. Connect the serial cable from the UPB Power Line interface to the serial port of the <strong>FSD</strong>
X10-UPB Bridge Plus <strong>Controller</strong>.
Simple Example to Configure <strong>FSD</strong> Logger<br />
<strong>FSD</strong> Logger is used to log changes in the state of device elements. For example, the temperature<br />
and humidity readings from various sensors around a museum can be logged over time. Separate<br />
log files can be created to record data from each sensor.<br />
Initial system set-up for configuration<br />
In this example we use the <strong>FSD</strong> Bridge <strong>Controller</strong> Plus equipped with temperature/humidity<br />
sensor attached through an FGI port. If you have not installed the <strong>FSD</strong> Bridge <strong>Controller</strong> Plus<br />
Software, you can install from the CD provided with the <strong>FSD</strong> Bridge <strong>Controller</strong> Plus.<br />
Instructions are found under the Help menu->View Installation Guides, and choose <strong>FSD</strong> X10-<br />
UPB-FGI Bridge <strong>Controller</strong> Plus from the list. Add <strong>FSD</strong> <strong>Controller</strong>, power line interfaces, and<br />
temperature/humidity sensors to the system.<br />
1. Connect the power supply to the controller and an USB cable from computer to controller<br />
or a NULL MODEM cable (also called twisted cable, do not use a straight serial cable)<br />
from the serial port of your computer to the serial port on the controller.<br />
2. Plug the FGI RS-485 cable with FGI Temperature/Humidity Sensors attached to the FGI<br />
port.<br />
3. Open the <strong>FSD</strong> Autostart application, which starts <strong>FSD</strong> Router and <strong>FSD</strong> Automator.<br />
4. In <strong>FSD</strong> Automator‘s View menu, choose <strong>FSD</strong> Namer to assign an <strong>FSD</strong> <strong>Controller</strong> (FGI<br />
Device), name the temperature/humidity sensors, and an UPB Power Line interface<br />
(e.g. PIM, an RS485/232 device).<br />
5. Load configuration (under the File menu choose ―Load Configuration‖).<br />
Configure the Temperature Humidity Sensors to report data<br />
For data logging, one must enable both a log<br />
file and at least one filter.<br />
1. To create a log file, choose Log Menu-><br />
Define Log Properties. In the dialog<br />
box displayed, click the ―Add Log<br />
File Definition‖.<br />
2. In the Log File Definition dialog, enable<br />
the log file, add a Log File Name, a<br />
description, and click the boxes with<br />
ellipsis to enter a destination for the<br />
log file and the backup log file.<br />
Ensure that the directories are<br />
defined.<br />
3. Choose the duration of logging, daily,<br />
weekly (named with the date of the<br />
Sunday of the current week), or<br />
monthly, (named with the 1st day of<br />
the current month.<br />
4. Choose maximum file size.<br />
5. Choose data format either binary (file<br />
compactness and processing efficiency) or<br />
comma delimited (for importing).<br />
6. Click ―Add Filter Definition‖ to add filtering<br />
elements.
Configure <strong>FSD</strong> Logger to Log Elements<br />
1. In the Edit Filter Options dialog, enter a name for the filter.<br />
2. Specify which device families, device types, and/or devices to log. If a single device type<br />
or specific device is selected, also enable which elements to log by clicking on the<br />
element in the list.<br />
3. Under Set Log Interval, specify whether to log element state values under the following<br />
conditions: (1) every report that occurs, (2) at set intervals (periodically, seconds or<br />
minutes), and/or (3) only when changes occur.<br />
To enable logs to collect data, either click the ―A‖ on the logger toolbar or select from the Log<br />
menu->―Enable All Logs‖.<br />
To view the log saved in binary form, select from the Log menu->―Extract Binary Log File‖.<br />
Select the log file to extract and in the subsequent dialog, specify the name and location of the<br />
extracted file. The data in the extracted file are comma delimited.<br />
NOTE: This example logs both temperature and humidity in the same log file. One can easily<br />
configure <strong>FSD</strong> Logger to create separate files to log temperature and humidity. Just specify<br />
which element to log.<br />
Simple Example to Configure Operating Modes<br />
The following example shows how use Operating Modes to configure the system. Although X10<br />
devices are used in the example, the instructions apply similarly to other device families.<br />
Initial system set-up - add <strong>FSD</strong> <strong>Controller</strong>, power line interface, and lamp module to the<br />
system.<br />
1. Open the <strong>FSD</strong> Autostart application, which starts <strong>FSD</strong> Router and <strong>FSD</strong> Automator.<br />
2. In <strong>FSD</strong> Automator‘s View menu, choose <strong>FSD</strong> Namer to assign an <strong>FSD</strong> <strong>Controller</strong> (FGI<br />
Device) and an X10 Power Line Interface (X10 Device) to the system (e.g. TW523 (a
Timer Etc. family device).<br />
3. From the <strong>FSD</strong> Automator application, select <strong>FSD</strong> Namer-> X10 Devices from the View<br />
menu.<br />
4. In the X10 Device List window, click the Insert button. From the droplist choose X10<br />
Lamp Module. Enter a Device Name, set the house and unit code (e.g. B and 2). Click<br />
―OK‖.<br />
5. In the X10 Device List window, click ―OK‖. If queried by a dialog box, choose to load<br />
configuration later.<br />
Configure Operating Modes and Set Operations - configure operating modes and link device<br />
elements<br />
1. In <strong>FSD</strong> Automator‘s View menu,<br />
choose <strong>FSD</strong> Namer. Double-click<br />
on an Operating Mode Group.<br />
Check its enabled checkbox and<br />
choose an Operating Mode Group<br />
Style: Radio button (only one<br />
item selected in the group),<br />
Independent (choice not<br />
influenced by other choices), all<br />
TRUE, or all FALSE.<br />
2. Select an operating mode by doubleclicking<br />
on an entry, set to<br />
enabled, and name operating<br />
modes (lower portion of dialog<br />
box). Enter ―Away‖, ―At home—<br />
awake‖, ―At home—asleep‖, and<br />
―On Vacation‖ as names for<br />
operating modes. Click ―OK‖.
3. In <strong>FSD</strong> Automator‘s View<br />
menu, choose <strong>FSD</strong> Namer<br />
to assign a Timer, Etc.<br />
device. In the Timer List<br />
dialog, click the Insert<br />
button. In the Edit Timer<br />
dialog, choose Time of Day<br />
Event from the Timer Type<br />
droplist. Enter a name for<br />
the timer. Click ―OK‖.<br />
From <strong>FSD</strong> Automator,<br />
choose Timers, Etc. from<br />
the Configure menu. Select<br />
the Time of Day Event<br />
device type and the device<br />
name you‘ve entered. Click<br />
―OK‖.<br />
4. In the Configure dialog, set the Start<br />
and Stop times desired. In<br />
the lower third of the dialog<br />
box, select the days the<br />
timer is enabled and the<br />
date range.<br />
5. In the bottom third choose<br />
―Enabled in All Operating<br />
Modes‖, if there are no<br />
restrictions on whether or<br />
not operation of the device<br />
depends on certain<br />
circumstances.<br />
6. If there are specific circumstances for operating the device, select ―Enabled in Selected<br />
Operating Modes‖. If you choose ―At home—awake‖ and ―School‘s in session‖, the<br />
timer works only when these modes are operating. Likewise, choosing ―On Vacation‖,<br />
the timer would work only<br />
when that operating mode is<br />
activated. Click ―OK‖.<br />
7. Under the Options Menu<br />
choose Set Operating<br />
Modes. Double-clicking on<br />
an operating mode on the list<br />
activates the operating<br />
mode. Under the enabled<br />
column the operating mode<br />
will be marked with an ―R‖,<br />
―I‖, ―T‖, or ―F‖, which<br />
indicates the operating mode<br />
group‘s style (Radio button<br />
(only one item selected in<br />
the group), Independent (choice not influenced by other choices), all TRUE, or all<br />
FALSE, respectively). Close dialog box to set changes.
8. Either (a) right-click the title bar in the device dialog and select Configure Operations from<br />
the menu or (b) from <strong>FSD</strong> Automator, choose Timers, Etc. from the Operations menu.<br />
Choose the timer you‘ve entered.<br />
9. A tabbed index dialog appears. On the tabs are the different element types on the Time of<br />
Day Event device. Click on ―From Event State‖. This ―From‖ element sends a signal<br />
and connects to a ―To‖ element on another device (e.g. lamp module). Click ―Add‖, to<br />
add an operation that connects the From and To elements. From the droplist select<br />
SET_MONENTARY_PAIR.<br />
10. In the resulting dialog, select the device family to connect with the ―To‖ element, the<br />
device type, and device name. Choose X10, X10 lamp module, and the name you‘ve<br />
entered, respectively. The Device element is Momentary On. Click ―OK‖.<br />
11. In the tabbed index dialog, click ―Load‖ to load the configuration.<br />
12. When loading finishes, choose X10 Devices from the Operations menu. Choose the lamp<br />
module you‘ve entered. Click the ―To Momentary On‖ element. Listed is the operation<br />
that links to the timer you‘ve entered. You have configured the system for an event<br />
timer to control a lamp module.<br />
13. From the device dialog of the time of day event, click on the Event State button (button<br />
should change from False to True. If there is a lamp device on the system with the<br />
address B-2, changing the event state should turn on and off the lamp module.<br />
For more complex combinations of operating modes to allow an event to be triggered, use<br />
―Multi-Mode Operation Enabled‖. Choose the operating modes among the different operating<br />
mode groups from the list that meet the conditions required. The operating modes selected are<br />
compared to the operating modes enabled in Set Operating Modes. If the operating mode is<br />
activated, the event occurs when triggered.<br />
The preceding example uses X10 family devices. However, devices from a different device<br />
family can be substituted (e.g. UPB devices). Link elements using operations as described<br />
above.
<strong>FSD</strong> <strong>Controller</strong> Spec Sheet Menu<br />
<strong>FSD</strong> X10 UPB FGI Bridge <strong>Controller</strong><br />
<strong>FSD</strong> Compact Bridge<br />
<strong>FSD</strong> X10 UPB FGI Bridge <strong>Controller</strong> Plus<br />
<strong>FSD</strong> UPB Compact <strong>Controller</strong><br />
<strong>FSD</strong> X10 Compact <strong>Controller</strong>
<strong>FSD</strong> X10 / UPB / FGI Bridge <strong>Controller</strong><br />
The <strong>FSD</strong> X10/UPB/FGI Bridge <strong>Controller</strong> provides a flexible and<br />
highly capable means to support a multi-protocol HA installation.<br />
It supports X10 (with extended command capability, including<br />
variations from different manufacturers), UPB, and hard-wired<br />
devices via the FGI interface. The bridge controller can be used<br />
stand-alone to integrate devices in a mixed X10 and UPB<br />
installation, or with a legacy X10 controller.<br />
Input and output commands to/from the X10, UPB, and FGI<br />
devices can be mapped across to the other protocols; for example, an X10 switch or a low-voltage hardwired switch<br />
could be mapped to send a UPB link command to control UPB devices, and a UPB command could be used to<br />
control an X10 device, X10 scene, or hardwired relay device. If used with a legacy X10 controller, input and output<br />
commands to/from the UPB and FGI devices can be mapped to X10 commands to the legacy X10 controller, via the<br />
legacy controller TW523 or PL513 X10 interface.<br />
The Bridge <strong>Controller</strong> also includes a flexible macro programming capability, and interval timer support.<br />
Provided software is used on a Windows XP or Windows 2000 computer<br />
to configure the bridge controller operation The computer does not need<br />
to remain connected during operation.<br />
If the computer does remain connected to the bridge, the software can be<br />
used for run-time monitoring and/or control of system devices, using a<br />
graphical floor-plan oriented user interface. The provided <strong>FSD</strong> Automator<br />
software suite includes a built-in graphical editor for creating layout<br />
graphics. Data logging software is provided to log device state data to<br />
disk; for example, the bridge controller could be used to implement a<br />
temperature and humidity data logging system. Run-time X10 and UPB<br />
commands can also be logged, as can timer and macro states.<br />
Remote monitoring, control, and configuration<br />
over a LAN, wireless LAN, or the Internet is<br />
supported in native mode.<br />
Third party application interfacing is supported<br />
with an easy-to-use interface application, and also<br />
with a documented packet based monitoring and<br />
control interface via a serial port USB driver, and<br />
via TCP/IP using an included PC hosted TCP/IP to<br />
serial packet router. The packet based interface is<br />
consistent across HA protocols, so the same<br />
interface approach can be used to control X10,<br />
UPB, and hardwired devices.
The <strong>FSD</strong> X10/UPB/FGI Bridge <strong>Controller</strong> can support up to 336 1-way associated device mappings (168 2-way<br />
device mappings). The total number of device associations depends on the type of device configured.<br />
Wiring Example:<br />
View example bridge configuration set-up online.<br />
View full documentation online.<br />
Included With Bridge:<br />
<strong>FSD</strong> X10 / UPB / FGI Bridge<br />
<strong>FSD</strong> Automator Software Suite<br />
Power Transformer, 14VAC<br />
USB Cable<br />
X10 Interface Cable<br />
Use This Bridge With:<br />
X10 Interface – TW523, PSC05, or equivalent<br />
Serial UPB Powerline Interface Module<br />
X10 Devices<br />
UPB Devices<br />
<strong>FSD</strong> Bridge Compatible FGI Hard-Wired Devices
<strong>FSD</strong> X10 / UPB Compact Bridge<br />
<strong>FSD</strong> X10 / UPB Compact Bridge<br />
The <strong>FSD</strong> X10 /UPB Compact Bridge provides a flexible and<br />
inexpensive means to support a two-protocol HA installation. It<br />
supports X10 (with extended command capability, including<br />
variations from different manufacturers) and UPB devices. The<br />
compact bridge controller can be used stand-alone to integrate devices<br />
in a mixed X10 and UPB installation, or with a legacy X10 controller.<br />
Input and output commands to/from the X10, UPB, and FGI devices<br />
can be mapped across to the other protocols; for example, an X10<br />
switch or a low-voltage hardwired switch could be mapped to send a<br />
UPB link command to control UPB devices, and a UPB command<br />
could be used to control an X10 device, X10 scene, or hardwired relay<br />
device. If used with a legacy X10 controller, input and output commands to/from the UPB and FGI devices can be<br />
mapped to X10 commands to the legacy X10 controller, via the legacy controller TW523 or PL513 X10 interface.<br />
The Compact <strong>Controller</strong> also includes a flexible macro programming capability, and interval timer support.<br />
Provided software is used on a Windows XP or Windows 2000 computer to configure the compact bridge operation<br />
The computer loads the bridge via the UPB serial port, and does not remain connected during operation.<br />
Device and operation configuration of the <strong>FSD</strong> X10 / UPB Compact Bridge uses the same methodology as larger<br />
bridges and controllers in the <strong>FSD</strong> product line. Upward compatibility within the family allows data configured for<br />
the compact bridge to be loaded into an <strong>FSD</strong> X10 / UPB / FGI Bridge if at some point greater capacity, additional<br />
software features, and / or hardware device support is desired.<br />
The <strong>FSD</strong> Compact Bridge <strong>Controller</strong> can support up to 176 1-way associated device mappings (88 2-way device<br />
mappings). The total number of device associations depends on the type of device configured.<br />
Specifications<br />
Inputs:<br />
Host computer loads through RS-232 UPB port<br />
RJ-11 input from legacy HA controller<br />
Emulates TW523 or PL513 X10 Interface<br />
9 VAC, 100ma<br />
Outputs:<br />
RJ-11 connection to TW523,<br />
PSC05, or PL513 X10 Interface<br />
RS-232 connection to Serial<br />
UPB Powerline Interface Module<br />
Dimensions:<br />
Bridge: 5‖ x 3‖ x 1‖
Wiring Example:<br />
View example bridge configuration set-up online.<br />
View full documentation online.<br />
Included With Bridge:<br />
<strong>FSD</strong> X10 / UPB Compact Bridge<br />
<strong>FSD</strong> Automator Software Suite<br />
Power Transformer, 9VAC<br />
X10 Interface Cable<br />
Use This Bridge With:<br />
X10 Interface – TW523, PSC05, or equivalent<br />
Serial UPB Powerline Interface Module<br />
X10 Devices<br />
UPB Devices
<strong>FSD</strong> X10 / UPB / FGI Bridge <strong>Controller</strong> Plus<br />
<strong>FSD</strong> X10 / UPB / FGI Bridge <strong>Controller</strong> Plus<br />
The <strong>FSD</strong> X10/UPB/FGI Bridge <strong>Controller</strong> Plus provides a flexible<br />
and highly capable means to support a multi-protocol HA<br />
installation. It supports X10 (with extended command capability,<br />
including variations from different manufacturers), UPB, and<br />
hard-wired devices via the FGI interface. The bridge controller<br />
can be used stand-alone to integrate devices in a mixed X10 and<br />
UPB installation, or with a legacy X10 controller.<br />
Input and output commands to/from the X10, UPB, and FGI devices can be mapped across to the other protocols.<br />
For example, an X10 switch or a low-voltage hardwired switch could be mapped to send a UPB link command to<br />
control UPB devices, and a UPB command could be used to control an X10 device, X10 scene, or hardwired relay<br />
device. If used with a legacy X10 controller, input and output commands to/from the UPB and FGI devices can be<br />
mapped to X10 commands to the legacy X10 controller, via the legacy controller<br />
TW523 or PL513 X10 interface.<br />
The <strong>FSD</strong> X10/UPB/FGI Bridge <strong>Controller</strong> Plus also includes a flexible macro<br />
programming capability, interval timer, and time-of-day timer support.<br />
Provided software is used on a Windows XP or Windows 2000 computer to<br />
configure the bridge controller operation The computer does not need to remain<br />
connected during operation. If the computer does remain connected to the<br />
bridge, the software can be used for run-time monitoring and/or control of<br />
system devices, using a graphical floor-plan oriented user interface. The<br />
provided <strong>FSD</strong> Automator software suite includes a built-in graphical editor for<br />
creating layout graphics. Data logging software is provided to log device state<br />
data to disk; for example, the bridge controller could be used to implement a temperature and humidity data logging<br />
system. Run-time X10 and UPB commands can<br />
also be logged, as well as timer and macro states.<br />
Remote monitoring, control, and configuration over<br />
a LAN, wireless LAN, or the Internet is supported<br />
in native mode.<br />
Third party application interfacing is supported<br />
with (1) an easy-to-use interface application, and<br />
(2) also with a documented packet based<br />
monitoring and control interface via a serial port<br />
USB driver, and via TCP/IP using an included PC<br />
hosted TCP/IP to serial packet router. The packet<br />
based interface is consistent across HA protocols,<br />
so the same interface approach can be used to<br />
control X10, UPB, and hardwired devices.<br />
The <strong>FSD</strong> X10/UPB/FGI Bridge <strong>Controller</strong> Plus can support up to 672 1-way associated device mappings (336 2-<br />
way device mappings). The total number of device associations depends on the type of device configured.
<strong>FSD</strong> X10 Compact <strong>Controller</strong><br />
<strong>FSD</strong> X10 Compact <strong>Controller</strong><br />
The <strong>FSD</strong> X10 Compact <strong>Controller</strong> is a highly capable yet low-cost<br />
single-protocol X10 home automation controller. It supports X10<br />
devices, including those with extended commands for groups and scenes,<br />
and X10 protocol variations from different manufacturers. The compact<br />
controller can be used stand-alone after initial configuration.<br />
Input and output commands to/from the X10 devices can be mapped<br />
across to others; for example, an X10 switch could be mapped to send a<br />
commands to control other X10 devices with different House and Unit<br />
code addresses, and also configured to operate with timer and macro<br />
devices.<br />
The <strong>FSD</strong> X10 Compact <strong>Controller</strong> also includes a flexible macro programming capability, interval timer, and timeof-day<br />
timer support.<br />
Provided software is used on a Windows XP or Windows 2000 computer to<br />
configure the compact controller operation The computer does not need to<br />
remain connected during operation. If the computer does remain connected to<br />
the controller, the software can be used for run-time monitoring and/or control of<br />
system devices, using a graphical floor-plan oriented user interface. The<br />
provided <strong>FSD</strong> Automator software suite includes a built-in graphical editor for<br />
creating layout graphics. Data logging software is provided to log device state<br />
data to disk. Run-time X10 commands can also be logged, as can timer and<br />
macro states.<br />
Remote monitoring, control, and configuration over a LAN, wireless LAN, or the Internet is supported in native<br />
mode.<br />
Third party application interfacing is supported with an<br />
easy-to-use interface application, and also with a<br />
documented packet based monitoring and control<br />
interface via a serial port USB driver, and via TCP/IP<br />
using an included PC hosted TCP/IP to serial packet<br />
router. The packet based interface is consistent across<br />
HA protocols, so the same interface approach can be<br />
used to control X10, UPB, and hardwired devices,<br />
using other controller and bridge products in <strong>FSD</strong>‘s<br />
automation product line.<br />
The <strong>FSD</strong> X10 Compact <strong>Controller</strong> can support up to<br />
64 devices. The total number of device depends on the<br />
type of device configured.
Wiring Example:<br />
View documentation online.<br />
Included With <strong>Controller</strong>:<br />
<strong>FSD</strong> X10 Compact <strong>Controller</strong><br />
<strong>FSD</strong> Automator Software Suite<br />
Power Transformer, 9VAC<br />
USB Cable<br />
X10 Interface Cable<br />
Use This <strong>Controller</strong> With:<br />
X10 Interface – TW523, PSC05, or equivalent<br />
X10 Devices
<strong>FSD</strong> UPB Compact <strong>Controller</strong><br />
<strong>FSD</strong> UPB Compact <strong>Controller</strong><br />
The <strong>FSD</strong> UPB Compact <strong>Controller</strong> also includes a flexible macro<br />
programming capability, interval timer, and time-of-day timer support.<br />
The <strong>FSD</strong> UPB Compact <strong>Controller</strong> is a highly capable yet low-cost singleprotocol<br />
UPB home automation controller. It supports UPB devices,<br />
including UPB link commands for groups and scenes. The compact<br />
controller can be used stand-alone after initial configuration.<br />
Input and output commands to/from the UPB devices can be mapped<br />
across to others; for example, a UPB switch could be mapped to send a<br />
commands to control other UPB devices with different addresses mapped<br />
through the controller, and also configured to operate with timer and macro<br />
devices.<br />
Provided software is used on a Windows XP or Windows 2000 computer<br />
to configure the compact controller operation The computer does not<br />
need to remain connected during operation. If the computer does remain<br />
connected to the controller, the software can be used for run-time<br />
monitoring and/or control of system devices, using a graphical floor-plan<br />
oriented user interface. The provided <strong>FSD</strong> Automator software suite<br />
includes a built-in graphical editor for creating layout graphics. Data logging software is provided to log device<br />
state data to disk. Run-time UPB commands can also be logged, as can timer and macro states.<br />
Remote monitoring, control, and configuration over a LAN, wireless LAN, or the Internet is supported in native<br />
mode.<br />
Third party application interfacing is supported with an easy-to-use interface application, and also with a<br />
documented packet based monitoring and control interface via a serial port USB driver, and via TCP/IP using an<br />
included PC hosted TCP/IP to serial packet router. The packet based interface is consistent across HA protocols, so<br />
the same interface approach can be used to control X10, UPB, and hardwired devices, using other controller and<br />
bridge products in <strong>FSD</strong>‘s automation product line.<br />
The <strong>FSD</strong> UPB Compact <strong>Controller</strong> can support up to 64 devices. The total number of device depends on the type of<br />
device configured.
Wiring Example:<br />
View documentation online.<br />
Included With <strong>Controller</strong>:<br />
<strong>FSD</strong> UPB Compact <strong>Controller</strong><br />
<strong>FSD</strong> Automator Software Suite<br />
Power Transformer, 9VAC<br />
USB Cable<br />
Use This <strong>Controller</strong> With:<br />
Serial UPB Powerline Interface Module<br />
UPB Devices


