SPEX Reference manual (PDF) - SRON
SPEX Reference manual (PDF) - SRON
SPEX Reference manual (PDF) - SRON

Create successful ePaper yourself
Turn your PDF publications into a flip-book with our unique Google optimized e-Paper software.
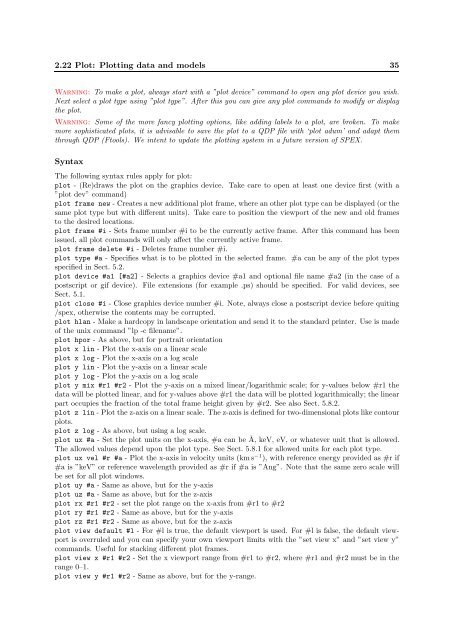
2.22 Plot: Plotting data and models 35<br />
Warning: To make a plot, always start with a ”plot device” command to open any plot device you wish.<br />
Next select a plot type using ”plot type”. After this you can give any plot commands to modify or display<br />
the plot.<br />
Warning: Some of the more fancy plotting options, like adding labels to a plot, are broken. To make<br />
more sophisticated plots, it is advisable to save the plot to a QDP file with ‘plot adum’ and adapt them<br />
through QDP (Ftools). We intent to update the plotting system in a future version of <strong>SPEX</strong>.<br />
Syntax<br />
The following syntax rules apply for plot:<br />
plot - (Re)draws the plot on the graphics device. Take care to open at least one device first (with a<br />
”plot dev” command)<br />
plot frame new - Creates a new additional plot frame, where an other plot type can be displayed (or the<br />
same plot type but with different units). Take care to position the viewport of the new and old frames<br />
to the desired locations.<br />
plot frame #i - Sets frame number #i to be the currently active frame. After this command has been<br />
issued, all plot commands will only affect the currently active frame.<br />
plot frame delete #i - Deletes frame number #i.<br />
plot type #a - Specifies what is to be plotted in the selected frame. #a can be any of the plot types<br />
specified in Sect. 5.2.<br />
plot device #a1 [#a2] - Selects a graphics device #a1 and optional file name #a2 (in the case of a<br />
postscript or gif device). File extensions (for example .ps) should be specified. For valid devices, see<br />
Sect. 5.1.<br />
plot close #i - Close graphics device number #i. Note, always close a postscript device before quiting<br />
/spex, otherwise the contents may be corrupted.<br />
plot hlan - Make a hardcopy in landscape orientation and send it to the standard printer. Use is made<br />
of the unix command ”lp -c filename”.<br />
plot hpor - As above, but for portrait orientation<br />
plot x lin - Plot the x-axis on a linear scale<br />
plot x log - Plot the x-axis on a log scale<br />
plot y lin - Plot the y-axis on a linear scale<br />
plot y log - Plot the y-axis on a log scale<br />
plot y mix #r1 #r2 - Plot the y-axis on a mixed linear/logarithmic scale; for y-values below #r1 the<br />
data will be plotted linear, and for y-values above #r1 the data will be plotted logarithmically; the linear<br />
part occupies the fraction of the total frame height given by #r2. See also Sect. 5.8.2.<br />
plot z lin - Plot the z-axis on a linear scale. The z-axis is defined for two-dimensional plots like contour<br />
plots.<br />
plot z log - As above, but using a log scale.<br />
plot ux #a - Set the plot units on the x-axis, #a can be Å, keV, eV, or whatever unit that is allowed.<br />
The allowed values depend upon the plot type. See Sect. 5.8.1 for allowed units for each plot type.<br />
plot ux vel #r #a - Plot the x-axis in velocity units (kms −1 ), with reference energy provided as #r if<br />
#a is ”keV” or reference wavelength provided as #r if #a is ”Ang”. Note that the same zero scale will<br />
be set for all plot windows.<br />
plot uy #a - Same as above, but for the y-axis<br />
plot uz #a - Same as above, but for the z-axis<br />
plot rx #r1 #r2 - set the plot range on the x-axis from #r1 to #r2<br />
plot ry #r1 #r2 - Same as above, but for the y-axis<br />
plot rz #r1 #r2 - Same as above, but for the z-axis<br />
plot view default #l - For #l is true, the default viewport is used. For #l is false, the default viewport<br />
is overruled and you can specify your own viewport limits with the ”set view x” and ”set view y”<br />
commands. Useful for stacking different plot frames.<br />
plot view x #r1 #r2 - Set the x viewport range from #r1 to #r2, where #r1 and #r2 must be in the<br />
range 0–1.<br />
plot view y #r1 #r2 - Same as above, but for the y-range.