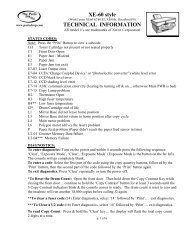
DC265 style Xerographic Module - The Parts Drop
DC265 style Xerographic Module - The Parts Drop
DC265 style Xerographic Module - The Parts Drop

You also want an ePaper? Increase the reach of your titles
YUMPU automatically turns print PDFs into web optimized ePapers that Google loves.
from: <strong>The</strong> <strong>Parts</strong> <strong>Drop</strong><br />
201-387-7776<br />
www.partsdrop.com<br />
<strong>The</strong>re are similar pairs of cartridge types for the overseas markets. Europe has its<br />
own, as does Latin America. Here’s a chart of the different reorder numbers and where they<br />
fit into the scheme of things:<br />
Reorder # Models Region – Market<br />
113R131 All except DC490 / DP90 / DT90 US – Sold (Type ‘A’)<br />
113R132 All except DC490 / DP90 / DT90 US – Metered (Type ‘B’)<br />
113R133 All except DC490 / DP90 / DT90 Europe (XE) – Sold<br />
113R134 All except DC490 / DP90 / DT90 Europe (XE) – Metered (FSMA)<br />
113R174 All except DC490 / DP90 / DT90 Latin America (ACO) – Sold<br />
113R175 All except DC490 / DP90 / DT90 Latin America (ACO) – FSMA<br />
113R620 All Models US – Sold (Type ‘A’)<br />
113R621 All Models US – Metered (FSMA)<br />
113R622 All Models Europe (XE) – Sold<br />
113R623 All Models Europe (XE) – Metered (FSMA)<br />
113R624 All Models Latin America (ACO) – Sold<br />
113R625 All Models Latin America (ACO) – Metered (FSMA)<br />
113R626 All Models<br />
US – Sold (EP : “Environmental<br />
Partnership”… OEM rebuilt)<br />
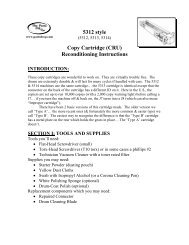
To rebuild one of these cartridges is somewhat time consuming, however with the<br />
proper procedure, it gets a lot easier. My first stab at taking one apart was at least two years<br />
ago. Since I didn’t have the Connectors available yet, I didn’t get too far into it, before I<br />
decided to procrastinate for a while (till now actually). I was very fortunate and thankful that<br />
a DVD called “Lakes CRU Rebuild” was given to me by a good friend. It turned out to be my<br />
sort of tutorial. Nothing fancy… very well explained. <strong>The</strong> fellow on the DVD has an easy<br />
going, matter-of-fact way of talking. He is obviously very comfortable with the procedure<br />
and it’s unscripted which is kind of refreshing. <strong>The</strong> DVD gave me a leg-up on the process<br />
and probably saved me from destroying the first cartridge in the process of learning how to<br />
properly take it apart.<br />
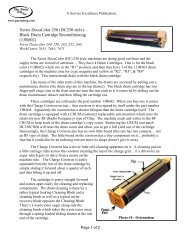
This is also a rather messy procedure… make sure you prepare a good work space<br />
accordingly. Toner will spill out of the dust filter vacuum ducts right from the onset (the<br />
ducts start on the left side of the cartridge and travel through the front end cover).<br />
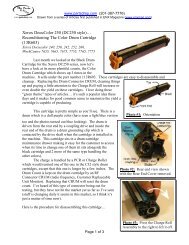
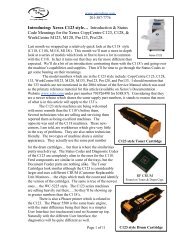
You’ll start by removing the Front End Cover. This is held on by 4 screws (Torx T20<br />
heads) (see the little white arrows on Photo 1). With the screws removed, you need to<br />
shimmy the cover and jiggle it a bit till it comes off towards the front. Pay attention to the<br />
Photo 1 – Front View<br />
Photo 2 – Front Cover (inside)<br />
Page 2 of 5 3/14/2007