You also want an ePaper? Increase the reach of your titles
YUMPU automatically turns print PDFs into web optimized ePapers that Google loves.
www.bergab.ru Берг АБ bergab@ya.ru Тел. (495)-228-06-21, факс (495) 223-3071<br />
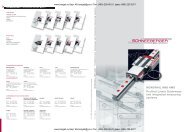
Setting up automatic tensioners:<br />
a typical example<br />
<strong>Timing</strong> <strong>Belt</strong> Tensioner<br />
(979272) for aftermarket<br />
VW 1.4/1.6L SOHC, I4 (EA 111)<br />
Revision date: 07/31/1998<br />
1.Allow the engine <strong>and</strong> tensioner to<br />
stabilize to the same relative ambient<br />
temperature before installing a<br />
tensioner for proper belt tension<br />
adjustment. Do not attempt to install<br />
a cool tensioner onto a hot engine or<br />
vise versa.<br />
2. Rotate both the crankshaft <strong>and</strong><br />
camshaft CLOCKWISE to TDC<br />
(Top Dead Center) position (i.e. #1<br />
cylinder firing position) <strong>and</strong> remove<br />
the timing belt. This defined position<br />
is to be the position where there<br />
is no action (positive or negative)<br />
from the camshaft or other<br />
sprockets. One should find no<br />
sudden movement or abrupt action<br />
from either of the sprockets.<br />
Generally cam & crankshaft<br />
sprockets have to line up with<br />
equivalent markings on the engine<br />
block to indicate TDC.<br />
Initial Setup of the TBT<br />
(<strong>Timing</strong> <strong>Belt</strong> Tensioner)<br />
3. Place a new tensioner onto the<br />
engine. Tensioner’s Anti-Rotation<br />
Fingers should fit over the Guiding<br />
Nut on the engine.<br />
4. Rotate the Installation Shaft Washer<br />
until the Hex Hole is pointing at<br />
the “5 O’clock position” then h<strong>and</strong><br />
tighten the M8 Mounting Bolt<br />
(See Figure 1).<br />
Fig. 1<br />
Installation of the TBT<br />
5. Install the timing belt being careful to<br />
engage the appropriate teeth of all<br />
the corresponding sprockets as per<br />
drive layout (See Figure 2).<br />
(Caution: Do not disturb the position of<br />
the crankshaft or camshaft sprockets<br />
during this procedure.)<br />
6. Rotate the Installation Shaft Washer<br />
CLOCKWISE with a Hex Key.<br />
Make sure to hold the mounting<br />
bolt with a Wrench in order to<br />
prevent it from turning when rotating<br />
the Installation Shaft Washer. The<br />
Tensioner assembly will move against<br />
the belt <strong>and</strong> the Arm will eventually<br />
start to move CLOCKWISE<br />
(See Figure 3).<br />
Fig. 3<br />
7. Continue rotating the Installation<br />
Shaft Washer until the Arm Pointer<br />
is positioned within the Nominal<br />
Position Window on the base plate,<br />
then lock the tensioner in this<br />
position by tightening the Mounting<br />
Nut with 19±3 Nm of torque<br />
(See Figure 4).<br />
Verification of the Nominal Position<br />
8. Remove both the Hex Key <strong>and</strong> the<br />
Wrench. Rotate the crankshaft two<br />
(2) complete revolutions manually<br />
for proper seating of the belt until<br />
the crankshaft is repositioned at the<br />
TDC position.<br />
Note: Repositioning the crankshaft to<br />
the TDC position must be done only<br />
during the clockwise rotation.<br />
9. Check the position of the Arm Pointer.<br />
– If the Arm Pointer still remains within<br />
the Nominal Position Window, the<br />
installation is complete.<br />
– If not, go to step #10. The installation<br />
needs to be repeated until the proper<br />
position is achieved.<br />
Readjustment<br />
10. Engage the Hex Key <strong>and</strong> retain<br />
it’s position while loosening the<br />
Mounting Bolt with the Wrench.<br />
The Mounting Bolt <strong>and</strong> the<br />
Tensioner do not need to be<br />
removed. Rotate the Installation<br />
Shaft Washer counterclockwise with<br />
the Hex Key until the Arm Pointer<br />
returns to the Free-Arm Position<br />
(See Figure 1). Follow step #5~9.<br />
Fig. 4<br />
Fig. 2<br />
www.bergab.ru Берг АБ bergab@ya.ru Тел. (495)-228-06-21, факс (495) 223-3071