Smarthome X10 Relay Wall Switch
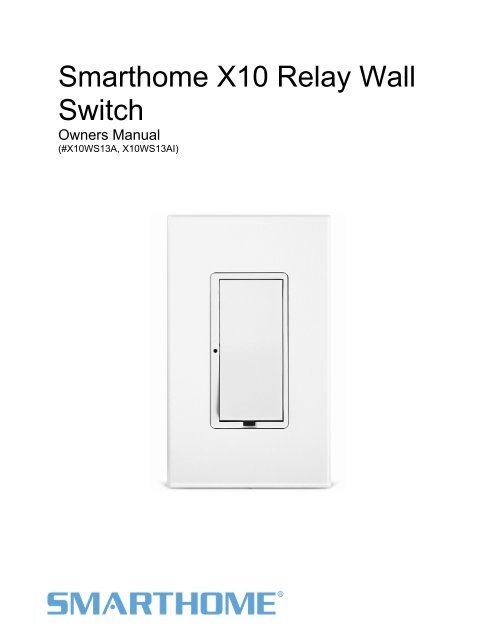
Smarthome X10 Relay Wall Switch
Smarthome X10 Relay Wall Switch
Create successful ePaper yourself
Turn your PDF publications into a flip-book with our unique Google optimized e-Paper software.
<strong>Smarthome</strong> <strong>X10</strong> <strong>Relay</strong> <strong>Wall</strong><br />
<strong>Switch</strong><br />
Owners Manual<br />
(#<strong>X10</strong>WS13A, <strong>X10</strong>WS13AI)<br />
Page 1 of 7<br />
<strong>X10</strong>WS13A Rev: 10/7/2011 6:08 PM
About <strong>X10</strong> <strong>Wall</strong> <strong>Switch</strong> ...............................................................................................................................3<br />
Features & Benefits...................................................................................................................................3<br />
What’s in the Box?.....................................................................................................................................3<br />
Getting Started ............................................................................................................................................4<br />
Identifying the Electrical Wires in your Home............................................................................................4<br />
Installation .................................................................................................................................................5<br />
Setting the <strong>X10</strong> Address............................................................................................................................6<br />
Removing the <strong>X10</strong> Address.......................................................................................................................6<br />
Factory Reset ..............................................................................................................................................6<br />
Specifications..............................................................................................................................................6<br />
Troubleshooting..........................................................................................................................................7<br />
Certification and Warranty .........................................................................................................................7<br />
Certification................................................................................................................................................7<br />
Limited Warranty .......................................................................................................................................7<br />
Page 2 of 7<br />
<strong>X10</strong>WS13A Rev: 10/7/2011 6:08 PM
About <strong>X10</strong> <strong>Wall</strong> <strong>Switch</strong><br />
This elegant and full-featured switch gives you local control and <strong>X10</strong> capabilities for the connected light or<br />
other non-dimmable load. Remotely turn the light on and off from an <strong>X10</strong> controller or send commands to<br />
other <strong>X10</strong> devices when you use <strong>X10</strong> <strong>Wall</strong> <strong>Switch</strong>’s paddle.<br />
Status LED<br />
<strong>Switch</strong> Paddle<br />
(Top: On<br />
Bottom: Off)<br />
<strong>Wall</strong>plate<br />
(sold separately)<br />
Set button<br />
Features & Benefits<br />
Replaces a standard light switch in minutes and programs in seconds<br />
Fully <strong>X10</strong> compatible to receive commands from any <strong>X10</strong> controller<br />
When controlled locally, the switch transmits <strong>X10</strong> signals to other devices<br />
Controls all standard incandescent loads up to 400 Watts or resistive loads up to 10 Amps<br />
Status LED indicates setup mode activity and signal transmission<br />
3-way and greater lighting circuit capability<br />
90-day warranty<br />
What’s in the Box?<br />
1x - <strong>X10</strong> <strong>Relay</strong> <strong>Wall</strong> <strong>Switch</strong><br />
2x - Mounting screws<br />
4x – Wire nuts<br />
1x - Quick-Start Guide<br />
Page 3 of 7<br />
<strong>X10</strong>WS13A Rev: 10/7/2011 6:08 PM
Getting Started<br />
CAUTIONS AND WARNINGS<br />
Read and understand these instructions before installing and retain them for future reference.<br />
This product is intended for installation in accordance with the National Electric Code and local regulations in the United States or<br />
the Canadian Electrical Code and local regulations in Canada. Use indoors only. This product is not designed or approved for<br />
use on power lines other than 120V 60Hz, single phase. Attempting to use this product on non-approved power lines may have<br />
hazardous consequences.<br />
- Use only indoors or in outdoor rated box<br />
- Be sure that you have turned off the circuit breaker or removed the fuse for the circuit you are installing this product into.<br />
Installing this product with the power on will expose you to dangerous voltages.<br />
- Connect using only copper or copper-clad wire<br />
- This product may feel warm during operation. The amount of heat generated is within approved limits and poses no<br />
hazards. To minimize heat buildup, ensure the area surrounding the rear of this product is as clear of clutter as possible.<br />
- To reduce the risk of overheating and possible damage to other equipment, do not use this product to control loads in<br />
excess of the specified maximum(s) or, install in locations with electricity specifications which are outside of the product’s<br />
specifications. If this device supports dimming, please note that dimming an inductive load, such as a fan or transformer,<br />
could cause damage to the dimmer, the load bearing device, or both. If the manufacturer of the load device does not<br />
recommend dimming, use a non-dimming on/off switch. USER ASSUMES ALL RISKS ASSOCIATED WITH DIMMING AN<br />
INDUCTIVE LOAD.<br />
Identifying the Electrical Wires in your Home<br />
- LINE - usually black, may also be called HOT or LIVE, carries 110VAC electricity into the outlet<br />
- NEUTRAL - usually white<br />
- LOAD – usually red or blue<br />
- GROUND - bare copper wire or metal fixture (if grounded)<br />
IMPORTANT!<br />
If you are having any difficulties, consult an electrician. If you are not knowledgeable about, and comfortable with, electrical<br />
circuitry, you should have a qualified electrician install <strong>X10</strong> <strong>Wall</strong> <strong>Switch</strong> for you. If you have any questions, please consult an<br />
electrician.<br />
Page 4 of 7<br />
<strong>X10</strong>WS13A Rev: 10/7/2011 6:08 PM
Installation<br />
1) Turn off the circuit breaker (or remove fuses) supplying power to the switch location<br />
2) Remove the existing wallplate from the switch you are replacing. Then, unscrew the switch and<br />
remove it from the junction box.<br />
3) Disconnect the wires from the switch you are replacing. If the wires cannot be detached by<br />
unscrewing them, cut the wires where they enter the switch and then strip ½ inch of insulation off the<br />
ends.<br />
4) Identify the wires in the junction box using a voltage tester. Then, see the diagram above to identify<br />
and connect the LINE, LOAD, NEUTRAL, and GROUND wires on <strong>X10</strong> <strong>Wall</strong> <strong>Switch</strong>.<br />
5) Ensure the wires are firmly attached and that there is no exposed copper except for the GROUND<br />
wire<br />
6) Gently place <strong>X10</strong> <strong>Wall</strong> <strong>Switch</strong> into the junction box, orienting the unit with the LED on the left and<br />
screw into place<br />
7) Enable power to the switch from the circuit breaker or fuse panel<br />
8) Test that the switch is working properly by turning the light on and off from the paddle<br />
9) Reinstall the wallplate<br />
Page 5 of 7<br />
<strong>X10</strong>WS13A Rev: 10/7/2011 6:08 PM
Setting the <strong>X10</strong> Address<br />
1) Press & hold <strong>X10</strong> <strong>Wall</strong> <strong>Switch</strong>’s Set button until <strong>X10</strong> <strong>Wall</strong> <strong>Switch</strong> beeps<br />
<strong>X10</strong> <strong>Wall</strong> <strong>Switch</strong>’s LED will begin blinking<br />
2) Using an <strong>X10</strong> controller, send the <strong>X10</strong> address you want to assign followed by the ON command<br />
three times.<br />
For example, to assign the address A1, send “A1 ON A1 ON A1 ON”.<br />
<strong>X10</strong> <strong>Wall</strong> <strong>Switch</strong> will double-beep and its LED will stop blinking<br />
Removing the <strong>X10</strong> Address<br />
1) Press & hold <strong>X10</strong> <strong>Wall</strong> <strong>Switch</strong>’s Set button until <strong>X10</strong> <strong>Wall</strong> <strong>Switch</strong> beeps<br />
<strong>X10</strong> <strong>Wall</strong> <strong>Switch</strong>’s LED will begin blinking<br />
2) Press & hold <strong>X10</strong> <strong>Wall</strong> <strong>Switch</strong>’s Set button until <strong>X10</strong> <strong>Wall</strong> <strong>Switch</strong> beeps again<br />
<strong>X10</strong> <strong>Wall</strong> <strong>Switch</strong>’s LED will continue blinking<br />
3) Using an <strong>X10</strong> controller, send the <strong>X10</strong> address you want to remove followed by the ON command<br />
three times.<br />
For example, to remove the address A1, send “A1 ON A1 ON A1 ON”.<br />
<strong>X10</strong> <strong>Wall</strong> <strong>Switch</strong> will double-beep and its LED will stop blinking<br />
Factory Reset<br />
1) Gently pull the Set button at the bottom of the paddle out as far as it will go (about 1/8 inch) to remove<br />
all power to <strong>X10</strong> <strong>Wall</strong> <strong>Switch</strong><br />
The LED and the load will turn off<br />
2) Wait 10 seconds, and then push the Set button in as far as it will go, making sure not to let up on the<br />
Set button<br />
<strong>X10</strong> <strong>Wall</strong> <strong>Switch</strong> will beep and flash its LED once<br />
The load will turn on<br />
3) Continue to hold down the Set button for 3 seconds, and then release<br />
A few seconds after you release the Set button, <strong>X10</strong> <strong>Wall</strong> <strong>Switch</strong> will double-beep and flash its<br />
LED once<br />
Specifications<br />
View specifications for <strong>X10</strong> <strong>Wall</strong> <strong>Switch</strong> at: www.smarthome.com/<strong>X10</strong>WS13A.html<br />
Page 6 of 7<br />
<strong>X10</strong>WS13A Rev: 10/7/2011 6:08 PM
Troubleshooting<br />
Problem Possible Cause Solution<br />
<strong>X10</strong> <strong>Wall</strong> <strong>Switch</strong> is not<br />
controlling the load.<br />
<strong>X10</strong> <strong>Wall</strong> <strong>Switch</strong> is not<br />
receiving signals from<br />
<strong>X10</strong> controllers.<br />
<strong>X10</strong> <strong>Wall</strong> <strong>Switch</strong> turned<br />
on by itself.<br />
<strong>X10</strong> <strong>Wall</strong> <strong>Switch</strong> is<br />
locked up.<br />
<strong>X10</strong> <strong>Wall</strong> <strong>Switch</strong> may not be<br />
getting power.<br />
<strong>X10</strong> <strong>Wall</strong> <strong>Switch</strong> and the<br />
controller may be on<br />
opposite phases.<br />
Other modules may be<br />
loading down the signal or<br />
creating too much noise.<br />
Stray <strong>X10</strong> signals from a<br />
neighboring system may<br />
have triggered <strong>X10</strong> <strong>Wall</strong><br />
<strong>Switch</strong>.<br />
A surge or excessive noise<br />
on the power line may have<br />
glitched it.<br />
Make sure the circuit breaker is turned on.<br />
Make sure the air gap (Set button) is not pulled out.<br />
Check the junction box wires to ensure all<br />
connections are tight and no bare wires are exposed.<br />
Install an <strong>X10</strong> signal bridge or coupler to bridge the<br />
power line phases.<br />
Move the other modules to different areas of your<br />
home to reduce noise on the power line.<br />
Install a noise filter between the <strong>X10</strong> <strong>Wall</strong> <strong>Switch</strong> and<br />
the noise-producing device.<br />
Install a power line signal blocker in your home to<br />
keep <strong>X10</strong> signals from other systems from interfering.<br />
Pull the Set button all the way out to air-gap it, and<br />
then push it back in until it is flush with the wallplate.<br />
If the above doesn’t work, perform a factory reset.<br />
If you have tried these solutions, reviewed this Owner’s Manual, and still cannot resolve an issue you are<br />
having with <strong>X10</strong> <strong>Wall</strong> <strong>Switch</strong>, please call: 800-762-7845.<br />
Certification and Warranty<br />
Certification<br />
This product has been thoroughly tested by ITS ETL SEMKO, a nationally recognized independent third-party testing laboratory. The North American<br />
ETL Listed mark signifies that the device has been tested to and has met the requirements of a widely recognized consensus of U.S. and Canadian<br />
device safety standards, that the manufacturing site has been audited, and that the manufacturer has agreed to a program of quarterly factory followup<br />
inspections to verify continued conformance.<br />
Limited Warranty<br />
Seller warrants to the original consumer purchaser of this product that, for a period of 90 days from the date of purchase, this product will be free from<br />
defects in material and workmanship and will perform in substantial conformity to the description of the product in this Owner’s Manual. This warranty<br />
shall not apply to defects or errors caused by misuse or neglect. If the product is found to be defective in material or workmanship, or if the product<br />
does not perform as warranted above during the warranty period, Seller will either repair it, replace it, or refund the purchase price, at its option, upon<br />
receipt of the product at the address below, postage prepaid, with proof of the date of purchase and an explanation of the defect or error. The repair,<br />
replacement, or refund that is provided for above shall be the full extent of Seller’s liability with respect to this product. For repair or replacement during<br />
the warranty period, call the Tech Support at 800-762-7845 with the Model # and Revision # of the device to receive an RMA# and send the product,<br />
along with all other required materials to:<br />
<strong>Smarthome</strong><br />
ATTN: Receiving<br />
16542 Millikan Ave.<br />
Irvine, CA 92606-5027<br />
Limitations<br />
The above warranty is in lieu of and Seller disclaims all other warranties, whether oral or written, express or implied, including any warranty or<br />
merchantability or fitness for a particular purpose. Any implied warranty, including any warranty of merchantability or fitness for a particular purpose,<br />
which may not be disclaimed or supplanted as provided above shall be limited to the 90-day of the express warranty above. No other representation or<br />
claim of any nature by any person shall be binding upon Seller or modify the terms of the above warranty and disclaimer.<br />
Home automation devices have the risk of failure to operate, incorrect operation, or electrical or mechanical tampering. For optimal use, manually verify<br />
the device state. Any home automation device should be viewed as a convenience, but not as a sole method for controlling your home.<br />
In no event shall Seller be liable for special, incidental, consequential, or other damages resulting from possession or use of this device, including<br />
without limitation damage to property and, to the extent permitted by law, personal injury, even if Seller knew or should have known of the possibility of<br />
such damages. Some states do not allow limitations on how long an implied warranty lasts and/or the exclusion or limitation of damages, in which case<br />
the above limitations and/or exclusions may not apply to you. You may also have other legal rights that may vary from state to state.<br />
© Copyright 2011 <strong>Smarthome</strong>, 16542 Millikan Ave., Irvine, CA 92606, 800-762-7845, www.smarthome.com<br />
Page 7 of 7 <strong>X10</strong>WS13A Rev: 10/7/2011 6:08 PM


