

Manual Venstar T1100RF Rev. 1 - Smarthome
Manual Venstar T1100RF Rev. 1 - Smarthome
Manual Venstar T1100RF Rev. 1 - Smarthome

Create successful ePaper yourself
Turn your PDF publications into a flip-book with our unique Google optimized e-Paper software.
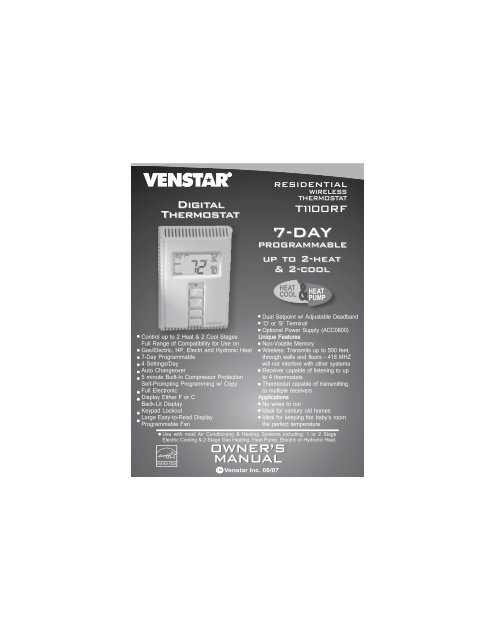
Digital<br />
Thermostat<br />
residential<br />
WIRELESS<br />
THERMOSTAT<br />
<strong>T1100RF</strong><br />
7-DAY<br />
PROGRAMMABLE<br />
up to<br />
2-heat<br />
& 2-cool<br />
HEAT<br />
COOL<br />
HEAT<br />
PUMP<br />
Control up to 2 Heat & 2 Cool Stages<br />
Full Range of Compatibility for Use on<br />
Gas/Electric, HP, Electri and Hydronic Heat<br />
7-Day Programmable<br />
4 Settings/Day<br />
Auto Changeover<br />
5 minute Built-In Compressor Protection<br />
Self-Prompting Programming w/ Copy<br />
Full Electronic<br />
Display Either F or C<br />
Back-Lit Display<br />
Keypad Lockout<br />
Large Easy-to-Read Display<br />
Programmable Fan<br />
Use with most Air Conditioning & Heating Systems including: 1 or 2 Stage<br />
Electric Cooling & 2 Stage Gas Heating, Heat Pump, Electric or Hydronic Heat.<br />
OWNER’S<br />
MANUAL<br />
<strong>Venstar</strong> Inc. 08/07<br />
Dual Setpoint w/ Adjustable Deadband<br />
‘O’ or ‘B’ Terminal<br />
Optional Power Supply (ACC0800)<br />
Unique Features<br />
Non-Volatile Memory<br />
Wireless: Transmits up to 500 feet,<br />
through walls and floors - 418 MHZ<br />
will not interfere with other systems<br />
Receiver capable of listening to up<br />
to 4 thermostats<br />
Thermostat capable of transmitting<br />
to multiple receivers<br />
Applications<br />
No wires to run<br />
Ideal for century old homes<br />
Ideal for keeping the baby’s room<br />
the perfect temperature
Table Of Contents<br />
FRONT PANEL<br />
DISPLAY<br />
QUICK START Set the clock and go<br />
SELECTING THE HEAT<br />
OR COOL MODE<br />
BASIC OPERATION<br />
PROGRAMMING A DAILY<br />
SCHEDULE<br />
ADVANCED SETUP<br />
ABOUT ADVANCED FEATURES<br />
& OPERATION<br />
WARRANTY<br />
CAUTION<br />
Follow Installation Instructions carefully.<br />
DISCONNECT POWER TO THE HEATER -<br />
AIR CONDITIONER BEFORE REMOVING<br />
THE OLD THERMOSTAT AND INSTALLING<br />
THE NEW THERMOSTAT.<br />
This device complies with Part 15 of the FCC<br />
Rules. Operation is subject to the following<br />
two conditions: (1) this device may not<br />
cause harmful interference, and (2) this<br />
device must accept any interference<br />
received, including interference that may<br />
cause undesired operation.<br />
P/N <strong>T1100RF</strong><br />
<strong>Venstar</strong> Inc. 08/07<br />
Page 1<br />
F<br />
Cc<br />
2<br />
3<br />
5<br />
6<br />
7<br />
8<br />
12<br />
16<br />
19<br />
WARNING<br />
<strong>T1100RF</strong><br />
FCC ID MUH-T10013
Front Panel<br />
6:03 Am<br />
Su<br />
AUTO<br />
68<br />
70<br />
COOL<br />
HEAT<br />
67<br />
o<br />
o<br />
MODE<br />
FAN<br />
Liquid Crystal Display<br />
with Thermoglow<br />
Up/Down Buttons<br />
Mode Button<br />
Fan Button<br />
Transmission Indicator<br />
Blinking Green = Communicating<br />
with the Receiver<br />
Page 2
Display<br />
:<br />
Am ProgramOn Setup<br />
I8 88Pm Locked<br />
SuMoTuWeThFrSa<br />
88<br />
AUTO<br />
OFFNight<br />
MorningDay<br />
Evening<br />
Fan On<br />
88<br />
COOL<br />
HEAT<br />
88<br />
o<br />
o<br />
Mode Indicators - Page 6<br />
Selects the operational mode of the equipment.<br />
HEAT - Indicates the heating mode.<br />
COOL - Indicates the air conditioning mode.<br />
AUTO - Indicates the system will automatically<br />
changeover between heat and cool modes<br />
as the temperature varies.<br />
PROGRAM ON - Indicates the time period<br />
program is enabled to run.<br />
OFF - Indicates heating and cooling are turned off.<br />
Clock with Day of the Week - Page 5<br />
Indicates the current time and day. This clock is<br />
also used to program the time period schedules.<br />
Room Temperature Display<br />
Indicates current room temperature.<br />
Desired Set Temperature - Page 7<br />
Indicates desired room temperature(s).<br />
Page 3
Display<br />
:<br />
Am ProgramOn Setup<br />
I8 88Pm Locked<br />
SuMoTuWeThFrSa<br />
88<br />
AUTO<br />
OFFNight<br />
MorningDay<br />
Evening<br />
Fan On<br />
88<br />
COOL<br />
HEAT<br />
88<br />
o<br />
o<br />
Morning, Day, Evening & Night icons - Pages 8-10<br />
Indicates the day part of the time period program.<br />
Setup icon - Pages 12-14<br />
Indicates the thermostat is in the setup mode.<br />
Fan On icon - Page 7<br />
Indicates constant, continuous fan operation.<br />
When Fan On is not lit - indicates the fan will only<br />
operate when necessary to heat or to cool.<br />
Locked icon - Page 18<br />
Indicates the keypad has been locked.<br />
Page 4
Quick Start Set the Clock and Go<br />
MODE<br />
FAN<br />
Setting the Clock<br />
Tip: To change hours<br />
quickly, press and<br />
hold the FAN button,<br />
then press the UP or<br />
DOWN button.<br />
Press the MODE button.<br />
While holding MODE,<br />
press the FAN button for<br />
two seconds to enter Setup<br />
screens.<br />
I2 : 00<br />
Am<br />
Setup<br />
i<br />
During Setup & Programming:<br />
Pressing the UP or DOWN<br />
button will modify the<br />
flashing selection.<br />
To adjust the<br />
Clock or Day use<br />
buttons.<br />
Setting the Day<br />
Su<br />
Setup<br />
2<br />
Press<br />
MODE<br />
Press the MODE button.<br />
While holding MODE,<br />
press the FAN button for<br />
two seconds to enter Setup<br />
screens.<br />
MODE<br />
FAN<br />
The thermostat is preprogrammed from the factory to operate<br />
one or two stage equipment* without the need for further<br />
programming. To optimize the installation of this thermostat,<br />
follow the instructions in the Advanced Setup section.<br />
* The thermostat is not preprogrammed from the factory to operate<br />
electric heat or heat pump systems. To control these systems,<br />
follow the instructions in the Receiver manual.<br />
Page 5
Selecting the Heat or Cool Mode<br />
Select Mode by Pressing the MODE Button<br />
Heating Only<br />
The HEAT setting indicates the<br />
temperature the room has to<br />
reach before the furnace will<br />
turn on to heat the room.<br />
I2 : 00<br />
Mo<br />
Pm<br />
70<br />
68<br />
HEAT o<br />
Press<br />
MODE<br />
Cooling Only<br />
The COOL setting indicates the<br />
temperature the room has to<br />
reach before the air conditioner<br />
will turn on to cool the room.<br />
Heating or Cooling<br />
AUTO will automatically select<br />
heat or cool based on room<br />
temperature demand.<br />
Time Schedule for<br />
Heating or Cooling<br />
The Program On setting will<br />
activate the time period<br />
programming for the cooling<br />
or heating setpoint ONLY<br />
(Morning, Day, Evening<br />
& Night Periods).<br />
Off<br />
OFF indicates both heating<br />
and air conditioning<br />
systems are turned off.<br />
I2 : 00<br />
Mo<br />
I2 : 00<br />
Pm<br />
70<br />
Pm<br />
Mo<br />
70<br />
AUTO<br />
I2 : 00<br />
ProgramOn<br />
Pm<br />
Mo<br />
70<br />
Day<br />
I2 : 00<br />
Pm<br />
Mo<br />
70<br />
OFF<br />
Page 6<br />
76<br />
o<br />
COOL<br />
76<br />
COOL<br />
o<br />
HEAT<br />
68<br />
76<br />
COOL<br />
o<br />
o<br />
HEAT<br />
68<br />
o<br />
Press<br />
MODE<br />
Press<br />
MODE<br />
Press<br />
MODE
Basic Operation<br />
Selecting Your Desired Temperature<br />
(adjusting the setpoints)<br />
AUTO OR PROGRAM MODE<br />
Pressing the UP or DOWN button in Auto or Program mode will<br />
adjust both the heat and cool set temperatures simultaneously.<br />
12:00 : Pm<br />
Mo<br />
AUTO<br />
70<br />
76<br />
COOL<br />
o<br />
HEAT<br />
68<br />
o<br />
Adjust the desired<br />
set temperature with the<br />
buttons.<br />
HEAT OR COOL MODE<br />
Pressing the UP or DOWN button in Heat or Cool mode will<br />
adjust only the heat or cool set temperature.<br />
12:00 : Pm<br />
Mo<br />
70<br />
o<br />
76<br />
COOL<br />
Adjust the desired<br />
set temperature with the<br />
buttons.<br />
Using the Fan Button<br />
12:00 : Pm<br />
65<br />
Fan On<br />
Mo<br />
85<br />
COOL<br />
HEAT<br />
55<br />
o<br />
o<br />
Press<br />
FAN<br />
Fan On indicates constant fan<br />
operation. You may turn the fan<br />
on even if the thermostat is in the<br />
Off mode. Pressing the FAN button<br />
toggles this feature on or off.<br />
Page 7
Programming a Daily Schedule<br />
(Unit # 1 only)<br />
MODE<br />
Press the MODE button. While holding MODE,<br />
press the UP button for two seconds to enter<br />
time period programming*.<br />
Use the Programming Worksheet on<br />
the back cover to help with this section.<br />
Select the day<br />
of week.<br />
(Mo - Su)<br />
Mo<br />
Press<br />
Adjust the start time<br />
for Morning.<br />
6 : 00 Am<br />
Mo<br />
Morning<br />
Start<br />
MODE<br />
Press<br />
Adjust the cooling<br />
setpoint for Morning.<br />
(35 - 99 )<br />
6 : 00 Am<br />
Mo<br />
Morning<br />
o<br />
78<br />
COOL<br />
MODE<br />
Press<br />
MODE<br />
Adjust the heating<br />
setpoint for Morning.<br />
(35 - 99 )<br />
6 : 00 Am<br />
Mo<br />
Morning<br />
78<br />
COOL<br />
HEAT<br />
70<br />
o<br />
o<br />
Press<br />
MODE<br />
*Time period programming is only<br />
available on Unit Number 1.<br />
Page 8<br />
Continued
Programming a Daily Schedule<br />
Adjust the start time<br />
for Day.<br />
Adjust the cooling<br />
setpoint for Day.<br />
(35 - 99 )<br />
Adjust the heating<br />
setpoint for Day.<br />
(35 - 99 )<br />
Adjust the start time<br />
for Evening.<br />
Adjust the cooling<br />
setpoint for Evening.<br />
(35 - 99 )<br />
8 : 00<br />
Mo<br />
Day<br />
8 : 00 Am<br />
Mo<br />
Day<br />
8 : 00 Am<br />
Mo<br />
6 : 00 Pm<br />
Mo<br />
Evening<br />
6 : 00 Pm<br />
Mo<br />
Evening<br />
Day<br />
Page 9<br />
Start<br />
Start<br />
o<br />
85<br />
COOL<br />
85<br />
COOL<br />
HEAT<br />
62<br />
o<br />
78<br />
COOL<br />
Continued<br />
(Unit # 1 only)<br />
o<br />
o<br />
Press<br />
MODE<br />
Press<br />
MODE<br />
Press<br />
MODE<br />
Press<br />
MODE<br />
Press<br />
MODE
Programming a Daily Schedule<br />
(Unit # 1 only)<br />
Adjust the heating<br />
setpoint for Evening.<br />
(35 - 99 )<br />
Adjust the start time<br />
for Night.<br />
6 : 00<br />
Mo<br />
Evening<br />
:<br />
I0 00Pm<br />
Mo<br />
Night<br />
Pm<br />
Start<br />
78<br />
COOL<br />
HEAT<br />
70<br />
o<br />
o<br />
Press<br />
MODE<br />
Press<br />
MODE<br />
Adjust the cooling<br />
setpoint for Night.<br />
(35 - 99 )<br />
I0 : 00 Pm<br />
Mo<br />
Night<br />
o<br />
82<br />
COOL<br />
Press<br />
MODE<br />
Adjust the heating<br />
setpoint for Night.<br />
(35 - 99 )<br />
I0 : 00<br />
Mo<br />
Night<br />
Pm<br />
82<br />
COOL<br />
HEAT<br />
62<br />
o<br />
o<br />
Press<br />
MODE<br />
Continued<br />
Page 10
Programming a Daily Schedule<br />
(Unit # 1 only)<br />
The copy command becomes available after<br />
programming the entire previous day.<br />
Yes<br />
No<br />
Select Yes to copy the<br />
previous day’s program<br />
to the day displayed.<br />
If Yes is selected:<br />
O<br />
Tu<br />
co<br />
py<br />
If No is selected:<br />
Press<br />
MODE<br />
Selecting Yes, then pressing MODE will<br />
copy the previous day’s program. If yes<br />
is selected again, or each time, this<br />
routine will repeat.<br />
Press<br />
MODE<br />
If No is selected, as in previous steps, flashing prompts for<br />
input will appear for the four time periods for the next day.<br />
MODE<br />
After programming for all seven days is complete, press<br />
the MODE and UP buttons at the same time for two seconds<br />
to leave the Setup screens. If no buttons are pressed, the<br />
display will leave the setup screens after 30 seconds.<br />
Page 11
Advanced Setup<br />
MODE<br />
MODE<br />
FAN<br />
Press the MODE button and<br />
release.<br />
Immediately press the MODE<br />
button again. While holding<br />
the MODE button, press the<br />
FAN button. When this<br />
screen appears<br />
Adjust the time<br />
of day clock.<br />
I2 : 00 Am<br />
12:00 :<br />
Am<br />
Setup<br />
Setup<br />
I<br />
NOTE: Each step # is located at<br />
the top right corner of the<br />
display for easy reference.<br />
I<br />
DO NOT<br />
RELEASE THE<br />
BUTTONS.<br />
Continue holding the MODE<br />
and FAN buttons for an additional<br />
seven seconds to<br />
enter Setup screens beyond<br />
step #2.<br />
Tip: To change hours quickly, press<br />
and hold the FAN button, then press the UP or DOWN buttons.<br />
On<br />
Off<br />
Select the day<br />
of the week.<br />
Leave this setup<br />
step set to OFF.<br />
Mo<br />
OFF<br />
Setup<br />
Setup<br />
2<br />
3<br />
2o e<br />
Press<br />
MODE<br />
Press<br />
MODE<br />
Press<br />
MODE<br />
Continued<br />
Page 12
Advanced Setup<br />
Select the House Code<br />
number. The Receiver<br />
must also use this same<br />
number for proper<br />
operation.<br />
(0 - 63)<br />
Select the Unit ID<br />
number. If more than<br />
1 thermostat is used,<br />
each will need a different<br />
Unit ID number.<br />
(1 - 4)<br />
Adjust the deadband<br />
for the 1st stage.<br />
(1 - 6 )<br />
Note: Available only<br />
on Unit ID #1.<br />
Adjust the minimum<br />
difference between<br />
cooling & heating<br />
setpoints.<br />
(0 - 6 )<br />
Select the cycles per<br />
hour limit:<br />
d=cycles per hour<br />
limit defeated<br />
d1=d + defeat 5 min.<br />
compressor lockout<br />
(d1, d, 2 - 6)<br />
Note: Available only<br />
on Unit ID #1.<br />
Page 13<br />
Setup<br />
o<br />
Setup<br />
I<br />
Setup<br />
2<br />
Setup<br />
2<br />
Setup<br />
6<br />
4<br />
5<br />
6<br />
7<br />
COOL<br />
HEAT<br />
8<br />
cy<br />
Continued<br />
Press<br />
MODE<br />
Press<br />
MODE<br />
Press<br />
MODE<br />
Press<br />
MODE<br />
Press<br />
MODE
Advanced Setup<br />
On<br />
Select backlight operation*:<br />
ON - Light continuously<br />
OFF - Light for 8 seconds<br />
after a button press<br />
Off<br />
Adjust the programmable<br />
fan timer:<br />
0 - 60 minutes<br />
0:00 = off<br />
Note: Available only<br />
on Unit ID #1.<br />
0:00 :<br />
Fan On<br />
On Setup<br />
L I<br />
Setup<br />
9<br />
I0<br />
Press<br />
MODE<br />
Press<br />
MODE<br />
C<br />
F<br />
Select thermostat<br />
operation in degrees<br />
Fahrenheit or Celsius.<br />
Setup<br />
f<br />
I I<br />
Press<br />
MODE<br />
After programming is complete,<br />
press the MODE and FAN buttons<br />
at the same time for two seconds<br />
to leave the Setup screens. If no<br />
buttons are pressed, the display<br />
will leave the setup screens after<br />
30 seconds.<br />
FAN<br />
*For increased battery life the backlight should be set to OFF unless<br />
the ACC0800 RF power supply adaptor is used to power the thermostat.<br />
Page 14
Advanced Setup<br />
Advanced Setup Table<br />
Step # Description Range Factory Default<br />
1<br />
2<br />
3*<br />
4<br />
5<br />
6**<br />
7<br />
8**<br />
9***<br />
10**<br />
11<br />
Time of Day<br />
Day of the Week<br />
Zoning System<br />
House Code<br />
Unit ID Number<br />
Deadband/Temp. Swing 1st Stage<br />
Minimum Heat/Cool Differential<br />
Cycles Per Hour<br />
Thermoglow Backlight<br />
Programmable Fan<br />
Fahrenheit or Celsius<br />
24 hour<br />
Mo - Su<br />
Off / On<br />
0 - 63<br />
1 - 4<br />
1 - 6<br />
0 - 6<br />
d, d1, 2 - 6<br />
0:00 - 0:60<br />
Off / On<br />
F / C<br />
12:00 am<br />
Mo<br />
Off<br />
0<br />
1<br />
2<br />
2<br />
6<br />
0:00<br />
On<br />
F<br />
*For proper operation this setup step should remain in the off position.<br />
**These setup steps are only available on the thermostat programmed as<br />
Unit ID Number 1.<br />
***For increased battery life the backlight should be set to OFF unless<br />
the ACC0800 RF power supply adaptor is used to power the thermostat.<br />
Page 15
Press<br />
MODE<br />
Press<br />
MODE<br />
About Advanced Features & Operation<br />
CALIBRATION - Under normal circumstances it will not be necessary to<br />
adjust the calibration of the temperature sensor. If calibration is<br />
required, please contact a trained HVAC technician to correctly perform<br />
the following procedure.<br />
Place the<br />
thermostat in<br />
the OFF mode.<br />
Press and hold the MODE button.<br />
While holding the<br />
Am ProgramOn Setup<br />
MODE button, I8 :<br />
press and hold AUTO<br />
OFF<br />
the DOWN button<br />
for 5 seconds. 88<br />
88Pm Locked<br />
SuMoTuWeThFrSa<br />
Night<br />
MorningDay<br />
Evening<br />
Fan On<br />
All of the icons will appear on<br />
the display.<br />
DEADBAND OPERATION - Controls up to two Heat and two Cool stages<br />
(please see the diagram below).<br />
The 1st Stage of heat or cool is turned on when:<br />
(A) The temperature spread from the setpoint is equal to or greater<br />
than: the setpoint plus the 1st stage deadband (step #6, page 13).<br />
This 1st stage deadband is adjustable from 1-6 degrees and the<br />
default is two degrees.<br />
The 2nd Stage of heat or cool is turned on when:<br />
(A) The 1st Stage has been on for a minimum of two minutes.<br />
And<br />
I2 : 00 Pm<br />
Su<br />
OFF<br />
70<br />
o<br />
88<br />
COOL<br />
HEAT o<br />
88<br />
Press<br />
MODE<br />
Press<br />
MODE<br />
(B) The temperature spread from the setpoint is equal to or greater<br />
than: the setpoint plus the 1st stage deadband (step #6, page 13),<br />
plus the 2nd stage deadband. This 2nd stage deadband is fixed at<br />
two degrees and is not adjustable.<br />
Heating<br />
Cooling<br />
Deadband Deadband Deadband Deadband<br />
db 2 db 1 db 1 db 2<br />
(non-adj. 2 ) (adj. 1-6 ) (adj. 1-6 ) (non-adj. 2 )<br />
Press the MODE button at the same<br />
time twice. The thermostat temperature<br />
will be I2 : 00<br />
displayed and<br />
may be calibrated<br />
OFF<br />
using the UP or<br />
DOWN buttons 70<br />
Pm<br />
Su<br />
After calibration is complete, press<br />
the MODE button I2 : 00 Pm<br />
Su<br />
once to save your<br />
changes and<br />
OFF<br />
return to normal<br />
operation.<br />
70<br />
2nd Stage<br />
turn on<br />
1st Stage<br />
turn on<br />
Heat<br />
Setpoint<br />
Cool<br />
Setpoint<br />
1st Stage<br />
turn on<br />
2nd Stage<br />
turn on<br />
DECREASE<br />
TEMPERATURE<br />
Page 16<br />
INCREASE
About Advanced Features & Operation<br />
FACTORY DEFAULTS - If, for any reason, you desire to return all the stored<br />
settings back to the factory default settings, follow the instructions below.<br />
WARNING: This will reset all Time Period and Advanced Programming to<br />
the default settings. Any information entered prior to this reset will be<br />
permanently lost.<br />
Press<br />
MODE<br />
Press<br />
MODE<br />
Place the<br />
thermostat in<br />
the OFF mode.<br />
I2 : 00 Pm<br />
Press and hold the MODE button.<br />
While holding the<br />
Am ProgramOn Setup<br />
MODE button,<br />
I8 :<br />
press and hold AUTO<br />
OFF<br />
the DOWN button<br />
for 5 seconds. 88<br />
88Pm Locked<br />
SuMoTuWeThFrSa<br />
Night<br />
MorningDay<br />
Evening<br />
Fan On<br />
All of the icons will appear on<br />
the display.<br />
Su<br />
OFF<br />
70<br />
o<br />
88<br />
COOL<br />
HEAT o<br />
88<br />
Press<br />
FAN<br />
Press<br />
MODE<br />
After all of the icons appear, release<br />
the MODE and<br />
DOWN buttons.<br />
Then press and<br />
hold the FAN<br />
button for 5 seconds.<br />
After the letters Fd appear on the<br />
display (Factory I2 : 00<br />
Default), release<br />
the FAN button. OFF<br />
Press the MODE 70<br />
Pm<br />
Su<br />
button twice to return to normal<br />
operation.<br />
HEAT/COOL DIFFERENTIAL - The Heat and Cool setpoints will not be<br />
allowed to come any closer to each other than the value set in Advanced<br />
Setup step #7, on page 13. This minimum difference is enforced during<br />
Auto-changeover and Program On operation.<br />
Note: To increase the spread between the heating and cooling setpoints,<br />
press the MODE button until only the heat setpoint is displayed; adjust to<br />
the desired setpoint. Press the MODE button until only the cool setpoint<br />
is displayed; adjust to the desired setpoint. Press the MODE button again<br />
to enter the Auto-changeover mode where both the heat and cool<br />
setpoints are displayed.<br />
MEMORY BACKUP - In the event of a power loss, the thermostat will retain<br />
the stored program settings without external power or batteries.<br />
PROGRAMMABLE FAN - This timer will start the fan at the top of each hour;<br />
and the fan will run for the number of minutes selected in step #10<br />
on page 14.<br />
Page 17
About Advanced Features & Operation<br />
KEYPAD LOCKOUT - To prevent unauthorized use of the thermostat, the<br />
front panel buttons may be disabled. To disable, or ‘lock’ the keypad,<br />
press and hold the MODE button. While holding the MODE button, press<br />
the UP and DOWN buttons together. The LOCKED icon will appear on<br />
the display, then release the buttons.<br />
I2 : 00 Pm<br />
ProgramOn<br />
Locked<br />
85<br />
Press all three<br />
We<br />
70<br />
COOL<br />
buttons in the order<br />
outlined above for<br />
HEAT o<br />
keypad lockout<br />
MODE<br />
55<br />
To unlock the keypad, press and hold the MODE button. While holding<br />
the MODE button, press the UP and DOWN buttons together. The<br />
LOCKED icon will disappear from the display, then release the buttons.<br />
BATTERY ELIMINATOR (optional accessory) - the P474-0800 RF power<br />
supply adaptor is used to power the thermostat and eliminate the need<br />
for replacing batteries each year. Use only the Totaline accessory<br />
P474-0800 for proper operation.<br />
LOW BATTERY WARNING - The two AA lithium batteries must be replaced<br />
at least once every 12 months to ensure proper operation. The “low<br />
battery” icon (fig. 1) will appear on the display when it is time to replace<br />
the batteries.<br />
When the “low battery” icon is displayed the batteries must be replaced<br />
immediately. The manufacturer cannot be liable for improper operation of<br />
the thermostat if the batteries are not immediately replaced. Annual<br />
battery replacement is especially critical in locations subject to freezing<br />
temperatures. The thermostat will be unable to turn on the heating<br />
system if the batteries are exhausted.<br />
Su<br />
72<br />
AUTO<br />
Fig. 1<br />
78<br />
COOL<br />
HEAT<br />
70<br />
o<br />
o<br />
Su<br />
72<br />
AUTO<br />
78<br />
COOL<br />
HEAT<br />
70<br />
Important: To assure proper operation use only AA LITHIUM batteries.<br />
Page 18<br />
o<br />
o<br />
o
Warranty<br />
One-Year Warranty - This Product is warranted to be free from defects in material and<br />
workmanship. If it appears within one year from the date of original installation, whether or not<br />
actual use begins on that date, that the product does not meet this warranty, a new or<br />
remanufactured part, at the manufacturer’s sole option to replace any defective part, will be<br />
provided without charge for the part itself provided the defective part is returned to the distributor<br />
through a qualified servicing dealer.<br />
THIS WARRANTY DOES NOT INCLUDE LABOR OR OTHER COSTS incurred for diagnosing, repairing,<br />
removing, installing, shipping, servicing or handling of either defective parts or replacement parts.<br />
Such costs may be covered by a separate warranty provided by the installer.<br />
THIS WARRANTY APPLIES ONLY TO PRODUCTS IN THEIR ORIGINAL INSTALLATION LOCATION AND<br />
BECOMES VOID UPON REINSTALLATION.<br />
LIMITATIONS OF WARRANTIES – ALL IMPLIED WARRANTIES (INCLUDING IMPLIED WARRANTIES OF FITNESS<br />
FOR A PARTICULAR PURPOSE AND MERCHANTABILITY) ARE HEREBY LIMITED IN DURATION TO THE<br />
PERIOD FOR WHICH THE LIMITED WARRANTY IS GIVEN. SOME STATES DO NOT ALLOW LIMITATIONS ON<br />
HOW LONG AN IMPLIED WARRANTY LASTS, SO THE ABOVE MAY NOT APPLY TO YOU. THE EXPRESSED<br />
WARRANTIES MADE IN THIS WARRANTY ARE EXCLUSIVE AND MAY NOT BE ALTERED, ENLARGED, OR<br />
CHANGED BY ANY DISTRIBUTOR, DEALER, OR OTHER PERSON WHATSOEVER. ALL WORK UNDER THE<br />
TERMS OF THIS WARRANTY SHALL BE PERFORMED DURING NORMAL WORKING HOURS. ALL<br />
REPLACEMENT PARTS, WHETHER NEW OR REMANUFACTURED, ASSUME AS THEIR WARRANTY PERIOD<br />
ONLY THE REMAINING TIME PERIOD OF THIS WARRANTY.<br />
THE MANUFACTURER WILL NOT BE RESPONSIBLE FOR:<br />
1. Normal maintenance as outlined in the installation and servicing instructions or owner’s<br />
manual, including filter cleaning and/or replacement and lubrication.<br />
2. Damage or repairs required as a consequence of faulty installation, misapplication,<br />
abuse, improper servicing, unauthorized alteration or improper operation.<br />
3. Failure to start due to voltage conditions, blown fuses, open circuit breakers or other<br />
damages due to the inadequacy or interruption of electrical service.<br />
4. Damage as a result of floods, winds, fires, lightning, accidents, corrosive environments or<br />
other conditions beyond the control of the Manufacturer.<br />
5. Parts not supplied or designated by the Manufacturer, or damages resulting from their use.<br />
6. Manufacturer products installed outside the continental U.S.A., Alaska, Hawaii, and<br />
Canada.<br />
7. Electricity or fuel costs or increases in electricity or fuel costs for any reason whatsoever<br />
including additional or unusual use of supplemental electric heat.<br />
8. ANY SPECIAL INDIRECT OR CONSEQUENTIAL PROPERTY OR COMMERCIAL DAMAGE OF ANY<br />
NATURE WHATSOEVER. Some states do not allow the exclusion of incidental or<br />
consequential damages, so the above may not apply to you.<br />
This warranty gives you specific legal rights and you may also have other rights which may vary<br />
from state to state.<br />
Page 19
Programming Worksheet see page 8<br />
DAY PERIOD START TIME COOL HEAT<br />
Morning<br />
M<br />
ONDAY Day<br />
Evening<br />
Night<br />
T Morning<br />
Copy Mon Tue<br />
UESDAY<br />
Day<br />
No<br />
Evening<br />
Yes<br />
Night<br />
W<br />
E<br />
N ES<br />
D<br />
D AY<br />
T<br />
H<br />
U<br />
R<br />
S<br />
D<br />
AY<br />
F<br />
R<br />
I<br />
D<br />
A<br />
Y<br />
A S T<br />
U<br />
R<br />
D<br />
AY<br />
S<br />
U<br />
NDAY<br />
Morning<br />
Day<br />
Evening<br />
Night<br />
Morning<br />
Day<br />
Evening<br />
Night<br />
Morning<br />
Day<br />
Evening<br />
Night<br />
Morning<br />
Day<br />
Evening<br />
Night<br />
Morning<br />
Day<br />
Evening<br />
Night<br />
Copy Tue<br />
Copy Wed<br />
Copy Thu<br />
Copy Fri<br />
Copy Sat<br />
No<br />
Yes<br />
No<br />
Yes<br />
No<br />
Yes<br />
No<br />
Sat<br />
Yes<br />
No<br />
Yes<br />
Wed<br />
Thu<br />
Fri<br />
Sun<br />
Printed on recycled paper.<br />
P/N 88-615 <strong>Rev</strong>. 1


