

Identity Manager 4.0.2: RBPM and Reporting Migration Guide - NetIQ
Identity Manager 4.0.2: RBPM and Reporting Migration Guide - NetIQ
Identity Manager 4.0.2: RBPM and Reporting Migration Guide - NetIQ

You also want an ePaper? Increase the reach of your titles
YUMPU automatically turns print PDFs into web optimized ePapers that Google loves.
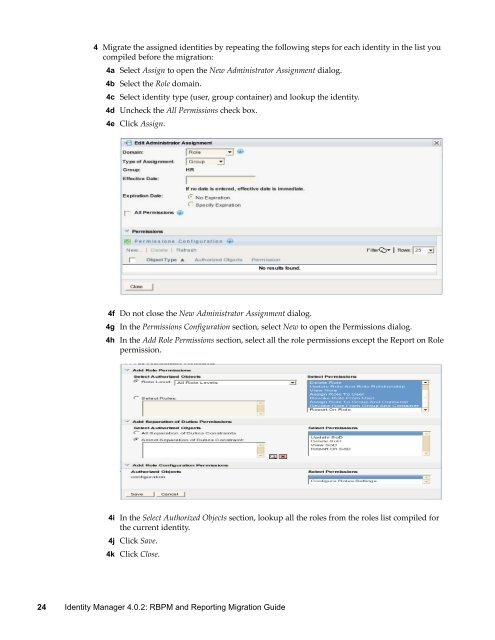
4 Migrate the assigned identities by repeating the following steps for each identity in the list you<br />
compiled before the migration:<br />
4a Select Assign to open the New Administrator Assignment dialog.<br />
4b Select the Role domain.<br />
4c Select identity type (user, group container) <strong>and</strong> lookup the identity.<br />
4d Uncheck the All Permissions check box.<br />
4e Click Assign.<br />
4f Do not close the New Administrator Assignment dialog.<br />
4g In the Permissions Configuration section, select New to open the Permissions dialog.<br />
4h In the Add Role Permissions section, select all the role permissions except the Report on Role<br />
permission.<br />
4i In the Select Authorized Objects section, lookup all the roles from the roles list compiled for<br />
the current identity.<br />
4j Click Save.<br />
4k Click Close.<br />
24 <strong>Identity</strong> <strong>Manager</strong> <strong>4.0.2</strong>: <strong>RBPM</strong> <strong>and</strong> <strong>Reporting</strong> <strong>Migration</strong> <strong>Guide</strong>


