Download IB for C1973F.pdf - Cello Electronics
Download IB for C1973F.pdf - Cello Electronics
Download IB for C1973F.pdf - Cello Electronics

Create successful ePaper yourself
Turn your PDF publications into a flip-book with our unique Google optimized e-Paper software.
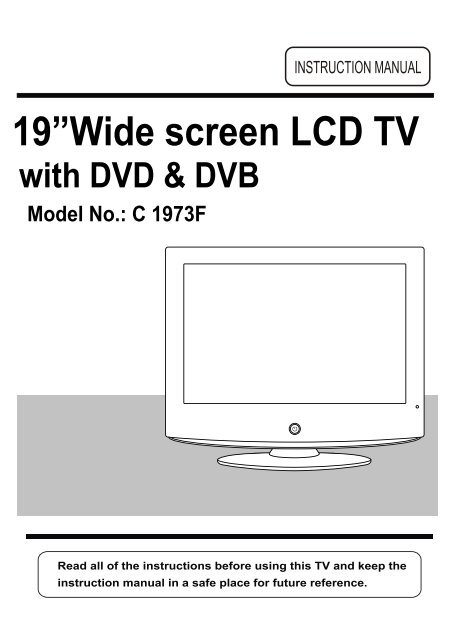
19”Wide screen LCD TV<br />
with DVD & DVB<br />
Model No.: C 1973F
LCD Screen<br />
Although the LCD screen is made with high-precision technology and<br />
99.99% or more of the pixels are effective, black dots may appear or<br />
bright points of light (red, blue or green) may appear constantly on the<br />
LCD screen. This is not a malfunction.
1<br />
2<br />
Caution<br />
Safety In<strong>for</strong>mation<br />
3<br />
4<br />
4<br />
5-6<br />
7-8<br />
9<br />
9-10<br />
11<br />
12<br />
12<br />
13<br />
14-15<br />
Unit andAccessory<br />
Getting Started<br />
Front View<br />
Rear View<br />
Remote Control Key Functions<br />
Menu Operation<br />
Basic TV operation<br />
PICTURE menu options<br />
SOUND menu options<br />
TIMER menu options<br />
FUNCTION menu options<br />
SETUP menu options<br />
16-17<br />
17-19<br />
20<br />
DVD operation<br />
DVD System Operation<br />
Disc care<br />
21<br />
22<br />
SimpleTroubleshooting<br />
Techincal Specifications
caution<br />
Caution<br />
The lightening flash with arrowhead symbol, within an equilateral triangle is<br />
intended to alert the user to the presence of un-insulated "dangerous voltage"<br />
within the products enclosure that may be of sufficient magnitude to constitute a<br />
risk of electric shock to the persons.<br />
The exclamation point within an equilateral triangle is intend to alert the user to<br />
the presence of important operating and maintenance (servicing) instructions in<br />
the literature accompanying the appliance.<br />
Correct disposal of this Product<br />
Waste Electrical & Electronic Equipment (WEEE)<br />
Your product is designed and manufactured with high quality materials and<br />
components which can be recycled and reused.<br />
This symbol means that electrical and electronic equipment, at their end-of-life,<br />
should be disposed of separately from your household waste.<br />
Please dispose of this equipment at your local community waste<br />
collection/recycling centre.<br />
In the European Union there are separate collection systems <strong>for</strong> used electrical<br />
and electronic products. Please help us to conserve the environment we live in!<br />
This unit is a “CLASS 1” laser product. This product uses a visible laser<br />
beam which could cause hazardous radiation exposure. Ensure the<br />
recorder is operated as instructed. Do not remove any covers or look into<br />
the DVD drawer opening whilst power is applied. Do NOT modify or adjust<br />
any controls that may affect laser emissions. Should the appliance become<br />
faulty consult a qualified technician.<br />
This appliance complies with European Safety and Electrical<br />
directives
Safety In<strong>for</strong>mation<br />
Safety In<strong>for</strong>mation<br />
To ensure reliable and safe operation of this equipment, please read carefully all the<br />
instructions in this user guide, especially the safety in<strong>for</strong>mation below.<br />
Electrical safety<br />
The TV set should only be connected to a mains supply which matches that stated on<br />
the label on the mains adaptor<br />
To prevent overload, don't share the same mains supply socket with too many other<br />
items of equipment.<br />
- Do not place any connecting wires where they may be stepped on or tripped over.<br />
- Do not place heavy items, which may damage the leads, on them.<br />
- Hold the Mains plug, not the wires, when removing from a socket.<br />
- During a thunderstorm or while leaving the TV <strong>for</strong> long periods, disconnect the<br />
aerial (if outdoor) and mains adaptor from the supply.<br />
- Do not allow water or moisture to enter the TV or mains adaptor. Do NOT use in<br />
wet or moist areas such as Bathrooms, steamy kitchens or near swimming pools.<br />
Pull the plug out immediately, and seek professional help if:<br />
- the mains plug or cable is damaged<br />
- liquid is spilt onto the set, or if it is accidentally exposed to water or moisture<br />
- anything accidentally penetrates the ventilation slots<br />
- the set doesn't work normally.<br />
- Do NOT remove the safety covers. There are no user serviceable parts inside. You<br />
may invalidate the warranty. Qualified personnel must only service this apparatus.<br />
- To avoid battery leakage, remove exhausted batteries from the remote control<br />
handset, or when not using <strong>for</strong> a long period.<br />
- Do NOT break open or throw exhausted batteries on a fire.<br />
Physical safety<br />
Do NOT block ventilation slots in the back cover. You may place the TV in a cabinet,<br />
but ensure at least 5cm (2") clearance all around.<br />
Do NOT tap or shake the TV screen, you may damage the internal circuits. Take good<br />
care of the remote control, do not drop.<br />
To clean the TV use a soft dry cloth. Do NOT use solvents or petrol based fluids. For<br />
stubborn stains, you may use a damp soft cloth with dilute detergent.
Unit and Accessory<br />
Power cable<br />
User’s Manual<br />
Warranty Card<br />
Quick Start Guide<br />
Warranty Card<br />
Quick Start Guide
Getting Started<br />
Getting Started<br />
Buttons For TV operation<br />
Please insert a 12cm disc<br />
according to the silk<br />
LED Indicator<br />
Power(on/standby)<br />
Remote Control Window<br />
(keep clear)<br />
Buttons <strong>for</strong> DVD operation<br />
(IR) Infrared Receiver: Receives IR signals from the remote control.<br />
(Power on/Standby) LED Indicator: Press POWER to turn on and off,<br />
Indicator on(Blue)<br />
Standby mode<br />
below<br />
TV/AV Press to display the input source menu(see page 10).<br />
MENU<br />
CH<br />
VOL<br />
Power<br />
: Play/pause the disc playing.<br />
: Stop the disc playing.<br />
: Play the previous track or chapter.<br />
: Play the next track or chapter.<br />
: Load/eject the disc.
Getting Started<br />
DVD<br />
SWITCH:<br />
Press to connect<br />
the power supply<br />
Common Interface<br />
COAX<br />
out<br />
Output to<br />
Audio amplifier<br />
TV Signal<br />
5
Getting Started<br />
REAR CONNECTIONS<br />
Name Function Description<br />
AC POWER IN Connect to power supply<br />
HDMI Connect to the HDMI of your DVD or other equipment<br />
VGA IN VGA signal from computer output<br />
SCART Connect to the composite terminal of your DVD/VCR<br />
S-Video IN S-Video signal input<br />
Video IN Video signal input<br />
(AUDIO)L/R IN Audio signal input <strong>for</strong> AV<br />
PC Audio IN PC audio input<br />
Headphone Connect it to your headphone or other audio equipment<br />
RF Connect to antenna or cable source<br />
COAX out Output to Audio amplifier<br />
10<br />
10<br />
THE TELEVISION MANUFACTURER RECOMMENDS THE USE OF AN<br />
OUTDOOR AERIAL SUITABLE FOR RECEPTION OF DIGITAL BROADCASTS<br />
6
Remote Control Key Functions<br />
TEXT<br />
POWER<br />
OFF FUNCTION STANDBY<br />
EPG<br />
POWER OFF<br />
Switch off the power supply.<br />
FUNCTION<br />
Press to display the input source menu.(see page 10)<br />
STANDBY<br />
Turn the TV on/standby.<br />
HOLD<br />
SUBTITLES<br />
OK<br />
MENU VOL PROG EXIT<br />
+ +<br />
QUICK START<br />
MUTE<br />
FAV<br />
DISPLAY<br />
1 2 3<br />
4 5 6<br />
7 8 9<br />
0 -/--<br />
PICTURE SOUND TIMER ASPECT<br />
SUBTITLES<br />
SETUP ZOOM<br />
Colour buttons: short cuts-follow the coloured links in<br />
the text.<br />
Blue Button: Nicam.<br />
TEXT: Turn off/on the Teletext display.<br />
HOLD: Hold or carry on the current subpage.<br />
EPG: To show the Electronic Program Guide during<br />
no-menu state only.<br />
SUBTITLES: To switch the dialogue at the bottom of the<br />
screen.<br />
Cursor left/right/up/down: Cursor buttons used in<br />
menus.<br />
OK: CONFIRM BUTTON <strong>for</strong> menu.<br />
MENU: System setup menu.<br />
QUICK START: To tune in your TV press the correct<br />
button.<br />
FAV: Means favorite, to display the favorite channel list<br />
defined by you.<br />
EXIT: Exit the OSD menu.<br />
MUTE: Mutes the Audio.<br />
DISPLAY: Display brief in<strong>for</strong>mation concerning the<br />
current channel you are view.<br />
(Used as “INFO” key mentioned in EPG menu)<br />
VOL+/-: Adjust the volume.<br />
PROG+/-: Scan through channels.<br />
7
POWER<br />
OFF FUNCTION STANDBY<br />
TEXT<br />
HOLD<br />
MENU<br />
QUICK START<br />
OK<br />
VOL PROG<br />
+ +<br />
EPG<br />
SUBTITLES<br />
EXIT<br />
MUTE<br />
0-9,-/--<br />
Choose channel directly. Number buttons <strong>for</strong> DVD.<br />
PICTURE: Select the picture mode.<br />
SOUND: Select the sound mode.<br />
Timer<br />
Standby timer.<br />
ASPECT<br />
Press to change the display mode of the screen.<br />
FAV<br />
DISPLAY<br />
1 2 3<br />
4 5 6<br />
7 8 9<br />
0 -/--<br />
PICTURE SOUND TIMER ASPECT<br />
SUBTITLES<br />
SETUP ZOOM<br />
: DVD fast reverse<br />
: stop DVD program.<br />
: play/pause DVD program.<br />
: DVD fast <strong>for</strong>ward.<br />
: DVD previous chapter.<br />
: load/eject DVD disc.<br />
: DVD next chapter.<br />
SETUP: DVD setup menu<br />
ZOOM: adjust picture size in DVD mode.<br />
SUBTITLES: select DVD disc subtitle.<br />
8
Menu Operation<br />
Basic TV operation<br />
TURN ON LCD TV<br />
1.Connect power cable to mains supply and turn on the power by using the “ Toggle Switch” at the back<br />
of the TV on the right hand side. The standby indicator on the front of the tv will light up in Blue.<br />
2.Use the POWER button on the front of the TV or the STANDBY button on the handset to turn on the TV ,<br />
the blue light will extinguish.<br />
TURN OFF LCD TV<br />
1.Press the POWER button on the front of the TV or the STANDBY button on the handset to turn the TV<br />
off into standby mode, the standby indicator will light blue.<br />
2.Press the POWER OFF button on the handset to switch off the from the Power Supply.<br />
NOTE: When you initially use the TV, you will see the “First Time Installation” menu as below:<br />
You can select “Country” and “Language”(OSD<br />
display laguage), and select the contents of the<br />
Auto Search(Analog Program or Digital Program)<br />
accroding to the hints on the bottom.<br />
When you finished, press button to select “OK”,<br />
and press OK button to start auto serch.<br />
First time installation<br />
Country<br />
Language<br />
Delete Analog Program<br />
First Time Installation<br />
The TV will start searching from the lowest<br />
frequency(You can press MENU to cancel<br />
the auto search.). When it finds a station, it will<br />
automatically store this in the first location and<br />
Analog Program Search<br />
Delete Digital Program<br />
Digital Program Search<br />
move to the next. When Autosearch is complete,<br />
OK<br />
Cancel<br />
the TV will display the first station found.<br />
Select Adjust<br />
If you want to change the order of the programs, you could use the "Program Edit" function to change(see<br />
page 15).<br />
UK<br />
English<br />
1. Press VOL+/- to adjust the volume.<br />
2. If you want to switch the sound OFF, press the MUTE<br />
3. You can cancel this function by pressing MUTE or VOL+ button.<br />
1. Using the CH+/- on the front panel or PROG+/- on the remote control.<br />
Press CH+/PROG+ to increase channel number.<br />
Press CH-/PROG- to decrease channel number.<br />
2. Using 0-9 digital buttons and -/-- button<br />
Press -/-- button, then the screen will display “-”, press again it will become “- -”.<br />
When it displays “-”, you should then press a unmber of 0-9 to play the channel you desired;<br />
When it displays “- -”, you should then press two unmbers to play the channel you desired.<br />
9
Press the MENU button to display the main menu.<br />
Use / buttons to select menu, and press button to enter the menu.<br />
PICTURE<br />
SOUND<br />
SETUP<br />
Picture Mode<br />
Contrast<br />
Brightness<br />
Color<br />
Tint<br />
Sharpness<br />
Personal<br />
50<br />
50<br />
50<br />
0<br />
Normal<br />
Volume<br />
Sound Mode<br />
Bass<br />
Treble<br />
Balance<br />
20<br />
Personal<br />
50<br />
50<br />
50<br />
Country<br />
Auto tuning<br />
Manual tuning<br />
Program Edit<br />
Common interface<br />
UK<br />
Select<br />
Enter<br />
Select Enter Select Enter<br />
TIMER<br />
FUNCTION<br />
Sleep Timer<br />
OSD Timer<br />
0 Min<br />
30Sec<br />
Language<br />
Video Size<br />
Blue Screen<br />
English<br />
Auto<br />
On<br />
Child Lock<br />
First Time Installation<br />
Reset<br />
Select<br />
Enter<br />
Select<br />
Enter<br />
- You should operate the menu according to the hint on the button of the OSD menu.<br />
- The CH+ and CH- buttons on the TV set and are used as and buttons on the OSD<br />
menu.<br />
- The VOL+ and VOL- buttons on the TV set are used as and buttons on the OSD<br />
menu.<br />
You can dispaly the input source menu by pressing the FUNCTION<br />
button on the remote control or on the the TV set, press /button<br />
to select, and press OK button to confirm you deside.<br />
TV<br />
SCART<br />
CVBS<br />
S-VIDEO<br />
VGA<br />
HDMI<br />
DVD<br />
DTV<br />
10
In this manual, the OSD (On Screen Display) may be different from your TV's because it is just<br />
example to help the TV operation.<br />
PICTURE menu options<br />
Press the MENU button on the front panel the remote control and then use / <br />
button to select the Video menu, press button to enter(see the picture below).<br />
Picture Mode<br />
Contrast<br />
Brightness<br />
Colour<br />
Tint<br />
Sharpness<br />
PICTURE<br />
Personal<br />
50<br />
50<br />
50<br />
0<br />
Normal<br />
1. Use / button to select what you want to<br />
adjust in the Video menu.<br />
2. Press / button to setup.<br />
3. When you are satisfied with your adjustment, press<br />
MENU button.<br />
Select<br />
Adjust<br />
Colour temperature<br />
DNR<br />
Normal<br />
Off<br />
Picture Mode<br />
Select the type of picture which best corresponds to your viewing requirements by selecting Picture Mode in<br />
Picture menu. You may select the picture mode directly by pressing the PICTURE button on the remote<br />
control.<br />
Contrast<br />
Adjust the contrast of the picture.<br />
Brightness<br />
Adjust the brightness of the picture.<br />
Colour<br />
Adjust the colour of the picture.<br />
NOTE: This option is invalid in PC mode, and it will be shown in gray.<br />
Tint<br />
Adjust the tint of the picture(in NTSC mode).<br />
Sharpness<br />
Select sharpness mode of the picture.<br />
Colour Temperature(in VGA mode)<br />
Select an optimum color temperature mode to suit your eyes <strong>for</strong> viewing among Normal, Warm and Cold.<br />
DNR<br />
If the broadcast signal received is weak, you can select the DNR option to reduce the video noise level<br />
between Off, Low, Mid and High.<br />
11
SOUND menu options<br />
Press the MENU button on the front panel or on the remote control and then use / <br />
button to select the Sound menu, press button to enter(see the picture below).<br />
Volume<br />
Sound Mode<br />
Bass<br />
Treble<br />
SOUND<br />
20<br />
Personal<br />
50<br />
50<br />
1. Use / button to select what you want to<br />
adjust in the Video menu.<br />
2. Press / button to setup.<br />
3. When you are satisfied with your adjustment, press<br />
MENU button.<br />
Balance<br />
50<br />
Select<br />
Adjust<br />
Volume<br />
Adjust the volume.<br />
Sound Mode<br />
Select the type of sound which best corresponds to your listening requirements by selecting Sound<br />
Mode in Sound menu. You may select the picture mode directly by pressing the SOUND button on<br />
the remote control.<br />
Bass<br />
Adjust the level of the lower-pitched sounds.<br />
Treble<br />
Adjust the level of the higher-pitched sounds.<br />
Balance<br />
Adjust the audio output between left and right speakers.<br />
NOTE: The Treble and bass just available when the audio preset is selected PERSONAL<br />
TIMER menu options<br />
Press the MENU button on the front panel or on the remote control and then use / <br />
button to select the Timer menu, press button to enter(see the picture below).<br />
Sleep Timer<br />
OSD Timer<br />
TIMER<br />
0 Min<br />
30Sec<br />
1. Use / button to select what you want to<br />
adjust in the Video menu.<br />
2. Press / button to setup.<br />
3. When you are satisfied with your adjustment, press<br />
MENU button.<br />
Select<br />
Adjust<br />
Sleep Timer<br />
Select the sleep time to put automatically the TV in standby mode. Timer can be selected as 15,30,45,60,<br />
75,90,105,120 and 0 Min(Off). You may select the sleep time by pressing SLEEP repeatedly.<br />
OSD Timer<br />
You can select the time when the OSD display on the screen such as: 5Sec,10Sec,15Sec,20Sec,25Sec,<br />
30Sec.<br />
12
FUNCTION menu options<br />
Press the MENU button on the front panel or on the remote control and then use → / ←<br />
button to select the Function menu, press ↓ button to enter(see the picture below).<br />
Language<br />
Video Size<br />
Blue Screen<br />
Child Lock<br />
First Time Installation<br />
FUNCTION<br />
English<br />
Auto<br />
On<br />
1. Use ↑/↓button to select what you want to<br />
adjust in the Video menu.<br />
2. Press → / ← button to setup.<br />
3. When you are satisfied with your adjustment, press<br />
MENU button.<br />
Reset<br />
Select<br />
Adjust<br />
Language<br />
Select the language of the OSD menu.<br />
Video Size<br />
Select the screen display mode.<br />
Note: The available aspect modes may differ from one input source to another.<br />
Blue Screen<br />
To turn on/off the function, when the function is turned on, the screen background will turn blue at very weak<br />
or no signal condition.<br />
Child Lock<br />
Child Lock<br />
Press → button to enter the Child Lock menu as below:<br />
Child Lock: Turn on/off the child lock function.<br />
Key Lock: This option allows you to lock the buttons on<br />
the TV set, so that a child may not accidentally<br />
Child Lock<br />
Key Lock<br />
Change PIN Code<br />
Off<br />
Off<br />
change your viewing preferences.<br />
Select Adjust<br />
Change PIN Code: Set pin code.<br />
Old PIN Code: The default is no password, press<br />
OK to confirm. If the pin code is changed, it must enter the<br />
old code to change.<br />
New PIN Code: Enter the new password.<br />
Enter Again: Enter the same password 2 twice, the<br />
password will be changed successfully.<br />
Old PIN Code<br />
New PIN Code<br />
Enter Again<br />
Change PIN Code<br />
Select Delete 0~9 Input OK Confirm<br />
PIN Code:<br />
Delete 0~9 Input OK Enter<br />
If you turn on the Child Lock function, and set the PIN<br />
Code, you have to enter the code when you want to use the TV or operate the OSD menu.<br />
Note: If the pin code is changed and the number <strong>for</strong>gotten or lost, please call the helpline.<br />
Reset<br />
Press → button to reset the setup.<br />
13
SETUP menu options(used in TV/DTV source)<br />
Press the MENU button on the front panel or on the remote control and then use /<br />
button to select the Setup menu, press button to enter(see the picture below).<br />
Country<br />
Auto Tuning<br />
Manual Tuning<br />
Program Edit<br />
Common Interface<br />
SETUP<br />
UK<br />
1. Use / (CH+/-) button to select what you want to<br />
adjust in the Video menu.<br />
2. Press / button to setup.<br />
3. When you are satisfied with your adjustment, press<br />
MENU button.<br />
Select<br />
Adjust<br />
Country<br />
This option allows you to select the country.<br />
Auto Tuning<br />
Press button to start auto tuning.<br />
Note: Be<strong>for</strong>e you per<strong>for</strong>m Auto Tuning, you must choose the country where you are by selecting<br />
COUNTRY option.<br />
Auto tuning<br />
Press OK key to start<br />
OK<br />
Enter<br />
MENU<br />
Return<br />
Manual Tuning<br />
Note: Be<strong>for</strong>e you per<strong>for</strong>m Manual Tuning, you must choose the country where you are by selecting<br />
Country option.<br />
Manual Tuning in TV mode<br />
Program<br />
Sound System<br />
Colour System<br />
Program Lable<br />
AFT<br />
Manual Search<br />
Manual Tuning<br />
Select Adjust 0-9 Input<br />
99<br />
I<br />
Auto<br />
Off<br />
471.43MHz<br />
Program: Select the current channel.<br />
Sound System: Select a corresponding sound system(In the UK select Pal I ).<br />
Color System: Select a corresponding color system.<br />
Program Label: Name the current channel, you can also rename the program which you have named.<br />
Press button to enter, and press / button to select the position, then press / (CH+/-)<br />
button or 0-9 button to enter the character, press OK button to confirm.<br />
AFT: Due to weak signals or a wrong antenna configuration, some of the channels may not be turned<br />
to the best reception condition. AFT function allows you to fine tune channel selected.<br />
Manual Search: Press / button to search.<br />
14
Manual Tuning in DTV mode<br />
Manual Tuning<br />
Channel<br />
Start Search<br />
Service Found<br />
Signal Quality<br />
Signal Strength<br />
Frequency<br />
32<br />
Begin<br />
0<br />
0%<br />
0%<br />
474.00MHz<br />
Select<br />
Adjust<br />
Channel: Select the current channel.<br />
Start Search: press button to begin searching, and it will display “Search”, after a few second,<br />
it will display “Finish”.<br />
Program Edit<br />
Channel list<br />
Flags<br />
X<br />
1.<br />
2.<br />
X<br />
X<br />
3.555<br />
4.flash<br />
5.<br />
X<br />
6. aaa<br />
7.<br />
8.<br />
Favorite Delete Lock radio<br />
Favorite(in DTV mode): Set favorite channels.(You could use the<br />
FAV+/- button to view the favorite channels in DTV<br />
source.)<br />
Use/(CH+/-) button to select the channel, and press<br />
the green button on the remote control to set, and there<br />
will be a “ ” on the channel, press the green button again<br />
to cancel. Such as channel 2.<br />
Delete: Delete the channel, the channel will be deleted.<br />
Lock: Lock the channel, you have to enter the code(PIN code in<br />
Child Lock menu--Function menu) to view the channel.<br />
Use/(CH+/-) button to select the channel, and press the<br />
blue button on the remote control to set, and there will be a<br />
“ ” on the channel, press the blue button again to cancel.<br />
Such as channel 5 and 6.<br />
Radio: In DTV mode, press red key to switch between TV and radio.<br />
Common interface(For DTV mode)<br />
15
DVD Operation<br />
DVD Operation<br />
Press the Power button on the TV or the remote control, then press the FUNCTION button to select DVD<br />
mode. If there is no disc in the DVD player the screen will show "NO DISC".<br />
Place a disc<br />
Insert a disc according to the silk.<br />
Do not touch the playing surface.<br />
Hold the disc around the outside with your fingers and place the disc into the slot. The player will<br />
automatically draw the disc into the player.<br />
To "Eject" the disc, press the " " button on the TV or on the remote control.<br />
Play<br />
The contents of each disc vary, as to how the disc was authored and what features are included. Some<br />
discs start playing as soon as they have been read, some need "Play" selecting in the Menu. Different play<br />
modes are offered, such as Menu Play, Sequence Play and other modes.<br />
Using the Display Feature<br />
1. Compatible with DVD, SVCD, VCD, CD, HD-CD, WMA, Digital Audio disc discs.<br />
2. Loading and playing DVDs (two pages)<br />
- Press DISPLAY button once to show the first page:<br />
- "Disc Type, Title * / * (the playing title / total titles), Chapter * / * (the playing chapter / total chapters),<br />
Elapsed Time of the Disc".<br />
- Press the button again to show the second page:<br />
- "Language */* (the serial number of playing language / the amount of optional languages) or Off,<br />
Language Type, Audio Type, Subtitle * / * (the serial number of playing subtitle /the amount of optional<br />
subtitles) or Off, Angle * / * (the serial number of playing angle / the amount of optional angles) or Off".<br />
- Press the button <strong>for</strong> the third time, the display menu fades out.<br />
3. Loading and playing SVCD discs (two pages)<br />
- Press Display button once to show the first page:<br />
- "Disc Type, Track * / * (the playing track / total tracks), Mute, PBC, Repeat Mode, Elapsed Time of the<br />
Playing Track".<br />
- Press the button again to show the second page:<br />
- "Language * / * (the serial number of playing language/ the amount of optional languages) or Off,<br />
Language Type, Audio Type, Subtitle * / * (the serial number of playing subtitle / the amount of optional<br />
subtitles) or Off".<br />
- Press the button <strong>for</strong> the third time, the display menu fades out.<br />
4. Loading and playing VCD<br />
- Press Display button once to show the first page:<br />
- "Disc Type, Track * / * (the playing track / total tracks), Mute, PBC, Repeat Mode, Elapsed Time of the<br />
Playing Track".<br />
- Press the button again, the display menu fades out.<br />
5. Loading and playing CD, HD-CD, WMA, Digital Audio / JPEG discs<br />
- Press Display button once to show the first page:<br />
- "Disc Type, Track * / * (the playing track / total tracks), Mute, Repeat Mode, Elapsed Time of the<br />
Playing Track".<br />
- Press the button again, the display menu fades out.<br />
Subtitles<br />
1. Compatible with DVD, SVCD discs.<br />
2. Press the Subtitle button on the remote once, and the subtitle info banner appears<br />
3. When a DVD or SVCD is recorded with subtitles, you can use the Subtitle feature to view the subtitles<br />
on-screen. By default, subtitles are off. The info banner will display Subtitle Off.<br />
4. To display subtitles, press the Subtitle button again. The default language with its responding serial<br />
number will be displayed in the info banner and subtitles will be displayed in that language. There are<br />
8 supported subtitles: Chinese, English, Japanese, French, Spanish, Portuguese, Germany and Latin.<br />
With each consecutive press of the Subtitle button, the subtitle switches.<br />
For example, "Language Icon: [1 English DTS 6CH] or [Off]" (the availability of the subtitles are<br />
disc-dependent). To turn subtitles off, press the Subtitle button until Subtitle Off is displayed.<br />
16
DVD System Operation<br />
Zoom In the Video Image<br />
1. Compatible with DVD, SVCD, VCD, JPEG discs.<br />
2. The Zoom Function allows you to enlarge the video image.<br />
3. Press Zoom repeatedly to activate the function and choose the required zoom factor: Zoom 1, Zoom 2,<br />
Zoom 3, Zoom 4, Zoom 1 /2, Zoom 1 /3, Zoom 1/4, Zoom Off.<br />
Digital Audio Disc<br />
1. Compatible with Digital Audio discs<br />
2. The player will search the disc directory automatically and display the contents on screen.<br />
3. The player will then start to play the first track, of the selected directory.<br />
4. To change directories use the direction buttons.<br />
DVD System Operation<br />
System operation will define the setting of the set; these definitions will be stored until you change them<br />
again.<br />
General Steps of Setup Menu<br />
1. Pause or Stop the player. Press SETUP on the remote control. The main menu will be shown as below.<br />
2. Press the /buttons to select the Icon of the desired section, e.g. “TV System" and press<br />
button to open that section.<br />
3. Press / to select the desired feature and again press button to open that section.<br />
4. Press/ to select the desired feature and then press "OK" to select the new setting.<br />
5 To exit the menu, press "SETUP" or to select EXIT SETUP and then press "OK"<br />
When launching the setup routine, the pressing of the following buttons will turn off the setup menu,<br />
while the choices that have been changed will be saved.<br />
Menu specification<br />
1. SYSTEM SETUP<br />
The system setup options are illustrated below:<br />
17
DVD System Operation<br />
TV SYSTEM<br />
According to the Color system of your TV, select proper TV TYPE.<br />
PASSWORD<br />
The password option is initialized as locked. You cannot set the ratings limit or change the password.<br />
To enable these features you must unlock the Password. The default password is "0000". Using the /<br />
button, move the highlight to "PASSWORD", press the button and enter "0000". You will see the<br />
padlock symbol open. You may now change the RATING or put in a new password number.<br />
If the Lock symbol is BLUE you must press the button to enter the lock field, the lock symbol will change<br />
to YELLOW, you may now enter a new 4 digit number. Please remember or write down the new Password<br />
and keep safe.<br />
RATING<br />
The Rating feature is a rating limit feature, like movie ratings. This helps you to control what DVD the<br />
family watches. There are 8 levels of selection, from KIDS SAFE to ADULT. Adult is the "play all" selection.<br />
2. LANGUAGE SETUP<br />
The language setup options are illustrated below:<br />
- OSD LANGUAGE: The OSD will display in the language you choose.<br />
- AUDIO LANG: If the disc you are playing has the language you choose, it will<br />
output audio in that language.<br />
- SUBTITLE LANG: If the disc you are playing has the language you require you may select this either in<br />
the Menu or using the "SUBTITLE" button on the Remote control. You may also switch this OFF.<br />
- MENU LANG: If the disc you are playing has the language you require you may<br />
select this.<br />
3. AUDIO SETUP<br />
-Highlight the AUDIO OUT option, and press the Arrow buttons to choose the audio output mode you prefer.<br />
Press Enter to confirm; There are 3 optional audio output modes: SPDIF /OFF, SPDIF / RAW, and SPDIF/<br />
PCM. SPDIF/ RAW is <strong>for</strong> amplifiers with a built in digital decoder. SPDIF/PCM is selected <strong>for</strong> amplifiers with<br />
no built in digital decoder.<br />
-TONE: Use the /button to move the scroll and adjust the tone.<br />
18
DVD System Operation<br />
4. DIGITAL SETUP<br />
The video setup options are illustrated below:<br />
- DYNAMIC RANGE: Use the /button to<br />
move the scroll and adjust the dynamic range.<br />
- DUAL MONO: Choose the mode of the audio output.<br />
- There are four modes: STEREO, MONO L, MONO R,<br />
MIX MONO.<br />
19
Disc Care<br />
Disc Care<br />
About Disc Terms<br />
Title<br />
Generally, pictures or music compressed on a DVD are divided into several sections, "title".<br />
Chapter<br />
The smaller section unit of picture or music in a DVD under the title, usually one title is comprised of one<br />
or more chapters and each of them is numbered <strong>for</strong> easy searching, but some discs may not have a<br />
recording chapter.<br />
Track<br />
A segment of picture or music on a CD, Each track is numbered <strong>for</strong> searching.<br />
Care of Disc<br />
Video disc contains high-density compressed data that needs proper handling.<br />
1. Hold the disc with fingers by outer edge and/or the center spindle hole. Do not touch the discs surface.<br />
2. Do not bend or press the disc.<br />
3. Do not expose the disc to direct sunlight or heating sources, Stere discs in cabinet vertically, and in dry<br />
condition.<br />
Prevent exposure to:<br />
Direct sunlight<br />
Heat or exhaust from a heating device<br />
Extreme humidity<br />
Clean the disc surface with a soft, dry cleaning cloth, Wipe the disc surface gently and radically from center<br />
toward the outer edge.<br />
Do not apply thinner, alcohol, chemical solvent, or sprays when cleaning. Such cleaning fluids will<br />
permanently damage the disc surface.<br />
20
Simple Troubleshooting<br />
Simple Troubleshooting<br />
SYMPTOM<br />
REMEDY<br />
GENERAL<br />
Dead. No LED Lit No power to the TV. Check all connections to the TV including.<br />
Dead Led lit red<br />
Blue screen.<br />
Noisy, snowy,<br />
ghosting picture (TV)<br />
No sound<br />
Set still in standby.<br />
No signal.<br />
Incorrect source<br />
selected.<br />
Poor aerial signal.<br />
Sound "Mute".<br />
Volume set too low.<br />
External leads not<br />
connected "if used".<br />
Press either the Power button or the Standby<br />
button on the Remote control.<br />
Press FUNCTION button to select correct<br />
source.<br />
If using an indoor aerial, try moving the<br />
aerial. Check aerial connections.<br />
Turn sound "Mute" OFF.<br />
Check volume settings.<br />
Check all external leads are connected.<br />
DVD<br />
Will not accept disc DVD not selected Select DVD with FUNCTION button.<br />
Screen shows "NO<br />
DISC"<br />
Picture "Freezes"<br />
or breaks up<br />
Certain disc functions<br />
not<br />
Disc placed incorrectly<br />
Disc must have mirror side facing you if single<br />
sided.<br />
Disc damaged or dirty<br />
Inspect disc. If damaged you must discard.<br />
If dirty see "Disc care' page 20.<br />
Disc damaged or dirty.<br />
See "Disc care" page 20.<br />
Disc may not<br />
support required<br />
feature.<br />
Read disc in<strong>for</strong>mation.<br />
21
Techincal Specifications<br />
Techincal Specifications<br />
TV<br />
TVSystem<br />
PAL/SECAM, BG/DK/I<br />
Screen size<br />
19"(diagonal)<br />
Resolution<br />
1440x900pixels (RGB)<br />
Aerial input 75 (unbalanced)<br />
Audio output power 2x3 W<br />
Power Consumption<br />
AC 100-240V 50/60Hz 60W<br />
Remote control<br />
Type<br />
Control distance<br />
Control angle<br />
Batteries<br />
Dimensions<br />
Weight<br />
infrared<br />
5m<br />
30° (horizontal)<br />
2 x 1.5 V, size AA<br />
48 x 168 x24 mm<br />
70 g (without battery)<br />
22
Order Form<br />
To get your bracket fast go to<br />
www.Solutions4Today.co.uk<br />
Or fill in the <strong>for</strong>m below and post to: Solutions 4 Today, PO Box 56, Leyburn, DL8 4WU<br />
Or call 02921 25 00 11<br />
Ref<br />
Unit Price<br />
Unit Price with<br />
Voucher<br />
Postage & Packing*<br />
Quantity<br />
WLB 901 £39.99 £29.99 £5.00 £<br />
L-1 £22.99 £12.99 £1.50 £<br />
Total Price<br />
*Postage & Packing to the UK Mainland (excluding Highlands & Islands—<strong>for</strong><br />
costs to these & non-UK Mainland destinations please contact our orderline)<br />
TOTAL £<br />
I enclose a cheque made payable to Solutions 4 Today Ltd <strong>for</strong> £___________________<br />
Please debit my card £___________________<br />
Payment Method: Visa Visa Delta MasterCard JCB<br />
Switch Solo Visa Electron<br />
Card Number:<br />
Billing Address:<br />
City:<br />
Name on Card:<br />
Security Code:<br />
Issue No:<br />
(Switch only)<br />
Postcode:<br />
Telephone<br />
Signature<br />
_________________________<br />
Valid From:<br />
/<br />
Expiry:<br />
_________________________________________________________________<br />
_________________________________________________________________<br />
_________________________________________________________________<br />
_________________________________________________________________<br />
___________________________________________Date_________________<br />
/<br />
DISCOUNT COUPON<br />
£10 OFF FOR PURCHASES M ADE UP<br />
TO 30 DAYS AFTER TV PURCHASE.<br />
To claim your £10 off go to<br />
www.Solutions4Today.co.uk<br />
W hen prom pted enter the prom otional code<br />
D W B 1 or return this voucher w ith your<br />
order <strong>for</strong>m .<br />
£10<br />
OFF<br />
www.solutions4today.co.uk
£10 off up to<br />
30 days after<br />
purchase<br />
LCD WALL MOUNTS TO FIT YOUR TELEVISION.<br />
To make the most of this great deal go to<br />
www.Solutions4Today.co.uk<br />
or fill in the <strong>for</strong>m overleaf.<br />
WLB 901 — £39.99 £29.99<br />
Highly manoeuvrable wall mount allowing<br />
easy positioning and multi-position use.<br />
• TV Size: 10” - 24”<br />
• Weight Limit: 15kgs<br />
• Tilt/Fixed: Tilt & Swivel<br />
• VESA: 75x75 / 100x100<br />
• Colour: Silver<br />
• Min Distance to Wall: 7cm<br />
This bracket will fit the television you have just purchased<br />
& all televisions from 14” - 24”<br />
L-1 — £22.99 £12.99<br />
• TV Size: 10” - 24”<br />
• Weight Limit: 15kgs<br />
• Tilt/Fixed: Fixed<br />
• VESA: 75x75 / 100x100<br />
• Colour: Grey<br />
• Max Distance to Wall: 43cm<br />
• Angle Tilt: 15°<br />
• Angle Swivel: 180°<br />
• Easy Installation<br />
• Supplied with all fixing<br />
screws required & fitting<br />
instructions<br />
Very discreet bracket with minimal distance<br />
to wall.<br />
(with voucher)<br />
(with voucher)<br />
• Min Distance to Wall: 1.2cm<br />
• Max Distance to Wall:<br />
1.2cm<br />
• Easy Installation<br />
• Supplied with all fixing<br />
screws required & fitting<br />
instructions<br />
This bracket will fit the television you have just purchased<br />
& all televisions from 14” - 24”<br />
DISCOUNT COUPON<br />
£10 OFF FOR PURCHASES M ADE UP<br />
TO 30 DAYS AFTER TV PURCHASE.<br />
To claim your £10 off go to<br />
www.Solutions4Today.co.uk<br />
W hen prom pted enter the prom otional code<br />
D W B 1 or return this voucher w ith your<br />
order <strong>for</strong>m .<br />
£10<br />
OFF<br />
www.solutions4today.co.uk