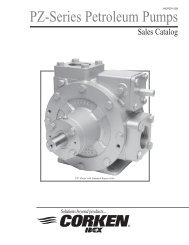
Industrial Vane Pumps - Corken
Industrial Vane Pumps - Corken
Industrial Vane Pumps - Corken

Create successful ePaper yourself
Turn your PDF publications into a flip-book with our unique Google optimized e-Paper software.
• Specific safety measures to be applied (e.g. gas<br />
detection, automatic shut-off valves, personal protective<br />
equipment, etc.).<br />
The following table shows the approximate weight of the<br />
bare pump for each model. For handling a bare pump,<br />
lifting slings should be used. Web slings are preferred<br />
over metal slings to minimize damage to the paint. See<br />
Appendix D for outline dimensions.<br />
Approximate Shipping Weight<br />
Model lb kg<br />
C51 50 22.7<br />
F51 25 11.3<br />
521 120 54.4<br />
721 140 63.5<br />
1021 200 90.7<br />
1321 170 77.1<br />
1521 205 92.9<br />
The Inlet Piping Should Include the Following:<br />
1. The tank excess flow valve (EFV) should have a flow<br />
rate of 1-1/2 to 2 times the capacity of he pump. Do not<br />
use an EFV without knowing its flow capacity.<br />
2. The tank shut-off valve must be a free-flow type and<br />
not a standard globe valve.<br />
3. A strainer of the “Y” type, with 20 to 40 mesh screen,<br />
must be on the inlet line of the pump. (Mesh size<br />
indicates the number of openings per lineal inch).<br />
4. Use a flexible connection in the pump inlet and outlet<br />
piping to compensate for piping strains.<br />
5. Use an eccentric swage at the pump inlet nozzle to<br />
change the line size (flat side up).<br />
6. Make the inlet line level or slope it downward to<br />
the pump.<br />
7. Inlet piping size should never be smaller than the inlet<br />
of the pump (see piping diagram in figure 2 for more<br />
details).<br />
The Outlet Piping Should Include the Following:<br />
1. A pressure gauge should be installed in the pump outlet<br />
or near it. A pressure gauge is necessary to determine<br />
the efficiency of your pumping system.<br />
2. A hydrostatic relief valve is required by most state laws<br />
and for your own safety.<br />
3. If the outlet piping exceeds 50 feet (15.2 m) in length, a<br />
check valve should be installed near the pump outlet<br />
and after the by-pass valve. A check valve is not<br />
necessary in applications that do not require a by-pass<br />
valve.<br />
4. Outlet piping size should never be smaller than the outlet<br />
of the pump (see piping diagram in figure 2 for more<br />
details).<br />
The Bypass System Must Include the Following:<br />
1. A pump by-pass system must be installed. If the pump<br />
discharge is shut off before the driver is stopped,<br />
dangerously high pressures can develop, unless a bypass<br />
valve is installed to permit the pump to discharge<br />
back to the supply tank, at a predetermined pressure.<br />
2. The pump may have an internal relief valve, but it is<br />
intended as a safety relief valve device and not an<br />
operational by-pass.<br />
Pump Model<br />
Max Differential Pressure<br />
521, 721, 1021, 125 psi (8.8 kg/cm 2 )<br />
1321, 1521 100 psi (7.0 kg/cm 2 )<br />
3. Always install an external by-pass relief valve (such as<br />
the <strong>Corken</strong> B177) in the pump discharge line. The bypass<br />
valve may discharge into the tank at any convenient<br />
opening, either liquid or vapor; however, it should not<br />
connect into the pump inlet piping system.<br />
A Vapor Equalizing System Should be Included:<br />
To obtain maximum performance from your Coro-<strong>Vane</strong>® pump,<br />
a vapor equalizing system should be installed. This system is<br />
simply a pipe connecting the vapor sections of the tank being<br />
unloaded and the tank being filled. This equalizing line allows<br />
vapor to move freely between the two tanks (in either direction)<br />
and assures that both tanks remain at the same pressure.<br />
As liquid is withdrawn from a tank, it must be replaced by an<br />
equal amount of vapor or the pressure in the tank will drop. If<br />
an equalizing line is not present, this vapor is formed by<br />
“boiling” of the liquid and a reduction of the tank’s pressure.<br />
Meanwhile, the tank being filled experiences a pressure<br />
increase as the rising fluid levels compresses the vapor space<br />
above it. A vapor equalizing line will eliminate both of these<br />
problems and will reduce pumping time, differential pressure,<br />
noise and wear on the entire system. Slow transfer rates will<br />
minimize these effects, and reduce the need for a vapor<br />
equalizing line. However, today’s high transfer rates require<br />
that a vapor equalizing line be installed.<br />
Another way to consider this principle is to remember that<br />
it takes two holes in an oil can for oil to be poured smoothly<br />
from the can; one for the oil to exit and the other for the air<br />
to enter (see the piping diagram in figure 2, page 5 for<br />
more details).<br />
Driver Installation<br />
The wiring of your electric motor is extremely important and<br />
must be done by a competent electrical contractor. The<br />
following wire sizing chart indicates the minimum standards<br />
for wire sizes.<br />
6