MAC 250 Krypton/Entour - Christie Lites
MAC 250 Krypton/Entour - Christie Lites
MAC 250 Krypton/Entour - Christie Lites

You also want an ePaper? Increase the reach of your titles
YUMPU automatically turns print PDFs into web optimized ePapers that Google loves.
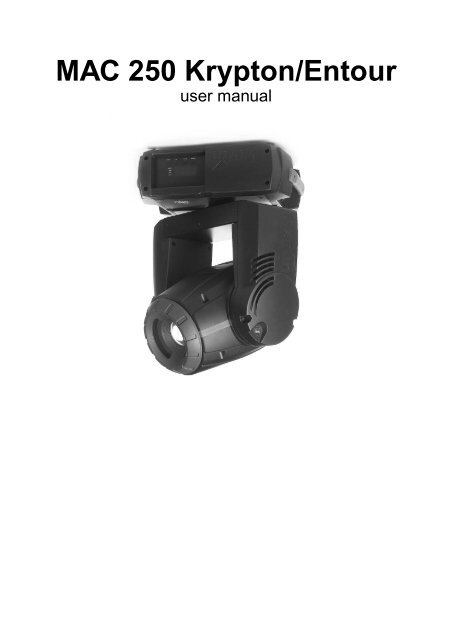
<strong>MAC</strong> <strong>250</strong> <strong>Krypton</strong>/<strong>Entour</strong><br />
user manual
All measurements are expressed in millimeters<br />
469<br />
538<br />
364<br />
119<br />
315<br />
375<br />
393<br />
270°<br />
270°<br />
128.5° 128.5°<br />
560<br />
© 2003 Martin Professional A/S, Denmark. All rights reserved. No part of this manual may be reproduced, in any form or by any<br />
means, without permission in writing from Martin Professional A/S, Denmark. Printed in Denmark.<br />
P/N 35000126 Rev. D
INTRODUCTION . . . . . . . . . . . . . . . . . . . . . . . . . . . . . . . . . . . . . . . . . . . . . . . . . . . . . . . . . . . . 4<br />
Features . . . . . . . . . . . . . . . . . . . . . . . . . . . . . . . . . . . . . . . . . . . . . . . . . . . . . . . . . . . . . . . . . . . . . . . . . . . . . . . . . . . . . . . 4<br />
<strong>MAC</strong> <strong>250</strong> <strong>Krypton</strong>/<strong>Entour</strong> safety information . . . . . . . . . . . . . . . . . . . . . . . . . . . . . . . . . . . . . . . . . . . . . . . . . . . . . . . . . . . 4<br />
SETUP . . . . . . . . . . . . . . . . . . . . . . . . . . . . . . . . . . . . . . . . . . . . . . . . . . . . . . . . . . . . . . . . . . 6<br />
Unpacking. . . . . . . . . . . . . . . . . . . . . . . . . . . . . . . . . . . . . . . . . . . . . . . . . . . . . . . . . . . . . . . . . . . . . . . . . . . . . . . . . . . . . . 6<br />
AC power . . . . . . . . . . . . . . . . . . . . . . . . . . . . . . . . . . . . . . . . . . . . . . . . . . . . . . . . . . . . . . . . . . . . . . . . . . . . . . . . . . . . . . 6<br />
Installation. . . . . . . . . . . . . . . . . . . . . . . . . . . . . . . . . . . . . . . . . . . . . . . . . . . . . . . . . . . . . . . . . . . . . . . . . . . . . . . . . . . . . . 8<br />
Connecting the serial data link . . . . . . . . . . . . . . . . . . . . . . . . . . . . . . . . . . . . . . . . . . . . . . . . . . . . . . . . . . . . . . . . . . . . . . 9<br />
CONTROL PANEL . . . . . . . . . . . . . . . . . . . . . . . . . . . . . . . . . . . . . . . . . . . . . . . . . . . . . . . . . 10<br />
Menu navigation . . . . . . . . . . . . . . . . . . . . . . . . . . . . . . . . . . . . . . . . . . . . . . . . . . . . . . . . . . . . . . . . . . . . . . . . . . . . . . . . 10<br />
DMX Mode selection. . . . . . . . . . . . . . . . . . . . . . . . . . . . . . . . . . . . . . . . . . . . . . . . . . . . . . . . . . . . . . . . . . . . . . . . . . . . . 10<br />
DMX Address selection . . . . . . . . . . . . . . . . . . . . . . . . . . . . . . . . . . . . . . . . . . . . . . . . . . . . . . . . . . . . . . . . . . . . . . . . . . 10<br />
Tailoring performance. . . . . . . . . . . . . . . . . . . . . . . . . . . . . . . . . . . . . . . . . . . . . . . . . . . . . . . . . . . . . . . . . . . . . . . . . . . . 10<br />
Information readouts. . . . . . . . . . . . . . . . . . . . . . . . . . . . . . . . . . . . . . . . . . . . . . . . . . . . . . . . . . . . . . . . . . . . . . . . . . . . . 11<br />
Test and service utilities . . . . . . . . . . . . . . . . . . . . . . . . . . . . . . . . . . . . . . . . . . . . . . . . . . . . . . . . . . . . . . . . . . . . . . . . . . 12<br />
DMX-512 CONTROL . . . . . . . . . . . . . . . . . . . . . . . . . . . . . . . . . . . . . . . . . . . . . . . . . . . . . . . 14<br />
Lamp power . . . . . . . . . . . . . . . . . . . . . . . . . . . . . . . . . . . . . . . . . . . . . . . . . . . . . . . . . . . . . . . . . . . . . . . . . . . . . . . . . . . 14<br />
Effect position . . . . . . . . . . . . . . . . . . . . . . . . . . . . . . . . . . . . . . . . . . . . . . . . . . . . . . . . . . . . . . . . . . . . . . . . . . . . . . . . . . 14<br />
Speed control . . . . . . . . . . . . . . . . . . . . . . . . . . . . . . . . . . . . . . . . . . . . . . . . . . . . . . . . . . . . . . . . . . . . . . . . . . . . . . . . . . 15<br />
OPTICAL CONFIGURATION . . . . . . . . . . . . . . . . . . . . . . . . . . . . . . . . . . . . . . . . . . . . . . . . . . . 17<br />
Rotating gobos . . . . . . . . . . . . . . . . . . . . . . . . . . . . . . . . . . . . . . . . . . . . . . . . . . . . . . . . . . . . . . . . . . . . . . . . . . . . . . . . . 17<br />
Fixed gobos (<strong>MAC</strong> <strong>250</strong> <strong>Entour</strong> only). . . . . . . . . . . . . . . . . . . . . . . . . . . . . . . . . . . . . . . . . . . . . . . . . . . . . . . . . . . . . . . . . 20<br />
Color filters . . . . . . . . . . . . . . . . . . . . . . . . . . . . . . . . . . . . . . . . . . . . . . . . . . . . . . . . . . . . . . . . . . . . . . . . . . . . . . . . . . . . 21<br />
Prism. . . . . . . . . . . . . . . . . . . . . . . . . . . . . . . . . . . . . . . . . . . . . . . . . . . . . . . . . . . . . . . . . . . . . . . . . . . . . . . . . . . . . . . . . 22<br />
Mounting the optional 14° lens (<strong>MAC</strong> <strong>250</strong> <strong>Entour</strong> only) . . . . . . . . . . . . . . . . . . . . . . . . . . . . . . . . . . . . . . . . . . . . . . . . . . 26<br />
SERVICE . . . . . . . . . . . . . . . . . . . . . . . . . . . . . . . . . . . . . . . . . . . . . . . . . . . . . . . . . . . . . . . 29<br />
Lamp replacement . . . . . . . . . . . . . . . . . . . . . . . . . . . . . . . . . . . . . . . . . . . . . . . . . . . . . . . . . . . . . . . . . . . . . . . . . . . . . . 29<br />
Cleaning . . . . . . . . . . . . . . . . . . . . . . . . . . . . . . . . . . . . . . . . . . . . . . . . . . . . . . . . . . . . . . . . . . . . . . . . . . . . . . . . . . . . . . 30<br />
Lubrication . . . . . . . . . . . . . . . . . . . . . . . . . . . . . . . . . . . . . . . . . . . . . . . . . . . . . . . . . . . . . . . . . . . . . . . . . . . . . . . . . . . . 31<br />
Replacing fuses . . . . . . . . . . . . . . . . . . . . . . . . . . . . . . . . . . . . . . . . . . . . . . . . . . . . . . . . . . . . . . . . . . . . . . . . . . . . . . . . 31<br />
Updating software. . . . . . . . . . . . . . . . . . . . . . . . . . . . . . . . . . . . . . . . . . . . . . . . . . . . . . . . . . . . . . . . . . . . . . . . . . . . . . . 32<br />
DMX PROTOCOL . . . . . . . . . . . . . . . . . . . . . . . . . . . . . . . . . . . . . . . . . . . . . . . . . . . . . . . . . 33<br />
<strong>MAC</strong> <strong>250</strong> <strong>Krypton</strong> DMX protocol. . . . . . . . . . . . . . . . . . . . . . . . . . . . . . . . . . . . . . . . . . . . . . . . . . . . . . . . . . . . . . . . . . . . 34<br />
<strong>MAC</strong> <strong>250</strong> <strong>Entour</strong> DMX protocol . . . . . . . . . . . . . . . . . . . . . . . . . . . . . . . . . . . . . . . . . . . . . . . . . . . . . . . . . . . . . . . . . . . . 37<br />
CONTROL MENU . . . . . . . . . . . . . . . . . . . . . . . . . . . . . . . . . . . . . . . . . . . . . . . . . . . . . . . . . . 40<br />
ERROR MESSAGES . . . . . . . . . . . . . . . . . . . . . . . . . . . . . . . . . . . . . . . . . . . . . . . . . . . . . . . . 44<br />
TROUBLESHOOTING . . . . . . . . . . . . . . . . . . . . . . . . . . . . . . . . . . . . . . . . . . . . . . . . . . . . . . . 45<br />
CIRCUIT BOARD CONNECTIONS . . . . . . . . . . . . . . . . . . . . . . . . . . . . . . . . . . . . . . . . . . . . . . . 46<br />
SPECIFICATIONS - <strong>MAC</strong> <strong>250</strong> KRYPTON . . . . . . . . . . . . . . . . . . . . . . . . . . . . . . . . . . . . . . . . . 47<br />
SPECIFICATIONS - <strong>MAC</strong> <strong>250</strong> ENTOUR . . . . . . . . . . . . . . . . . . . . . . . . . . . . . . . . . . . . . . . . . . 49
INTRODUCTION<br />
Thank you for selecting the Martin <strong>MAC</strong> <strong>250</strong> <strong>Krypton</strong> or the <strong>MAC</strong> <strong>250</strong> <strong>Entour</strong>.<br />
Features<br />
Some of the many features include:<br />
• efficient, 2000 hour, <strong>250</strong> watt discharge lamp<br />
• 12 interchangeable dichroic colors<br />
• 7 interchangeable indexed-rotation gobos<br />
• interchangeable 3-facet rotating prism<br />
• motorized focus<br />
• full-range dimming<br />
• fast blackout and strobe effects<br />
• coated optics<br />
• user-installable firmware<br />
• switch-selectable power supply settings<br />
The <strong>MAC</strong> <strong>250</strong> <strong>Entour</strong> additionally features:<br />
• 10 fixed gobos<br />
• Tilt locks<br />
• Optional lens providing a 14° beam angle<br />
For the latest firmware updates, documentation, and other information about this and all Martin Professional<br />
products, please visit the Martin web site at http://www.martin.dk.<br />
Please check the Martin web site at http://www.martin.dk for the latest product software and documentation.<br />
Comments or suggestions regarding this document may be e-mailed to service@martin.dk or posted to<br />
Martin Professional A/S<br />
Olof Palmes Allé 18<br />
DK-8200 Aarhus N, Denmark<br />
Attn: Service Department<br />
Please review the important safety precautions in this manual before installing and operating the fixture.<br />
<strong>MAC</strong> <strong>250</strong> <strong>Krypton</strong>/<strong>Entour</strong> safety information<br />
Warning!<br />
This product is for professional use only. It is not for household or residential use.<br />
This product presents risks of lethal or severe injury due to fire and heat, electric shock, ultraviolet radiation,<br />
lamp explosion, and falls. Read this manual before powering or installing the fixture, follow the safety<br />
precautions listed below and observe all warnings in this manual and printed on the fixture. If you have<br />
questions about how to operate the fixture safely, please contact your Martin dealer or call the Martin<br />
24-hour service hot line at +45 70 200 201.<br />
PROTECTION FROM ELECTRIC SHOCK<br />
Warning!<br />
Always disconnect from mains supply before replacing the lamp.<br />
• Disconnect the fixture from AC power before removing or installing the lamp, fuses, or any part, and when<br />
not in use.<br />
• Always ground (earth) the fixture electrically.<br />
4<br />
<strong>MAC</strong> <strong>250</strong> <strong>Krypton</strong>/<strong>Entour</strong>
• Use only a source of AC power that complies with local building and electrical codes and has both overload<br />
and ground-fault protection.<br />
• Do not expose the fixture to rain or moisture.<br />
• Refer any service operation not described in this manual to a qualified technician.<br />
PROTECTION FROM UV RADIATION AND LAMP EXPLOSION<br />
• Never operate the fixture with missing or damaged lenses and/or covers.<br />
• When replacing the lamp, allow the fixture to cool for at least 15 minutes before opening the fixture or<br />
removing the lamp. Protect your hands and eyes with gloves and safety glasses.<br />
• Do not stare directly into the light. Never look at an exposed lamp while it is lit.<br />
• Replace the lamp if it becomes defective or worn out, or before usage exceeds the maximum service life.<br />
PROTECTION FROM BURNS AND FIRE<br />
Danger!<br />
Intense heat. Avoid contact by persons and materials.<br />
The exterior of the fixture can get very hot - up to 120° C (248° F). Allow the fixture to cool<br />
for at least 45 minutes before handling.<br />
Prolonged exposure to unshielded lamp can cause eye and skin burns.<br />
• Never attempt to bypass the thermostatic switch or fuses. Always replace defective fuses with ones of the<br />
specified type and rating.<br />
• Keep all combustible materials (for example fabric, wood, paper) at least 1 meter (39 inches) away from the<br />
fixture. Keep flammable materials well away from the fixture.<br />
• Do not illuminate surfaces within 3 meters (10 feet) of the fixture.<br />
• Provide a minimum clearance of 0.1 meters (4 inches) around fans and air vents.<br />
• Never place filters or other materials over the lens.<br />
• Do not modify the fixture or install other than genuine Martin parts.<br />
• Do not operate the fixture if the ambient temperature (Ta) exceeds 40° C (104° F). Protection from injury<br />
due to falls<br />
• Do not lift or carry the fixture alone.<br />
• When suspending the fixture, verify that the structure can hold at least 10 times the weight of all installed<br />
devices.<br />
• Verify that all external covers and rigging hardware are securely fastened and use an approved means of<br />
secondary attachment such as a safety cable.<br />
• Block access below the work area whenever installing or removing the fixture.<br />
Introduction 5
SETUP<br />
Unpacking<br />
The <strong>MAC</strong> <strong>250</strong> <strong>Krypton</strong>/<strong>Entour</strong> comes with:<br />
• MSD <strong>250</strong>/2 lamp (factory installed)<br />
• 3-meter, 3-wire IEC power cable<br />
• user manual<br />
• 1/4-turn clamp mounting bracket<br />
• 5-meter, 3-pin shielded XLR control cable<br />
The <strong>MAC</strong> <strong>250</strong> <strong>Entour</strong> also comes with an extra 14° lens.<br />
The packing material or flightcase is carefully designed to protect the fixture during shipment - always use it<br />
to transport the fixture.<br />
When installing the <strong>MAC</strong> <strong>250</strong> <strong>Entour</strong> model you may find it useful to lock the<br />
head in place using the tilt locks.<br />
AC power<br />
Warning!<br />
For protection from electric shock, the fixture must be grounded<br />
(earthed). The power supply shall have overload and<br />
ground-fault protection.<br />
Important! Verify that power supply settings match the local AC supply<br />
before use.<br />
The <strong>MAC</strong> <strong>250</strong> <strong>Krypton</strong>/<strong>Entour</strong> is factory configured for 230 V / 50 Hz operation. If your AC power supply is<br />
different, the fixture must be configured for the local voltage and frequency. Always use the settings that are<br />
closest to your AC supply.<br />
6<br />
<strong>MAC</strong> <strong>250</strong> <strong>Krypton</strong>/<strong>Entour</strong>
CONFIGURING FOR LOCAL AC POWER<br />
Voltage<br />
Frequency<br />
50<br />
60<br />
120<br />
100<br />
230<br />
210<br />
<strong>250</strong><br />
Figure 1: Power supply settings<br />
1 Disconnect the fixture from power.<br />
2 Remove the 2 Phillips screws in the access cover directly behind the power and data connectors. Lift off the<br />
cover.<br />
3 Locate the selection switches.<br />
4 Move the voltage switch to the setting that most closely matches the local AC voltage. If your voltage falls<br />
halfway between 2 settings, select the higher voltage. For example, if the AC voltage is 220 V, use the 230<br />
V setting instead of 210 V.<br />
5 Move the frequency switch to the setting that matches the local AC frequency: 50 or 60 Hz.<br />
6 Replace the cover.<br />
INSTALLING A PLUG ON THE POWER CABLE<br />
The power cable must be fitted with a grounding-type cord cap that fits your power distribution system.<br />
Consult an electrician if you have any doubts about proper installation.<br />
• Following the cord cap manufacturer’s instructions, connect the yellow and green wire to ground (earth), the<br />
brown wire to live, and the blue wire to neutral. The table below shows some pin identification schemes.<br />
Wire Pin Marking Screw color<br />
brown live “L” yellow or brass<br />
blue neutral “N” silver<br />
yellow/green ground green<br />
Table 1: Plug wiring<br />
APPLYING POWER<br />
Warning!<br />
Important!<br />
The power cables must be undamaged and rated for the electrical requirements of all<br />
connected devices.<br />
Powering through a dimmer system can damage the fixture.<br />
1 Verify that the supply cable is undamaged and rated for the current requirements of all connected devices.<br />
2 Plug the prepared power cable into the AC socket and a grounded AC power supply.<br />
Setup 7
Installation<br />
LOCATION AND ORIENTATION<br />
The <strong>MAC</strong> <strong>250</strong> <strong>Krypton</strong>/<strong>Entour</strong> may be installed in any orientation. It can be fastened directly to a suitable<br />
surface, hung with a rigging clamp, or placed directly on a level surface.<br />
For safe operation, install the <strong>MAC</strong> <strong>250</strong> <strong>Krypton</strong>/<strong>Entour</strong> in a location where:<br />
• the fixture is at least 1 meters (39 inches) away from combustible materials<br />
• the fixture is protected from rain and moisture<br />
• there is at least 0.1 meters (4 inches) clearance around the fan and control panel<br />
• there are no flammable materials nearby<br />
RIGGING OR MOUNTING THE <strong>MAC</strong> <strong>250</strong> KRYPTON/ENTOUR<br />
Warning!<br />
Block access below the work area before proceeding.<br />
The <strong>MAC</strong> <strong>250</strong> <strong>Krypton</strong>/<strong>Entour</strong> can be placed on stage or clamped to a truss in any orientation. The<br />
Fast-Lock system enables quick and easy fastening of the clamp brackets in 4 positions.<br />
The <strong>MAC</strong> <strong>250</strong> <strong>Krypton</strong>/<strong>Entour</strong> includes an omega clamp mounting bracket to which 1 or 2 rigging clamps<br />
(not included) can be bolted. The clamp mounting bracket fastens to the base as shown with 1/4-turn<br />
fasteners.<br />
Figure 2: Clamp mounting bracket<br />
Warning!<br />
Attach an approved safety cable to the attachment point provided in the base. Never use<br />
the carrying handles for secondary attachment. Always use an approved safety cable.<br />
The 1/4-turn fasteners are locked only when turned fully clockwise.<br />
1 Verify that the clamps are in good condition and can bear at least 10 times the weight of the fixture. Bolt<br />
clamps to the bracket with a grade 8.8 (minimum) M12 bolt and lock nut, or as recommended by the clamp<br />
manufacturer, through the 13 mm holes in the clamp mounting bracket.<br />
2 Align the clamp mounting bracket with any 2 key slots on the base. Insert both locking pins into the slots and<br />
turn both levers a full 1/4 turn clockwise to lock.<br />
3 Verify that the structure can bear at least 10 times the weight of all installed fixtures, clamps, cables,<br />
auxiliary equipment, etc.<br />
4 Working from a stable platform, clamp the fixture to the structure.<br />
8<br />
<strong>MAC</strong> <strong>250</strong> <strong>Krypton</strong>/<strong>Entour</strong>
5 Install a safety cable that can bear at least 10 times the weight of the fixture securely to the structure and<br />
anchor the cable to the dedicated attachment point on the base. The attachment point is designed to fit a<br />
carabiner clamp.<br />
6 Verify that there are no combustible materials or surfaces to be illuminated within 1 meter (39 inches) of the<br />
fixture, and that there are no flammable materials nearby.<br />
Connecting the serial data link<br />
The <strong>MAC</strong> <strong>250</strong> <strong>Krypton</strong>/<strong>Entour</strong> has locking 3-pin and 5-pin data input and output sockets that are<br />
wired for use with DMX devices with pin 1 to shield, pin 2 to cold (-) and pin 3 to hot (+).<br />
Important!<br />
Never connect more than 1 data input and 1 data output.<br />
1 Connect the controller’s output to the fixture’s data input.<br />
2 Connect the output of the fixture closest to the controller to the input of the next fixture. If connecting a<br />
fixture with pin 3 hot to a fixture with pin 3 cold, use a phase-reversing adaptor.<br />
3 To terminate the link, insert a male 120 Ω XLR termination plug in the output of the last fixture.<br />
TIPS FOR BUILDING A SERIAL LINK<br />
• Use shielded twisted-pair cable designed for RS-485 devices: standard microphone cable cannot transmit<br />
DMX data reliably over long runs. For links up to 300 meters (1000 ft.) long, you can use 24 AWG, low<br />
capacitance, 85-150 ohm characteristic impedance, shielded cable with 1 or more twisted pairs. For runs up<br />
to 500 meters (1640 ft.) use 22 AWG cable. Use an amplifier if the serial link exceeds 500 meters.<br />
• Never use a “Y” connector to split the link. To split the serial link into branches use a splitter such as the<br />
Martin 4-Channel Opto-Isolated RS-485 Splitter/Amplifier.<br />
• Do not overload the link. Up to 32 devices may be connected on a serial link.<br />
• Terminate the link by installing a termination plug in the output socket of the last fixture on the link. The<br />
termination plug, which is simply a male XLR connector with a 120 ohm, 0.25 watt resistor soldered<br />
between pins 2 and 3, “soaks up” the control signal so it does not reflect back down the link and cause<br />
interference. If a splitter is used, terminate each branch of the link.<br />
Setup 9
CONTROL PANEL<br />
You set the address and personalities, read out data, and execute service utilities from the control panel.<br />
Settings can also be changed remotely via the serial link with the Martin MP-2 uploader.<br />
See also the control menu table starting on page 40.<br />
Menu navigation<br />
The DMX address and any error messages are displayed after the fixture resets. To enter the menu, press<br />
[menu]. Use the [up] and [down] keys to move within the menu. To select a function or submenu, press<br />
[enter]. To escape a function or menu, press [menu].<br />
DMX Mode selection<br />
The fixture has two DMX operating modes, 16-bit and 16-bit Extended. 16-bit Extended mode uses 17 DMX<br />
channels, three more than the 14 DMX channels than standard 16-bit mode requires. 16-bit Extended mode<br />
provides more precise control of the dimmer color, and focus settings. The DMX mode is selected using the<br />
PSET option in the fixture control menu (see “Control menu” on page 40).<br />
SETTING THE DMX MODE<br />
1 Apply power to the <strong>MAC</strong> <strong>250</strong> <strong>Krypton</strong>/<strong>Entour</strong>. Press [menu] to enter the main menu.<br />
2 Select PSET using the [up] and [down] keys. Press [enter].<br />
3 Select 16BT for standard 16-bit mode, or 16EX for 16-bit extended mode.Press [enter].<br />
4 Press [menu] to return to the main menu.<br />
DMX Address selection<br />
For independent control, each fixture must be assigned its own address and non-overlapping control<br />
channels. Two <strong>MAC</strong> <strong>250</strong> <strong>Krypton</strong>/<strong>Entour</strong>s can share the same address if they are to respond identically:<br />
they will receive the same instructions and individual control will not be possible.<br />
SETTING THE DMX ADDRESS<br />
1 Apply power to the <strong>MAC</strong> <strong>250</strong> <strong>Krypton</strong>/<strong>Entour</strong>. Press [menu] to enter the main menu.<br />
2 Select AddR using the [up] and [down] keys. Press [enter].<br />
3 Select an address (start channel) from 1 to 500 using the [up] and [down] keys. Press [enter]. Press [menu]<br />
to return to the main menu.<br />
Tailoring performance<br />
MOVEMENT<br />
The <strong>MAC</strong> <strong>250</strong> <strong>Krypton</strong>/<strong>Entour</strong> provides the three menus with options for optimizing movement to suit<br />
different applications.<br />
• PATI, the pan and tilt invert menu, allows you to swap the pan and tilt channels (SWAP>ON), invert pan<br />
movement (PINV>ON), and invert tilt movement (TINV>ON). These options can be useful in situations<br />
10<br />
<strong>MAC</strong> <strong>250</strong> <strong>Krypton</strong>/<strong>Entour</strong>
where you want some fixtures to mirror the performance of others with the same DMX address, or when<br />
fixtures are not oriented as programmed.<br />
• PTSP, the pan/tilt speed menu, provides 3 settings: FAST, NORM and SLOW. NORM is best for<br />
most applications. FAST provides better performance in applications where speed is most important.<br />
• SCUT, the shortcuts setting which can be found under the PERS (personality) menu, determines whether<br />
the color and gobo wheels scroll past open when changing positions. When set to ON, the wheels can “take<br />
a shortcut” and scroll through open when this is the shortest path to the next position. The wheels do not<br />
scroll past open when SCUT is set to OFF.<br />
DISPLAY<br />
The display menu (PERS>dISP) determines whether the display remains lit or not. Select ON to have<br />
the display remain lit, or OFF to extinguish the display two minutes after the last key press.<br />
To flip the display for easier reading, press [up] and [down] simultaneously.<br />
The display intensity setting (PERS>dINT) controls display brightness. You can select AUTO for<br />
automatic dimming of the display using the built-in light sensor, or manually select an intensity level from 10<br />
to 100.<br />
LAMP POWER<br />
There are two settings that modify lamp control: Automatic Lamp On (PERS>ALON) and DMX Lamp-Off<br />
(PERS>DLoF).<br />
There are three options for automatic lamp control: ON, OFF, and DMX. When ALON is OFF, the lamp<br />
remains off until a lamp-on command is received from the controller. When ALON is ON, the lamp strikes<br />
automatically after the fixture is powered on. When ALON is set to DMX, the lamp strikes automatically<br />
when the fixture receives DMX data, and it extinguishes automatically 15 minutes after DMX data is lost.<br />
When ALON is either ON or DMX, lamp strike timing is determined by the fixture address to prevent all<br />
lamps from striking at once.<br />
The DMX Lamp-Off setting effects how the lamp can be turned off. When dLOF is ON, lamp power can be<br />
switched off by sending a DMX value from 248 to 255 on channel 1 for five seconds. When dLOF is OFF,<br />
the lamp-off command will not work unless special conditions are met. Refer to the DMX protocol.<br />
RESET<br />
The fixture can be reset from the controller if DMX reset (PERS>dRES) is set to 5SEC. If DMX reset is<br />
OFF, this command will not work unless special conditions are met. Refer to the DMX protocol.<br />
DEFAULT SETTINGS<br />
The fixture can be reset to its factory default settings by selecting dFSE>FACT>LOAd.<br />
Information readouts<br />
POWER-ON HOURS<br />
Read the total number of hours the fixture has been on since fabrication (INFO>TIME>HRS>TOTL),<br />
and the number of hours on since the counter was last reset (INFO>TIME>HRS>RSET). This can be<br />
used to track maintenance intervals. Press [up] for 5 seconds while displayed to reset.<br />
LAMP HOURS<br />
Read the total number of lamp hours since fabrication (INFO>TIME>L HR>TOTL), and the number<br />
of lamp hours since the counter was last reset (INFO>TIME>L HR>RSET). Reset this counter after<br />
installing a new lamp. Press [up] for 5 seconds while displayed to reset.<br />
Control Panel 11
LAMP STRIKES<br />
Read the total number of lamp strikes (INFO>TIME>L ST>TOTL), and the number of lamps strikes<br />
since the counter was last reset (INFO>TIME>L ST>RSET). Reset this counter when installing a<br />
new lamp. Press [up] for 5 seconds while displayed to reset.<br />
FIRMWARE VERSION<br />
INFO>VER displays the firmware version number. The firmware version is also displayed briefly at<br />
startup.<br />
Test and service utilities<br />
DMX READOUT<br />
The DMX log (dMXL) menu provides useful information for troubleshooting control problems.<br />
RATE displays the DMX refresh rate in packets per second. Values lower than 10 or higher than 44 may<br />
result in erratic performance, especially when using tracking control.<br />
qUAL displays the quality of the received DMX data as a percentage of packets received. Values much<br />
below 100 indicate interference, poor connections, or other problems with the serial data link that are the<br />
most common cause of control problems.<br />
STCO displays the DMX start code. Packets with a start code other than 0 may cause irregular<br />
performance.<br />
The remaining options under dMXL display the DMX values received on each of the 13 channels, from<br />
SHUT (shutter, channel 1) to EFSP (effect speed, channel 13). If the fixture does not behave as expected,<br />
reading the DMX values can help you troubleshoot the problem.<br />
MANUAL CONTROL<br />
The manual control menu (MAN) provides commands for turning the lamp on (LON), turning the lamp off<br />
(LoFF), and resetting the fixture (RST). It also permits you to position and move individual effects.<br />
EFFECTS TEST<br />
The test sequence (TSEQ>RUN) runs through all effects to provide a quick check of fixture performance.<br />
Note: the test sequence does not automatically strike the lamp. Use MAN>LON and MAN>LoFF to<br />
control lamp power. Press [menu] to stop the test.<br />
FEEDBACK TOGGLE<br />
Magnetic sensors monitor the positions of the color wheel, gobo wheel, and rotating gobos. If they detect an<br />
error, the shutter closes while the effect resets. This feature can be disabled by turning effects feedback off<br />
(UTIL>EFFb>OFF).<br />
ADJUSTMENT POSITIONS<br />
The adjustment menu (UTIL>AdJ) provides commands for positioning effects during mechanical<br />
adjustment.<br />
EFFECT CALIBRATION<br />
With the calibration menu (UTIL>CAL), effect positions can be fine-tuned with a software-defined offset<br />
value to compensate for small misalignments or differences between fixtures.<br />
The default offset command (UTIL>dFOF) erases any offsets stored in memory.<br />
CIRCUIT BOARD TEST<br />
UTIL>PCBT executes a routine designed for testing the main circuit board. For service use only.<br />
12<br />
<strong>MAC</strong> <strong>250</strong> <strong>Krypton</strong>/<strong>Entour</strong>
UPLOAD MODE<br />
The upload mode command (UTIL>UPLd) prepares the fixture for a software update. This command is<br />
not necessary, however, as upload mode is engaged automatically by the uploader.<br />
Control Panel 13
DMX-512 CONTROL<br />
The <strong>MAC</strong> <strong>250</strong> <strong>Krypton</strong>/<strong>Entour</strong> is compatible with USITT DMX512 controllers.<br />
The full protocol is available in “DMX protocol” on page 33.<br />
The fixture has two DMX operating modes, 16-bit and 16-bit Extended. 16-bit Extended mode uses 17 DMX<br />
channels, three more than the 14 DMX channels than standard 16-bit mode requires. 16-bit Extended mode<br />
provides more precise control of the dimmer color, and focus settings. All other functions are identical. See<br />
“DMX protocol” on page 25.This section briefly describes the DMX-controllable effects. The DMX mode is<br />
selected using the PSET option in the fixture control menu (see “Control menu” on page 40).<br />
Lamp power<br />
LAMP-ON<br />
Unless automatic lamp strike is enabled, lamp power remains off until a lamp-on command is sent from the<br />
controller.<br />
Note: A peak of electric current that can be many times the operating current is drawn for an instant when<br />
striking a discharge lamp. Striking many lamps at once may cause a voltage drop large enough to prevent<br />
lamps from striking or draw enough current to trip circuit breakers. If sending lamp-on commands to multiple<br />
fixtures, program a sequence that strikes lamps one at a time at 5 second intervals.<br />
LAMP-OFF<br />
The lamp can be turned off from the controller by sending the lamp-off command on channel 1 for 5<br />
seconds. The lamp cannot be restruck for 8 minutes after being turned off. Note that the<br />
lamp-off command may be disabled by the DMX Lamp-Off personality setting (PERS/dLOF).<br />
Effect position<br />
RESET<br />
If an effect loses its indexing and fails to move to programmed positions, the fixture can be reset from the<br />
controller by sending the “Reset” command on channel 1 for 5 seconds. Note that the DMX reset feature<br />
may be disabled by the DMX Reset personality setting (PERS/dRES).<br />
DIMMER / SHUTTER<br />
The mechanical dimmer/shutter system provides full, high-resolution dimming, “instant” open and blackout,<br />
random and variable strobe effects, and random and variable pulses in which the dimmer snaps open and<br />
slowly dims or snaps closed and slowly opens. Shutter, strobe, and pulse effects are selected on channel 1.<br />
The intensity level is selected on channel 2. 16-bit Extended mode provides fine tuning of the intensity level<br />
on channel 3.<br />
COLOR<br />
The color wheel can be scrolled continuously - allowing for split color effects - or in steps, and rotated<br />
randomly or continuously in both directions at different speeds. 16-bit Extended mode provides finer tuning<br />
on channel 5 of the color setting selected on channel 4.<br />
ROTATING GOBOS<br />
The <strong>MAC</strong> <strong>250</strong> <strong>Krypton</strong>/<strong>Entour</strong> has 7 indexed-rotation gobo positions plus an open position. Gobos can be<br />
indexed (positioned at a defined angle), rotated continuously, or rotated and shaken (bounced). The gobo<br />
and the type of movement are selected on channel 4 (channel 6 in 16-bit Extended mode) and the index<br />
14<br />
<strong>MAC</strong> <strong>250</strong> <strong>Krypton</strong>/<strong>Entour</strong>
angle or rotation speed are selected on channel 5 (channel 7 in 16-bit Extended mode). Fine tuning of this<br />
index position or rotation is available on channel 6 (channel 8 in 16-bit Extended mode).<br />
The gobo wheel can also rotate continuously in both directions at variable speed.<br />
FIXED GOBOS (<strong>MAC</strong> <strong>250</strong> ENTOUR ONLY)<br />
The <strong>MAC</strong> <strong>250</strong> <strong>Entour</strong> provides an additional wheel with 10 fixed gobo positions (plus open). The gobo and<br />
the type of movement are selected on channel 7 (channel 9 in 16-bit Extended mode). The gobo wheel can<br />
also rotate continuously in both directions at variable speed.<br />
FOCUS<br />
The beam may be focused from approximately 2 meters (6.5 feet) to infinity using channel:<br />
• 7 in 16-bit mode on the <strong>MAC</strong> <strong>250</strong> <strong>Krypton</strong><br />
• 9 in 16-bit Extended mode on the <strong>MAC</strong> <strong>250</strong> <strong>Krypton</strong><br />
• 8 in 16-bit mode on the <strong>MAC</strong> <strong>250</strong> <strong>Entour</strong><br />
• 10 in 16-bit Extended mode on the <strong>MAC</strong> <strong>250</strong> <strong>Entour</strong><br />
ROTATING PRISM<br />
The prism is controlled using channel:<br />
• 8 in 16-bit mode on the <strong>MAC</strong> <strong>250</strong> <strong>Krypton</strong><br />
• 10 in 16-bit Extended mode on the <strong>MAC</strong> <strong>250</strong> <strong>Krypton</strong><br />
• 9 in 16-bit mode on the <strong>MAC</strong> <strong>250</strong> <strong>Entour</strong><br />
• 11 in 16-bit Extended mode on the <strong>MAC</strong> <strong>250</strong> <strong>Entour</strong><br />
The prism may be inserted and removed from the light path. It rotates in both directions at varying speeds.<br />
PAN AND TILT<br />
Head pan and tilt are controlled on channels<br />
• 9-12 in 16-bit mode on the <strong>MAC</strong> <strong>250</strong> <strong>Krypton</strong><br />
• 12-15 in 16-bit Extended mode on the <strong>MAC</strong> <strong>250</strong> <strong>Krypton</strong><br />
• 10-13 in 16-bit mode on the <strong>MAC</strong> <strong>250</strong> <strong>Entour</strong><br />
• 13-16 in 16-bit Extended mode on the <strong>MAC</strong> <strong>250</strong> <strong>Entour</strong><br />
The course control channel sets first 8 bits (the most significant byte or MSB), and the fine channel sets the<br />
second 8 bits (the least significant byte or LSB) of the 16-bit control byte. In other words, the fine channel<br />
fine-tunes the position set by the course channel.<br />
Speed control<br />
The speed control channels are:<br />
• 13 & 14 in 16-bit mode on the <strong>MAC</strong> <strong>250</strong> <strong>Krypton</strong><br />
• 16 & 17 in 16-bit Extended mode on the <strong>MAC</strong> <strong>250</strong> <strong>Krypton</strong><br />
• 14 & 15 in 16-bit mode on the <strong>MAC</strong> <strong>250</strong> <strong>Entour</strong><br />
• 17 & 18 in 16-bit Extended mode on the <strong>MAC</strong> <strong>250</strong> <strong>Entour</strong><br />
TRACKING CONTROL<br />
Tracking control for pan/tilt and the various effects is enabled by setting the speed channels to 0.<br />
With tracking control, the speed at which effects move is determined by the cross-fade time between two<br />
positions or scenes. The controller divides the move into steps and updates the fixture with small changes<br />
at the rate required to achieve the fade. The fixture “tracks” the changes and averages them with a digital<br />
filter algorithm to provide smooth movement.<br />
DMX-512 control 15
VECTOR CONTROL<br />
Alternatively, with vector control, movement speed is determined by the selected speed values on the speed<br />
channels.This provides a way to control speed on controllers without cross-faders. Vector control also<br />
provides smoother movement, particularly at slow speeds, with controllers that send slow or irregular<br />
tracking updates.<br />
When using vector control, the cross-fade time must be 0.<br />
BLACKOUT<br />
When “blackout while moving” is selected on the speed channels, the shutter closes when the effect moves<br />
to make the transition invisible. The shutter opens when the movement is complete.<br />
PERSONALITY OVERRIDES<br />
The following channel provide tracking values that allow you to override the pan/tilt speed personality<br />
setting (PTSP in the control menu)<br />
• 13 in 16-bit mode on the <strong>MAC</strong> <strong>250</strong> <strong>Krypton</strong><br />
• 16 in 16-bit Extended mode on the <strong>MAC</strong> <strong>250</strong> <strong>Krypton</strong><br />
• 14 in 16-bit mode on the <strong>MAC</strong> <strong>250</strong> <strong>Entour</strong><br />
• 17 in 16-bit Extended mode on the <strong>MAC</strong> <strong>250</strong> <strong>Entour</strong><br />
The following channel provide tracking values that allow you to override the shortcuts setting (SCUT in the<br />
control menu).<br />
• 14 in 16-bit mode on the <strong>MAC</strong> <strong>250</strong> <strong>Krypton</strong><br />
• 17 in 16-bit Extended mode on the <strong>MAC</strong> <strong>250</strong> <strong>Krypton</strong><br />
• 15 in 16-bit mode on the <strong>MAC</strong> <strong>250</strong> <strong>Entour</strong><br />
• 18 in 16-bit Extended mode on the <strong>MAC</strong> <strong>250</strong> <strong>Entour</strong><br />
16<br />
<strong>MAC</strong> <strong>250</strong> <strong>Krypton</strong>/<strong>Entour</strong>
OPTICAL CONFIGURATION<br />
GOBO ORIENTATION<br />
Figure 3 shows the correct orientation for different gobo types. When in doubt, install gobos with the more<br />
reflective side towards the lamp.<br />
Uncoated side towards lamp<br />
Coated side towards stage<br />
Coated Glass Gobos<br />
Textured Glass Gobos<br />
When an object is held up to the<br />
uncoated side there is no space<br />
between the object and its<br />
reflection. The back edge of the<br />
gobo cannot be seen when<br />
looking through the coated side.<br />
Smooth side towards lamp<br />
Reflective side towards lamp<br />
When an object is held up to the<br />
coated side there is a space<br />
between the object and its reflection.<br />
The back edge of the gobo can be<br />
seen when looking through the<br />
uncoated side.<br />
Textured side towards stage<br />
Black side towards stage<br />
Metal Gobos<br />
Image/text Gobos<br />
Reversed image towards<br />
lamp<br />
Figure 3: Gobo orientation<br />
True image towards stage<br />
CUSTOM GOBOS<br />
For optimum performance, custom glass gobos for the <strong>MAC</strong> <strong>250</strong> <strong>Krypton</strong>/<strong>Entour</strong> should be made with the<br />
text, logo, and similar artwork reversed on the coated side. Gobo types and dimensions are specified in on<br />
“Gobos” on page 47.<br />
Rotating gobos<br />
The <strong>MAC</strong> <strong>250</strong> <strong>Krypton</strong>/<strong>Entour</strong> accepts up to eight metal or glass gobos with an outside diameter of 22.5 mm<br />
and a maximum image diameter of 17 mm.<br />
Optical configuration 17
STANDARD ROTATING GOBO CONFIGURATION<br />
The <strong>MAC</strong> <strong>250</strong> <strong>Krypton</strong>/<strong>Entour</strong> provides 7 gobos as shown below.<br />
2<br />
1<br />
7<br />
6<br />
Position Gobo<br />
1 Eclipse<br />
2 Fat bar<br />
3 Fan<br />
4 Happy Yins<br />
5 Twisted triangle<br />
6 Splash<br />
7 Aflobet<br />
Table 2: Rotating gobos<br />
3<br />
5<br />
4<br />
Figure 3: <strong>MAC</strong> <strong>250</strong><br />
REPLACING A GOBO<br />
Danger!<br />
Intense heat. Avoid contact by persons and materials. The exterior of the fixture can get<br />
very hot - up to 120° C (248° F). Disconnect the fixture from AC power and allow it to cool<br />
for at least 45 minutes before handling.<br />
Do not removing covers while the fixture is powered on as this exposes dangerous live<br />
electrical circuits, hot surfaces, and a lamp under high pressure.<br />
1 Disconnect the fixture from AC power and allow it to cool.<br />
2 Remove the top cover of the fixture head using a flathead screwdriver to loosen the four quarter-turn<br />
screws. The top and bottom cover look the same, but the top cover is found by checking if the text on the<br />
back of the head is oriented correctly (top) or not (bottom) as illustrated here.<br />
Minimum distance to flamm<br />
Minimum distance to illumina<br />
Maximum ambient te<br />
Exterior surface to<br />
3 Turn the gobo wheel to access the desired position.<br />
18<br />
<strong>MAC</strong> <strong>250</strong> <strong>Krypton</strong>/<strong>Entour</strong>
4 Remove the gobo holder from the gobo wheel.<br />
5 Squeeze the ends of the retention spring together and remove. Push the gobo out from the back and<br />
remove.<br />
6 Orient the gobo as shown in “Gobo orientation” on page 17 and insert the replacement gobo into the holder.<br />
Secure the gobo with the retention spring.<br />
7 Insert the gobo holder back in the gobo wheel using a small flathead screwdriver to lift the retaining blades.<br />
8 Replace the cover before applying power.<br />
Optical configuration 19
.<br />
Fixed gobos (<strong>MAC</strong> <strong>250</strong> <strong>Entour</strong> only)<br />
The <strong>MAC</strong> <strong>250</strong> <strong>Entour</strong> provides 10 fixed gobo positions (plus open).<br />
8<br />
9<br />
7<br />
10<br />
6<br />
5<br />
1<br />
4<br />
2<br />
3<br />
Position Gobo<br />
1 Oriental fire<br />
2 Wiggles<br />
3 Pear drops<br />
4 Brush strokes<br />
5 Lashes<br />
6 Splash<br />
7 Crazed<br />
8 Dibs<br />
9 Sharp breakup (large)<br />
10 Zeds-a-leaping<br />
Table 3: Fixed gobos<br />
REPLACING A FIXED GOBO<br />
Danger!<br />
Intense heat. Avoid contact by persons and materials. The exterior of the fixture can get<br />
very hot - up to 120° C (248° F). Disconnect the fixture from AC power and allow it to cool<br />
for at least 45 minutes before handling.<br />
Do not removing covers while the fixture is powered on as this exposes dangerous live<br />
electrical circuits, hot surfaces, and a lamp under high pressure.<br />
1 Disconnect the fixture from AC power and allow it to cool.<br />
2 Remove the top cover of the fixture head using a flathead screwdriver to loosen the four quarter-turn<br />
screws. The top and bottom cover look the same, but the top cover is found by checking if the text on the<br />
back of the head is oriented correctly (top) or not (bottom) as illustrated here.<br />
Minimum distance to flamm<br />
Minimum distance to illumina<br />
Maximum ambient te<br />
Exterior surface to<br />
3 Turn the gobo wheel to access the desired position.<br />
20<br />
<strong>MAC</strong> <strong>250</strong> <strong>Krypton</strong>/<strong>Entour</strong>
4 Push and slide the gobo out of position<br />
5 Insert the replacement gobo into the holder. Secure the gobo with the retention feather. You may find it<br />
easiest to do this with the assistance of a flathead screwdriver.<br />
6 Replace the cover before applying power.<br />
Color filters<br />
STANDARD CONFIGURATION<br />
The <strong>MAC</strong> <strong>250</strong> <strong>Krypton</strong>/<strong>Entour</strong> provides 12 dichroic color filters as shown below.<br />
Position<br />
Color<br />
1 CTC<br />
2 Yellow 603<br />
12<br />
1<br />
3 Blue 104<br />
11<br />
2<br />
4 Pink 312<br />
5 Green 206<br />
10<br />
3<br />
6 Blue 108<br />
7 Red 301<br />
9<br />
4<br />
8 Magenta 507<br />
9 Blue 101<br />
5<br />
8<br />
7<br />
6<br />
10 Orange 306<br />
11 Dark green<br />
12 Purple 502<br />
Figure 5: <strong>MAC</strong> <strong>250</strong><br />
Optical configuration 21
REPLACING A COLOR FILTER<br />
Danger!<br />
Intense heat. Avoid contact by persons and materials. The exterior of the fixture can get<br />
very hot - up to 120° C (248° F). Disconnect the fixture from AC power and allow it to cool<br />
for at least 45 minutes before handling.<br />
Do not removing covers while the fixture is powered on as this exposes dangerous live<br />
electrical circuits, hot surfaces, and a lamp under high pressure.<br />
1 Disconnect the fixture from AC power and allow it to cool.<br />
2 Remove the top cover. The top and bottom cover look the same, but the top cover is found by checking if<br />
the text on the back of the head is oriented correctly (top) or not (bottom).Remove the top cover of the<br />
fixture head using a flathead screwdriver to loosen the four quarter-turn screws. The top and bottom cover<br />
look the same, but the top cover is found by checking if the text on the back of the head is oriented correctly<br />
(top) or not (bottom) as illustrated here.<br />
Minimum distance to flamm<br />
Minimum distance to illumina<br />
Maximum ambient te<br />
Exterior surface to<br />
3 Turn the color wheel to access the desired color filter. Press the<br />
filter forwards slightly to release it and then grasp it by the edges<br />
and remove.<br />
B<br />
4 To insert a filter, slide it under the retention spring until it snaps into<br />
place.<br />
5 Replace the top cover before applying power.<br />
A<br />
Prism<br />
Figure 4: Filter replacement<br />
The standard 3-facet prism can be replaced with optional five- and nine-facet prisms. See “Accessories” on<br />
page 48 for part numbers. See:<br />
• Replacing the prism in a <strong>MAC</strong> <strong>250</strong> <strong>Entour</strong> below, or<br />
• “Replacing the prism in a <strong>MAC</strong> <strong>250</strong> <strong>Krypton</strong>” on page 24.<br />
REPLACING THE PRISM IN A <strong>MAC</strong> <strong>250</strong> ENTOUR<br />
Danger!<br />
Intense heat. Avoid contact by persons and materials. The exterior of the fixture can get<br />
very hot - up to 120° C (248° F). Disconnect the fixture from AC power and allow it to cool<br />
for at least 45 minutes before handling.<br />
Do not removing covers while the fixture is powered on as this exposes dangerous live<br />
electrical circuits, hot surfaces, and a lamp under high pressure.<br />
1 Disconnect the fixture from AC power and allow it to cool.<br />
22<br />
<strong>MAC</strong> <strong>250</strong> <strong>Krypton</strong>/<strong>Entour</strong>
2 Remove the top cover. The top and bottom cover look the same, but the top cover is found by checking if<br />
the text on the back of the head is oriented correctly (top) or not (bottom).Remove the top cover of the<br />
fixture head using a flathead screwdriver to loosen the four quarter-turn screws. The top and bottom cover<br />
look the same, but the top cover is found by checking if the text on the back of the head is oriented correctly<br />
(top) or not (bottom) as illustrated here.<br />
Minimum distance to flamm<br />
Minimum distance to illumina<br />
Maximum ambient te<br />
Exterior surface to<br />
3 Using a flathead screwdriver, remove the two retaining plates (only one - at position A - is illustrated here)<br />
holding the prism module in place. Disconnect the cables (at positions marked B) from the PCBs on the<br />
prism module.<br />
A<br />
B<br />
4 Lift the prism module out of the fixture.<br />
Optical configuration 23
5 Using a Philips screwdriver, remove the half-circle shaped plate that holds the prism into place (as indicated<br />
in this illustration).<br />
6 Remove the rubber belt to free the prism and replace it with a compatible rotating prism (contact your Martin<br />
dealer for a list of available prisms).<br />
7 Replace the rubber drive belt over the rotating prism and screw the half-circle shaped plate into place. The<br />
prism should be able to rotate freely.<br />
8 Reinsert the prism module into the fixture, reattach the leads (these are numbered) to the PCBs, and screw<br />
the retaining plates into place.<br />
9 Replace the top cover using a flathead screwdriver to tighten the four quarter-turn screws.<br />
10 Connect the fixture to AC power.<br />
REPLACING THE PRISM IN A <strong>MAC</strong> <strong>250</strong> KRYPTON<br />
Danger!<br />
Intense heat. Avoid contact by persons and materials. The exterior of the fixture can get<br />
very hot - up to 120° C (248° F). Disconnect the fixture from AC power and allow it to cool<br />
for at least 45 minutes before handling.<br />
Do not removing covers while the fixture is powered on as this exposes dangerous live<br />
electrical circuits, hot surfaces, and a lamp under high pressure.<br />
1 Disconnect the fixture from AC power and allow it to cool.<br />
2 Remove the top cover. The top and bottom cover look the same, but the top cover is found by checking if<br />
the text on the back of the head is oriented correctly (top) or not (bottom).Remove the top cover of the<br />
fixture head using a flathead screwdriver to loosen the four quarter-turn screws. The top and bottom cover<br />
look the same, but the top cover is found by checking if the text on the back of the head is oriented correctly<br />
(top) or not (bottom) as illustrated here.<br />
Minimum distance to flamm<br />
Minimum distance to illumina<br />
Maximum ambient te<br />
Exterior surface to<br />
24<br />
<strong>MAC</strong> <strong>250</strong> <strong>Krypton</strong>/<strong>Entour</strong>
3 Using a flathead screwdriver, remove the two retaining plates (only one - at position A - is illustrated here)<br />
holding the prism module in place. Disconnect the cables (at positions marked B) from the PCBs on the<br />
prism module.<br />
A<br />
B<br />
B<br />
4 Lift the prism module out of the fixture.<br />
5 Using a Philips screwdriver, remove the half-circle shaped plate that holds the prism into place (as indicated<br />
in this illustration).<br />
6 Remove the rubber belt to free the prism and replace it with a compatible rotating prism (contact your Martin<br />
dealer for a list of available prisms).<br />
Optical configuration 25
7 Replace the rubber drive belt over the rotating prism and screw the half-circle shaped plate into place. The<br />
prism should be able to rotate freely.<br />
8 Reinsert the prism module into the fixture, reattach the leads (these are numbered) to the PCBs, and screw<br />
the retaining plates into place.<br />
9 Replace the top cover using a flathead screwdriver to tighten the four quarter-turn screws.<br />
10 Connect the fixture to AC power.<br />
Mounting the optional 14° lens (<strong>MAC</strong> <strong>250</strong> <strong>Entour</strong> only)<br />
The <strong>MAC</strong> <strong>250</strong> <strong>Entour</strong> is supplied with an optional 14° lens. Mounting optional 14 degree lens. to mount the<br />
lens:<br />
1 Disconnect the fixture from AC power and allow it to cool.<br />
2 Lock the head in top side up position. Remove the top cover of the fixture head using a flathead screwdriver<br />
to loosen the four quarter-turn screws. The top and bottom cover look the same, but the top cover is found<br />
by checking if the text on the back of the head is oriented correctly (top) or not (bottom) as illustrated here.<br />
Minimum distance to flamm<br />
Minimum distance to illumina<br />
Maximum ambient te<br />
Exterior surface to<br />
3 Locate the effect module and remove the wire connectors (located at position B). Using a flat head<br />
screwdriver, remove the screws (located at the positions marked A) and lift the tabs. Lift the effect module<br />
out of the fixture.<br />
A<br />
B<br />
A<br />
26<br />
<strong>MAC</strong> <strong>250</strong> <strong>Krypton</strong>/<strong>Entour</strong>
4 Remove the three Phillips screws and lift the plate off the effect module.<br />
5 Remove the four Phillips screws.<br />
6 Lift the lens module plate off the effect module.<br />
7 Remove the three Torx 10 screws holding the lens in place.<br />
Optical configuration 27
8 Place the 14° lens between the standard lens and the plate and replace the three Torx 10 screws.<br />
9 Perform these steps in reverse, returning the components to their correct positions and replacing all the<br />
covers, before applying power to the fixture.<br />
28<br />
<strong>MAC</strong> <strong>250</strong> <strong>Krypton</strong>/<strong>Entour</strong>
SERVICE<br />
The <strong>MAC</strong> <strong>250</strong> <strong>Krypton</strong>/<strong>Entour</strong> requires regular maintenance to keep performing at their peak. Excessive<br />
dust, grease, and smoke fluid buildup degrades performance and causes overheating and damage that is<br />
not covered by the warranty. The maintenance schedule will depend on the application and should be<br />
discussed with your Martin distributor. Refer any service that is not described here to a professional<br />
technician.<br />
Danger!<br />
Intense heat. Avoid contact by persons and materials. The exterior of the fixture can get<br />
very hot - up to 120° C (248° F). Disconnect the fixture from AC power and allow the it to<br />
cool for at least 45 minutes before handling.<br />
Do not removing covers while the fixture is powered on as this exposes dangerous live<br />
electrical circuits, hot surfaces, and a lamp under high pressure.<br />
Lamp replacement<br />
Lamp life will vary; the rated life is an average figure that is based on the manufacturer’s test cycle. For<br />
maximum lamp life, avoid excessive strikes and always allow the lamp to burn for at least 5 minutes before<br />
turning it off.<br />
To reduce the risk of lamp explosion, which may damage the fixture, never exceed the lamp’s rated life<br />
(2000 hours) by more than 25 percent.<br />
Replace the lamp when:<br />
• it strikes with difficulty or not at all, or is in any other way defective<br />
• usage exceeds the manufacturer’s “replace before” hours. See Table 5.<br />
COMPATIBLE LAMPS<br />
A Philips MSD <strong>250</strong>/2 lamp is included installed. The <strong>MAC</strong> <strong>250</strong> <strong>Krypton</strong>/<strong>Entour</strong> lamp options are shown in the<br />
table below. Installing any other lamp may damage the fixture.<br />
Lamp Average life Color Temp.<br />
Osram HSD <strong>250</strong>/78 3000 hr 7800K<br />
Philips MSD <strong>250</strong>/2 2000 hr 9000K<br />
GE CSD <strong>250</strong>/2 2000 hr 9000K<br />
Table 5: Lamp comparison<br />
INSTALLING A LAMP<br />
Danger!<br />
Intense heat. Avoid contact by persons and materials. The exterior of the fixture can get<br />
very hot - up to 120° C (248° F). When replacing the lamp, disconnect the fixture from AC<br />
Service 29
power and allow it to cool for at least 45 minutes before proceeding. Wear safety goggles<br />
to protect your eyes.<br />
3<br />
mm<br />
#2<br />
1 Locate the lamp access cover at the back of the fixture head and remove the Phillips screws.<br />
2 Pull out the lamp socket.<br />
Figure 5: Lamp installation<br />
3 If changing the lamp, remove the old lamp from the socket.<br />
4 Holding the new lamp by its ceramic base (do not touch the glass), align the small pin on the lamp with the<br />
small hole in the socket and insert the lamp squarely. Make sure that the 4 small projections on the base<br />
contact the face of the socket.<br />
5 Clean the glass bulb with the cloth supplied with the lamp, particularly if your fingers touched the glass. A<br />
clean, lint-free cloth wetted with alcohol may also be used.<br />
6 Insert the lamp into the fixture with as little twist in the lamp wires as possible.<br />
7 Align the screw holes and fasten the lamp access plate with 2 screws.<br />
8 If replacing the lamp, reset the lamp hour and lamp strike counters as described on page 11.<br />
9 Strike the lamp (after setup is complete) and adjust it for optimum performance by turning the 3 adjustment<br />
screws one at a time until the brightest part of the beam is centered.<br />
10 Adjust the lamp position if necessary by turning the 3 lamp adjustment screws to the middle of their range<br />
using a 3 mm Allen wrench.<br />
Cleaning<br />
OPTICAL COMPONENTS<br />
Use care when cleaning optical components. The surface on dichroic filters is achieved by means of special<br />
multi-layer coatings and even small scratches may be visible. Residues from cleaning fluids can bake onto<br />
components and ruin them.<br />
1 Allow the components to cool completely.<br />
2 Wash dirty lenses and filters with isopropyl alcohol. A generous amount of regular glass cleaner may also<br />
be used, but no residues may remain.<br />
3 Rinse with distilled water. Mixing the water with a small amount of wetting agent such as Kodak Photoflo will<br />
help prevent streaking and spotting.<br />
4 Dry with a clean, soft and lint-free cloth or blow dry with compressed air.<br />
30<br />
<strong>MAC</strong> <strong>250</strong> <strong>Krypton</strong>/<strong>Entour</strong>
FAN<br />
To maintain adequate cooling it is important that the fan be cleaned regularly. It can be cleaned with a soft<br />
brush, vacuum, or compressed air.<br />
Lubrication<br />
Use only silicone lubricant, Martin P/N 37302003 (500 ml) or P/N 37302004 (200 ml, in applicator bottle).<br />
No other lubricant is approved for use. When applying lubricant, always remove excess and do not get oil<br />
on other parts.<br />
1 Check the focus mechanism and apply a drop of lubricant to the 3 metal slides if movement is rough.<br />
2 Lubricate the rotating-gobo bearings if movement is rough on slow rotation or if they become noisy. Apply a<br />
few drops of oil to each bearing from the lamp side of the wheel.<br />
Replacing fuses<br />
MAIN FUSE<br />
The main fuse holder is built in to the mains input socket. Never replace the fuse with one of a different<br />
rating!<br />
1 Unplug the mains cable from the input socket.<br />
2 Pry open the fuse holder and remove the fuse.<br />
3 Replace the fuse with one of the same type and rating. The fuse rating is listed on serial number label.<br />
4 Close the fuse holder and replace the mains cable.<br />
POWER SUPPLY FUSES<br />
There are two fuses for the low-voltage power supplies located on the printed circuit board. If one or more of<br />
the green LEDs on the PCB does not light, one of these fuses may be blown. If all three LEDs are lit, the<br />
low-voltage power supplies are functioning correctly.<br />
Have the fixture serviced by a Martin service technician if the problem persists.<br />
1 Disconnect the fixture from AC power.<br />
2 Remove the left-side yoke cover (when looking at the head in the text in the upright position from the back<br />
as indicated in the illustration) to access the PCB.<br />
Minimum distance to flamm<br />
Minimum distance to illumina<br />
Maximum ambient te<br />
Exterior surface to<br />
3 Carefully remove and check the two fuses located in the bottom of the PCB (see “Circuit board connections”<br />
on page 46). Replace as necessary with fuses of the same size and rating (see page 47).<br />
4 Re-attach the yoke cover.<br />
Service 31
Updating software<br />
The latest <strong>MAC</strong> <strong>250</strong> <strong>Krypton</strong>/<strong>Entour</strong> firmware is available from the support area of the Martin web site at<br />
www.martin.dk. It can be installed via the serial data link using a supported Martin uploader such as the<br />
MP-2, or via a LightJockey 4064 ISA DMX interface.<br />
Note: Intermediate control systems such as the Martin Lighting Director (MLD) and the Martin Matrix must<br />
be bypassed when updating fixture software via the DMX link. These systems do not relay the update code<br />
correctly because it is not a DMX-compliant signal.<br />
NORMAL UPDATE<br />
To update fixture software, connect an upload device to the fixture just like a DMX controller and perform a<br />
DMX mode upload as described in the uploader’s documentation. There is no need to isolate the <strong>MAC</strong> <strong>250</strong><br />
<strong>Krypton</strong>/<strong>Entour</strong>s from other types of fixtures on the serial link.<br />
When the upload is completed (and when booting up) the <strong>MAC</strong> <strong>250</strong> <strong>Krypton</strong>/<strong>Entour</strong> performs a check-sum<br />
test of the flash memory and then resets. If the firmware is corrupted a check-sum error (CSER) occurs. A<br />
few seconds later the fixture displays UPLd and is ready for a new DMX-mode upload.<br />
In the unlikely event that a software upload is interrupted, the fixture must be powered off for at least 10<br />
seconds to force the check-sum test. You can repeat the DMX-mode upload as soon as UPLd is<br />
displayed.<br />
BOOT SECTOR UPDATE<br />
If the normal update procedure fails or the software update notes call for a boot-sector update, install new<br />
software as follows.<br />
1 Disconnect the fixture from AC power.<br />
2 Remove the left-side yoke cover (when looking at the head in the text in the upright position from the back<br />
as indicated in the illustration) to access the PCB.<br />
Minimum distance to flamm<br />
Minimum distance to illumina<br />
Maximum ambient te<br />
Exterior surface to<br />
3 The boot sector jumper is located next to the plug for the control<br />
panel data cable. Move the jumper to the Init setting. Verify that<br />
the Flash Write jumper is in the Enable position. See the<br />
diagram in “Circuit board connections” on page 46.<br />
4 Apply power and perform a boot-mode upload as described in<br />
the uploader manual.<br />
Lock<br />
Init<br />
front<br />
5 Disconnect the fixture from AC power. Move the jumper back to<br />
the Lock setting.<br />
6 Re-attach the yoke cover.<br />
32<br />
<strong>MAC</strong> <strong>250</strong> <strong>Krypton</strong>/<strong>Entour</strong>
DMX PROTOCOL<br />
This chapter contains:<br />
• “<strong>MAC</strong> <strong>250</strong> <strong>Krypton</strong> DMX protocol” on page 34<br />
• “<strong>MAC</strong> <strong>250</strong> <strong>Entour</strong> DMX protocol” on page 37<br />
DMX protocol 33
<strong>MAC</strong> <strong>250</strong> <strong>Krypton</strong> DMX protocol<br />
16 Bt<br />
(16 Bit Mode)<br />
16 Ex<br />
(16 Bit Extended) Value Percent Function<br />
1<br />
1 If DMX Reset is disabled in the menu,<br />
a reset command can only be<br />
executed if the CTC filter is selected,<br />
the prism is on (not rotating) and the<br />
open gobo is selected.<br />
A 5 second delay can be given to the<br />
reset command from the fixture menu<br />
under, dRES.<br />
2 If DMX Lamp Off is disabled in the<br />
menu, a lamp off command can only<br />
be executed if the CTC filter is<br />
selected, the prism is on (not rotating)<br />
and the open gobo is selected.<br />
2 2<br />
3<br />
0 - 19<br />
20 - 49<br />
50 - 72<br />
73 - 79<br />
80 - 99<br />
100 - 119<br />
120 - 127<br />
128 - 147<br />
148 - 167<br />
168 - 187<br />
188 - 190<br />
191 - 193<br />
194 - 196<br />
197 - 199<br />
200 - 202<br />
203 - 207<br />
208 - 217<br />
218 - 227<br />
228 - 237<br />
238 - 247<br />
248 - 255<br />
0 - 7<br />
8 - 19<br />
20 - 28<br />
29 - 31<br />
31 - 39<br />
39 - 47<br />
47 - 50<br />
50 - 58<br />
58 - 65<br />
66 - 73<br />
74 - 75<br />
75 - 76<br />
76 - 77<br />
77 - 78<br />
78 - 79<br />
80 - 81<br />
82 - 85<br />
85 - 89<br />
89 - 93<br />
93 - 97<br />
97 – 100<br />
0 - 255 0 – 100<br />
0-255 0-100<br />
0<br />
11<br />
22<br />
33<br />
44<br />
55<br />
66<br />
77<br />
88<br />
99<br />
110<br />
121<br />
132<br />
143<br />
0<br />
4<br />
9<br />
13<br />
17<br />
22<br />
26<br />
30<br />
35<br />
39<br />
43<br />
47<br />
52<br />
56<br />
Shutter, Strobe, Reset, Lamp On/Off<br />
Shutter closed<br />
Shutter open<br />
Strobe, fast → slow<br />
Shutter open<br />
Opening pulse, fast → slow<br />
Closing pulse, fast → slow<br />
Shutter open<br />
Random strobe, fast<br />
Random strobe, medium<br />
Random strobe, slow<br />
Shutter open<br />
Random opening pulse, fast<br />
Random opening pulse, slow<br />
Random closing pulse, fast<br />
Random closing pulse, slow<br />
Shutter open<br />
Reset fixture<br />
Shutter open<br />
Lamp on<br />
Shutter open<br />
Lamp off<br />
Dimmer<br />
Closed → open<br />
Dimmer Fine (Lowest Significant Byte)<br />
Closed → open<br />
Color<br />
Continuous Scroll: full color positions:<br />
White<br />
CTC<br />
Yellow 603<br />
Blue 104<br />
Pink 312<br />
Green 206<br />
Blue 108<br />
Red 301<br />
Magenta 507<br />
Blue 101<br />
Orange 306<br />
Dark green<br />
Purple 502<br />
White<br />
3 4<br />
156 – 159<br />
160 – 163<br />
164 – 167<br />
168 – 171<br />
172 – 175<br />
176 – 179<br />
180 – 183<br />
184 – 187<br />
188 – 191<br />
192 – 195<br />
196 – 199<br />
200 – 203<br />
204 – 207<br />
61 – 63<br />
63 – 64<br />
64 – 65<br />
66 – 67<br />
67 – 68<br />
69 – 70<br />
70 – 72<br />
72 – 73<br />
74 – 75<br />
75 – 76<br />
77 – 78<br />
78 – 79<br />
80 – 81<br />
Stepped Scroll<br />
White<br />
CTC<br />
Yellow 603<br />
Blue 104<br />
Pink 312<br />
Green 206<br />
Blue 108<br />
Red 301<br />
Magenta 507<br />
Blue 101<br />
Orange 306<br />
Dark green<br />
Purple 502<br />
208 – 226<br />
227 – 245<br />
82 – 88<br />
89 – 96<br />
Continuous Rotation<br />
CW, fast → slow<br />
CCW, slow → fast<br />
246 – 248<br />
249 – 251<br />
252 – 255<br />
96 – 97<br />
98 – 98<br />
99 – 100<br />
Random color<br />
Fast<br />
Medium<br />
Slow<br />
5 0 - 255 0 - 100 Color (Lowest Significant Byte)<br />
34<br />
<strong>MAC</strong> <strong>250</strong> <strong>Krypton</strong>/<strong>Entour</strong>
0 - 4<br />
5 - 10<br />
11 - 15<br />
16 - 20<br />
21 - 25<br />
26 - 30<br />
31 - 35<br />
36 - 42<br />
0 - 2<br />
2 - 4<br />
4 - 6<br />
6 - 8<br />
8 - 10<br />
10 - 12<br />
12 - 14<br />
14 - 16<br />
Rotating Gobo selection and shake<br />
Indexing: set position on channel 5 in 16 bt mode or<br />
channel 6 in 16 Ex mode<br />
Open gobo<br />
Gobo 1<br />
Gobo 2<br />
Gobo 3<br />
Gobo 4<br />
Gobo 5<br />
Gobo 6<br />
Gobo 7<br />
4 6<br />
43 - 50<br />
51 - 58<br />
59 - 65<br />
66 - 73<br />
74 - 81<br />
82 - 89<br />
90 - 96<br />
97 - 104<br />
17 - 20<br />
20 - 23<br />
23 - 26<br />
26 - 29<br />
29 - 32<br />
32 - 35<br />
35 - 38<br />
38 - 41<br />
Rotation: set rotation speed on channel 5 in 16 bt<br />
mode or channel 6 in 16 Ex mode<br />
Open gobo<br />
Gobo 1<br />
Gobo 2<br />
Gobo 3<br />
Gobo 4<br />
Gobo 5<br />
Gobo 6<br />
Gobo 7<br />
105 - 119<br />
120 - 134<br />
135 - 149<br />
150 - 164<br />
165 - 179<br />
180 - 194<br />
195 - 209<br />
41 - 46<br />
47 - 52<br />
53 - 58<br />
59 - 64<br />
65 - 70<br />
70 - 76<br />
76 - 82<br />
Rotation with shake, slow → fast: set rotation speed<br />
on channel 5 in 16 bt mode or channel 6 in 16 Ex<br />
mode<br />
Gobo 7, Shake slow → fast<br />
Gobo 6, Shake slow → fast<br />
Gobo 5, Shake slow → fast<br />
Gobo 4, Shake slow → fast<br />
Gobo 3, Shake slow → fast<br />
Gobo 2, Shake slow → fast<br />
Gobo 1, Shake slow → fast<br />
210 - 232<br />
233 - 255<br />
82 - 91<br />
91 - 100<br />
Continuous scroll<br />
CW slow → fast<br />
CCW fast → slow<br />
Gobo rotation (active when you select gobo on<br />
channel 4 in 16 bt mode or channel 5 in 16 Ex mode)<br />
5 7<br />
0 - 255<br />
0 - 2<br />
3 - 127<br />
128 - 252<br />
253 - 255<br />
0 - 100<br />
0 - 1<br />
1 - 50<br />
50 - 98<br />
99 - 100<br />
Index position 0 - 395<br />
Continuous rotation (direction and speed)<br />
No rotation<br />
CW, slow → fast<br />
CCW, fast → slow<br />
No rotation<br />
6 8 0 – 255 0 - 100 Gobo Rotation ((Lowest Significant Byte)<br />
7 9<br />
0 - 255 0 - 100<br />
Focus<br />
Infinity → 2 meters<br />
10 0 - 255 0 - 100 Focus (Lowest Significant Byte)<br />
0 - 19<br />
20 - 79<br />
80 - 89<br />
90 - 149<br />
150 - 215<br />
0 - 7<br />
8 - 31<br />
31 - 35<br />
35 - 58<br />
59 - 84<br />
Prism<br />
Prism off<br />
Rotating prism, CCW fast à slow<br />
No rotation<br />
Rotating prism, CW slow à fast<br />
Prism off<br />
8 11<br />
9 12<br />
10 13<br />
11 14<br />
12 15<br />
216 - 220<br />
221 - 225<br />
226 - 230<br />
231 - 235<br />
236 - 240<br />
241 - 245<br />
246 - <strong>250</strong><br />
251 - 255<br />
84 - 86<br />
87 - 88<br />
89 - 90<br />
91 - 92<br />
93 - 94<br />
95 - 96<br />
96 - 98<br />
98 - 100<br />
0 - 255 0 - 100<br />
0 - 255 0 - 100<br />
0 - 255 0 – 100<br />
0 - 255 0 – 100<br />
Prism/Gobo Macros<br />
Macro 1<br />
Macro 2<br />
Macro 3<br />
Macro 4<br />
Macro 5<br />
Macro 6<br />
Macro 7<br />
Macro 8<br />
Pan<br />
Left → right (128 = neutral)<br />
Pan Fine (Lowest Significant Byte)<br />
Left → right<br />
Tilt<br />
Left → right (128 = neutral)<br />
Tilt Fine (Lowest Significant Byte)<br />
Left → right<br />
DMX protocol 35
13 16<br />
0 - 2<br />
3 - 245<br />
246 - 248<br />
249 - 251<br />
252 - 255<br />
0 - 2<br />
3 - 245<br />
246 - 251<br />
252 - 255<br />
0 - 1<br />
1 - 96<br />
96 - 97<br />
98 - 98<br />
99 - 100<br />
0 - 1<br />
1 - 96<br />
96 - 98<br />
99 - 100<br />
Pan/Tilt Speed<br />
Tracking<br />
Fast → slow<br />
Tracking, PTSP NORM (menu override)<br />
Tracking, PTSP FAST (menu override)<br />
Blackout while moving<br />
Effects Speed<br />
Dimmer, focus<br />
Tracking mode<br />
Fast → slow<br />
Tracking<br />
Maximum speed<br />
0 - 2<br />
3 - 245<br />
246 - 248<br />
249 - 251<br />
252 - 255<br />
0 - 1<br />
1 - 96<br />
96 - 97<br />
98 - 98<br />
99 - 100<br />
Color<br />
Tracking mode<br />
Speed, fast → slow<br />
Tracking, SCUT OFF (control menu override)<br />
Tracking, SCUT ON (control menu override)<br />
Blackout while moving<br />
14 17<br />
0 - 245<br />
246 - 248<br />
249 - 251<br />
252 - 255<br />
0 - 96<br />
96 - 97<br />
98 - 98<br />
99 - 100<br />
Gobo selection<br />
Normal (no blackout)<br />
Normal, SCUT OFF (control menu override)<br />
Normal, SCUT ON (control menu override)<br />
Blackout while moving<br />
0 - 2<br />
3 - 245<br />
246 - 251<br />
252 – 255<br />
0 - 1<br />
1 - 96<br />
96 - 98<br />
99 - 100<br />
Indexed gobo rotation (only if gobo type = indexed)<br />
Tracking mode<br />
Fast à slow<br />
Tracking<br />
Blackout while moving<br />
0 - 251<br />
252 - 255<br />
0 - 98<br />
99 - 100<br />
Prism<br />
Normal (no blackout)<br />
Blackout while moving<br />
36<br />
<strong>MAC</strong> <strong>250</strong> <strong>Krypton</strong>/<strong>Entour</strong>
<strong>MAC</strong> <strong>250</strong> <strong>Entour</strong> DMX protocol<br />
16 Bt<br />
(16 Bit Mode)<br />
16 Ex<br />
(16 Bit Extended) Value Percent Function<br />
1<br />
1 If DMX Reset is disabled in the menu,<br />
a reset command can only be<br />
executed if the CTC filter is selected,<br />
the prism is on (not rotating) and the<br />
open gobo is selected.<br />
A 5 second delay can be given to the<br />
reset command from the fixture menu<br />
under, dRES.<br />
2 If DMX Lamp Off is disabled in the<br />
menu, a lamp off command can only<br />
be executed if the CTC filter is<br />
selected, the prism is on (not rotating)<br />
and the open gobo is selected.<br />
2 2<br />
3<br />
0 - 19<br />
20 - 49<br />
50 - 72<br />
73 - 79<br />
80 - 99<br />
100 - 119<br />
120 - 127<br />
128 - 147<br />
148 - 167<br />
168 - 187<br />
188 - 190<br />
191 - 193<br />
194 - 196<br />
197 - 199<br />
200 - 202<br />
203 - 207<br />
208 - 217<br />
218 - 227<br />
228 - 237<br />
238 - 247<br />
248 - 255<br />
0 - 7<br />
8 - 19<br />
20 - 28<br />
29 - 31<br />
31 - 39<br />
39 - 47<br />
47 - 50<br />
50 - 58<br />
58 - 65<br />
66 - 73<br />
74 - 75<br />
75 - 76<br />
76 - 77<br />
77 - 78<br />
78 - 79<br />
80 - 81<br />
82 - 85<br />
85 - 89<br />
89 - 93<br />
93 - 97<br />
97 – 100<br />
0 - 255 0 – 100<br />
0-255 0-100<br />
0<br />
11<br />
22<br />
33<br />
44<br />
55<br />
66<br />
77<br />
88<br />
99<br />
110<br />
121<br />
132<br />
143<br />
0<br />
4<br />
9<br />
13<br />
17<br />
22<br />
26<br />
30<br />
35<br />
39<br />
43<br />
47<br />
52<br />
56<br />
Shutter, Strobe, Reset, Lamp On/Off<br />
Shutter closed<br />
Shutter open<br />
Strobe, fast → slow<br />
Shutter open<br />
Opening pulse, fast → slow<br />
Closing pulse, fast → slow<br />
Shutter open<br />
Random strobe, fast<br />
Random strobe, medium<br />
Random strobe, slow<br />
Shutter open<br />
Random opening pulse, fast<br />
Random opening pulse, slow<br />
Random closing pulse, fast<br />
Random closing pulse, slow<br />
Shutter open<br />
Reset fixture<br />
Shutter open<br />
Lamp on<br />
Shutter open<br />
Lamp off<br />
Dimmer<br />
Closed → open<br />
Dimmer Fine (Lowest Significant Byte)<br />
Closed → open<br />
Color<br />
Continuous Scroll: full color positions:<br />
White<br />
CTC<br />
Yellow 603<br />
Blue 104<br />
Pink 312<br />
Green 206<br />
Blue 108<br />
Red 301<br />
Magenta 507<br />
Blue 101<br />
Orange 306<br />
Dark green<br />
Purple 502<br />
White<br />
3 4<br />
156 – 159<br />
160 – 163<br />
164 – 167<br />
168 – 171<br />
172 – 175<br />
176 – 179<br />
180 – 183<br />
184 – 187<br />
188 – 191<br />
192 – 195<br />
196 – 199<br />
200 – 203<br />
204 – 207<br />
61 – 63<br />
63 – 64<br />
64 – 65<br />
66 – 67<br />
67 – 68<br />
69 – 70<br />
70 – 72<br />
72 – 73<br />
74 – 75<br />
75 – 76<br />
77 – 78<br />
78 – 79<br />
80 – 81<br />
Stepped Scroll<br />
White<br />
CTC<br />
Yellow 603<br />
Blue 104<br />
Pink 312<br />
Green 206<br />
Blue 108<br />
Red 301<br />
Magenta 507<br />
Blue 101<br />
Orange 306<br />
Dark green<br />
Purple 502<br />
208 – 226<br />
227 – 245<br />
82 – 88<br />
89 – 96<br />
Continuous Rotation<br />
CW, fast → slow<br />
CCW, slow → fast<br />
246 – 248<br />
249 – 251<br />
252 – 255<br />
96 – 97<br />
98 – 98<br />
99 – 100<br />
Random color<br />
Fast<br />
Medium<br />
Slow<br />
5 0 - 255 0 - 100 Color (Lowest Significant Byte)<br />
DMX protocol 37
0 - 4<br />
5 - 10<br />
11 - 15<br />
16 - 20<br />
21 - 25<br />
26 - 30<br />
31 - 35<br />
36 - 42<br />
0 - 2<br />
2 - 4<br />
4 - 6<br />
6 - 8<br />
8 - 10<br />
10 - 12<br />
12 - 14<br />
14 - 16<br />
Rotating Gobo selection and shake<br />
Indexing: set position on channel 5 in 16 bt mode or<br />
channel 6 in 16 Ex mode<br />
Open gobo<br />
Gobo 1<br />
Gobo 2<br />
Gobo 3<br />
Gobo 4<br />
Gobo 5<br />
Gobo 6<br />
Gobo 7<br />
4 6<br />
43 - 50<br />
51 - 58<br />
59 - 65<br />
66 - 73<br />
74 - 81<br />
82 - 89<br />
90 - 96<br />
97 - 104<br />
17 - 20<br />
20 - 23<br />
23 - 26<br />
26 - 29<br />
29 - 32<br />
32 - 35<br />
35 - 38<br />
38 - 41<br />
Rotation: set rotation speed on channel 5 in 16 bt<br />
mode or channel 6 in 16 Ex mode<br />
Open gobo<br />
Gobo 1<br />
Gobo 2<br />
Gobo 3<br />
Gobo 4<br />
Gobo 5<br />
Gobo 6<br />
Gobo 7<br />
105 - 119<br />
120 - 134<br />
135 - 149<br />
150 - 164<br />
165 - 179<br />
180 - 194<br />
195 - 209<br />
41 - 46<br />
47 - 52<br />
53 - 58<br />
59 - 64<br />
65 - 70<br />
70 - 76<br />
76 - 82<br />
Rotation with shake, slow → fast: set rotation speed<br />
on channel 5 in 16 bt mode or channel 6 in 16 Ex<br />
mode<br />
Gobo 7, Shake slow → fast<br />
Gobo 6, Shake slow → fast<br />
Gobo 5, Shake slow → fast<br />
Gobo 4, Shake slow → fast<br />
Gobo 3, Shake slow → fast<br />
Gobo 2, Shake slow → fast<br />
Gobo 1, Shake slow → fast<br />
210 - 232<br />
233 - 255<br />
82 - 91<br />
91 - 100<br />
Continuous scroll<br />
CW slow → fast<br />
CCW fast → slow<br />
Gobo rotation (active when you select gobo on<br />
channel 4 in 16 bt mode or channel 5 in 16 Ex mode)<br />
5 7<br />
0 - 255<br />
0 - 2<br />
3 - 127<br />
128 - 252<br />
253 - 255<br />
0 - 100<br />
0 - 1<br />
1 - 50<br />
50 - 98<br />
99 - 100<br />
Index position 0 - 395<br />
Continuous rotation (direction and speed)<br />
No rotation<br />
CW, slow → fast<br />
CCW, fast → slow<br />
No rotation<br />
6 8 0 – 255 0 - 100 Gobo Rotation ((Lowest Significant Byte)<br />
0 - 7<br />
8 - 15<br />
16 - 23<br />
24 - 31<br />
32 - 39<br />
40 - 47<br />
48 - 55<br />
56 - 63<br />
64 - 71<br />
72 - 79<br />
80 - 87<br />
88 - 95<br />
0 - 3<br />
3 - 6<br />
6 - 9<br />
9 - 12<br />
13 - 15<br />
16 - 18<br />
19 - 22<br />
22 - 25<br />
25 - 28<br />
28 - 31<br />
31 - 34<br />
35 - 37<br />
Gobo Wheel 2 (static). Selection and Shake<br />
Open gobo<br />
Gobo 1<br />
Gobo 2<br />
Gobo 3<br />
Gobo 4<br />
Gobo 5<br />
Gobo 6<br />
Gobo 7<br />
Gobo 8<br />
Gobo 9<br />
Gobo 10<br />
Open<br />
7 9<br />
96 - 105<br />
106 - 115<br />
116 - 125<br />
126 - 135<br />
136 - 145<br />
146 - 155<br />
156 - 165<br />
166 - 175<br />
176 - 185<br />
186 - 195<br />
196 - 205<br />
38 - 41<br />
42 - 45<br />
45 - 49<br />
49 - 53<br />
53 - 56<br />
57 - 60<br />
61 - 65<br />
65 - 69<br />
69 - 73<br />
73 - 76<br />
77 - 80<br />
Gobo Shake<br />
Gobo 10 - Shake, slow → fast<br />
Gobo 9 - Shake, slow → fast<br />
Gobo 8 - Shake, slow → fast<br />
Gobo 7 - Shake, slow → fast<br />
Gobo 6 - Shake, slow → fast<br />
Gobo 5 - Shake, slow → fast<br />
Gobo 4 - Shake, slow → fast<br />
Gobo 3 - Shake, slow → fast<br />
Gobo 2 - Shake, slow → fast<br />
Gobo 1 - Shake, slow → fast<br />
Open Gobo - Shake, slow → fast<br />
206 - 230<br />
231 - 255<br />
81 - 90<br />
91 - 100<br />
Continuous Rotation<br />
CW slow → fast<br />
CCW fast → slow<br />
38<br />
<strong>MAC</strong> <strong>250</strong> <strong>Krypton</strong>/<strong>Entour</strong>
8 10<br />
0 - 255 0 - 100<br />
Focus<br />
Infinity → 2 meters<br />
11 0 - 255 0 - 100 Focus (Lowest Significant Byte)<br />
0 - 19<br />
20 - 79<br />
80 - 89<br />
90 - 149<br />
150 - 215<br />
0 - 7<br />
8 - 31<br />
31 - 35<br />
35 - 58<br />
59 - 84<br />
Prism<br />
Prism off<br />
Rotating prism, CCW fast à slow<br />
No rotation<br />
Rotating prism, CW slow à fast<br />
Prism off<br />
9 12<br />
10 13<br />
11 14<br />
12 15<br />
13 16<br />
14 17<br />
216 - 220<br />
221 - 225<br />
226 - 230<br />
231 - 235<br />
236 - 240<br />
241 - 245<br />
246 - <strong>250</strong><br />
251 - 255<br />
84 - 86<br />
87 - 88<br />
89 - 90<br />
91 - 92<br />
93 - 94<br />
95 - 96<br />
96 - 98<br />
98 - 100<br />
0 - 255 0 - 100<br />
0 - 255 0 - 100<br />
0 - 255 0 – 100<br />
0 - 255 0 – 100<br />
0 - 2<br />
3 - 245<br />
246 - 248<br />
249 - 251<br />
252 - 255<br />
0 - 2<br />
3 - 245<br />
246 - 251<br />
252 - 255<br />
0 - 1<br />
1 - 96<br />
96 - 97<br />
98 - 98<br />
99 - 100<br />
0 - 1<br />
1 - 96<br />
96 - 98<br />
99 - 100<br />
Prism/Gobo Macros<br />
Macro 1<br />
Macro 2<br />
Macro 3<br />
Macro 4<br />
Macro 5<br />
Macro 6<br />
Macro 7<br />
Macro 8<br />
Pan<br />
Left → right (128 = neutral)<br />
Pan Fine (Lowest Significant Byte)<br />
Left → right<br />
Tilt<br />
Left → right (128 = neutral)<br />
Tilt Fine (Lowest Significant Byte)<br />
Left → right<br />
Pan/Tilt Speed<br />
Tracking<br />
Fast → slow<br />
Tracking, PTSP NORM (menu override)<br />
Tracking, PTSP FAST (menu override)<br />
Blackout while moving<br />
Effects Speed<br />
Dimmer, focus<br />
Tracking mode<br />
Fast → slow<br />
Tracking<br />
Maximum speed<br />
0 - 2<br />
3 - 245<br />
246 - 248<br />
249 - 251<br />
252 - 255<br />
0 - 1<br />
1 - 96<br />
96 - 97<br />
98 - 98<br />
99 - 100<br />
Color<br />
Tracking mode<br />
Speed, fast → slow<br />
Tracking, SCUT OFF (control menu override)<br />
Tracking, SCUT ON (control menu override)<br />
Blackout while moving<br />
15 18<br />
0 - 245<br />
246 - 248<br />
249 - 251<br />
252 - 255<br />
0 - 96<br />
96 - 97<br />
98 - 98<br />
99 - 100<br />
Gobo selection<br />
Normal (no blackout)<br />
Normal, SCUT OFF (control menu override)<br />
Normal, SCUT ON (control menu override)<br />
Blackout while moving<br />
0 - 2<br />
3 - 245<br />
246 - 251<br />
252 – 255<br />
0 - 1<br />
1 - 96<br />
96 - 98<br />
99 - 100<br />
Indexed gobo rotation (only if gobo type = indexed)<br />
Tracking mode<br />
Fast à slow<br />
Tracking<br />
Blackout while moving<br />
0 - 251<br />
252 - 255<br />
0 - 98<br />
99 - 100<br />
Prism<br />
Normal (no blackout)<br />
Blackout while moving<br />
DMX protocol 39
CONTROL MENU<br />
Options displayed in bold represent the default settings.<br />
Menu Item Options Notes (Default settings in bold print)<br />
AddR - 1-512 DMX address<br />
PSET 16BT 16 Bit<br />
16EX<br />
16 Bit extended<br />
PATI SWAP ON Map DMX pan control to tilt channel and vice versa.<br />
OFF<br />
Normal pan and tilt control<br />
PINV ON Reverse DMX pan control, right → left<br />
OFF<br />
Normal pan control, left → right<br />
TINV ON Reverse DMX tilt control, down → up<br />
OFF<br />
Normal tilt control, up → down<br />
PTSP NORM Default pan/tilt speed<br />
FAST<br />
SLOW<br />
Maximum pan/tilt speed (position may be less precise)<br />
Minimum pan/tilt speed<br />
PERS dISP ON Display remains on<br />
2 MN Display extinguishes 2 minutes after last key press<br />
10MN<br />
Display extinguishes 10 minutes after last key press<br />
dINT AUTO Automatic display dimming<br />
10-100 Set display intensity manually<br />
dLOF ON Enable DMX lamp off command<br />
OFF<br />
Disable DMX lamp off command<br />
dRES ON Enable DMX reset command<br />
OFF<br />
5SEC<br />
Disable DMX reset command<br />
Reset from Controller<br />
ALON ON Lamp strikes automatically within 90 seconds of power on<br />
OFF<br />
dMX<br />
No automatic lamp strike<br />
Lamp strikes if DMX is present, douses 15 mins. after it’s<br />
missing<br />
SCUT ON Effect wheels turn shortest distance<br />
OFF<br />
Effect wheels do not cross open position<br />
dICU DIM1 0-100%<br />
DIM2<br />
Tungsten<br />
dFSE FACT LOAD Return all personality settings (not calibrations) to factory<br />
defaults<br />
40<br />
<strong>MAC</strong> <strong>250</strong> <strong>Krypton</strong>/<strong>Entour</strong>
INFO TIME/L HR RSET Hours of operation since counter reset. To reset, display<br />
counter and press [up] for 5 seconds.<br />
TOTL<br />
RSET<br />
Total hours of operation with lamp on since fabricated<br />
Lamp hours since counter reset. To reset, display counter<br />
and press [up] for 5 seconds.<br />
TIME/L ST TOTL Total number of lamp strikes since fabricated<br />
RSET<br />
Number of lamp strikes since counter reset. To reset,<br />
display counter and press [up] for 5 seconds.<br />
VER X.X CPU firmware version<br />
TEMP HEAD Head temperature<br />
BASE<br />
Base Temperature<br />
dMXL - RATE DMX packets per second<br />
qUAL<br />
STCO<br />
SHUT..EFSP<br />
SHUT<br />
DIM<br />
COL<br />
GOBO<br />
ROGO<br />
FOC<br />
PRIS<br />
PANC<br />
PANF<br />
TILC<br />
TILF<br />
PTSP<br />
EFSP<br />
Percentage of data received without errors<br />
Decimal value of the DMX start code.<br />
DMX value (from 0 → 255) received for each channel.<br />
Shutter value<br />
Dimmer value<br />
Color wheel value<br />
Fixed gobo value<br />
Rotating gobo value<br />
Focus value<br />
Prism value<br />
Coarse pan value<br />
Fine pan value<br />
Coarse tilt value<br />
Fine tilt value<br />
Pan/tilt speed value<br />
Effect speed value<br />
Control menu 41
MAN RST - Reset fixture<br />
L ON - Lamp on<br />
LoFF - Lamp off<br />
SHUT OPEN Open shutter<br />
CLOS<br />
STRF<br />
STRM<br />
STRS<br />
Close shutter<br />
Fast strobe<br />
Medium strobe<br />
Slow strobe<br />
dIM 0-255 Dimmer<br />
COL OPEN Color wheel in open position.<br />
12 C1-C12 Color wheel positions 1 → 12.<br />
CW F<br />
CCWF<br />
CW M<br />
CCWM<br />
CW S<br />
CCWS<br />
RNdF<br />
RNdM<br />
RNdS<br />
Clockwise rotation - fast<br />
Counter-clockwise rotation - fast<br />
Clockwise rotation - medium<br />
Counter-clockwise rotation - medium<br />
Clockwise rotation - slow<br />
Counter-clockwise rotation - slow<br />
Random color - fast<br />
Random color - medium<br />
Random color - slow<br />
gObO OPEN Gobo wheel in open position<br />
g1 I-g7 I Indexed gobos 1-7<br />
g1 R-g7 R Rotating gobos 1-7<br />
g1RS-g7RS Rotating gobo shake 1-7<br />
CW F<br />
CCWF<br />
CW M<br />
CCWM<br />
CW S<br />
CCWS<br />
Clockwise rotation, fast<br />
Counter-clockwise rotation, fast<br />
Clockwise rotation, medium<br />
Counter-clockwise rotation, medium<br />
Clockwise rotation, slow<br />
Counter-clockwise rotation - slow<br />
I/S 0-255 Clockwise rotation of gobo wheel. Slow - fast.<br />
42<br />
<strong>MAC</strong> <strong>250</strong> <strong>Krypton</strong>/<strong>Entour</strong>
MAN<br />
(cont.)<br />
PRIS ON Prism in<br />
OFF<br />
Prism out<br />
CWF<br />
CCWF<br />
CWM<br />
CCWM<br />
CWS<br />
CCWS<br />
Clockwise rotation - fast<br />
Counter-clockwise rotation - fast<br />
Clockwise rotation - medium<br />
Counter-clockwise rotation - medium<br />
Clockwise rotation - slow<br />
Counter-clockwise rotation - slow<br />
FOC 0-255 Focus, Infinity-Near<br />
PAN 0-255 Pan, Left-Right<br />
TILT 0-255 Tilt, Up-Down<br />
TSEQ - RUN Run a general test of all effects<br />
UTIL<br />
(Press<br />
and hold<br />
Enter<br />
more<br />
than 3<br />
sec. to<br />
access)<br />
FEbA ON Magnetic sensors monitor the positions of the color wheel,<br />
gobo wheel, and rotating gobos. If they detect an error, the<br />
shutter closes while the effect resets.<br />
OFF<br />
Effect feedback disabled.<br />
EFFb ON Enable on the fly reset of magnetically indexed effects<br />
OFF<br />
Disable on the fly reset of magnetically indexed effects<br />
Adj - Not implemented<br />
CAL - Not implemented<br />
dFOF SURE Return all offsets to the default settings<br />
PCbT Led PCB test for service use only.<br />
UPLd SURE Manually set fixture to software update mode<br />
Control menu 43
ERROR MESSAGES<br />
Display readout Appears if... What to do<br />
MERR (Memory error)<br />
...the EEPROM memory cannot be<br />
read.<br />
• Contact service technician.<br />
**** ... there is no communication between<br />
the control panel and motherboard.<br />
This appears briefly when switching on<br />
the fixture.<br />
COER (Color wheel time-out)<br />
RGER (Rot. gobo time-out)<br />
FGER (Fixed gobo time-out)<br />
GOER (Gobo index time out)<br />
L1ER<br />
...the magnetic-indexing circuit<br />
malfunctions (e.g. sensor defective or<br />
magnet missing).<br />
...the software don’t detect any pulses<br />
from the light sensor for a specific<br />
period of time.<br />
• Check fuses.<br />
• Check cable between control panel<br />
and motherboard.<br />
• Reinstall software.<br />
• Contact service technician.<br />
• After the time-out, the effect in question<br />
stops in a random position.<br />
• Contact service technician.<br />
• Ensure that the light sensor cable is<br />
mounted correctly on the PL54 connector,<br />
or alternatively the light sensors<br />
might be defective.<br />
LERR ...the lamp cannot be struck. • Replace the lamp<br />
shER<br />
....there is a short circuit and the lamp • Contact service technician.<br />
is struck without a command.<br />
bTER<br />
...the temperature in the base is too<br />
high<br />
• Ensure that the fans are clear and<br />
functioning and that the ambient temperature<br />
does not exceed 40° C<br />
(104° F)<br />
• Contact service technician if the<br />
problem persists.<br />
PAER<br />
TIER<br />
...if there is a pan error and the sensor<br />
cannot find the pan index point<br />
...if there is a tilt error and the sensor<br />
cannot find the pan index point<br />
• After the time-out, the fixture stops in<br />
a random position.<br />
• Contact service technician.<br />
• After the time-out, the fixture stops in<br />
a random position.<br />
• Contact service technician.<br />
dRER ...if there is a drive current error. • Contact service technician.<br />
dPER<br />
...if there is a display programming • Contact service technician.<br />
error.<br />
Table 6: Error messages<br />
44<br />
<strong>MAC</strong> <strong>250</strong> <strong>Krypton</strong>/<strong>Entour</strong>
TROUBLESHOOTING<br />
Problem Probable cause(s) Remedy<br />
One or more of the fixtures<br />
is completely dead.<br />
Fixtures reset correctly but<br />
all respond erratically or<br />
not at all to the controller.<br />
Fixtures reset correctly but<br />
some respond erratically<br />
or not at all to the<br />
controller.<br />
Shutter closes suddenly.<br />
No light and “LERR” error<br />
message displayed.<br />
Lamp cuts out<br />
intermittently.<br />
No power to fixture. • Check that power is switched on and cables<br />
are plugged in.<br />
Primary fuse blown. • Replace fuse.<br />
Secondary fuse(s) blown (located on<br />
PCB inside base).<br />
• Check fuses on PCB and replace.<br />
The controller is not connected. • Connect controller.<br />
XLR pin-out of the controller does not<br />
match pin-out of the first fixture on the<br />
link (i.e. signal is reversed).<br />
• Install a phase-reversing cable between the<br />
controller and the first fixture on the link.<br />
Poor data quality • Check data quality (page 12). If much under<br />
100 percent, the problem may be a bad data<br />
link connection, poor quality or broken<br />
cabling, missing termination, or a defective<br />
fixture disturbing the link.<br />
Bad data link connection • Inspect connections and cables. Correct<br />
poor connections. Repair or replace damaged<br />
cables.<br />
Data link not terminated with 120Ω<br />
termination plug.<br />
• Insert termination plug in output jack of the<br />
last fixture on the link.<br />
Incorrect addressing of the fixtures. • Check address setting.<br />
One of the fixtures is defective and<br />
disturbs data transmission on the link.<br />
XLR pin-out on fixtures does not<br />
match (pins 2 and 3 reversed).<br />
The color wheel, gobo wheel, or a<br />
gobo has lost its index position and the<br />
fixture is resetting the effect.<br />
The power supply settings do not<br />
match local AC voltage and frequency.<br />
• Bypass one fixture at a time until normal<br />
operation is regained: unplug both connectors<br />
and connect them directly together.<br />
• Have the defective fixture serviced by a<br />
qualified technician.<br />
• Install a phase-reversing cable between the<br />
fixtures or swap pins 2 and 3 in the fixture<br />
that behaves erratically.<br />
• Contact Martin technician for service if the<br />
problem persists.<br />
• Disconnect fixture. Check settings (“AC<br />
power” on page 6) and correct if necessary.<br />
Lamp missing or blown • Disconnect fixture and replace lamp.<br />
Fixture is too hot. • Allow fixture to cool.<br />
• Clean fan.<br />
• Make sure air vents at control panel and<br />
front lens are not blocked.<br />
• Turn up the air conditioning.<br />
The power supply settings do not<br />
match local AC voltage and frequency.<br />
Table 7: Troubleshooting<br />
• Disconnect fixture. Check settings (“AC<br />
power” on page 6) and correct if necessary.<br />
Troubleshooting 45
CIRCUIT BOARD CONNECTIONS<br />
Pan / Tilt Switch<br />
14 15<br />
Light Sensor<br />
Temp Head<br />
Fans<br />
Temp On Board<br />
13<br />
LS<br />
F1<br />
F2<br />
F3<br />
XLR<br />
11 (Gobo 2)<br />
10 Pris. Rot.<br />
Tilt<br />
F.B.<br />
Pan<br />
F.B.<br />
6 Gobo Wh.<br />
5 Gobo Rot.<br />
ET 2 AL<br />
ET 6.3 AL<br />
33120043-B<br />
46<br />
<strong>MAC</strong> <strong>250</strong> <strong>Krypton</strong>/<strong>Entour</strong>
SPECIFICATIONS - <strong>MAC</strong> <strong>250</strong> KRYPTON<br />
PHYSICAL<br />
Base length . . . . . . . . . . . . . . . . . . . . . . . . . . . . . . . . . . . . . . . . . . . . . . . . . . . . . . . . . . . . . . . . . . . . . . . . . . . . . . . . . . .375 mm (14.8 in)<br />
Base width . . . . . . . . . . . . . . . . . . . . . . . . . . . . . . . . . . . . . . . . . . . . . . . . . . . . . . . . . . . . . . . . . . . . . . . . . . . . . . . . . . .315 mm (12.4 in)<br />
Yoke width . . . . . . . . . . . . . . . . . . . . . . . . . . . . . . . . . . . . . . . . . . . . . . . . . . . . . . . . . . . . . . . . . . . . . . . . . . . . . . . . . . .393 mm (15.5 in)<br />
Height . . . . . . . . . . . . . . . . . . . . . . . . . . . . . . . . . . . . . . . . . . . . . . . . . . . . . . . . . . . . . . . . . . . . . . . . . . . . . . . . . . . . . .538 mm (21.2 in)<br />
Weight . . . . . . . . . . . . . . . . . . . . . . . . . . . . . . . . . . . . . . . . . . . . . . . . . . . . . . . . . . . . . . . . . . . . . . . . . . . . . . . . . . . . . . . 22.4 kg (49 lbs)<br />
AC POWER<br />
Operating range . . . . . . . . . . . . . . . . . . . . . . . . . . . . . . . . . . . . . . . . . . . . . . . . . . . . . . . . . . . . . . . . . . . . . . . . . . . 100 - <strong>250</strong> V, 50/60 Hz<br />
AC input . . . . . . . . . . . . . . . . . . . . . . . . . . . . . . . . . . . . . . . . . . . . . . . . . . . . . . . . . . . . . . . . . . . . . . . . . . . . . . 3-prong IEC male socket<br />
MAXIMUM POWER AND CURRENT<br />
100 V, 50 Hz. . . . . . . . . . . . . . . . . . . . . . . . . . . . . . . . . . . . . . . . . . . . . . . . . . . . . . . . . . . . . . . . . . . . . . . . . . . . . . . 319 W, 3.8 A, PF 0.8<br />
100 V, 60 Hz. . . . . . . . . . . . . . . . . . . . . . . . . . . . . . . . . . . . . . . . . . . . . . . . . . . . . . . . . . . . . . . . . . . . . . . . . . . . . . . 317 W, 3.4 A, PF 0.9<br />
120 V, 50 Hz. . . . . . . . . . . . . . . . . . . . . . . . . . . . . . . . . . . . . . . . . . . . . . . . . . . . . . . . . . . . . . . . . . . . . . . . . . . . . . . 320 W, 2.9 A, PF 0.9<br />
120 V, 60 Hz. . . . . . . . . . . . . . . . . . . . . . . . . . . . . . . . . . . . . . . . . . . . . . . . . . . . . . . . . . . . . . . . . . . . . . . . . . . . . . . 314 W, 2.7 A, PF 1.0<br />
208 V, 50 Hz. . . . . . . . . . . . . . . . . . . . . . . . . . . . . . . . . . . . . . . . . . . . . . . . . . . . . . . . . . . . . . . . . . . . . . . . . . . . . . . 320 W, 1.9 A, PF 0.8<br />
208 V, 60 Hz. . . . . . . . . . . . . . . . . . . . . . . . . . . . . . . . . . . . . . . . . . . . . . . . . . . . . . . . . . . . . . . . . . . . . . . . . . . . . . . 319 W, 1.7 A, PF 0.9<br />
230 V, 50 Hz. . . . . . . . . . . . . . . . . . . . . . . . . . . . . . . . . . . . . . . . . . . . . . . . . . . . . . . . . . . . . . . . . . . . . . . . . . . . . . . 323 W, 1.6 A, PF 0.9<br />
230 V, 60 Hz. . . . . . . . . . . . . . . . . . . . . . . . . . . . . . . . . . . . . . . . . . . . . . . . . . . . . . . . . . . . . . . . . . . . . . . . . . . . . . . 326 W, 1.5 A, PF 1.0<br />
<strong>250</strong> V, 50 Hz. . . . . . . . . . . . . . . . . . . . . . . . . . . . . . . . . . . . . . . . . . . . . . . . . . . . . . . . . . . . . . . . . . . . . . . . . . . . . . . 326 W, 1.5 A, PF 0.9<br />
<strong>250</strong> V, 60 Hz. . . . . . . . . . . . . . . . . . . . . . . . . . . . . . . . . . . . . . . . . . . . . . . . . . . . . . . . . . . . . . . . . . . . . . . . . . . . . . . 325 W, 1.4 A, PF 1.0<br />
Note: Measurements have a margin of error of +/- 10%<br />
V = volts, Hz = hertz, W = watts, A = amps, PF = power factor<br />
THERMAL<br />
Maximum ambient temperature (T a ) . . . . . . . . . . . . . . . . . . . . . . . . . . . . . . . . . . . . . . . . . . . . . . . . . . . . . . . . . . . . . . . . . 40° C (104° F)<br />
Maximum surface temperature . . . . . . . . . . . . . . . . . . . . . . . . . . . . . . . . . . . . . . . . . . . . . . . . . . . . . . . . . . . . . . . . . . . . 120° C (248° F)<br />
INSTALLATION<br />
Orientation . . . . . . . . . . . . . . . . . . . . . . . . . . . . . . . . . . . . . . . . . . . . . . . . . . . . . . . . . . . . . . . . . . . . . . . . . . . . . . . . . . . . . . . . . . . . . . any<br />
Minimum distance to flammable materials . . . . . . . . . . . . . . . . . . . . . . . . . . . . . . . . . . . . . . . . . . . . . . . . . . . . . . . . . . . . . . 0.1 m (4 in)<br />
Minimum distance to illuminated surfaces . . . . . . . . . . . . . . . . . . . . . . . . . . . . . . . . . . . . . . . . . . . . . . . . . . . . . . . . . . . . . 0.3 m (12 in)<br />
FUSES<br />
Main fuse . . . . . . . . . . . . . . . . . . . . . . . . . . . . . . . . . . . . . . . . . . . . . . . . . . . . . . . . . . . . . . . . . . . . . . . . . . . . . 6.3 A / <strong>250</strong> V, time-delay<br />
Fuse F1 . . . . . . . . . . . . . . . . . . . . . . . . . . . . . . . . . . . . . . . . . . . . . . . . . . . . . . . . . . . . . . . . . . . . . . . . . . . . . . 6.3 A / <strong>250</strong> V, time-delay<br />
Fuse F2 . . . . . . . . . . . . . . . . . . . . . . . . . . . . . . . . . . . . . . . . . . . . . . . . . . . . . . . . . . . . . . . . . . . . . . . . . . . . . . . 2.0 A / <strong>250</strong> V, time-delay<br />
LAMPS<br />
Philips MSD <strong>250</strong>/2. . . . . . . . . . . . . . . . . . . . . . . . . . . . . . . . . . . . . . . . . . . . . . . . . . . . . . . . . . . . . . . . . . . . . . . .3000 hr, 9000K, <strong>250</strong> W<br />
Osram HSD <strong>250</strong>/78 . . . . . . . . . . . . . . . . . . . . . . . . . . . . . . . . . . . . . . . . . . . . . . . . . . . . . . . . . . . . . . . . . . . . . . .3000 hr, 7800K, <strong>250</strong> W<br />
GE CSD <strong>250</strong>/2 . . . . . . . . . . . . . . . . . . . . . . . . . . . . . . . . . . . . . . . . . . . . . . . . . . . . . . . . . . . . . . . . . . . . . . . . . . .2000 hr, 9000K, <strong>250</strong> W<br />
GOBOS<br />
Outside diameter . . . . . . . . . . . . . . . . . . . . . . . . . . . . . . . . . . . . . . . . . . . . . . . . . . . . . . 22.5 mm + 0/- 0.3 mm (0.886 in. +0/- 0.012 in)<br />
Maximum image diameter . . . . . . . . . . . . . . . . . . . . . . . . . . . . . . . . . . . . . . . . . . . . . . . . . . . . . . . . . . . . . . . . . . . . . . .17 mm (0.669 in)<br />
Maximum thickness . . . . . . . . . . . . . . . . . . . . . . . . . . . . . . . . . . . . . . . . . . . . . . . . . . . . . . . . . . . . . . . . . . . . . . . . . . . 1.8 mm (0.071 in)<br />
Glass type . . . . . . . . . . . . . . . . . . . . . . . . . . . . . . . . . . . . . . . . . . . . . . . . . . . . . . . . . . . . . . . . . . . . .high temperature Borofloat or better<br />
Glass coating . . . . . . . . . . . . . . . . . . . . . . . . . . . . . . . . . . . . . . . . . . . . . . . . . . . . . . . . . . . . . . . . . . . . . dichroic or enhanced aluminum<br />
Metal . . . . . . . . . . . . . . . . . . . . . . . . . . . . . . . . . . . . . . . . . . . . . . . . . . . . . . . . . . . . . . . . . . . . . . . . aluminum (steel okay for short use)<br />
Specifications - <strong>MAC</strong> <strong>250</strong> <strong>Krypton</strong> 47
CONTROL AND PROGRAMMING<br />
Data input . . . . . . . . . . . . . . . . . . . . . . . . . . . . . . . . . . . . . . . . . . . . . . . . . . . . . . . . . . . . . . . .locking 3-pin and 5-pin XLR male sockets<br />
Data output . . . . . . . . . . . . . . . . . . . . . . . . . . . . . . . . . . . . . . . . . . . . . . . . . . . . . . . . . . . . . locking 3-pin and 5-pin XLR female sockets<br />
Data pinout . . . . . . . . . . . . . . . . . . . . . . . . . . . . . . . . . . . . . . . . . . . . . . . . . . . . . . . . . . . . . . . . .pin 1 shield, pin 2 cold (-), pin 3 hot (+)<br />
Receiver . . . . . . . . . . . . . . . . . . . . . . . . . . . . . . . . . . . . . . . . . . . . . . . . . . . . . . . . . . . . . . . . . . . . . . . . . . . . . . . . . Opto-isolated RS-485<br />
Protocols. . . . . . . . . . . . . . . . . . . . . . . . . . . . . . . . . . . . . . . . . . . . . . . . . . . . . . . . . . . . . . . . . . . . . . . . . . . . . . USITT DMX-512 (1990)<br />
DMX Channels. . . . . . . . . . . . . . . . . . . . . . . . . . . . . . . . . . . . . . . . . . . . . . . . . . . . . . . . . . . . . . . . . . . . . <strong>Krypton</strong> - 14/17, <strong>Entour</strong> 15/18<br />
DESIGN STANDARDS<br />
Canadian safety . . . . . . . . . . . . . . . . . . . . . . . . . . . . . . . . . . . . . . . . . . . . . . . . . . . . . . . . . . . . . . . . . . . . . . . . . . . . .CSA C22.2 NO 166<br />
EU EMC. . . . . . . . . . . . . . . . . . . . . . . . . . . . . . . . . . . . . . . . . . . . . . . . . . . . . . . . . . . . . . . . . . . . . . . . . . . . . EN 50 081-1, EN 50 082-1<br />
EU safety . . . . . . . . . . . . . . . . . . . . . . . . . . . . . . . . . . . . . . . . . . . . . . . . . . . . . . . . . . . . . . . . . . . . . . . . . . EN 60598-1, EN 60598-2-17<br />
US safety . . . . . . . . . . . . . . . . . . . . . . . . . . . . . . . . . . . . . . . . . . . . . . . . . . . . . . . . . . . . . . . . . . . . . . . . . . . . . . . . . . . . . ANSI/UL 1573<br />
CE approved<br />
PHOTOMETRICS<br />
Light output . . . . . . . . . . . . . . . . . . . . . . . . . . . . . . . . . . . . . . . . . . . . . . . . . . . . . . . . . . . . . . . . . . . . . . . . . . . . . . . . . . . . . 4618 lumens<br />
Field angle . . . . . . . . . . . . . . . . . . . . . . . . . . . . . . . . . . . . . . . . . . . . . . . . . . . . . . . . . . . . . . . . . . . . . . . . . . . . . . . . . . . . . . . . . . . . 20.6°<br />
Measurement conditions . . . . . . . . . . . . . . . . . . . . . . . . . . . . . . . . . . . . . . . . . . . . . . . . . . . . . . . . . . . . 230 V, 50 Hz; no effects applied<br />
Measurement source. . . . . . . . . . . . . . . . . . . . . . . . . . . . . . . . . . . . . . . . . . . . . . . . . . . . . . . . . . . . . . . . . . . . . . . . . . Philips MSD <strong>250</strong>/2<br />
INCLUDED ITEMS<br />
Omega bracket, <strong>MAC</strong> <strong>250</strong>/300 1/4-turn<br />
XLR cable, 5 m, black, 3-pin<br />
Mains cable, 3 m, IEC 3-pin<br />
User manual<br />
ACCESSORIES<br />
G-clamp . . . . . . . . . . . . . . . . . . . . . . . . . . . . . . . . . . . . . . . . . . . . . . . . . . . . . . . . . . . . . . . . . . . . . . . . . . . . . . . . . . . . . . . P/N 91602003<br />
Half-coupler clamp. . . . . . . . . . . . . . . . . . . . . . . . . . . . . . . . . . . . . . . . . . . . . . . . . . . . . . . . . . . . . . . . . . . . . . . . . . . . . . . P/N 91602005<br />
ORDERING INFORMATION<br />
<strong>MAC</strong> <strong>250</strong> <strong>Krypton</strong> (packed in cardboard box) . . . . . . . . . . . . . . . . . . . . . . . . . . . . . . . . . . . . . . . . . . . . . . . . . . . . . . . . . P/N 90225600<br />
<strong>MAC</strong> <strong>250</strong> <strong>Krypton</strong> (in flightcase) . . . . . . . . . . . . . . . . . . . . . . . . . . . . . . . . . . . . . . . . . . . . . . . . . . . . . . . . . . . . . . . . . . . P/N 90225610<br />
48<br />
<strong>MAC</strong> <strong>250</strong> <strong>Krypton</strong>/<strong>Entour</strong>
SPECIFICATIONS - <strong>MAC</strong> <strong>250</strong> ENTOUR<br />
PHYSICAL<br />
Base length . . . . . . . . . . . . . . . . . . . . . . . . . . . . . . . . . . . . . . . . . . . . . . . . . . . . . . . . . . . . . . . . . . . . . . . . . . . . . . . . . . .375 mm (14.8 in)<br />
Base width . . . . . . . . . . . . . . . . . . . . . . . . . . . . . . . . . . . . . . . . . . . . . . . . . . . . . . . . . . . . . . . . . . . . . . . . . . . . . . . . . . .315 mm (12.4 in)<br />
Yoke width . . . . . . . . . . . . . . . . . . . . . . . . . . . . . . . . . . . . . . . . . . . . . . . . . . . . . . . . . . . . . . . . . . . . . . . . . . . . . . . . . . .393 mm (15.5 in)<br />
Height . . . . . . . . . . . . . . . . . . . . . . . . . . . . . . . . . . . . . . . . . . . . . . . . . . . . . . . . . . . . . . . . . . . . . . . . . . . . . . . . . . . . . .538 mm (21.2 in)<br />
Weight . . . . . . . . . . . . . . . . . . . . . . . . . . . . . . . . . . . . . . . . . . . . . . . . . . . . . . . . . . . . . . . . . . . . . . . . . . . . . . . . . . . . . . . 22.4 kg (49 lbs)<br />
AC POWER<br />
Operating range . . . . . . . . . . . . . . . . . . . . . . . . . . . . . . . . . . . . . . . . . . . . . . . . . . . . . . . . . . . . . . . . . . . . . . . . . . . 100 - <strong>250</strong> V, 50/60 Hz<br />
AC input . . . . . . . . . . . . . . . . . . . . . . . . . . . . . . . . . . . . . . . . . . . . . . . . . . . . . . . . . . . . . . . . . . . . . . . . . . . . . . 3-prong IEC male socket<br />
MAXIMUM POWER AND CURRENT<br />
100 V, 50 Hz. . . . . . . . . . . . . . . . . . . . . . . . . . . . . . . . . . . . . . . . . . . . . . . . . . . . . . . . . . . . . . . . . . . . . . . . . . . . . . . 319 W, 3.8 A, PF 0.8<br />
100 V, 60 Hz. . . . . . . . . . . . . . . . . . . . . . . . . . . . . . . . . . . . . . . . . . . . . . . . . . . . . . . . . . . . . . . . . . . . . . . . . . . . . . . 317 W, 3.4 A, PF 0.9<br />
120 V, 50 Hz. . . . . . . . . . . . . . . . . . . . . . . . . . . . . . . . . . . . . . . . . . . . . . . . . . . . . . . . . . . . . . . . . . . . . . . . . . . . . . . 320 W, 2.9 A, PF 0.9<br />
120 V, 60 Hz. . . . . . . . . . . . . . . . . . . . . . . . . . . . . . . . . . . . . . . . . . . . . . . . . . . . . . . . . . . . . . . . . . . . . . . . . . . . . . . 314 W, 2.7 A, PF 1.0<br />
208 V, 50 Hz. . . . . . . . . . . . . . . . . . . . . . . . . . . . . . . . . . . . . . . . . . . . . . . . . . . . . . . . . . . . . . . . . . . . . . . . . . . . . . . 320 W, 1.9 A, PF 0.8<br />
208 V, 60 Hz. . . . . . . . . . . . . . . . . . . . . . . . . . . . . . . . . . . . . . . . . . . . . . . . . . . . . . . . . . . . . . . . . . . . . . . . . . . . . . . 319 W, 1.7 A, PF 0.9<br />
230 V, 50 Hz. . . . . . . . . . . . . . . . . . . . . . . . . . . . . . . . . . . . . . . . . . . . . . . . . . . . . . . . . . . . . . . . . . . . . . . . . . . . . . . 323 W, 1.6 A, PF 0.9<br />
230 V, 60 Hz. . . . . . . . . . . . . . . . . . . . . . . . . . . . . . . . . . . . . . . . . . . . . . . . . . . . . . . . . . . . . . . . . . . . . . . . . . . . . . . 326 W, 1.5 A, PF 1.0<br />
<strong>250</strong> V, 50 Hz. . . . . . . . . . . . . . . . . . . . . . . . . . . . . . . . . . . . . . . . . . . . . . . . . . . . . . . . . . . . . . . . . . . . . . . . . . . . . . . 326 W, 1.5 A, PF 0.9<br />
<strong>250</strong> V, 60 Hz. . . . . . . . . . . . . . . . . . . . . . . . . . . . . . . . . . . . . . . . . . . . . . . . . . . . . . . . . . . . . . . . . . . . . . . . . . . . . . . 325 W, 1.4 A, PF 1.0<br />
Note: Measurements have a margin of error of +/- 10%<br />
V = volts, Hz = hertz, W = watts, A = amps, PF = power factor<br />
THERMAL<br />
Maximum ambient temperature (T a ) . . . . . . . . . . . . . . . . . . . . . . . . . . . . . . . . . . . . . . . . . . . . . . . . . . . . . . . . . . . . . . . . . 40° C (104° F)<br />
Maximum surface temperature . . . . . . . . . . . . . . . . . . . . . . . . . . . . . . . . . . . . . . . . . . . . . . . . . . . . . . . . . . . . . . . . . . . . 120° C (248° F)<br />
INSTALLATION<br />
Orientation . . . . . . . . . . . . . . . . . . . . . . . . . . . . . . . . . . . . . . . . . . . . . . . . . . . . . . . . . . . . . . . . . . . . . . . . . . . . . . . . . . . . . . . . . . . . . . any<br />
Minimum distance to flammable materials . . . . . . . . . . . . . . . . . . . . . . . . . . . . . . . . . . . . . . . . . . . . . . . . . . . . . . . . . . . . . . 0.1 m (4 in)<br />
Minimum distance to illuminated surfaces . . . . . . . . . . . . . . . . . . . . . . . . . . . . . . . . . . . . . . . . . . . . . . . . . . . . . . . . . . . . . 0.3 m (12 in)<br />
FUSES<br />
Main fuse . . . . . . . . . . . . . . . . . . . . . . . . . . . . . . . . . . . . . . . . . . . . . . . . . . . . . . . . . . . . . . . . . . . . . . . . . . . . . 6.3 A / <strong>250</strong> V, time-delay<br />
Fuse F1 . . . . . . . . . . . . . . . . . . . . . . . . . . . . . . . . . . . . . . . . . . . . . . . . . . . . . . . . . . . . . . . . . . . . . . . . . . . . . . 6.3 A / <strong>250</strong> V, time-delay<br />
Fuse F2 . . . . . . . . . . . . . . . . . . . . . . . . . . . . . . . . . . . . . . . . . . . . . . . . . . . . . . . . . . . . . . . . . . . . . . . . . . . . . . . 2.0 A / <strong>250</strong> V, time-delay<br />
LAMPS<br />
Philips MSD <strong>250</strong>/2. . . . . . . . . . . . . . . . . . . . . . . . . . . . . . . . . . . . . . . . . . . . . . . . . . . . . . . . . . . . . . . . . . . . . . . .3000 hr, 9000K, <strong>250</strong> W<br />
Osram HSD <strong>250</strong>/78 . . . . . . . . . . . . . . . . . . . . . . . . . . . . . . . . . . . . . . . . . . . . . . . . . . . . . . . . . . . . . . . . . . . . . . .3000 hr, 7800K, <strong>250</strong> W<br />
GE CSD <strong>250</strong>/2 . . . . . . . . . . . . . . . . . . . . . . . . . . . . . . . . . . . . . . . . . . . . . . . . . . . . . . . . . . . . . . . . . . . . . . . . . . .2000 hr, 9000K, <strong>250</strong> W<br />
GOBOS<br />
Outside diameter . . . . . . . . . . . . . . . . . . . . . . . . . . . . . . . . . . . . . . . . . . . . . . . . . . . . . . 22.5 mm + 0/- 0.3 mm (0.886 in. +0/- 0.012 in)<br />
Maximum image diameter . . . . . . . . . . . . . . . . . . . . . . . . . . . . . . . . . . . . . . . . . . . . . . . . . . . . . . . . . . . . . . . . . . . . . . .17 mm (0.669 in)<br />
Maximum thickness . . . . . . . . . . . . . . . . . . . . . . . . . . . . . . . . . . . . . . . . . . . . . . . . . . . . . . . . . . . . . . . . . . . . . . . . . . . 1.8 mm (0.071 in)<br />
Glass type . . . . . . . . . . . . . . . . . . . . . . . . . . . . . . . . . . . . . . . . . . . . . . . . . . . . . . . . . . . . . . . . . . . . .high temperature Borofloat or better<br />
Glass coating . . . . . . . . . . . . . . . . . . . . . . . . . . . . . . . . . . . . . . . . . . . . . . . . . . . . . . . . . . . . . . . . . . . . . dichroic or enhanced aluminum<br />
Metal . . . . . . . . . . . . . . . . . . . . . . . . . . . . . . . . . . . . . . . . . . . . . . . . . . . . . . . . . . . . . . . . . . . . . . . . aluminum (steel okay for short use)<br />
Specifications - <strong>MAC</strong> <strong>250</strong> <strong>Entour</strong> 49
CONTROL AND PROGRAMMING<br />
Data input . . . . . . . . . . . . . . . . . . . . . . . . . . . . . . . . . . . . . . . . . . . . . . . . . . . . . . . . . . . . . . . .locking 3-pin and 5-pin XLR male sockets<br />
Data output . . . . . . . . . . . . . . . . . . . . . . . . . . . . . . . . . . . . . . . . . . . . . . . . . . . . . . . . . . . . . locking 3-pin and 5-pin XLR female sockets<br />
Data pinout . . . . . . . . . . . . . . . . . . . . . . . . . . . . . . . . . . . . . . . . . . . . . . . . . . . . . . . . . . . . . . . . .pin 1 shield, pin 2 cold (-), pin 3 hot (+)<br />
Receiver . . . . . . . . . . . . . . . . . . . . . . . . . . . . . . . . . . . . . . . . . . . . . . . . . . . . . . . . . . . . . . . . . . . . . . . . . . . . . . . . . Opto-isolated RS-485<br />
Protocols. . . . . . . . . . . . . . . . . . . . . . . . . . . . . . . . . . . . . . . . . . . . . . . . . . . . . . . . . . . . . . . . . . . . . . . . . . . . . . USITT DMX-512 (1990)<br />
DMX Channels. . . . . . . . . . . . . . . . . . . . . . . . . . . . . . . . . . . . . . . . . . . . . . . . . . . . . . . . . . . . . . . . . . . . . <strong>Krypton</strong> - 14/17, <strong>Entour</strong> 15/18<br />
DESIGN STANDARDS<br />
Canadian safety . . . . . . . . . . . . . . . . . . . . . . . . . . . . . . . . . . . . . . . . . . . . . . . . . . . . . . . . . . . . . . . . . . . . . . . . . . . . .CSA C22.2 NO 166<br />
EU EMC. . . . . . . . . . . . . . . . . . . . . . . . . . . . . . . . . . . . . . . . . . . . . . . . . . . . . . . . . . . . . . . . . . . . . . . . . . . . . EN 50 081-1, EN 50 082-1<br />
EU safety . . . . . . . . . . . . . . . . . . . . . . . . . . . . . . . . . . . . . . . . . . . . . . . . . . . . . . . . . . . . . . . . . . . . . . . . . . EN 60598-1, EN 60598-2-17<br />
US safety . . . . . . . . . . . . . . . . . . . . . . . . . . . . . . . . . . . . . . . . . . . . . . . . . . . . . . . . . . . . . . . . . . . . . . . . . . . . . . . . . . . . . ANSI/UL 1573<br />
CE approved<br />
PHOTOMETRICS (ENTOUR)<br />
Light output . . . . . . . . . . . . . . . . . . . . . . . . . . . . . . . . . . . . . . . . . . . . . . . . . . . . . . . . . . . . . . . . . . . . . . . . . . . . . . . . . . . . . 4323 lumens<br />
Field angle . . . . . . . . . . . . . . . . . . . . . . . . . . . . . . . . . . . . . . . . . . . . . . . . . . . . . . . . . . . . . . . . . . . . . . . . . . . . . . . . . . . . . . . . . . . . . . 17°<br />
Optional field angle (for <strong>MAC</strong> <strong>250</strong>). . . . . . . . . . . . . . . . . . . . . . . . . . . . . . . . . . . . . . . . . . . . . . . . . . . . . . . . . . . . . . . . . . . . . . . . . . . 14°<br />
Measurement conditions . . . . . . . . . . . . . . . . . . . . . . . . . . . . . . . . . . . . . . . . . . . . . . . . . . . . . . . . . . . . 230 V, 50 Hz; no effects applied<br />
Measurement source. . . . . . . . . . . . . . . . . . . . . . . . . . . . . . . . . . . . . . . . . . . . . . . . . . . . . . . . . . . . . . . . . . . . . . . . . . . Philips MSD <strong>250</strong>/<br />
INCLUDED ITEMS<br />
Omega bracket, <strong>MAC</strong> <strong>250</strong>/300 1/4-turn<br />
XLR cable, 5 m, black, 3-pin<br />
Mains cable, 3 m, IEC 3-pin<br />
14° lens<br />
User manual<br />
ACCESSORIES<br />
G-clamp . . . . . . . . . . . . . . . . . . . . . . . . . . . . . . . . . . . . . . . . . . . . . . . . . . . . . . . . . . . . . . . . . . . . . . . . . . . . . . . . . . . . . . . P/N 91602003<br />
Half-coupler clamp. . . . . . . . . . . . . . . . . . . . . . . . . . . . . . . . . . . . . . . . . . . . . . . . . . . . . . . . . . . . . . . . . . . . . . . . . . . . . . . P/N 91602005<br />
ORDERING INFORMATION<br />
<strong>MAC</strong> <strong>250</strong> <strong>Entour</strong> (packed in cardboard box). . . . . . . . . . . . . . . . . . . . . . . . . . . . . . . . . . . . . . . . . . . . . . . . . . . . . . . . . . . P/N 90225710<br />
<strong>MAC</strong> <strong>250</strong> <strong>Entour</strong> (in flightcase). . . . . . . . . . . . . . . . . . . . . . . . . . . . . . . . . . . . . . . . . . . . . . . . . . . . . . . . . . . . . . . . . . . . . P/N 90225700<br />
50<br />
<strong>MAC</strong> <strong>250</strong> <strong>Krypton</strong>/<strong>Entour</strong>