A guide to VE configure - Zanshin
A guide to VE configure - Zanshin
A guide to VE configure - Zanshin

Create successful ePaper yourself
Turn your PDF publications into a flip-book with our unique Google optimized e-Paper software.
Connecting your Victron product <strong>to</strong> a computer with <strong>VE</strong> Configure<br />
It is necessary <strong>to</strong> know several things before connecting your Victron product <strong>to</strong> a computer.<br />
• Phoenix Chargers, Phoenix Multi (including Compact) and larger Phoenix Inverters are all compatible<br />
with <strong>VE</strong> <strong>configure</strong>. All other models are not.<br />
• <strong>VE</strong> Configure 1 works with software<br />
1. 14xx100.HEX up <strong>to</strong> 14xx118.HEX (Phoenix chargers)<br />
2. All 15xxxxxx.HEX (Phoenix Multis/ Inverters)<br />
3. 17xx100>HEX up <strong>to</strong> 17xx129.HEX (Phoenix Multis/ Inverters)<br />
• <strong>VE</strong> Configure 2 is compatible with newer software versions.<br />
• You can find the software version number on the on the white sticker on the microprocessor on the<br />
controller PCB<br />
You can use converter MK1b (or latterly MK2b) <strong>to</strong> connect the UTP cable (same as the remote control cable)<br />
<strong>to</strong> an available serial COM port on your computer.<br />
Although the <strong>VE</strong> Configure program still supports MK1b converters we recommend using MK2b or<br />
higher. Victron Energy will not give support if you encounter communication problems when using an<br />
MK1b.<br />
If you do not have a free COM port, you can use the USB converter <strong>to</strong> simulate a COM port.<br />
Ask your Victron dealer for a suitable adapter cable for this purpose.<br />
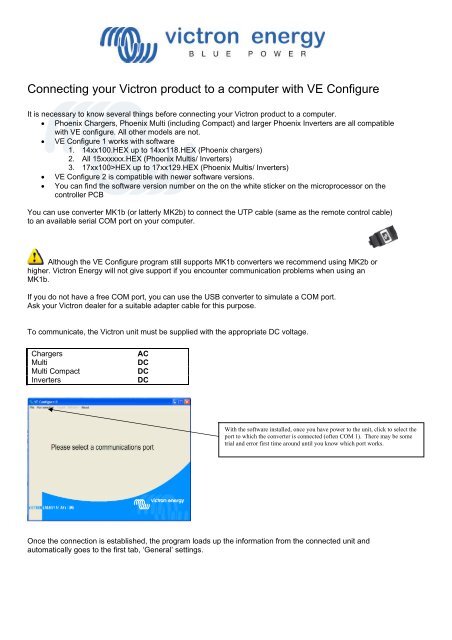
To communicate, the Victron unit must be supplied with the appropriate DC voltage.<br />
Chargers<br />
Multi<br />
Multi Compact<br />
Inverters<br />
AC<br />
DC<br />
DC<br />
DC<br />
With the software installed, once you have power <strong>to</strong> the unit, click <strong>to</strong> select the<br />
port <strong>to</strong> which the converter is connected (often COM 1). There may be some<br />
trial and error first time around until you know which port works.<br />
Once the connection is established, the program loads up the information from the connected unit and<br />
au<strong>to</strong>matically goes <strong>to</strong> the first tab, ‘General’ settings.