

Chairside - Glidewell Dental Labs
Chairside - Glidewell Dental Labs
Chairside - Glidewell Dental Labs

Create successful ePaper yourself
Turn your PDF publications into a flip-book with our unique Google optimized e-Paper software.
Patient Positioning<br />
You can take the necessary pictures with the chair in two<br />
positions: completely horizontal and at 45 degrees from<br />
horizontal (Figs. 3, 4). With the chair at an inclination of<br />
about 45 degrees, you can take the anterior, right and left<br />
retracted views, as well as the three headshots. For nicer<br />
looking pictures, you can take the three headshots with the<br />
patient standing in front of a contrasting background.<br />
Tips for Better Photos<br />
• Standardize the photographs by taking them at the same<br />
distance from the subject every time. That way, it will be<br />
easier to compare “before” and “after” shots.<br />
• Do not change the “P” or program mode in the Pentax<br />
Optio W90. This will standardize your exposure settings<br />
because the camera’s default setting will adjust the focus<br />
and the exposure for you automatically, and the lighting<br />
should not change in the operatory.<br />
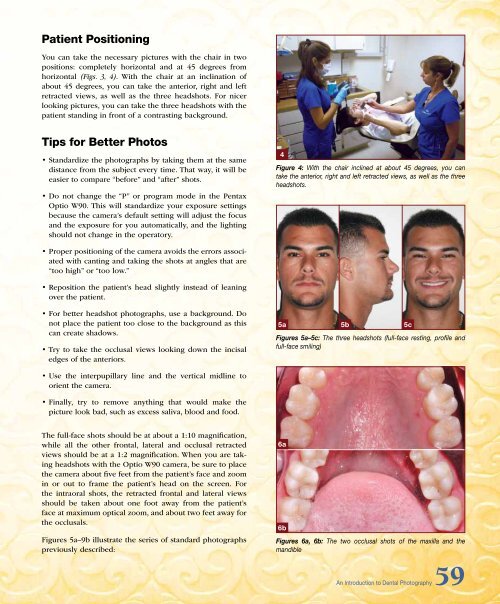
4<br />
Figure 4: With the chair inclined at about 45 degrees, you can<br />
take the anterior, right and left retracted views, as well as the three<br />
headshots.<br />
• Proper positioning of the camera avoids the errors associated<br />
with canting and taking the shots at angles that are<br />
“too high” or “too low.”<br />
• Reposition the patient’s head slightly instead of leaning<br />
over the patient.<br />
• For better headshot photographs, use a background. Do<br />
not place the patient too close to the background as this<br />
can create shadows.<br />
• Try to take the occlusal views looking down the incisal<br />
edges of the anteriors.<br />
5a 5b 5c<br />
Figures 5a–5c: The three headshots (full-face resting, profile and<br />
full-face smiling)<br />
• Use the interpupillary line and the vertical midline to<br />
orient the camera.<br />
• Finally, try to remove anything that would make the<br />
picture look bad, such as excess saliva, blood and food.<br />
The full-face shots should be at about a 1:10 magnification,<br />
while all the other frontal, lateral and occlusal retracted<br />
views should be at a 1:2 magnification. When you are taking<br />
headshots with the Optio W90 camera, be sure to place<br />
the camera about five feet from the patient’s face and zoom<br />
in or out to frame the patient’s head on the screen. For<br />
the intraoral shots, the retracted frontal and lateral views<br />
should be taken about one foot away from the patient’s<br />
face at maximum optical zoom, and about two feet away for<br />
the occlusals.<br />
Figures 5a–9b illustrate the series of standard photographs<br />
previously described:<br />
6a<br />
6b<br />
Figures 6a, 6b: The two occlusal shots of the maxilla and the<br />
mandible<br />
An Introduction to <strong>Dental</strong> Photography59


