

VIDEO INSPECTION SYSTEM - Harbor Freight Tools
VIDEO INSPECTION SYSTEM - Harbor Freight Tools
VIDEO INSPECTION SYSTEM - Harbor Freight Tools

You also want an ePaper? Increase the reach of your titles
YUMPU automatically turns print PDFs into web optimized ePapers that Google loves.
look at the monitor screen to see if<br />
the LED’s are on or not.<br />
(See Figure B.)<br />
NOTE: This product is ideal for<br />
pipes 1-1/2”-4-3/4” inner diameter<br />
with multiple bends.<br />
9.<br />
Push in on the Camera (A) button<br />
if using the C1 Camera Input (K).<br />
Leave the button out if using the C2<br />
Input (L). An image should appear<br />
on the Monitor (2). If not, recheck the<br />
connections. (See Figure B.)<br />
13.<br />
Adjust the Brightness (E) and Contrast<br />
(D) on the front of the Monitor<br />
(2). If additional light is needed, push<br />
on the LED Switch (B) on the front<br />
of the Monitor. Adjust the brightness<br />
of the LED lights with the Dimmer<br />
Switch (C). (See Figure B.)<br />
14.<br />
To reel the Cable (3) back in, carefully<br />
guide the Cable (3) back into the<br />
reel with one hand, while turning the<br />
reel with the other. To prevent damage,<br />
do not sharply bend the cable.<br />
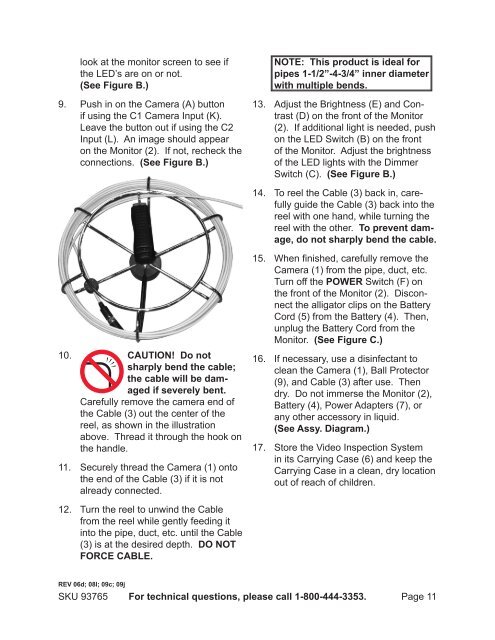
10. CAUTION! Do not<br />
sharply bend the cable;<br />
the cable will be damaged<br />
if severely bent.<br />
Carefully remove the camera end of<br />
the Cable (3) out the center of the<br />
reel, as shown in the illustration<br />
above. Thread it through the hook on<br />
the handle.<br />
11.<br />
Securely thread the Camera (1) onto<br />
the end of the Cable (3) if it is not<br />
already connected.<br />
15.<br />
16.<br />
17.<br />
When finished, carefully remove the<br />
Camera (1) from the pipe, duct, etc.<br />
Turn off the POWER Switch (F) on<br />
the front of the Monitor (2). Disconnect<br />
the alligator clips on the Battery<br />
Cord (5) from the Battery (4). Then,<br />
unplug the Battery Cord from the<br />
Monitor. (See Figure C.)<br />
If necessary, use a disinfectant to<br />
clean the Camera (1), Ball Protector<br />
(9), and Cable (3) after use. Then<br />
dry. Do not immerse the Monitor (2),<br />
Battery (4), Power Adapters (7), or<br />
any other accessory in liquid.<br />
(See Assy. Diagram.)<br />
Store the Video Inspection System<br />
in its Carrying Case (6) and keep the<br />
Carrying Case in a clean, dry location<br />
out of reach of children.<br />
12.<br />
Turn the reel to unwind the Cable<br />
from the reel while gently feeding it<br />
into the pipe, duct, etc. until the Cable<br />
(3) is at the desired depth. DO NOT<br />
FORCE CABLE.<br />
REV 06d; 08l; 09c; 09j<br />
SKU 93765<br />
For technical questions, please call 1-800-444-3353.<br />
Page 11


