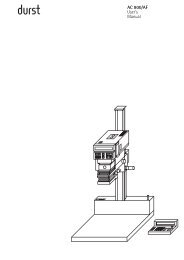
Instruction Manual ColorLine 5000 Analyzer
Instruction Manual ColorLine 5000 Analyzer
Instruction Manual ColorLine 5000 Analyzer

You also want an ePaper? Increase the reach of your titles
YUMPU automatically turns print PDFs into web optimized ePapers that Google loves.
Control Functions<br />
4-line LCD Screen<br />
The 4-line LCD screen displays the information about current conditions or what to do next, for the mode<br />
of operation you have selected.<br />
Rotary Encoder Wheel<br />
The Rotary Encoder Wheel allows you to quickly change information within a field. For instance, in the<br />
Standby Mode, turning the Rotary Encoder Wheel changes the time displayed on the LCD screen. This<br />
control can be used for manual time changes, or using the <strong>ColorLine</strong> <strong>5000</strong> as a manual timer. (When the<br />
time changes, the LCD screen also shows the exposure time in + or - log Density as well, providing for<br />
easy fractional exposure changes.)<br />
If you press and hold (for about five seconds) any of the buttons on the control panel while turning on the<br />
power switch of the power module, you will see the user menu appear on the LCD screen. From there<br />
you can choose several options:<br />
Set Key<br />
Setup of the variable contrast filtration table<br />
Setup of contrast tables for black & white papers<br />
Illumination level selection for the control panel (backlight)<br />
Choice of lines or numeric values on the LCD screen during analyzing functions<br />
Language selection for the LCD screen<br />
Reset the factory default values<br />
Set the average factor<br />
The Set Key has three main functions:<br />
Densi Key<br />
It takes you out of the analyze mode normal window and allows you to move around the Set<br />
Mode window to make program changes.<br />
Pressed in combination with the Densi key it takes you through the steps of auto-programming to<br />
a gray print.<br />
When in the Analyze Mode, and pressed in combination with the Densi key, it takes you through<br />
the steps of programming to a known image.<br />
The Densi Key is used in combination with the Set key as described above. It also toggles the beeping<br />
sound on and off. After pressing the start/stop key to begin timing an exposure, you can press the Densi<br />
key to switch on or off the beeping sound. It produces a short beep once per second while the timer is<br />
counting down with one long beep at the end of the exposure.<br />
The three buttons in the bottom row of the control panel have two different sets of labels. Read the top<br />
label when in normal Analyze Mode functions: Analyze, Lamp, Start/Stop. Read the bottom row of labels<br />
when you have pressed the Set key and are navigating the fields of information available there.<br />
Analyze/Enter Key<br />
The Analyze/Enter key activates the normal analyzing function. In Set mode, it allows you to enter a new<br />
level of the programming functions. For instance, when the CAL field is blinking, pressing this key allows<br />
you to 'enter' the Calibration window. Then change the calibration values using other buttons and the<br />
encoder wheel.<br />
Lamp/Escape Key