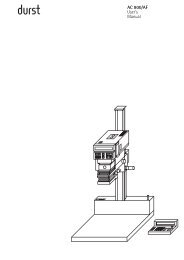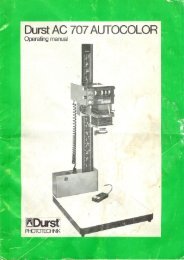
Instruction Manual ColorLine 5000 Analyzer
Instruction Manual ColorLine 5000 Analyzer
Instruction Manual ColorLine 5000 Analyzer

You also want an ePaper? Increase the reach of your titles
YUMPU automatically turns print PDFs into web optimized ePapers that Google loves.
<strong>Instruction</strong> <strong>Manual</strong><br />
For The<br />
<strong>ColorLine</strong> <strong>5000</strong> <strong>Analyzer</strong><br />
#6230<br />
Including Programming Tips & Techniques
Index<br />
<strong>ColorLine</strong> <strong>5000</strong> Quick Start for Color Prints form Negatives<br />
Introduction<br />
Specifications<br />
Set-Up<br />
Power Connections for Most Enlargers<br />
Fan-Cooled Enlargers<br />
Items Included with the <strong>ColorLine</strong> <strong>5000</strong><br />
Initialization<br />
Definition of Terms<br />
The Vocabulary of Analyzing<br />
Control Panel<br />
Probe and Sensor<br />
Spot Cover<br />
Part-Integration Cover<br />
Image Diffuser<br />
Multiple Readings<br />
Cosine Correction<br />
Rotary Encoder<br />
Known Image<br />
Standby Mode<br />
Analyze Mode<br />
Set Mode<br />
LogD, CC’s, and Points<br />
<strong>ColorLine</strong> <strong>5000</strong> Controls<br />
Control Functions<br />
4-line LCD Screen<br />
Rotary Encoder Wheel<br />
Set Key<br />
Densi Key<br />
Analyze/Enter Key<br />
Lamp/Escape Key<br />
Start/Stop/Step Key<br />
Fields and Windows Functions<br />
Paper Type Selection Field<br />
Probe Cover Selection Field<br />
CAL Selection Field<br />
Slope Selection Field<br />
Master Channel Selection Field<br />
<strong>Analyzer</strong> Menu Options<br />
Getting Started<br />
Programming for Color (Programming to a 'Known' Image)<br />
Analyzing Color<br />
Multi-Point Analyzing<br />
Quick Start Black & White Programming
Additional Functions<br />
Auto-Programming a 'Perfect' Gray Print<br />
Slope Calibration<br />
Use as a Reference Densitometer<br />
Using the <strong>ColorLine</strong> <strong>5000</strong> to Verify Filtration Values<br />
Calibration with Black & White Materials<br />
Variable Contrast Paper VC Table<br />
Black & White Paper Contrast Table
COLORLINE <strong>5000</strong> QUICK START FOR COLOR PRINTS FORM<br />
NEGATIVES<br />
Why can't things be simple? In the good old days when on-easel color analyzers first came into the<br />
marketplace they were little more than a light meter to guide the user to a filter pack for enlarging color<br />
negatives. Comparing that to the <strong>ColorLine</strong> <strong>5000</strong> <strong>Analyzer</strong> of today, and it's like comparing a pocket<br />
calculator to a 200mhz Pentium II computer. The <strong>ColorLine</strong> <strong>5000</strong> reads color or black and white filtration<br />
and exposure time simultaneously. It also:<br />
operates as a control panel for most enlargers<br />
serves as a timer for most enlargers<br />
provides an easy way to adjust exposure time in partial (1/30th of a stop increments) or full stops<br />
works as a color or b/w transmission densitometer measuring yellow, magenta and cyan and<br />
density<br />
programs itself (with a little help from you) to a standard gray for easy analyzing and process<br />
control<br />
measures and corrects for long exposure times (slope of reciprocity failure) with any print material<br />
reads and suggests the contrast grades and exposure times for black and white papers<br />
sets and measures the filtration for variable contrast black and white papers.<br />
With all these functions, it's no wonder that some people get a little bit confused when they first try to use<br />
the <strong>ColorLine</strong> <strong>5000</strong>. It can be compared to getting a new digital watch and not knowing which key to push<br />
and how many times to push it to set the alarm function. After a little bit of practice it becomes second<br />
nature.<br />
All that being said, I'd like to give you a "cheat sheet" of steps to use with the <strong>ColorLine</strong> <strong>5000</strong> to get you<br />
started quick and easy. Maybe these will make it simpler and easier for you to use. Warning! Some of the<br />
following information will get a bit tedious, because I want to cover each and every step needed.<br />
Selecting and Setting the Correct Channel<br />
The <strong>ColorLine</strong> <strong>5000</strong> has 99 channels to choose from. Each channel can be programmed for use with<br />
color negatives (NEGATIVE), prints from slides or transparencies (POSITIVE), black and white prints on<br />
graded paper(B/W), or prints on variable contrast black and white papers (V/CONTRA).<br />
Each channel can also be programmed to indicate which type of probe measurement method was<br />
programmed; spot measuring using the clear plastic probe cover (SPOT), partial integration using just the<br />
white plastic diffusion probe cover (PT/INIT) or fully integrated readings using both the white plastic<br />
diffusion probe cover plus the frosted diffuser under the enlarging lens (INTEG).<br />
If you want to select a different channel to use (other than the one you are currently in);<br />
1. Press the SET key, and the channel number will begin blinking.<br />
2. Now turn the encoder wheel until the channel number you want appears in the blinking field on<br />
the display.<br />
3. Press the LAMP key to return to the READY mode.<br />
If you want to change the characteristics of a channel, then while in the SET mode, press the<br />
START/STOP key until the field you want to change is blinking. For instance if you want to reprogram<br />
channel 20 for printing color negatives using the spot probe cover:<br />
1. Press the SET key. (The channel number field will be blinking.)<br />
2. Turn the ENCODER WHEEL until channel 20 appears in the number field.<br />
3. Press the START/STOP key one time so the material field is blinking.<br />
4. Turn the ENCODER WHEEL to display the word NEGATIVE.<br />
5. Press the START/STOP key once so the probe field is blinking.
6. Turn the ENCODER WHEEL to display the word SPOT.<br />
7. Press the LAMP key to return to the READY mode.<br />
This same technique applies to setting any field on any of the 99 channels.<br />
You might consider setting channels 1-10 for your most often used paper (eg: color negative), channels<br />
11 - 20 for B/W and 21 - 30 for reversal printing (if you do that). Keep a log of how each channel is<br />
configured and what each one is used for and the programmed settings. It will make life much easier than<br />
trying to remember it all.<br />
Programming to Make Color Prints from Negatives<br />
Having just made a "perfect" print, leave the enlarger's filter and lens settings alone, and note what time<br />
was used to make the print. For our example, let's say the time was 8 seconds. Make sure you are in the<br />
correct channel for programming this information. (The channel number itself could be anything from 1 to<br />
99, but you will want to be in a channel that is set for NEGATIVE and probably for SPOT reading.)<br />
1. Press the ANALYZE key.<br />
2. Place the probe in the part of the picture that you want to program for, such as skin tone, blue<br />
sky, green foliage; whatever will be useful to you. Be sure to cosine correct the probe if you are<br />
using the spot cover. (Cosine correction simply means tilting the probe so that the sensing cell is<br />
looking straight into the enlarger lens, and the probe opening is in the center of the projected<br />
circle.)<br />
3. Simultaneously press the top two keys (SET and DENSI) for about 1 second and then release<br />
them. The analyzer has now memorized the color of your selected area.<br />
4. Now turn the ENCODER WHEEL until the display shows 8 seconds. (Make sure it says 8<br />
seconds and not 8 tenths of a second.)<br />
5. Press the ANALYZE key to lock all this information into its memory. The analyzer is now<br />
programmed for whatever color was being measured by the probe's sensor, and set for the<br />
exposure time used when you made your "perfect" print.<br />
Analyzing a "New" Color Negative<br />
Once you have programmed the analyzer as described above, it's ready to use. After you place a "new"<br />
negative in the negative carrier just follow these easy steps.<br />
1. Press the ANALYZE key.<br />
2. Place the probe in the part of the picture that you have programmed for, such as skin tone, blue<br />
sky, green foliage, etc., and cosine correct the angle of the probe if you are using the clear spot<br />
cover. (Remember that the programmed color limits what you can analyze. If channel 20 is<br />
programmed for a skin tone, then that is all it will be useful for. A different channel will be needed<br />
for blue sky, or green foliage, etc.)<br />
3. Adjust the filter dials on your enlarger until the display on the <strong>ColorLine</strong> <strong>5000</strong> is nulled to zero in<br />
all three colors and the time displayed is within about 1/2 stop of the 8 seconds (or whatever<br />
time) your programmed to originally. (Later, when you have gone through the slope testing<br />
procedures, the time won't really matter. But until then, stay within 1/2 stop of the originally<br />
programmed time.)<br />
4. Press the LAMP key to turn off the analyzing function and lock in on the exposure time on the<br />
display. The enlarger lamp will remain switched on so you can finalize your composition.<br />
5. Then press the LAMP key again to switch off the enlarger lamp.<br />
6. Insert your paper into the easel and press the START/STOP key to begin the exposure.<br />
Now that you are more familiar with the analyzer's use, take the time to program a channel to produce<br />
truly neutral gray. This will make integrated readings more accurate. You can also use it to spot read<br />
cement or other gray areas in your negative; thus making your Colorline<br />
<strong>5000</strong> truly easier to use and more powerful than any other analyzer for the price! Oh, and be sure to<br />
record the settings for each channel in your darkroom log.
Now you know how to quickly set up a channel for use, program it and use it to analyze a new color<br />
negative. It's basically the same for prints from slides and black and white prints. So get back into your<br />
darkroom and let these simple instructions help you make great prints right away.
INTRODUCTION<br />
Thank you for selecting the JOBO <strong>ColorLine</strong> <strong>5000</strong> <strong>Analyzer</strong>. It is the latest in a long line of high quality<br />
color and black & white analyzer products from JOBO AG of Germany. In combination with your enlarger,<br />
you can easily print color negatives, color transparencies or black & white negatives, onto the print<br />
material of your choice. Once programmed, it will establish both your exposure and your filter pack for<br />
color prints, as well as the exposure and contrast grade for black & white prints. It also serves as a timer<br />
and densitometer. Its LCD screen shows you needed information regarding filtration and exposure, as<br />
well as providing information on what step to take next when using the analyzer.<br />
Please read this instruction manual before using the <strong>ColorLine</strong> <strong>5000</strong>. While the analyzer is remarkably<br />
easy to use, there are many functions available. Without reading this manual you may miss out on<br />
techniques which will make the <strong>ColorLine</strong> more productive for you.<br />
This instruction manual has been divided two ways: First a quick start group of instructions to help you<br />
get productive with its basic functions right away, followed by a very detailed set of instructions to help<br />
you understand the details of its operation. Secondly these sections are broken down by paper groups:<br />
Color negative, color positive, black & white variable contrast, and black & white graded papers. We have<br />
attempted to keep these sections independent of each other, so you won’t have to flip back and forth<br />
throughout the book to complete one series of functions.<br />
At JOBO, we strive to provide you with great products and customer support. This instruction manual is a<br />
part of that support program. If you have any suggestions which you feel would enhance the instructions<br />
and provide better information to the user, please feel free to contact JOBO Customer Service. We<br />
appreciate your input.
Specifications<br />
Suitable paper types:<br />
Color negative<br />
Color positive<br />
Black & white graded<br />
Black & white variable contrast<br />
Sensor:<br />
6 mm spot<br />
Sensor accessories:<br />
Part-integrated diffuser<br />
Full-integration diffuser<br />
Paper channels:<br />
99 channels<br />
Switched power:<br />
500 Watts<br />
Light range:<br />
0.0025 to 50 lux<br />
Exposure accuracy:<br />
0.01 logD<br />
Exposure accuracy in range 0.1..99.9 seconds:<br />
0.1 second increments<br />
Exposure accuracy in range 100..999 seconds:<br />
1 second increments<br />
Color balance accuracy:<br />
0.01 logD<br />
Slope correction accuracy:<br />
0.2%<br />
Number of averaged points during analyzing:<br />
1 to 10 readings<br />
Contrast grade range:
0 to 5 grade<br />
Contrast grade accuracy:<br />
0.5 grade<br />
Note: All data is saved in backup memory, however the battery life is limited (up to five years). It is<br />
important to maintain a notebook or journal with your program reference numbers in it. That way, if the<br />
battery dies, you will still be able to reprogram the analyzer with your current information.<br />
WARNING: The <strong>ColorLine</strong> unit and especially the probe are very sensitive. Do not attempt to open them!<br />
Every unit and sensor are matched to each other and can be changed and re-calibrated only by the<br />
JOBO Service Department! Do not store the analyzer in excessive heat or cold (beyond 15 to 30 degrees<br />
C, or 60 to 85 degrees F).
Set-Up<br />
Power Connections for Most Enlargers<br />
Connect the low voltage power cable from the <strong>ColorLine</strong> control module into the power supply. Connect<br />
your enlarger’s power plug into the <strong>ColorLine</strong> piggyback socket. Then connect the power plug into your<br />
power outlet. Switch on the unit by pressing the switch on the power supply. Readings from the analyzer<br />
will be more consistent if you allow five minutes or more for warm-up prior to use.<br />
Fan-Cooled Enlargers<br />
Some enlargers operate with a continuously running fan to keep their lamphouses cool. Make certain that<br />
you connect the <strong>ColorLine</strong> <strong>5000</strong> the same way you would a normal timer, so that the fan will operate<br />
normally. If there is no way to use a standard timer, you cannot use the timing operation of the <strong>ColorLine</strong><br />
<strong>5000</strong>. You must transfer the time to the enlarger’s timer manually.<br />
Items Included with the <strong>ColorLine</strong> <strong>5000</strong><br />
Each analyzer comes with the following items:<br />
<strong>Analyzer</strong> with non-detachable probe<br />
Power supply module (part #92273 for 120 volts, or #92254 for 220 volts)<br />
Clear spot probe cover (part #11440)<br />
Part-integration probe cover (part #11441)<br />
Image diffuser (part #16520)<br />
Black & white negative, color negative, and color transparency of a gray card, one each (part<br />
#16522)<br />
Carrying case (#86360), includes inserts: #88063, #88064, and #88065<br />
This instruction manual, English edition (part #66050)<br />
Initialization<br />
Initialization of the analyzer has been performed at the factory. No further initialization is needed.
Definition of Terms<br />
The Vocabulary of Analyzing<br />
Throughout this instruction manual we will be using terms with which you may not be familiar if you have<br />
not used analyzers previously. Some terms are new with the <strong>ColorLine</strong> <strong>5000</strong>. Understanding these terms<br />
will help you follow the instructions better. Please take a few moments to read and understand the terms<br />
listed below. They will aid you as you learn to use the <strong>ColorLine</strong> <strong>5000</strong>.<br />
Control Panel<br />
This display is where all the 'action' takes place. The LCD screen, the five push buttons and the rotary<br />
encoder wheel make up the components of the control panel. LED’s in the panel help you to find the right<br />
controls in the dark.<br />
Probe and Sensor<br />
The probe is the measuring equipment of the analyzer. The sensor is the small 6 mm area in the center of<br />
the probe. It is the part which is light sensitive. The probe housing has slots to accept different light<br />
modifier covers. These covers allow for measuring in three ways: Spot, partial integration, and total<br />
integration.<br />
Spot Cover<br />
This clear piece of plastic with a hole cut in its center is the primary means of measuring the quality and<br />
quantity of light in a given area of a projected image. The hole in the cover casts a shadow. By centering<br />
this shadow around the sensor below, you can be assured of getting consistent light measurements. This<br />
procedure is used to adjust the cosine. (see below)<br />
Part-Integration Cover<br />
This translucent white plastic piece slides into grooves in the top of the probe (like the spot cover above).<br />
The advantage of this probe cover is that you don’t have to have a consistent single color or density area<br />
to measure. Instead, you place the probe with this cover in position in the most 'scrambled' part of the<br />
picture. Look for different colors and different densities, all in a single area, that fit the surface of the partintegration<br />
cover. All the colors and densities falling on the part-integration cover will end up mixed, and<br />
be approximately equal to a neutral gray.<br />
Image Diffuser<br />
This small frosted plastic panel is to be placed under the lens of your enlarger, possibly in a filter holder.<br />
(The holder that may have contained a red filter that came with your enlarger.) With the image diffuser<br />
under the lens, and the part-integration cover on the probe, you can make full-integration readings, which<br />
totally integrates all the image colors and densities rather than just those that fall within a two inch square<br />
area. The problem with this type of reading that it is difficult to compensate for any dominant color in the<br />
picture such as green grass or a blue sky.<br />
Multiple Readings<br />
This method of reading is great when you don’t have any part of the picture large enough for taking a<br />
single reading using a programmed area (such as skin tones, gray or white). By taking multiple readings,<br />
you can select a variety of areas as significant samples of the total picture. When averaged together by<br />
the analyzer, they may average to neutral gray, yielding excellent results.<br />
Cosine Correction<br />
When you took those advanced math courses in high school, you probably thought you would never need<br />
to use sine, cosine, and tangent when you got out into the 'real' world. Well, here is a real world use for
cosine. This term actually refers to the ability to tilt the probe of the analyzer so it is 'looking' directly into<br />
the lens of the enlarger. It is very important for the light coming from the lens to enter straight into the<br />
probe’s sensor. If the probe is out of alignment by just a couple degrees, some of the light will reflect off<br />
the sensor’s surface and not be measured accurately. When using the spot cover, be sure that the<br />
shadow of the hole is centered around the sensor. Accuracy here will pay off in more consistent results.<br />
Rotary Encoder<br />
The rotary encoder wheel is on the right side of the analyzer. It is used for rapidly scrolling through many<br />
of the options and operations of the <strong>ColorLine</strong> <strong>5000</strong>.<br />
Known Image<br />
A known image is a negative or transparency you have already printed successfully It is used to program<br />
the analyzer for a specific color or density. With this program you may make prints containing the same<br />
color or density.<br />
Standby Mode<br />
This mode is the normal 'resting' state of the analyzer. It is waiting for your command to start an<br />
exposure, turn on the enlarger lamp, change an exposure time, analyze or change program information.<br />
Simply select a button to press, or turn the rotary encoder to proceed.<br />
Analyze Mode<br />
When you press the Analyze button in the standby mode, you enter the Analyze Mode. The analyzer will<br />
display information on the LCD screen to help you make the right enlarger settings for your next image.<br />
Set Mode<br />
When you press the Set key in the standby mode, you enter the Set Mode. You are able to navigate<br />
through the various fields of the program memory, reading or changing the information shown. Most often<br />
you will use this mode to switch to a different program channel.<br />
LogD, CC's, and Points<br />
The density value of an image or filter is often expressed as 'logD', 'cc’s' or 'points.' LogD is most often<br />
used in readings of density with films or prints. Points or cc’s are usually used for color printing filter<br />
values. All three terms relate to the same system of measuring. They refer to the 'logarithmic value' of the<br />
density. With logD (logarithmic density) and cc’s (color correction), the value is expressed as an integer<br />
(single place digit) followed by a value expressed as hundredths, i.e., '1.30.' Points are expressed as<br />
percent values of this figure, i.e., a logD value of 1.30 = '130' points. For every one ƒ stop of density<br />
change on the film or print, there is a change of 0.30 logD or 30 points (larger numbers equal more<br />
density). This figure is additive, so two ƒ stops would be 0.60 logD or 60 points etc.<br />
Equal values of all three primary (red, green, and blue) or all three secondary (magenta, yellow, and<br />
cyan) colors give a neutral gray color, i.e., M 0.30 plus Y 0.30 plus C 0.30 equals a neutral gray<br />
(sometimes referred to as 'optical density') of 0.30, or a neutral density value of one ƒ stop. Another<br />
example is; M 0.30 and Y 0.90 and C 0.30 is equal to M 0.00 and Y 0.60 and C 0.00 with 0.30 of neutral<br />
density.
<strong>ColorLine</strong> <strong>5000</strong> Controls<br />
(Click on a control to go to the description.)<br />
Wiring Diagram<br />
Adjust the Probe Cosine
Control Functions<br />
4-line LCD Screen<br />
The 4-line LCD screen displays the information about current conditions or what to do next, for the mode<br />
of operation you have selected.<br />
Rotary Encoder Wheel<br />
The Rotary Encoder Wheel allows you to quickly change information within a field. For instance, in the<br />
Standby Mode, turning the Rotary Encoder Wheel changes the time displayed on the LCD screen. This<br />
control can be used for manual time changes, or using the <strong>ColorLine</strong> <strong>5000</strong> as a manual timer. (When the<br />
time changes, the LCD screen also shows the exposure time in + or - log Density as well, providing for<br />
easy fractional exposure changes.)<br />
If you press and hold (for about five seconds) any of the buttons on the control panel while turning on the<br />
power switch of the power module, you will see the user menu appear on the LCD screen. From there<br />
you can choose several options:<br />
Set Key<br />
Setup of the variable contrast filtration table<br />
Setup of contrast tables for black & white papers<br />
Illumination level selection for the control panel (backlight)<br />
Choice of lines or numeric values on the LCD screen during analyzing functions<br />
Language selection for the LCD screen<br />
Reset the factory default values<br />
Set the average factor<br />
The Set Key has three main functions:<br />
Densi Key<br />
It takes you out of the analyze mode normal window and allows you to move around the Set<br />
Mode window to make program changes.<br />
Pressed in combination with the Densi key it takes you through the steps of auto-programming to<br />
a gray print.<br />
When in the Analyze Mode, and pressed in combination with the Densi key, it takes you through<br />
the steps of programming to a known image.<br />
The Densi Key is used in combination with the Set key as described above. It also toggles the beeping<br />
sound on and off. After pressing the start/stop key to begin timing an exposure, you can press the Densi<br />
key to switch on or off the beeping sound. It produces a short beep once per second while the timer is<br />
counting down with one long beep at the end of the exposure.<br />
The three buttons in the bottom row of the control panel have two different sets of labels. Read the top<br />
label when in normal Analyze Mode functions: Analyze, Lamp, Start/Stop. Read the bottom row of labels<br />
when you have pressed the Set key and are navigating the fields of information available there.<br />
Analyze/Enter Key<br />
The Analyze/Enter key activates the normal analyzing function. In Set mode, it allows you to enter a new<br />
level of the programming functions. For instance, when the CAL field is blinking, pressing this key allows<br />
you to 'enter' the Calibration window. Then change the calibration values using other buttons and the<br />
encoder wheel.<br />
Lamp/Escape Key
The Lamp/Escape key normally acts as a switch for your enlarger lamp, just like the focus switch on an<br />
enlarging timer. When used in the Set Mode, pressing this key allows you to 'escape' from the level of<br />
programming you are in. In the example mentioned above, after you have changed the calibration values,<br />
press the Escape key to leave the calibration window and return to navigate the Set Mode window.<br />
Start/Stop/Step Key<br />
The Start/Stop/Step key starts and stops the timing of an exposure when in Standby Mode. The<br />
exposure can be started and stopped as many times as desired. When in Set Mode, this key 'steps' you<br />
through the various fields in any window. For instance in the Set Program window (the one you see when<br />
you simply press the Set key), the Step key will take you in order from the program number field:<br />
To the paper type field<br />
To the probe cover selection field<br />
To the CAL (calibration) field<br />
To the slope selection field<br />
To the Master channel selection field<br />
To the User Menu Access field (an alternate access to the same menu found when switching on<br />
the power while holding down any of the five keys)<br />
Back to the program number field again.<br />
Fields and Windows Functions<br />
Paper Type Selection Field<br />
The <strong>ColorLine</strong> <strong>5000</strong> has 99 individual programmable memory channels. They can be used for different<br />
subjects, different paper types, different colors, different densities, etc.<br />
The Paper Type Selection Field gives you a choice of four paper types: Color negative, color positive,<br />
black & white, and variable contrast (V/CONTR) black & white.<br />
When you adjust a Master channel characteristic, it will affect ALL papers under the same paper type. It<br />
makes a 'parallel' adjustment to all channels of that type. The master channel is very handy for adjusting<br />
to changing process conditions, such as aging developer, since it affects all programs the same way.<br />
Probe Cover Selection Field<br />
The Probe Cover Selection Field allows you to select among three different probe cover selections or<br />
conditions: Spot, Part Integrated, and Fully-Integrated. The spot cover is a clear plastic cover with a hole<br />
in the center used for cosine correction. Spot analyzing is most commonly used when you have an image<br />
with a color or density for which you are already programmed, such as skin tone, white, or gray. The partintegrated<br />
reading uses a translucent (milky white) plastic cover. The fully-integrated readings use the<br />
translucent cover plus another diffuser directly under the lens. These methods are most useful if you have<br />
images to print without any 'standard' reference areas. However, they have been largely replaced by<br />
using the spot cover with a multiple reading technique. By measuring up to 10 different parts of the<br />
picture, you can control exactly what the analyzer reads. If you select a variety of densities (and colors),<br />
the reading will average to a medium gray, and usually gives very good results.<br />
CAL Selection Field<br />
The CAL Selection Field gives you access to the reference numbers which control the calibration of<br />
each individual channel. These numbers can be changed manually through this field selection or<br />
automatically by using either of two auto-programming methods: Programming to a known image, or<br />
auto-programming to a gray strip. If you choose to adjust them manually, this (and all of the various<br />
calibrating fields) can be adjusted by logD or 'point' numbers. That is, if you want to make a 1 stop<br />
change to the density channel, just add or subtract 30 points. (30 logD units = 1 stop) Or if you want to<br />
make a 15 yellow shift to a program, just add or subtract 15 points to the yellow channel.
Slope Selection Field<br />
The Slope Selection Field gives you access to the reference numbers which control the slope settings<br />
for each individual channel. Slope refers to a graphic representation of the sensitivity of the paper in<br />
response to different exposure times. As the exposure times get longer, you will generally need even<br />
more time, to get an equivalent density to short exposures. For instance, 5 seconds at ƒ5.6 gives an<br />
equivalent density to 20 seconds at ƒ11 only when the paper has a straight line response instead of a<br />
curved slope (as many black & white papers do.) But in a typical color paper, the 20 second exposure at<br />
ƒ11 might have to be stretched out to 24 seconds or so, to give equal results due to the changing slope.<br />
The slope correction is automatically adjusted using the 'change slope' field in the change program<br />
window. Ordinarily you will not make a manual change to this field of information. A correct slope setting<br />
allows you to make exposures over a wide range of times, and still get consistently accurate densities in<br />
your prints.<br />
Note: After changing the slope setting, you may need to re-calibrate your program, best done by<br />
'programming to a known image.'<br />
The slope is specific to each individual channel (unlike the Master Channel described below), enabling<br />
you to work with different brands or types of paper for the same process. For instance, Fuji and Kodak<br />
papers can both be processed in RA-4 chemicals, but they have different slope settings. Since the slope<br />
setting in the <strong>ColorLine</strong> <strong>5000</strong> is 'attached' to the individual memory channel, you can work with both<br />
papers on different channels quite easily.<br />
Master Channel Selection Field<br />
The Master Channel Selection Field gives you access to the reference numbers which control the<br />
calibration of All Channels which share the same paper type.<br />
For instance, if you wanted to adjust for a change in the activity level of the developer for printing your<br />
color negatives, it would affect every color negative channel the same way. Rather than going through the<br />
tedious routine of changing each affected channel individually, you can make changes to the Master<br />
Channel field once for all the color negative papers. (This feature also applies to any of the other paper<br />
types. It introduces a 'parallel' change to all channels sharing the same paper type.) You can make the<br />
changes manually through this selection field or automatically by using either of the two autoprogramming<br />
methods: Programming to a known image, or auto-programming to a gray strip.<br />
<strong>Analyzer</strong> Menu Options<br />
With the <strong>ColorLine</strong> <strong>5000</strong> switched off, press the Densi key and turn on the power switch (on the power<br />
module). Or, in the Set mode, press the Step key 6 times until you see —User Menu— blinking, and then<br />
press the Enter key.<br />
Turn the rotary encoder wheel until you see the cursor pointing to the line 'Set Language.'<br />
Press the enter key, and using the step key, scroll through the list of available languages.<br />
Press the enter key when you have selected the language of your choice.<br />
Turn the rotary encoder wheel until you see the cursor pointing to the line 'Set backlight' and press the<br />
enter key.<br />
Now by pressing the step key, or turning the rotary encoder wheel, you can scroll through the various<br />
illumination options. With your room lights switched off, you can see which illumination level suits you<br />
best. Remember that you don’t want the display too bright if it is near to the paper. Try to arrange your<br />
darkroom so that the paper does not pass by the illuminated display on the way from the papersafe to the<br />
easel.
Once you have selected the display brightness, press the enter key to return to the user menu.<br />
Turn the rotary encoder wheel until the cursor is pointing to 'Colorlines.'<br />
Press the enter key.<br />
By turning the rotary encoder wheel, you will be able to see the four options available in this menu. The<br />
flashing message at the bottom of each option describes the features of the option.<br />
Color Line type-1; 'non-lines analyze':<br />
C h a n n e l 8 8 N E G A T I V E<br />
- Y - - - M - - - C - L o g D - T i m e<br />
4 0 3 0 1 0 7 0 5 . 0 0<br />
- - - - - - A n a l y z e - - - - - - -<br />
With this option, all three colors are shown with a numeric value indicating how many points or<br />
cc’s of filtration are needed to null the analyzer.<br />
Color Line type-2; '2 lines analyze':<br />
C h a n n e l 8 8 N E G A T I V E<br />
_ _ _ _ _ _ _ * ¯ ¯ ¯ ¯<br />
¯ ¯ ¯<br />
L o g D 7 0 T i m e 5 . 0 0<br />
- - - - - - A n a l y z e - - - - - - -<br />
This option automatically zeroes the lowest filter change (normally cyan in printing negatives) and<br />
only shows the two active colors. Change your filter pack until the lines disappear and you are left<br />
with only the center reference mark.<br />
Color Line type-3; '3 lines analyze':<br />
C h a n n e l 8 8 N E G A T I V E<br />
_ _ _ _ _ _ _ * = = = =<br />
¯ ¯ ¯<br />
L o g D 7 0 T i m e 5 . 0 0<br />
- - - - - - A n a l y z e - - - - - - -<br />
With this option, you get a graphic representation of the needed change, in all three colors.<br />
Simply change your filter pack until the lines disappear and you are left with only the center<br />
reference mark.<br />
Color Line type-4; 'cyan zeroed analyze':<br />
C h a n n e l 8 8 N E G A T I V E<br />
- Y - - - M - - - C - L o g D - T i m e<br />
4 0 3 0 0 7 0 5 . 0 0<br />
- - - - - - A n a l y z e - - - - - - -
With this option the analyzer automatically zeroes out the cyan filtration numbers. It indicates only<br />
the needed filtration change in yellow and magenta.<br />
Select one of the four options for 'Colorlines' and press the enter key.<br />
Turn the rotary encoder wheel until the cursor is pointing to exit. Press the enter key.<br />
There are two other fields in the User Menu, both of which relate to setting up the contrast standards for<br />
black & white printing. One establishes the desired filtration for variable contrast paper grades. The other<br />
sets the range of densities for each contrast grade. You may want to wait until you have worked with the<br />
black & white programs for a while before changing the standard settings. However, they are easy to use<br />
when the time comes to reprogram these fields.
Getting Started<br />
A lot of the functions used in programming for color negative printing will also be used for programming<br />
color slide and black & white printing. The techniques are essentially the same. Only the paper and<br />
chemical processing will be changed. If you learn the methods for one category of paper, you can easily<br />
transfer the technique to other paper types.<br />
Programming for Color<br />
(Programming to a 'Known' Image)<br />
Begin with an image you have already printed successfully. Print it today! You must have filter pack and<br />
exposure settings that are accurate for today’s conditions, not some time in the past. Adjust the exposure<br />
and color balance as necessary to produce a print that is absolutely correct in exposure and color<br />
balance. The effectiveness of your programming depends on the accuracy of this initial print. Any error in<br />
this print will show up in all following prints made from its calibration.<br />
Having made a 'perfect' print of this image, leave the enlarger settings alone: Enlarger height, filtration<br />
and aperture setting, etc. You need them to be precisely the same as when you made the 'perfect' print.<br />
Select the channel you want to program. If you need to change to a different program number, press the<br />
set key and turn the rotary encoder wheel to get to the number you want. While you are in the Set Mode,<br />
make sure it is set for the correct paper type, and also check that it is set for the probe type that you plan<br />
to use. Different probe types will require different programs since they affect the light reaching the probe.<br />
Then press the escape key to return to the Standby Mode.<br />
You will want to have a notebook or journal to keep track of all the programs you enter into your <strong>ColorLine</strong><br />
<strong>5000</strong>. You might program channel 1 for a gray card, channel 2 for a skin tone, channel 3 for a white shirt,<br />
etc. Without the notebook it will be hard to remember which channel is for which color and which<br />
particular paper. A sample chart is included at the end of this manual for your convenience.<br />
With the room lights switched off, press the Analyze key on the control panel and make sure you are in<br />
the channel you want to program.<br />
Position the probe to read the exact spot in the image you want programmed (i.e. skin tone, white shirt,<br />
gray card, blue sky, etc.)<br />
Cosine correct the probe if you are using the spot cover. Cosine correction is Essential for accurate<br />
readings. The light must strike the sensor at exactly a 90o angle or some of the light may reflect off the<br />
sensor and not be measured. If you are not reading a part of the image which is directly below the lens,<br />
you will need to tilt and rotate the probe, until the shadow of the hole in the spot cover is centered around<br />
the sensor on the probe face. If you are using part-integrated or fully-integrated readings, it is not<br />
essential to cosine correct the probe.<br />
While in the Analyze Mode, press and hold both the Set and Densi keys. The <strong>ColorLine</strong> <strong>5000</strong> is now<br />
programmed for the color of the image, but still needs to be programmed for the exposure time. Turn the<br />
rotary encoder wheel until you get the time used for the exposure of the 'perfect' print. Then press Enter.<br />
If you are sure that you are satisfied with the above steps, press the enter key to update new calibration<br />
reference numbers for this channel. If you don’t want the <strong>ColorLine</strong> <strong>5000</strong> to enter the new numbers into<br />
memory, then press the escape key and exit this mode.<br />
After programming to a known image, the analyzer is in Standby Mode. You can check the program by<br />
pressing the analyze key. The LCD screen should indicate the colors are nulled and the time should be<br />
set for the time you input. If not, then start this sequence over again.
Now is a good time to enter all this reference information into your lab journal. Include the program’s<br />
target color (skin tone, white, gray, etc.) the paper type, the probe type, the calibration, slope, and master<br />
channel reference numbers.<br />
This channel is now programmed for the color and exposure you selected from your 'perfect' print. If there<br />
are other colors or densities in that print that you would also like to program the analyzer to know, now is<br />
a good time to do it. Typical programs might be for gray, white, and skin tones. With these three<br />
programs, you can print almost any image. If there is a good skin tone or a good white in the picture, your<br />
choice is easy. Select the correct channel, place the probe in that part of the image under the enlarger<br />
and press the Analyze key. If you don’t have a good white or skin tone, then use the gray channel and<br />
take multiple readings from different colors and different densities all over the image. These will average<br />
to gray, and generally give a very good print as a result.<br />
Analyzing Color<br />
1. Select an image to print that has the same kind of color in it as the program you have entered in<br />
your <strong>ColorLine</strong> <strong>5000</strong>. (Skin tone, gray card, white, etc.)<br />
2. Press the lamp key and adjust your enlarger to compose your print.<br />
3. Place the probe in an area of the new image that your program is calibrated for, i.e., skin tone or<br />
gray card etc.<br />
4. Press the analyze key. Turn the filter dials of your enlarger lamphouse until the colors are nulled<br />
out.<br />
5. Notice the exposure time. If you want it to be longer or shorter, adjust your lens aperture (ƒstop)<br />
to get the time you desire.<br />
6. Once you are satisfied with both the filter pack and exposure time, press the start/stop key<br />
7. Insert paper into the easel and press the start/stop key to start the exposure.<br />
8. If you wish to stop the exposure and restart it, you may do so by pressing the start/stop key.<br />
9. Process the print.<br />
Multi-Point Analyzing<br />
This measurement technique can help you to determine a correct filter pack when the color or density of<br />
the 'unknown' image does not exactly fit the programs you have available. If you have a group<br />
photograph, and don’t know which individual’s skin tone is closest to your program, analyze several of<br />
them to get an average skin tone. If you have a green program for scenics, try multiple readings of the<br />
green subjects in the image, to average the green.<br />
One exception to the procedure described above is the use of a gray channel. If you have a subject with<br />
no single suitable color for analyzing, then multiple readings of different colors and different densities can<br />
average to gray. The principle is similar to pouring different colors of paint into a single bucket. The<br />
greater the variety of colors and densities that you pour into the bucket, the more likely you are to end up<br />
with gray.<br />
The multi-point technique of the <strong>ColorLine</strong> <strong>5000</strong> allows up to 10 measurements to be averaged. If you go<br />
past 10 measurements, the information is lost and you need to start over. Fortunately, the LCD screen<br />
shows how many readings have been taken, so it’s easy to keep track of how many you have done.<br />
To use the multi-point technique follow these steps:<br />
1. Select a program which is most suitable for the image to be printed.<br />
2. After composing your enlargement, press the analyze key to turn on the enlarger and activate the<br />
Analyze Mode.
3. Place the probe in the first part of the projected image you plan to measure. Cosine correct the<br />
probe and press the analyze key. The bottom line of the LCD screen will now indicate you have<br />
measured point 1. Do Not Adjust Your Filters of the enlarger lamphouse until you have made<br />
your final measurement.<br />
4. Move the probe to another point you wish to measure. Cosine correct the probe again and press<br />
the analyze key. The screen will now indicate you have measured point 2.<br />
5. Repeat step 4 as few or as many times as needed, until all points you want have been measured.<br />
Do not exceed 10 measuring points or you will have to start over again. (You will lose all 10 of the<br />
readings.)<br />
6. At the final measuring point, Do Not Move The Probe after you have made the reading. The<br />
analyzer requires the information from the final reading for accurate results. Now adjust your filter<br />
pack to null out the color indicators on LCD screen and adjust the exposure time if you wish.<br />
7. Press the start/stop key to lock in the exposure time, and remove the probe.<br />
8. If you need to check for composition: Press the lamp key to turn on the enlarger, adjust your<br />
easel, press the lamp key to turn off the enlarger. Expose the print by pressing the start/stop key,<br />
and process the print.<br />
Quick Start Black & White Programming<br />
You use the same probe for color and black & white printing. When set for black & white, the probe is<br />
unaffected by standard safelights. It works with both fixed-grade and variable contrast papers. The VC in<br />
the black & white programs indicates any variable contrast paper.<br />
1. Begin with an image you have already printed successfully. Print it today! You must have the<br />
contrast grade and exposure settings that are accurate for today’s conditions, not some time in<br />
the past. Adjust the exposure and contrast as necessary to produce a print that is absolutely<br />
correct in exposure and contrast. The effectiveness of your programming depends on the<br />
accuracy of this initial print. Any error in this print will show up in all following prints made from its<br />
calibration.<br />
2. Having made a 'perfect' print of this image, leave the enlarger settings alone. You need them to<br />
be precisely the same as when you made the 'perfect' print.<br />
3. Select the channel you want to program. If you need to change to a different program number,<br />
press the set key and turn the rotary encoder wheel to get to the number you want. While you are<br />
in the Set Mode make sure it is set for the correct paper type, and also check that it is set for the<br />
correct probe type that you plan to use. Different probe types will require different programs since<br />
they affect the light reaching the probe. Then press the Escape key to return to the Standby<br />
Mode.<br />
4. You will want to have a notebook or journal to keep track of all the programs you enter into your<br />
<strong>ColorLine</strong> <strong>5000</strong>. You might program channel 1 for a mid-tone, channel 2 for a shadow density,<br />
channel 3 for a highlight density, etc. Without the notebook it will be hard to remember which<br />
channel is for which density and which particular paper. A sample chart is included at the end of<br />
this manual for your convenience.<br />
5. With the room lights switched off, press the Analyze key on the control panel and make sure the<br />
<strong>ColorLine</strong> is in the channel you want to program.<br />
6. Position the probe to read the exact spot in the image you want programmed (i.e. highlight,<br />
shadow, etc.)<br />
7. Cosine correct the probe if you are using the spot cover. Cosine correction is Essential for<br />
accurate readings. The light must strike the sensor at exactly a 90o angle or some of the light<br />
may reflect off the sensor and not be measured. If you are not reading a part of the image which<br />
is directly below the lens, you will need to tilt and rotate the probe, until the shadow of the hole in<br />
the spot cover is centered around the sensor on the probe face. If you are using part-integrated<br />
or fully-integrated readings, it is not essential to cosine correct the probe.<br />
8. While in the Analyze Mode, turn the rotary encoder wheel to set the contrast grade used to make<br />
the 'perfect' print. Then press and hold both the Set and Densi keys to program the channel. Turn<br />
the rotary encoder wheel to set the exposure time used for the 'perfect' print. Then press Enter.<br />
The channel is programmed.
Note: When working with graded black & white papers, you may need to use separate program channels<br />
for different paper grades, since they may have different printing speeds.
Additional Functions<br />
Auto-Programming a 'Perfect' Gray Print<br />
At first thought, you are likely to wonder why anyone would want a 'perfect' gray print. It’s not a very<br />
exciting subject, and you probably don’t ordinarily photograph a lot of gray cards. But there are three very<br />
good uses for this function.<br />
The first involves the master channel of the <strong>ColorLine</strong> <strong>5000</strong>. In order to get the master channel to work for<br />
you, there must be a calibrated gray print channel. When you process a gray test print, and find that the<br />
image has shifted slightly, use the 'reprogram master channel' function to adjust your analyzer. This<br />
corrects the filtration and/or exposure, so your processor makes 'perfect' prints again.<br />
Like the master channel, the slope setting requires the use of a gray print. Once you have a correct slope<br />
setting, you can expose your prints with a wide range of exposure times and get excellent results. Without<br />
a correctly adjusted slope setting, you Must work at a fixed exposure time to get consistent prints.<br />
A 'perfect' gray channel serves you well when you have an image to print that doesn’t have a color or<br />
density in the picture that matches any of your standard programs. Then all you have to do is take multipoint<br />
readings of different colors and different densities, and you’ll usually get a very good first print.<br />
This procedure is essentially the same for black & white or color. The difference is the black and white<br />
density will be displayed as one density number and the color as the three colors and the density.<br />
The following information describes the procedure for auto-programming for a 'perfect' gray test<br />
print:<br />
1. Cut a sheet of photo paper into approximately 9 x 12 cm (roughly 3-1/2" x 5") pieces. Make sure<br />
their size will work with your processing method (i.e. drum processor or roller transport<br />
processor). You simply need a piece of paper large enough to completely cover the top surface of<br />
the analyzer probe. Save the extra pieces in your papersafe for future test prints.<br />
2. Insert the appropriate gray film (color negative, color slide, black & white negative) into the<br />
enlarger and project an 8 x 10" image.<br />
3. Select an unused channel to program.<br />
4. Place the probe directly under the enlarging lens, on the baseboard, and press the analyze key.<br />
5. Null the analyzer by changing the filter pack of your enlarger<br />
6. Adjust the aperture of the enlarger lens to set the exposure time at 5.0 seconds. (Sometimes it<br />
may not be possible to get precisely 5.0 seconds; select the closest time possible. Accuracy at<br />
this phase is very important.)<br />
7. Press the start/stop key.<br />
8. Expose a test print, by pressing the start/stop key.<br />
9. Process and dry this test print plus a second sheet of paper for a paperbase reference. With<br />
negative printing paper, use an unexposed piece of paper. For reversal materials, you will need<br />
to expose it to light to make a print that is white, showing just base plus fog. Use at least a 10<br />
second exposure to white light. Even longer will be okay.<br />
10. Place the probe directly under the enlarger lens, press the Densi key and while holding it down,<br />
press the set key. This will activate the densitometer.<br />
11. Put the white (base plus fog sample) paper on top of the probe. Be sure it covers the entire top<br />
surface of the probe.<br />
12. Remove the film from the carrier of the enlarger. Set the filter pack to zero (or use your 'whitelight'<br />
switch) to zero all filtration. Open the lens aperture fully.<br />
13. Press the SET key. This sets the current density values (of the white paper) as a reference for<br />
the base plus fog density of the paper.<br />
14. While holding the probe securely, remove the white paper sample and place the test print over<br />
the top of the probe. You can now read the relative log densities of the three color layers of the<br />
test print. The color negative test print is considered to be satisfactory if all three color density<br />
values are in the range of 55 - 60 points, and the difference is not more than 2 between any of
the numbers. For instance Y 58 - M 57 - C 59 would be acceptable and considered neutral. Y 58 -<br />
M 57 - C 60 would not be acceptable since the M and C readings are more than 2 points apart.<br />
Note: When programming prints from transparencies, all three density values should be in the range of<br />
45 - 50 points. With black & white there will be only one number displayed at between 55 and 60. The rest<br />
of the procedure is the same.<br />
15. If you don’t want to change the calibrations, or if the density readings in step 13 were neutral and<br />
in the acceptable range, then press the enter key and using the rotary encoder, select 'Cancel<br />
Change' and the program will remain unchanged. If you need to improve the program go on to<br />
step 16.<br />
16. With the test print still over the probe, press the enter key. If the readings were not acceptable in step 15, use<br />
the rotary encoder to select "change CAL". Then press ENTER. The program reference numbers have now been<br />
automatically adjusted to give an improved test print on the next cycle of testing. Return to step 2<br />
and start again. It is not unusual for this sequence to take 6 - 12 test prints to achieve the 'perfect'<br />
gray print.<br />
Note: When you start over at step 2 in each cycle remember to analyze the negative again. Without<br />
reanalyzing at this point, you would not introduce the improvements in the program into the next test print.<br />
Slope Calibration<br />
This procedure is essentially the same as the gray test in the section above. The main difference is that<br />
instead of just trying to get a gray print, you are now trying to get two matched gray prints from two<br />
different but 'equal' exposures. For example 5 seconds at ƒ5.6 and 20 seconds at ƒ11 would give<br />
matched densities if the paper had a 'straight-line slope.' The goal here is to print at two different<br />
exposure times that would be representative of times you typically use in your darkroom work, and<br />
produce matched prints.<br />
Slope Calibration Procedure:<br />
1. Cut a sheet of photo paper into approximately 9 x 12 cm (roughly 3-1/2" x 5") pieces. Make sure<br />
their size will work with your processing method (i.e. drum processor or roller transport<br />
processor). You simply need a piece of paper large enough to completely cover the top surface of<br />
the analyzer probe. Save the extra pieces in your papersafe for future test prints.<br />
2. Insert the appropriate gray film into the enlarger and project an 8 x 10" image.<br />
3. Place the probe directly under the enlarging lens, on the baseboard, and press the analyze key.<br />
4. Select an ƒ stop approximately 1/3 of the lens’s aperture range from wide open. (On a ƒ2.8 lens<br />
use ƒ5.6.)<br />
5. Null the analyzer by adjusting the filter pack of the enlarger lamphouse.<br />
6. Check to see if you can get a 20 second exposure on the analyzer by simply adjusting the lens<br />
aperture. (If you cannot get both a 5 second and 20 second setting from your lens aperture at this<br />
elevation of the enlarger head, adjust the head to a height that will allow you to get these<br />
exposures from a single head position.)<br />
7. Set the exposure back to 5 seconds again and check that the <strong>ColorLine</strong> <strong>5000</strong> is nulled.<br />
8. Press the start/stop key.<br />
9. Set the probe aside and place one of the test papers directly under the lens on the baseboard or<br />
easel. Since you will be exposing two test prints separately, it will be helpful to mark the prints to<br />
identify them later. (A hand-held paper punch works very well for this purpose. You can easily<br />
make notches along the edge of the paper for identification.)<br />
10. Press the start/stop key. After the exposure, remove the paper and place it in another papersafe<br />
or light tight compartment.<br />
11. Press the analyze key and put the probe in the same position as before.<br />
12. Adjust the lens aperture so the LCD screen shows an exposure of 20 seconds. Null the filter pack<br />
and confirm the 20 seconds again.<br />
13. Press the start/stop key to end the analyze function.
14. Set the probe aside and place the second test paper under the lens. (Remember to mark it as the<br />
second test print.)<br />
15. Press the start/stop key to start the timed exposure.<br />
16. Process and dry the two test prints.<br />
17. Place the probe directly under the enlarger lens.<br />
18. Place the first test print directly on top of the probe. Make sure it completely covers the top of the<br />
probe.<br />
19. Remove the film from the carrier, set the filter pack to zero, and open the lens aperture fully.<br />
20. Press the densi and set keys to run the densitometer. mode.<br />
21. When the densities are stable, press SET. This sets the first print density values as a reference.<br />
22. While holding the probe securely, remove the 1st test print and place the second test print on top<br />
of the probe. Make sure it is covering the entire top surface. You can now read the relative log<br />
densities of all 3 color layers. The density difference in each color should be no more than ± 2<br />
points.<br />
23. With the second test print still on top of the probe, press the enter key. Turn the rotary encoder to<br />
select the 'Change Slope' option. If you are sure that you want to change the slope settings,<br />
press the enter key. If you do not want to change the slope settings, because the gray prints were<br />
within ± 2 points in each color, or because you think you might have made an error in this<br />
sequence of steps, then use the rotary encoder to select the 'Cancel Change' option and press<br />
the enter key to exit the mode and leave the slope settings unchanged.<br />
Note: Changes in slope settings will alter the results of the program. After changing slope settings,<br />
reconfirm the results of the channel by making test prints. If necessary, use the techniques for<br />
programming to a 'known' image or auto-programming.<br />
Use as a Reference Densitometer<br />
The <strong>ColorLine</strong> <strong>5000</strong> can quickly and easily function as a reference transmission densitometer, to check<br />
color densities of various materials.<br />
To use the <strong>ColorLine</strong> <strong>5000</strong> as a Reference Densitometer:<br />
1. Press the Densi and Set keys. The display shows density in log values. For black & white paper,<br />
only the optical density is shown on the LCD screen.<br />
2. Press the SET key to store the current density as a reference point. For subsequent readings, the<br />
analyzer will show the difference between the current density being measured and the reference<br />
density. You can reset the reference point as many times as needed.<br />
3. To exit the Reference Density Mode press the escape key.<br />
Using the <strong>ColorLine</strong> <strong>5000</strong> to Verify Filtration Values<br />
You can use your analyzer to read the filtration density of a dichroic or sheet filter equipped enlarger. The<br />
true value will be displayed. Follow the steps outlined above in the ‘Use as a Reference Densitometer’ to<br />
set a reference point. Usually you will want this value set with no filters (or filter values zeroed) in the light<br />
path. Place or dial in the filter settings you wish to verify, into the enlarger. Analyze the readings with the<br />
filters in place. The value displayed is the actual filter values of the enlarger setting or filters used.<br />
Calibration with Black and White Materials<br />
The <strong>ColorLine</strong> <strong>5000</strong> can be easily used with both B & W and color materials. The calibration procedures<br />
are the same, except that a neutral gray negative film is used for self-calibration. The required paper
grade can be determined, and then used with graded or variable contrast paper, either fiber or resin<br />
coated.<br />
Paper Grade Analysis:<br />
The densitometer function of the <strong>ColorLine</strong> <strong>5000</strong> is used to determine the contrast grade needed for any<br />
particular negative. The procedure is:<br />
1. Place the negative in the enlarger, compose and focus the image.<br />
2. With the room dark, press 'Analyze' button.<br />
3. Press the 'Densi' and 'Analyze' buttons simultaneously.<br />
4. Position the probe over the darkest portion of the negative that shows detail, correct for cosine,<br />
and press the 'Analyze' button.<br />
5. Position the probe over the lightest portion of the negative that shows detail, correct for cosine,<br />
and press the 'Analyze' button.<br />
6. The <strong>ColorLine</strong> will now show the recommended paper grade in the fourth line of the display.<br />
7. Exit the 'Analyze' function by pressing the 'Lamp' key.<br />
Graded Papers:<br />
Graded papers, either fiber or RC, often have different speeds dependent on the grade. These should be<br />
given separate calibration channels, since the paper speed directly effects the density of the finished<br />
print.<br />
Variable Contrast B & W Papers:<br />
Variable contrast papers have the ability to change their contrast characteristics with the color of the light<br />
used for exposure. Generally, yellow filters are used for grades from 00 to 2.0, and magenta filters for<br />
grades from 2.5 to 5.0. It is possible to use the filters on the color head of your enlarger to arrive at the<br />
desired grade. The other option is to use filters sold by the paper manufacturers which are used under the<br />
enlarging lens or in a filter drawer.<br />
If the filters in the color head of your enlarger are used, the paper speed will vary with the desired grade<br />
(due to the variation in density of the filters for the various grades). When using this option it will be<br />
necessary to give each grade separate calibration channels in order to achieve the correct density.<br />
If the manufacturers filters are employed, the paper normally responds with two different emulsion<br />
speeds, one for grades 0 to 3.5, and another for grades 4 to 5. In this case only two calibration channels<br />
will be necessary to accommodate these different sensitivities.<br />
Specification sheets, supplied by the paper manufacturer, will tell you what the speed variations are for<br />
the different grades. Filter settings for use with your enlarger’s color head may also be included.<br />
Because the <strong>ColorLine</strong> has the ability to store and measure both density and color, it can be used to<br />
select the correct filtration as well as exposure for variable contrast papers.. The unit is pre-calibrated with<br />
density and filtration values which are suitable for most variable contrast papers. These settings can be<br />
used as a starting point.<br />
The procedure is as follows:<br />
1. Establish the contrast range for the negative following the procedure outlined above.<br />
2. Press 'Set', select 'V/Contrast' for the channel used.<br />
3. Press 'Lamp' to exit the 'Set' mode.<br />
4. Place the negative in the negative carrier, focus, and press 'Analyze'.<br />
5. Select the required contrast grade by using the rotary control..<br />
6. Place the probe and cosine correct..<br />
7. Turn either the yellow or magenta filter on the enlarger until the display reads 0-0-0.<br />
8. Adjust the lens aperture until the exposure is in the range of 5 to 10 seconds.
9. Press 'Lamp' to exit the 'Analyze' mode.<br />
10. Expose the print.<br />
The density and filtration values for variable contrast papers can be easily modified in the 'User Menu'.<br />
This is accessed by entering the 'Set' mode and repeatedly pressing 'Start/Stop' until the 'User Menu'<br />
blinks. Press 'Analyze' and select 'Set up VC Table' Filtration and density values can then be edited to<br />
match the manufacturers recommendations for each grade of paper from 00 to 5.0.<br />
Variable Contrast Paper VC Table<br />
In this table from the User Menu, you can change the standards for filtration to use with variable contrast<br />
papers. To modify any paper grade, enter the User Menu. Turn power switched off. Press the Densi key<br />
and hold it while switching the power on. Keep the Densi key pressed until the User Menu appears. Use<br />
the rotary encoder to select 'set up VC table.' Press the enter key. Then use the rotary encoder to select<br />
the contrast grade you wish to change. Press the step key to navigate through the various fields of this<br />
window, and use the rotary encoder to change the settings in any field. You can select the amount of<br />
filtration and logD for each contrast grade. Use the enter key to leave this table when you have finished.<br />
Black & White Paper Contrast Table<br />
In this table from the User Menu, you can change the range of acceptable negative densities for each<br />
paper grade.<br />
The default values are:<br />
Grade = Density Range<br />
0.0 = 135 to 999<br />
0.5 = 126 to 134<br />
1.0 = 115 to 125<br />
1.5 = 105 to 114<br />
2.0 = 95 to 104<br />
2.5 = 86 to 94<br />
3.0 = 78 to 85<br />
3.5 = 70 to 77<br />
4.0 = 63 to 69<br />
4.5 = 57 to 62<br />
5.0 = 0 to 56<br />
To modify any paper grade, enter the User Menu. With the power switched off, press the Densi key and<br />
hold it while switching the power on. Keep the Densi key pressed until the User Menu appears. Use the<br />
rotary encoder to select 'set up contrast table'. Press the enter key. Then use the rotary encoder to select<br />
the contrast grade you wish to change. Press the step key to navigate through the various fields of this<br />
window, and use the rotary encoder to change the settings in any field. You can change the minimum and<br />
maximum densities for each contrast grade.<br />
The <strong>ColorLine</strong> <strong>5000</strong> will automatically change any overlapping densities to prevent them from appearing<br />
in two different contrast grades. For example, if you have changed the minimum density for grade 2 from<br />
95 to 90, the analyzer will automatically lower the maximum density for grade 2.5 from 94 to 89.<br />
Be sure to use the enter key to leave this table when you have finished making any changes.