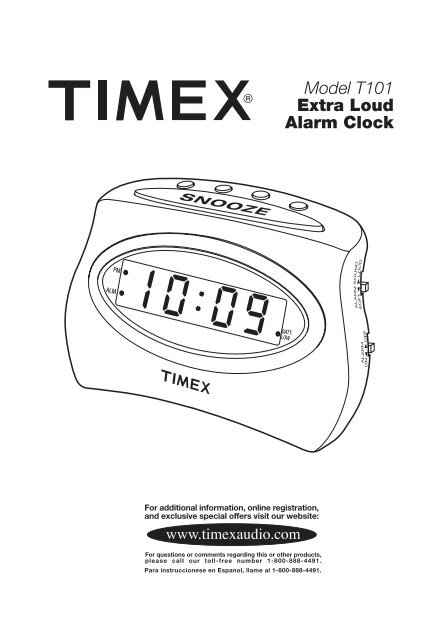
Model T101 Extra Loud Alarm Clock - TIMEX Audio
Model T101 Extra Loud Alarm Clock - TIMEX Audio
Model T101 Extra Loud Alarm Clock - TIMEX Audio

You also want an ePaper? Increase the reach of your titles
YUMPU automatically turns print PDFs into web optimized ePapers that Google loves.
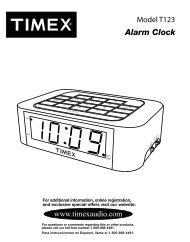
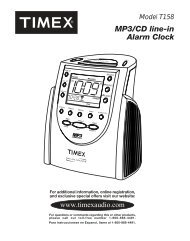
<strong>Model</strong> <strong>T101</strong><br />
<strong>Extra</strong> <strong>Loud</strong><br />
<strong>Alarm</strong> <strong>Clock</strong><br />
PM<br />
ALM.<br />
For additional information, online registration,<br />
and exclusive special offers visit our website:<br />
www.timexaudio.com<br />
For questions or comments regarding this or other products,<br />
please call our toll-free number 1-800-888-4491.<br />
Para instruccionese en Espanol, llame al 1-800-888-4491.
Controls and Indicators<br />
Hour Button<br />
Time Set Button<br />
Snooze Bar<br />
Minute Button<br />
<strong>Alarm</strong> Set/Reset Button<br />
PM Indicator<br />
<strong>Alarm</strong> Volume<br />
PM<br />
ALM.<br />
<strong>Alarm</strong> Indicator<br />
<strong>Alarm</strong> ON/OFF Switch<br />
Battery Low indicator<br />
1
Battery Backup<br />
It is strongly recommended that a 9-Volt battery be installed into<br />
the unit, as directed below, in order to activate this product’s<br />
Battery Backup feature. In the event that the AC cord is<br />
disconnected or a power failure or other interruption occurs, the<br />
Battery Backup will maintain clock and alarm settings for the life<br />
of the battery. Failure to install a battery will mean the loss of all<br />
time and alarm settings during power failures or interruptions.<br />
To install the battery:<br />
1. Open the battery compartment<br />
cover.<br />
2. Install one 9-Volt battery (alkaline<br />
is recommended for longer life),<br />
making sure that the large terminal<br />
matches to the large outlet.<br />
3. The display’s Battery Low Indicator Battery Compartment<br />
will light when no battery is<br />
installed, or when the battery is<br />
weak or installed incorrectly.<br />
Note: You should replace the battery every six months, or after<br />
any extended power outage that could drain the battery power.<br />
2
Maintenance<br />
• Protect your furniture when placing the unit on natural wood<br />
or wood with a lacquered finish. A cloth or other protective<br />
material should be placed between the unit and the furniture.<br />
• Clean the casing with a soft cloth moistened only with mild<br />
soap and water. Stronger cleaning agents, such as benzine,<br />
thinner, or similar materials are not recommended, as they<br />
may damage the surface of the case.<br />
• If the unit is not to be used for a prolonged period, such as<br />
a month or longer, remove the battery to prevent possible<br />
corrosion. Should the battery compartment become corroded<br />
or dirty, clean it thoroughly and replace the battery.<br />
Setting <strong>Clock</strong> Time and <strong>Alarm</strong> Time<br />
Setting <strong>Clock</strong> Time<br />
1. Press and hold the Time Set button while pressing the Hour<br />
button until the current hour is displayed. Remember to set<br />
the time to the correct AM or PM setting. A small dot in the<br />
upper-left-hand corner of the display is the PM Indicator.<br />
2. Press and hold the Time Set button while pressing the<br />
Minute button until the current time is displayed.<br />
Setting <strong>Alarm</strong> Time<br />
1. Press and hold the <strong>Alarm</strong> Set/Reset button while pressing<br />
the Hour button until the desired alarm hour is displayed.<br />
Again, remember to set the correct AM or PM setting.<br />
2. Press and hold the <strong>Alarm</strong> Set/Reset button while pressing<br />
the Minute button until the desired alarm time is displayed.<br />
3
Operating the <strong>Alarm</strong><br />
1. Set the alarm time as indicated in Setting <strong>Alarm</strong> Time.<br />
2. Set the <strong>Alarm</strong> Mode switch to “On.” A small dot will appear<br />
in the lower left corner of the clock display, indicating that<br />
the alarm has been set and will sound at the time selected.<br />
Note: The alarm will play until it is shut off, or for a<br />
maximum of two hours. As long as the <strong>Alarm</strong> Mode<br />
switch is set to “On,” the alarm will sound at the set<br />
time every 24 hours.<br />
3. After the alarm sounds, press the <strong>Alarm</strong> Set/Reset button<br />
to turn off the alarm while automatically resetting it for the<br />
following day.<br />
4. To turn off the alarm without automatically setting it for the<br />
following day, set the <strong>Alarm</strong> Mode switch to “Off.”<br />
Choosing an <strong>Alarm</strong> Volume<br />
Choose a soft or extra alarm volume by setting the <strong>Alarm</strong><br />
Volume switch.<br />
Operating the Snooze Feature<br />
1. To operate the snooze feature, press the Snooze Bar after<br />
the alarm sounds. The alarm will shut off for approximately<br />
nine minutes before sounding again. You may repeat this<br />
process several times during the two-hour snooze cycle.<br />
4
CAUTION<br />
RISK OF ELECTRIC SHOCK.<br />
DO NOT OPEN<br />
CAUTION: TO REDUCE THE RISK OF ELECTRIC SHOCK, DO<br />
NOT REMOVE COVER (OR BACK). NO USER-SERVICEABLE PARTS<br />
INSIDE. REFER SERVICING TO QUALIFIED SERVICE PERSONNEL.<br />
WARNING: TO REDUCE THE RISK OF FIRE OR ELECTRIC SHOCK,<br />
DO NOT EXPOSE THIS APPLIANCE TO RAIN OR MOISTURE.<br />
The lightning flash with arrowhead in an equilateral triangle is<br />
intended to alert the user of the presence of uninsulated<br />
“dangerous voltage” within the product’s enclosure that may<br />
be of sufficient magnitude to constitute a risk of electric shock.<br />
The exclamation point within an equilateral triangle is intended<br />
to alert the user of the presence of important operating and<br />
maintenance (servicing) instructions in the literature<br />
accompanying the appliance.<br />
The symbols above are located at the back of the cabinet.<br />
CAUTION: To prevent electric shock do not use this (Polarized)<br />
plug with an extension cord receptacle, or other outlets unless<br />
the blades can be fully inserted to prevent blade exposure.<br />
ATTENTION: Pour prévenir les chocs électriques ne pas utiliser<br />
cette fiche polarisée avec un prolongateur. Une prise de courant,<br />
ou une autre sortie de courant sauf si les lames peuvent étre<br />
insérées à fond sans en laisser aucune partie à decouvert.
A Consumer Guide to Product Safety<br />
IMPORTANT SAFETY INSTRUCTIONS<br />
This unit has been designed and manufactured to assure your personal safety. Improper use can result<br />
in potential electrical shock or fire hazards. Please read all safety and operating instructions carefully<br />
before installation and use. Keep these instructions handy for future reference. Take special note, adhere<br />
to all warnings, and always follow the instruction on the unit and in the instructions and service manuals.<br />
1. Water and Moisture - The unit should not be used near water. For example: near a bathtub,<br />
washbowl, kitchen sink, laundry tub, swimming pool or in a wet basement.<br />
2. Ventilation - The unit should be situated so that its location or position does not interfere with it’s<br />
proper ventilation. For example, it should not be situated on a bed, sofa, rug or similar surface that<br />
may block ventilation openings. Also, it should not be placed in a built-in installation, such as a<br />
bookcase or cabinet that may impede the flow of air through the ventilation openings.<br />
3. Heat - The unit should be situated away from heat sources such as radiators, heat registers, stoves<br />
or other appliances (including amplifiers) that produce heat.<br />
4. Power Sources - The unit should be connected to a power supply only of the type described in<br />
the operating instructions or as marked on the appliance.<br />
5. Grounding or Polarization - This product is equipped with a polarized alternating-current line plug<br />
(a plug having one blade wider than the other). As a safety feature this plug will fit into the power<br />
outlet only one way. If you are unable to fit the plug fully into the outlet, try reversing the plug. If<br />
the plug still fails to fit, contact your electrician to replace your obsolete outlet. Do not defeat the<br />
safety purpose of your polarized plug.<br />
6. Power-Cord Protection - Power supply cords should be routed so that they are not likely to be<br />
walked on or pinched by items placed upon or against them. It is always best to have a clear area<br />
from where the cord exits the unit to where it is plugged into an AC outlet.<br />
7. Cleaning - The unit should be cleaned only as recommended by the manufacturer.<br />
8. Objects and Liquid Entry - Care should be taken so that objects do not fall and liquids are not<br />
spilled into the enclosure through openings.<br />
9. Attachments – Do not use attachments not recommended by the product manufacturer as they<br />
may cause hazards.<br />
10. Lightning – For added protection for this product during a lightning storm, or when it is left<br />
unattended and unused for long periods of time, unplug it from the wall outlet and disconnect<br />
the antenna or cable system. This will prevent damage to the product due to lightning and<br />
power-line surges.<br />
11. Overloading – Do not overload wall outlets, extension cords, or integral convenience receptacles<br />
as this can result in a risk of fire or electric shock.<br />
12. Damage Require Service - The unit should be serviced by qualified service personnel when:<br />
A. The power supply cord or plug has been damaged.<br />
B. Objects have fallen into or liquid has been spilled into the enclosure.<br />
C. The unit has been exposed to rain.<br />
D. The unit has been dropped or the enclosure damaged.<br />
E. The unit does not appear to operate normally or exhibits a marked change in performance.<br />
13. Antenna - Do not connect to an external antenna.<br />
14. Non-Use Periods – The power cord of the unit should be unplugged from the outlet when it is to<br />
be left unused for a long period of time.<br />
15. Servicing - The user should not attempt to service the unit beyond that described in the user’s<br />
operating instructions. All other servicing should be referred to qualified service personnel.<br />
16. If you have any questions, call SDI Technologies Inc. Timex <strong>Audio</strong> Products Division Customer Service,<br />
1-800-888-4491.
Limited 90-Day Warranty Information<br />
Timex <strong>Audio</strong> Products, a division of SDI Technologies Inc. (hereafter referred to as SDI Technologies),<br />
warrants this product to be free from defects in workmanship and materials, under normal use<br />
and conditions, for a period of 90 days from the date of original purchase.<br />
Should service be required by reason of any defect or malfunction during the warranty period, SDI<br />
Technologies will repair or, at its discretion, replace this product without charge (except for a $3.00<br />
charge for handling, packing, return UPS/postage, and insurance). This decision is subject to<br />
verification of the defect or malfunction upon delivery of this product to the Factory Service Center<br />
listed below. The product must include proof of purchase, including date of purchase. The fee for<br />
service after the warranty period or without proof of purchase is $6.00.<br />
Before returning this product for service, please first replace the batteries (if applicable) with fresh<br />
ones, as exhausted or defective batteries are the most common cause of problems encountered.<br />
If service is still required:<br />
1. Remove batteries (if applicable) and pack the unit in a well-padded, heavy corrugated box.<br />
2. Enclose a photocopy of your sales receipt, credit card statement, or other proof of the date of<br />
purchase.<br />
3. Enclose a check or money order payable to the order of Soundesign, for the sum of $3.00 (or<br />
$6.00 if after the warranty period or without proof of purchase).<br />
4. Send the unit prepaid to the Factory Service Center listed below:<br />
Consumer Repair Department<br />
SDI Technologies Inc.<br />
Timex <strong>Audio</strong> Products Division<br />
1401 Pullman Drive<br />
El Paso, Texas 79936-7726<br />
NOTE: This warranty is valid only if the product is used for the purpose for which it was designed.<br />
It does not cover (i) products which have been damaged by negligence, misuse or accident, or<br />
which have been modified or repaired by unauthorized persons; (ii) cracked or broken cabinets,<br />
or units damaged by excessive heat; (iii) damage to tape cassettes (if applicable); (iv) the cost of<br />
shipping this product to the Factory Service Center and its return to the owner.<br />
This warranty is valid only in the United States of America and does not extend to owners of the<br />
product subsequent to the original purchaser. Any applicable implied warranties are also limited<br />
to 90 days, and SDI Technologies will not be liable for consequential damages. (Some states do<br />
not allow limitations on implied warranties or exclusion of consequential damages, so these<br />
restrictions may not apply to you.) This warranty gives you specific legal rights, and you may also<br />
have other rights which vary from state to state.<br />
If you have questions or comments regarding this or other SDI Technologies products,<br />
please call our toll-free number: 1-800-888-4491.<br />
<strong>TIMEX</strong> is a registered trademark of Timex Corporation the United States and other<br />
countries.<br />
<strong>T101</strong>-010705-0<br />
Printed in China