Alarm Clock with Month / Date / Day Display - TIMEX Audio
Alarm Clock with Month / Date / Day Display - TIMEX Audio
Alarm Clock with Month / Date / Day Display - TIMEX Audio

You also want an ePaper? Increase the reach of your titles
YUMPU automatically turns print PDFs into web optimized ePapers that Google loves.
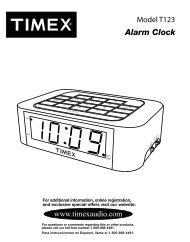
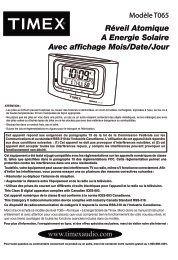
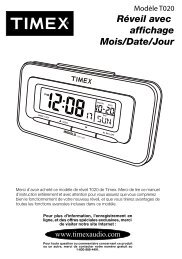
Model T020<br />
<strong>Alarm</strong> <strong>Clock</strong> <strong>with</strong><br />
<strong>Month</strong> / <strong>Date</strong> / <strong>Day</strong><br />
<strong>Display</strong><br />
Thank you for purchasing this Timex model T020 <strong>Alarm</strong> <strong>Clock</strong>. Please read this<br />
instruction manual carefully and completely to insure that you understand the<br />
proper operation of your new alarm clock, and that you get the maximum benefit<br />
from all the advanced features included in this model.<br />
For additional information, online registration,<br />
and exclusive special offers visit our website:<br />
www.timexaudio.com<br />
For questions or comments regarding this or other<br />
products, please call our toll-free number 1-800-888-4491.<br />
Para instruccionese en Espanol, llame al 1-800-888-4491.
Limited 90-<strong>Day</strong> Warranty Information<br />
Timex <strong>Audio</strong> Products, a division of SDI Technologies Inc. (hereafter referred to as SDI Technologies),<br />
warrants this product to be free from defects in workmanship and materials, under normal use<br />
and conditions, for a period of 90 days from the date of original purchase.<br />
Should service be required by reason of any defect or malfunction during the warranty period,<br />
SDI Technologies will repair or, at its discretion, replace this product <strong>with</strong>out charge (except for a<br />
$3.00 charge for handling, packing, return UPS/postage, and insurance). This decision is subject<br />
to verification of the defect or malfunction upon delivery of this product to the Factory Service<br />
Center listed below. The product must include proof of purchase, including date of purchase. The<br />
fee for service after the warranty period or <strong>with</strong>out proof of purchase is $6.00.<br />
Before returning this product for service, please first replace the batteries (if applicable) <strong>with</strong> fresh<br />
ones, as exhausted or defective batteries are the most common cause of problems encountered.<br />
If service is still required:<br />
1. Remove batteries (if applicable) and pack the unit in a well-padded, heavy corrugated box.<br />
2. Enclose a photocopy of your sales receipt, credit card statement, or other proof of the date<br />
of purchase.<br />
3. Enclose a check or money order payable to the order of Soundesign, for the sum of $3.00 (or<br />
$6.00 if after the warranty period or <strong>with</strong>out proof of purchase).<br />
4. Send the unit prepaid to the Factory Service Center listed below:<br />
Consumer Repair Department<br />
SDI Technologies Inc.<br />
Timex <strong>Audio</strong> Products Division<br />
1330 Goodyear Dr.<br />
El Paso, TX 79936-6420<br />
NOTE: This warranty is valid only if the product is used for the purpose for which it was designed.<br />
It does not cover (i) products which have been damaged by negligence, misuse or accident, or<br />
which have been modified or repaired by unauthorized persons; (ii) cracked or broken cabinets,<br />
or units damaged by excessive heat; (iii) damage to tape cassettes (if applicable); (iv) the cost of<br />
shipping this product to the Factory Service Center and its return to the owner.<br />
This warranty is valid only in the United States of America and does not extend to owners of the<br />
product subsequent to the original purchaser. Any applicable implied warranties are also limited<br />
to 90 days, and SDI Technologies will not be liable for consequential damages. (Some states do<br />
not allow limitations on implied warranties or exclusion of consequential damages, so these<br />
restrictions may not apply to you.) This warranty gives you specific legal rights, and you may also<br />
have other rights which vary from state to state.<br />
<strong>TIMEX</strong> is a registered trademark of Timex Corporation the United States and other countries.<br />
T020-042209-A<br />
Printed in China
Care and Maintenance<br />
If you notice that the time display is beginning to fade, or if it has completely disappeared,<br />
replace the batteries. Replace both batteries at the same time and do not mix different<br />
types of batteries. Do not leave exhausted batteries in the clock for a long period of time.<br />
They may eventually leak and cause damage to the clock itself or to the surface the clock<br />
is placed on.<br />
Please dispose of the exhausted batteries properly.<br />
Note: After replacing the batteries the clock will return to its original default settings. It<br />
will be necessary to reset the time and alarm settings.
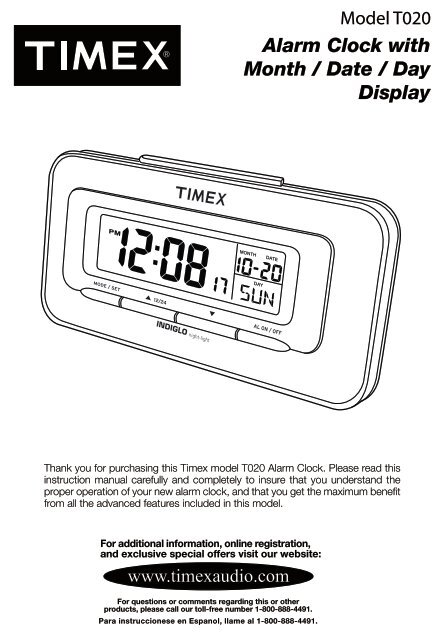
Controls<br />
Snooze/Light Button<br />
Mode/Set Button<br />
Snooze/<strong>Alarm</strong><br />
On/Off Button<br />
UP / 12/24 Button<br />
Down Button<br />
Controls and Their Functions<br />
Snooze Bar – When Snooze function is activated, press to stop alarm temporarily.<br />
After 5 minutes alarm turns ‘On’ again. Snooze operation can be repeated up to 8<br />
times. If snooze is not activated, pressing Snooze Bar resets alarm to following day.<br />
During normal operation, pressing the Snooze Bar also turns on the display<br />
backlighting momentarily for nighttime viewing. After 5 seconds the lighting turns off<br />
automatically.<br />
MODE Button – Used to switch between time and alarm time display modes, and<br />
to enter manual time and alarm setting modes.<br />
/12/24 Button - Used to switch the time display between 12-hour and 24-hour<br />
formats. Also used to manually advance the time, year, month, and date displays.<br />
Button – Used to manually ‘back-up’ the time, year, month, and date displays.<br />
Snooze/<strong>Alarm</strong> On/Off Button – Use to activate or deactivate the alarm and<br />
activate or deactivate the Snooze function.<br />
Time <strong>Display</strong><br />
PM Indicator<br />
<strong>Alarm</strong> Time Indicator<br />
<strong>Alarm</strong> Indicator<br />
24 Hour<br />
Indicator<br />
<strong>Month</strong> /<br />
<strong>Date</strong><br />
Indicator<br />
Time<br />
<strong>Display</strong><br />
Snooze Indicator<br />
Seconds Indicator<br />
<strong>Day</strong><br />
Indicator
Preparation for Use<br />
Installing the Batteries<br />
Open the Battery Compartment cover by<br />
pressing down on the locking tab. Insert 2 “AA”<br />
batteries (not included) in the battery<br />
compartment. Be sure to insert the batteries<br />
according to the polarity markings ( “+” / “−“)<br />
inside the battery compartment. If the batteries<br />
are inserted incorrectly the unit will not work.<br />
We recommend you use a well-known brand of<br />
alkaline batteries for longest life and best<br />
performance.<br />
Operating Instructions<br />
Setting the <strong>Clock</strong><br />
Selecting 12-Hour or 24-Hour <strong>Display</strong> Mode<br />
Press the button momentarily to switch the display between the 12-Hour and 24-Hour<br />
format. If you select the 24-Hour format the “24H” indicator will appear in the display. In<br />
the 24-Hour format midnight is displayed as “0:00”, 1 PM is displayed as “13:00”, 6 PM<br />
is displayed as “18:00”, etc. The 24-Hour format is often referred to as Military Time.<br />
In the 12-Hour format midnight is displayed as “12:00”. Noon is displayed as<br />
“PM 12:00”. If the “PM” indicator does not appear, the time displayed is AM. There is no<br />
AM indicator.<br />
Setting The Time / Year / <strong>Month</strong> and <strong>Date</strong><br />
After you have selected the 12 or 24-Hour display format, proceed as follows:<br />
1. Press and hold the MODE button for two seconds until the Hour digits begin flashing,<br />
then press either the or buttons to set the display to the correct hour, AM<br />
or PM. If the PM indicator does not appear the hour displayed is AM.<br />
2. When the correct hour appears press the MODE button once to start the Minute<br />
digits flashing, then press either the or buttons to set the display to the<br />
correct minute.<br />
3. When the correct minutes appear press the MODE button once to start the Seconds<br />
digits flashing. If you want to set the seconds counter to “00” press either the <br />
or button once. If you do not wish to ‘zero’ the seconds, proceed to step 4.<br />
4. Press the MODE button once more to start the Year display flashing. The default<br />
year is 2004. Press the button to set the display to the correct year.<br />
5. Press the MODE button once more to start the <strong>Month</strong> display flashing, then press<br />
either the or buttons to set the display to the correct month.<br />
6. Press the MODE button once more to start the <strong>Date</strong> display flashing, then press<br />
either the or buttons to set the display to the correct date. Note that the<br />
<strong>Day</strong> of the Week indicator changes automatically as you adjust the <strong>Date</strong> display.<br />
7. After you have completed these adjustments you may press the MODE button once<br />
more to exit the setting mode and return to the current time display. Or if you do<br />
nothing the display will return to the current time automatically after 15 seconds.<br />
Note: You must complete each of the above steps and move to the next step <strong>with</strong>in 15<br />
seconds. If you do not make any adjustment <strong>with</strong>in 15 seconds the clock will exit the<br />
setting mode and return to the previously displayed information. You must then start <strong>with</strong><br />
Step 1 again and make sure you complete each step <strong>with</strong>in 15 seconds, while the display<br />
is flashing.
Setting the <strong>Alarm</strong> Time<br />
1. When the correct time, month, and date are showing on the display press the MODE<br />
button once to change the display from current time to alarm time. The initial default<br />
alarm setting is 12:00 (AM). The “AL” indicator appears between the Hour and<br />
Minute digits to confirm that you are in the alarm-setting mode.<br />
2. While the display is in the alarm-setting mode press and hold the MODE button for<br />
two seconds until the <strong>Alarm</strong> Hour digits begin flashing, then press either the or<br />
buttons to set the display to the desired wake-up hour, AM or PM. If the PM<br />
indicator does not appear the hour displayed is AM.<br />
3. When the desired wake up hour appears press the MODE button once to start the<br />
Minute digits flashing, then press either the or buttons to set the display<br />
to the desired wake-up minute.<br />
4. When the desired wake-up time appears on the display you may press the MODE<br />
button once more to return to the current time display. After 15 seconds the display<br />
returns to the current time mode automatically.<br />
5. If you wish to reconfirm the wake-up time just press the MODE button once. The<br />
display will change from current time to alarm time. After 15 seconds the display<br />
changes back to current time automatically.<br />
Activating The <strong>Alarm</strong> and Snooze Functions<br />
To turn the alarm ‘On’ press the Snooze/<strong>Alarm</strong> On/Off button on the front panel once.<br />
The <strong>Alarm</strong> On indicator appears in the display.<br />
To activate the Snooze function press the Snooze/<strong>Alarm</strong> On/Off button once more.<br />
The Snooze indicator appears in the center of the display.<br />
At the selected wake-up time the alarm turns on automatically. The alarm begins <strong>with</strong> a<br />
single ‘beep’ and then the frequency of the ‘beeps’ increases. The alarm continues for<br />
two minutes, then shuts off automatically and resets itself for the same time on the<br />
following day.<br />
To stop the alarm sooner, press any button on the front panel. The alarm stops immediately<br />
and resets itself for the same time on the following day.<br />
Snooze Function<br />
If you activated the Snooze function and the Snooze indicator appears in the display after<br />
the alarm turns on you may press the Snooze Bar for an extra 5 minutes sleep. The alarm<br />
will stop and then start again 5 minutes later. You may repeat the Snooze operation up<br />
to 8 times, but after 8 times the alarm resets itself for the following day. The Snooze<br />
indicator flashes in the display during Snooze operation.<br />
Deactivating The <strong>Alarm</strong> and Snooze Functions<br />
To deactivate the <strong>Alarm</strong> and Snooze functions, press the Snooze/<strong>Alarm</strong> On/Off button<br />
until both the <strong>Alarm</strong> indicator and Snooze indicator disappear from the display.