T622 User Manual - TIMEX Audio
T622 User Manual - TIMEX Audio
T622 User Manual - TIMEX Audio

Create successful ePaper yourself
Turn your PDF publications into a flip-book with our unique Google optimized e-Paper software.
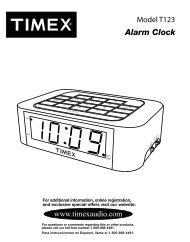
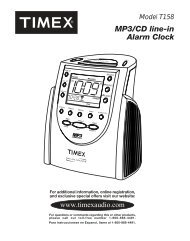
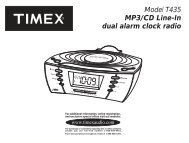
Model <strong>T622</strong><br />
Stereo CD<br />
Clock Radio with<br />
Auto-Set Digital Tuning<br />
SNOOZE/DIM<br />
2<br />
For additional information, online registration,<br />
and exclusive special offers visit our website:<br />
www.timexaudio.com<br />
For questions or comments regarding this or other products,<br />
please call our toll-free number 1-800-888-4491.<br />
Para instruccionese en Espanol, llame al 1-800-888-4491.
SNOOZE/DIM<br />
Controls and Indicators<br />
Time Set Button P<br />
On/Off Lock Switch O<br />
Q Calendar Button<br />
R Zone Button<br />
S Radio Band<br />
Button<br />
Underneath Top Panel Cover<br />
Radio Preset Buttons<br />
Snooze/Dimmer Bar 1<br />
Alarm Reset Button 2<br />
Button 3<br />
Radio Tune - Button 4<br />
N MP-3/AUX<br />
Line- In Button<br />
M CD Play/Pause<br />
Button<br />
L Open CD Door<br />
Button<br />
K Alarm Set<br />
Button<br />
Volume - Button 5<br />
2<br />
J Enter Button<br />
Volume + Button 6<br />
9 . Button<br />
Aux Input Plug<br />
H Music On/Off<br />
Button<br />
G Radio Tune<br />
+ Button<br />
1
Display with Indicators<br />
Clock PM Indicator<br />
Unlock Indicator<br />
Daylight-Saving<br />
Time Indicator<br />
Battery Low<br />
Indicator<br />
CD/Radio Alarm<br />
Indicator<br />
Zone/Calendar Display/<br />
CD Track/Radio Dial/<br />
Alarm Wake Time<br />
Buzzer Alarm<br />
Indicator<br />
Alarm Off Indicator<br />
CD Play Indicator<br />
Pause Indicator<br />
Radio Band<br />
AM/FM Indicators<br />
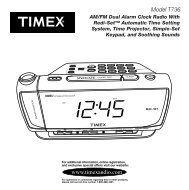
Setting the Clock<br />
Alarm Wake Time<br />
AM/PM Indicators<br />
Auto-Set and <strong>Manual</strong> Time and Date Settings<br />
This model is equipped with the Auto-Set feature, meaning that the time and date have been<br />
programmed at the factory and will already be set when you first plug the model in. Auto-Set<br />
is programmed for Eastern Standard Time. To change your time zone setting, perform steps<br />
below.<br />
1. Remove the top panel cover.<br />
Zone Button<br />
Calendar<br />
Button<br />
On/Off Lock<br />
switch<br />
Time Set<br />
Button<br />
Back of cabinet<br />
2
2. Slide the O On/Off Lock switch to 'Off'. The unlock indicator will appear on the display.<br />
3. Press the R Zone Button, the current Auto-Set Time Zone will flash. Press the<br />
3 > Buttons to select your time zone. The display will show each<br />
zone's current time setting. There are seven zones<br />
Auto-Set Time Zones<br />
ATL : Atlantic Standard Time<br />
EAS: Eastern Standard Time<br />
CEN: Central Standard Time<br />
MTN: Mountain Standard Time<br />
PAC: Pacific Standard Time<br />
ALS: Alaska Standard Time<br />
HAI: Hawaii Standard Time<br />
4. Press the J Enter Button.<br />
<strong>Manual</strong> Time and Date Settings<br />
1. To change the time setting, press the P Time Set Button once. The clock display will<br />
flash. Press the 3 > Buttons to set the time. Hold a button for a few seconds<br />
to set the time rapidly. Be sure to set the correct AM or PM time, shown by the PM<br />
indicator (AM does not show).<br />
2. Press the J Enter Button. The clock will beep twice and the display will stop flashing.<br />
3. Press the Q Calendar Button. The current year setting will flash on lower right screen.<br />
Press 3 > Buttons to adjust. Press Q Calendar Button again and the<br />
current month/date will flash. Press 3 > Buttons to adjust then press the J<br />
Enter Button to exit.<br />
Daylight-Saving Time and Leap Year Adjustments<br />
This unit will automatically adjust the clock at the beginning and end of Daylight-Saving Time<br />
each year. It will also adjust the month/day display for leap year automatically.<br />
This unit automatically advances one hour at the start of Daylight-Saving Time on the first<br />
Sunday of April, and moves back one hour at the end of Daylight-Saving Time on the last<br />
Sunday of October. If you live in an area that does not observe Daylight-Saving Time, it will<br />
be necessary for you (except Hawaii zone) to manually adjust the clock back one hour at the<br />
beginning of Daylight-Saving Time and forward one hour at the end of Daylight-Saving Time.<br />
Programming the Preset Radio Stations<br />
This unit has four Radio Preset Buttons for you to store and access your favorite stations quickly.<br />
It also includes 12 insert pictures for the buttons, each showing a different radio station format<br />
(Jazz, Country, Rock, etc.). You should prepare a list of four stations to program the settings.<br />
1. Press the H Music On/Off Button to turn on the radio.<br />
2. Set the AM or FM band by switching the S Radio Band Button to AM or FM.<br />
3. Repeatedly press either the 4 Radio Tune - or G Radio Tune + Button to find the station.<br />
Press and hold the 4 Radio Tune - or G Radio Tune + Button for a few seconds and release.<br />
The radio will search up or down the dial and stop on the next strong station.<br />
Note: Extend the wire antenna for better FM reception.<br />
4. Press and hold a Radio Preset Button to set the station. The unit will beep twice.<br />
5. Remove the clear button cover from a Radio Preset Button, place the corresponding<br />
paper insert onto the clear button cover.<br />
6. Replace the clear cover.<br />
Notes:<br />
• Keep fluorescent lamps away from the unit, it may causes interference to the radio.<br />
• Repeat steps 3 and 6 for the remaining three Preset Buttons.<br />
• The Buttons on the right end are N MP-3/Aux Line-in and M CD Play/Pause Button.<br />
7. Slide the O On/Off Lock Switch to 'On'. Replace the top panel cover and tighten the screw.<br />
3
Changing the Preset Button Inserts<br />
This unit includes three sets of 12 Preset Button Paper Inserts, each showing a different radio<br />
station format (Jazz, Country, Rock, etc.). Follow these instructions to insert the inserts to<br />
match the programmed stations. See below for images of the twelve inserts.<br />
1<br />
1 Remove the top panel cover.<br />
2<br />
CLEAR<br />
BUTTON<br />
COVER<br />
2 Remove each clear button cover.<br />
3<br />
BUTTON<br />
INSERT<br />
3 Place the paper insert into the clear cover<br />
4<br />
CLEAR<br />
BUTTON<br />
COVER<br />
WITH<br />
INSERT<br />
4 Replace the clear cover together with paper<br />
insert on the top of black button.<br />
5 Slide O On/Off Lock Switch to On.<br />
FRAME<br />
F Replace the top panel with the tags against<br />
hooks from the front.<br />
CLEAR<br />
BUTTON<br />
COVER<br />
WITH<br />
INSERT<br />
G Secure the top panel cover.<br />
4
Alarm Operating Instructions<br />
Setting and Operating the Alarm<br />
1. Press and release the K Alarm Set Button. The wake time on the display will flash.<br />
2. Press the 3 > Button to set the alarm time. Hold either button for a few<br />
seconds to advance the time quickly.<br />
3. For wake to buzzer, press the J Enter Button. The unit will beep twice and the Buzzer<br />
Alarm Indicator will appear, showing that the alarm will sound at the set time.<br />
4. For wake to radio, (skip step 3). Press one of the Radio Preset Buttons then the J Enter<br />
Button. The unit will beep twice and the Music Alarm Indicator will appear, showing that<br />
the alarm will sound at the set time.<br />
5. For wake to CD, (skip step 3 and 4). Press M CD Play/Pause Button. The unit will beep<br />
twice and the Music Alarm Indicator will appear showing that the alarm will sound at the<br />
set time.<br />
6. When the alarm sounds, press the 1 Snooze / Dimmer Bar for a 9-minute Snooze time,<br />
or press the 2 Alarm Reset Button to shut off the alarm. The alarm will be automatically<br />
set to turn on at the same time the following day. If you do not want the alarm to turn on<br />
again the next day, press the G Music On/Off Button again to shut off the alarm<br />
completely. Note: You can press the 2 Alarm Reset Button at any time to change the<br />
alarm function or to cancel the alarm completely.<br />
Playing Compact Discs<br />
Playing Compact Discs<br />
1. Press the L Open CD Door Button and place a CD on the spindle with the printed side<br />
facing out, then gently close the CD Player door.<br />
2. Press the M CD Play/Pause Button once. The first track will start playing, and the<br />
bottom of the display will show the CD Track Indicator.<br />
3. Adjust the volume using the Volume Buttons.<br />
4. To pause the CD, press the M CD Play/Pause Button while the CD is playing. The<br />
display will show the Pause Indicator (//). Press the M CD Play/Pause Button again<br />
to continue play.<br />
5. Press the 9 Forward Button ( ) to skip to the next track. Press the 3 Reverse<br />
Button ( ) to return to the beginning of the current track. Press the 3 Reverse<br />
Button ( ) again to skip to the previous track.<br />
6. To stop play before the CD has ended, press the H Music ON/OFF Button.<br />
5
Playing the Radio<br />
1. There are two ways to turn on the radio. Press one of the Radio Preset Buttons to listen<br />
to one of the preset stations, or press the H Music On/Off Button. The radio frequency<br />
will appear on the display.<br />
2. Set the AM or FM band by pushing the S Radio Band Button to AM or FM.<br />
3. Press either the 4 Radio Tuner - or G Radio Tuner + Button to find the station.<br />
Hold either button for a few seconds to scan the dial quickly.<br />
Note:<br />
• Extend the wire antenna for better FM reception.<br />
• MP-3 Player may cause interference the radio reception. If interference occurs, turn off<br />
and unplug MP-3 Player from the radio.<br />
4. Press 6 Volume + Button or 5 Volume - Button to adjust volume level.<br />
5. Press H Music On/Off Button to Off to shut off radio.<br />
Playing the MP-3 / Aux Line-in<br />
1. Connect your CD / MP-3 Player or other devices to the MP-3 / Aux Line-in Plug.<br />
2. Press the N MP-3 / Aux Line-in Button. 'AU' will appear on the display.<br />
3. Press 6 Volume + Button or 5 Volume - Button to adjust volume level.<br />
Note: To avoid distortion of sound, always set the volume level of the auxiliary device to a<br />
low or middle position, and adjust the desired volume level from the radio.<br />
4. Press H Music On/Off Button to Off to shut off unit.<br />
Adjusting the Display Backlight<br />
This alarm clock radio features an adjustable display backlight, with dim, medium, and<br />
bright settings. To select a backlight setting, press the 1 Snooze / Dimmer Bar until<br />
desired brightness is reached.<br />
6
Limited 90-Day Warranty Information<br />
Timex <strong>Audio</strong> Products, a division of SDI Technologies Inc. (hereafter referred to as SDI Technologies),<br />
warrants this product to be free from defects in workmanship and materials, under normal use<br />
and conditions, for a period of 90 days from the date of original purchase.<br />
Should this product fail to function in a satisfactory manner, it is best to first return it to the store<br />
where it was originally purchased. Should this fail to resolve the matter and service still be required<br />
by reason of any defect or malfunction during the warranty period, SDI Technologies will repair<br />
or, at its discretion, replace this product without charge (except for a $5.00 charge for handling,<br />
packing, return UPS/postage, and insurance). This decision is subject to verification of the defect<br />
or malfunction upon delivery of this product to the Factory Service Center listed below. The<br />
product must include proof of purchase, including date of purchase. The fee for service after<br />
the warranty period or without proof of purchase is $10.00.<br />
Before returning this product for service, please first replace the batteries (if applicable) with fresh<br />
ones, as exhausted or defective batteries are the most common cause of problems encountered.<br />
If service is still required:<br />
1. Remove the batteries (if applicable) and pack the unit in a well padded, heavy corrugated<br />
box.<br />
2. Enclose a photocopy of your sales receipt, credit card statement, or other proof of the date<br />
of purchase, if within the warranty period.<br />
3. Enclose a check or money order payable to the order of SDI Technologies, for the sum of<br />
$5.00 ($10.00 after warranty period).<br />
4. Send the unit prepaid and insured, to the Factory Service Center listed below.<br />
Consumer Repair Department<br />
Timex <strong>Audio</strong> Products Division<br />
1330 Goodyear Dr.<br />
El Paso, TX 79936-6420<br />
NOTE: This warranty is valid only if the product is used for the purpose for which it was designed.<br />
It does not cover (i) products which have been damaged by negligence, misuse or accident, or<br />
which have been modified or repaired by unauthorized persons; (ii) cracked or broken cabinets,<br />
or units damaged by excessive heat; (iii) damage to CD’s or tape cassettes (if applicable); (iv) the<br />
cost of shipping this product to the Factory Service Center and its return to the owner.<br />
This warranty is valid only in the United States of America and does not extend to owners of<br />
the product subsequent to the original purchaser. Any applicable implied warranties are also<br />
limited to 90 days, and SDI Technologies will not be liable for consequential damages. (Some<br />
states do not allow limitations on implied warranties or exclusion of consequential damages, so<br />
these restrictions may not apply to you.) This warranty gives you specific legal rights, and you<br />
may also have other rights which vary from state to state.<br />
For questions or comments regarding this or other products, please call our toll-free number<br />
1-800-888-4491.<br />
<strong>TIMEX</strong> is a registered trademark of Timex Corporation in the U.S. and other countries.<br />
<strong>T622</strong>-042105-1
Installation and Maintenance<br />
Installation<br />
1. Remove the unit and all packing materials from the carton.You should save the packing<br />
materials in case unit needs to be returned for service. If you do not wish to save the<br />
materials, please dispose of them properly.<br />
2. Place the unit on a stable, level surface, close to an AC outlet, out of direct sunlight,<br />
and away from sources of dust, dirt, heat, water, moisture, vibration, and strong<br />
magnetic fields.<br />
"Sure Alarm" Battery Backup Installation<br />
The Battery Low Indicator flashes when there is not enough power to run the backup.<br />
It is recommended that 3 “AA” batteries be installed into the unit, as directed below, to<br />
activate the “Sure Alarm” battery backup feature. In the event that the AC power cord<br />
is disconnected or a power failure or other interruption occurs, the “Sure Alarm” system<br />
will maintain clock and alarm settings for the life of the batteries, ensuring that the alarm<br />
will sound at the set time (Note: while operating on battery power, all set alarms will sound<br />
as a buzzer). When power is restored, the clock will cease using battery power, and will<br />
again operate on AC power.<br />
1. Gently turn the unit over and remove the battery<br />
compartment door.<br />
2. Install 3 “AA” batteries (alkaline batteries are<br />
recommended for longer life) into the battery<br />
compartment, SDI Technologies making Inc. sure that the + and – polarities<br />
match up with the diagram printed inside the<br />
compartment.<br />
Note: Do not replace batteries without AC plugged in,<br />
otherwise you will loose the clock settings.<br />
3. Close the battery compartment door, making sure the<br />
door locks into place and gently return the clock radio<br />
Battery Compartment<br />
to its upright position.<br />
Maintenance<br />
1. Place the unit on a level surface away from sources of direct sunlight or excessive heat.<br />
2. Protect your furniture when placing your unit on a natural wood and lacquered finish.<br />
A cloth or other protective material should be placed between it and the furniture.<br />
3. Clean your unit with a soft cloth moistened only with mild soap and water. Stronger<br />
cleaning agents, such as Benzine, thinner or similar materials can mar the surface of<br />
the case.<br />
4. If the unit is not to be used for a prolonged period, such as a month or longer, remove<br />
the batteries to prevent possible corrosion. Should the battery compartment become<br />
Printed in<br />
corroded or dirty, clean the compartment thoroughly and replace the batteries.
A Consumer Guide to Product Safety<br />
IMPORTANT SAFETY INSTRUCTIONS<br />
This unit has been designed and manufactured to assure your personal safety. Improper use<br />
can result in potential electrical shock or fire hazards. Please read all the safety and operating<br />
instructions carefully before installation and use. Keep these instructions handy for future<br />
reference. Take special note, adhere to all warning, and always follow the instructions on the<br />
unit and in the instructions and service manuals.<br />
1. Water and Moisture - The unit should not be used near water. For example: near a<br />
bathtub, washbowl, kitchen sink, laundry tub, swimming pool or in a wet basement.<br />
2. Ventilation - The unit should be situated so that its location or position does not interfere<br />
with its proper ventilation. For example, it should not be situated on a bed, sofa, rug or<br />
similar surface that may block ventilation openings. Also, it should not be placed in a builtin<br />
installation, such as a bookcase or cabinet that may impede the flow of air through the<br />
ventilation openings.<br />
3. Heat - The unit should be situated away from heat sources such as radiators, heat registers,<br />
stoves or other appliances (including amplifiers) that produce heat.<br />
4. Power Sources - The unit should be connected to a power supply only of the type<br />
described in the operating instructions or as marked on the appliance.<br />
5. Grounding or Polarization - This product is equipped with a polarized alternating current<br />
line plug (a plug having one blade wider than the other). As a safety feature this plug will<br />
fit into the power outlet only one way. If you are unable to fit the plug fully into the outlet,<br />
try reversing the plug. If the plug still fails to fit, contact your electrician to replace your<br />
obsolete outlet. Do not defeat the safety purpose of the polarized plug.<br />
6. Power-Cord Protection - Power supply cords should be routed so that they are not<br />
likely to be walked on or pinched by items placed upon or against them. It is always best<br />
to have a clear area from where the cord exits the unit to where it is plugged into an AC<br />
outlet.<br />
7. Cleaning - Unplug this product from the well outlet before cleaning. Do not use liquid<br />
cleaners or aerosol cleaners. Use a damp cloth for cleaning.<br />
8. Non-Use Periods – The power cord of the unit should be unplugged from the outlet<br />
when it is to be left unused for a long period of time.<br />
9. Objects and Liquid Entry - Care should be taken so that objects do not fall and liquids<br />
are not spilled into the enclosure through openings.<br />
10. Attachments - Do not use attachments not recommended by the product manufacturer<br />
as they may cause hazards.<br />
11. Lightning - For added protection for this product during a lightning storm, or when it is<br />
left unattended and unused for long periods of time, unplug it from the wall outlet and<br />
disconnect the antenna or cable system. This will prevent damage to the product due to<br />
lightning and power-line surges.<br />
12. Overloading - Do not overload wall outlets, extension cords, or integral convenience<br />
receptacles as this can result in a risk of fire or electric shock.<br />
China
13. Damage Requiring Service - The unit should be serviced by qualified service personnel when:<br />
A. The power supply cord or plug has been damaged.<br />
B. Objects have fallen into or liquid has been spilled into the enclosure.<br />
C. The unit has been exposed to rain.<br />
D. The unit has been dropped or the enclosure damaged.<br />
E. The unit does not appear to operate normally or exhibits a marked change in performance.<br />
14. Servicing - The user should not attempt to service the unit beyond that described in the<br />
user’s operating instructions. All other servicing should be referred to qualified service<br />
personnel.<br />
15. Safety Check - Upon completion of any service or repairs to this product, ask the service<br />
telchnician to perform safety checks to determine that the product is in proper operating<br />
condition.<br />
16. Antenna - Do not connect to an external antenna.<br />
FCC Information<br />
This device complies with Part 15 of the FCC rules. Operation is subject<br />
to the following two conditions: (1) this device may not cause harmful<br />
interference, and (2) this device must accept any interference received,<br />
including interference that may cause undesired operation.<br />
This equipment complies with the limits for a Class B digital device as specified in Part 15 of<br />
FCC Rules. These limits provide reasonable protection against radio and TV interference in a<br />
residential area.<br />
However, your equipment might cause TV or radio interference even when it is operating<br />
properly. To eliminate interference you can try one or more of the following corrective measures:<br />
• Reorient or relocate the receiving antenna.<br />
• Increase the distance between the equipment and the radio or TV.<br />
• Use outlets on different electrical circuits for the equipment and the radio or TV.<br />
Consult your dealer or an experienced radio/television technician if the problem still exists.<br />
Modifying or tampering with your system’s internal components can cause a malfunction and<br />
might invalidate the system’s warranty and void your FCC authorization to operate it. If your<br />
system is not performing as it should, call SDI Technologies Inc., Timex <strong>Audio</strong> Products<br />
Consumer Services, 1-800-888-4491 for assistance.<br />
Laser Safety<br />
This unit employs a laser. Only a qualified person should remove the cover or attempt to<br />
service this device, because of possible eye injury.<br />
CAUTION: USE OF CONTROLS, ADJUSTMENTS OR PERFORMANCE OF PROCEDURES<br />
OTHER THAN SPECIFIED HEREIN MAY RESULT IN HAZARDOUS RADIATION EXPOSURE.<br />
DANGER: INVISIBLE LASER RADIATION WHEN OPEN AND INTERLOCK FAILED OR<br />
DEFEATED, AVOID DIRECT EXPOSURE TO BEAM.<br />
CAUTION: HAZARDOUS LASER RADIATION WHEN OPEN AND INTERLOCK DEFEATED.
CAUTION<br />
RISK OF ELECTRIC SHOCK.<br />
DO NOT OPEN<br />
CAUTION: TO REDUCE THE RISK OF ELECTRIC SHOCK, DO<br />
NOT REMOVE COVER (OR BACK). NO USER-SERVICEABLE PARTS<br />
INSIDE. REFER SERVICING TO QUALIFIED SERVICE PERSONNEL.<br />
WARNING: TO REDUCE THE RISK OF FIRE OR ELECTRIC SHOCK,<br />
DO NOT EXPOSE THIS APPLIANCE TO RAIN OR MOISTURE.<br />
The lightning flash with arrowhead in an equilateral triangle<br />
is intended to alert the user of the presence of uninsulated<br />
“dangerous voltage” within the product’s enclosure that may<br />
be of sufficient magnitude to constitute a risk of electric shock.<br />
CAUTION: To prevent electric shock, match wide blade of<br />
plug to wide slot. Fully insert.<br />
ATTENTION: Pour éviter les choc électriques. Introduire la<br />
lame la plus large de la fiche dans la borne correspondante<br />
de la prises et pousser jusqu’au fond.<br />
Note:<br />
The exclamation point within an equilateral triangle is intended<br />
to alert the user of the presence of important operating and<br />
maintenance (servicing) instructions in the literature<br />
accompanying the appliance.<br />
The symbols above are located at the back of the cabinet.<br />
The manufacturer is not responsible for any radio or TV<br />
interference cause by unauthorized modifications to this<br />
equipment. Such modification could void the user’s authority<br />
to operate the equipment.