T736 User Manual - TIMEX Audio
T736 User Manual - TIMEX Audio
T736 User Manual - TIMEX Audio

You also want an ePaper? Increase the reach of your titles
YUMPU automatically turns print PDFs into web optimized ePapers that Google loves.
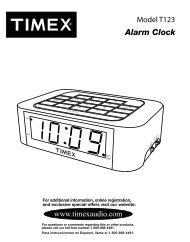
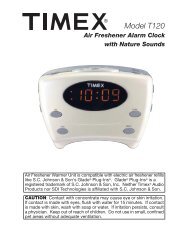
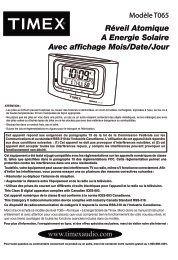
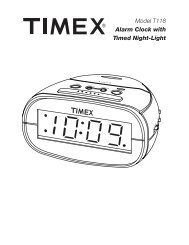
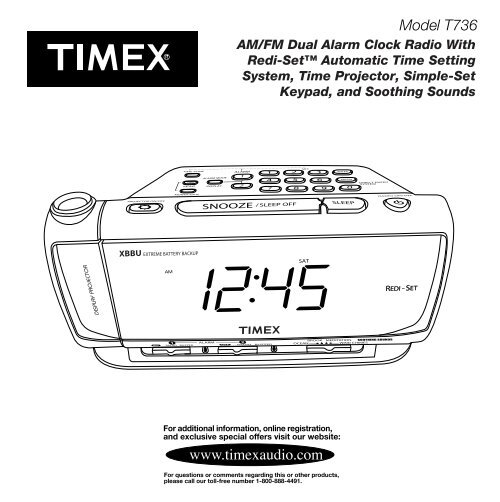
Model <strong>T736</strong><br />
AM/FM Dual Alarm Clock Radio With<br />
Redi-Set Automatic Time Setting<br />
System, Time Projector, Simple-Set<br />
Keypad, and Soothing Sounds<br />
For additional information, online registration,<br />
and exclusive special offers visit our website:<br />
www.timexaudio.com<br />
For questions or comments regarding this or other products,<br />
please call our toll-free number 1-800-888-4491.
CAUTION<br />
RISK OF ELECTRIC SHOCK.<br />
DO NOT OPEN<br />
CAUTION: TO REDUCE THE RISK OF ELECTRIC SHOCK, DO NOT REMOVE COVER (OR BACK). NO USER-SERVICEABLE<br />
PARTS INSIDE. REFER SERVICING TO QUALIFIED SERVICE PERSONNEL.<br />
WARNING: TO REDUCE THE RISK OF FIRE OR ELECTRIC SHOCK, DO NOT EXPOSE THIS APPLIANCE TO RAIN OR<br />
MOISTURE.<br />
AVERTISSEMENT: POUR RÉDUIRE LE RISQUE D’INCENDIE OU DE CHOC ÉLECTRIQUE, NE PAS EXPOSER CET<br />
APPAREIL SOUS LA PLUIE ET L’HUMIDITÉ<br />
The lightning flash with arrowhead symbol, within an equilateral triangle, is intended to alert the user of the presence<br />
of uninsulated “dangerous voltage” within the product’s enclosure that may be of sufficient magnitude to constitute<br />
a risk electric shock to persons.<br />
The exclamation point within an equilateral triangle is intended to alert the user of the presence of important<br />
operating and maintenance (servicing) instructions in the literature accompanying the appliance.<br />
CAUTION: To prevent electric shock, do not use this (Polarized) plug with an extension cord receptacle, or other<br />
outlets unless the blades can be fully inserted to prevent blade exposure.<br />
ATTENTION: Pour prévenir les chocs électriques ne pas utiliser cette fiche polarisée avec un prolongateur. Une<br />
prise de courant, ou une autre sortie de courant sauf si les lames peuvent étre insérées à fond sans en laisser<br />
aucune partie à decouvert.<br />
A Consumer Guide to Product Safety<br />
• The apparatus shall not be exposed to dripping or splashing and that no objects filled with liquids, such as vases, shall be placed on<br />
apparatus.<br />
L'appareil ne doit pas être exposé aux écoulements ou aux éclaboussures et aucun objet ne contenant de liquide, tel qu'un vase, ne doit<br />
être placé sur l'objet.<br />
• Main plug is used as disconnect device and it should remain readily operable during intended use. In order to disconnect the apparatus<br />
from the mains completely, the mains plug should be disconnected from the mains socket outlet completely.<br />
La prise du secteur ne doit pas être obstruée ou doit être facilement accessible pendant son utilisation. Pour être complètement déconnecté<br />
de l'alimentation d'entrée, la prise doit être débranchée du secteur.<br />
• Battery shall not be exposed to excessive heat such as sunshine, fire or the like.<br />
Les piles ne doivent pas être exposées à de forte chaleur, tel qu'à la lumière du soleil, au feu ou autres choses de semblable.<br />
• The marking information is located at the bottom of apparatus.<br />
Les marquages sont inscrits en bas de l'appareil.
A Consumer Guide to Product Safety<br />
This unit has been designed and manufactured to assure your personal safety. Improper use can result in potential electrical shock or fire<br />
hazards.<br />
1. Read these Instructions.<br />
2. Keep these Instructions.<br />
3. Heed all Warnings.<br />
4. Follow all instructions.<br />
5. Water and Moisture - Do not use this apparatus near water. For example: near a bathtub, washbowl, kitchen sink, laundry tub, swimming<br />
pool or in a wet basement.<br />
6. Ventilation - Do not block any of the ventilation openings. Install in accordance with the manufacturers instructions. For example, it<br />
should not be situated on a bed, sofa, rug or similar surface that may block ventilation openings. Also, it should not be placed in a built-in<br />
installation, such as a bookcase or cabinet that may impede the flow of air through the ventilation openings.<br />
7. Heat - Do not install near any heat sources such as radiators, heat registers, stoves, or other apparatus (including amplifiers) that produce<br />
heat.<br />
8. Power Sources - The unit should be connected to a power supply only of the type described in the operating instructions or as marked<br />
on the appliance.<br />
9. Grounding or Polarization - Do not defeat the safety purpose of the polarized or grounding - type plug. A polarized plug has two blades<br />
with one wider than the other. A grounding type plug has two blades and a third grounding prong. The wide blade or the third prong<br />
are provided for your safety. When the provided plug does not fit into your outlet, consult an electrician for replacement of the obsolete<br />
outlet.<br />
10. Power-Cord Protection - Protect the power cord from being walked on or pinched particularly at plugs, convenience receptacles, and<br />
the point where they exit from the apparatus. It is always best to have a clear area from where the cord exits the unit to where it is<br />
plugged into an AC outlet.<br />
11. Cleaning - Unplug this product from the well outlet before cleaning. Do not use liquid cleaners or aerosol cleaners. Clean only with a dry<br />
cloth.<br />
12. Non-Use Periods – The power cord of the unit should be unplugged from the outlet when it is to be left unused for a long period of<br />
time.<br />
13. Objects and Liquid Entry - Care should be taken so that objects do not fall and liquids are not spilled into the enclosure through<br />
openings.<br />
14. Attachments - Only use attachments/accessories specified by the manufacturer.<br />
15. Lightning - Unplug this apparatus during lightning storms or when unused for long periods of time.<br />
16. Overloading - Do not overload wall outlets, extension cords, or integral convenience receptacles as this can result in a risk of fire or<br />
electric shock.<br />
17. Damage Require Service - Refer all servicing to qualified service personnel. Servicing is required when the apparatus has been damaged<br />
in any way, such as power-supply cord or plug is damaged, liquid has been spilled or objects have fallen into the apparatus, the apparatus<br />
has been exposed to rain or moisture, does not operate normally, or has been dropped.<br />
18. Servicing - The user should not attempt to service the unit beyond that described in the user’s operating instructions. All other servicing<br />
should be referred to qualified service personnel.<br />
19. Safety Check - Upon completion of any service or repairs to this product, ask the service telchnician to perform safety checks to<br />
determine that the product is in proper operating condition.<br />
20. Antenna - Do not connect to an external antenna.<br />
Questions? Service? Warranty? Visit www.timexaudio.com
Table of Contents<br />
FCC Information ................................................................................................................................................................1<br />
Introduction .......................................................................................................................................................................2<br />
Preparation for Use ....................................................................................................................................................... 2-3<br />
Controls and Indicators.....................................................................................................................................................4<br />
Display with Indicators......................................................................................................................................................5<br />
Operating Instructions ................................................................................................................................................. 5-8<br />
Listening to The Radio ............................................................................................................................................... 8-12<br />
Changing The Lithium Back-Up Battery ................................................................................................................. 12-13<br />
Care and Maintenance ....................................................................................................................................................13<br />
Warranty Information ......................................................................................................................................................14<br />
FCC Information<br />
This device complies with Part 15 of the FCC Rules, operation is subject to the following two conditions:<br />
(1) This device may not cause harmful interference, and (2) this device must accept any interference<br />
received, including interference that may cause undesired operation.<br />
This equipment complies with the limits for a Class B digital device as specified in Part 15 of FCC Rules. These limits provide<br />
reasonable protection against radio and TV interference in a residential area.<br />
However, your equipment might cause TV or radio interference even when it is operating properly. To eliminate interference<br />
you can try one or more of the following corrective measures:<br />
• Reorient or relocate the receiving antenna.<br />
• Increase the distance between the equipment and the radio or TV.<br />
• Use outlets on different electrical circuits for the equipment and the radio or TV.<br />
• Consult your dealer or an experienced radio/television technician if the problem still exists.<br />
Modifying or tampering with your system’s internal components can cause a malfunction and might invalidate the system’s<br />
warranty and void your FCC authorization to operate it.<br />
This Class B digital apparatus complies with Canadian ICES-003.<br />
Cet appareil numérique de la classe B est conforme à la norme NMB-003 du Canada.
Introduction<br />
Thank you for purchasing this Timex Dual Alarm Clock Radio with Redi-Set Automatic Time Setting System. The clock in this<br />
model will set itself to the correct year, month, date, day, and time, the first time you plug it in, and after every power<br />
interruption. The default setting is the Eastern Time zone. All you need do is set it to your own time zone once, and you may<br />
never have to adjust it again. Daylight Saving Time and Standard Time adjustments are made automatically, through the year<br />
2099. This model is truly the cure for the annoying “flashing 12:00” display.<br />
This model includes a programmable dual alarm system that allows you to set one or both alarms for weekdays only,<br />
weekends only, or everyday operation. And you can have one alarm wake you to the buzzer while the second alarm wakes<br />
you to your favorite radio station. There is also a Simple-Set direct entry keypad for time and alarm settings, a time<br />
projector, and soothing nature sounds.<br />
And the Sure-Alarm battery back up system will operate the buzzer alarm to wake you up even if the power is off at the<br />
wake-up time. Best of all, with Xtreme Battery Back Up (XBBU) system the long life 3-volt lithium battery that is pre-installed<br />
in your unit will last for 5 to 8 years before it needs to be replaced………a major money-saver compared to buying new 9-volt<br />
batteries every 6 months. And when the 3-volt lithium battery finally does need to be replaced, a low battery indicator begins<br />
flashing in the display.<br />
Please read this manual completely to understand all of the great features included in your model. Please retain this manual<br />
for future reference, and because the warranty and product service info are printed at the end of this manual.<br />
Preparation For Use<br />
Unpacking And Set Up<br />
• Remove the radio from the carton and remove all packing materials from the radio. We recommend that, if possible, you<br />
save the carton and packing materials in case your radio ever needs to be returned for service. Using the original carton<br />
and packing material is the best way to protect your radio from damage in transit. If you do dispose of the carton and<br />
packing material, please do so properly. Timex cares about our environment.<br />
• Unwind the external FM antenna on the back cabinet and extend it to its full length for best FM reception.<br />
IMPORTANT! Protect Your Furniture<br />
This radio is equipped with non-skid rubber ‘feet’ to prevent the radio from moving when you operate the controls. These<br />
‘feet’ are made from special non-migrating rubber material formulated to avoid leaving any marks or stains on your furniture.<br />
However certain types of oil-based furniture polishes, wood preservatives, or cleaning sprays may react with the rubber ‘feet’,<br />
causing the rubber material to soften and leave marks or a rubber residue on wooden furniture. If you will be placing this radio<br />
on fine wooden furniture we strongly recommend that you place a small cloth between the radio and your furniture, or that<br />
you apply small felt pads on the bottom of the rubber ‘feet’.<br />
2
Preparation For Use<br />
Power Source<br />
This radio is designed to operate on normal 120V 60Hz AC power only. Do not attempt to<br />
operate this radio on any other power source. You could cause damage to the radio and such<br />
damage is not covered by your warranty.<br />
This radio should be connected to an AC outlet that is always ‘live’. Do not connect it to an<br />
outlet that is controlled by a wall switch. When the power to the radio is interrupted the<br />
installed lithium battery takes over to maintain the time and alarm settings, and to operate the<br />
buzzer alarm if the power is ‘Off’ at the wake up time. To maximize the life of the lithium<br />
battery keep the radio connected to a ‘live’ AC outlet at all times.<br />
This radio is equipped with a polarized AC plug with one wide blade and one narrow blade.<br />
This is a safety feature designed to minimize the chance of electric shock. If this plug will not<br />
fit into your existing AC outlet do not try to force it and do not try to file the wider blade to<br />
make it fit. Contact a qualified, licensed electrician to replace your outdated outlet.<br />
AC Plug<br />
AC Outlet<br />
Sure Alarm Battery Back-Up System<br />
This Timex Redi-Set Clock Radio includes a Sure-Alarm battery back-up circuit that will wake-you up even if the power is ‘off’<br />
at the selected wake-up time. If your power is ‘off’ at the wake up time the clock display will be off and the radio will not<br />
operate, but a separate ‘mini-buzzer’ will turn on automatically to wake you up, even if you selected the Wake To Radio<br />
option.<br />
The Sure-Alarm buzzer will sound for 3 minutes and then shut off automatically.<br />
To stop the Sure-Alarm buzzer immediately, press the RADIO ON/OFF button. The SNOOZE button has no effect during<br />
Sure-Alarm operation.<br />
Note: In order to maximize the life of the built-in lithium battery please be sure to set the Alarm 1 and Alarm 2 switches to<br />
the ‘OFF’ position if the radio will be disconnected from the AC outlet for more than a few hours. This will prevent the<br />
Sure-Alarm buzzer from turning ‘On’ unnecessarily.<br />
3
Time Zone Button<br />
Time Set Button<br />
Month/Date Button<br />
Projector On/Off Button<br />
Controls and Indicators<br />
Snooze Button Alarm Mode / Display Button<br />
Alarm 1 Button<br />
Alarm 2 Button<br />
SimpleSet Keypad Buttons (1 through 0)<br />
Enter Button<br />
AM/PM Button<br />
Projector Lens<br />
Radio ON/OFF Button<br />
Sleep Button<br />
Alarm 1 Selector (Off/Radio/Buzzer)<br />
Soothing Sounds Selector<br />
Left View<br />
Alarm 2 Selector (Off/Radio/Buzzer)<br />
Right View<br />
Speaker<br />
Back View<br />
Line Input Jack<br />
Projector<br />
Focus Control<br />
Flip (Projector)<br />
Image Switch<br />
Display Dimmer Control<br />
Tuning Control<br />
4<br />
Volume<br />
Control<br />
AM/FM/<br />
Sounds<br />
Selector<br />
FM Antenna Wire Back-Up Battery<br />
Compartment<br />
(On Bottom Cabinet)<br />
LINE IN<br />
AC Power Cord
Display with Indicators<br />
AM Indicator<br />
PM Indicator<br />
PM<br />
Day Indicators<br />
Aux (Line In) Indicator<br />
KHz (AM) Frequency Indicator<br />
MHz (FM) Frequency Indicator<br />
Alarm 2 Indicator<br />
Alarm 1 Indicator<br />
Time / Year / Month / Date and<br />
Radio Frequency Display<br />
Low Battery Indicator<br />
Operating Instructions<br />
Setting The Time, The First Time<br />
IMPORTANT: The first time you connect your Redi-Set clock radio to the AC outlet the internal computer will automatically<br />
set the time correctly for the Eastern Time Zone, which is the initial default setting.<br />
The display will begin a countdown sequence (5-4-3-2-1) then the correct year will flash twice, the correct Month/Date will<br />
flash twice, and then the correct Eastern Time will be displayed. If you live in the Eastern Time Zone there is nothing else to<br />
do. Your Redi-Set clock is set correctly and running.<br />
If you do not live in the Eastern Time zone you must change the default zone display to your own zone. You only do this one<br />
time and the Redi-Set internal computer will remember the new default zone setting and will always return to that setting after<br />
a power interruption.<br />
There are 7 time zones programmed into your Redi-Set clock radio.<br />
ZONE 01 – Atlantic Time<br />
ZONE 02 – Eastern Time (Default Setting)<br />
ZONE 03 – Central Time<br />
ZONE 04 – Mountain Time<br />
ZONE 05 – Pacific Time<br />
ZONE 06 – Alaskan Time<br />
ZONE 07 – Hawaiian Time<br />
To change the default time zone, depress and hold the TIME ZONE button. The number “02” will<br />
appear in the display indicating that the default zone is ZONE 02, Eastern Time, and then the<br />
display will begin flashing “0”<br />
5
Operating Instructions<br />
Enter your own 2-digit time zone on the SimpleSet Keypad. For example if you live in the Pacific Time Zone enter “05” on the<br />
keypad and then press the ENTER button. The clock will ‘beep’ twice and the time display will change from Eastern Time<br />
to Pacific Time.<br />
Note: You must always enter a zero (0) before your time zone number. If you do not enter a zero first you will hear a long<br />
‘beep’ indicating that your time zone was not recognized. If this occurs just re-enter your 2-digit time zone correctly<br />
according to the table above on page 5.<br />
Date Display<br />
To see the correct date at any time, depress the MONTH/DATE button. The display changes<br />
from Time to Month and Date (MM/DD).<br />
For example, October 9th will be displayed as 10. 9.<br />
Year Display<br />
To see the correct year, depress the MONTH/DATE and TIME buttons together.<br />
The display changes from Time to Year.<br />
Daylight Saving Time (DST) and Leap Year Adjustments<br />
All Daylight Saving Time and Leap Year adjustments are made automatically by the Redi-Set internal computer as follows:<br />
• Start of Daylight Saving Time – At 2:00 AM on the 2 nd Sunday in March the clock will automatically advance to 3:00 AM.<br />
• End of Daylight Saving Time – At 3:00 AM on the 1 st Sunday in November the clock will automatically reset to 2:00 AM.<br />
• Leap Year – At 12:00 midnight on February 28 th in a Leap Year the calendar display will automatically change to “2.29”.<br />
Note: If you live in an area that does not observe Daylight Saving Time (DST) you may disable the automatic Daylight Saving<br />
Time (DST) feature. Depress and hold the TIME ZONE button for 5 seconds. The display will briefly show “OFF” and then<br />
return to the correct time. The automatic DST feature is now disabled and the time will not change automatically from<br />
Standard Time to Daylight Saving Time. Repeat this procedure again to re-enable the automatic DST feature.<br />
<strong>Manual</strong> Time Adjustments<br />
Some people like to set their clocks 5 to 10 minutes fast to make sure that they will always be ‘on time’. Even though the<br />
Redi-Set internal computer sets the time automatically, you still have the option of adjusting the time manually if you wish.<br />
To manually adjust the time display depress and hold the TIME button for 3 seconds until “0” begins flashing in the display.<br />
While the “0” is flashing in the display enter the desired time on the SimpleSet keypad, press the AM/PM button if necessary<br />
to switch between AM and PM, and then press the ENTER button. The clock will ‘beep’ twice to confirm that the setting was<br />
accepted and the new time will appear on the display.<br />
Note: If you manually adjust the time your new setting is entered into the Redi-Set internal computer as the new default time<br />
setting. If the power is interrupted the display will return to your new setting, not the original setting, when the power is<br />
restored.<br />
6
Adjusting The Wake Up Times<br />
Your Redi-Set clock radio has two separate alarms that can be set and used independently. You may use the alarms to wake<br />
two people at different times, or you may use one alarm for weekdays and the other for weekend wake up times.<br />
The initial default setting for Alarm 1 is 6:00 AM. The initial default setting for Alarm 2 is 7:00 AM.<br />
The procedure for adjusting the wake-up times is the same for both Alarm 1 and Alarm 2.<br />
1. Depress and hold either the ALARM 1 or ALARM 2 Setting Button for 3 seconds. The display<br />
will briefly show the current Alarm 1 or Alarm 2 wake up time and then “0” begins flashing.<br />
2. Enter the desired wake-up time on the SimpleSet keypad, press the AM/PM button to switch<br />
between AM and PM wake-up time if necessary, and then press the ENTER button. The clock<br />
will ‘beep’ twice to confirm that the new alarm time has been accepted and the display will<br />
return to the correct time.<br />
Notes:<br />
• Be sure that you have set the wake-up time correctly for AM or PM by observing the AM/PM indicators on the display.<br />
• If you enter an invalid time on the keypad you will hear a long ‘beep’ and the display will return to the flashing “0”. Re-enter<br />
a valid wake-up time and press the ENTER button again.<br />
Selecting The Alarm Mode<br />
Your Redi-Set clock radio allows you to select from among three different alarm operation modes for either alarm. The alarm modes are:<br />
• Everyday – the alarm will turn on all 7 days.<br />
• Weekdays only – the alarm will only turn on Monday through Friday.<br />
• Weekends only – the alarm will only turn on Saturday and Sunday.<br />
To check the Alarm Mode setting for Alarm 1, depress the ALARM 1 setting button. The display<br />
will show the Alarm 1 wake-up time and the Day indicators will show you the alarm mode that is<br />
selected.<br />
• If all 7 Day indicators are ‘On’, the Everyday alarm mode is selected.<br />
• If only the MON (Monday) through FRI (Friday) indicators are ‘On’, the Weekdays only mode is<br />
selected.<br />
• If only the SAT (Saturday) and SUN (Sunday) indicators are ‘On’, the Weekends only mode is<br />
selected.<br />
To change the Alarm Mode setting for Alarm 1:<br />
1. Hold the ALARM 1 setting button for 3 seconds until “0” begins flashing in the display.<br />
2. Enter a new wake-up time on the SimpleSet keypad, or re-enter the current wake up time and continue pressing the<br />
ALARM MODE (Display) button until the Day indicators show the desired mode, Weekdays only, Weekends only, or<br />
Everyday operation.<br />
3. Press the AM/PM button if necessary and then press the ENTER button to save the new Alarm Mode selection.<br />
Follow the same procedure to select the desired Alarm Mode for Alarm 2 if necessary.<br />
7
Checking The Wake-Up Times And Alarm Mode<br />
Whenever you want to check the wake-up time or alarm mode settings, briefly press either the ALARM 1 or ALARM 2 Setting<br />
Buttons. The display will change from correct time to “wake-up time” and the DAY indicators will show you the alarm mode<br />
that is currently selected.<br />
Release the ALARM 1 or ALARM 2 setting buttons to return to the correct time.<br />
Listening to The Radio<br />
Digital Radio Frequency Display<br />
This clock radio features a digital radio frequency display instead of a dial scale to make tuning easier, especially in a dark<br />
room. The jumbo LED time display automatically changes to a radio frequency display as soon as you begin turning the<br />
TUNING control. And the display automatically changes back to the correct time within 5 seconds after you release the<br />
TUNING control.<br />
1. Set the BAND AM/FM/SOUNDS selector switch to the desired band, AM or FM.<br />
2. Set the VOLUME control to a low setting.<br />
3. Press the RADIO ON/OFF button to turn the radio ‘On’. The display changes from time to an<br />
AM or FM Frequency.<br />
4. Rotate the TUNING control to select the desired radio frequency.<br />
Important: It is not necessary to set the display to the exact frequency of your desired station. Just use the<br />
display as a guide and rotate the TUNING control until you find the strongest and the best reception even if the<br />
frequency number shown on the display is slightly higher or lower than the actual station frequency.<br />
Within 5 seconds after you release the TUNING control the display automatically returns to the correct time. If you wish to<br />
check the station frequency again, press the ALARM MODE (Display) button. The display will change from time to radio<br />
frequency for 5 seconds and then return to time display.<br />
5. Adjust the VOLUME control to the desired setting.<br />
6. When you are finished listening press the RADIO ON/OFF button to turn the radio ‘Off’.<br />
Antenna Information<br />
AM – The AM bar antenna is inside the cabinet. If AM reception is weak,<br />
change the position of the cabinet until the internal antenna picks up the<br />
strongest signal.<br />
FM – Make sure the external FM antenna wire on the back cabinet is fully<br />
unwound and extended to its full length.<br />
Natural/Soothing Sounds<br />
This model includes four natural soothing sounds that you can use to help you fall asleep, or to wake you up, as an alternative<br />
to the radio or the buzzer. To operate the soothing sounds:<br />
• Press the RADIO ON/OFF button to turn the system ‘On’.<br />
• Set the AM/FM/SOUNDS selector to SOUNDS. One of the 4 sounds will begin playing.<br />
• Select the desired sound with the Soothing Sounds selector switch.<br />
• Adjust the VOLUME control to the desired level.<br />
• When you are finished listening press the RADIO ON/OFF button to turn the system ‘Off’.<br />
8
Wake To Radio<br />
1. Turn the radio ‘On’ and select the band, station, and volume level that you wish to hear when the alarm comes ‘On’,<br />
then turn the radio ‘Off’ again.<br />
2. Reconfirm the wake-up time and alarm mode settings for the alarm you are using, Alarm 1 or Alarm 2, or both alarms.<br />
3. Slide the ALARM SELECTOR control on the front panel for one or both alarms to the Radio position. The appropriate<br />
AL 1 and/or AL 2 indicators will light up to confirm that the alarms are set.<br />
4. At the selected wake-up time the radio will turn ‘On’. It will play for one hour and then shut off automatically.<br />
5. To stop the radio sooner, press either the appropriate ALARM 1 or ALARM 2 button, or press the RADIO ON/OFF<br />
button. The radio will stop but the alarm remains set and will turn on again at the same time on the following day,<br />
depending on the Alarm Mode setting.<br />
6. If you do not want the alarm to repeat on the following day, slide the appropriate ALARM SELECTOR switch to the<br />
‘Off’ position. The AL 1 and/or AL 2 indicators turn off.<br />
Wake To Soothing Sounds<br />
1. Turn the radio ‘On’, set the AM/FM/SOUNDS selector to the SOUNDS position, select the desired sound, and adjust<br />
the VOLUME control as desired. Then turn the radio ‘Off’ again.<br />
2. Reconfirm the wake-up time and alarm mode settings for the alarm you are using, Alarm 1 or Alarm 2, or both alarms.<br />
3. Slide the ALARM SELECTOR control on the front panel for one or both alarms to the Radio position. The appropriate<br />
AL 1 and/or AL 2 indicators will light up to confirm that the alarms are set.<br />
4. At the selected wake-up time the selected sound will turn ‘On’. It will play for one hour and then shut off automatically.<br />
5. To stop the sound sooner, press either the appropriate ALARM 1 or ALARM 2 button, or press the RADIO ON/OFF<br />
button. The sound will stop but the alarm remains set and will turn on again at the same time on the following day,<br />
depending on the Alarm Mode setting.<br />
6. If you do not want the alarm to repeat on the following day, slide the appropriate ALARM SELECTOR switch to the<br />
‘Off’ position. The AL 1 and/or AL 2 indicators turn off.<br />
Wake To Buzzer (Crescendo Alarm)<br />
Note: Alarm 1 and Alarm 2 have different buzzer sounds.<br />
• Alarm 1 is a “Single Beep” sound.<br />
• Alarm 2 is a “Double Beep” sound.<br />
You will be able to tell which alarm is going off by the sound that it makes.<br />
1. Reconfirm the wake-up time and alarm mode settings for the alarm you are using, Alarm 1 or Alarm 2, or both alarms.<br />
2. Slide the ALARM SELECTOR control on the front panel for one or both alarms to the Buzz position. The appropriate<br />
AL 1 and/or AL 2 indicators will light up to confirm that the alarms are set.<br />
3. At the selected wake-up time the buzzer will turn ‘On’. It will continue for one hour and then shut off automatically.<br />
4. To stop the alarm sooner, press the appropriate ALARM 1 or ALARM 2 button or the RADIO ON/OFF button. The<br />
buzzer will stop but the alarm remains set and will turn on again at the same time on the following day, depending on<br />
the Alarm Mode setting. To turn the radio on immediately press the RADIO ON/OFF button a second time.<br />
5. If you do not want the alarm to turn the buzzer on the following day, set the appropriate ALARM selector to the ‘Off’<br />
position.<br />
9
Radio And Buzzer Operation<br />
You may set one alarm for wake to RADIO and the other for wake to BUZZER. Just set the ALARM 1 and ALARM 2 Selector<br />
Controls to the desired positions.<br />
Snooze Control<br />
After the alarm turns on in the morning you may press the Snooze button to stop the alarm for 9 minutes. After 9 minutes<br />
the alarm turns on again.<br />
The Snooze operation may be repeated several times within one hour of the original alarm time. But after one hour the alarm<br />
will not turn on again.<br />
During Snooze operation the appropriate Alarm indicator flashes in the display.<br />
Sleep To Music or Soothing Sounds Timer<br />
You can program the Sleep Timer to play the radio or soothing sounds from 1 minute up to 99 minutes and then shut off<br />
automatically. The factory default sleep timer setting is 60 minutes.<br />
1. Press the SLEEP button. The display will briefly show “60” and the radio or selected sound<br />
will begin to play. After 60 minutes the radio will shut off automatically. Each time you press the<br />
SLEEP button the sleep timer will start at 60 minutes. This is the initial sleep timer default<br />
setting.<br />
2. To increase or decrease the amount of time that the radio will play before shutting off, hold the Sleep button for 3<br />
seconds until a “0” begins flashing in the display, then use the SimpleSet keypad to enter the desired sleep timer setting<br />
between 1 minute and 99 minutes. When the desired time is showing on the display press the ENTER button to save<br />
the new setting. The clock will ‘beep’ twice to confirm that the new setting has been accepted.<br />
Notes:<br />
• When you change the sleep timer from the 60-minute default setting to a different setting, the new setting becomes the<br />
new default setting. Whenever you activate the sleep timer it will begin with your new default setting and count down to<br />
zero from that point.<br />
• If you enter an invalid sleep time on the keypad you will hear a long ‘beep’ to warn you that you have entered an invalid<br />
number. Use the SimpleSet keypad to enter a valid number (1 to 99) and press the ENTER button again.<br />
3. To cancel the sleep timer before it counts down to “00” and shut the radio ‘Off’ immediately, press the SNOOZE bar.<br />
IMPORTANT:<br />
Remember that the station and volume settings that you choose for the “Sleep To Music” operation are the same settings<br />
that you will hear if you set the alarm for wake to radio the following morning.<br />
Display Dimmer Control<br />
You can reduce the display brightness by sliding the DIMMER control to the Low position.<br />
10
Projector Operation<br />
IMPORTANT: The projected image will be most visible when the room is dark. The image may not be visible<br />
during daylight hours or in a brightly lit room.<br />
Please note that there is no ‘PM’ indicator in the projector display. If the ‘AM’ indicator does not appear then the<br />
time being projected is ‘PM’.<br />
1. Press the PROJECTOR ON/OFF button to turn the projector ‘On’.<br />
2. Turn the projector housing slowly to aim the projected image on your wall or ceiling.<br />
“PROJECTOR” On/Off Button<br />
3. If the image appears to be upside down on your wall or ceiling when you are lying in bed, set the FLIP IMAGE switch<br />
to its alternate position.<br />
4. If the image is fuzzy or out of focus, slowly rotate the FOCUS adjustment ring clockwise or counter-clockwise until you<br />
achieve the sharpest focus.<br />
5. If you do not want to see the projected image, press the PROJECTOR ON/OFF button to switch the projector ‘Off’.<br />
11
Line Input Jack<br />
You may listen to the sound from an iPod, MP3 player, CD player or other external music source by connecting the external<br />
device to the Line In jack on the back of this clock radio. Use an audio cable (not included) with 3.5mm mini plugs to connect<br />
the headphone jack of the external device to the Line In jack of this unit. An AUX indicator will appear on the display when a<br />
cable is connected to the Line In jack of this radio. Begin playback on the external device and adjust the VOLUME control of<br />
this clock radio.<br />
Note: You must remove the audio cable from the Line In jack of this clock radio in order to listen to AM or FM. When the<br />
audio cable is disconnected the AUX indicator turns ‘Off’ in the display.<br />
When the back-up battery voltage drops below a certain level the Low Battery indicator ( )<br />
begins flashing in the display. When you see this indicator you should replace the battery as soon<br />
as it is convenient for you to do so.<br />
To replace the battery, proceed as follows:<br />
IMPORTANT: Leave the radio connected to the AC outlet when replacing the battery to<br />
avoid losing all of your time and alarm settings.<br />
1. Purchase a replacement 3V lithium battery. The battery type is CR2450. This type battery is<br />
available almost everywhere that batteries are sold.<br />
2. Remove the battery from the packaging so it is ready to install.<br />
3. Place that radio face down on a towel or similar soft surface to avoid scratching the front lens.<br />
Battery Compartment<br />
4. Use a small Phillips screwdriver to remove the screw that secures the battery holder and slide<br />
the battery holder out of the cabinet.<br />
5. Remove the original battery from the battery holder and insert the new battery into the holder in the same way, with the<br />
“+” side facing up. Slide the battery holder with the new battery back into the cabinet and secure the holder with the small<br />
screw.<br />
6. Turn the radio right side up and confirm that the Low Battery indicator ( ) is ‘Off’.<br />
CAUTION: Danger of explosion if battery is incorrectly replaced.<br />
Replace only with the same or equivalent type.<br />
PRÉCAUTION:<br />
Changing The Lithium Back-Up Battery<br />
Danger d’explosion si les piles sont remplacées de façon incorrect.<br />
Remplacer les piles seulemnet par le même type de pile ou l’équivalent.<br />
Resetting The Clock After a Total Memory Loss<br />
If you experience a power failure with an exhausted back-up battery in the radio, all of the time and alarm settings may be<br />
lost. In this case the clock will reset itself to its initial default settings when power is restored. If you notice that the time on the<br />
display is incorrect, press the MONTH/DATE button to check the calendar setting. If the Month and Date are also incorrect<br />
you probably experienced a total memory loss.<br />
To reset the clock after a total memory loss, proceed as follows:<br />
1. Follow the instructions on page 12 and install a fresh CR2450 lithium back-up battery.<br />
2. Connect the radio to the AC outlet and wait until the time is displayed.<br />
3. Press and hold the MONTH/DATE and TIME buttons together for 3 seconds. The year will appear briefly followed by<br />
a flashing “0”. Use the SimpleSet keypad to enter the correct year and then press the ENTER button. The clock will beep<br />
twice to confirm the setting.<br />
12
4. Press and hold the MONTH/DATE button for 3 seconds. The month and date (MM/DD) will appear briefly followed by<br />
a flashing “0”. Use the SimpleSet keypad to enter the correct month and date in the MM/DD format and then press the<br />
ENTER button. The clock will beep twice to confirm the setting. The Day indicator will automatically change to match<br />
the Year, Month, and Date you selected.<br />
5. Press and hold the TIME button for 3 seconds until a flashing “0” appears in the display. Use the SimpleSet keypad to<br />
enter the correct time, press the AM/PM button if necessary, and then press the ENTER button to save the setting.<br />
The clock will ‘beep’ twice to confirm that the setting was accepted and the clock will begin to run.<br />
6. After you have reset the Year, Month/Date, and Time displays, check your alarm time and alarm mode<br />
settings and adjust as required.<br />
Lithium Battery Precautions<br />
• Dispose of exhausted battery properly, in accordance with your local regulations.<br />
• Do not leave the exhausted battery lying around where a young child or pet could play with or swallow it. If the battery is<br />
swallowed, contact a physician immediately.<br />
• Battery may explode if mistreated. Do not attempt to recharge it or disassemble it. Do not dispose of the old battery in a<br />
fire.<br />
Care and Maintenance<br />
There are no user serviceable parts inside this radio. Please refer all service problems to a qualified service facility.<br />
If the cabinet becomes dusty wipe the exterior with a soft dust cloth only. Never use dusting sprays or polishes on the<br />
cabinet.<br />
If the cabinet becomes dirty or smudged with fingerprints it may be wiped with a soft cloth that has been slightly dampened<br />
with a mild soap and water solution. Always disconnect the power cord from the AC outlet before cleaning and never allow<br />
any liquid to get inside the cabinet.<br />
13
Limited 90-Day Warranty Information<br />
Timex <strong>Audio</strong> Products, a division of SDI Technologies Inc. (hereafter referred to as SDI Technologies), warrants this product<br />
to be free from defects in workmanship and materials, under normal use and conditions, for a period of 90 days from the date<br />
of original purchase.<br />
Should service be required by reason of any defect or malfunction during the warranty period, SDI Technologies will repair<br />
or, at its discretion, replace this product without charge (except for a $5.00 charge for handling, packing, return<br />
UPS/postage, and insurance). This decision is subject to verification of the defect or malfunction upon delivery of this product<br />
to the Factory Service Center listed below. The product must include proof of purchase, including date of purchase. The fee<br />
for service after the warranty period or without proof of purchase is $15.00.<br />
Before returning this product for service, please first replace the batteries (if applicable) with fresh ones, as exhausted or<br />
defective batteries are the most common cause of problems encountered.<br />
If service is still required:<br />
1. Remove batteries (if applicable) and pack the unit in a well-padded, heavy corrugated box.<br />
2. Enclose a photocopy of your sales receipt, credit card statement, or other proof of the date of purchase.<br />
3. Enclose a check or money order payable to the order of SDI Technologies, Inc. for the sum of $5.00 (or $15.00 if after<br />
the warranty period or without proof of purchase).<br />
4. Send the unit prepaid to the Factory Service Center listed below:<br />
Consumer Repair Department<br />
SDI Technologies Inc.<br />
Timex <strong>Audio</strong> Products Division<br />
1330 Goodyear Drive<br />
El Paso TX 79936-6420<br />
NOTE: This warranty is valid only if the product is used for the purpose for which it was designed. It does not cover (i)<br />
products which have been damaged by negligence, misuse or accident, or which have been modified or repaired by<br />
unauthorized persons; (ii) cracked or broken cabinets, or units damaged by excessive heat; (iii) damage to tape cassettes (if<br />
applicable); (iv) the cost of shipping this product to the Factory Service Center and its return to the owner.<br />
This warranty is valid only in the United States of America and does not extend to owners of the product subsequent to the<br />
original purchaser. Any applicable implied warranties are also limited to 90 days, and SDI Technologies will not be liable for<br />
consequential damages. (Some states do not allow limitations on implied warranties or exclusion of consequential damages,<br />
so these restrictions may not apply to you.) This warranty gives you specific legal rights, and you may also have other rights<br />
which vary from state to state.<br />
© 2009 SDI Technologies, Inc. All rights reserved<br />
<strong>TIMEX</strong> is a registered trademark of Timex Corporation the United States and other countries<br />
<strong>T736</strong>-122909-A<br />
14<br />
Printed in China