Air Freshener Warmer Unit - TIMEX Audio
Air Freshener Warmer Unit - TIMEX Audio
Air Freshener Warmer Unit - TIMEX Audio

You also want an ePaper? Increase the reach of your titles
YUMPU automatically turns print PDFs into web optimized ePapers that Google loves.
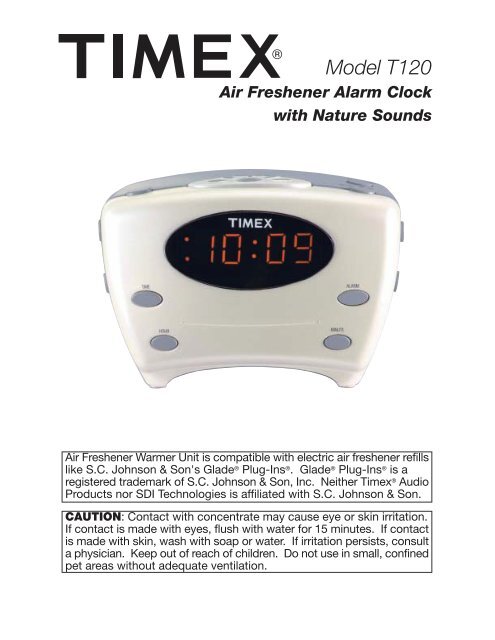
Model T120<strong>Air</strong> <strong>Freshener</strong> Alarm Clockwith Nature Sounds<strong>Air</strong> <strong>Freshener</strong> <strong>Warmer</strong> <strong>Unit</strong> is compatible with electric air freshener refillslike S.C. Johnson & Son's Glade ® Plug-Ins ® . Glade ® Plug-Ins ® is aregistered trademark of S.C. Johnson & Son, Inc. Neither Timex ® <strong>Audio</strong>Products nor SDI Technologies is affiliated with S.C. Johnson & Son.CAUTION: Contact with concentrate may cause eye or skin irritation.If contact is made with eyes, flush with water for 15 minutes. If contactis made with skin, wash with soap or water. If irritation persists, consulta physician. Keep out of reach of children. Do not use in small, confinedpet areas without adequate ventilation.
Controls and IndicatorsSnooze/Sleep SoundsOff ButtonAlarm ResetButtonALARM RESETSNOOZE/SLEEP OFFSLEEP SOUNDSTIMEROFFONSleep SoundsButton<strong>Air</strong> <strong>Freshener</strong>Timer On/OffTOP VIEWPM IndicatorAlarm IndicatorAROMA ONBattery BackupIndicator<strong>Air</strong> <strong>Freshener</strong>IndicatorTime Set ButtonTIMEALARMAlarm Set ButtonHour ButtonHOURMINUTEMinute ButtonFRONT VIEW<strong>Air</strong> <strong>Freshener</strong><strong>Warmer</strong> <strong>Unit</strong>Alarm SwitchALARMCathedralChimesOFFAROMA MODEONTIME<strong>Air</strong> <strong>Freshener</strong>Mode SwitchSleep SoundsSwitchSOUNDSOCEANBROOKFORESTVOLUMEHIMEDLOSleep SoundsVolume ControlSIDE VIEWS
Battery Backup InstallationIn the event that the AC power cord is disconnected or a powerfailure or other interruption occurs, the Battery Backup willmaintain clock and alarm settings for the life of the battery.During interruptions the display will be blank, but settings will besaved and automatically restored when AC power is again active.To install the battery:1. Open the battery compartmentcover on the bottom of the unit.2. Install one 9-Volt battery (alkalineis recommended for longer life),making sure that the large terminalmatches to the large outlet.Battery CompartmentThe Battery Backup Indicator LED is located in the lower-righthandcorner of the display. The LED will light when no batteryis installed, or when the installed battery is low on power.Maintenance• Protect your furniture when placing the unit on natural woodor wood with a lacquered finish. A cloth or other protectivematerial should be placed between the unit and the furniture.• Clean the casing with a soft cloth moistened only with mildsoap and water. Stronger cleaning agents, such as benzine,thinner, or similar materials are not recommended, as theymay damage the surface of the case.• If the unit is not to be used for a prolonged period, such asa month or longer, remove the battery to prevent possiblecorrosion. Should the battery compartment become corrodedor dirty, clean it thoroughly and replace the battery.• Do not remove or puncture clear film protecting the fragranceconcentrate. Do not place open fragrance cartridge onfinished surfaces.
Setting Clock Time and Alarm TimeSetting Clock Time1. Press and hold the Time Set Button while pressing theHour Button until the current hour is displayed. Rememberto set the correct AM or PM setting. A small light in theupper-left-hand corner of the display is the PM Indicator.2. Press and hold the Time Set Button while pressing theMinute Button until the current time is displayed.Setting Alarm Time1. Press and hold the Alarm Set Button while pressing theHour Button until the desired alarm hour is displayed.Again, remember to set the correct AM or PM setting.2. Press and hold the Alarm Set Button while pressing theMinute Button until the desired alarm time is displayed.Operating the Alarm and Snooze Features1. Set the alarm time as indicated in Setting Alarm Time.2. Slide the Alarm Switch to the “Cathedral” or “Chimes”position to wake to one of the two alarm bell sounds. These“Gentle Wake” bells feature a gently rising alarm volume.The Alarm Indicator will appear in the display’s lower-lefthandcorner to show that the alarm has been set.3. When the alarm sounds, press the Alarm Reset Buttonto turn off the alarm while resetting it for the same wake timethe following day, or slide the Alarm Switch to the “Off”position to turn off the alarm without resetting it. Even if theAlarm Reset Button was pressed, sliding the AlarmSwitch to “Off” at any time will turn off the alarm.4. To use the snooze feature, press the Snooze/Sleep SoundsOff Button when the alarm sounds. The alarm will turn offfor approximately nine minutes before sounding again. Youmay repeat this process several times during the two-houralarm cycle.
Sleeping to Nature Sounds With TimerThis model features soothing nature sounds to fall asleep to.1. Slide the Sleep Sounds Switch to your choice of naturesounds: Ocean, Brook, or Forest.2. Press the Sleep Sounds Button to turn on the naturesounds and start the sleep timer. Slide the three-positionSleep Sounds Volume Control to the desired level.3. The sleep timer starts at 59 minutes. To adjust, press andhold the Sleep Sounds Button. The display counts downfrom “59.” Release the button at your desired sleep time.When the display reaches “00” the sounds stop automatically.4. To turn off the nature sounds at any time before the timerreaches “00,” press the Snooze/Sleep Sounds Off Button.Operating the <strong>Air</strong> <strong>Freshener</strong> <strong>Warmer</strong> <strong>Unit</strong>This model comes with one fragrance cartridge designed to fitthe <strong>Air</strong> <strong>Freshener</strong> <strong>Warmer</strong> <strong>Unit</strong>. <strong>Warmer</strong> <strong>Unit</strong> is compatiblewith refills like S.C. Johnson & Son's Glade ® Plug-Ins ® .Inserting Fragrance Cartridge1. Using the peel tab, slowly remove label from cartridge. Donot puncture film protecting fragrance concentrate.2. Insert the cartridge into the <strong>Air</strong> <strong>Freshener</strong> <strong>Warmer</strong> <strong>Unit</strong>,with the flat side of the cartridge facing the back of the model.3. Replace cartridge every 45 days, or when it is dry and cracked.Using the <strong>Air</strong> <strong>Freshener</strong>The air freshener can be set to disperse continuously or for alimited time period.1. To set the air freshener to disperse continuously, slide the<strong>Air</strong> <strong>Freshener</strong> Mode Switch to the “Aroma On” position.Slide switch to “Off/Timer” to turn off the air freshener.2. To disperse for a one-hour time period, press the <strong>Air</strong><strong>Freshener</strong> Timer On/Off button. To turn off the airfreshener before the hour is complete, press the button again.When fragrance is active, the <strong>Air</strong> <strong>Freshener</strong> Indicator lights.
CAUTIONRISK OF ELECTRIC SHOCK.DO NOT OPENCAUTION: TO REDUCE THE RISK OF ELECTRIC SHOCK, DONOT REMOVE COVER (OR BACK). NO USER-SERVICEABLE PARTSINSIDE. REFER SERVICING TO QUALIFIED SERVICE PERSONNEL.WARNING: TO REDUCE THE RISK OF FIRE OR ELECTRIC SHOCK,DO NOT EXPOSE THIS APPLIANCE TO RAIN OR MOISTURE.The lightning flash with arrowhead in an equilateral triangle isintended to alert the user of the presence of uninsulated“dangerous voltage” within the product’s enclosure that maybe of sufficient magnitude to constitute a risk of electric shock.The exclamation point within an equilateral triangle is intendedto alert the user of the presence of important operating andmaintenance (servicing) instructions in the literatureaccompanying the appliance.The symbols above are located at the bottom of the cabinet.CAUTION: To prevent electric shock, do not use this (Polarized)plug with an extension cord receptacle, or other outlets unlessthe blades can be fully inserted to prevent blade exposure.ATTENTION: Pour prévenir les chocs électriques ne pas utilisercette fiche polarisée avec un prolongateur. Une prise de courant,ou une autre sortie de courant sauf si les lames peuvent étreinsérées à fond sans en laisser aucune partie à decouvert.This device complies with part 15 of the Federal CommunicationsCommission Rules. Operation is subject to the condition thatthis device does not cause harmful interference.Note: The manufacturer is not responsible for any radio or TVinterference cause by unauthorized modifications to thisequipment. Such modification could void the user’sauthority to operate the equipment.
A Consumer Guide to Product SafetyWhen used in the directed manner, this unit has been designed and manufactured to ensureyour personal safety. However, improper use can result in potential electrical shock or firehazards. Please read all safety and operating instructions carefully before installation anduse, and keep these instructions handy for future reference. Take special note of all warningslisted in these instructions and printed on the product.1. Water and Moisture — The unit should be kept dry and away from water or otherliquids. If liquid is spilled on the unit, or if the unit should fall or be accidentally placedin or on a wet or damp area, immediately unplug the unit.2. Ventilation — The unit should be set up in an area and position that does not interferewith its proper ventilation. Check to see where the ventilation opening is on the product.Do not set up the unit on a bed, sofa, rug, or similar surface that may block the opening.Do not keep the unit in a tight-fitting installation, such as a bookcase or cabinet, whichimpedes the flow of air through the ventilation openings.3. Heat — The unit should be situated away from heat sources such as radiators, spaceheaters, stoves, or other appliances (including amplifiers) that produce or emit heat.4. Power Sources — The unit should be connected to a power supply only of the typedescribed in the operating instructions, or as marked on the appliance.5. Grounding or Polarization — This unit is equipped with a two-pronged, polarizedalternating-current line plug (a plug having one blade wider than the other). This plugonly fits into your power outlet in one direction. This is a safety feature. If you are havingdifficulty inserting the plug fully into your outlet, try reversing the plug blades; do notforce the plug into the outlet. If you are still having difficulty, contact your electrician toreplace your obsolete outlet.6. Power-Supply Cord Protection — Power-supply cords should be routed so thatthey are not likely to be walked on or pinched by items placed upon or against them,paying particular attention to areas at the outlet and where they exit from the unit.7. Overloading — Do not overload wall outlets, extension cords, or integral conveniencereceptacles as this can result in a risk of fire or electric shock.8. Cleaning — The unit should be cleaned only as recommended by the manufacturer.See the Maintenance section of this manual for cleaning instructions.9. Periods of Nonuse — If the unit is to be left unused for an extensive period of time,such as longer than a month, the power cord should be unplugged from the outlet.10. Object and Liquid Entry — Care should be taken so that objects do not falland/or liquids do not spill into any openings or vents located on the product.12. Attachments — Do not use attachments not recommended by the product manufacturer.13. Damage Requiring Service — The appliance should be serviced by qualified servicepersonnel when:A. the power-supply cord or plug has been damaged.B. objects have fallen and/or liquid has been spilled into openings or vents.C. the unit has been exposed to rain.D. the unit has been dropped or the enclosure damaged.E. the unit exhibits a marked change in performance or does not operate normally.14. Antenna — The user should not connect an external antenna to the unit.15. Servicing — The user should not attempt to service the unit beyond those methodsdescribed in the operating instructions. Any servicing not covered in the instructionsshould be left to qualified service personnel. Please also see the Warranty Informationfor more information on product servicing.This device complies with Part 15 of the Federal CommunicationsCommission Rules. Operation is subject to the condition thatthe device does not cause harmful interference.
Limited 90-Day Warranty InformationTimex <strong>Audio</strong> Products, a division of SDI Technologies Inc. (hereafter referred toas SDI Technologies), warrants this product to be free from defects in workmanshipand materials, under normal use and conditions, for a period of 90 days from thedate of original purchase.Should this product fail to function in a satisfactory manner, it is best to first returnit to the store where it was originally purchased. Should this fail to resolve the matterand service still be required by reason of any defect or malfunction during the warrantyperiod, SDI Technologies will repair or, at its discretion, replace this product withoutcharge (except for a $3.00 charge for handling, packing, return UPS/postage, andinsurance). This decision is subject to verification of the defect or malfunction upondelivery of this product to the Factory Service Center listed below. The productmust include proof of purchase, including date of purchase. The fee for serviceafter the warranty period or without proof of purchase is $6.00.Before returning this product for service, please first replace the batteries (ifapplicable) with fresh ones, as exhausted or defective batteries are the mostcommon cause of problems encountered.If service is still required:1. Remove batteries (if applicable) and pack the unit in a well-padded,heavy corrugated box.2. Enclose a photocopy of your sales receipt, credit card statement, or other proofof the date of purchase.3. Enclose a check or money order payable to the order of Soundesign, for thesum of $3.00 (or $6.00 if after the warranty period or without proof of purchase).4. Send the unit prepaid to the Factory Service Center listed below:Consumer Repair DepartmentSDI Technologies Inc.Timex <strong>Audio</strong> Products Division1401 Pullman Drive, Suite AEl Paso, TX 79936-7726NOTE: This warranty is valid only if the product is used for the purpose for whichit was designed. It does not cover (i) products which have been damaged bynegligence, misuse or accident, or which have been modified or repaired byunauthorized persons; (ii) cracked or broken cabinets, or units damaged byexcessive heat; (iii) damage to tape cassettes (if applicable); (iv) the cost of shippingthis product to the Factory Service Center and its return to the owner.This warranty is valid only in the <strong>Unit</strong>ed States of America and does not extendto owners of the product subsequent to the original purchaser. Any applicableimplied warranties are also limited to 90 days, and SDI Technologies will not beliable for consequential damages. (Some states do not allow limitations on impliedwarranties or exclusion of consequential damages, so these restrictions may notapply to you.) This warranty gives you specific legal rights, and you may also haveother rights which vary from state to state.For questions or comments regarding this or other products, pleasecall our toll-free number: 1-800-888-4491.<strong>TIMEX</strong> is a registered trademark of Timex Corporation in the<strong>Unit</strong>ed States and other countries.T120-100402 Printed in China