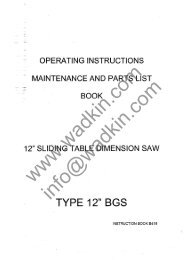
Wadkin JET Tenoner Manual and Parts List
Wadkin JET Tenoner Manual and Parts List
Wadkin JET Tenoner Manual and Parts List

You also want an ePaper? Increase the reach of your titles
YUMPU automatically turns print PDFs into web optimized ePapers that Google loves.
12<br />
START AND FEED CONTROL<br />
Individual start <strong>and</strong> feed buttons FIG.9, are situated on front panel<br />
on beam.<br />
When isolator (optional), which is situated on rear beam support, is<br />
fitted, proceed as follows:-<br />
To start, turn isolator to '1', then press button 'H' FIG.9 to start<br />
cutterhead, then press feed button 'J'.<br />
Where no isolator is fitted, control is simply via the panel start<br />
<strong>and</strong> feed buttons.<br />
NOTE: HEAD MUST BE STARTED IN THIS SEQUENCE AND SHOULD BE LEFT<br />
RUNNING AFTER EACH CUT AS REPEATED STARTING AND STOPPING MAY CREATE<br />
EXCESSIVE HEAT IN THE MOTOR AND RAPID BRAKE WEAR.<br />
INCH FORVARD/INCH REVERSE CONTROL<br />
For ease of tooling changes, inch forward/inch reverse buttons 'K'<br />
are situated on front panel on beam FIG.9.<br />
MASTER STOP CONTROL<br />
A Master Stop button 'L' FIG.9, is situated on front panel on beam.<br />
Depression of Master Stop button shuts down all electrics. Master<br />
Stop button stays in the OFF position until released by pulling<br />
button.<br />
ADJUSTABLE STOPS<br />
Two adjustable stops 'M' FIG.10 are fitted to rail 'N' <strong>and</strong> are<br />
positioned according to length of traver~ required.<br />
FIXED STOPS<br />
Fixed stops 'P' FIG.11 are fitted at either end of rail to safeguard<br />
overiding of adjustable stop when using inch forward/inch reverse.<br />
OVERSIZE TIMBER PRESSURE SWITCH<br />
A pressure switch 'R' FIG.12 is situated on cutter guard'S' <strong>and</strong> is<br />
actuated when an oversize piece of timber is clamped onto the<br />
roachi ne. Once actuated tha traverse is. imme.d.iately-_wppQd.<br />
www.wadkin.com<br />
VERTICAL ADJUSTMENT OF TABLE<br />
Set each table vertically by loosening locking h<strong>and</strong>le 'T' FIG.13 <strong>and</strong><br />
position table by vertical adjustment h<strong>and</strong>le 'U' in conjunction with<br />
digital readout 'V' FIG.12. Relock locking h<strong>and</strong>le "<br />
HORIZONTAL ADJUSTMENT OF TABLE<br />
info@wadkin.com<br />
Set each table horizontal by means of screw 'A' FIG.17.<br />
FRONT END STOP -<br />
STANDARD<br />
To set tenon length use adjusting screw 'W' FIG.14. To set <strong>and</strong> stop<br />
'X' FIG.15 use h<strong>and</strong>le 'Y' FIG.14 <strong>and</strong> push through table <strong>and</strong> turn<br />
approximately 30· to locate on adjusting screw ·W·.<br />
Continued on Page 18