Profile Rail Linear Guides
Profile Rail Linear Guides
Profile Rail Linear Guides

Create successful ePaper yourself
Turn your PDF publications into a flip-book with our unique Google optimized e-Paper software.
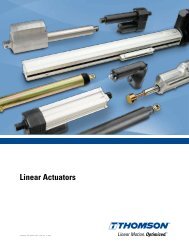
<strong>Linear</strong> Motion. Optimized.<br />
<strong>Profile</strong> <strong>Rail</strong> <strong>Linear</strong> <strong>Guides</strong><br />
Table 4. Shoulder heights and corner radii, mm<br />
Guide Type <strong>Rail</strong> Carriage<br />
h1 max r1 max h2 r2 max<br />
500 Series Ball <strong>Linear</strong> Guide<br />
15 3.5 .8 3.5 .6<br />
20 4 .9 4 .9<br />
25 5 1.1 5 1.1<br />
30 5.5 1.3 5.5 1.3<br />
35 6 1.3 6 1.3<br />
45 8 1.3 8 1.3<br />
500 Series Roller <strong>Linear</strong> Guide<br />
25 5 .8 5 .8<br />
35 6 .8 6 .8<br />
45 8 .8 8 .8<br />
55 10 1.2 10 1.2<br />
65 10 1.5 10 1.5<br />
AccuMini <strong>Linear</strong> Guide<br />
10 1.75 0.4 3.5 0.4<br />
15 1.75 0.4 5 0.4<br />
20 2 0.5 7 0.5<br />
T-Series * <strong>Linear</strong> Guide<br />
15 3 .3 8 .2<br />
20 3.9 0.4 10 0.3<br />
25 5.5 0.5 12 0.4<br />
30 5.9 0.7 14 0.5<br />
35 5.9 0.8 15 0.6<br />
Table 5. Recommended Bolt Tightening Torque, Nm<br />
Bolt Size Class 8.8 Class 12.9<br />
M2.5 0,7 1,2<br />
M4 2,8 4,6<br />
M5 5,7 9,5<br />
M6 9,5 16<br />
M8 23 39<br />
M10 46 77<br />
M12 80 135<br />
M14 129 215<br />
M16 198 330<br />
Installation Procedure<br />
Clean and inspect all mating surfaces for burrs, nicks,<br />
dirt, etc. A simple stone can be used to remove minor<br />
imperfections in the mounting surfaces.<br />
Note : T-Series is not as sensitive to imperfections of the<br />
mounting surface.<br />
<strong>Rail</strong> Mounting<br />
1. Carefully place the rail on the mounting surface.<br />
2. Insert screws into the mounting holes and tighten<br />
lightly.<br />
3. Clamp the reference edge of the rail against a locating<br />
edge on the mounting surface.<br />
The locating edge can be a machined reference edge,<br />
a straight edge, a row of dowels or keys, or some other<br />
edge which the rail can be clamped against. It should<br />
be straight, either within the mounting tolerances<br />
shown in Table 3 or according to the application<br />
requirements, whichever is tighter.<br />
4. Starting from the center of the rail moving outwards,<br />
tighten each screw to the recommended tightening<br />
torque in Table 5.<br />
5. If parallel rails are to be used, one of the following<br />
methods may be employed to obtain the parallelism<br />
recommended in Table 1 :<br />
a. two parallel locating edges<br />
b. a gage block or parallel between the rails<br />
c. the use of the top plate with the carriages mounted,<br />
to locate or “float” the second rail into place.<br />
6. Repeat steps 1 – 4 to install the second rail.<br />
7. Insert a rail plug into each counterbore in the rail.<br />
Carefully tap rail plugs into place using a soft material<br />
such as brass or wood. When properly installed, the rail<br />
plugs should be flush with the top surface of the rail.<br />
Do not countersink the rail plugs.<br />
Note : <strong>Rail</strong> plugs are available and are shipped with all<br />
rails except for the AccuMini <strong>Linear</strong> Guide size 10.<br />
8. If desired, rail tape can then be applied to the top of<br />
the rail. For sizes 35 and below, the rail tape may be<br />
used without the rail plugs.<br />
94<br />
www.thomsonlinear.com